To get the best accuracy out of any benchrest rifle, you need to find the optimal position of front rest and rear bag. The important point to remember is that each rig is different. One gun may perform best with the front rest right at the tip of the forearm (Position ‘D’ in photo), while another gun will work best with the rest positioned much further back. This Editor’s own 6mmBR rifle has a laminated stock that is pretty flexy in the front. It shoots best with the front rest’s sandbag located a good 6″ back from the forearm tip (position ‘A’).
Here’s some benchrest advice that can help you reduce vertical and shoot tighter groups… without spending another penny. Many benchrest shooters spend a fortune on equipment and devote countless hours to meticulous handloading, but they never experiment with their rifle’s position/balance on the bags. This article explains why you should test your rifle in various positions. What you learn may surprise you (and improve your scores).
Next time you go to the range, experiment with the position of your rifle on the front rest, and try a couple different positions for the rear bag. You may find that the rifle handles much better after you’ve made a small change in the placement of your gun on the bags. Recoil can be tamed a bit, and tracking can improve significantly, if you optimize the front rest and rear bag positioning.
This competitor has the front rest positioned fairly far forward but not all the way out. Note the stop on the front rest — this limits forward stock travel.
A small change in the position of the forearm on the front rest, or in the placement of the rear bag, can make a big difference in how your gun performs.
Balance Your Gun BEFORE You Spend Hours Tuning Loads
In the pursuit of ultimate accuracy, shooters may spend countless hours on brass prep, bullet selection, and load tuning. Yet the same shooters may pay little attention to how their gun is set-up on the bags. When you have acquired a new rifle, you should do some basic experimentation to find the optimal position for the forearm on the front rest, and the best position for the rear bag. Small changes can make a big difference.
Joel Kendrick, past IBS 600-yard Shooter of the Year, has observed that by adjusting forearm position on the front rest, he can tune out vertical. He has one carbon-fiber-reinforced stock that is extremely rigid. When it was placed with the front rest right under the very tip of the forearm, the gun tended to hop, creating vertical. By sliding the whole gun forward (with more forearm overhang ahead of the front sandbag), he was able to get the whole rig to settle down. That resulted in less vertical dispersion, and the gun tracked much better.
Fore/aft stock position is important even with very wide fore-ends.
Likewise, the placement of the rear bag is very important. Many shooters, by default, will simply place the rear bag the same distance from the front rest with all their guns. In fact, different stocks and different calibers will NOT behave the same. By moving the rear bag forward and aft, you can adjust the rifle’s overall balance and this can improve the tracking significantly. One of our shooters had a Savage 6BR F-Class rifle. By default he had his rear bag set almost all the way at the end of the buttstock. When he slid the rear bag a couple inches forward the gun tracked much better. He immediately noticed that the gun returned to point of aim better (crosshairs would stay on target from shot to shot), AND the gun torqued (twisted) less. The difference was quite noticeable.
A small change in the position of the forearm on the front rest, or in the placement of the rear bag, can make a big difference in how your gun performs. You should experiment with the forearm placement, trying different positions on the front rest. Likewise, you can move the rear bag back and forth a few inches. Once you establish the optimal positions of front rest and rear bag, you should find that your gun tracks better and returns to battery more reliably. You may then discover that the gun shoots smaller groups, with less vertical dispersion. And all these benefits are possible without purchasing any expensive new gear.
To get the best accuracy out of any benchrest rifle, you need to find the optimal position of front rest and rear bag. The important point to remember is that each rig is different. One gun may perform best with the front rest right at the tip of the forearm (Position ‘D’ in photo), while another gun will work best with the rest positioned much further back. This Editor’s own 6BR sits in a laminated stock that is pretty flexy in the front. It shoots best with the front rest’s sandbag located a good 6″ back from the forearm tip (position ‘A’).
Here’s some benchrest advice that can help you reduce vertical and shoot tighter groups… without spending another penny. Many benchrest shooters spend a fortune on equipment and devote countless hours to meticulous handloading, but they never experiment with their rifle’s position/balance on the bags. This article explains why you should test your rifle in various positions. What you learn may surprise you (and improve your scores).
Next time you go to the range, experiment with the position of your rifle on the front rest, and try a couple different positions for the rear bag. You may find that the rifle handles much better after you’ve made a small change in the placement of your gun on the bags. Recoil can be tamed a bit, and tracking can improve significantly, if you optimize the front rest and rear bag positioning.
This competitor has the front rest positioned fairly far forward but not all the way out. Note the stop on the front rest — this limits forward stock travel.
Balance Your Gun BEFORE You Spend Hours Tuning Loads
In the pursuit of ultimate accuracy, shooters may spend countless hours on brass prep, bullet selection, and load tuning. Yet the same shooters may pay little attention to how their gun is set-up on the bags. When you have acquired a new rifle, you should do some basic experimentation to find the optimal position for the forearm on the front rest, and the best position for the rear bag. Small changes can make a big difference.
Joel Kendrick, past IBS 600-yard Shooter of the Year, has observed that by adjusting forearm position on the front rest, he can tune out vertical. He has one carbon-fiber-reinforced stock that is extremely rigid. When it was placed with the front rest right under the very tip of the forearm, the gun tended to hop, creating vertical. By sliding the whole gun forward (with more forearm overhang ahead of the front sandbag), he was able to get the whole rig to settle down. That resulted in less vertical dispersion, and the gun tracked much better.
Fore/aft stock position is important even with very wide fore-ends.
Likewise, the placement of the rear bag is very important. Many shooters, by default, will simply place the rear bag the same distance from the front rest with all their guns. In fact, different stocks and different calibers will NOT behave the same. By moving the rear bag forward and aft, you can adjust the rifle’s overall balance and this can improve the tracking significantly. One of our shooters had a Savage 6BR F-Class rifle. By default he had his rear bag set almost all the way at the end of the buttstock. When he slid the rear bag a couple inches forward the gun tracked much better. He immediately noticed that the gun returned to point of aim better (crosshairs would stay on target from shot to shot), AND the gun torqued (twisted) less. The difference was quite noticeable.
A small change in the position of the forearm on the front rest, or in the placement of the rear bag, can make a big difference in how your gun performs. You should experiment with the forearm placement, trying different positions on the front rest. Likewise, you can move the rear bag back and forth a few inches. Once you establish the optimal positions of front rest and rear bag, you should find that your gun tracks better and returns to battery more reliably. You may then discover that the gun shoots smaller groups, with less vertical dispersion. And all these benefits are possible without purchasing any expensive new gear.
What was old, is new again… RCBS has just introduced an all-new balance beam scale, the RCBS M1000 Scale. RCBS claims this magnetic-dampened scale will weigh up to 1,000 Grains with +/- 0.1-grain accuracy (one-tenth of a grain is about three kernels of Varget). The new M1000 mechanical scale features a magnetic damping system for fast readings, and maintenance-free movement. A newly-designed “tip-proof” pan should ease powder loading. Notably, the M1000 scale was designed to work in both right-handed and left-handed configurations. Curtis Smith, RCBS Product Director, explains: “For those who choose mechanical scales, accuracy and reliability are top priorities. The new M1000 scale provides exactly that for both left- and right-handed users.” The scale is quite affordable — it is available now at Amazon.com for $129.59. (MSRP is $159.45.) For more information, visit www.RCBS.com.
Triple Poise Operation with 1000-Grain Capacity
The scale has some interesting features, including three poises (weight index adjusters). The main poise goes to 1000 grains, while the medium poise runs up to 20 grains. The most precise small poise spans one grain in tenth of a grain increments. The rated capacity of the RCBS M1000 scale is 1000 grains.
Multiple Reference Pointers for Target Weights
The M1000 also features multiple pointers which can be used to set target weight ranges. This speeds up operations. According to the M1000 Users Manual: “[There are] three separate pointers for easy reading of over and under loads. The center Pointer is what is used when balancing the scale and establishes a ZERO Balance. The top and bottom Pointers represent approximately 1.5 grain above and below target load. The top and bottom pointers allow the user to quickly weigh loads knowing that if the beam pointer is oscillating between the top and bottom pointers the load is within +/- 1.5 grains. Having top and bottom pointers also eliminates the need to move the small poise to check powder charge variations.”
Share the post "New M1000 Balance Beam Scale from RCBS"
PMA Tool now offers a unique “adjustable” Stock Weight System with variable weighting from 2 to 8 ounces (including internal sleeve). This $65.95 system allows the shooter to add or remove weight (in the buttstock) to balance the gun, or adjust the weight to meet class weight limits. Say, for example you were running at max weight but then changed your scope for a new optic that weighed 4 ounces less. With this system, you can easily get back up to the “legal limit”. You can also use the weight to adjust balance when running barrels of different lengths or contours.
The PMA Stock Weight system is made up of a sleeve, a nut and three interchangeable weights. The sleeve and nut weigh 2 ounces (combined) and weight inserts of 2, 4 and 6 ounces are included in the system. The sleeve is machined from aluminum, while the nut and weights are machined from stainless steel. All weights are roll-stamped with their weights and “coin-slotted” so they can be easily installed using a screwdriver or coin. The nut utilizes a 1/4″ hex wrench for removal from the sleeve and installation of weights.
While installation of these Stock Weight Systems is fairly simple, PMA states that: “The sleeve should be installed into the buttstock by someone with some mechanical aptitude and an understanding of stock construction, preferably a trained gunsmith or stock-fitter.”
Product tip from EdLongrange. We welcome reader submissions.
Share the post "PMA Tool Offers Adjustable Stock Weight System"
Denver Instrument, maker of the MXX and Timberline Series of precision balances, has created a helpful guide explaining how to get the best performance from a digital scale. Denver Instrument knows that, to achieve and maintain a very high level of accuracy with digital scales, they must be calibrated regularly, leveled properly, and kept away from sources of interference. Unfortunately, some reloaders treat their electronic scales as if the machines were toasters — something to place on a tabletop, plug into an outlet, then “set and forget.” There’s a better way to set up your scale and keep it functioning optimally. Here are ten guidelines provided by Denver Instrument. Follow these “Ten Commandments” and you’ll benefit:
ONE: Thou shalt choose the best resting spot. The performance of your balance depends greatly on the surrounding environment. Choose a location away from the main traffic flow of the room, especially doors. Also be aware of heating and cooling vents as these produce air movement. You can adjust the environmental settings on your balance to provide the best performance in the chosen location. Balances must be placed away from magnets as they affect the weigh cell performance.
TWO: Thou shalt avoid vibrations. Vibrations can come from large machinery in production environments and from fume hoods in laboratories. An alternative to fume hoods are Power Safety Workstations which are designed specifically for use with a balance.
THREE: Thou shalt watch temperature changes. On an analytical balance a one degree temperature change can cause a 1 digit (0.0001g) drift. Although Denver balances have temperature correction built-in, it is still important to calibrate your balance when the temperature changes significantly. Choosing to place your balance in a temperature controlled room, away from sunlight, and calibrating often helps minimize the effects of temperature.
FOUR: Thou shalt calibrate often. Upon installation and each time the balance is moved you should calibrate your balance. For example moving an analytical balance to a location that is only 13 feet higher changes the weight reading from 200.0000 g to 199.9997 g; which means the result is 0.0003 g lighter than the actual mass.
FIVE: Remember to check the level. The instrument should be leveled upon installation with all feet (two front feet for round pan units, four feet for square pan units) touching the countertop. If the level changes, the balance should be re-leveled and recalibrated. As an example, a 200g sample would weigh 0.0025 g less when tilted at an angle of 0.3°.
SIX: Honor thy weights. Keep in mind that weights are only as reliable as their quality and certification. Remember, a 1 g does not weigh precisely 1.00000 grams. Weights should be recertified annually. Denver Instrument offers recertification services on all weights 1 mg to 5 kg. Check to make sure you have selected the proper weight class for your balance. The weight tolerance should be better than balance readability. Always use tweezers or gloves when handling weights as smudges and indentations change the value of the weight. Keep weights in cases so they don’t get scratched or dusty.
SEVEN: Thou shalt always use a small container and weigh in the center of the pan. Especially when using an analytical balance, the effects of air buoyancy increase as the sample container size increases. Using a small sample container will minimize the effects. Items placed on the pan provide a downward force. Placing them directly in the center of the pan keeps corner loading errors at a minimum.
EIGHT: Thou shalt not unplug. To perform within published speci-fications, balances must have power applied for 30 minutes to 48 hours depending on the resolution of the balance. Denver balances have a standby mode which turn the display to standby but keep power cycling through the electronics.
NINE: Thou shalt not ignore static. Static is one of the most common weighing “noises”. It can cause reading to appear too high, too low or just be unstable. Denver balances include grounding methods to reduce the effects of static. However sometimes extra supplies are needed. Consider anti-static weigh dishes, anti-static brushes or low tech ways to increase the humidity of the chamber like placing damp cotton balls or glass wool in a small vial in the corner of the analytical draft shield.
TEN: Thou shalt clean often. Dirty weigh pans and powder in weighing chamber can contribute to static issues and lead to a wide variety of problems. Denver weigh pans are made from stainless steel and can be cleaned using a variety of household and laboratory chemicals. A small paint brush can be used to get power away from the edges of the draft shield for easy clean up.
Share the post "Ten Commandments for Use of Electronic Scales"
Here’s some benchrest advice that can help you reduce vertical and shoot tighter groups… without spending another penny. Next time you go to the range, experiment with the position of your rifle on the front rest, and try a couple different positions for the rear bag. You may find that the rifle handles much better after you’ve made a small change in the placement of your gun on the bags. Recoil can be tamed a bit, and tracking can improve significantly, if you optimize the front rest and rear bag positioning.
Balance Your Gun BEFORE You Spend Hours Tuning Loads
In the pursuit of ultimate accuracy, shooters may spend countless hours on brass prep, bullet selection, and load tuning. Yet the same shooters may pay little attention to how their gun is set-up on the bags. When you have acquired a new rifle, you should do some basic experimentation to find the optimal position for the forearm on the front rest, and the best position for the rear bag. Small changes can make a big difference.
Joel Kendrick, past IBS 600-yard Shooter of the Year, has observed that by adjusting forearm position on the front rest, he can tune out vertical. He has one carbon-fiber-reinforced stock that is extremely rigid. When it was placed with the front rest right under the very tip of the forearm, the gun tended to hop, creating vertical. By sliding the whole gun forward (with more forearm overhang ahead of the front sandbag), he was able to get the whole rig to settle down. That resulted in less vertical dispersion, and the gun tracked much better.
Likewise, the placement of the rear bag is very important. Many shooters, by default, will simply place the rear bag the same distance from the front rest with all their guns. In fact, different stocks and different calibers will NOT behave the same. By moving the rear bag forward and aft, you can adjust the rifle’s overall balance and this can improve the tracking significantly. One of our shooters had a Savage 6BR F-Class rifle. By default he had his rear bag set almost all the way at the end of the buttstock. When he slid the rear bag a couple inches forward the gun tracked much better. He immediately noticed that the gun returned to point of aim better (crosshairs would stay on target from shot to shot), AND the gun torqued (twisted) less. The difference was quite noticeable.
The important point to remember here is that each rig is different. One gun may perform best with the front rest right at the tip of the forearm (Position ‘D’ in photo), while another gun will work best with the rest positioned much further back. This Editor’s own 6BR sits in a laminated stock that is pretty flexy in the front. It shoots best with the front rest’s sandbag located a good 6″ back from the forearm tip (position ‘A’).
A small change in the position of the forearm on the front rest, or in the placement of the rear bag, can make a big difference in how your gun performs. You should experiment with the forearm placement, trying different positions on the front rest. Likewise, you can move the rear bag back and forth a few inches. Once you establish the optimal positions of front rest and rear bag, you should find that your gun tracks better and returns to battery more reliably. You may then discover that the gun shoots smaller groups, with less vertical dispersion. And all these benefits are possible without purchasing any expensive new gear.
The Hornady Lock N Load AutoCharge Electronic Scale/Dispenser is now on sale for under $200.00. Grafs.com has the Hornady AutoCharge for $194.99 (with $5.95 flat sh/h) and Amazon.com offers the AutoCharge for $195.00 with FREE ‘Super-Saver’ shipping. If you are looking for an affordable combination digital scale and powder dispenser, this is very attractive pricing. By comparison, the RCBS ChargeMaster is currently on sale for $299.99 at Sinclair International. So you can save at least $105.00 by buying RED instead of GREEN.
While we have a lot of positive experience with the RCBS Chargemaster, we haven’t done any long-term testing of the Hornady AutoCharge. However, user reviews have generally been positive. We suggest you do your own research and then make your own decision. Both the Hornady LnL AutoCharge and RCBS ChargeMaster offer load precision to ±0.1 grains. Both the Hornady Autocharge and the RCBS ChargeMaster are sold with a one-year manufacturers warranty.
Features and Specifications:
Scale capacity of 1000 grains
Easy-to-operate keypad
Large backlit display
Automatic and manual dispense options
Trickle function
Three speed settings
Easy Outflow Powder Drain
Overcharge protection
One-year manufactuer’s warranty
This Youtube video shows the Hornady Lock-N-Load AutoCharge in action.
If you want to learn more about the Hornady AutoCharge, there is a detailed review in Shooting.com.au, a popular Aussie gun forum. This product review features actual test results along with lots of sharp, jumbo-sized photos. Here is the summary of the reviewer’s test results: “Weighing [20 charges of a stick powder] on a Redding beam scale (the only other scale I have) showed that 12 were spot on and the remainder we fairly equally split between 0.1 grain under and 0.1 grain over according to this scale. I consider this to be more than adequate for me.”
If you are looking for an affordable precision scale, the GemPro 250 scale is now on sale for just $145.00 at Amazon.com. This scale offers 0.02 grain resolution, good enough to trickle kernel by kernel. The GemPro 250 comes with a 30-year warranty for American buyers. As this scale weighs more precisely than popular digital powder scale/dispensers, you can use the digital dispenser to throw a “close” charge and then fine-tune your load with the GemPro, kernel by kernel.
by Bill Schnauffer (aka Cover Dog)
The Importance of Precise Loads for Long-Range Shooting
The reloading scale is the life blood of anyone’s loading bench. It’s used for everything from weighing powders to cases or bullets and yes even primers. I would have never considered weighing primers but that is one of the many things I learned the weekend of May 20-22, 2011 at The Original Pennsylvania 1000-Yard Bench Rest Club’s Bench Rest Instructional School. All aspects of reloading for 1000-yard BR have to be identical. Your brass, bullets, powder and primers all have to weigh the same, for all your sighters and your 10 record shots, if you want any chance of being competitive. This can only become a reality if your scale is up to the task. Everything you do when shooting at 1000 yards is magnified 10x and your scale needs to be above all else, accurate and repeatable.
I thought that a scale accurate to 1/10th of a grain was good enough. Not so in the long range BR game. Scales need to be accurate to at least 5/100ths of a grain or better if you can afford it. This prompted my search for such a scale.
GemPro Is Half the Price of Denver Instrument MXX-123
I have read reviews for several of the better scales used for reloading including the Accu-Lab VIC 123 (now replaced by the Sartorius Acculab AY123110V). The [AY123 seriess] scales are accurate to 2/100ths of a grain, but is also a scale that many felt was affected by RF interference and the slightest air movement made it drift. This was due in part because of the strain gauge technology that is used in the manufacture of this scale. And with parts not readily available, the lead time for one is you want it is over 20 weeks. The Denver Instrument MXX-123 also had a good review but the current version, [Sartorius Acculab AY123110V], is into the $320 price range. And this is out of reach for many reloaders.
This now brings me to the My Weigh GemPro 250. It uses True-Division German HBM sensors and professional components in the manufacture of this scale. It has a 50 gram weight capacity (771.72 grains) and accuracy down to 2/100ths of a grain. It features seven (7) weighing modes as listed below. And with a retail price in the $145.00 range, this is a scale that most reloaders could afford for their reloading bench. And you won’t be pressed for room on that bench. The scale is very compact, measuring 5.25″ X 3.75″ X 2.5″.
Product Sale Tip by Boyd Allen. We welcome Reader Submissions.
Share the post "GemPro 250 Digital Scale on Sale for Just $145.00"
This article first appeared in 2011.
JayChris, AccurateShooter.com’s IT “guru”, has tested three different digital scales. The first is the relatively inexpensive ($150.00) GemPro 500, the second was the $333.00 Sartorius AY123, which is very similar to the Denver Instrument MXX123 and Acculab-123. Lastly, JayChris tested his $1225.00 Sartorius GD503 lab scale. The 3-way comparison test produced interesting findings. We learned that the AY123 had some serious shortcomings when used to weigh powder. The GemPro 500 performed well for the price, but was quite a bit slower than the big GD503. In speed of response, accuracy of measurement, resistance to drift, and overall reliability, the GD503 was the clear winner in our comparison. Sometimes you do get what you pay for. CLICK HERE for GD503 Review with Videos.
BATTLE of the BALANCES
Three-Way Comparison Test: GemPro 500, Sartorius AY123, Sartorius GD503 Testing Report by JayChris
Precision Weighing Balances, www.balances.com, an authorized Sartorius Distributor, shipped me an AY123 (same as Denver MXX123, Acculab 123, etc.) along with a high-end GD503 force restoration scale. I had purchased the GD503, while the AY123 was a loaner for this comparison test. I included in this test a GemPro 500 scale that I already had. My key objective in this comparison test was to test each scale for measurement drift over time. We wanted to see if the displayed weight of a given object (here a certified test weight), would change over time, or with repeated measurements.
The first test was a “quick” test, where I measured the same weight ten (10) times, in the same order, about every 30 seconds or so. I did this at about the same speed as weighing out powder, maybe a bit slower. This took about 5 or 6 minutes. The second test was more-or-less an overnight test, where I measured the same weight in lengthening intervals, starting every 10 minutes, then every 30, then every 60, and so on. You can see the time series on the included graphs.
TEST SETUP:
– I used the same 100 GRAM Sartorius certified check weight for every test (see photo). Note: 100 GRAMS = 1543.233 GRAINS
– I calibrated each scale within 30 seconds of each other before starting the test.
– I tare’d each scale within a few seconds of each other
– All three scales are connected to the same line conditioning PDU and are located in the same environment (right next to each other)
Measurement Resolution and Display Increments
– The Sartorius AY123 measures to the nearest hundredth of a grain (.00). Increments are in 0.02 grain divisions, i.e. the nearest two hundredth of a grain.
– The Sartorius GD503 measures to the nearest thousandth of a grain (.000). Increments are in 0.005 grain divisions, i.e. the nearest five thousandth of a grain.
– The GemPro 500 measures to the nearest half-tenth of a grain (.05).
NOTE: When weighing powder, I weigh to the nearest .05 grain so any of these provide adequate (or more-than) resolution.
FIRST SERIES Quick Test:
* X-axis is weighing series iteration
SECOND SERIES Time-based:
* X-axis is a time series in minutes-from-0.
THIRD SERIES AY123 “Stable” vs. “Unstable”:
* X-axis is a weighing series iteration
This is a test of the AY123 in “Stable” vs. “Unstable” environment mode. The GD503 was used for comparison. I ran this test to compare the AY123 in “Stable” conditions mode (default) vs. “Unstable” conditions mode, based on anecdotal reports that the “Unstable” mode produces more consistent results. I did not find that to be so. In addition, I found that the weighing time for the “Unstable” mode was extremely slow — taking nearly 5 – 7 seconds per instance to complete a measurement. It then takes a few seconds to return to zero. In the AY123’s default “Stable” mode, it takes a second or so. Based on my testing then, there is no advantage to running the AY123 (or similar clones) in the “unstable mood”. It will simply slow you down.
Observations and Conclusions
Overall, the GD503 was the most consistent, never varying more than .005 (five-thousandths) of a grain, which is about ten times less drift than the next closest scale. The GemPro was “close” behind, never varying more than .05 of a grain. The AY123 was consistently variable and lost significant resolution over time. It was difficult to plot the AY123 results because it rarely settled at a weight for longer than a few seconds — it would routinely come up with a different weight every few seconds, varying by as much as .04 of a grain. I selected the first reading it “settled” on as the “official” reading.
The one thing this test does NOT demonstrate is trickling — our previous Review of the GD503 has a video that shows that nicely. The GD503 gives you near instantaneous read-outs when trickling. By contrast, both the AY123 and GemPro 500 require a “trickle-and-wait-for-update” plan. The GD503 is really dramatically better in its ability to return a “final” weight very quickly. This allows efficient trickling. CLICK HERE for GD503 Review with Videos.
[UPDATE: One of our readers observed that there is a setting which can make the AY123 more responsive (and accurate) when trickling charges: “Note that the video shows the 123 jumping as powder is added. The reason is the scale is in the default setting, which is for single weightings. When changed to ‘Filling’ mode, the scale reacts very quickly, and in my case accurately. Trickling is easy in the ‘Filling’ mode. My experience is that the AY123 is an excellent scale, but is sensitive to environmental factors. The GD503 is way better and is also way more expensive.” — Matt P.]
GemPro 500 Performed Well — Drift Was Usually Minimal and Charges Settle Fairly Quickly
I’ve used the GemPro 500 for quite a while now and have found it to be fairly reliable. However, over one previous loading session I have seen it drift as much as .150 of a grain. I had to go back and re-weigh charges because of this. Therefore, I tend to tare it every five (5) weighings or so which is probably overkill based on one case. I’ve not had that problem since so I am guessing something happened environmentally (maybe I bumped it or something). Overall, the GemPro is not overly sensitive to environment and settles fairly quickly and reliably.
Charges Weighed by SD503 Have More Consistent Velocities, with lower SDs
I’ve loaded a few hundred rounds with the GD503 now. I have not found it to drift more than .010 of a grain in that time. So, now, I only tend to tare it once at the beginning of a load session. I have gotten extremely consistent velocities from charges loaded with this scale, with single-digit standard deviations. By contrast, previously, my best efforts usually resulted in standard deviations (SDs) in the low teens.
Based on my experience testing the AY123, I would not choose this scale to load powder with. The readings are just too variable. The slightest environment factors (breathing, hand movement, etc.) cause large changes in results. I tried to load some rounds using this scale (backed by my GD503 to verify) and I couldn’t do better than a few tenths of a grain, and that was with considerable effort. The Sartorius AY123 is really the wrong tool for the job when it comes to measuring powder.
Thanks to Precision Weighing Balances for providing the AY123 for comparison. The other two scales, the GemPro 500 and GD503, I purchased on my own nickel. [Editor’s Note: When purchased in 2011, Jay’s GD503 cost approximately $900.00. The current 2012 price at Balances.com is $1225.00.] All three of these digital scales can be purchased through the Precision Weighing Balances webstore:
If you use a balance-beam scale to weigh powder and reloading components, here’s a clever way to magnify the view of the beam tip. Of course you can use an old-fashioned magnifying glass, clamped in place, to upsize the view. But now there’s a parallax-free, electronic solution that works for anyone with an iPhone or Android OS smartphone.
Forum member Allan E. (aka “1066”) discovered that he could use the camera on his smartphone to display and magnify the image of a balance-beam tip. This works via a Magnifying Glass App you can download for free. Just turn on the smartphone, activate the Magnifying Glass App and zoom-in to suit your preference. Alan explains: “This saves those tired eyes. It’s much more accurate because there’s no parallax — the lens is directly in line with the pointer so we can see [the pointer] off the screen from any angle. It’s a much clearer view, and it costs nothing.”
You’ll need to fabricate some kind of stand or clamp for the phone. Allan created a smartphone mount with a bit of wire, rubber bands, and a bullet box. You can see the system working in the video below. (The video starts by showing a webcam + laptop balance-beam monitor system. The Smartphone system demo begins at the 1:30″ time-mark.)
Magnifying Glass Apps for iPhones and Android Phones
There are numerous ‘magnifying glass’ programs for Apple and Android smartphones that use the built-in camera. Most include a zoom function and auto-focus. You might try a couple different Apps and see which works best for you. Some perform better in low light, while others resolve better. All of the following have 4-star or better user ratings:
Hey folks, here’s a very good deal if you want a combo electronic powder dispenser/scale. The Hornady Lock-N-Load AutoCharge typically retails for around $240 (currently it’s $229.99 at Cabelas and $249.99 at MidwayUSA). Right now, ManVentureOutpost.com has the AutoCharge for just $186.01 (plus shipping). That’s over $50 off typical retail. NOTE: You MUST use Coupon Code SPR2012 during checkout to get that $186.01 price. Act quickly — supplies are limited at that price.
3/5/2012 UPDATE — ManVentureOutpost.com Sold Out of this item, which is now back-ordered. ManVenture is still (apparently) honoring the $186.01 price (with SPR2012 Coupon Code).
Hornady AutoCharge Is Much Less Expensive than RCBS ChargeMaster
That price for the Hornady unit is about $155.00 less than typical pricing for the RCBS Chargemaster (Sinclair sells the Chargemaster for $340.99 plus shipping). For most tasks the Hornady performs quite well. However, RCBS ChargeMaster fans will be quick to note that there has been more accumulated knowledge on tweaking the RCBS machine. But if you want a bargain, consider the “red option” — the Hornady AutoCharge.
This Youtube video shows the Hornady Lock-N-Load AutoCharge in action.
If you want to learn more about the Hornady AutoCharge, there is a detailed review in Shooting.com.au, a popular Aussie gun forum. This product review features actual test results along with lots of sharp, jumbo-sized photos. Here is the summary of the reviewer’s test results: “Weighing [20 charges of a stick powder] on a Redding beam scale (the only other scale I have) showed that 12 were spot on and the remainder we fairly equally split between 0.1 grain under and 0.1 grain over according to this scale. I consider this to be more than adequate for me.”
Ultra-portable mini-reloading scales have become popular with shooters who reload at the range. These can be small enough to fit in a shirt pocket. While not as precise as a bench-top unit, they can deliver read-outs to within 0.2 grains. These ultra-compact scales should prove very useful for any shooter that needs to load at the range. Additionally, they are affordable enough to be used as a back-up to a larger electronic or balance beam scale. Two models, one from MTM and the other from Acculab (Sartorius) have caught our attention.
NOTE: We haven’t yet been able to comparison-test these two scales with a laboratory scale to confirm the claimed levels of weighing precision and see if there are any serious calibration or “drift” issues. But we’ve heard no negative reports.
MTM Mini Reloading Scale — $30 The new DS-1200 weighs up to 1200 grains. MTM claims accuracy (resolution) to plus or minus 0.1 (one-tenth) grain. You can switch measurements among grains, grams, ounces and carats .The unit features a high-impact, plastic sensor cover that doubles as a large powder pan. The DS-1200 comes with a calibration weight, two (2) CR2032 Batteries, and a foam lined storage/travel case. Up to 1200 grain capacity with To save battery power, the large, backlit display shuts off automatically after 3 minutes. Here are sources for this bargain-priced new scale:
Acculab Pocket Pro PP-62 Mini Scale — $110
Sartorius, makers of the popular Acculab-123 scale and its Denver Instrument clone, the MXX-123, has introduced a new, portable reloading scale that is truly pocket-sized. The compact model PP-62 will work as a portable scale or a back-up for a benchscale. It measures 3.5″ long, 3″ wide, and just 7/8″ thick.
The Pocket Pro can handle a maximum weight of 1000 grains. Acculab claims resolution down to 0.1 (one-tenth) GRAM, which provides readability to 0.20 GRAINS. We like the fact that the unit runs on a single, easy-to-purchase AA battery. Battery life is up to 20 hours, if you turn off the back lighting on the LCD display. A sliding cover also protects the weighing mechanism during transport. The PP-62 offers easy one-button calibration with the supplied check weight.
Sinclair Int’l sells the new Acculab PP-62, for $119.95 (Item 10-6200). This includes battery, weighing pan, and 50 gram calibration weight. ScalesGalore.com offers the PP-62 (with battery, pan, and check weight), for $109.95.
CONSUMER ALERT: On the web you’ll find other versions of the Acculab Pocket-Pro® Scales, priced at $45-$60.00. These are the PP-201 (photo below) and PP-401. Though these scales appear identical to the PP-62 (Sinclair item 10-6200), they are NOT the SAME. The cheaper PP-201 and PP-401 are only rated to one-TENTH of a GRAM. The PP-62 is RATED to one-HUNDRETH of a GRAM — roughly 0.2 GRAIN precision.
Share the post "Pocket-Sized Scales for Reloaders"


 ONE: Thou shalt choose the best resting spot. The performance of your balance depends greatly on the surrounding environment. Choose a location away from the main traffic flow of the room, especially doors. Also be aware of heating and cooling vents as these produce air movement. You can adjust the environmental settings on your balance to provide the best performance in the chosen location. Balances must be placed away from magnets as they affect the weigh cell performance.
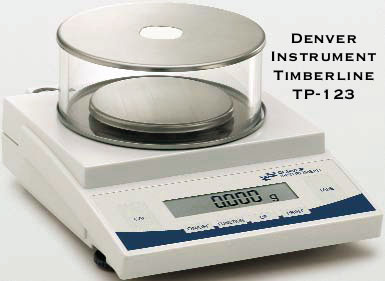 SEVEN: Thou shalt always use a small container and weigh in the center of the pan. Especially when using an analytical balance, the effects of air buoyancy increase as the sample container size increases. Using a small sample container will minimize the effects. Items placed on the pan provide a downward force. Placing them directly in the center of the pan keeps corner loading errors at a minimum.
 The Hornady Lock N Load AutoCharge Electronic Scale/Dispenser is now on sale for under $200.00.
  If you are looking for an affordable precision scale, the GemPro 250 scale is now on sale for just $145.00 at


 Magnifying Glass Apps for iPhones and Android Phones
 Ultra-portable mini-reloading scales have become popular with shooters who reload at the range. These can be small enough to fit in a shirt pocket. While not as precise as a bench-top unit, they can deliver read-outs to within 0.2 grains. These ultra-compact scales should prove very useful for any shooter that needs to load at the range. Additionally, they are affordable enough to be used as a back-up to a larger electronic or balance beam scale. Two models, one from MTM and the other from Acculab (Sartorius) have caught our attention.
 The new DS-1200 weighs up to 1200 grains. MTM claims accuracy (resolution) to plus or minus 0.1 (one-tenth) grain. You can switch measurements among grains, grams, ounces and carats .The unit features a high-impact, plastic sensor cover that doubles as a large powder pan. The DS-1200 comes with a calibration weight, two (2) CR2032 Batteries, and a foam lined storage/travel case. Up to 1200 grain capacity with To save battery power, the large, backlit display shuts off automatically after 3 minutes. Here are sources for this bargain-priced new scale:


