|
|
July 1st, 2023

The anvil is the tripod-shaped thin metal piece protruding above the bottom of the primer cup. Getting the primer sitting fully flush on the bottom of the case primer pocket, without crunching it too much, requires some keen feel for the progress of primer seating.
Sadly, Glen Zediker passed away in October 2020. However, his insights live on through his written works. This feature is based on Glen’s popular reloading books and his articles for the Midsouth Blog.
 In two informative Midsouth Blog articles, Glen Zediker offers helpful advice on priming. First he examines what happens to the primer itself as it is seated in the cup. Glen explains why some “crush” is important, and why you never want to leave a high primer. Glen also reviews a variety of priming tools, including his favorite — the Forster Co-Ax Bench Primer Seater. Then he offers some key safety tips. Glen provides some “rock-solid” advice about the priming operation. You’ll find more great reloading tips in Glen Zediker’s popular book, Top-Grade Ammo, which we recommend. In two informative Midsouth Blog articles, Glen Zediker offers helpful advice on priming. First he examines what happens to the primer itself as it is seated in the cup. Glen explains why some “crush” is important, and why you never want to leave a high primer. Glen also reviews a variety of priming tools, including his favorite — the Forster Co-Ax Bench Primer Seater. Then he offers some key safety tips. Glen provides some “rock-solid” advice about the priming operation. You’ll find more great reloading tips in Glen Zediker’s popular book, Top-Grade Ammo, which we recommend.
Priming Precision vs. Speed
Glen writes: “The better priming tools have less leverage. That is so we can feel the progress of that relatively very small span of depth between start and finish. There is also a balance between precision and speed in tool choices, as there so often is.”
Benchtop Priming Tools — The Forster Co-Ax
Glen thinks that the best choice among priming options, considering both “feel” and productivity, may be the benchtop stand-alone priming stations: “They are faster than hand tools, and can be had with more or less leverage engineered into them. I like the one shown below the best because its feeding is reliable and its feel is more than good enough to do a ‘perfect’ primer seat. It’s the best balance I’ve found between speed and precision.”


Load Tuning and Primers
Glen cautions that you should always reduce your load when you switch to a new, not-yet-tested primer type: “The primer is, in my experience, the greatest variable that can change the performance of a load combination, which is mostly to say ‘pressure’. Never (never ever) switch primer brands without backing off the propellant charge and proving to yourself how far to take it back up, or to even back it off more. I back off one full grain of propellant [when I] try a different primer brand.”

Priming Safety Tips by Zediker
1. Get a good primer “flip” tray for use in filling the feeding magazine tubes associated with some systems. Make double-damn sure each primer is fed right side up (or down, depending on your perspective). A common cause of unintentional detonation is attempting to overfill a stuffed feeding tube magazine, so count and watch your progress.
2. Don’t attempt to seat a high primer more deeply on a finished round. The pressure needed to overcome the inertia to re-initiate movement may be enough to detonate it.
3. Don’t punch out a live primer! That can result in an impressive fright. To kill a primer, squirt or spray a little light oil into its open end. That renders the compound inert.
4. Keep the priming tool cup clean. That’s the little piece that the primer sits down into. Any little shard of brass can become a firing pin! It’s happened!
These Tips on Priming come from Glen’s Zediker’s excellent book Top-Grade Ammo, a great resource for precision hand-loaders. We also recommend Glen’s New Competitive AR-15: The Ultimate Technical Guide, which includes good general information on AR components and reloading.
Share the post "Smart Advice for Efficient and Safe Case Priming"
July 19th, 2021

The anvil is the tripod-shaped thin metal piece protruding above the bottom of the primer cup. Getting the primer sitting fully flush on the bottom of the case primer pocket, without crunching it too much, requires some keen feel for the progress of primer seating.

Sadly, Glen Zediker passed away on October 1, 2020. But his technical insights and helpful advice live on thanks to his written works — his books and articles. In two informative Midsouth Blog articles, Glen Zediker presented helpful advice on priming. First he examined what happens to the primer itself as it is seated in the cup. Glen then explained why some “crush” is important, and why you never want to leave a high primer.
Glen also reviewed a variety of priming tools, including his favorite — the Forster Co-Ax Bench Primer Seater. Then he offers some key safety tips. Glen provides some “rock-solid” advice about the priming operation. You’ll find more great reloading tips in Glen’s Top-Grade Ammo book.
Priming Precision vs. Speed
Glen wrote: “The better priming tools have less leverage. That is so we can feel the progress of that relatively very small span of depth between start and finish. There is also a balance between precision and speed in tool choices, as there so often is.”
Benchtop Priming Tools — The Forster Co-Ax
Glen believed that the best choice among priming options, considering both “feel” and productivity, may be the benchtop stand-alone priming stations: “They are faster than hand tools, and can be had with more or less leverage engineered into them. I like the one shown below the best because its feeding is reliable and its feel is more than good enough to do a ‘perfect’ primer seat. It’s the best balance I’ve found between speed and precision.”


Load Tuning and Primers
Glen cautioned that you should always reduce your load when you switch to a new, not-yet-tested primer type: “The primer is, in my experience, the greatest variable that can change the performance of a load combination, which is mostly to say ‘pressure’. Never (never ever) switch primer brands without backing off the propellant charge and proving to yourself how far to take it back up, or to even back it off more. I back off one full grain of propellant [when I] try a different primer brand.”

Priming Safety Tips by Glen Zediker
1. Get a good primer “flip” tray for use in filling the feeding magazine tubes associated with some systems. Make double-damn sure each primer is fed right side up (or down, depending on your perspective). A common cause of unintentional detonation is attempting to overfill a stuffed feeding tube magazine, so count and watch your progress.
2. Don’t attempt to seat a high primer more deeply on a finished round. The pressure needed to overcome the inertia to re-initiate movement may be enough to detonate it.
3. Keep the priming tool cup clean. That’s the little piece that the primer sits down into. Any little shard of brass can become a firing pin! It’s happened!
These Tips on Priming come from Glen’s excellent book Top-Grade Ammo, available at Amazon.com.
Share the post "Tech Tips for Priming Cases More Efficiently and Safely"
August 5th, 2020

Here is an article Glen Zediker wrote for the Midsouth Blog. In this article Glen gives important advice on selecting, handling, seating, and testing primers. The right primer choice can and will affect your load’s performance and accuracy. And proper primer handling is essential for safety.
Glen is the author of many excellent books on reloading. This article is adapted from Glen’s books, Handloading For Competition and Top-Grade Ammo, available at Midsouth HERE. For more information about other books by Glen, visit ZedikerPublishing.com.
RELOADERS CORNER: PRIMER TECH
by Glen Zediker
The primer is one component in the collection that might not get all the attention it warrants. That’s because it is the one thing, above all other components, that you don’t want to just swap and switch around. We’ve all heard cautions about testing new lots of every component, especially propellant, but primers not only change lot to lot, they vary greatly in their influence on any one load, brand to brand.
The difference in one brand to the next can equal a good deal more or less pressure, for instance. While there are “general” tendencies respecting the “power” of various-brand primers, always (always) reduce the load (propellant quantity) when switching primers.
This has become more of an issue over the past few years as we’ve faced component shortages. I can tell you without a doubt that going from a WW to a CCI, or from a Remington to a Federal, can have a major influence on a load. I establish that from chronograph readings. No doubt, it’s best to have a good supply of one primer brand and lot that produces good results, and when that’s not possible, it’s a hard sell to convince someone to stop loading ammo and get back to testing. But. It is important. I can tell you that from (bad) experience. How I, and we all, learn most things…
When I switch primers, whether as a test or a necessity, I reduce my load ONE FULL GRAIN. There can be that much effect.
The Elements of a Primer
A primer is made up of a brass cup filled with explosive compound (lead styphate). Lead styphate detonates on impact. Primers don’t burn – they explode! In the manufacturing process, this compound starts as a liquid. After it’s laid into the cup, and while it’s still wet, a triangular piece or metal (the “anvil”) is set in. When the cup surface is struck by the firing pin, the center collapses, squeezing the explosive compound between the interior of the cup and the anvil. That ignites the compound and sends a flame through the case flash hole, which in turn lights up the propellant. |
Primers Can be Dangerous — Particularly When Stacked
Don’t underestimate that. I’ve had one experience that fortunately only created a huge start, but I know others who have had bigger more startling mishaps. These (almost always) come from primer reservoirs, such fill-tubes. Pay close attention when charging up a tube and make sure all the primers are facing the right way, and that you’re not trying to put in “one more” when it’s full! That’s when “it” usually happens. What will happen, by the way, is akin to a small grenade. Static electricity has also been blamed, so keep that in mind.
Sizes and Types of Primers
Primers come in two sizes and four types. “Large” and “small”: for example, .223 Rem. takes small, .308 Win. takes large. Then there are pistol and rifle in each size.
Rifle primers and pistol primers are not the same, even though they share common diameters! Rifle primers [normally] have a tougher cup, and, usually, a hotter flash. Never swap rifle for pistol. Now, some practical-style competitive pistol shooters using their very high-pressure loads (like .38 Super Comp) sometimes substitute rifle primers because they’ll “handle” more pressure, but they’ve also tricked up striker power. That’s a specialized need.
Further, some primer brands are available with a “magnum” option. Some aren’t. My experience has been that depends on the “level” of their standard primer. A magnum primer, as you might guess, has a more intense, stouter flash that travels more “deeply” to ignite the larger and more dense powder column. It reaches further, faster.

Flash Consistency Counts
 Flash Consistency is very important, shot to shot. The consistency of every component is important: bullet weights, diameters, case wall thicknesses, and all the way down the list. We’re hoping to get more consistent behavior from a “match” or “benchrest” primer, and we’re paying more for it. I can tell you that some brands that aren’t touted as “match” are already consistent. That all comes from experience: try different primers, just respect the need to initially reduce the load for each test. Flash Consistency is very important, shot to shot. The consistency of every component is important: bullet weights, diameters, case wall thicknesses, and all the way down the list. We’re hoping to get more consistent behavior from a “match” or “benchrest” primer, and we’re paying more for it. I can tell you that some brands that aren’t touted as “match” are already consistent. That all comes from experience: try different primers, just respect the need to initially reduce the load for each test.
Primer Dimensional Differences and Primer Tools
One last thing — there are small variations in primer dimensions (heights, diameters) among various brands. These variations are not influential to performance. However — small diameter variations can influence feeding through priming tools. This can be a hitch especially in some progressive loading machines. Manufacturers usually offer insight (aka: “warnings”) as to which are or aren’t compatible, so find out.
 Get Midsouth products HERE Get Midsouth products HERE
Get Primer trays HERE
This article is adapted from Glen’s books, Handloading For Competition and Top-Grade Ammo, available at Midsouth HERE. Learn more about Glen’s books at ZedikerPublishing.com. |
Share the post "Primers 101 — What You Need to Know About Primers"
June 10th, 2020

The anvil is the tripod-shaped thin metal piece protruding above the bottom of the primer cup. Getting the primer sitting fully flush on the bottom of the case primer pocket, without crunching it too much, requires some keen feel for the progress of primer seating.
 In two informative Midsouth Blog articles, Glen Zediker offers helpful advice on priming. First he examines what happens to the primer itself as it is seated in the cup. Glen explains why some “crush” is important, and why you never want to leave a high primer. Glen also reviews a variety of priming tools, including his favorite — the Forster Co-Ax Bench Primer Seater. Then he offers some key safety tips. Glen provides some “rock-solid” advice about the priming operation. You’ll find more great reloading tips in Glen’s newest book, Top-Grade Ammo, which we recommend. In two informative Midsouth Blog articles, Glen Zediker offers helpful advice on priming. First he examines what happens to the primer itself as it is seated in the cup. Glen explains why some “crush” is important, and why you never want to leave a high primer. Glen also reviews a variety of priming tools, including his favorite — the Forster Co-Ax Bench Primer Seater. Then he offers some key safety tips. Glen provides some “rock-solid” advice about the priming operation. You’ll find more great reloading tips in Glen’s newest book, Top-Grade Ammo, which we recommend.
Priming Precision vs. Speed
Glen writes: “The better priming tools have less leverage. That is so we can feel the progress of that relatively very small span of depth between start and finish. There is also a balance between precision and speed in tool choices, as there so often is.”
Benchtop Priming Tools — The Forster Co-Ax
Glen thinks that the best choice among priming options, considering both “feel” and productivity, may be the benchtop stand-alone priming stations: “They are faster than hand tools, and can be had with more or less leverage engineered into them. I like the one shown below the best because its feeding is reliable and its feel is more than good enough to do a ‘perfect’ primer seat. It’s the best balance I’ve found between speed and precision.”


Load Tuning and Primers
Glen cautions that you should always reduce your load when you switch to a new, not-yet-tested primer type: “The primer is, in my experience, the greatest variable that can change the performance of a load combination, which is mostly to say ‘pressure’. Never (never ever) switch primer brands without backing off the propellant charge and proving to yourself how far to take it back up, or to even back it off more. I back off one full grain of propellant [when I] try a different primer brand.”

Priming Safety Tips by Zediker
1. Get a good primer “flip” tray for use in filling the feeding magazine tubes associated with some systems. Make double-damn sure each primer is fed right side up (or down, depending on your perspective). A common cause of unintentional detonation is attempting to overfill a stuffed feeding tube magazine, so count and watch your progress.
2. Don’t attempt to seat a high primer more deeply on a finished round. The pressure needed to overcome the inertia to re-initiate movement may be enough to detonate it.
3. Don’t punch out a live primer! That can result in an impressive fright. To kill a primer, squirt or spray a little light oil into its open end. That renders the compound inert.
4. Keep the priming tool cup clean. That’s the little piece that the primer sits down into. Any little shard of brass can become a firing pin! It’s happened!
These Tips on Priming come from Glen’s newest book, Top-Grade Ammo, available at Midsouth Shooters Supply. CLICK HERE to learn more about this and other publications from Zediker Publishing.
Share the post "Case Priming Procedures — Insights from Glen Zediker"
February 8th, 2019

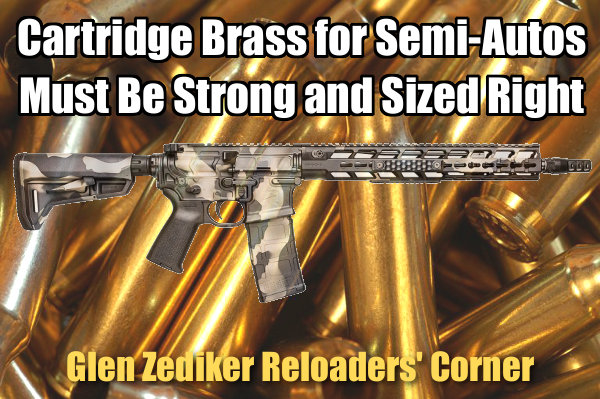
Here are highlights from an article Glen Zediker wrote for the Midsouth Blog. In this article Glen focuses on cartridge brass for semi-auto rifles, AR-platform guns in particular. Glen notes that semi-autos are tougher on brass than bolt-action rifles, so you need strong, durable brass, that has been full-length sized. And you need to be careful about neck tension, and primers. The article starts with Glen’s recommendations for tough, hard brass, and then includes the points outlined below.
Glen is the author of many excellent books on reloading. This article is adapted from Glen’s books, Handloading For Competition and Top-Grade Ammo, available at Midsouth HERE. For more information about other books by Glen, visit ZedikerPublishing.com.
ONE: Full Length-Size Cases with Adequate Shoulder Set-Back
This is a huge source of debate… amongst my readers, but, since now I’m strictly speaking of semi-auto needs I doubt there will be much dissent: full-length resize all cases! Most cases from most semi-autos will emerge with a pretty well-blown case shoulder [taming down an excessively functioning gas system can reduce this]. Make double-sure you’re sizing the cases down to at least 0.003 clearance. If you don’t there are safety and function problems ahead.
TWO: USE Sufficient Neck Tension
The case neck [must be] reduced an adequate amount to retain the bullet. There should be a minimum net difference of 0.003 inches (three-thousandths) between sized outside case neck diameter and loaded round outside case neck diameter. [Editor — that means at least three thou of “grip”.] Reason: don’t take a chance of inadvertent bullet movement during the recoil and feeding cycles. That movement can be back or forward! It’s easily possible for a bullet to jump ahead when the inertia from the bolt carrier assembly chambers the next round.

THREE: Use Tough Primers
Choose a tough primer! There’s a floating firing pin on an AR15 (M1A also) that is supposed to be held in check but that system doesn’t always work! If you load and extract a round and see a little dimple in the primer, that’s from the firing pin tapping off of it (again, created by inertia of bolt closing). A combination of a high primer and a sensitive primer cup assembly can create a “slam-fire”. Brands? CCI has some mil-spec primers that work well, and I’ve had great success with Remington 7-1/2. Some of the well-respected “match” primers are a little thin. The CCI and Remington also hold up well to the (sometimes) greater firing forces working on the primer (again, from the quick unlocking).
Here’s what I use from Midsouth.
FOUR: Be Sure to Seat Primers Below Flush
And, finally, make double-sure that each and every primer is seated to below flush with the case head! That’s true for any firearm (because it also means that the primer is fully seated) but imperative for safety in a semi-auto. This is especially an issue for those who use a progressive-type loading press.
Share the post "Cartridge Brass Wisdom for Semi-Auto Shooters by Zediker"
|

 In two informative Midsouth Blog articles, Glen Zediker offers helpful advice on priming. First he examines what happens to the primer itself as it is seated in the cup. Glen explains why some “crush” is important, and why you never want to leave a high primer. Glen also reviews a variety of priming tools, including his favorite — the Forster Co-Ax Bench Primer Seater. Then he offers some key safety tips. Glen provides some “rock-solid” advice about the priming operation. You’ll find more great reloading tips in Glen Zediker’s popular book, Top-Grade Ammo, which we recommend.


 Flash Consistency is very important, shot to shot. The consistency of every component is important: bullet weights, diameters, case wall thicknesses, and all the way down the list. We’re hoping to get more consistent behavior from a “match” or “benchrest” primer, and we’re paying more for it. I can tell you that some brands that aren’t touted as “match” are already consistent. That all comes from experience: try different primers, just respect the need to initially reduce the load for each test.
 Get Midsouth products


