Eurooptic vortex burris nightforce sale


teslong borescope digital camera barrel monitor


As an Amazon Associate, this site earns a commission from Amazon sales.


April 1st, 2023

Saturday Movies: USAMU Marksmanship Training + 20 Articles

USAMU Markmanship training videos
SFC Lance Dement as featured in CMP’s First Shot Online journal.

The U.S. Army Marksmanship Unit (USAMU) has created a series of instructional videos about High Power Rifle shooting, Service Rifle shooting, 3-Gun matches, and pistol competition. We’ve linked five of these informative USAMU videos today along with a special profile video on Amanda Elsenboss, who, as a USAMU shooter, has won both the Long Range and High Power National Championships in recent years.

In addition, as a major BONUS, we link twenty (20) informative articles authored by expert USAMU shooters and coaches. Those excellent, detailed articles covering a wide range of topics including rifle positions, wind reading, fitness training, trigger control, nutrition, training plans, and much more.

Amanda Elsenboss — National HP and Long Range Champion


usamu amanda elsenboss rifle long range

The gifted SSG Amanda Elsenboss won the 2019 NRA Long-Range Championship and the 2021 High Power National Championship. In 2022 Amanda also won the National President’s Rifle Match, the first woman ever to do so. Those accomplishments place Amanda among America’s legendary shooters. Amanda started shooting at age 8 with her father, then began competitive marksmanship at age 13. In 2009, she joined the U.S. Army as part of the USAMU rifle team. She has left full-time service, but is now a member of the Pennsylvania National Guard.

Sight Alignment and Trigger Control

In this USAMU Shooter’s Corner instructional video, SFC Kenneth Rose explains key elements of using sights on a service rifle. Rose also explain how to make the trigger pull at the optimum moment when the sights are perfectly aligned and steady.

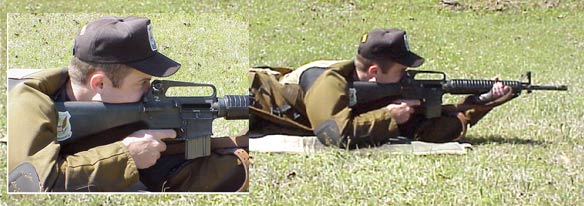
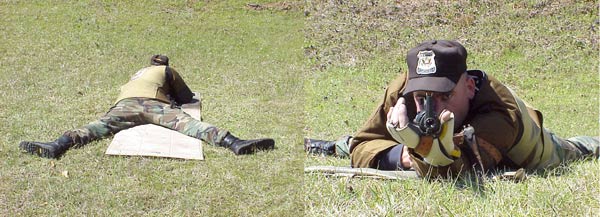
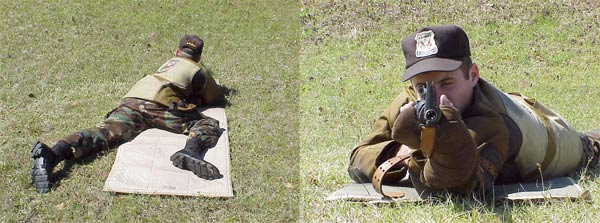
How to Set Up Sling and Rifle for Prone Shooting

In this video, the USAMU’s SGT Jonathan Wannemacher explains how to set up a service rifle sling for prone rifle shooting. Wannemacher has earned a number of coveted awards including the the Distinguished Rifleman Badge and President’s Hundred Tab.

Rifle Grip, Stance, and Body Position for 3-Gun Action Matches

SFC Daniel Horner, now with SIG Sauer, is arguably the best 3-Gun action shooter on the planet. Horner has won multiple major 3-Gun Championships, shooting rifle, shotgun, and pistol in timed action matches. Horner’s speed, accuracy, and mobility is without peer. In this video, Horner shows techniques for AR-type rifle shooting in 3-Gun competition.

Amazing Trick Shot with Air Rifle

In this Trick Shot Tuesday video SPC Ivan Roe shoots a pill (at two different angles) off the top of a balloon. Very impressive shooting! Ivan hails from Manhattan, Montana and has been a notable member of the USAMU International Rifle Team.

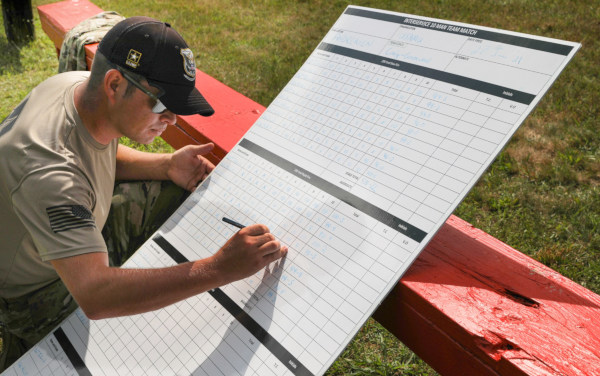
How to Use Data Books During Matches

Data books can be very valuable tools during marksmanship training. In this video, USAMU shooter SGT Lane Ichord explains Data Book basics and how to log information during practice and matches.

USAMU Saturday Movies service rifle training

BONUS: 20 Marksmanship Articles from USAMU Experts

USAMU shooters and coaches have written an excellent series of articles on highpower and service rifle shooting. Many of these originally appeared in The First Shot, the CMP’s on-line magazine. Here are twenty notable USAMU expert articles:

Elements of a Good Prone Position – Building the Position – By SPC Matthew Sigrist
Crossed-Ankle Sitting Position – By SFC Grant Singley
Standing and Trigger Control – By SFC Brandon Green

Bare Necessities for Highpower Rifle Competition – By SPC Nathan J. Verbickas
Physical Conditioning for Highpower Shooting – By SGT Walter E. Craig
Better Performance Through Proper Nutrition – By CPL Walter Craig

The Importance of the Data Book – By SFC Jason St John
Rifle Cleaning and Maintenance – By SSG William T. Pace
Developing a Training Plan – By SFC Lance Dement

Sight Adjustment and Minute of Angle (MOA) – By SSG Daniel M. Pettry
No-Wind Zero and Marking Your Sights – By SFC Jason St. John
What Sight Picture Is Best For You? – By SSG Tobie Tomlinson
Reading the Wind (Part 1, Rapid Fire) – By SFC Emil Praslick
Reading the Wind (Part 2, 600 Yds) – By SFC Emil Praslick

So you want to shoot Infantry Trophy? – By SFC Norman Anderson
Thinking Your Way to Success – By SFC Emil Praslick
Coats, Gloves, and Mitts – By PFC Evan Hess
Straight to the Rear – By SPC Tyrel Cooper
It’s Just a Sling – By SFC Lance Dement
Strapping In – By SPC Calvin Roberts

USAMU Saturday Movies service rifle training

Permalink - Articles, - Videos, Competition, Shooting Skills, Tactical No Comments »
November 22nd, 2022

Prone Shooting Technique — Mastering the Prone Position

prone shooting position smallbore highpower lones wigger nra sports usa

Shooting Sports USA (SSUSA) offers a wide selection of informative articles on marksmanship techniques. If you shoot prone, “hard-holding”, you know how important proper positioning and technique can be. There is a SSUSA article that every prone shooter should read — whether you shoot air rifle, smallbore, or High Power. Compiled wtih the help of some of the country’s best prone marksmen, this article, How to Master Prone Shooting, provides a step-by-step guide to perfecting your prone position technique.

READ Full Article on Shooting Sports USA »

How to Master Prone Shooting — SSUSA by NRA Staff
The prone position is the most precise of the rifle shooting positions. It is used in many different shooting events at distances as close as 5 meters and as far away as 1,000 yards, and beyond that in long-range disciplines such as PRS and NRL. Prone shooting is very popular among shooters whose training time is limited, because it does not require as much practice. Age has little effect on a shooter’s ability to do well in prone; many older shooters are able to continue competing successfully in prone matches.

Here is a sample, listing STEP ONE, the basics of the prone position:

Step One: Study the Position
The prone position is steady because it is low, which gives a wide base of support to help keep the rifle still. Below are the key features of the prone position.

1. Straight line form left hand through left arm, side and leg.
2. Head tipped down comfortably.
3. Right hand grips rifle lightly.
4. Body lies behind rifle. Angle to rifle is 10 to 20 degrees.
5. Right knee bent slightly, toe pointing out.
6. Rifle lies on heel of left hand, fingers relaxed.
7. Left elbow rests to left of rifle.
8. Sling (if present) supports weight of rifle. Left arm relaxed.
9. Body rests slightly more on left side.
10. Left leg straight, toe pointing inward or straight back.

There are FIVE MORE STEPS described in detail with specific actions to perform, in the FULL Article. For example, in STEP FOUR (Sling Adjustment), the article explains: “Put the sling high on the arm and tighten the sling keeper. Wrap the arm around the sling so that the sling comes across the left hand and forearm.”

prone shooting position smallbore highpower lones wigger nra sports usa

prone shooting position smallbore highpower lones wigger nra sports usa

Permalink - Articles, Competition, Shooting Skills No Comments »
November 5th, 2018

Basics of the Prone Position — Building the Position

USAMU Prone First Shot CMP

The First Shot, the CMP’s online magazine, features a well-written article on Prone Shooting Technique by SPC Matthew Sigrist of the U.S. Army Marksmanship Unit (USAMU). The article covers all the major points of gun hold and body position: hand position, elbow position, stock weld, buttstock placement, and sling position/tension.

Keep it Steady — The Elements of a Good Prone Position

Part 1 — Building the Position
By SPC Matthew Sigrist

Imagine the following scenario: You are at the last stage of fire in the National Trophy Individual Match, firing at the 600 yard line in the prone position and every point matters. What should you reflect on as you prepare to shoot this final string? As your eyes cloud from sweat, you realize that all you have to rely on is your experience and knowledge of the fundamentals.

During the National Trophy Individual Match, you will fire 60 percent of your shots from the prone position. This article will address the fundamentals of a good prone position and help you learn the techniques required to be successful in both the slow and rapid-fire stages of National Match competition.

This article will be divided into two parts. In part one, we will discuss the elements of a good prone position. In part two, we will cover the techniques you will in the rapid-fire and slow-fire stages.

The Fundamentals

The fundamentals are the building blocks of a position. Much like the framework of a house, a correct application of the fundamentals ensures a solid and stable structure. Since each person’s position will depend on their particular body build and shape, there is no “perfect position” that applies to everyone. Experience, practice and knowledge of the correct fundamentals will dictate the best position for you.

There are six key elements of any position. The purpose for these six points is to achieve a solid platform that allows for consistent sight alignment using the least amount of muscle tension.

    1. Placement of the Firing Hand (the hand that pulls the trigger)
    The firing hand needs to be placed high on the pistol grip. This high hand position will give you better control of the rifle. Combined with a firm grip there will be a reduced amount of hand movement when pulling the trigger. Wrap your thumb over the three fingers on the pistol grip (excluding the trigger finger). This will help isolate the movement of the trigger finger.

    2. Placement of the Non-firing Hand (the hand supporting the rifle).
    The non-firing hand should grip the handguard or stock in the flat portion of the hand between the thumb and forefinger. The fingers should curl naturally around the stock, but they should not grip it tightly. The position of the hand on the stock will depend on the physical size of the shooter. Generally speaking, taller shooters with longer arms will grip the rifle further out, near the sling swivel, while shorter shooters will need to pull their hand rearward. This is sometimes referred to as “short-stocking” the rifle.

    3. Stock Weld
    Stock weld is the contact that the face makes with the stock. It is important because it directly effects your sight alignment. Consistent head placement will help you achieve consistent sight alignment. The human head weighs an average of 8 to 10 pounds. The full weight of the head must rest on the stock. In doing this you achieve two things, a relaxed neck and reduced recoil because of the pressure of the head.

    4. Placement of the Rifle (the contact that is made in the firing shoulder)
    The rifle butt placement needs to be consistent. If this changes between shots, it effects your sight alignment and the effect of recoil. In the prone position the rifle will sit lower in the shoulder compared to other shooting positions. This allows for a more forward head and a lower position as a whole.

    5. Position of the Sling
    The sling should be high on the arm, above the bicep. This way the sling will have less leverage on the arm so it doesn’t cut off the circulation.


Demonstration of the placement of the firing elbow (left) and non-firing elbows (right).

    6. Placement of both the firing, and non-firing elbows
    A guideline for non-firing elbow placement is that there should be 1 ½’’ to 2’’ gap between your non-firing arm and the rifle’s magazine. (NOTE: this references the AR-15 service rifle) Your arm should be almost straight up and down; this will transfer the weight directly down the arm and not to the side (see picture above). Think of the firing arm as only a kind of kickstand, it doesn’t support weight it only holds the firing hand in position.

Variations of the Prone Position

There are two main variations of the prone position; open/spread legged, and bent-legged. The two types will be discussed below.

Open/Spread Leg Position

Demonstration of the Open/Spread Leg Position.

The first position is the open/spread legged position. This is when the shooter spreads their legs shoulder width or more apart. This allows for a more forward pressure on the sling and elbows. This position requires a tighter sling and solid elbow placement. The rifle should sit tight in the shoulder. With this position, your body will be farther behind the rifle compared to the bent leg position, allowing for minimum disturbance from recoil.

Bent Leg Position

Demonstration of the Bent Leg Position.

The bent leg position is when the shooter bends the firing side leg up towards the firing hand making the knee at a rough 90 degree angle to the body. The non-firing leg will remain straight and inline with the body. This will take pressure off the lungs and heart minimizing the pulse from the chest as well as easing the pressure on the lungs which will allow for easy breathing and control.

Summary

You now know the fundamentals of a good prone position, as well as the two types most commonly used. Extensive dry-firing will reveal which is the best position for you. If possible, have a friend take pictures of you in position. This will enable you to better diagnose and correct your errors. Remember, a position must be both fundamentally sound and comfortable. Practice frequently to learn your new position and to develop the conditioning required to endure long days on the range.

Permalink Competition, Shooting Skills 1 Comment »
October 8th, 2015

Learn Position Shooting Techniques from Gary Anderson

rimfire sporter position shooting Gary Anderson

Want to learn the basics of position shooting? Then you should check out an article by Gary Anderson, DCM Emeritus, in On the Mark digital magazine (Summer 2014, pp. 6-13). This article covers all the key elements: body position (prone, sitting, standing), sling use/adjustment, sight picture, aiming process, and trigger control. While this 8-page article was specifically written for Rimfire Sporter shooters, the techniques described by Anderson apply to all types of position shooting, whether you shoot air rifles, smallbore rifles, or centerfire rifles.

CLICK HERE to load On the Mark eZine and Read Gary Anderson Article (page 6-13)
NOTE: This is a large PDF Document — it may take some time to fully load.

Here’s what Anderson says about aiming — how to keep your sights steady and get them centered on the middle of the target:

Trigger Contact and Center
rimfire sporter position shooting Gary AndersonAs soon as aiming at the target begins, the index finger must move from the trigger-guard to contact the trigger. It is important to get initial pressure on the trigger as soon as aiming begins. Then the shooter must focus on the sight picture and centering the sight picture movements over the aiming point. No one, not even champion shooters, can hold the aligned sights perfectly still. The sights are going to move a little bit or a lot, depending on the shooter’s skill level. The secret is to center those sight picture movements over the aiming point on the target (see trace illustration) before pulling the trigger.

When the sight picture movements on the target are centered, the last step in firing the shot is to add… smooth pressure on the trigger until the shot breaks.

Anderson also discusses the 5 Basics of Shot Technique:

rimfire sporter position shooting Gary Anderson

Permalink Shooting Skills 1 Comment »