Hunting season is starting soon in most areas of the country. Here’s a way you can improve your hunting skills/knowledge. The NRA is offering a FREE online Experienced Hunter Education Course for those preparing to take advantage of the 2025 hunting season.
“Our Experienced Hunter Education Course provides those who might have taken a season or two off a convenient way to sharpen their skills before heading back into the field,” said Peter Churchbourne, director of NRA’s Hunters Leadership Forum.
NRA’s free 2-hour course is a firearm and hunting safety-training refresher in a convenient online format available through desktop, tablet, or smartphone. The course is available to everyone at www.NRAEHE.org. NOTE: The course is NOT a substitute for state-mandated hunter safety requirements and does not offer any certifications.
The NRA’s NRA Experienced Hunter Education Course, is an online training program designed to help hunters brush up their skills. Free to all, this comprehensive hunting refresher course will help hunters become safer and more confident before heading out into the field. CLICK HERE for more information.
“If you’ve taken a break from the shooting sports or haven’t hunted in a season or two, our Experienced Hunter Education Course is the perfect refresher for firearms safety and safe hunting practices,” explained Elizabeth Bush, managing director of NRA Community Engagement. “Best of all, we’re offering this service completely free of charge.”
Course Description
This online training course is specifically designed for individuals who have not hunted in the past year or more and are looking for a safety refresher before they head back out in the field. In this course, hunters will have the opportunity to refresh their skills by taking a look at safe hunting practices and firearms safety. Once completed, you will be a safer hunter in the field.
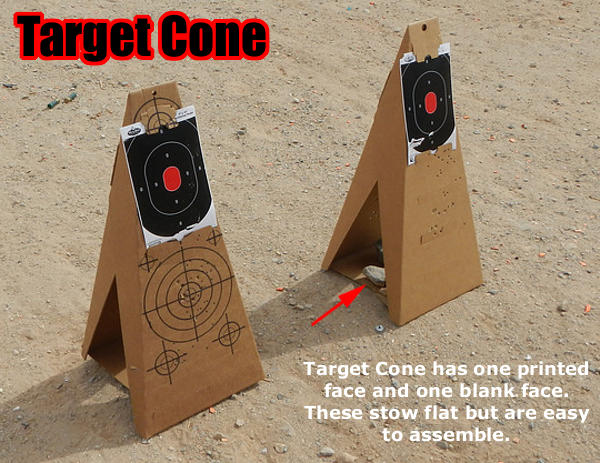
Sometimes you have an opportunity to go shooting but you’re a long way from home and don’t have your regular tall target frame(s). Here’s a handy product — a 28″ tall foldable cardboard cone — you can easily carry in your vehicle and deploy any time.
With this innovative Target Cone you can easily carry a target-holder wherever you go. The Target Cone from Re-Nine Safety transports flat so it can be easily stowed in the trunk of your car (or even under a seat). When you’re ready to use it, simply fold the flaps to create a self-supporting cone with pre-printed targets on one side. Place a rock on the base to hold it steady. The Target Cone can be used by itself or, as shown below, you can attach other targets, such as Re-Nine’s Silhouette Target (below right).
We think this is a great innovation. Keep a couple Target Cone flats in the back of your car or truck and you’ll always have a target support. For spur-of-the-moment range sessions, this is much easier than toting around a big target frame. The Re-Nine Safety Target Cones come flat, fold together and interlock forming a sturdy 28″ tall stand-alone target. These are sold as a 5-pack for $25.00.
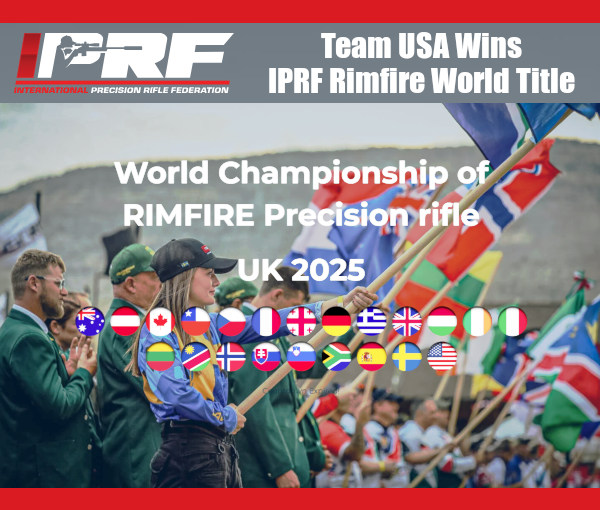
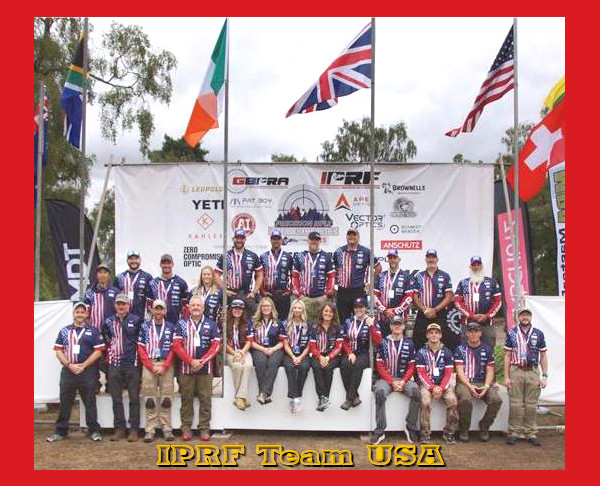
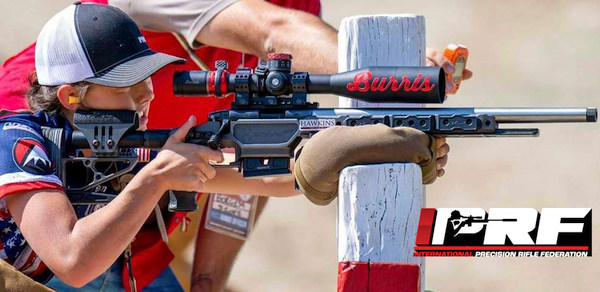
The International Precision Rifle Federation (IPRF), is a governing organization for tactical-style precision shooting, both centerfire and rimfire. Recently IPRF conducted its second-ever .22 LR Precision Rimfire World Championships, held this year in the United Kingdom. We’re proud to announce that Team USA won the 2025 IPRF rimfire title. Team USA took top honors at the 2025 IPRF PR22 World Championships, securing the gold medal with a dominant performance.
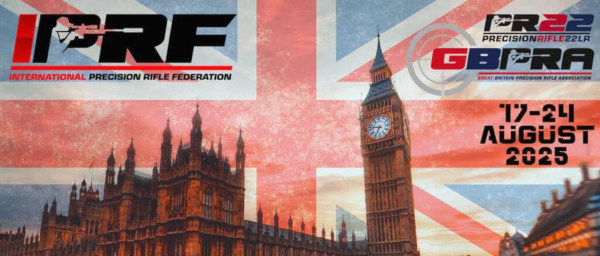
The IPRF Rimfire World Championships were held August 17-24, 2025 at the West Midlands Shooting Centre in Drayton, UK. Competing against the world’s best, Team USA finished with an impressive team score of 2089 to win the 2025 IPRF PR22 world title.
The victory was a result of outstanding individual and team achievements across multiple divisions. In the Open Division, Team USA not only secured team gold but also saw Matt Stiner take 2nd place individually, with an honorable mention to Erich Leipold for a strong performance that tied for third. The Lady’s Division was a clean sweep, with the team earning gold, Camdyn Powers winning 1st place, and McKenzie Burns securing 2nd. The Juniors Division also brought home team gold, with Dakota Wright and Reagan Stahmer earning 2nd and 3rd place, respectively. The Seniors Division added another team gold, with Dave Ostrowske claiming the 3rd place individual medal, while the Factory Division team earned a bronze medal, with Ronald Verran finishing in 3rd place.
“We are incredibly proud of Team USA’s remarkable success at the World Championships,” said Adam Braverman, V.P. of Sales & Marketing for Lapua. “Their dedication, skill, and unwavering commitment to excellence have rightfully earned them the title of world champions. Congratulations to every member of the team on this phenomenal victory.”
2025 Team USA shooters were chosen based on their performances at the U.S.A. PRS Rimfire and NRL22 championships, along with 8 qualifier matches held between January 2024 and March 2025. This selection process ensured that Team USA had great shooters who could dominate the IPRF PR22 Championship.
Video from Previous IPRF Rimfire Championship in Italy in 2023
American team member Camdyn Powers at the 2023 IPRF Rimfire World Championship in Italy. Photo courtesy Burris Optics.
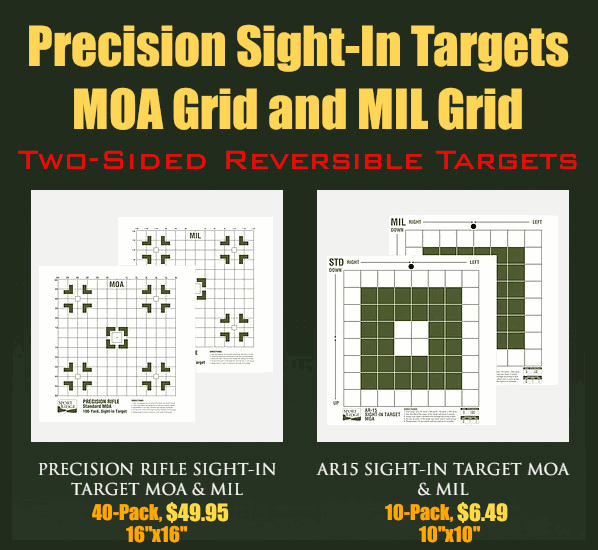
One side has MOA (Minute of Angle) grid for MOA-based scopes. Flip target over for MIL adjustment grid.
Here’s a clever product that can speed up the process of sighting-in your rifles, whether you have a scope with MOA-based clicks or an optic with MIL-based clicks. Sport Ridge offers a pair targets that are printed on BOTH sides with precise grids based on your scope’s click values. One side has an MOA-based grid while the other side of the target has 1/10th Milliradian (MIL) grid.
Choose between two, double-sided printed targets: the 16″x16″ 100-yard Precision Rifle Target and the 10″x10″ 25/50-yard AR15 Sight-In Target. For both target types, side one has an MOA-based grid for scopes with 1/4-MOA or 1/8-MOA click values. Flip the target over to use the grid for MIL scopes with 1/10th Milliradian click values.
Sport Ridge’s Premium Precision Sight-In Targets allow you to adjust the point of impact quickly because the target’s grid boxes precisely match the click values of MOA and MIL measurement systems. Sport Ridge states: “No more guesswork at matching your optic’s adjustment value, saving your ammunition and time spent sighting-in firearms.” Get the 16″x16″ Precision Target 40-pack for $49.95, or the 10″x10″ AR Target 10-pack for $6.49.
Manufacturer Video Explains How to Sight-In with MOA/MIL Grid Target:
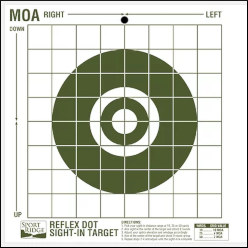
For MOA-type scopes, Sport Ridge also offers a single-sided Reflex Sight-In target with an MOA-based adjustment grid. This has a large center sighting bullseye so it can be used to confirm MOA-based click values at longer ranges (300+ yards) with rifles. Or use it at close range (for 10, 25, or 50 yards) for red-dot equipped pistols or shotguns. A 10-pack of these targets is $6.49.
REFLEX DOT SIGHT-IN TARGET
• Large Central Bull with MOA Grid
• Table of distance MOA optic click values
• Grid adjustment in direction Up/Down, Left/Right
This video explains general principles of sighting-in rifles, including dialing to Point of Impact:
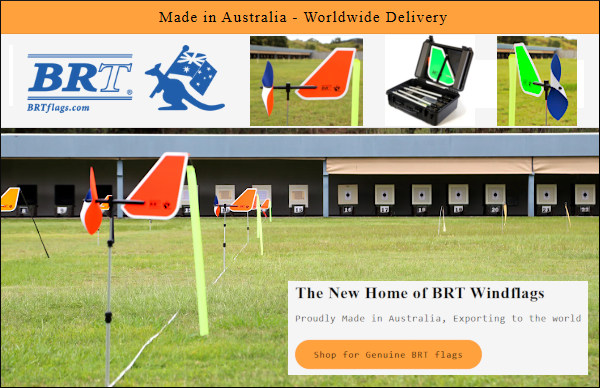
A while back our Aussie friend Stuart Elliot of BRT Shooters Supply filmed some interesting videos at the QTS range in Brisbane, Australia. Stuart told us: “I was shooting in an Air Gun Benchrest match here in Brisbane, Australia. I finished my target early and was awaiting the cease fire and took a short, slow-motion video of windflag behavior.” You may be surprised by the velocity changes and angle swings that occur, even over a relatively short distance (just 25 meters from bench to target).
Here are windflags in slow motion:
The flags show in the videos are “Aussie Wind Flags”, developed by Stuart Elliot. These are still produced in Australia, and are now available through BRTFlags.com.
Here is a video in real time:
Stuart says this video may surprise some shooters who don’t use windflags: “Many people say the wind doesn’t matter. Well it sure does — whether for an airgun at 25 meters or a long range centerfire at 1,000.” This video illustrates how much the wind can change direction and velocity even in a small area.
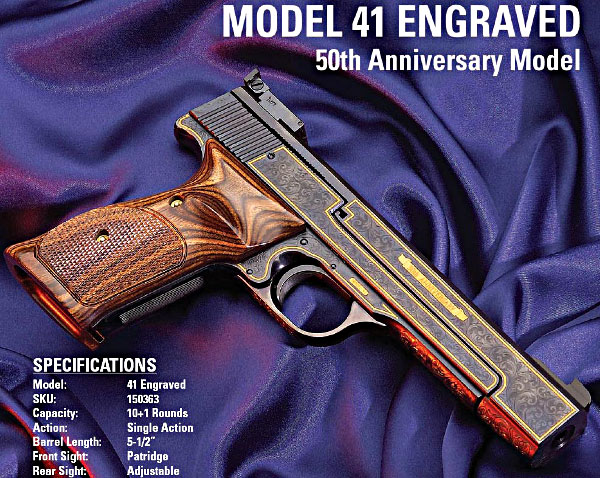
The Smith & Wesson Model 41 is a classic American rimfire target pistol. Beautifully crafted, the Model 41 boasts a superb trigger, comfortable grip, and excellent accuracy. New or used, a Model 41 is a fine addition to any firearms collection. We’ve shot a few Model 41s, and they will spoil you if you go back to a lesser rimfire pistol. First released commercially in in 1957, a special 50th Anniversary Model (shown above top) came out in 2007 (hitting the market in 2008). Perhaps it should have been named the 60th Anniversary edition, as the first prototypes of the Model 41 were crafted way back in 1947. READ American Rifleman article about Model 41.
The Model 41 is one of those classic American designs that has stood the test of time. Many feel the Model 41 represents the apex of American .22 LR pistol design, much like the Colt Python is the “crown jewel” of double-action revolvers. One YouTube poster noted: “After [65] years the Model 41 is still near the top of the game in precision .22s. Very few if any of the current day pistols can match the workmanship, fit, and balance that makes having a Model 41 so enjoyable to own.”
The Stunning 50th Anniversary Edition Model 41
Probably the most sought-after Model 41 is the handsome, machine-engraved 50th Anniversary Model, released in 2007. This was offered in a hardwood, glass-covered case. This would be a prized addition to any gun collection. For $2000.00 to $3700.00 you can find the fully engraved, 50th Anniversary Model 41 in presentation case on various auction websites. First released in 2007, the engraved model 41 combines superior accuracy with stunning appearance.
The 50th Anniversary Model was machine-engraved with Class A+ coverage, 24 carat gold striping, and special serial number range FYA0001 – FYA0500.
Smith & Wesson Model 41 — An American Classic Rimfire Pistol
The Smith & Wesson Model 41 is an American classic — one of the great, iconic .22 LR target pistols. Accurate, well-balanced and built-to-last, model 41s have been in production for over 50 years. The Model 41 remains one of the most accurate pistols ever produced by Smith & Wesson.
Model 41 photo by Mightymoo01, creative commons released CC BY-SA 3.0.
Beautifully crafted, the Model 41 boasts a superb trigger, comfortable grip, and excellent accuracy. Whether an older classic or a newer model, the S&W Model 41 is something every gun owner would prize for target shooting. And “like new” high-grade models are now appreciating in value!
Field Test of Current Generation S&W Model 41
So how do modern production Model 41s shoot? Very well indeed, based on the results from popular gun Vlogger 22plinkster. He took a new Model 41 to his test range and tested it for handling and accuracy. Watch the 22plinkster video below:
22plinkster runs of the most popular gun-centric YouTube channels. His videos have been watched by hundreds of thousands of firearms fans. Some of .22 Plinkster’s videos involve trick shots, but he’s actually a very competent marksman who has shot a vast collection of .22 LR/22 WMR pistols and rifles, making him a qualified rimfire expert.
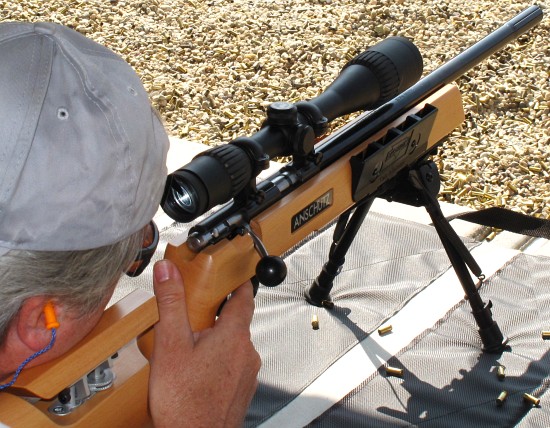
AccurateShooter’s Editor trains with .22 LR Anschutz model 64R back in 2008.
Rimfire Tactical Matches Aren’t Really New
NRL22 and PRS 22 rimfire shooting disciplines are fun, affordable forms of competition. We’re pleased to see the rapid growth of NRL22 and PRS rimfire. However, the concept of a rimfire tactical/practical match is not new — at least on the West Coast. Way before anyone every heard of PRS, California shooting clubs conducted “Rimfire Tactical” matches. These matches were first fired nearly two decades ago. CLICK HERE to read our comprehensive Rimfire Tactical report from way back in 2008. That article includes free targets, ballistics charts, and a complete run-down on suitable rimfire rifles.
The Concept Behind the Rimfire Tactical Match by Bill Erwin
Many guys who shoot long-range tactical matches practice with .22 LR rifles of similar configuration. Rimfire ammo is way more affordable than centerfire, you do not need a big range facility, and shooting rimfire saves wear and tear on your centerfire rifle. Further, for learning how to read the wind, there really is no better training tool than a 22 LR, even as close as 50 yards. Check out this table showing how a .22 LR ballistics compare to .308 Win:
.22 LR vs. .308, Distances for Equal 10 MPH Wind Drift
This table shows the corresponding distances at which a 10 mph full-value crosswind pushes a .22 LR bullet and .308 projectile the same amount. Values are based on 0.130 BC for a 40gr .22 LR bullet, and 0.496 BC for 175gr .308 bullet.
22 LR 40gr 1050 fps
50 yd Wind 1.0″
75 yd Wind 2.2″
100 yd Wind 3.8″
125 yd Wind 5.8″
150 yd Wind 8.2″
175 yd Wind 11.0″
200 yd Wind 14.3″
.308 Win 175gr 2650 fps
130 yd Wind 1.07″
180 yd Wind 2.15″
230 yd Wind 3.68″
280 yd Wind 5.63″
330 yd Wind 7.98″
380 yd Wind 10.71″
440 yd Wind 14.56″
This table shows how the .22 LR can be an effective substitute for a .308 Win during training. Because the smaller bullet drifts more in the wind, a .22 LR rimfire shooter will experience roughly the same crosswind effects as if he was shooting a 175gr .308 Win twice as far out. So, rimfire work can teach you to dope the wind like a .308 Win, but at less than half the distance. Shooting a .22 LR at 100 yards is like shooting a .308 Win (with 175gr SMK) at 230 yards.
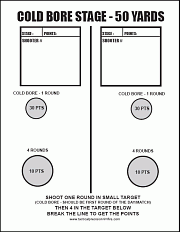
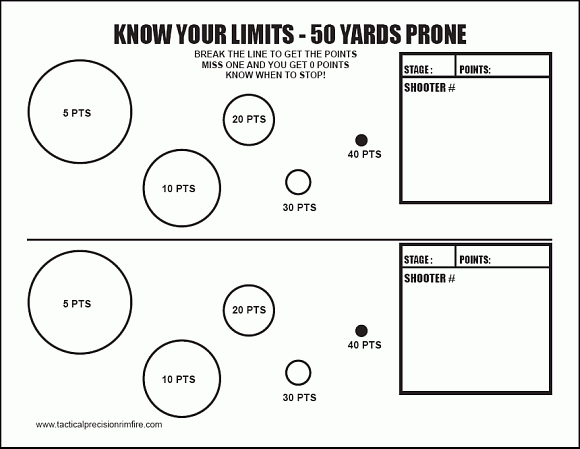
SPECIAL BONUS–Rimfire Tactical Precision Targets
These FREE targets by DesertFrog are offered in Adobe Acrobat format for easy printing. CLICK HERE to download all six targets as a .ZIP archive.
Rimfire Training Target for Fun Matches
Here’s a rimfire training target with “big to small” target circles. Start with the largest circles, then move to the smaller ones in sequence. This systematic drill provides increasing challenge shot-by-shot. Novices often are quite surprised to see their accuracy improve as they move from bigger to smaller aiming points. That provides positive feedback — always a good thing.
Right Click and “Save as” to download printable PDF versions of target.
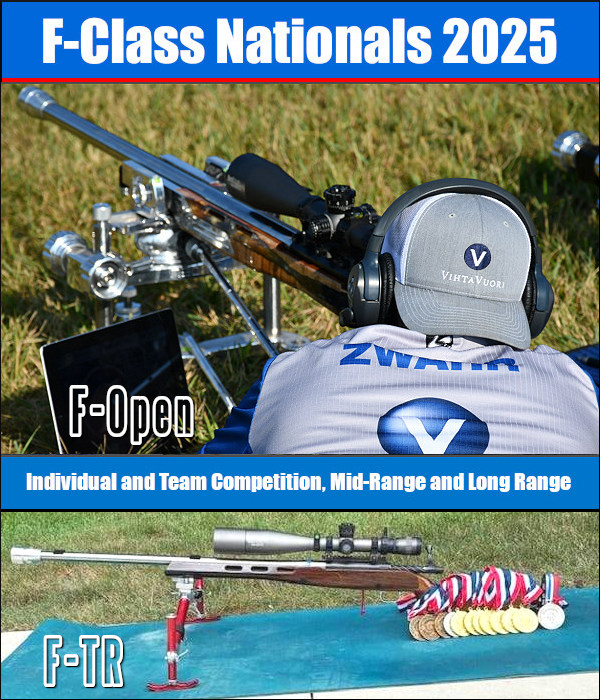
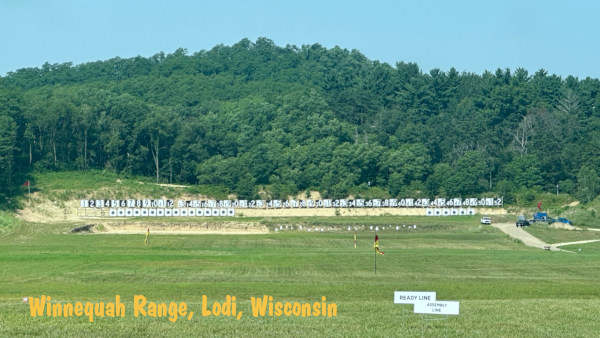
The 2025 F-Class Nationals took place recently at the Winnequah Range in Wisconsin. The match was run superbly with an excellent target system. Competitor John Masek, who finish 10th in F-Open, noted: “Congrats to all the winners in both Mid and Long Range — there were no ‘gimme’ matches the whole week. It was an awesome match and the folks at Winnequah put on a hell of a match. We had hundreds of devices on the Shotmarker system at one time and I don’t remember it ever going down because of it. Great weather and a tricky tricky range led to all kinds of shake-ups each day especially as long range went on.” The winds did become challenging on the final day said Winnequah staffer Kevin Liebetrau.
The Winnequah Gun Club in Lodi, Wisconsin, hosted the NRA F-Class National Championships from August 2nd to 9th, attracting top-tier competitors. This premier event has two main categories: F-Open and F-TR, each with specific equipment and caliber rules. The championship employed ShotMarker Electronic Target Systems for real-time scoring at both Mid-Range (600 yards) and Long-Range (1000 yards).
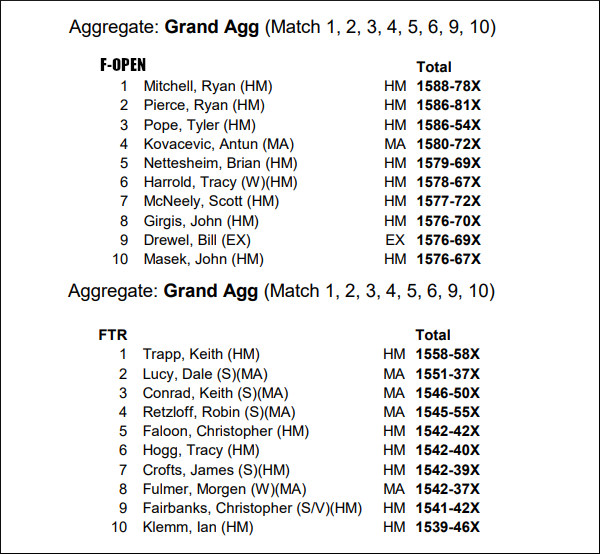
F-Class Long Range Nationals Top 10 Finishers, F-Open and F-TR
Congratulations to Ryan Mitchell for winning the 2025 F-Open Long-Range Nationals.
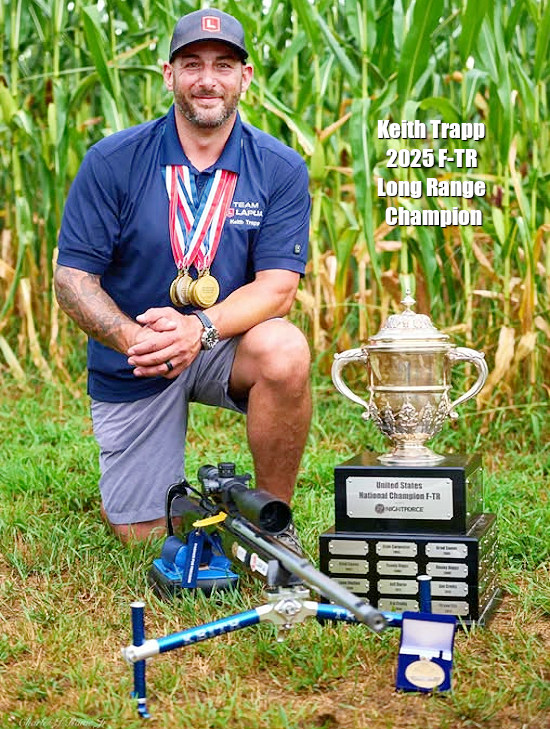
Congratulations to Keith Trapp for winning the F-TR Long-Range Nationals for the second time!
Team Competition at the F-Class Nationals
Here is a video from the Long Range Teams Match.
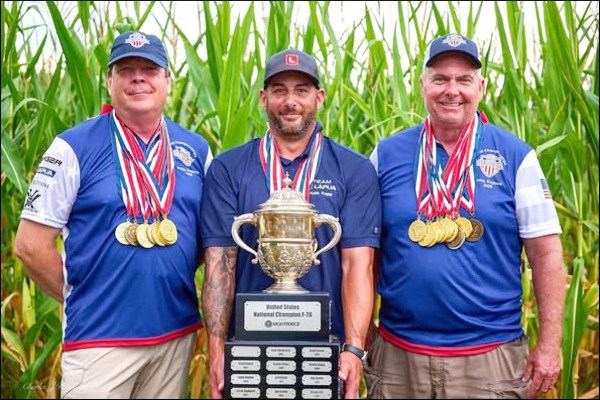
In Team Competition, the Bayou Boys won F-Open with a 1578-72X score with Team Lapua just six Xs behind with 1578-66X. In F-TR division, Team USA F-TR Berger took the title with a 1542-33X score. In second was Team USA F-TR Vihtavuori with a 1527-36X score.
SEE: F-Open Team Results; F-TR Team Results.
Keith Trapp Wins F-TR LR National Championship
Team Lapua’s Keith Trapp won the F-TR division of the USA F-Class Long Range National Championship, with an impressive 1558-58X Aggregate score. This marks Trapp’s second F-Class National Championship win. Trapp won his first F-Class Long Range title in 2022, and his first Mid-Range title in 2023.
“I’m incredibly proud of this win,” said Trapp. “The competition was fierce, but my equipment, particularly the Berger bullets, Vihtavuori powder, and Lapua cases, performed flawlessly, giving me the confidence I needed to perform at my best. It’s truly an honor to win this title for a second time.”
Keith Trapp’s confidence was significantly aided by his choice of ammunition. He relied on Berger 200.20X bullets, propelled by Vihtavuori N150 powder, loaded into Lapua .308 Win Palma cases. Trapp is set to compete this September on the international stage at the upcoming European F-Class Nationals.
Top F-TR finishers in the Long Range Competition. Dale Lucy on left, and Keith Conrad on right. First-place finisher Keith Trapp holds the trophy. Keith won the title the hard way, overcoming a crossfire on Day One. This was a great performance.
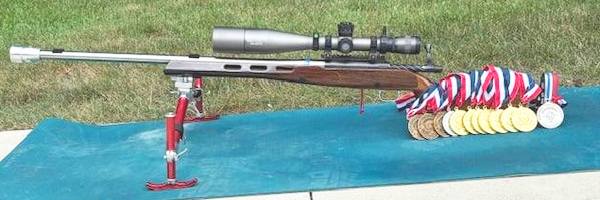
Dale Lucy’s F-TR Rifle with Barrel Tuner and SEB Joy-Pod front joystick-adjustable bipod.
Competitor Mike Cateena noted that there was “challenging weather this week for the 2025 US F-Class National Championship and amazingly the rain held off until the finish of the last day.” Mike added: “And congratulations to all the winners and a huge congratulations to the USA F-TR Rifle team — you guys absolutely crushed it at Nationals this year! And thank you Winnequah Gun Club for doing an amazing job at hosting this year’s F-Class Nationals and thank you Criterion Barrels, Inc., Krieger Barrels and Brux Barrels, LLC for supporting the match.”
Competitor F-Class John, who finished 10th in the Long Range event, said the match was run really well and the support services provided to competitors were excellent.
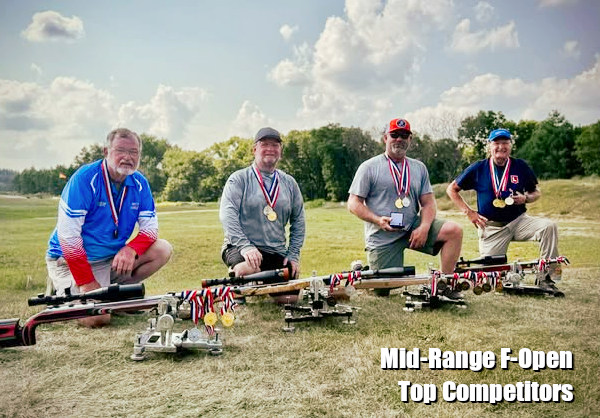
2025 Mid-Range F-Class Nationals Results
The 2025 F-Class Mid-Range Nationals were held August 2-5 at the Winnequah Range. Remarkably, the top five F-Open shooters all finished with 1796 points, dropping only 4 points in nine stages, earning 1796 out of 1800 possible points. Randy Snook won the F-Open Class shooting a 6BRA with a 1796-127X score, winning the title on X-count. Here are the scores for the top five Mid-Range F-0pen shooters: Randy Snook 1796-127X; Brad Johnson 1796-118X; Johnny Ingram 1796-117X; Andy Amber 1796-116X; Dave Lyons 1796-106X.
The top five Mid-Range competitors all finished with 1796 points, dropping just 4 points on 180 targets!
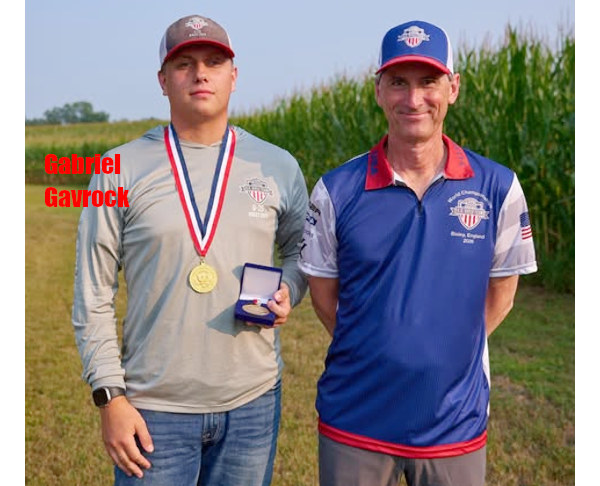
In the F-TR Division (limited to .223 Rem and .308 Win), Gabriel Gavrock secured the 2025 Mid-Range Title with a 1785-100X Score. In second was Lusty Leo Cebula with a 1782-94X score. Finishing third was David Schmidt with 1781-97X. It’s notable that Gabe Gavrock (below left in photo) is just 19 years old — so this is a great start to his marksmanship career. Gabe is a member of the Under-25 United States Rifle Team. He is the only junior to ever win a USA F-Class Nationals event.
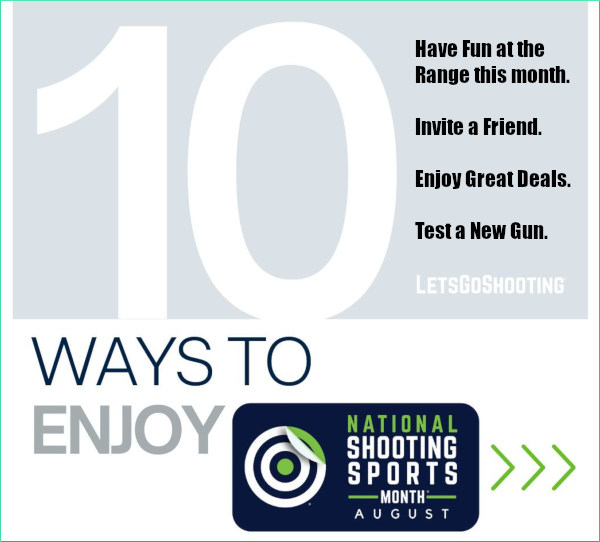
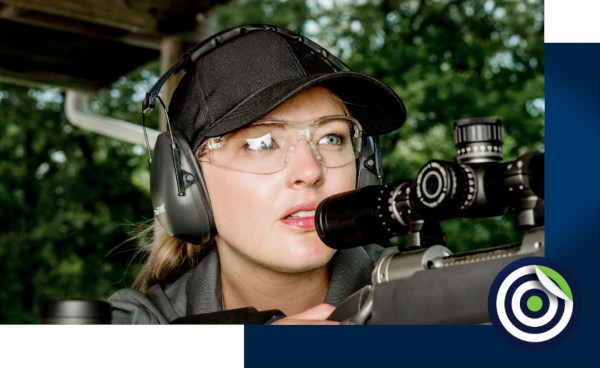
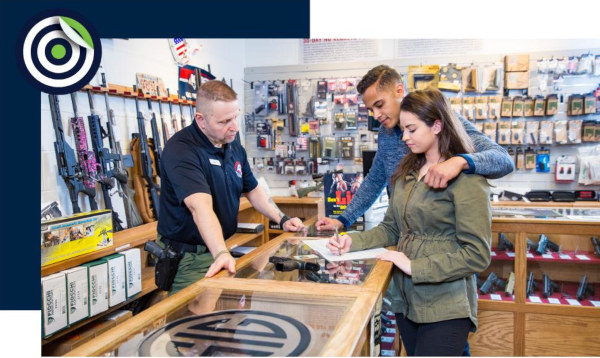
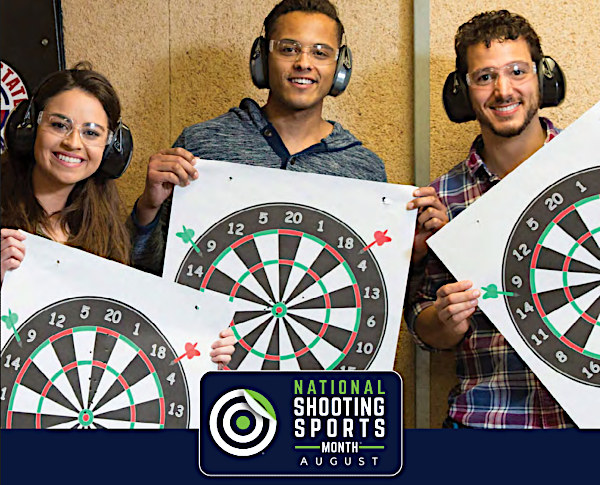
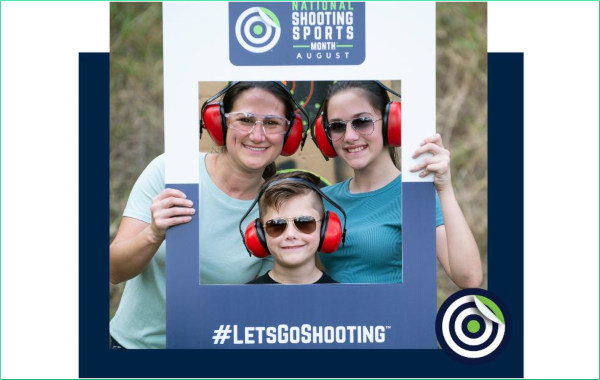
August is officially National Shooting Sports Month, sponsored by NSSF, the National Shooting Sports Foundation. This month, head to the range, and bring a newbie to introduce him or her to the sport. NSSF’s +ONE Movement encourages experienced shooters to mentor newcomers, so bring a friend to the range, teach firearms safety, and have fun together. More than 63 million adults and youth participate in target shooting sports, and NSSF invites you to give shooting a try!
1. Rediscover Shooting
Haven’t shot in a while? Dust off your shooting gear. Always check to see if firearms are loaded when removing them from storage. And call an old shooting buddy or family member to join you.
2. Try a Drill or Competition
There are many ways to build shooting skills, but two of the most rewarding ways of self-improvement often come from timed drills, accuracy drills or competitions. Find a drill for you or a local pistol, rifle or shotgun competition. There many even be a multi-gun competition.
3. Take Your First Shots
Safety orientation, range rules, range officers… there are things you need to know about if you haven’t tried target shooting before. Learn about range safety and etiquette and consider taking an introductory class like First Shots.
4. Take a Date to the Range
Make it a date! Ask your spouse/partner to go target shooting with you. You’ll have a great time together. Don’t have someone to go with? Call the range and ask about shooting events and training classes.
5. Be a Mentor
The right teacher makes all the difference when learning a new activity. The +ONE initiative inspires experienced shooters and hunters to guide newcomers and novices on how to safely handle firearms and learn marksmanship skills.
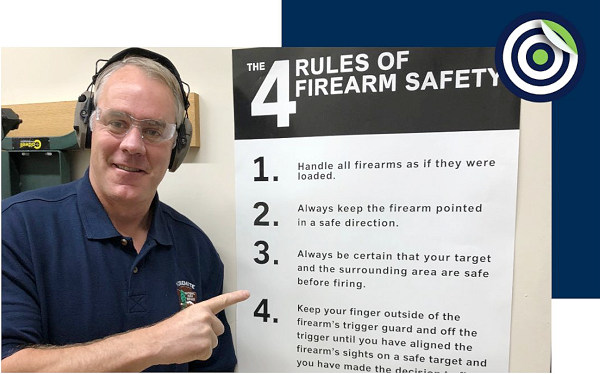
6. Brush Up on Safety
Enroll in a firearm training course or review the rules of firearm safety. Responsible gun owners safely handle their firearms and securely store them when not in use. Check with your local retailer of range for in-person training opportunities.
7. Tune Up for Hunting Season
Hunting is fun and can provide the ability to harvest healthful food. A trip to a firearms retailer or range can help you prepare for hunting season. You can enroll in a hunter education course, find the right gear, and get your rifle sited properly for the fall hunting season.
8. Take Advantage of August Deals
Retailers and ranges will be offering specials during National Shooting Sports Month at thousands of events nationwide. Find a participating business near you to take advantage of these notable offers at ShootingSportsmonth.org.
9. Have A Fun Target Match with Friends
With pistols and rimfire rifles you can have fun shooting indoors, and many ranges are open after work. This is an opportunity to have funs with friends and co-workers. NSSF offers a variety of nice targets you can print out.
10. Share #LetsGoShooting with Friends and Social Media
#LetsGoShooting is the official theme of National Shooting Sports Month. Share your shooting experience on social media networds and encourage other to go to the range for fun, socializing, and training.
Whether you’re new to target shooting, a first-time gun owner or experienced, see what National Shooting Sports Month has to offer at your shooting range or firearm retailer. America’s firearm owners will find National Shooting Sports Month in August a great time to spend a day at the range enjoying their favorite target-shooting sports with friends and family members. It’s also a time for millions of first-time gun owners to check out all that the shooting sports have to offer.
Wind effects are complex. In trying to access wind speeds and angles, you’ll want to watch multiple indicators — mirage, dust, wind-flags, grass movement, and more. You’ll also need to be concerned about wind cycles. In the video below, Bryan Litz talks about variable wind speed along a bullet’s flight path. A respected ballistics guru, Bryan is the founder of Applied Ballistics and a designer of Berger’s Hybrid Match projectiles. He is also a past F-TR National Champion and a High Master Palma ace.
In this video, Bryan discusses how wind effects can vary in intensity at different points along the bullet’s flight path to the target. Sometimes the firing line is sheltered, and the strongest winds come into effect in the middle of the trajectory. Bryan concludes: “Wind matters everywhere … but the best thing you can do is try to get a handle on the wind [velocity and angle] where you are. That may or may not represent the wind down-range — that’s when you have to look downrange and make a judgment[.]”
Litz Competition Tip: Select your wind shooting strategy carefully. For beginners and veterans, most points are typically lost to wind. Successful shooters put a lot of thought into their approach to wind shooting. Sometimes it’s best to shoot fast and minimize the changes you’ll have to navigate. Other times it’s best to wait out a condition which may take several minutes. Develop a comfortable rest position so you have an easier time waiting when you should be waiting.
More Wind Tips from Wind Wizard Emil Praslick
In these two short videos, Emil Praslick III, former coach of the USAMU and USA National long range teams, explains how to find the wind direction and how to confirm your no-wind zero. Praslick is widely considered to be one of the best wind coaches in the USA.
When Winds Are EXTREME — Near Gale Force at Ben Avery
This video shows INSANE winds at NBRSA 100/200 Benchrest Nationals. This was filmed at the Ben Avery Range in Phoenix, AZ during the recent NBRSA 100/200 yard National Championships. Extreme to say the least. Based on what we’re seeing here, there are 20-25 mph crosswinds, with gusts to 35 mph — near Gale Force. Video by Hall-of-Fame Benchrest competitor Gene Bukys, whom we sadly lost to COVID last year. RIP Gene.
Texas gunsmith Mike Bryant reports: “This video shows the Unlimited Class 200 at the Nationals in Phoenix. I had three 10-shot groups in the low 2″ range with a 2.228″ being my big group and was glad they weren’t bigger. Thursday and Friday were the worst of the windy days. Unfortunately those were the days for the UL 200 and it was about as windy through most all of the Sporter 200.”
Excellent Wind Reading Resource
The Wind Book for Rifle Shooters covers techniques and tactics used by expert wind-readers. The authors provide a wind-reading “toolbox” for calculating wind speed, direction, deflection and drift. They explain how to read flags and mirage, record and interpret your observations, and time your shots to compensate for wind. Here are two reviews:
This is a must-have book if you are a long-range sport shooter. I compete in F-Class Open and when read it from cover to cover, it helped me understand wind reading and making accurate scope corrections. Buy this book, read it, put into practice what it tells you, you will not be disappointed. — P. Janzso
If you have one book for wind reading, this should be it. It covers how to get wind speed/direction from flags, mirage, and natural phenomenon. This is the best book for learning to read wind speed and direction. — Muddler


 For MOA-type scopes, Sport Ridge also offers a single-sided