Berger Twist-Rate Stability Calculator
On the Berger Bullets website you’ll find a handy Twist-Rate Stability Calculator that predicts your gyroscopic stability factor (SG) based on mulitiple variables: velocity, bullet length, bullet weight, barrel twist rate, ambient temperature, and altitude. This cool tool tells you if your chosen bullet will really stabilize in your barrel.
How to Use Berger’s Twist Rate Calculator
Using the Twist Rate Calculator is simple. Just enter the bullet DIAMETER (e.g. .264), bullet WEIGHT (in grains), and bullet overall LENGTH (in inches). On its website, Berger conveniently provides this info for all its bullet types. For other brands, we suggest you weigh three examples of your chosen bullet, and also measure the length on three samples. Then use the average weight and length of the three. To calculate bullet stability, simply enter your bullet data (along with observed Muzzle Velocity, outside Temperature, and Altitude) and click “Calculate SG”. Try different twist rate numbers (and recalculate) until you get an SG value of 1.4 (or higher).
Gyroscopic Stability (SG) and Twist Rate
Berger’s Twist Rate Calculator provides a predicted stability value called “SG” (for “Gyroscopic Stability”). This indicates the Gyroscopic Stability applied to the bullet by spin. This number is derived from the basic equation: SG = (rigidity of the spinning mass)/(overturning aerodynamic torque).
If you have an SG under 1.0, your bullet is predicted not to stabilize. If you have between 1.0 and 1.1 SG, your bullet may or may not stabilize. If you have an SG greater than 1.1, your bullet should stabilize under optimal conditions, but stabilization might not be adequate when temperature, altitude, or other variables are less-than-optimal. That’s why Berger normally recommends at least 1.5 SG to get out of the “Marginal Stability” zone.
In his book Applied Ballistics For Long-Range Shooting, 3rd Ed., Bryan Litz (Berger Ballistician) recommends at least a 1.4 SG rating when selecting a barrel twist for a particular bullet. This gives you a safety margin for shooting under various conditions, such as higher or lower altitudes or temperatures.
Story idea from EdLongrange. We welcome reader submissions.
An Oregon anti-hunting ballot initiative opposed by NSSF®, The Firearm Industry Trade Association, failed to gather enough certified signatures to be considered by voters. Oregon’s Initiative Petition 28 (IP 28), called the “People for the Elimination of Animal Cruelty Exemptions (PEACE) Act,” was proposed to prohibit and criminalize hunting, trapping and livestock production.
The proposed ballot initiative was disqualified by the Oregon Secretary of State’s Elections Division for consideration by voters on November 3, 2026, after it gathered just 104,262 valid signatures, below the threshold requirement of 117,173 required signatures.
“This radical anti-hunting plan was clearly, and correctly, rejected by Oregonians who wanted no part of this attack on the heritage of outdoorsmanship and proven conservation efforts that managed hunting requires,” said Lawrence G. Keane, NSSF Senior Vice President & General Counsel. “The proposal would have, without question, destroyed Oregon’s rural communities, outdoor economy and abundant wildlife. Hunters are the original wildlife conservationists and are crucial to sustained propagation of managed wildlife for future generations. Oregonians are correct to reject this short-sighted and politically-driven agenda that would have annihilated over a century’s work to restore wildlife across Oregon’s landscape.”
NSSF strongly opposed IP 28, which was pitched to voters as a measure to strengthen state animal cruelty laws. However, Oregon already punishes animal cruelty. IP 28 would have removed legal protections for regulated hunting, fishing, ranching and other lawful activities that are critical for wildlife management, culturally rooted and economically important across the state.
Further, IP 28 would have threatened the funding structure that supports wild game and nongame species alike. In fact, 85 percent of Oregon’s wildlife money comes from the combination of excise taxes paid by firearm and ammunition manufacturers and hunting license, permit and stamp fees. The U.S. Fish and Wildlife Service (USFWS) apportioned $1.3 billion to state wildlife agencies last year. Over $804 million of that is sourced directly from the Pittman-Robertson excise tax paid by firearm and ammunition manufacturers. Oregon received over $9.7 million from that apportionment.
The Oregon Department of Fish and Wildlife (ODFW) reports that hunting, fishing and wildlife watching accounted for $1.2 billion in spending in 2019, or $1.47 billion when adjusted for inflation. Oregon’s outdoor recreation economy generated $9 billion in economic impact in 2024, supporting more than 76,000 jobs and accounts for 2.7 percent of state gross domestic product.
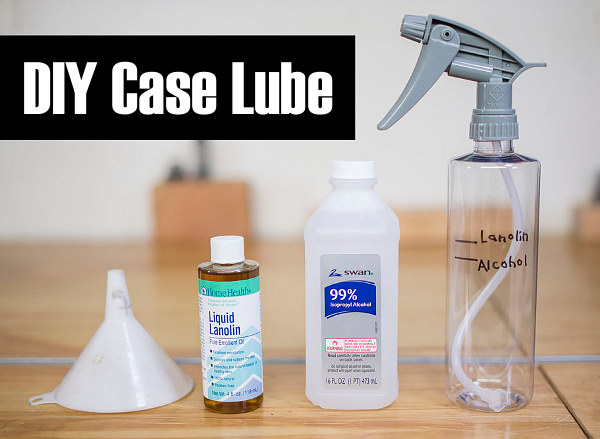
Tired of spending $15-$25 for a can of spray lube that doesn’t last that long? For about the same price as a single 10 oz. can you can make your own effective spray lube that should last for multiple seasons and lube thousands of cases quickly and easily.
In the YouTube video embedded below, our friend Gavin Gear of UltimateReloader.com shows how to make your own case lube using simple, inexpensive ingredients. As recommended by the 6.5 Guys, this Liquid Lanolin + Isopropyl Alchohol mix works well and is very cost-effective. You can make a pint of this home-brew Lanolin case lube that will lube thousands of cases — many more than a typical commercial aerosol spray can (that’s mostly compressed air).
Gavin describes the exact mixing process on his Ultimate Reloader website. Gavin says this lube mix is a good complement to the Hornady One-Shot (pistol) and Dillon DCL (rifle) lubes he has used for pistol and rifle reloading sessions. CLICK HERE to read more.
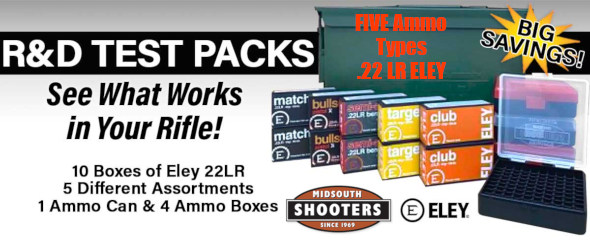
Do you compete in rimfire benchrest, silhouette, or NRL22 matches? Then you’ll want to check out the Shooting Sports USA .22 LR Ammo Roundup on the SSUSA.org website. That article covers .22 LR ammunition from Lapua, ELEY, SK, RWS, Norma, Wolf, and Aquila. Notably there’s a detailed discussion of Lapua’s new Long Range and Super Long Range ammo. In addition, SSUSA confirms that SK ammo (made in Germany by Nammo, parent of Lapua) and Wolf Match Target ammo (made by ELEY) both offer quite good performance for a moderate price.
The article notes that there is a much wider range of .22 LR ammo types available now than a few years ago. It’s not just a choice between cheap products and high-end match ammo. As SSUSA explains: “It used to be that .22 LR was either quite expensive match grade ammo, or it was cheap plinking or hunting ammo. Today, competitors have choices in grades of .22 LR match ammunition to suit their pocketbook or firearms.” We’ve seen good results with relatively inexpensive Norma Tac-22, and the SSUSA article says that SK performs well above its price level.
Seven Brands of .22 LR MATCH AMMUNITION
Lapua Super Long Range and Long Range .22 LR
Lapua Super Long Range and Long Range ammunition comes from Finland, and is designed for the growing long-range rimfire disciplines with targets at 100-300 yards. Lapua says this ammo delivers very low ES and SD numbers. Our friend F-Class John has tested this ammo and confirmed it performs very well (SEE video above). “Each production lot of Lapua’s new rimfire products are test-fired in 50-round groups for dispersion”, Capstone’s Marketing Director, Geoff Esterline, said. “The results determine whether it makes Super Long Range or Long Range packaging.”
ELEY .22 LR Ammunition
ELEY has long been a top choice for .22 LR competition — both position shooting and benchrest. ELEY now offers 11 different varieties of .22 LR match ammunition, ranging in price from $8.50 (Benchrest Outlaw) to $20 (ELEY Tenex). If you compete in the rimfire benchrest, you should definitely try some ELEY ammo.
SK .22 LR Ammunition
Numerous .22 LR ammunition types are offered by SK, suitable for a variety of disciplines — from NRL22 to Biathlon. Generally cheaper than ELEY Match ammo, SK offers good “bang for the buck”. F-Class John says it performs great considering the price. The SSUSA article notes that: “German manufacturer SK has eight match-grade .22 LR offerings, including two for pistols, one for semi-automatic rifles, and one for frigid, wintertime conditions.”
RWS .22 LR Ammunition
Sometimes hard to locate at vendors in the USA, RWS is popular among European competition shooters. The top-tier RWS ammo is a choice of many competitive shooters. RWS currently offers nine Premium Line .22 LR varieties and three Professional Line offerings. The SSUSA tester noted that RWS Rifle Match ammo shot great in his Bergara BMR, shooting one-ragged-hole groups at 50 yards and about one MOA at 100 yards. That’s great performance for $10/box ammo.
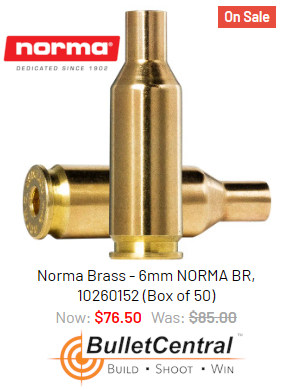
Norma .22 LR Ammunition
Norma also offers XTREME LR-22, a new type of competition rimfire ammo with a radical new bullet. This unique, patented bullet design has a special base with a cone (see diagram). Norma claims that this “rocket tail” design reduces drag by creating less negative pressure at the back end of the bullet. It will be interesting to see how this new bullet design works in rimfire ELR competition.
Wolf .22 LR Ammunition
SSUSA says that Wolf Match Target is a top performer in the under-$10 per box category. This is because, according to SSUSA: “It is manufactured by ELEY in England (and loaded with Vihtavuori powder) and re-branded, if online information is correct.” Wolf Match Target is available from Target Sports USA for $70.83 for a 500-pack ($0.142 per round). Or you can get single 50-rd boxes from Champion’s Choice for $7.50/box ($0.15 per round).
Aguila .22 LR Ammunition
Made in Mexico, Aguila .22 LR rimfire ammo is the bargain item among the seven ammo-makers featured by SSUSA. It is usually available at very affordable prices.
We wouldn’t choose Aguila for a benchrest or three -position match, but it could work for a local NRL-22 match or a steel-target competition at relatively short range. Aguila .22 LR ammo starts at under $3.80 per box. Right now many low-cost Aguila .22 LR ammo types are out-of-stock. But you can still find some more expensive varieties such as the Aguila Interceptor High Velocity HP, available for $8.99/50 rounds from Midsouth.
We are re-publishing this article at the request of Forum members who found the information very valuable. If you haven’t read this Safety Tip before, take a moment to learn how you can inspect your fired brass to determine if there may be a potential for case separation. A case separation can be dangerous, potentially causing serious injury.
On the highly-respected Riflemans’ Journal blog, created by our late, dear friend German Salazar*, there was an excellent article about Cartridge Case-Head Separation. In this important article, Salazar (aka GS Arizona) examined the causes of this serious problem and explained the ways you can inspect your brass to minimize the risk of a case-head separation. As cases get fired multiple times and then resized during reloading, the cases can stretch. Typically, there is a point in the lower section of the case where the case-walls thin out. This is your “danger zone” and you need to watch for tell-tale signs of weakening.
The photo below shows a case sectioned so that you can see where the case wall becomes thinner near the web. You can see a little arrow into the soot inside the case pointing to the thinned area. This case hadn’t split yet, but it most likely would do so after one or two more firings.
Paper Clip Hack for Detecting Problems
The article provided a great, easy tip for detecting potential problems. You can use a bent paper clip to detect potential case wall problems. Slide the paper clip inside your case to check for thin spots. GS Arizona explains: “This simple little tool (bent paper clip) will let you check the inside of cases before you reload them. The thin spot will be immediately apparent as you run the clip up the inside of the case. If you’re seeing a shiny line on the outside and the clip is really hitting a thin spot inside, it’s time to retire the case. If you do this every time you reload, on at least 15% of your cases, you’ll develop a good feel for what the thin spot feels like and how it gets worse as the case is reloaded more times. And if you’re loading the night before a match and feel pressured for time — don’t skip this step!”
* Sadly, German Salazar passed away unexpectedly on June 21, 2022 at age 62. German was a great inspiration to this site who helped guide the creation of the AccurateShooter Forum. A brilliant man, expert attorney, and top-tier marksman, German will be sorely missed in the shooting sports world.
The 2026 summer season is well underway. Do you have a good first-aid kit in your vehicle to deal with possible injuries to family members? And of course it’s always wise to have a first aid kit when going to a shooting range. For just $20.00 on Amazon you can get an excellent kit from Be Smart/TRI, the #1 maker of First Aid Kits in the USA.
TRI’s Be Smart Get Prepared First Aid Kit has 303 items inside a sturdy case with shoulder strap and carry handle. There is also a handy, detachable mini pouch with key essentials for first aid on-the-go. You can easily bring the mini-pouch along on a bike ride or hike. And if you have Amazon prime, you can get this $20 kit shipped for free.
This multi-purpose First Aid Kit includes:
• 102 – Assorted Bandages 3/4 x 3
• 50 – Bandages 3/4 x 3
• 30 – Bandages 3/8 x 1 1/2
• 6 – Bandages Closure
• 3 – Knuckle Bandages
• 1 – Tapes – .5 x 2.5yd Waterproof
• 10 – Cotton Tips – 2.75″”/10 Pack
• 4 – Finger Splints
• 1 – First Aid Guide
• 4 – Gauze Pad – 2 x 2 / 4 ply
• 4 – Gauze Pad – 4 x 4 / 4 ply
• 1 – Gauze Pad – 5 x 9
• 2 – Nitrile Gloves
• 1 – Instant Cold Pack – 5 x 6
To help ensure that outdoor adventures remain safe and trouble-free, the CTD Shooters’ Log has a helpful Essential Summer Survival Guide. This is worth reading before you venture away from civilization.
Here are some highlights of the article with links for MORE INFO:
First Aid Kits for Campers
You should never venture outside without a first aid kit close at hand. While exploring the outdoors, all types of accidents can occur—from cuts, scrapes, and burns to broken limbs and severe allergic reactions.
Basic Survival Skills
Basic survival skills are a necessity if you plan to spend any amount of time outdoors. These five tips, plus a how-to on what to pack in a lightweight, basic survival kit will help if you are ever stuck, lost, stranded or injured in the field.
How to Treat Burns
Fireworks, barbeques and campfires — in the summer we are frequently around fire, which increases our chance of getting burned. A first-degree burn is most likely home treatable, while a third degree burn requires immediate medical attention. Learn how to spot the differences between minor and severe burns.
At the request of our readers, we provide select “Deals of the Week”. Every Sunday afternoon or Monday morning we offer our Best Bargain selections. Here are some of the best deals on firearms, hardware, reloading components, optics, and shooting accessories. Be aware that sale prices are subject to change, and once clearance inventory is sold, it’s gone for good. You snooze you lose.
NOTE: All listed products are for sale to persons 18 years of age or older. No products are intended for use by minors.
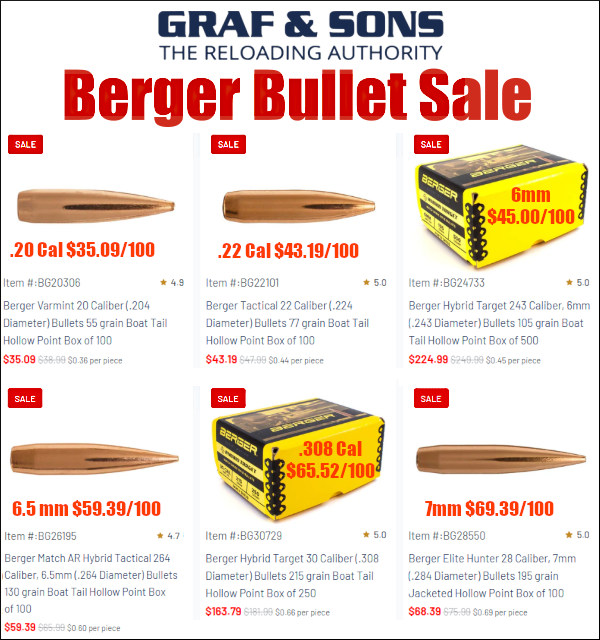
Graf & Sons — Berger Bullet Sale
⏺️ » Major sale with great prices for Berger bullets
Berger bullets are widely regarded as among the very best on the market for multiple calibers and bullet weights. On sale now at Graf & Sons are a wide selection of varmint, hunting, and match bullets in the full range of calibers from .20 Cal to .338 Cal. Now you can get the same bullets used by National Champions at some of the lowest prices we’ve seen this year.
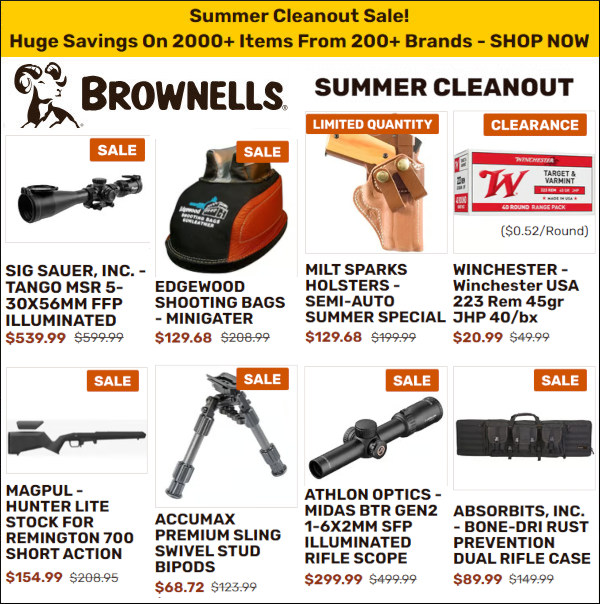
Brownells — Summer Cleanout Sale with 25-55% Off Products
⏺️ » Save big bucks on wide variety of products, discounts up to 55%
If you need quality shooting sports products, visit Brownells for the Summer Cleanout Sale. There are many scopes, accessories, bipods, gunstocks, rifle cases, holsters and other products on SALE at 20-30% off. Plus some items are discounted up to 55%! You’ll also find binoculars, spotting scopes, and rangefinders on sale as well as tripods.
From the landing page, you can select product types (optics, guns, reloading, parts etc.) or choose items by discount level — up to 29%, up to 39%, up to 49%, and over 50%. There are currently over 50 products in each discount category.
As an Amazon affiliate, this site can earn revenues through sales commissions.
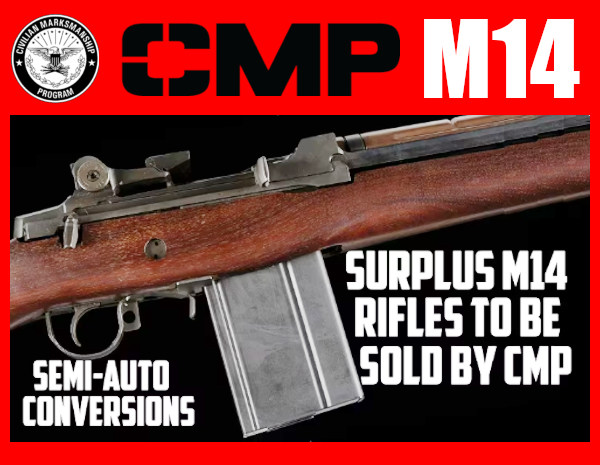
Here’s exciting news from the Civilian Marksmanship Program (CMP). The CMP plans to modify its surplus M14 military rifles, making them permanently semi-auto rather than fully automatic as originally issued. These converted semi-automatic M14s will then be offered for sale through the CMP sales department, with the first M14 rifles set to be delivered “late 2026 to early 2027″. The CMP has not issued any pricing estimates at this time. Do note that the Springfield M1A, basically a civilian version of the M14, has been available for many years. However, this is the first time true, historic military M14s will be sold to the public, albeit after conversion to semi-auto function. CLICK HERE for CMP Official M14 Announcement.
Announcement: By special authorization, the CMP is pleased to announce the future availability and sale of surplus M14 Rifles. Prior to sale, the rifles will be modified to be permanently and irreversibly semi-automatic rifles. The modified semi-automatic M14s will be fully compliant with CMP enabling legislation authorizing the transfer and sale of military surplus .30 caliber rifles.
Details: The CMP anticipates first order fulfilment in the late 2026 to early 2027 timeframe. More details will be published on the M14 order submission process, pricing, limits and sales channels (mail order and physical stores) at a later date. Proceeds from the sale of these and other historic firearms allow the CMP to teach firearms safety and marksmanship, conduct competitions, and provide scholarships and youth programs, nationwide.
Background: Designed by John C. Garand, the M14 is the direct descendant of the M1 Garand rifle. It is a 7.62 rifle officially adopted as the U.S. Army’s service rifle in 1957. The Civilian Marksmanship Program is singularly authorized to modify these rifles and make them available for sale to eligible US Citizens.
CLICK HERE for additional, detailed 19-minute analysis of CMP M14 Sale Program by Second Amendment scholar Mark W. Smith.
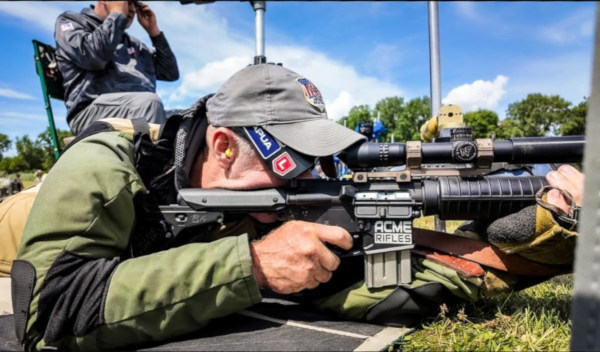
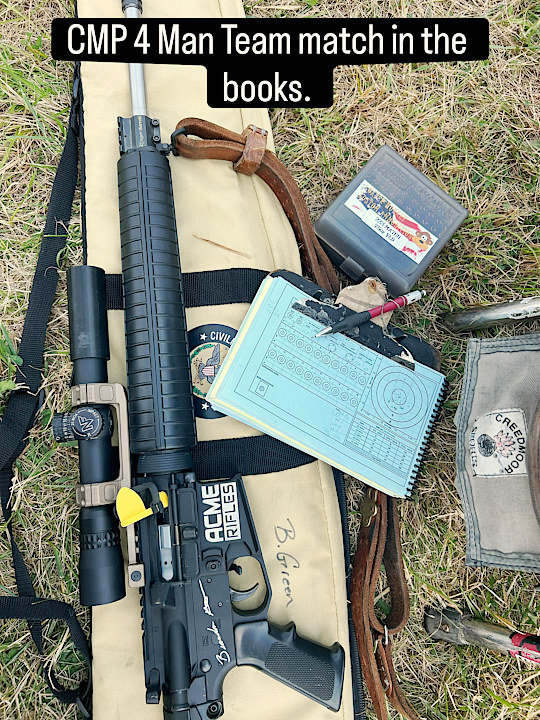
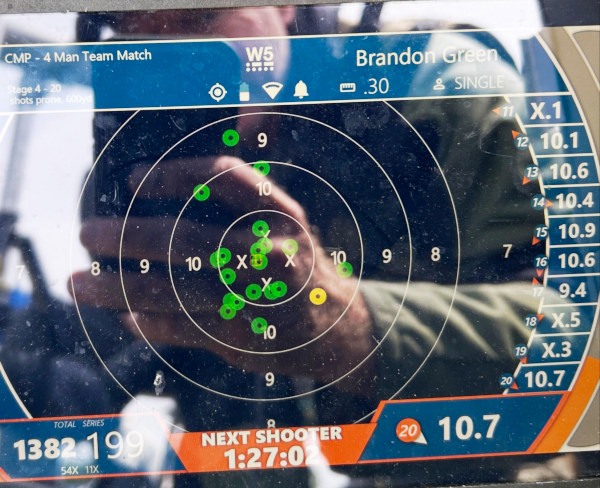
Report from Brandon Green at Camp Perry
Brandon Green — a multi-time Nat’l High Power and Long Range Champion — recently completed a 4-Man Team Match at the CMP Championships at Camp Perry, Ohio. His team did well but Brandon is hoping to do better in individual competition. Brandon posted: “Now on to the Civilian Marksmanship Program National Rifle Matches. I just want to thank TJ Jones and Krieger Barrels for cutting hammer barrels and building a lights out upper receiver! I didn’t point it as well as I should have, but the rifle wasn’t the problem! Also a big thank you to ACME Rifles/ACME Machine for a new lower and engraving my signature on the side! How cool is that! And thank you to Jack Abrams and Loader Monkey LLC for the ammo! Hopefully I can hold a little harder tomorrow!”
Rifle Training Clinics
The Junior and Advanced Rifle Clinics are in full swing. If you want to learn the finer points of highpower competition this is a good place to start! Thank you to VFB, ACME Rifles, and Civilian Marksmanship Program for getting events like this together. Iron sharpens iron! I also want to thank Krieger Barrels, Creedmoor Sports, and Berger Bullets.
Video from CMP Range with Junior and Advanced Rifle Clinics in Progress
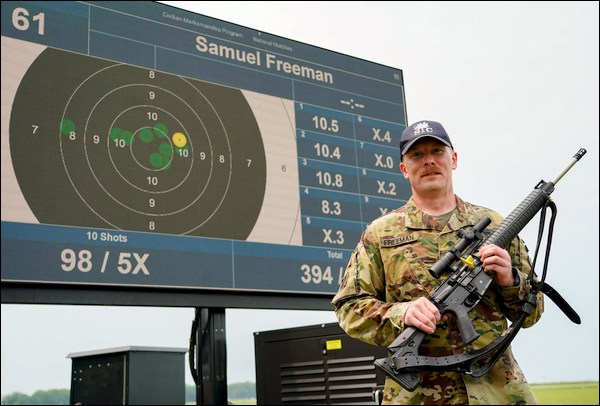
Winner of President’s Shoot-Off
Congratulations to MAJ Samuel Freeman, who was the top competitor in the 2026 President’s Shoot-off! Each year, the top 20 competitors of the President’s Rifle Match meet on the firing line for a 10-shot shoot-off to determine the overall winner. This is the second time MAJ Freeman will be bringing home the President’s Rifle Trophy. Congrats to Samuel.
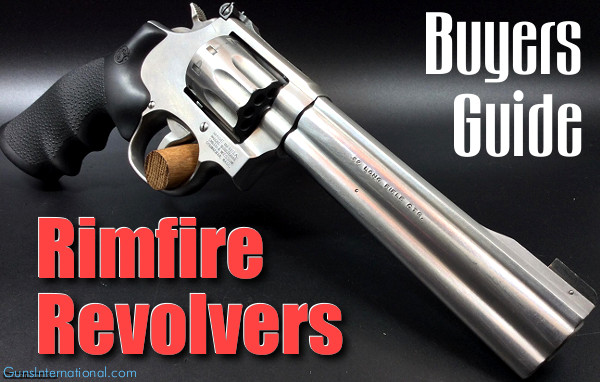
In recent years, the ranks of first-time gun buyers have grown dramatically. Millions of Americans have purchased their first-ever handgun. With so many handgun options (from derringers to Desert Eagles) many first-time buyers have trouble making a choice. What should those millions of new gun buyers have acquired first? Perhaps it should have been a rimfire revolver. Here is why…
The .22 LR revolver remains one of the most fun, affordable, and versatile firearms you can own, and in 2026, manufacturers are offering excellent wheelguns for plinking, training, target shooting, small-game hunting, and collecting. From classic cowboy-style six-shooters to high-capacity double-action revolvers, today’s rimfire revolvers deliver reliability, accuracy, and the ability to last a lifetime.
This video covers ten popular .22 LR revolvers. It features rimfire wheelguns from Smith & Wesson, Colt, Ruger and other respected manufacturers.
The Argument for a Rimfire Revolver
Some years back, a close relative contacted this Editor. Wanting to get started in handgunning, he sought my advice on purchasing his very first handgun. “Should I get a Glock?”, he asked. “No” was my response. “Well how about an M&P?” he inquired. “Better ergos” I said, “but ‘No’ is still my reply.” “OK, how about a KelTec, they’re cheap…” “Absolutely not”, I replied.
I could tell he was getting annoyed, when he said “OK, Mr. know-it-all, so what handgun should I get?” Calmly, I replied: “Get a .22-caliber rimfire revolver. You will never out-grow it. You will learn sight alignment and trigger control. You can practice with inexpensive ammunition. A good .22 revolver will be considerably more accurate than 90% of the self-loading pistols you could buy. If you get a Smith & Wesson, you will keep the gun for the rest of your life and pass it on to your kids. If you or your heirs ever wear out the barrel or cylinder, Smith & Wesson will replace the parts for free, forever.”
Don’t own a quality .22 LR wheelgun yet? Well start saving those pennies. Every serious gun aficionado should have a quality rimfire revolver. A rimfire wheelgun is also very good choice for a first handgun. Indeed, a strong argument could be made that a .22 LR revolver is THE best choice for a new shooter’s first handgun. A .22 LR revolver is easy to shoot, easy to maintain, and will last a lifetime. Once you have mastered the basics of shooting with a .22 LR, you can move on to larger caliber handguns.
TOP FIVE Reasons to Own a Rimfire Revolver:
1. Rimfire .22 LR Ammunition is cheap, and now plentiful again.
2. A good, full-size .22 LR revolver will be MORE ACCURATE than the vast majority of semi-auto rimfire handguns. With no magazines to jam, a good wheelgun will also be more reliable than most self-loading rimfires.
3. A rimfire revolver can shoot tens of thousands of rounds, with just routine maintenance. This gun can last a lifetime and then you can pass it on to your kids.
4. On a S&W revolver, it is very easy to tune the pull weight. You can have a safe double-action pull with a very light, crisp single-action release.
5. It is easy to change grips and sights to suit your preference. You can also mount a scope on the top-strap.
1. Smith & Wesson Model 617, 6″ or 4″ BBL, $1019.00 MSRP
10-Shot, Stainless Steel, 44.1 Oz. (6″ barrel), 39 Oz. (4″ barrel)
First Handgun Choice — Consider a .22 LR Wheelgun
A very good choice for a first handgun is a Smith & Wesson .22 LR revolver, such as the S&W Model 617. The model 617 is extremely accurate, with a crisp trigger and good sights. Choose either a 4″ or 6″ barrel. The current model has a handy, 10-round cylinder.
This Editor’s first really accurate handgun was a .22 LR Smith & Wesson Model 617 that could easily stack ten shots in a dime at 10 yards. It remains my favorite and most-used handgun. What can we say about the Model 617? The single-action trigger pull is superb, and the accuracy surpasses most any semi-auto rimfire pistol, except for a few, very expensive target pistols. We like the 6″ version for the longer sight radius, but the 4″-barrel 617 is also very accurate, and it balances better.
Smith & Wesson’s Model 617, offered with either 6″ or 4″ barrels, is extremely accurate, with a very crisp trigger, and good sights. Accuracy is better than most shooter can hold. You can learn all the fundamentals with this ultra-reliable K-Frame handgun, shooting inexpensive .22 LR ammo. The 6″ version has a longer sight radius, so it’s superior for bullseye work. But the 4″ version balances much better. There is also a Mountain Gun version with a stepped barrel and wood grip (see below). The choice is yours.
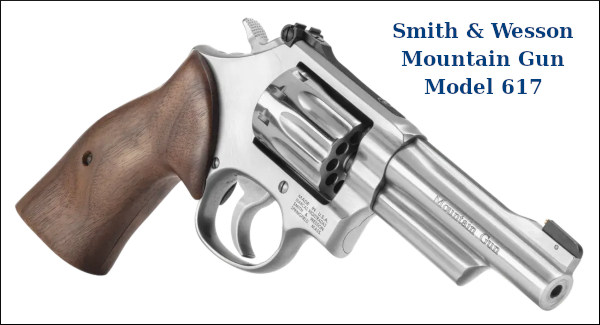
617 Mountain Gun Variant
The Model 617 is rugged, durable, and can give you a lifetime of shooting fun. Your Editor has owned a 4″ ten-shot Model 617 for over 25 years, and it’s still going strong. Here is a video showing the 4″-barrel version of Smith & Wesson’s popular model 617.
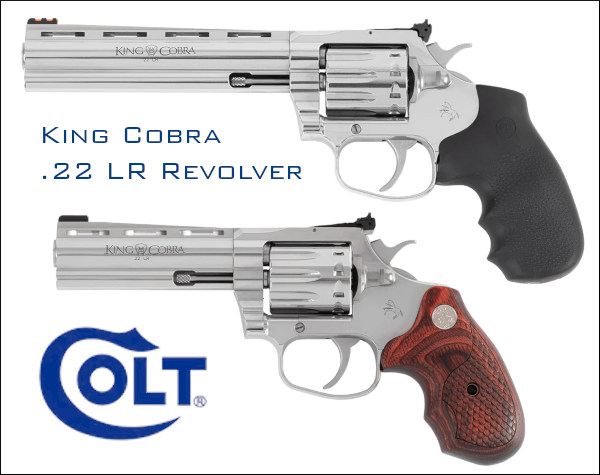
A handsome, very accurate wheelgun with a superb trigger, the Colt .22 LR King Cobra Target is offered with five (5) barrel sizes: 8″, 6″, 4.25″, 3″, and 2″. For general slow-pace target work, we recommend the 6″ barrel, which offers the longer site radius. The 4.25″ version is also good for ladies and juniors as it is lighter. And if you prefer dark-tone handguns, Colt also offers a Blued version of the King Cobra target in all five barrel lengths for $1149.00 MSRP.
Ruger introduced the .22 LR GP100 two years ago. Since then, it has become a good seller. This 10-shot revolver with 5.5″ barrel has a comfortable grip and triple-locking cylinder (locked into the frame at the front, rear and bottom). Many shooters like the fact that the 5.5″-barrel GP100 carries its heft more to the rear than S&W’s 6″ 617. However, we’d give the edge to the 617’s trigger. NOTE: Davidson’s also has a limited edition GP100 with shorter 4″ barrel. This Davidson’s exclusive edition 4″ GP100 is handier to carry and balances better.
4. Smith & Wesson Model 17 Masterpiece, $1169.00 MSRP
6-Shot, Carbon (Blued) Steel, 39.9 Oz., 6″ Barrel
Smith & Wesson re-introduced its Model 17 Masterpiece revolver a few years back. This blued 6-shot classic was “re-released” with a retro-style grip. It still offers outstanding accuracy and a sweet trigger pull. For those who like the look of the original K-22 revolvers this can fill the bill. With a non-underlug 6″ barrel, this is 4.2 ounces lighter than the 6″ Model 617. The price, $1169.00 MSRP, is pretty steep. This is currently out of production but available at some vendors. And if you look around you may be able to find an original K-22 for a few hundred dollars less. We’ve seen some decent examples on Gunbroker in the $800 range, but pristine K-22s are selling for over $1000 now.
5. Smith & Wesson Model 63, 3″ BBL, $909.00 MSRP
8-Shot, Stainless Steel, 25.8 Oz., 3″ barrel
The 8-Shot Smith & Wesson Model 63 may be one of the most versatile revolvers on the market. With a 3″ barrel, it balances well and is easy to hold. This makes this a great training pistol for a new shooter, even a junior or a lady with small hands. The latest 8-shot version offers nice big sights with fiber-optic front insert. While we consider this a great training and plinking handgun, it can also do double-duty for concealed carry or as a camping trip option.
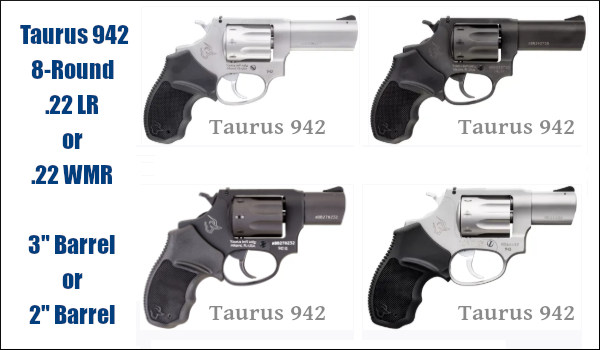
The Taurus 942 Ultra-Lite is a small-frame, double-action/single-action rimfire revolver featuring an 8-shot capacity, stainless barrel and aluminum alloy frame. It is offered with either a 3″ barrel or a 2″ barrel. With its ultra-compact size and light 17.8-oz. weight, this is a decent choice for CCW use. The Taurus 942 Ultra-Lite is offered in both .22 LR and .22 WMR chamberings with either a silver (as shown) or flat black finish. We’d get the .22 WMR version for CCW use.
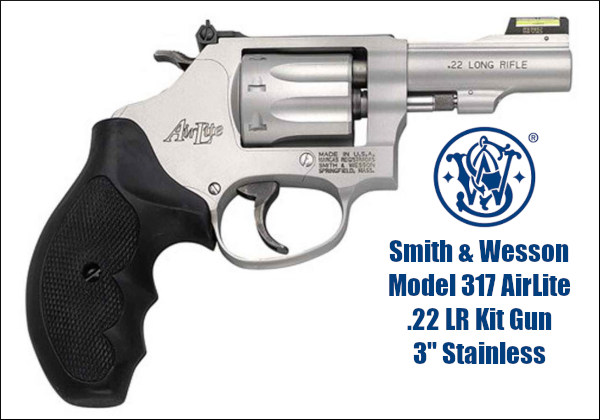
7. Smith & Wesson Model 317 AirLite Kit Gun, $889.00 MSRP
The Smith & Wesson Model 317 AirLite Kit Gun look similar to its S&W Model 63 brother, but it is considerably lighter in weight. With aluminum alloy frame and cylinder components, the 3″-barrel Model 317 weighs just 11.8 oz. unloaded. That makes this a 8-shot wheelgun a very suitable pistol to take on a backwoods hike or camping trip, hence the name “Kit Gun”.
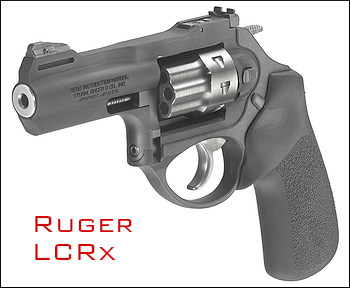
The Ruger LCRx Revolver combines traditional wheelgun features with modern composite construction. The 3″ barrel and cylinder are steel. The “frame” housing the barrel and cylinder are aerospace-grade aluminum. The rear/lower section of the pistol, what Ruger calls the “fire control housing”, is made of polymer. This cuts weight. That fire control housing holds the hammer/trigger assemblies and provides a mount for the interchangeable grips. Thanks to its weight-saving features, Ruger’s LCRx is 8.5 ounces lighter than S&W’s Model 63, though both have 3″-long barrels. The LCRx is currently out of production, but still available.


 Berger Twist-Rate Stability Calculator
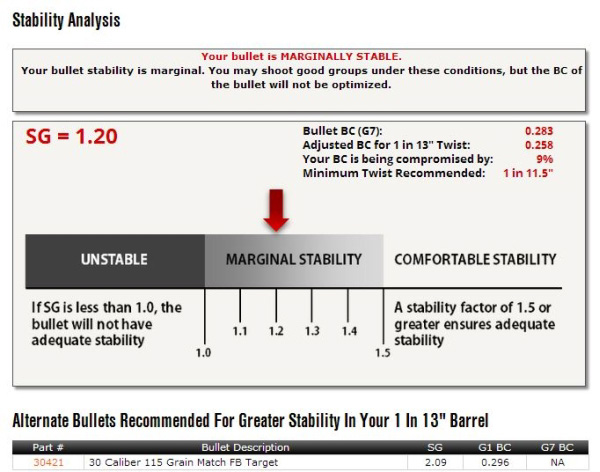


 On the highly-respected Riflemans’ Journal blog, created by our late, dear friend German Salazar*, there was an excellent article about Cartridge Case-Head Separation. In this important article, Salazar (aka GS Arizona) examined the causes of this serious problem and explained the ways you can inspect your brass to minimize the risk of a case-head separation. As cases get fired multiple times and then resized during reloading, the cases can stretch. Typically, there is a point in the lower section of the case where the case-walls thin out. This is your “danger zone” and you need to watch for tell-tale signs of weakening.