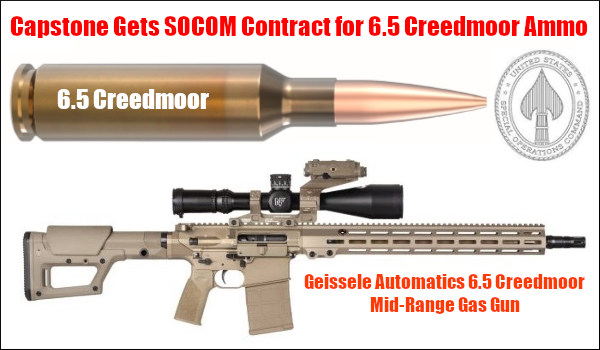
Capstone Precision Group (CPG), manufacturer of Berger bullets and ammunition, has been selected to build the M1200 6.5 Creedmoor Special Ball Long-Range Ammunition for U.S. Special Operations Command (USSOCOM). CPG will begin delivery of M1200 6.5 Creedmoor rounds to U.S. SOCOM units in spring 2027.
As an approved supplier for the Special Operations Unique Munitions Requirements (SUMR) program, CPG will build several million M1200 6.5 Creedmoor rounds loaded with Berger 6.5mm 140gr OTM projectiles in their Mesa, AZ manufacturing facility.
The M1200 6.5 Creedmoor cartridge is designed to deliver exceptional long-range precision and reliable performance when fired suppressed from USSOCOM’s advanced semi-automatic weapons platform. CPG will manufacture a significant volume of M1200 6.5 Creedmoor ammunition to support USSOCOM special operators deployed worldwide.
Our selection as supplier for M1200 ammunition represents a significant validation of our capabilities, quality standards, and commitment to support the nation’s most demanding military missions,” said Emil Praslick, Director of Business Development for CPG. “We are honored to build precision-engineered ammunition solutions that provide USSOCOM special operators the means for mission-critical success.”
Capstone Precision Group produces Berger bullets and aammunition in Mesa, AZ, and is the exclusive distributor of Lapua components and ammunition, Vihtavuori Powders, and SK Rimfire ammo. Capstone Precision Group is a Part of Nammo Group.
Sierra Bullets has published load data for the 6mm Creedmoor cartridge, a necked-down version of the popular 6.5 Creedmoor. Sierra has released very comprehensive 6mm Creedmoor load data, covering fifteen (15) different bullets from 55 to 110 grains. NOTE: Hornady-brand brass was used for Sierra’s 6mm Creedmoor load tests, not the newer, stronger Lapua 6.5 CM brass with small primer pockets. Hand-loaders using Lapua 6.5 Creedmoor brass necked to 6mm may have to adjust their loads.
Sierra writes: “As soon as the 6.5 Creedmoor was released in 2007, a 6mm version was being envisioned. After the 6mm Creedmoor demonstrated its worth at 1000 yards it began to catch the attention of Precision Rifle Series (PRS) competitors. The 6mm Creedmoor is a great fit for those looking for an AR platform-friendly cartridge. It delivers velocities very similar to the .243 Win and yet fits the AR10 magazine length[.] The 30-degree shoulder makes this a very efficient case and helps prolong case life as well. The 6mm Creedmoor works well with powders such as H4350, [RE-16], RE-17, and Ramshot Hunter for heavier long-range bullet weights. Slightly faster powders such as RE-15, Win 760, and Vihtavuori N540 work well with lighter weight bullets.”
Sierra Bullets Tested for 6mm Creedmoor Load Data
55gr BlitzKing (#1502)
60gr HP (#1500)
70gr HPBT (#1505)
70gr BlitzKing (#1507)
75gr HP (#1510)
In developing its 6mm Creedmoor load data, Sierra tested a very wide selection of propellants, two dozen overall. For the smaller bullets, fast-burning powders such as Benchmark, H4895, and CFE223 were tested. For the heavier 100+ grain bullets, Sierra tested a selection of medium-burn-rate powders including H4350, Reloder 16, Reloder 17, Varget, and Superformance. Sierra did a very thorough job. We know this information will be welcomed by 6mm Creedmoor shooters.
Don’t know what powder to try first? For the 107-110 grain bullets, if you want best accuracy and low ES/SD, our Forum members recommend Alliant Reloder 16 and Hodgdon H4350. If you are seeking max velocity with the 110-grainer, look at Hodgdon Superformance and Reloder 19.
Here are Sierra’s 6mm Creedmoor Load Data Charts for 90-95 grain bullets plus the 107gr MK and 110gr MK. There are five other tables for other bullet types.
BONUS: PRB 6mm Creedmoor and 6.5 Creedmoor Load Survey
The Precision Rifle Blog compiled Load Data from PRS Competitors, for both 6mm Creedmoor and 6.5 Creedmoor. This is a good place to start. PRB surveyed the match loads for “173 of the top-ranked precision rifle shooters in the country”. One cautionary note: These PRS guys may be loading fairly hot, so work up gradually, 0.3 grains at a time. CLICK HERE.
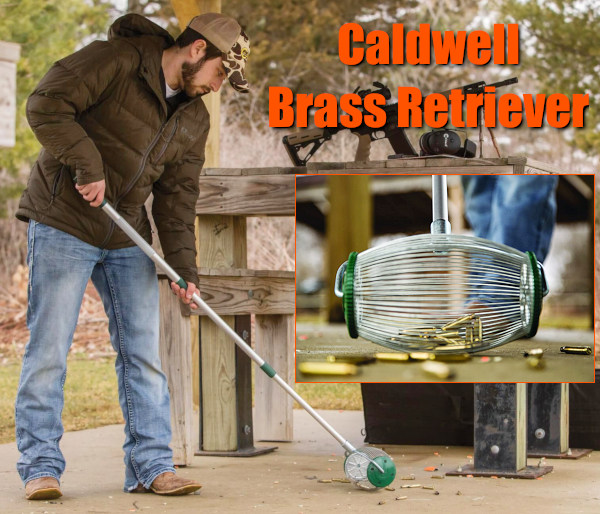
Caldwell Brass Retriever
Tired of bending over or kneeling down to retrieve your fired cartridge brass? For older shooters (including this Editor) getting down on the ground to pick up brass is tough on the lower back and knees. Here’s a product that makes brass retrieval quick, easy, and pain-free. The Caldwell Brass Retriever works quite well with a little practice, once you apply the correct pressure. While it won’t always grab every fired case, it will capture nearly all, and that can really make the job go much faster.
One owner praises this as a “very good tool” that is “a lot easier on my back.” While it can work on grass, gravel, and hard-packed earth, the unit works best on smooth, hard surfaces. Currently priced at $49.99 at MidwayUSA, it is an affordable tool.
Caldwell states: “Spend less time bending over and picking up brass at the range and more time shooting. The Caldwell® Brass Retriever picks up brass, saving your back and time. The Brass Retriever can pick up rifle and pistol brass quickly and efficiently. The retriever comes complete with a roll cage separator that allows you to dump the collected brass into a bucket quickly. It is collapsible as well, making it convenient to transport. The retriever’s handle expands from 28″ up to 57″ tall.”
Brass Retriever Owner Reviews
Here are Amazon reviews from actual purchasers. It’s clear the device is not perfect and can miss a case or two. However, the Brass Retriever does grab the vast majority of brass on the ground, sized .223 Rem or larger diameter. This will save time and reduces stress on your back and joints:
“This thing … does a terrific job of collecting the brass from a standing posture quickly and efficiently. It helps to have the cases on a smooth surface like concrete or dirt without a lot of vegetation. But we used it on open desert yesterday and it collected nearly every case with a single pass. It’s now a permanent piece of gear in the stuff we take when target or ground squirrel shooting.” — Hans H.
“This WILL save your back. The only drawback is you can’t overload it with brass. After couple dozen pieces (or less) it will start dropping brass while you’re attempting to collect others. That’s the limitation (one of them). There is a short learning curve (15 min.) in which you’ll learn how much brass is too much And how you need to orientate the wires to pick up the brass. It doesn’t do as well on gravel or high grass as it does on a smooth, firm surface. Even with its limitations, it’s a keeper. Just empty every dozen or so pieces and it works very well.” — Jeff M.
Specialized Tool for .22 LR Brass
NOTE: The Caldwell Brass Retriever is designed primarily to recover reloadable rifle and pistol brass, with case diameters as fat as .223 Rem or larger. Some people state it can be used for smaller .22 LR cartridges too, but there is a much better product for that.
The UniqueTek Rimfire Brass Wizard is optimized for picking up .22 LR rimfire cases. It has a smaller basket with wires spaced closer together. It can also pick up pistol and rifle cartridge brass but will hold fewer cases than the original Brass Wizard or the Caldwell Brass Retriever. The Brass Wizard “Rimfire” The Brass Wizard “Rimfire” comes standard with the telescoping handle and includes a”Dumper” accessory.
Even with high-quality brass from Lapua, Peterson, Norma, Alpha and RWS, occasionally you may find one or two cases per box which have a small flake or obstruction in the flash-hole. This will appear like a thin crescent on one side of the flash hole (see photo). You should inspect ALL new brass before loading to identify any pieces with a partially-obstructed flash hole. It’s a good idea to remove any flake or thin crescent left as an artifact of the flash-hole forming process. Because the flash-hole itself is normally centered and of the correct diameter, it is not necessary to ream the flash-hole to a larger diameter. All you really need to do is remove the small obstruction(s). This can be done quickly with inexpensive tools.
Use a Small Pin Vise to Remove Flash-Hole Obstructions
Folks have asked if there is a tool that can remove obstructions from a Lapua small, BR-sized flash hole without opening the hole size. The Lapua PPC/BR flash hole is spec’d at 1.5mm, which works out to 0.059055″. Most of the PPC/BR flash-hole uniforming tools on the market use a 1/16″ bit which is nominally 0.0625″, but these often run oversize — up to 0.066″.
If you want to just clear out any obstructions in the flash hole, without increasing the flash hole diameter, you can use an inexpensive “pin vise” with an appropriate drill bit. For $5.39, Amazon sells a 10-piece set of cobalt steel 1.5mm drill bits, that matches the Lapua flash hole exactly. Other vendors offer a #53 pin vise drill bit that measures .0595″ or .060″ (depending or source). An 0.0595″ bit is close enough. You can find pin vises and these small-diameter drill bits at hobby stores.
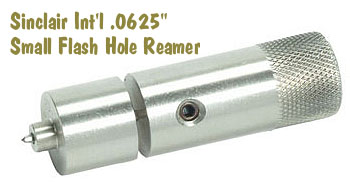
For quite some time, Sinclair Int’l has sold a similar device for small (PPC and BR-size) flash holes. Like the 07-3081 unit for large flash holes, the 073000 Reamer for small flash holes works from the outside, so it can index off the primer pocket. It reams to .0625″, and also costs $29.99. The standard dimension for Lapua 220 Russian and 6mmBR flash holes is 1.5mm or .0590″. This tool will permit standard-size decapping rods with .0625″ tips to work without binding. However, note that both Forster and Redding normally supply .057″ decapping pins with their PPC and BR dies. So, it is NOT necessary to ream your Lapua BR/PPC flashholes, unless you prefer to do so for uniformity. It IS, however, a good idea to check BR/PPC flash holes for burrs before loading the first time.
NOTE: If you purchase either the 073081 or 073000 Sinclair Flash Hole Reamer tools, we recommend you mic the cutter tip before you process a bunch of cases. Sometimes a tip comes through that is oversize. This will ream the flash holes larger than you may intend.
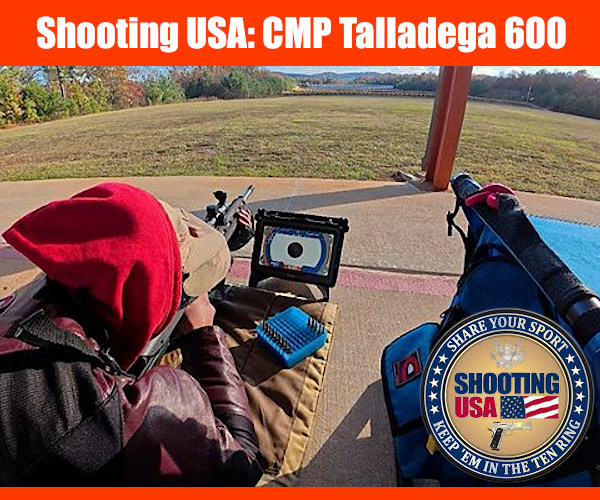
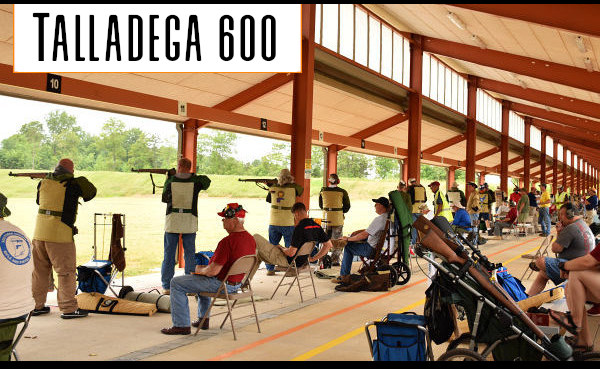
The Talladega Marksmanship Park had its 10-year anniversary last year, as the 500-acre facility originally opened in May 2015. To mark the occasion, the CMP hosted a 10th Anniversary celebration during the annual Talladega 600 event held November 7–13, 2025. This Wednesday, July 22, 2026, Shooting USA TV features the Talladega facility and 10th Anniversary matches. The facility is situated just two miles from the world-famous Talladega Superspeedway. Today’s Shooting USA episode features the Talladega 600 series of matches, including the Congressional 30 service rifle match shot on the famous Range One.
Shooting USA SHOW TIMES: This Shooting USA Episode airs Wednesday, July 22, 2026 at 9:00 PM Eastern and Pacific; 8:00 PM Central. If you miss the regular broadcast, you can stream the show online at any time on Vimeo for $0.99 per episode.
Shooting USA TV has a good show today. Shooting USA’s Wednesday episode features the military rifle competition at Talladega Marksmanship in Alabama. Historic military rifles from the past century are competing — Garands, Springfields and other military battle rifles are on the firing line.
The annual Talladega 600 event has welcomed competitors of all experience levels for the last decade and serves as one of the park’s most popular events of the year. With 408 individuals traveling to the 500-acre CMP Talladega Marksmanship Park to participate in rifle, pistol and shotgun events, last fall’s event marked the highest attendance in the history of the Talladega 600.
Each spring, the CMP hosts a Spring Classic Event at the Talladega Marksmanship Park. The 2026 CMP Talladega Spring Classic ran March 17-22, 2026. The event schedule included both rifle and pistol competitions. Events included Garand/Springfield/Vintage/Modern Military, Rifle Marksmanship 101/M16 Match, Pistol Marksmanship 101/M9 Match, CMP Match Pistol 2700, CMP 80 Shot Matches, CMP EIC Service Rifle Match and 2×600 Mid-Range match.
Competitors used electronic targets for pistol and rifle matches. Each firing point of the 500-acre facility is now equipped with a state-of-the-art, KTS electronic target and scoring monitor. Located beside the shooter, on the firing line, each monitor allows the competitor to see his/her shot value in a matter of seconds. Spectators can view the results in real time on large monitors.
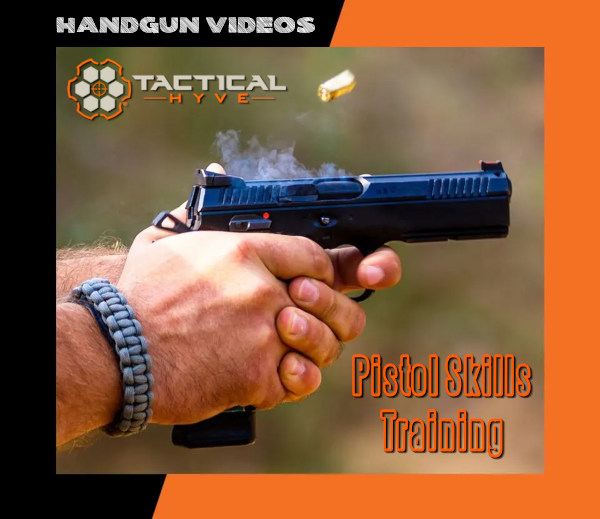
The Tactical Hyve YouTube channel currently hosts over 1,100 videos! Here are three of our favorite Tactical Hyve videos focusing on pistol marksmanship. These videos cover basic essential techniques as well as advanced handgun skills used in competition. These videos feature highly-skilled handgun experts.
1. How to Aim a Pistol with Iron Sights or Red Dot
We recommend this video for persons training for a CCW permit, or who are getting started in pistol shooting competition. The video shows proper technique for using iron sights. In addition, it offers some important advice for shooting with Red Dots. Shooting with Red Dot sights can be easier than with iron sights because you only have to put the dot on the target, rather than align front blade with rear notch. But it does take some familiarization to get things right. And persons with astigmatism can have challenges with Red Dot sights.
2. Get Your Sights Back On Target Fast
This popular video covers a very important skill for both pistol competition and defensive handgun use — getting your sights back on target quickly. This informative video covers grip, sight picture, trigger control, and how to handle recoil and muzzle rise. If you’re considering action pistol or 3-gun matches, definitely watch this video.
3. Five Most Common Pistol Shooting Mistakes
In this video, Myles, the founder of Tactical Hyve, talks about the five most common pistol shooting mistakes he sees in classes and how to correct them. Many folks begin pistol shooting without a qualified instructor. Or they try to imitate what they see on TV. This can lead to new pistol shooters forming bad habits. This video helps handgunners correct those bad habits. This popular video has 1.9 million views.
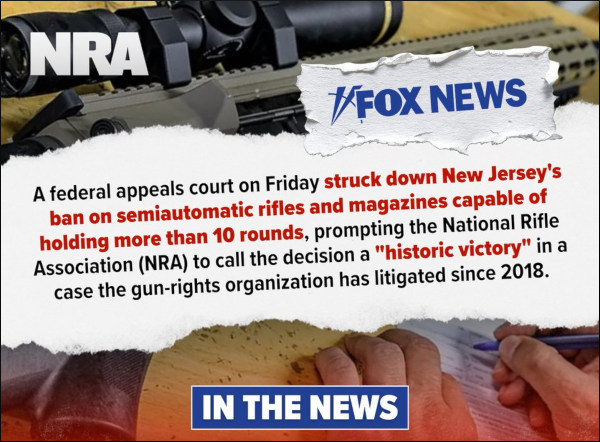
In a landmark Second Amendment victory, on 7/17/2026 the U.S. Court of Appeals for the Third Circuit has held that New Jersey’s bans on semi-automatic rifles and magazines capable of holding more than ten rounds violate the Second Amendment. The court declared the state’s so-called “assault-firearm” ban unconstitutional as it applied to the full class of semi-automatic rifles, not just the AR-15, and also struck down New Jersey’s restrictions on magazines capable of holding more than 10 rounds. READ Decision.
Sitting en banc, the Third Circuit struck down New Jersey’s bans on “assault firearms” and “large capacity ammunition magazines,” applying the text-and-history test set forth by the U.S. Supreme Court in the NRA’s landmark victory, NYSRPA v. Bruen.
The U.S. Court of Appeals for the Third Circuit held that New Jersey’s “assault firearm” ban on semi-automatic rifles violates the Second Amendment. The decision comes just weeks after the Supreme Court granted review in FPC’s Viramontes v. Cook County case, which challenges a similar ban in Illinois and has the potential to strike down these unconstitutional bans nationwide.
Beginning with the Second Amendment’s text, the court concluded that both semiautomatic firearms and magazines qualify as “Arms” protected by the Second Amendment: semiautomatic firearms because they are firearms, and magazines because they are necessary to operate many firearms.
The Third Circuit court determined that both “assault firearms” and magazines holding 10+ rounds are “in common use,” noting that Americans lawfully possess at least 24 million AR-platform rifles and more than 100 million 30-round magazines. Because these arms are commonly owned and, as the Supreme Court held in District of Columbia v. Heller (2008), there is no historical tradition that supports banning arms in common use, the Third Circuit held that New Jersey’s bans violate the Second Amendment.
In striking down New Jersey’s bans, the Third Circuit — which covers Delaware and Pennsylvania in addition to New Jersey — became the highest-level court in the country to invalidate such laws. The decision represents a long and hard-fought victory for the NRA and Firearms Policy Coalition, which have litigated New Jersey cases, alongside the state Association of New Jersey Rifle & Pistol Clubs, since 2018.
NSSF’s General Counsel Lawrence Keane praised the Third Circuit’s opinion: “Today’s ruling by the Third Circuit vindicates what NSSF has argued for decades. The [Semi-auto Modern Sporting Rifle] is a commonly used firearm that is protected for legal sale and lawful ownership under the Second Amendment. Additionally, standard-capacity magazines are ‘arms’ that are also protected by the Second Amendment.
The case now returns to the district court for further proceedings consistent with the Third Circuit’s ruling, including entry of an order implementing the decision and further litigation over New Jersey’s bans on semi-automatic pistols and shotguns, which the court did not address. New Jersey may also petition the U.S. Supreme Court to review the case.
Let’s face it, AR-platform rifles run dirty, at least compared to typical bolt-action rifles. The AR-15 works by piping gas from the barrel back into the bolt carrier, causing the bolt to unlock and the carrier to move the bolt backward. The “exhaust gas” from the barrel contains soot and carbon. The carbon will form hard deposits on the bolt. In addition, the carbon can combine with lube on the bolt carrier to make a nasty, paste-like sludge. This can be particularly problematic when the black paste pollutes the ejector and extractor recess.
This Editor has inspected dozens of ARs over the years. Other than mag-related malfunctions, the most common cause of AR cycling problems I found was oily gunk in the extractor and ejector areas. Many AR owners overlook these critical areas. Look at an AR that hasn’t been cleaned properly and you’ll probably find black gunk (and small brass shavings) in the ejector and extractor recesses.
If you want to keep your black rifle running smoothly and reliably, you must clean it regularly and follow the correct maintenance procedures. Here are three videos that explain how to properly disassemble and clean AR-platform rifles. And then they cover the essential lubrication ARs need to run reliably.
Take-Down and Full Cleaning of AR15 by Jerry Miculek
Here ace shooter Jerry Miculek takes down and cleans an AR-platform rifle belonging to his daughter Lena. This is a good video because Lena’s rifle was “run hard and packed up dirty” so you can see where carbon and grease build up. This 35-minute video is very thorough. Jerry is one of the nation’s top action carbine shooters, so listen carefully to his advice on cleaning and lubrication.
General AR-15 Maintenance and Lubrication
There are various schools of thought on AR lubrication. Some guys like to run “wet” with lots of CLP, while others choose to focus lubrication on the key spots that receive the most friction and wear, such as the contact point for the bolt carrier. We do advice check the ejector recess and extractor spring recess frequently as gunk can get in there, causing malfunctions. Here is a good video from Pew Pew Tactical — a 7-minute guide to cleaning and lubricating AR-platform rifles. This shows important details for both the upper and the lower.
How to Clean Your AR-15 Bolt Carrier Assembly
This video offers very specific advice on the bolt carrier group, which receives the dirty gas directly from the barrel. Be sure to check the extractor and ejector recesses. That’s where old lube, brass shavings, and carbon accumulate. Follow the directions in this video for lubrication, and don’t over-lubricate the bolt carrier — that will only capture more carbon.
At the request of our readers, we provide select “Deals of the Week”. Every Sunday afternoon or Monday morning we offer our Best Bargain selections. Here are some of the best deals on firearms, hardware, reloading components, optics, and shooting accessories. Be aware that sale prices are subject to change, and once clearance inventory is sold, it’s gone for good. You snooze you lose.
NOTE: All listed products are for sale to persons 18 years of age or older. No products are intended for use by minors.
Brownells — Observation Optics Super Summer Cleanout Sale
⏺️ » Save hundreds on Spotters, Binocs, and Rangefinders
If you need some new, high-quality optics, visit Brownells for the Optics Summer Cleanout Sale. There are many “Observation Optics” with prices reduced by 20-30% and some items discounted by 70% or more! You’ll find binoculars, spotting scopes, and rangefinders on sale as well as tripods and other accessories. Brands include Vortex, Leupold, Burris, Revic, and Longshot.
Precision Reloading — Sale on Primers, All Types in Stock
⏺️ » Primer Sale for CCI, Federal, Rem, Winchester, and more
If you need primers for your rifle, pistol, or shotguns, here is a great chance to save 30% or more on quality primers. Precision Reloading is running a major primer sale with discounts on ALL in-stock primers. This sale includes all leading primer brands including CCI, Federal, Remington, Winchester, Fiocchi, Cheddite, and Nobel Sport. Prices are great — such as $54.99 for 1000 CCI #400 Small Rifle Primers and $53.99 for 1000 Remington #7-1/2 Small Rifle BR primers.
As an Amazon affiliate, this site can earn revenues through sales commissions.
There is a good article on gun safes in SHOT Business, a publication for the NSSF SHOT Show audience. Written by Christopher Cogley, this Safe Spaces Article offers some very important things to consider when purchasing a gun safe. Here are key points from that article:
Safe Security — The security of a gun safe comes down to two main factors: the thickness of the steel and the construction of the safe. When it comes to construction, look for a safe that has continuous welded construction instead of bolts or spot-welding, which are easier for trained gun thieves to cut through with torches or high-power saws.
Lock Options — Traditional combination locks are arguably the simplest choice. The downside, though, is they don’t provide quick access to firearms in an emergency. Electronic and biometric keypads provide quicker access — but be sure to replace the batteries every year.
Fireproof Rating — Aside from theft, the biggest threat to your firearms is fire. Unfortunately, the fireproof rating on gun safes can be confusing because there is no single, “standard” fireproof rating. As a general rule, the fireproof rating states how long a safe can be exposed to a fire of a particular temperature and maintain a temperature inside the safe of no more than 350 degrees F. To put this in context, the average house fire creates temperatures between 800 and 1,200 degrees F.
Where to Place a Gun Safe in Your Home
The Safe Spaces article includes advice from Stephen Hall, CEO of Lock It Up Safes. Hall addressed the question: “Where should I put my safe?”
Hall states: “Ease of installation should NOT be the foremost consideration when making this decision. Putting a safe in the garage has both pros and cons. We see some retailers recommend the garage solely because they don’t have the right team on board to install safes in other locations, and wheeling one into the garage is the easy way out.
Putting a safe in the garage is fine if that is the only place you an put it, but most want the safe in the home, where they can get to it quickly. Temperature and humidity are important considerations as well, and both are more easily controlled in a house rather than in the garage.
One advantage to garage installation is the concrete floor provides a solid base for safe installation. Houses built on concrete slabs also offer a solid anchor on the first level. If the safe needs to go to an upper floor, the weight of the safe and its contents need to be factored in.”
Place Safe Against Outside Wall
Hall recommends placing your gun safe against an outside wall: “In case of fire, the safe will typically last longer as there is not a lot that can burn on one side of the safe, thus keeping it cooler.”
Don’t Make the Mistake of Buying an Undersized Safe
The most common mistake people make when buying a gun safe is getting a safe that’s too small. This video explains why you should probably invest in a bigger safe. First, the rated gun capacity is exaggerated — rifles with mounted optics, long barrels, wide forearms and/or pistol grips take up considerably more space than a small rimfire rifle or a lever gun with iron sights. Second, your gun collection will likely grow in years to come. Third, you may want to store other valuables in the safe — such as vital documents, jewelry, watches, and pricey electronics. In this video the host notes: “Get a much larger safe than you think you’ll need at first. This will guarantee that you will have enough room for future purchases and all the guns and equipment you currently have.”
Recommended Safe Features for Long-Gun Storage
Editor’s Recommendation:
Budget $1200-1500 for a safe from a major maker, with external hinges, and an interior at least 58″ high. That gives you room for 30″-barreled rifles with a top shelf for handguns and other valuables. A rotary rack and slide-out drawers are great additions.
Keypad or Dial? We favor rotary dial locks. With minimal maintenance they will function flawlessly for decades. But the digital locks offer quick-access and convenience. If you go digital, get a commercial-grade unit.
Fire-lining is worth getting, but a thin layer of sheet-rock doesn’t make a safe truly “fire-proof”.
Interior at least 58″ High and 30″ wide Overall Weight 750+ Pounds 8 Gauge or Heavier Wall Thickness Double-Wall, Composite Door with Relockers Minimum UL RSC Rated. TL-15 or TL-30 Rating is Desirable External Hinges
Mechanical UL Group II (or better) Lock with Standard Dial Or UL Type 1 Commercial-Grade Electronic Lock
Custom Interior Suitable for Scoped Guns with Long Barrels On-Door Storage System for Non-scoped Long Guns OR Rotary Gun Rack for Scoped Rifles and ARs
Internal (sandwiched) Insulator, Reinforced if Sheet-rock Palusol? Heat-Activated Expanding Door Seals
Slide-out Drawers for Handguns Fire-lined Inner Safe for Paper and Media
Low Gloss, Rust-resistant External Finish Pre-Drilled holes for Lag Bolts and in Rear for Electric Cord Overhead Fluorescent Lamp and/or LED Mini-lights on Strings