Want to improve your understanding of Ballistics, Bullet Design, Bullet Pointing, and other shooting-related tech topics? Well here’s a treasure trove of gun expertise. Applied Ballistics offers dozens of FREE tech articles on its website. Curious about Coriolis? — You’ll find answers. Want to understand the difference between G1 and G7 BC? — There’s an article about that.
“Doc” Beech, technical support specialist at Applied Ballistics says these articles can help shooters working with ballistics programs: “One of the biggest issues I have seen is the misunderstanding… about a bullet’s ballistic coefficient (BC) and what it really means. Several papers on ballistic coefficient are available for shooters to review on the website.”
Credit Shooting Sports USA Editor John Parker for finding this great resource. John writes: “Our friends at Applied Ballistics have a real gold mine of articles on the science of accurate shooting on their website. This is a fantastic source for precision shooting information[.] Topics presented are wide-ranging — from ballistic coefficients to bullet analysis.”
Here are six (6) of our favorite Applied Ballistics articles, available for FREE to read online. There are dozens more, all available on the Applied Ballistics Education Webpage. After Clicking link, select Plus (+) Symbol for “White Papers”, then find the article(s) you want in the list. For each selection, then click “Download” in the right column. This will send a PDF version to your device.
Want to see a bullet hit a target in ultra-ultra-slow motion? Watch this video to witness some amazing things — such as a bullet jacket peeling back like a banana-skin (at time-mark 7:30). Some years ago, Werner Mehl of Kurzzeit.com produced a 10-minute video for the SHOT Show. This video has has been watched over 15 million times on YouTube, making it one of the most popular shooting-related videos in history. Employing cameras recording at up to 1,000,000 (one million) frames per second, Mehl’s bullet flight video has been called “astounding” and “mesmerizing”. If you haven’t seen it yet, sit back and enjoy!
Watch This Video! It’s Really Something Special…
Kurzzeit.com Video System
German engineer Werner Mehl developed super-sophisticated camera systems that can record at up to 1,000,000 frames per second. Werner also developed an advanced chronograph system that was the most sophisticated in the world prior to the development of the new-generation compact radar chronographs. Werner has now retired from business, but he was a brilliant engineer and his high-speed cameras were truly amazing.
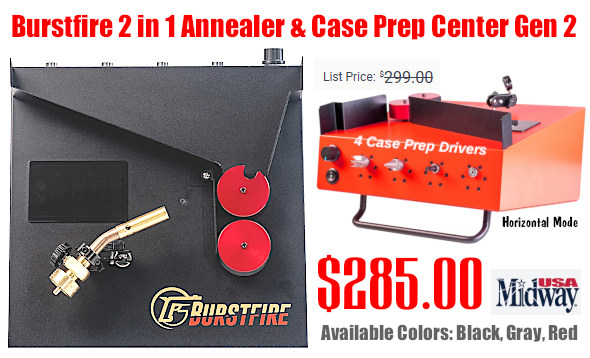
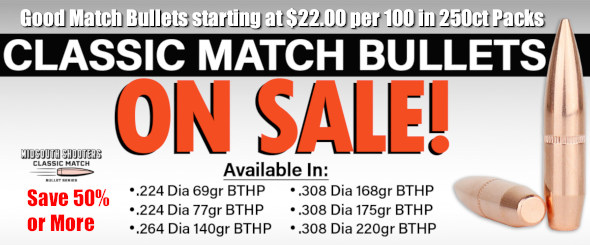
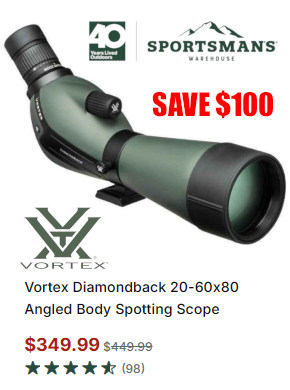
At the request of our readers, we provide select “Deals of the Week”. Every Sunday afternoon or Monday morning we offer our Best Bargain selections. Here are some of the best deals on firearms, hardware, reloading components, optics, and shooting accessories. Be aware that sale prices are subject to change, and once clearance inventory is sold, it’s gone for good. You snooze you lose.
NOTE: All listed products are for sale to persons 18 years of age or older. No products are intended for use by minors.
Midway USA — Vortex Optics Sale
⏺️ » Major savings on Vortex scopes, spotters, rangefinders
If you need to upgrade your pistol or rifle with new optics check out the Vortex Optics Sale over at Midway. From red-dots to rifle scopes to spotting scopes there’s something for all your needs at some of the lowest prices we’ve seen this year.
Powder Valley — Vihtavuori Powder Sale
⏺️ » Significant discounts on popular Vihtavuori powders
If you’re looking for powder, check out the Powder Valley Vihtavuori Powder Sale. Right now you’ll find everything from fast pistol powders to slow ELR powders at major savings. The choice of champions in many shooting disciplines, Vihtavuori (VV) powders are also reasonably priced. They are now some of the most cost effective, high-quality, ultra-consistent powders.
As an Amazon affiliate, this site can earn revenues through sales commissions.
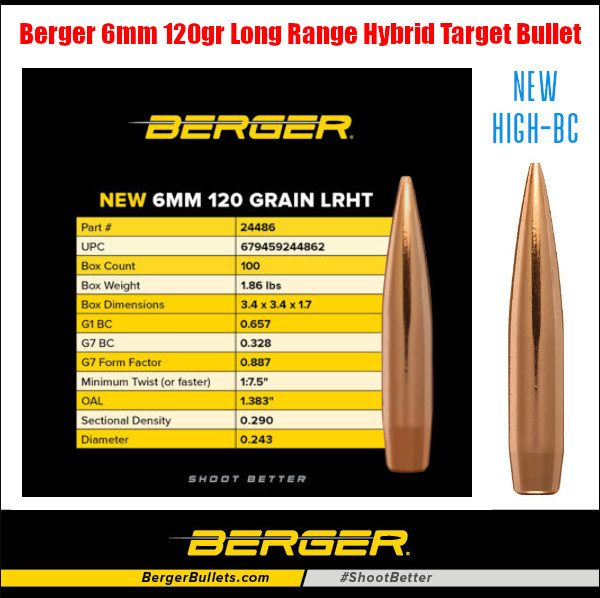
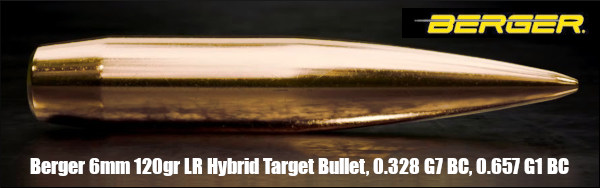
Berger has recently introduced a very impressive new projectile, a 120-grain 6mm (.243) Long Range Hybrid Target (LRHT) bullet, that offers an ultra-high Ballistic Coefficient (BC) along with very impressive accuracy. This new bullet has already proven itself in competition. Read on to learn more about tests of the new 120-grainer by Ultimate Reloader (Gavin Gear) and Applied Ballistics (Bryan Litz). Both those tests, featured in videos below, demonstrated the new 6mm 120gr LRHT bullet is very consistent and has an ultra-high BC. Berger reports these new heaviest-in-class 6mm bullets have “Doppler radar-verified performance with less than 1% BC Standard Deviation.”
Ultimate Reloader Tests New Berger 120gr LRHT 6mm Bullets
Here’s a good video with tests of Berger’s new 120gr 6mm bullet. The test was done with Lapua 6.5×47 brass necked down to 6mm. Ultimate Reloader’s Gavin Gear reports that the bullet proved to be extremely consistent in both weight and max ogive diameter and had a very consistent BC. This means it is relatively easy to find a very accurate load that also exhibits ultra-low ES and SD. The new 120-grainer should prove popular for mid- and long-range benchrest, PRS/NRL, silhouette matches, and 300m competition. Recommended minimum barrel twist rate is 1:7.5″.
Berger 6mm 120 Grain Long Range Hybrid Target bullets are available now in 100-count, 500-count, and new 1500-count Berger Competition Packs.
Bryan Litz Tests New Berger 120gr LRHT 6mm Bullet
Berger’s new 120gr 6mm LRHT bullet was also recently tested by Bryan Litz of Applied Ballistics. Bryan confirmed the new 120-grainer has an extremely high BC and has very consistent weight, dimensions, and BC values. In this video, the Berger .243 cal (6mm) 120 gr Long Range Hybrid Target bullet is tested at 300 yards with Doppler radar to measure ballistic performance, as well as precision. The results are discussed, as well as stability requirements.
Load with 6mm Creedmoor Cartridge:
Peterson small rifle primer brass
CCI-450 small rifle magnum primers
Vihtavuori N565 powder
Berger 6mm 120gr LRHT seated 0.015″ off lands
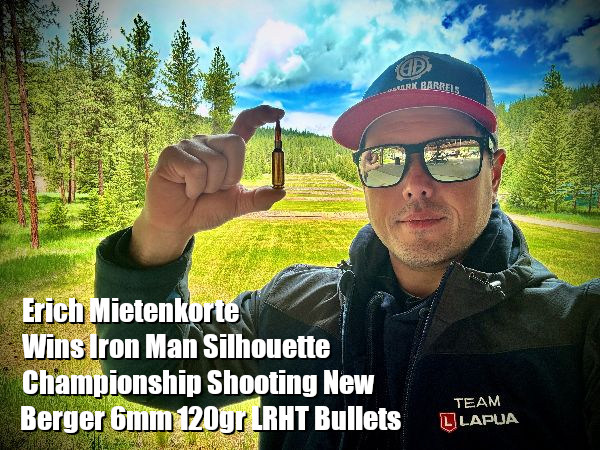
New 6mm Berger Bullet Wins Major Silhouette Championship
How does this new, high-BC 6mm Berger LRHT bullet actually perform in competition? Well the answer is this new 120-grainer in definitely a winner. This new bullet was recently used to win a major national silhouette championship, showing stellar performance.
Berger’s new 6mm 120gr Long Range Hybrid Target (LRHT) bullet was used by Erich Mietenkorte to win the recent 2026 Iron Man Metallic Silhouette Championship. Using the 120gr LRHT, Mietenkorte not only claimed the High Power and Overall Aggregate titles but also tied the all-time Aggregate record and completed the prestigious Bull River Ultra Slam (knocking down 20 consecutive rams).
“Berger’s new 6mm 120gr Long Range Hybrid Target bullets performed exactly how you’d want in a championship,” said Erich Mietenkorte. “Vihtavuori N140 with 120gr LRHTs produced outstanding precision from the start. Five-shot groups at 200 meters averaged 1/4 MOA, and that accuracy held all the way to 500 meters.”
Designed for long-range precision, the Berger 6mm 120 Grain LRHT is heaviest-in-class and offers exceptional performance and features:
Industry-leading 0.328 G7 ballistic coefficient (BC)
Hybrid ogive design for easy tuning and jump tolerance
Meplat Reduction Technology (MRT) for enhanced consistency
Doppler radar-verified performance with less than 1% BC Standard Deviation
About the Iron Man Silhouette Championship
The Iron Man Silhouette Championship lives up to its name. Over the course of the two-day event, competitors fire a grueling 320 shots for record, all from the standing offhand position—two 40-shot Smallbore Rifle matches each morning and two 40-shot High-Power Rifle matches each afternoon. Targets range from 40 to 100 meters for Smallbore (.22 LR) and 200 to 500 meters for High-Power (centerfire).
When neck-turning cases, it’s a good idea to extend the cut slightly below the neck-shoulder junction. This helps keep neck tension more uniform after repeated firings, by preventing a build-up of brass where the neck meets the shoulder. One of our Forum members, Craig from Ireland, a self-declared “neck-turning novice”, was having some problems turning brass for his 20 Tactical cases. He was correctly attempting to continue the cut slightly past the neck-shoulder junction, but he was concerned that brass was being removed too far down the shoulder.
Craig writes: “Everywhere I have read about neck turning, [it says] you need to cut slightly into the neck/shoulder junction to stop doughnutting. I completely understand this but I cant seem to get my neck-turning tool set-up to just touch the neck/shoulder junction. It either just doesn’t touch [the shoulder] or cuts nearly the whole shoulder and that just looks very messy. No matter how I adjust the mandrel to set how far down the neck it cuts, it either doesn’t touch it or it cuts far too much. I think it may relate to the bevel on the cutter in my neck-turning tool…”
Looking at Craig’s pictures, we’d agree that he didn’t need to cut so far down into the shoulder. There is a simple solution for this situation. Craig is using a neck-turning tool with a rather shallow cutter bevel angle. This 20-degree angle is set up as “universal geometry” that will work with any shoulder angle. Unfortunately, as you work the cutter down the neck, a shallow angled-cutter tip such as this will remove brass fairly far down. You only want to extend the cut about 1/32 of an inch past the neck-shoulder junction. This is enough to eliminate brass build-up at the base of the neck that can cause doughnuts to form.
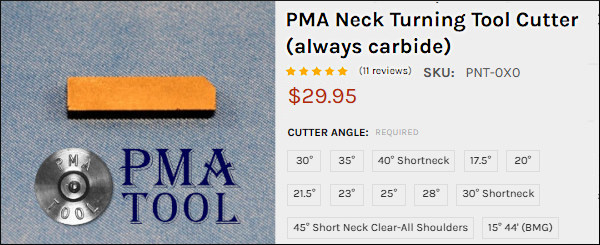
The answer here is simply to use a cutter tip with a wider angle — 30 to 40 degrees. The cutter for the K&M neck-turning tool (above) has a shorter bevel that better matches a 30° shoulder. There is also a 40° tip available. PMA Tool and 21st Century Shooting also offer carbide cutters with a variety of bevel angles to exactly match your case shoulder angle*. WalkerTexasRanger reports: “I went to a 40-degree cutter head just to address this same issue, and I have been much happier with the results. The 40-degree heads are available from Sinclair Int’l for $15 or so.” Forum Member CBonner concurs: “I had the same problem with my 7WSM… The 40-degree cutter was the answer.” Below is Sinclair’s 40° Cutter for its NT-series neck-turning tools. Item NT3140, this 40° Cutter sells for $14.99. For the same price, Sinclair also sells the conventional 30° Cutter, item NT3100.
Al Nyhus has another clever solution: “The best way I’ve found to get around this problem is to get an extra shell holder and face it off .020-.025 and then run the cases into the sizing die. This will push the shoulder back .020-.025. Then you neck turn down to the ‘new’ neck/shoulder junction and simply stop there. Fireforming the cases by seating the bullets hard into the lands will blow the shoulder forward and the extra neck length you turned by having the shoulder set back will now be blended perfectly into the shoulder. The results are a case that perfectly fits the chamber and zero donuts.”
In the video below, Shiraz Balolia takes you through the essentials of fire-forming brass with his custom-made, water-cooled benchrest railgun. Shiraz is a former Team Captain (and member) of the U.S. F-Class Open Rifle Team. Shiraz has competed on the National and World level for more than two decades, and has won multiple major International championships in 1000-yard shooting. In this video he will walk you through fire-forming cartridges in .284 Shiraz, a wildcat based on the .284 Winchester.
Fire-forming properly is a pre-requisite for accuracy in a match rifle. Done right, fire-forming can improve cartridge consistency shot to shot. Creating a fire-forming fixture like this, or even a more basic design, can save you time and potential frustration on the range, Shiraz explains. The key is getting the initial case expansion to match your competition chamber quickly but without generating excessive heat. Follow along as Shiraz takes you through the methodology of fire-forming both in his work shop and on the range.
Here Shiraz Balolia takes you through the essentials of fire-forming brass with his custom-made, water-cooled benchrest railgun.
Along with running the successful Grizzly Industrial enterprise, Shiraz is a top competitor and member of the U.S. F-Open team. He has competed in three world championships. In recent years he captured three straight Canadian National F-Class Championships (READ 3-Peat STORY). So, this guy knows his stuff.
Shiraz shows fellow shooters how to fire-form cases efficiently without burning precious match barrel life. In the video above he uses a custom-designed railgun that employs water cooling for the barrel. This is done with hoses running from a sink, so that cool water is constantly flowing through the barrel jacket.
Shiraz says the fired cartridge are actually cool to the touch because the water-jacketed barrel keeps everything at a moderate temperature. (See video at 8:00)
This USAMU article explores three different “Philosophies” of precision reloading. Some handloaders seek to produce ammo that yields the very tightest groups (without factoring in the wind). Other shooters load their ammo to deliver the highest safe velocity. That’s because a projectile launched at higher velocity will drift less in the wind. The theory is that even if fast ammo doesn’t produce the tightest groups in zero wind conditions, it will yield higher scores in a the real world (where the wind blows). Lastly, some handloaders favor ammo that is ultra-consistent across a wide temperature range. This last philosophy dictates selection of a powder that is temp-insensitive, even if it may not produce the very best raw accuracy (or speed).
What’s Your Handloading Philosophy?
Objectives of Reloading — Accuracy, Velocity, Temp Stability What do you, the reader, primarily value in your handloads?
Viewpoint ONE: Accuracy Trumps Everything
Some shooters prize consistent, excellent medium/long range accuracy enough that they’re willing to give up some extra velocity (and reduced wind deflection) to obtain that. Their underlying philosophy could be stated: “Superior accuracy is present for every shot, but the wind isn’t”. One’s ability to hold well, aim well and read the wind are all factors in making this type decision. The photo below shows stellar raw accuracy. This is an 0.67″, 10-shot group at 300-yards fired from a text fixture. The group measures just 0.67″. (This shows the USAMU’s 600-yard load with 75gr bullets).
Viewpoint TWO: Load to Highest Safe Velocity for Less Wind Drift
Some shooters value obtaining the highest safe velocity, even if one’s pure, consistent mechanical accuracy at medium/long range isn’t quite as brilliant. The theory here seems to be that a really good hold extracts as much mechanical accuracy from the rifle/ammo as possible, and faster bullets equal occasional “bonus” points snatched from the jaws of wind.
[For example] one of the USAMU’s many Service Rifle National Champions revealed his philosophy. It can be stated thus: a super-accurate, but [relatively] “slow” load “required him to have a Ph.D. in wind reading for every shot, while a faster, but less accurate load netted him more points.”
Note — this was not mere speculation; his score book data backed up his claims, due to less wind effects. Remember, however, this fellow has a consistent, National Championship-level hold, and other Champions on the same team would have opted differently.
Viewpoint THREE: Temperature Stability Is Key
Still another approach is to place heavy emphasis on fine accuracy with absolute stability in changing temperatures. When this writer was actively earning his Distinguished Rifleman badge, that was his goal. The reason? Sighting shots are not allowed in EIC (“Leg”) matches. The first shot out of the barrel was for score. It had to be 100% consistent, with very reliable, predictable elevation and wind deflection regardless of the ambient temperature — even if it wasn’t the lowest wind deflection possible.
Naturally, selecting a powder that is insensitive to temperature changes is a key element here. Elevation zeros and wind effects HAD to be consistent every time. Hunters and military snipers might be among those who fall into this camp, as well as those in pursuit of their Distinguished Rifleman badges.
Contrast that with a traditional High Power shooter who gets two sighter shots before each event (offhand, sitting rapid, prone rapid, prone slow fire.) If there is a zero change on any given day, he/she can correct during sighters. This writer well remembers talking with another very high-level Service Rifle competitor who was happy to have high temperatures boost the velocities of his ammunition above their usual level… As far as this SR competitor was concerned, 60-80 fps more velocity -– even if only due to high ambient temperatures -– meant less wind deflection, and he was mighty happy to have it.
Particularly in the summer, with hot daily conditions, you need to be concerned about temperature stability. Loads worked up in winter may be over-pressue in the summer time. FYI summer officially begins this year on June 21, 2026, Summer Solstice, just 10 days away.
This article has been confined to NRA High Power Rifle competition, which has relatively generous 10-ring dimensions in relation to the accuracy of well-built competition rifles. Hopefully, it will provide food for thought. For some, this might be an opportunity to ensure that one’s load development approach helps them attain their desired results.
Chart created with Ammoguide’s Visual Comparison Tool. Visit Ammoguide.com to learn more.
One of our forum members was looking for a very accurate, mid-sized 6.5mm cartridge for target working and coyote hunting. There are many great options including the 6.5 Grendel, 6.5×47 Lapua, 6.5 Creedmoor, and Remington .260 (a 6.5-08). If you are considering the 6.5×47 you should read our 6.5×47 Cartridge Guide authored by the 6.5 Guys. This and other 6.5mm cartridges are covered in this introduction to 6.5 mm cartridges prepared by Eben Brown, President of Eabco.com.
Quick Guide to 6.5mm Cartridges
by Eben Brown, EABCO.com, (E. Arthur Brown Co. Inc.)
The current popularity of 6.5mm cartridges in the USA has been a long time in coming. I won’t go into my opinions on why it took so long to catch on. The important thing is that it finally HAS caught on and we’re now so fortunate to have a wide selection of 6.5mm cartridges to choose from!
6.5mm Grendel – Developed by Alexander Arms for the AR15 and military M4 family of rifles. The Grendel fits the dimensional and functional requirements of these rifles while delivering better lethality and downrange performance. [Editor: The little 6.5 Grendel delivers a lot of performance from a small package. This is one of the most accurate cartridge options for the AR15 platform.]
6.5mm BRM – Developed by E. Arthur Brown Company to give “Big Game Performance to Small Framed Rifles” — namely our Model 97D Rifle, TC Contender, and TC Encore. Velocities of 2400-2500 fps with 140gr bullets puts it just under the original 6.5×55 Swede performance.
6.5mm x 47 Lapua – Developed by Lapua specifically for international 300m shooting competitions (with some interest in long-range benchrest as well). Case capacity, body taper, shoulder angle, and small rifle primer are all features requested by top international shooters. You can expect velocities of 2500-2600+ with 140 gr bullets.
6.5mm Creedmoor – Developed by Hornady and Creedmoor Sports, the 6.5mm Creedmoor is designed for efficiency and function. Its shape reaches high velocities while maintaining standard .308 Winchester pressures and its overall length fits well with .308 Win length magazines. You can expect velocities of 2600-2700+ fps with 140gr bullets. [Editor: Yep, we know some PRS guys are loading hotter than that in bolt guns. We recommend you try the 120-130 grain bullets also with this cartridge. That may put you in a better accuracy node.]
This video reviews 6.5 Creedmoor Cartridge Brass options:
.260 Remington – Developed by Remington to compete with the 6.5mmx55 Swedish Mauser that was (finally) gaining popularity in 1996. By necking down the 7mm-08 Remington to 6.5mm (.264 cal), the .260 Remington was created. It fit the same short-action [receivers] that fit .308 Win, .243 Win, 7mm-08 Rem, etc. You can expect velocities of 2600-2700 fps with 140gr bullets in the 260 .Remington.
[Editor’s Note: In the .260 Rem, try the Lapua 120gr Scenar-Ls and/or Berger 130gr VLDs for great accuracy and impressive speeds over 2950 fps.]
6.5mm x 55 Swedish Mauser – This was the cartridge that started the 6.5mm craze in the USA. It is famous for having mild recoil, deadly lethality on even the biggest game animals, and superb accuracy potential. Original ballistics were in the 2500 fps range with 140gr bullets. Nowadays handloaders get 2600-2700+ fps.
[Editor’s Note: Tor from Scandinavia offers this bit of 6.5x55mm history: “Contrary to common belief, the 6.5×55 was not developed by Mauser, but was constructed by a joint Norwegian and Swedish military commission in 1891 and introduced as the standard military cartridge in both countries in 1894. Sweden chose to use the cartridge in a Mauser-based rifle, while Norway used the cartridge in the Krag rifles. This led to two different cartridges the 6.5×55 Krag and 6.5×55 Mauser — the only real difference being safe operating pressure.”]
6.5-284 Norma — This comes from necking the .284 Winchester down to .264 caliber. Norma standardized it for commercial ammo sales. The 6.5mm-284 was very popular for F-Class competition and High Power at 1,000 yards. However, many F-Class competitors have switched to the straight .284 Win for improved barrel life. 6.5-284 velocities run 3000-3100+ fps with 140gr bullets.
.264 Winchester Magnum – Developed by Winchester back in 1959, the .264 Win Mag never really caught on and may have delayed the ultimate acceptance of 6.5mm cartridges by US shooters (in my opinion). It missed the whole point and original advantage of 6.5 mm cartridges.
The Original 6.5mm Advantage
The special needs of long-range competition have skewed things a little. However the original advantages of 6.5mm cartridges — how deadly the 6.5mms are on game animals, how little recoil they produce, and how easy they are to shoot well — still hold true today.
Do you use factory ammo for your hunting rifles? Or perhaps you buy bulk centerfire ammo for your AR15 or varmint rifle. Or do you shoot a variety of rimfire ammo? Then this book can definitely benefit you.
If you ever shoot factory ammo, you should consider getting Ammo & Ballistics 6. This resource lists over 2,600 different loads for 200+ cartridge types from .17 Mach 2 up to .700 Nitro Express, including the most popular centerfire and rimfire cartridges (both rifle and handgun). In this updated-for-2020 Sixth Edition, there are over 3,000 tables covering virtually every caliber and every load for all commercially-loaded hunting ammunition sold in the USA. Tables include velocity, energy, wind drift, bullet drop, and ballistic coefficients up to 1,000 yards.
Ammo & Ballistics 6 contains data and illustrations on the vast majority of sporting cartridge types sold in the USA: 200-plus cartridge types from .17 Mach 2 up to .700 Nitro Express.
Extensive Cartridge Coverage: Contains data for over 200 cartridge types. Load Database: Includes over 2,600 different loads and 3,000 ballistic tables. Detailed Metrics: Provides information on bullet weight, type, velocity, energy, wind drift, bullet drop, and ballistic coefficients up to 1,000 yards. Choose Hunting Ammo:Ammo & Ballistics 6 helps you select ammo for a hunt — quickly compare the velocity and knock-down power of various commercial ammo.
Verified Book Purchaser Reviews
“Outstanding reference guide for shooters and ballistic enthusiasts alike. Has data on velocity, energy delivered, Taylor KO index, windage and elevation on numerous loadings for hundreds of [cartridge types]. Each cartridge has all dimensions labeled (i.e rim, case length, neck, etc.), and has an informative description of the cartridges history/relevance.” — S. Step, 2017
“Great heaps of data! This volume has pages and pages of new data for .22LR like the hot Velocitor, and also on the .22 WMR from 30 grains up into the 50s. Most importantly there is lots of range data, drop, windage, kinetic energy, etc. — Terrific reference guide….” — E. Svanoe
Flattest-Shooting Cartridges by Caliber (Ron Spomer)
In this 15-minute video, hunting expert Ron Spomer examines a variety of standard and wildcat cartridges from .17 caliber all the way to .338 caliber. For each caliber, Ron picks a flat-shooting “winner” and provides some ballistics comparison tables. This video is quite popular, with over 550,000 views on YouTube.
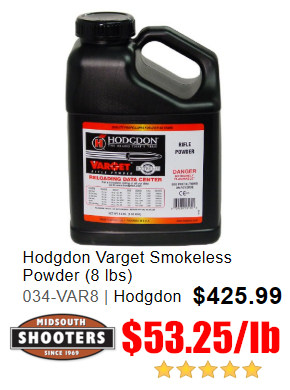
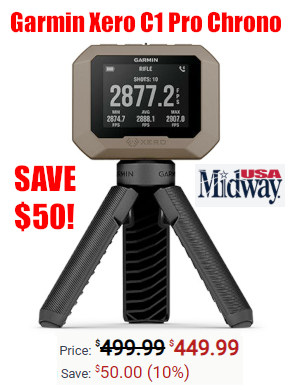
At the request of our readers, we provide select “Deals of the Week”. Every Sunday afternoon or Monday morning we offer our Best Bargain selections. Here are some of the best deals on firearms, hardware, reloading components, optics, and shooting accessories. Be aware that sale prices are subject to change, and once clearance inventory is sold, it’s gone for good. You snooze you lose.
NOTE: All listed products are for sale to persons 18 years of age or older. No products are intended for use by minors.
Brownells — Summer Sale (Optics, Tools, Ammo & More)
⏺️ » Save Up To 62% + FREE SHIPPING On Orders $150+
Right now Brownells is running a major Summer Sale with big discounts on a wide selection of products. You can save up to 62% on optics, reloading tools, ammo and more. Plus Brownells offers FREE Shipping on orders that total $150.00 or more. Use CODE 150FREESHIP to save $15 to $30+ on your order.
Powder Valley — Lapua Brass and Bullets SALE
⏺️ » Great savings on wide selection of Lapua Brass & Bullets
Lapua brass has won more matches and set more records than any other brand of brass. In addition, Lapua bullets deliver great accuracy with a huge selection of bullet calibers/weights. Right now Lapua brass cases and Lapua bullets are on sale at Powder Valley. Enjoy discounts for popular cartridge types from .22 up to .338 calibers. And yes .220 Russian, 6mmBR, 6GT, and 6mm Creedmoor are in stock along with numerous other .22, 6mm, 6.5mm, 7mm, and .30-Cal cartridge types. Enjoy savings on Lapua brass and bullets.
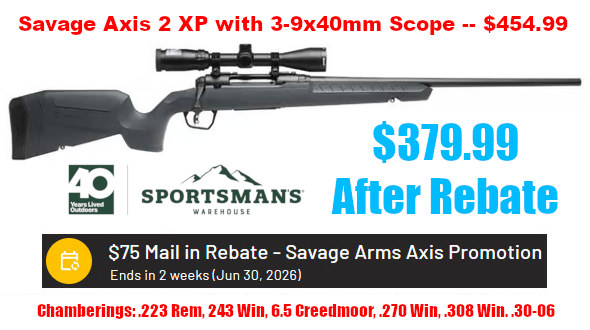
Bonus: Father’s Day SAVAGE Rifle REBATE Through 6/30/2026
As an Amazon affiliate, this site can earn revenues through sales commissions.


 When neck-turning cases, it’s a good idea to extend the cut slightly below the neck-shoulder junction. This helps keep neck tension more uniform after repeated firings, by preventing a build-up of brass where the neck meets the shoulder. One of our Forum members, Craig from Ireland, a self-declared “neck-turning novice”, was having some problems turning brass for his 20 Tactical cases. He was correctly attempting to continue the cut slightly past the neck-shoulder junction, but he was concerned that brass was being removed too far down the shoulder.


 .260 Remington – Developed by Remington to compete with the 6.5mmx55 Swedish Mauser that was (finally) gaining popularity in 1996. By necking down the 7mm-08 Remington to 6.5mm (.264 cal), the .260 Remington was created. It fit the same short-action [receivers] that fit .308 Win, .243 Win, 7mm-08 Rem, etc. You can expect velocities of 2600-2700 fps with 140gr bullets in the 260 .Remington.