The shooting season is now in full swing. When you head to the range you’ll want to be prepared. That means collecting all the gear you’ll need at the range. It’s easy to forget small, critical items, so we’ve provided a checklist of the small “extras” you should pack before you head out to the range. In addition to rifle, rests, ammo, targets, and cleaning gear, here are a dozen essentials you should include in your range bag.
• Shell-Holder — If you don’t have calipers, you can use a shell-holder to check for excessive case expansion from hot loads. If a fired case doesn’t slip into the shell-holder easily, your load is definitely TOO HOT.
• Extra Earplugs — Always use ear protection when shooting. We bring a 35mm film canister with extra sets of foam earplugs.
• Hex Wrench or Screwdriver for action screws — Action screws can work loose with time. Always bring the appropriate hex wrench or screwdriver whenever you go to the range.
• Small Wrench for Scope Rings — Check the tension of your scope base and ring fasteners before you go. Bring along a small Torx wrench for the ring screws (or other tool that fits your fasteners).
• Normal and Under-sized Jags — It is often wise to use one-caliber undersize jags when applying solvent with cotton patches. You should have a couple sizes in your range kit.
• Extra Batteries — Bring extra batteries for all your electronic gear — which can include chronograph, windmeter, digital camera, GPS etc.
• Small Notebook and Pen or Pencil — Use the notebook to record chron data, log group sizes, and make notes about wind and weather conditions.
• Adhesive dots — Bring a few sheets of adhesive dots (sold at office supply stores). Use small white or black dots as target pasters. Use larger red or orange dots as aiming points (target centers).
• Folding Chair or Camp Stool — This comes in handy if you’re spotting for another shooter, or if you reload away from the firing line.
• Water Bottle — You can’t shoot well if you’re dehydrated. Bring at least two quarts of water with you and keep a bottle at the bench.
• Surveyors’ Tape and Wood Stakes — You can make inexpensive wind indicators using surveyors’ tape attached to the top of wood stakes.
• Small Plastic Ruler — Use this to measure your group sizes. A transparent (see-through) ruler works best. Rulers are also useful for drawing lines on targets.
This list is not intended to be exclusive. There are many other items you may wish to include. Obviously bring safety glasses, and Sharpie-type pens are always handy to mark targets. We invite our readers to add other “essentials” to the list. The important thing is to plan ahead, packing your key items before you drive to the range.
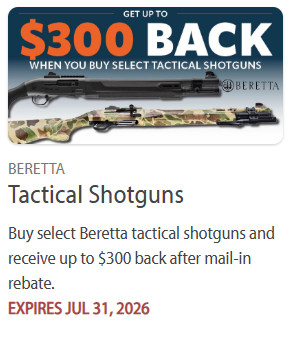
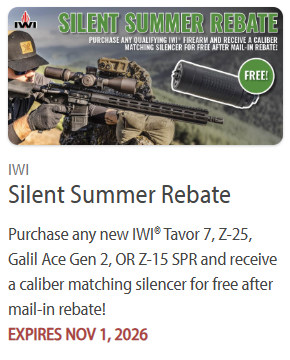
We’ve found a dozen great discount/rebate programs. These specials can save you big bucks on rifles, pistols, shotguns, ammo, and shooting accessories. Some of these rebates are worth $100 or more. For example you can get up to $300 off a Beretta Shotgun. And there’s a $250 credit for a SilencerCo Suppressor. Note: Many of these promos are good for 3 months or more, but some expire at the end of July 2026 — so check the dates.
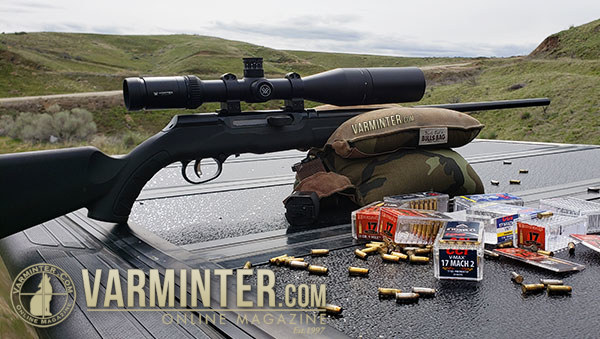
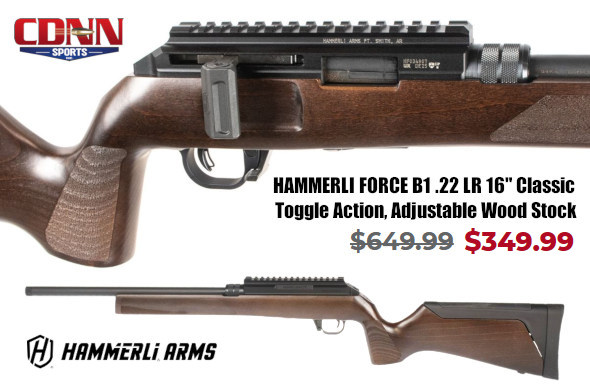
The 17 Mach 2 (aka “17 HM2″) is making a come-back. We’re glad. This high-velocity round fits actions and magazines designed for the .22 LR, so it’s an easy barrel-swap upgrade for most rimfire bolt-guns (semi-autos are more complicated). The 17 Mach 2 cartridge doesn’t deliver the velocity of the 17 HMR, but it is still way faster than a .22 LR. Expect 2000-2100 fps with 17 Mach 2 compared to 1250 fps for “High-Velocity” .22 LR ammo. And, importantly, 17 Mach 2 ammo is much less expensive than 17 HMR. If you shop around, you can get 50 rounds of 17 Mach 2 for about $8.50 (or less). That’s 43% cheaper than a better-than-average $14.99 price of 17 HMR — a significant savings at 17 cents/round vs. 30 cents/round! And may vendors are selling 17 HMR ammo for $16-$18 for 50 rounds (i.e. up to 36 cents/round).
17 Mach 2 Major Selling Points:
1. 60% more velocity than typical “High-Velocity” .22 LR ammo.
2. 40% less cost than average 17 HMR ammo.
3. 17 Mach 2 OAL is compatible with .22 LR receivers and magazines.
17 Mach 2 — Best High Velocity Rimfire Bang for the Buck?
If you are looking for a capable, squirrel-busting round or a fun plinking round, you should definitely consider the 17 Mach 2, especially since CCI has committed to production of the little cartridge. CCI recently rolled out its “Gen 2″ 17 Mach 2 VNT Ammo with polymer tip (see top of article).
Considering that 17 HMR ammo is typically $15 to $18 per box, the 17 Mach 2 is a good value by comparison. It is available from vendors for under $8.50 per 50ct box. That’s $0.17 per round. When you consider overall “bang for the buck”, for many shooters, it makes sense to use the 17 Mach 2 rather than a 17 HMR. You save money, barrel life is a little longer, and the 17 Mach 2 is still a much more potent cartridge than the .22 LR. Check out this comparison, and note how the 17 Mach 2 has a much flatter trajectory than the .22 LR. For varmint shooting, the 17 Mach 2 is clearly the better choice.
And you can easily adapt a .22 LR Rifle to shoot the 17 Mach 2 just by changing the barrel. The magazine and bolt operation should work as the cartridge length, cartridge body diameter, and rim size is the same as the .22 LR.
Hornady’s 17 Mach 2 has a 2100 FPS muzzle velocity vs. 1255 FPS for “High-Velocity” .22 LR.
17 Mach 2 Rifle Reviews
Gun-makers have taken notice of the availability of 17 Mach 2 ammo, introducing new models chambered for this versatile little rimfire round. For a high-volume, small-species varminting, the 17 Mach 2 is much more effective than the .22 LR, and much less expensive than the larger 17 HMR.
Savage A17 in 17 Mach 2
There are a number of reviews on new-generation 17 Mach 2 rifles. Varminter.com reviewed the Savage A17 in 17 HM2. Editor Eric Mayer wrote: “This new addition to the A17 line comes at a time when the 17 Mach 2 round is experiencing a resurgence, with ammo now available from CCI and Hornady, including the lead-free NTX round from Hornady. This means … you don’t have to break the bank to buy a current, functioning, semi-auto 17 Mach 2 and you don’t have to … convert your 10/22.”
Eric shot four different types of 17 Mach 2 ammo, putting 1000+ rounds through the Savage. He was impressed: “I am very excited that Savage Arms has chambered their A17 rifle in the 17 Mach 2 / 17 HM2 round. After shooting the prototype, I can confidently say that this new A17 will become my go-to 17 Mach 2 rifle. This new rifle is a great option for varminters everywhere!”
Toggle Bolt Volquartsen Summit in 17 HM2
It’s rare for us to see a rimfire that we’d really like to own, but the Summit from Volquartsen fits the bill. This versatile rifle features a cool, straight-pull toggle bolt, similar to those on elite Biathlon rifles. You can see how this gun shoots in this informative 22 Plinkster video:
22 Plinkster Tests Volquartsen Summit Rifle in 17 Mach 2
The 17 Mach 2 (17 HM2) is making a comeback. Now leading manufacturers are offering this efficient little rimfire cartridge in some nice rifles. Both Anschutz and Volquartsen will offer new 17 Mach 2 rifles in 2019. The Volquartsen Summit features a lightweight, carbon fiber-wrapped barrel threaded 1/2-28 for brakes or suppressors. The Summit boasts a nice 1.75-lb trigger pull. The Summit’s CNC-machined receiver features a +20 MOA Rail. NOTE: The video shows a silhouette-style laminated wood stock. However, the Summit comes standard with a composite Magpul stock that actually works better for shooting from a bench.
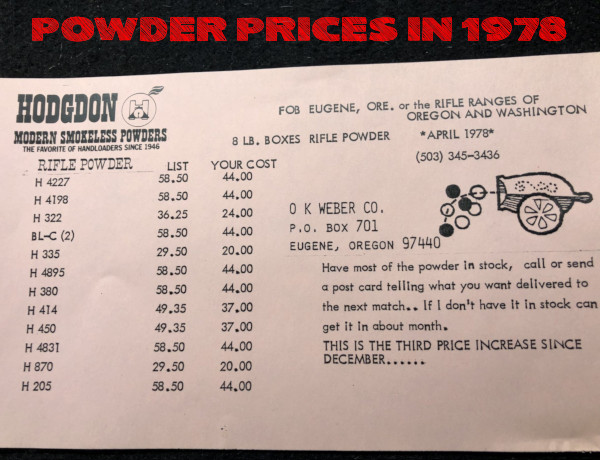
Have inflation (and supply chain shortages) affected the price of powder? You bet. Probably WAY more than you could imagine. Forum member “Two Time HM LR” posted this interesting photo (above) showing Hodgdon powder prices from 1978, as sold by O.K. Weber in Oregon.
Now the prices — $20 to $44 — may not get your attention at first. But take note that these numbers are for EIGHT pound jugs. Yep eight-pounders were all under $45! For example, H4895 was $44 for 8 pounds back in 1978, 45 years ago. And H335 was $20 for eight pounds — that’s just $2.50 per pound!
These days a single pound of a desirable powder such as Varget might cost $65 at some stores IF you can find it at all. On Hodgdon’s web site, H4895 powder is now priced at $68.99 per pound in July 2026. Using that current $68.99/lb figure, H4895 is now 12.5 times (1250%) higher than it was in 1978, when H4895 cost $44 for 8 pounds, i.e. $5.50 per pound.
Here are some comments from our Forum Members:
“Heck those prices are just about the same as current ones, just a little smaller container now.” — Joe
“I’ve got some H4831 in a can marked ‘WWII Surplus Powder’ with a price tag of $2.75. We’ll never see that again either.” Rick in Oregon
“1978 prices and [2024] income would be nice. Unfortunately that doesn’t work. If you compare prices and income, powder cost about the same. You also have to discount the temporary gouging that we are seeing.” — Tmwinds
“So I used to buy gas for 10 cents per gallon and they’d pump it, check the oil, and clean the windshield.” — Pirate Ammo
One comment suggests that the powder price hike actually tracks general U.S. currency inflation over the last four decades. So perhaps powder price increases are not as bad as they seem, when compared to how all prices have risen since 1978:
“Using H4895 [8 lbs.] as a comparison basis at $58.50 (list price) in 1978 calculates it to $276 in today’s money. Looking at … prices it looks like around [$380] for the same item in today’s money, so it really hasn’t gone up [that much as corrected for inflation]. Availability is another issue though and if someone is really needing powder they may well have to pay above suggested retail.” — Drover
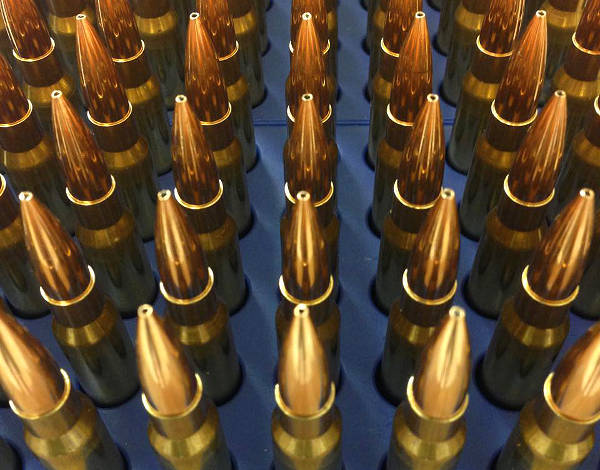
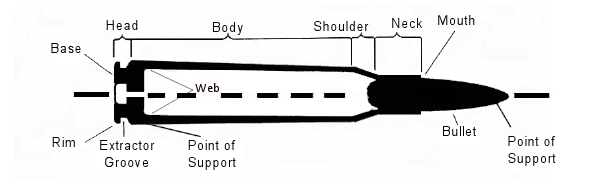
Precision Benchrest and F-Class shooters favor premium brass from Lapua, Norma, Peterson, or RWS. (Lake City also makes quality brass in military calibers.) Premium brass delivers better accuracy, more consistent velocities, and longer life. Shooters understand the importance of good brass, but many of us have no idea how cartridge cases are actually made. Here’s how it’s done.
The process starts with a brass disk stamped from strips of metal. Then, through a series of stages, the brass is extruded or drawn into a cylindrical shape. In the extrusion process the brass is squeezed through a die under tremendous pressure. This is repeated two or three times typically. In the more traditional “draw” process, the case is progressively stretched longer, in 3 to 5 stages, using a series of high-pressure rams forcing the brass into a form die. While extrusion may be more common today, RWS, which makes some of the most uniform brass in the world, still uses the draw process: “It starts with cup drawing after the bands have been punched out. RWS cases are drawn in three ‘stages’ and after each draw they are annealed, pickled, rinsed and subjected to further quality improvement measures. This achieves specific hardening of the brass cases and increases their resistance to extraordinary stresses.” FYI, Lapua also uses a traditional draw process to manufacture most of its cartridge brass (although Lapua employs some proprietary steps that are different from RWS’s methods).
After the cases are extruded or drawn to max length, the cases are trimmed and the neck/shoulder are formed. Then the extractor groove (on rimless cases) is formed or machined, and the primer pocket is created in the base. One way to form the primer pocket is to use a hardened steel plug called a “bunter”. In the photos below you see the stages for forming a 20mm cannon case (courtesy OldAmmo.com), along with bunters used for Lake City rifle brass. This illustrates the draw process (as opposed to extrusion). The process of draw-forming rifle brass is that same as for this 20mm shell, just on a smaller scale.
River Valley Ordnance explains: “When a case is being made, it is drawn to its final draw length, with the diameter being slightly smaller than needed. At this point in its life, the head of the draw is slightly rounded, and there are no provisions for a primer. So the final drawn cases are trimmed to length, then run into the head bunter. A punch, ground to the intended contours for the inside of the case, pushes the draw into a cylindrical die and holds it in place while another punch rams into the case from the other end, mashing the bottom flat. That secondary ram holds the headstamp bunter punch.
This video employs DEFORM-2D software to show the draw process for brass casings.
The headstamp bunter punch has a protrusion on the end to make the primer pocket, and has raised lettering around the face to form the headstamp writing. This is, of course, all a mirror image of the finished case head. Small cases, such as 5.56×45, can be headed with a single strike. Larger cases, like 7.62×51 and 50 BMG, need to be struck once to form a dent for the primer pocket, then a second strike to finish the pocket, flatten the head, and imprint the writing. This second strike works the brass to harden it so it will support the pressure of firing.”
Thanks to Guy Hildebrand, of the Cartridge Collectors’ Exchange, OldAmmo.com, for providing this 20mm Draw Set photo. Bunter photo from River Valley Ordnance.
Photos and Facebook post by Tactical Rifle Shooters
Yet another .300 Blackout disaster. Unfortunately, that .300 Blackout cartridge can fit in a .223 Rem chamber. Shooting a .308-caliber bullet in .223 bore is a recipe for disaster.
The .300 AAC Blackout aka “300 BLK”, is a compact 30-caliber cartridge designed to work in AR-15 rifles. It has a shorter cartridge case to accommodate the bigger 30-caliber bullet while still fitting in a standard AR-15 magazine. Unfortunately, that’s the danger. A careless shooter can toss a .300 Blackout cartridge in with .223 Rem rounds without noting. And because the case-head size is the same as the .223 Rem (5.56×45) the rifle’s bolt assembly will happily chamber and fire the .300 BLK round. Problem is, that forces a .308 diameter bullet down an undersized .223-caliber bore. Not good!
This images were provided by Tactical Rifle Shooters on Facebook. The message was clear: “Don’t try to run 300 Blackout in your .223/5.56mm. It won’t end well. The problem is identical rifles and identical magazines but different calibers.”
Image from Accurate Shooter Forum. Cutaway shows the jammed .30-Cal bullet:
For those who MUST have a .300 Blackout, here are some things you can do:
1. Use different colored magazines for .300 Blackout vs. .223 Rem.
2. Fit all your uppers with caliber-labeled ejection port covers.
3. Mark .223 Rem upper handguards with the caliber in bright paint.
4. Mark all .300 BLK Rounds with heavy black marker.
Comments by Folks Who Viewed these .300 Blackout Disaster Photos:
“The .300 Blackout is simply a badly-designed round. A properly-designed round would have had a feature in the shape that would have prevented cross loading in the first place.” — D. Santiago
“I almost made that mistake… I had a magazine of 300 BLK inserted in my .223/5.56 all night. Fortunately, I never pulled the trigger. Once I realized the mistake, I almost got ill. [After that incident] I no longer own a 300 BLK.” — B. Welch
“Happened to me hog hunting from a helo. Gun exploded in my face.” — B. Hood
“Fire-forming projectiles [is] so wrong in centerfire!” — M. Stres
“Had some dude come into the store the other day wanting .300 Blackout ammo to shoot in his 5.56 AR. It took 15 minutes of explaining for him to understand you got to have a .300 Blackout Upper!” — R. Williams
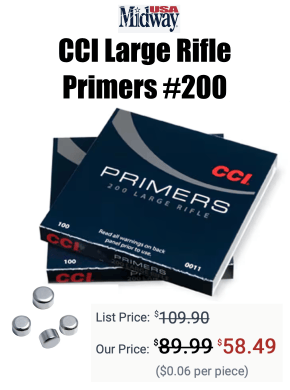
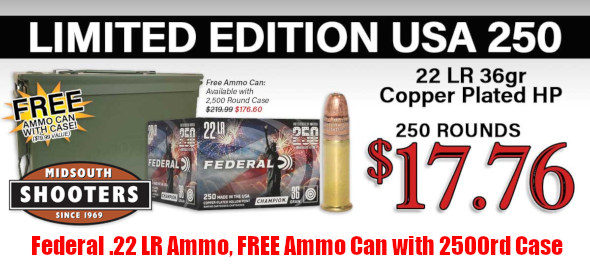
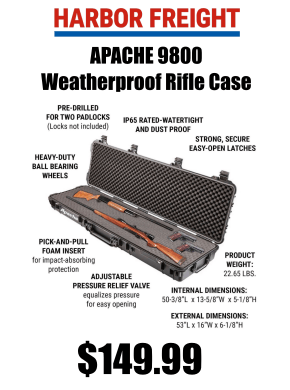
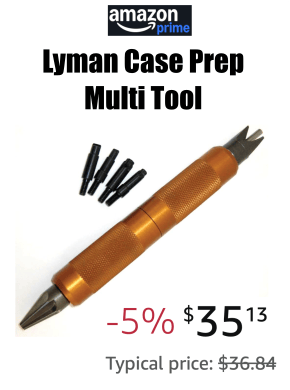
At the request of our readers, we provide select “Deals of the Week”. Every Sunday afternoon or Monday morning we offer our Best Bargain selections. Here are some of the best deals on firearms, hardware, reloading components, optics, and shooting accessories. Be aware that sale prices are subject to change, and once clearance inventory is sold, it’s gone for good. You snooze you lose.
NOTE: All listed products are for sale to persons 18 years of age or older. No products are intended for use by minors.
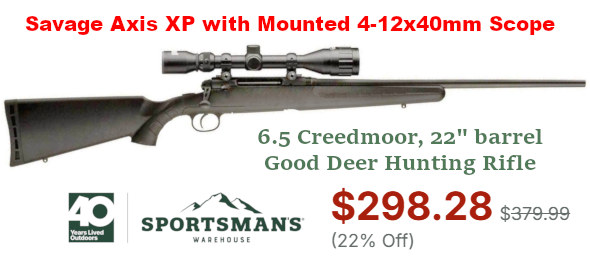
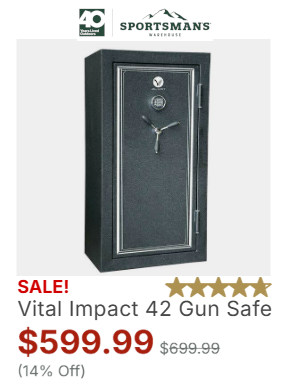
Sportsman’s Warehouse — Orange Tag Gun Sale
⏺️ » Big savings on rifles, shotguns and pistols
If you’re in the market for a new firearm — whether a new hunting rifle, AR rifle, lever-action rifle, pistol, or shotgun — head over to Sportsman’s Warehouse for the major Orange Tag Gun Sale running this week. With 390 firearms on sale, there’s literally something for anyone no matter what kind of guns you like or what discipline you shoot. Savings are significant, up to 32%. For example the S&W M&P Shield 40sw pistol is marked down to $365.47 from $519.99, a 30% discount.
Brownells – Freedom Sale + 12% Savings with Code FREEDOM12
⏺️ » Major savings on products plus 12% OFF with CODE FREEDOM12
Brownells is running a major Freedom to Boom Sale this week in preparation for July 4 and the nation’s 250th anniversary. A wide variety of products are on sale, including Howa barreled actions, Athlon chronographs, and AccuTac bipods. PLUS you can save 12% on most products with code FREEDOM12.
As an Amazon affiliate, this site can earn revenues through sales commissions.
Sinclair Internationalhas released an interesting article about Case Concentricity* and bullet “run-out”. This instructional article by Bob Kohl explains the reasons brass can exhibit poor concentricity, and why high bullet run-out can be detrimental to accuracy.
Concentricity, Bullet Alignment, and Accuracyby Bob Kohl
The purpose of loading your own ammo is to minimize all the variables that can affect accuracy and can be controlled with proper and conscientious handloading. Concentricity and bullet run-out are important when you’re loading for accuracy. Ideally, it’s important to strive to make each round the same as the one before it and the one after it. It’s a simple issue of uniformity.
The reason shooters work with tools and gauges to measure and control concentricity is simple: to make sure the bullet starts down the bore consistently in line with the bore. If the case isn’t properly concentric and the bullet isn’t properly aligned down the center of the bore, the bullet will enter the rifling inconsistently. While the bore might force the bullet to align itself with the bore (but normally it doesn’t), the bullet may be damaged or overstressed in the process – if it even it corrects itself in transit. These are issues we strive to remedy by handloading, to maintain the best standard possible for accurate ammunition.
The term “concentricity” is derived from “concentric circle”. In simple terms it’s the issue of having the outside of the cartridge in a concentric circle around the center. That goes from case head and center of the flash hole, to the tip of the bullet.
Factors Affecting Concentricity
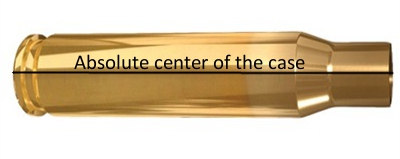
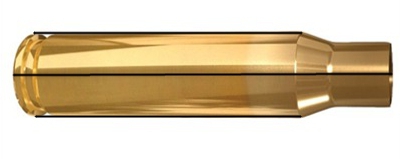
The point of using this term is to identify a series of issues that affect accurate ammunition. Ideally this would work best with a straight-walled case; but since most rifle cartridge cases are tapered, it equates to the smallest cross section that can be measured point by point to verify the concentric circle around the center. For the examples below, I’m working with .308 Winchester ammo.
Figure 1: The cartridge.
Figure 2: Centerline axis of the case, extending from flash hole to case mouth.
The case walls have to be in perfect alignment with the center, or axis, of that case, even if it’s measured at a thousandth of an inch per segment (in a tapered case).
Figure 3: Case body in alignment with its axis, or centerline, even in a tapered case.
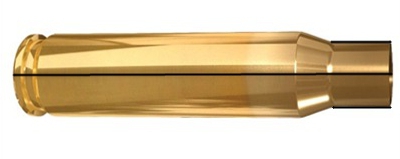
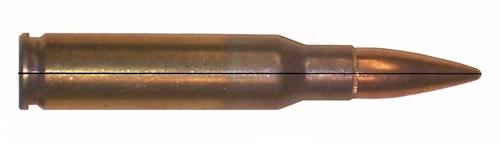
The case neck must also be in alignment with its axis. By not doing so you can have erratic bullet entry into the bore. The case neck wall itself should be as uniform as possible in alignment and in thickness (see the M80 7.62x51mm NATO cartridge in Figure 5) and brass can change its alignment and shape. It’s why we expand the case neck or while some folks ream the inside of the neck and then turn the outside for consistent thickness, which affects the tension on the bullet when seated.
Figure 4: Neck in alignment with center of the case axis.
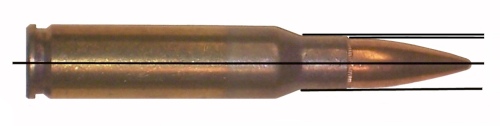
Figure 5: Variations in case neck wall thickness, especially on some military brass, can cause an offset of the bullet in its alignment. This is an M80 ball round. Note the distinct difference of the neck walls.
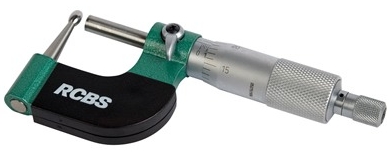
Having a ball micrometer on hand helps, especially with military brass like 7.62x51mm in a semi-auto rifle, where there are limits as to how thin you want the neck walls to be. In the case of 7.62 ball brass you want to keep the wall to .0145″.
Figure 6: A ball micrometer like this RCBS tool (#100-010-268) can measure case neck thickness.
Turning the outside of the neck wall is important with .308 military cases regardless of whether you expand or ream the neck walls. There are several outside neck turning tools from Forster, Hornady, Sinclair, and others. I’ve been using classic Forster case trimming (#100-203-301) and neck turning (#749-012-890) tools for 40 years.
Bullet Run-Out
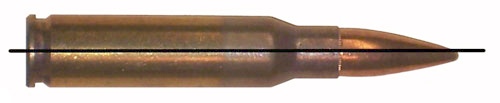
The cartridge, after being loaded, still needs to be in alignment with the center of the case axis. Figure 7 shows a bad example of this, a round of M80 ball. A tilted bullet is measured for what’s known as bullet “run-out”.
Figure 7: An M80 round with the bullet tilted and not aligned with the axis. This will be a flyer!
Run-out can be affected by several things: (1) improperly indexing your case while sizing, which includes not using the proper shell holder, especially while using a normal expander ball on the sizing die (it also can stretch the brass). (2) The head of a turret press can flex; and (3) improper or sloppy bullet seating. This is also relevant when it comes to using a progressive press when trying to load accuracy ammo.
Mid Tompkins came up with a simple solution for better bullet seating years ago. Seat your bullet half way into the case, back off the seater die and rotate the case 180 degrees before you finish seating the bullet. It cuts down on run-out problems, especially with military brass. You also want to gently ream the inside of the neck mouth to keep from having any brass mar the surface of the bullet jacket and make proper seating easier. A tilted bullet often means a flyer.
Figure 8: Proper alignment from the center of the case head to the tip of the bullet.
(NOTE: This links to a Web Archive version of the original Sinclair Int’l article.)
*Actually some folks would say that if we are talking about things being off-center or out-of-round, we are actually talking about “eccentricity”. But the tools we use are called “Concentricity Gauges” and Concentricity is the term most commonly used when discussing this subject.
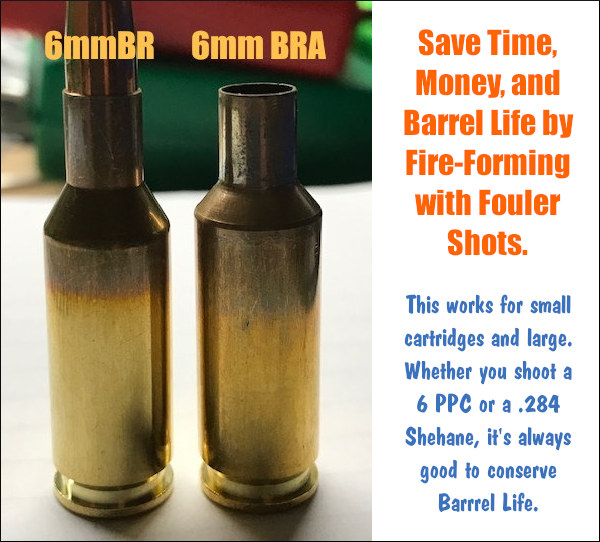
Here’s a tip for guys who shoot the 6 PPC, 6 Dasher, 6 BRA, .284 Shehane, or other wildcat cartridges that require fire-forming. Use your fouler shots to fire-form new cases. That way your fouler shots do “double-duty” and you get your brass fire-formed without putting extra rounds through your expensive barrel.
This procedure is recommended by Joel Kendrick, the 2004 IBS 600-yard Shooter of the Year. After he cleans his barrel, Joel knows it takes two or three shots to foul in the bore before accuracy returns. When shooting his PPC, Joel uses those fouler shots to fire-form his new brass. Joel explains: “I like to have relatively new brass always ready. By fire-forming a couple cases after each barrel-cleaning during a match, by the end of the weekend I’ve got a dozen or more freshly fire-formed cases to put into the rotation. If you do this with your fouler shots you get your fire-forming accomplished without using up any extra barrel life.”
This not only saves barrel wear, but it saves you trips to the range for the purpose of fire-forming. We thank Joel for this smart suggestion. For those who do not have a dedicated barrel for fire-forming, this should help keep your round-count down. Note: With this fouler fire-forming routine, you should ALWAYS do the fire-forming with the SAME POWDER you load for your match ammo. Joel currently works as the Supplier Quality Process Engineer for MMI-TruTec, a company that offers barrel surface coatings that can further extend your barrel life.
The U.S. Army Marksmanship Unit published a series of reloading “how-to” articles on the USAMU Facebook page. A while back the USAMU’s reloading gurus looked at the subject of cartridge run-out and what can be done to produce straighter ammo. Tasked with producing thousands of rounds of ammo for team members, the USAMU’s reloading staff has developed smart methods for improving concentricity, even with budget-priced dies. For other hand-loading tips, visit the USAMU Facebook page.
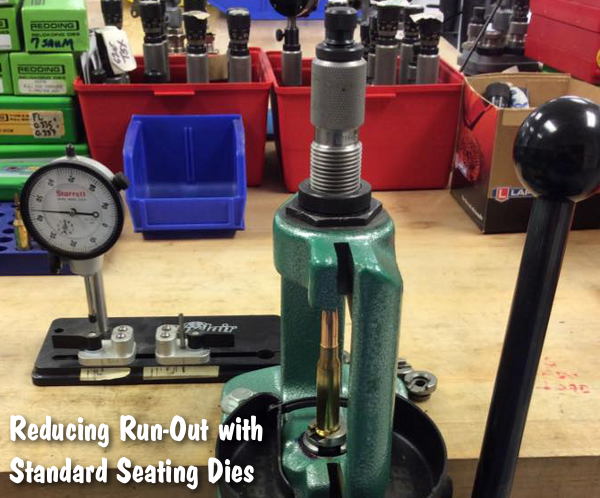
Minimizing Runout with Standard Seating Dies
This USAMU article explains how to set up standard bullet seating dies dies to minimize Total Indicated Run-out (TIR). The loading process is described using a single-stage press since most handloaders have one. A high-quality run-out gauge is essential for obtaining consistent, accurate results.
Having sized, primed, and charged our brass, the next step is bullet seating. Many approaches are possible; one that works well follows. When setting up a standard seating die, insert a sized, trimmed case into the shellholder and fully raise the press ram. Next, back the seating stem out and screw the die down until the internal crimping shoulder touches the case mouth.
Back the die out ¼ turn from this setting to prevent cartridge crimping. Next, lower the press ram and remove the case. Place a piece of flat steel (or window glass, which is quite flat) on the shellholder and carefully raise the ram.
Place tension on the die bottom with the flat steel on the shellholder. This helps center the die in the press threads. Check this by gently moving the die until it is well-centered. Keeping light tension on the die via the press ram, secure the die lock ring. If one were using a match style, micrometer-type seating die, the next step would be simple: run a charged case with bullet on top into the die and screw the seating stem down to obtain correct cartridge OAL.
However, with standard dies, an additional step can be helpful. When the die has a loosely-threaded seating stem, set the correct seating depth but don’t tighten the stem’s lock nut. Leave a loaded cartridge fully raised into the die to center the seating stem in the die. Then, secure the stem’s lock nut. Next, load sample cartridges and check them to verify good concentricity.
One can also experiment with variations such as letting the seating stem float slightly in the die to self-center, while keeping correct OAL. The run-out gauge will show any effects of changes upon concentricity. However, this method has produced excellent, practical results as evidenced by the experiment cited previously. These results (TIR Study 2) will reproduced below for the reader’s convenience.
First, however, let’s examine run-out figures of some factory-loaded match ammunition. This should give readers who are new to TIR gauges some perspective about the TIR ranges one might encounter.
TIR Study 1: 50 rounds Lake City M852 Match 7.62mm
(168 gr. Sierra MatchKings)
0.000” – 0.001” = 2%
0.001” – 0.002” = 30%
0.002” – 0.003” = 16%
0.003” – 0.004” = 22%
0.004” – 0.005” = 14%
0.005” – 0.006” = 14%
0.006” – 0.007” = 0%
0.007” – 0.008” = 2%
TIR Study 2: 50 rounds of .308 match ammo loaded using carefully-adjusted standard dies, vs. 50 using expensive “Match” dies from the same maker.
Standard dies, TIR:
0.000” — 0.001” = 52%;
0.001”– 0.002” = 40%;
0.002”– 0.003” = 8%.
None greater than 0.003”.
Note: both samples were loaded using the O-Ring method, i.e. with a rubber O-Ring placed under the locking ring of the Full-length sizing die to allow that die to float.
These tips are intended to help shooters obtain the best results from inexpensive, standard loading dies. Especially when using cases previously fired in a concentric chamber, as was done above, top-quality match dies and brass can easily yield ammo with virtually *no* runout, given careful handloading.


 The shooting season is now in full swing. When you head to the range you’ll want to be prepared. That means collecting all the gear you’ll need at the range. It’s easy to forget small, critical items, so we’ve provided a checklist of the small “extras” you should pack before you head out to the range. In addition to rifle, rests, ammo, targets, and cleaning gear, here are a dozen essentials you should include in your range bag.
 • Shell-Holder — If you don’t have calipers, you can use a shell-holder to check for excessive case expansion from hot loads. If a fired case doesn’t slip into the shell-holder easily, your load is definitely TOO HOT.
 • Hex Wrench or Screwdriver for action screws — Action screws can work loose with time. Always bring the appropriate hex wrench or screwdriver whenever you go to the range.
 • Extra Batteries — Bring extra batteries for all your electronic gear — which can include chronograph, windmeter, digital camera, GPS etc.
 • Folding Chair or Camp Stool — This comes in handy if you’re spotting for another shooter, or if you reload away from the firing line.
 • Small Plastic Ruler — Use this to measure your group sizes. A transparent (see-through) ruler works best. Rulers are also useful for drawing lines on targets.


 Precision Benchrest and F-Class shooters favor premium brass from


 The headstamp bunter punch has a protrusion on the end to make the primer pocket, and has raised lettering around the face to form the headstamp writing. This is, of course, all a mirror image of the finished case head. Small cases, such as 5.56×45, can be headed with a single strike. Larger cases, like 7.62×51 and 50 BMG, need to be struck once to form a dent for the primer pocket, then a second strike to finish the pocket, flatten the head, and imprint the writing. This second strike works the brass to harden it so it will support the pressure of firing.”

 The
The 


 Here’s a tip for guys who shoot the 6 PPC, 6 Dasher, 6 BRA, .284 Shehane, or other wildcat cartridges that require fire-forming. Use your fouler shots to fire-form new cases. That way your fouler shots do “double-duty” and you get your brass fire-formed without putting extra rounds through your expensive barrel.