Based on the questions we get on a daily basis on our 800 (Customer Support) line, twist is one of the most misunderstood subjects in the gun field. So let’s look deeper into this mystery and get a better understanding of what twist really means.
When you see the term 1:14″ (1-14) or 1:9″ twist, just exactly what does this mean? A rifle having a 1:14″ twist means the bullet will rotate one complete revolution every fourteen inches of the barrel. Naturally a 1:9″ turns one time every nine inches that it travels down the barrel. Now, here’s something that some people have trouble with. I’ve had calls from shooters thinking that a 1:14″ twist was faster than a 1:9″ because the number was higher with the 1:14″. The easiest way to remember this is the higher the number, the slower the twist rate is.
Now, the biggest misconception is that if a shooter has a .223 with a 1:8″ twist, his rifle won’t stabilize a 55gr bullet or anything lighter. So let’s look at what is required. The longer a bullet is for its diameter, the faster the twist has to be to stabilize it. In the case of the .223 with a 1:8″ twist, this was designed to stabilize 80gr bullets in this diameter. In truth the opposite is true. A 1:8″ will spin a 55gr faster than what is required in order to stabilize that length of bullet. If you have a bullet with good concentricity in its jacket, over-spinning it will not [normally] hurt its accuracy potential. [Editor’s Note: In addition, the faster twist rate will not, normally, decrease velocity significantly. That’s been confirmed by testing done by Bryan Litz’s Applied Ballistics Labs. There may be some minor speed loss.]
Many barrel-makers mark the twist rate and bore dimensions on their barrel blanks.
Think of it like tires on your truck. If you have a new set of tires put on your truck, and they balance them proper at the tire shop, you can drive down a street in town at 35 MPH and they spin perfect. You can get out on the highway and drive 65 MPH and they still spin perfect. A bullet acts the same way.
Once I loaded some 35gr HP bullets in a 22-250 Ackley with a 1:8″ twist. After putting three shots down range, the average velocity was 4584 FPS with an RPM level of 412,560. The group measured .750″ at 100 yards. This is a clear example that it is hard to over-stabilize a good bullet.
Twist-rate illustration by Erik Dahlberg courtesy FireArmsID.com. Krieger barrel photo courtesy GS Arizona.
Getting started in long-range shooting? Need some pointers on gun set-up and hardware options? Bryan Litz of Applied Ballistics has created a helpful series of videos for the NSSF covering long range shooting. Bryan, a past F-TR Long-Range National Champion and Chief Ballistician for Berger Bullets, knows his stuff. His Applied Ballistics squad was the winning team at the 2016 King of 2 Miles event. Here are four (4) videos, each covering a topic of interest for long-range shooters. Running 3-4 minutes each, these videos can help you get started, and invest wisely when acquiring your next long-range rifle, scope, and accessories.
Long Range Precision — The Keys to Success
TIP for Plotting Long Range Trajectories: You want to know the true, actual ballistic coefficients of your loads. The BCs listed by manufacturers for their projectiles may be somewhat unreliable — the real BC could be higher or lower (and BC can change with velocity). That can result in problems at longer distances. Using sophisticated equipment, Applied Ballistics has measured true BCs for hundreds of projectiles. Plugging these verified numbers into your Ballistics App can improve your hit percentage at long range.
Tools of Choice — Purpose-Built Long Range Rifles
TIP for Choosing a Rifle: When you’re selecting a rifle for long range shooting, it’s important to understand your application and objectives. The applications for long-range shooting can be very refined. You have to select all the details of your application to select the correct rifle. Here are two examples — a semi-auto AR-platform rifle with scope and a bolt-action Fullbore (Palma) rifle with aperture sights. There are many other long range disciplines — F-TR for example. The F-TR rig uses a bipod and rear bag and a scope. To be competitive, a modern F-TR rig should shoot well under half-MOA.
Equipment Advice — Upgrading Your Hardware
TIP for Upgrading Your Rifle: At some point factory rifle owners will recognize weak links in the equipment chain. You can run that factory rifle for quite some time, but the barrel is eventually what’s going to hold you back. The twist-rate may not be high enough to stabilize the high-BC bullets. So the first thing you’re going to want to upgrade is the barrel. You want to get a fast twist-rate barrel with a chamber that is optimized for the bullet you’ll be shooting. A good-quality, custom barrel will be easier to clean, and it will improve the overall accuracy and precision of your shooting.
Big Boomers — Large-Caliber Rifles for Long Range
TIP for Shooting Hard-Recoiling Rifles: Bryan Litz defines “Large Caliber” as .338 caliber and bigger. These rifles can shoot heavy bullets with high BCs. However there are some trade-offs. It can be hard to maintain good fundamentals of marksmanship (trigger control, sight alignment) when you’re fighting heavy recoil and burning 100+ grains of powder. You’re dealing with the challenges that high energy brings. You want a muzzle brake with any cartridge .338 or above. Also, when considering lathe-turned solid bullets, remember that these typically have less sectional density compared to lead-cored bullets with similar profiles. This affects ballistics as well as recoil energy.
Want to improve your understanding of Ballistics, Bullet Design, Bullet Pointing, and other shooting-related tech topics? Well here’s a treasure trove of gun expertise. Applied Ballistics offers dozens of FREE tech articles on its website. Curious about Coriolis? — You’ll find answers. Want to understand the difference between G1 and G7 BC? — There’s an article about that.
“Doc” Beech, technical support specialist at Applied Ballistics says these articles can help shooters working with ballistics programs: “One of the biggest issues I have seen is the misunderstanding… about a bullet’s ballistic coefficient (BC) and what it really means. Several papers on ballistic coefficient are available for shooters to review on the website.”
Credit Shooting Sports USA Editor John Parker for finding this great resource. John writes: “Our friends at Applied Ballistics have a real gold mine of articles on the science of accurate shooting on their website. This is a fantastic source for precision shooting information[.] Topics presented are wide-ranging — from ballistic coefficients to bullet analysis.”
Here are six (6) of our favorite Applied Ballistics articles, available for FREE to read online. There are dozens more, all available on the Applied Ballistics Education Webpage. After Clicking link, select Plus (+) Symbol for “White Papers”, then find the article(s) you want in the list. For each selection, then click “Download” in the right column. This will send a PDF version to your device.
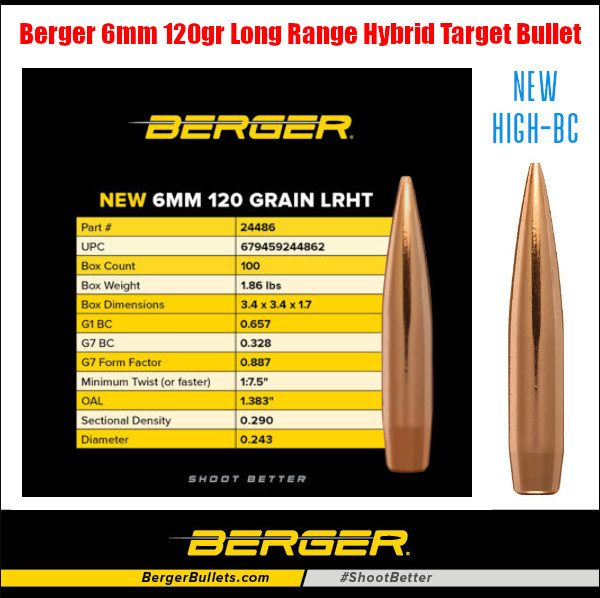
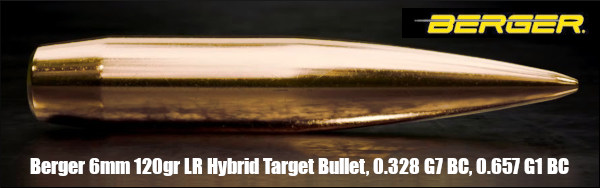
Berger has recently introduced a very impressive new projectile, a 120-grain 6mm (.243) Long Range Hybrid Target (LRHT) bullet, that offers an ultra-high Ballistic Coefficient (BC) along with very impressive accuracy. This new bullet has already proven itself in competition. Read on to learn more about tests of the new 120-grainer by Ultimate Reloader (Gavin Gear) and Applied Ballistics (Bryan Litz). Both those tests, featured in videos below, demonstrated the new 6mm 120gr LRHT bullet is very consistent and has an ultra-high BC. Berger reports these new heaviest-in-class 6mm bullets have “Doppler radar-verified performance with less than 1% BC Standard Deviation.”
Ultimate Reloader Tests New Berger 120gr LRHT 6mm Bullets
Here’s a good video with tests of Berger’s new 120gr 6mm bullet. The test was done with Lapua 6.5×47 brass necked down to 6mm. Ultimate Reloader’s Gavin Gear reports that the bullet proved to be extremely consistent in both weight and max ogive diameter and had a very consistent BC. This means it is relatively easy to find a very accurate load that also exhibits ultra-low ES and SD. The new 120-grainer should prove popular for mid- and long-range benchrest, PRS/NRL, silhouette matches, and 300m competition. Recommended minimum barrel twist rate is 1:7.5″.
Berger 6mm 120 Grain Long Range Hybrid Target bullets are available now in 100-count, 500-count, and new 1500-count Berger Competition Packs.
Bryan Litz Tests New Berger 120gr LRHT 6mm Bullet
Berger’s new 120gr 6mm LRHT bullet was also recently tested by Bryan Litz of Applied Ballistics. Bryan confirmed the new 120-grainer has an extremely high BC and has very consistent weight, dimensions, and BC values. In this video, the Berger .243 cal (6mm) 120 gr Long Range Hybrid Target bullet is tested at 300 yards with Doppler radar to measure ballistic performance, as well as precision. The results are discussed, as well as stability requirements.
Load with 6mm Creedmoor Cartridge:
Peterson small rifle primer brass
CCI-450 small rifle magnum primers
Vihtavuori N565 powder
Berger 6mm 120gr LRHT seated 0.015″ off lands
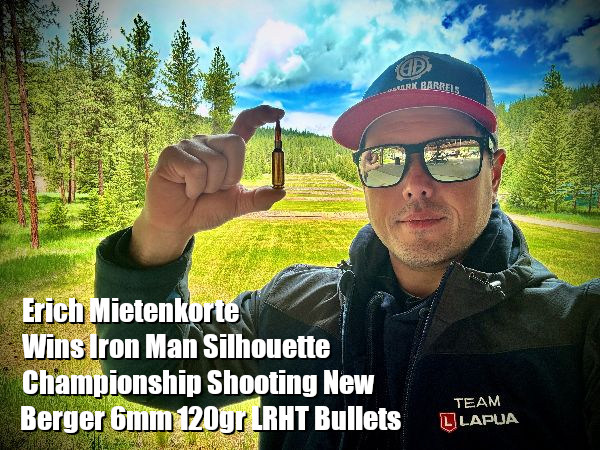
New 6mm Berger Bullet Wins Major Silhouette Championship
How does this new, high-BC 6mm Berger LRHT bullet actually perform in competition? Well the answer is this new 120-grainer in definitely a winner. This new bullet was recently used to win a major national silhouette championship, showing stellar performance.
Berger’s new 6mm 120gr Long Range Hybrid Target (LRHT) bullet was used by Erich Mietenkorte to win the recent 2026 Iron Man Metallic Silhouette Championship. Using the 120gr LRHT, Mietenkorte not only claimed the High Power and Overall Aggregate titles but also tied the all-time Aggregate record and completed the prestigious Bull River Ultra Slam (knocking down 20 consecutive rams).
“Berger’s new 6mm 120gr Long Range Hybrid Target bullets performed exactly how you’d want in a championship,” said Erich Mietenkorte. “Vihtavuori N140 with 120gr LRHTs produced outstanding precision from the start. Five-shot groups at 200 meters averaged 1/4 MOA, and that accuracy held all the way to 500 meters.”
Designed for long-range precision, the Berger 6mm 120 Grain LRHT is heaviest-in-class and offers exceptional performance and features:
Industry-leading 0.328 G7 ballistic coefficient (BC)
Hybrid ogive design for easy tuning and jump tolerance
Meplat Reduction Technology (MRT) for enhanced consistency
Doppler radar-verified performance with less than 1% BC Standard Deviation
About the Iron Man Silhouette Championship
The Iron Man Silhouette Championship lives up to its name. Over the course of the two-day event, competitors fire a grueling 320 shots for record, all from the standing offhand position—two 40-shot Smallbore Rifle matches each morning and two 40-shot High-Power Rifle matches each afternoon. Targets range from 40 to 100 meters for Smallbore (.22 LR) and 200 to 500 meters for High-Power (centerfire).
Over the past 12 months, this article was one of the TOP 20 most-read Daily Bulletin features. We’re reprising it today for those who may have missed it the first time. The above diagram comes from a TiborasurasRex YouTube Video comparing G1 and G7 BC models. CLICK HERE to watch the video.
The better, up-to-date ballistics programs let you select either G1 or G7 Ballistic Coefficient (BC) values when calculating a trajectory. The ballistic coefficient (BC) of a body is a measure of its ability to overcome air resistance in flight. You’ve probably seen that G7 values are numerically lower than G1 values for the same bullet (typically). But that doesn’t mean you should select a G1 value simply because it is higher.
Some readers are not quite sure about the difference between G1 and G7 models. One forum member wrote us: “I went on the JBM Ballistics website to use the web-based Trajectory Calculator and when I got to the part that gives you a choice to choose between G1 and G7 BC, I was stumped. What determines how, or which one to use?”
The simple answer is the G1 value normally works better for shorter flat-based bullets, while the G7 value should work better for longer, boat-tailed bullets.
G1 vs. G7 Ballistic Coefficients — Which Is Right for You?
G1 and G7 refer both refer to aerodynamic drag models based on particular “standard projectile” shapes. The G1 shape looks like a flat-based bullet. The G7 shape is quite different, and better approximates the geometry of a modern long-range bullet. So, when choosing your drag model, G1 is preferable for flat-based bullets, while G7 is ordinarily a “better fit” for longer, boat-tailed bullets.
Drag Models — G7 is better than G1 for Long-Range Bullets
Many ballistics programs still offer only the default G1 drag model. Bryan Litz, author of Applied Ballistics for Long Range Shooting, believes the G7 standard is preferrable for long-range, low-drag bullets: “Part of the reason there is so much ‘slop’ in advertised BCs is because they’re referenced to the G1 standard which is very speed sensitive. The G7 standard is more appropriate for long range bullets. Here’s the results of my testing on two low-drag, long-range boat-tail bullets, so you can see how the G1 and G7 Ballistic coefficients compare:
G1 BCs, averaged between 1500 fps and 3000 fps:
Berger 180 VLD: 0.659 lb/in²
JLK 180: 0.645 lb/in²
The reason the BC for the JLK is less is mostly because the meplat was significantly larger on the particular lot that I tested (0.075″ vs 0.059″; see attached drawings).
For bullets like these, it’s much better to use the G7 standard. The following BCs are referenced to the G7 standard, and are constant for all speeds.
Many modern ballistics programs, including the free online JBM Ballistics Program, are able to use BCs referenced to G7 standards. When available, these BCs are more appropriate for long range bullets, according to Bryan.
[Editor’s NOTE: BCs are normally reported simply as an 0.XXX number. The lb/in² tag applies to all BCs, but is commonly left off for simplicity.]
This article is copyright 2026 AccurateShooter.com. No 3rd Party republication of this article is allowed without advance approval and payment of licensing fees.
Want to improve your understanding of Ballistics, Bullet Design, Bullet Pointing, and other shooting-related tech topics? Well here’s a treasure trove of gun expertise. Applied Ballistics offers dozens of FREE tech articles on its website. Curious about Coriolis? — You’ll find answers. Want to understand the difference between G1 and G7 BC? — There’s an article about that.
“Doc” Beech, technical support specialist at Applied Ballistics says these articles can help shooters working with ballistics programs: “One of the biggest issues I have seen is the misunderstanding… about a bullet’s ballistic coefficient (BC) and what it really means. Several papers on ballistic coefficient are available for shooters to review on the website.”
Credit Shooting Sports USA Editor John Parker for finding this great resource. John writes: “Our friends at Applied Ballistics have a real gold mine of articles on the science of accurate shooting on their website. This is a fantastic source for precision shooting information[.] Topics presented are wide-ranging — from ballistic coefficients to bullet analysis.”
Here are five (5) of our favorite Applied Ballistics articles, available for FREE to read online. There are dozens more, all available on the Applied Ballistics Education Webpage. After Clicking link, select Plus (+) Symbol for “White Papers”, then find the article(s) you want in the list. For each selection, then click “Download” in the right column. This will send a PDF version to your device.
Want to improve your understanding of Ballistics, Bullet Design, Bullet Pointing, and other shooting-related tech topics? Well here’s a treasure trove of gun expertise. Applied Ballistics offers dozens of FREE tech articles on its website. Curious about Coriolis? — You’ll find answers. Want to understand the difference between G1 and G7 BC? — There’s an article about that.
“Doc” Beech, technical support specialist at Applied Ballistics says these articles can help shooters working with ballistics programs: “One of the biggest issues I have seen is the misunderstanding… about a bullet’s ballistic coefficient (BC) and what it really means. Several papers on ballistic coefficient are available for shooters to review on the website.”
Credit Shooting Sports USA Editor John Parker for finding this great resource. John writes: “Our friends at Applied Ballistics have a real gold mine of articles on the science of accurate shooting on their website. This is a fantastic source for precision shooting information[.] Topics presented are wide-ranging — from ballistic coefficients to bullet analysis.”
Here are six (6) of our favorite Applied Ballistics articles, available for FREE to read online. There are dozens more, all available on the Applied Ballistics Education Webpage. After Clicking link, select Plus (+) Symbol for “White Papers”, then find the article(s) you want in the list. For each selection, then click “Download” in the right column. This will send a PDF version to your device.
Are you curious about bullet stabilization? Do you understand why bullets can tumble or become unstable if the velocity gets too low or if the twist rate is inadequate. Here is an excellent video from Gunwerks that explains Bullet Stabilization.
This animated video starts by showing the design/shape differences between an older-style rifle bullet and a newer VLD-style bullet with higher BCs (Ballistic Coefficients). Generally speaking, the longer a bullet gets relative to diameter, the more RPM is required for stability. And to achieve that higher RPM you need more barrel twist and/or more RPM. The video illustrates where the Center of Gravity and the Center of Pressure are located. These are farther apart (in relative terms) for a VLD or Hybrid-style, long-nose bullet.
When the bullet is in flight there is an angle of attack. This is exaggerated in the animation for illustration purposes, but it is important to understand the the attack angle affect stability. The rotation rate (Revolutions Per Minute) is a function of bullet velocity as it leaves the muzzle and the twist rate of the barrel. Since long VLD-style bullets need more stability, the barrel twist rate needs to be higher than with shorter, fatter bullets. This is pretty much try for all calibers.
The importance of adequate barrel twist rates for bullet stabilization is further discussed in this next video featuring Bryan Litz of Applied Ballistics:
Bullet Stability and Twist Rates
In this video, Bryan Litz talks about bullet in-flight stability and how to calculate barrel twist-rate requirements for long-range bullets. Bryan explains that bullet stability (for conventional projectiles) is basically provided by the spinning of the bullet. But this spin rate is a function of BOTH the nominal twist rate of the barrel AND the velocity of the projectile. Thus, when shooting the same bullet, a very high-speed cartridge may work with a slower barrel twist rate than is required for a lower-speed (less powerful) cartridge. For match bullets, shot at ranges to 1000 yards and beyond, Bryan recommends a twist rate that offers good stability.
The Applied Ballistics Facebook Page features great, interesting new content posted multiple times each week. This resource features videos, test results, accuracy tips, and samples from Bryan Litz’s excellent books on ballistics and the three volume series on Modern Advancements in Long Range Shooting. Here are some highlights from Applied Ballistics’ Facebook posts from the past two weeks. Plus there’s a discount code, READ2026, that can save you 25% on Applied Ballistics books purchased in the month of March.
.22 LR Super Slow Motion Video — Watch the Bullet!
Watch .22 LR Rimfire Projectile Exiting Rifle Muzzle
This video, filmed with an ultra-high-speed camera, shows the milliseconds in time as a .22-caliber bullet travels the first 11 inches after leaving a .22 LR rifle barrel. Applied Ballistics states: “Notice that the bullet is fully obturated to the internal bore dimension — the step/rebate that exists on the unfired bullet where it meets the case gets expanded (obturated) and doesn’t exist on the fired bullet.”
How Important is Case Fill Ratio — You May Be Surprised
Conventional reloading practice is to select a powder that gives you a good case fill, meaning 90%-100% fill ratio for the cartridge and bullet you’re using. But why?
Some say that a higher fill ratio is good because it prevents the powder from settling differently in the case (which could lead to inconsistent ignition and greater MV SD). This explanation sounds good, and went unchallenged for a long time. However, Applied Ballistics has done some interesting testing that sheds new light on the density issue.
Modern Advancements in Long Range Shooting – Vol. 2 contains the results of Applied Ballistics tests of five different cartridge types — .223 Rem to .338 Lapua — loaded with different powders to produce fill ratios of 80%, 90%, and 100%. The testers wanted to see if 100% fill ratios actually gave better results (lower MV SDs) than the lower fill ratios.
Results of testing 3 different loads in 5 different cartridges — The highest MV SD was in fact measured in an 80% fill ratio load. However, the lowest MV SD was also measured for a different 80% load! Seems like the more we learn, the more questions we have. An informative Applied Ballistics podcast covers the Fill Ratio test. Visit Thescienceofaccuracy.com to access this and interesting podcasts.
EDITOR’s NOTE: There were multiple comments from Facebook readers stating that fill ratios 90% and above worked more consistently for them. And the reloading manuals warn against very low fill ratios.
Get 25% Off Applied Ballistics Books in March 2026
Applied Ballistics, through its Science of Accuracy webstore, is currently offering big savings on its popular books — considered to be the best print resources about rifle accuracy/ballistics ever published. This month you can save 25% on all Applied Ballistics book titles by respected expert (and past national champion) Bryan Litz. Use Code READ2026 to get 25% of one or more of these books.
Get 25% OFF Applied Ballistics Books! Use code: READ2026 at checkout.
Initial radar testing shows an interesting stability trend for slugs vs. pellets: drag is minimized for pellets in slower-twist barrels, while drag of slugs is minimized for a faster twist. Also, consistency of drag/BC is best when drag is minimized (BC maximized).
Show below are test data for .300 caliber 44.5 grain Slug and .300 caliber 44.8 grain Pellet, both shot from an air rifle around 800 FPS. Experienced air rifle shooters told us to expect this so it’s nice to see the measurements supporting this trend!
So why is fast twist good for slugs while bad for pellets and vice versa? Air rifle pellets with a skirt are mostly drag-stabilized, not spin-stabilized. So, they don’t need much if any spin at all to fly point forward; the skirt catches the air like the fins of a rocket. As such, spinning the pellets faster only becomes a problem of dynamic stability. If I had any suggestion after looking at this data, it would be to try an even slower twist for pellets, perhaps a 1:60″ (one turn in 5 feet) or even 1:120″.
Slugs are spin-stabilized so it reasons that more spin suppresses yaw and maximizes BC, to a point. Based on these results, it appears the slug is reaching max stability/BC with the 1:22″ and the 1:18″ provides no further benefit. Again, these are just initial findings, we’re eager to explore further in the coming weeks! To view our recent Air Rifle projectile testing, with full 8-minute video, CLICK HERE.


 The better, up-to-date ballistics programs let you select either G1 or G7 Ballistic Coefficient (BC) values when calculating a trajectory. The ballistic coefficient (BC) of a body is a measure of its ability to overcome air resistance in flight. You’ve probably seen that G7 values are numerically lower than G1 values for the same bullet (typically). But that doesn’t mean you should select a G1 value simply because it is higher.
 Drag Models — G7 is better than G1 for Long-Range Bullets


 Some say that a higher fill ratio is good because it prevents the powder from settling differently in the case (which could lead to inconsistent ignition and greater MV SD). This explanation sounds good, and went unchallenged for a long time. However, Applied Ballistics has done some interesting testing that sheds new light on the density issue.