To get the best accuracy out of any benchrest rifle, you need to find the optimal position of front rest and rear bag. The important point to remember is that each rig is different. One gun may perform best with the front rest right at the tip of the forearm (Position ‘D’ in photo), while another gun will work best with the rest positioned much further back. This Editor’s own 6mmBR rifle has a laminated stock that is pretty flexy in the front. It shoots best with the front rest’s sandbag located a good 6″ back from the forearm tip (position ‘A’).
Here’s some benchrest advice that can help you reduce vertical and shoot tighter groups… without spending another penny. Many benchrest shooters spend a fortune on equipment and devote countless hours to meticulous handloading, but they never experiment with their rifle’s position/balance on the bags. This article explains why you should test your rifle in various positions. What you learn may surprise you (and improve your scores).
Next time you go to the range, experiment with the position of your rifle on the front rest, and try a couple different positions for the rear bag. You may find that the rifle handles much better after you’ve made a small change in the placement of your gun on the bags. Recoil can be tamed a bit, and tracking can improve significantly, if you optimize the front rest and rear bag positioning.
This competitor has the front rest positioned fairly far forward but not all the way out. Note the stop on the front rest — this limits forward stock travel.
A small change in the position of the forearm on the front rest, or in the placement of the rear bag, can make a big difference in how your gun performs.
Balance Your Gun BEFORE You Spend Hours Tuning Loads
In the pursuit of ultimate accuracy, shooters may spend countless hours on brass prep, bullet selection, and load tuning. Yet the same shooters may pay little attention to how their gun is set-up on their front rest and rear bag. When you have acquired a new rifle, you should do some basic experimentation to find the optimal position for the forearm on the front rest, and the best position for the rear bag. Small changes can make a big difference.
Joel Kendrick, past IBS 600-yard Shooter of the Year, has observed that by adjusting forearm position on the front rest, he can tune out vertical. He has one carbon-fiber-reinforced stock that is extremely rigid. When it was placed with the front rest right under the very tip of the forearm, the gun tended to hop, creating vertical. By sliding the whole gun forward (with more forearm overhang ahead of the front sandbag), he was able to get the whole rig to settle down. That resulted in less vertical dispersion, and the gun tracked much better.
Fore/aft stock position is important even with very wide fore-ends.
Likewise, the placement of the rear bag is very important. Many shooters, by default, will simply place the rear bag the same distance from the front rest with all their guns. In fact, different stocks and different calibers will NOT behave the same. By moving the rear bag forward and aft, you can adjust the rifle’s overall balance and this can improve the tracking significantly. One of our shooters had a Savage 6BR F-Class rifle. By default he had his rear bag set almost all the way at the end of the buttstock. When he slid the rear bag a couple inches forward the gun tracked much better. He immediately noticed that the gun returned to point of aim better (crosshairs would stay on target from shot to shot), AND the gun torqued (twisted) less. The difference was quite noticeable.
A small change in the position of the forearm on the front rest, or in the placement of the rear bag, can make a big difference in how your gun performs. You should experiment with the forearm placement, trying different positions on the front rest. Likewise, you can move the rear bag back and forth a few inches. Once you establish the optimal positions of front rest and rear bag, you should find that your gun tracks better and returns to battery more reliably. You may then discover that the gun shoots smaller groups, with less vertical dispersion. And all these benefits are possible without purchasing any expensive new gear.
If you want smoother bullet seating, inside neck lube can help. Forum member Ackleyman II likes to add a little Mica powder inside his case necks before seating bullets. This is easily done with the Forster three-brush neck lube kit. Ackleyman tells us: “Many loads that I have will not shoot well with a dry neck compared to a neck that is cleaned and lubed with this [Forster Dry Lubricator] — the best $15 you have ever spent.”
The Forster Case Neck Lubricator features three brushes attached to a tough, impact-resistant case with holes for bench mounting. The brushes accommodate all calibers from 22 to 35 caliber. The kit includes enough “motor mica” to process 2000 to 3000 cases and has a cover to keep dust and grit from contaminating the mica. By moving the case neck up and down on the correct mica-covered brush, the neck can be cleaned and lubricated at the same time.
Function: Lubricate case necks for easier resizing
Contents: Kit with base, lid, and three nylon brushes
Lubricant: Includes 1/10 oz. of Motor Mica, enough to process 2000-3000 cases
Neck Lubrication After Ultrasonic Cleaning or Wet Tumbling with Pins
If you wet-tumble your cases with stainless media and solvents or ultrasonically clean your brass, you may find that the inside of the case necks get too “squeaky clean”. The inside surface of the neck looses lubricity. In this situation, applying a dry lube can definitely be beneficial. CLICK HERE to see story about ultrasonic cleaning.
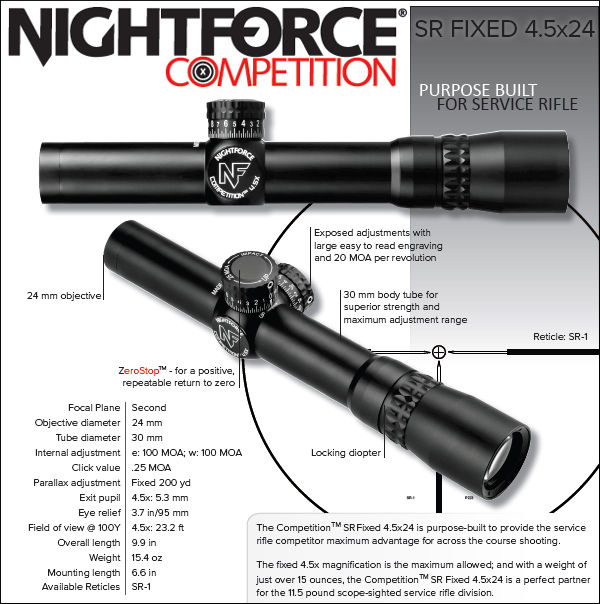
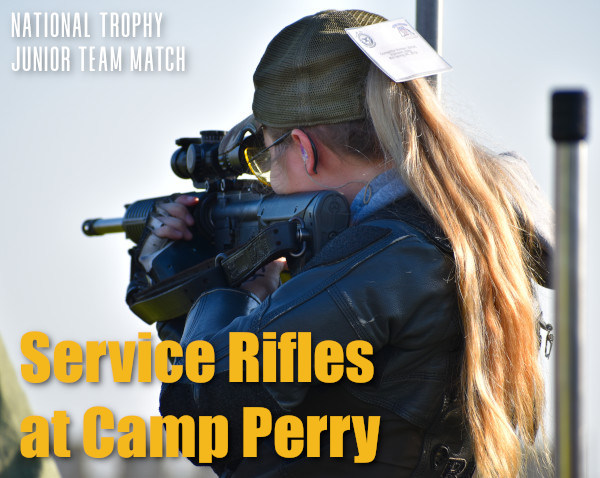
In Service Rifle competition in the United States, scopes are currently limited to a maximum magnification of 4.5 power (4.5X). Both the NRA and CMP rulebooks stipulate that variable and fixed scopes cannot exceed this power, and the objective lens diameter must not exceed 34mm.
Service Rifle Scope Configuration Rules
Maximum Magnification: 4.5x power is the max magnification allowed for Service Rifles.
Variable Power Limit: If using a variable scope, it can have any magnification range as long as it cannot be dialed higher than 4.5X.
Lens Size: 34mm is the maximum allowed objective lens diameter.
Sight Consistency: The same optical sight must be used for all stages of a course of fire. Changing optics between slow-fire and rapid-fire strings is prohibited.
Mount Height: The scope centerline must be no higher than 3.5 inches above the barrel bore centerline.
Popular Service Rifle Optics
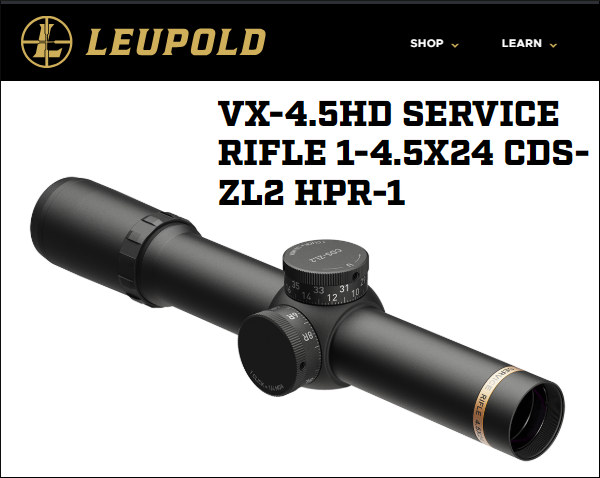
Because of the 4.5X power limit and 34mm max objective size, Service Rifle competitors typically run purpose-built AR-optimized service rifle optics or tactical low-power variable optics (LPVOs). The most popular service rifle optics include:
Sightron S-TAC 1-4.5X24mm SR-1/AR-1 Scope
Nightforce Competition SR Fixed 4.5x24mm
Leupold VX-4.5HD Service Rifle 1-4.5x24mm CDS-ZL2 HPR-1
Forest of Windflags at World Benchrest Championships in France in 2011
There’s a simple, inexpensive “miracle device” that can cut your groups in half. If you’re not using this device, you’re giving away accuracy. The “miracle device” to which we refer is a simple wind indicator aka “windflag”. Using windflags may actually improve your accuracy on target much more than weighing charges to the kernel, or spending your life savings on the “latest and greatest” hardware.
Remarkably, many shooters who spend $3000.00 or more on a precision rifle never bother to set up windflags, or even simple wood stakes with some ribbon to show the wind. Whether you’re a competitive shooter, a varminter, or someone who just likes to punch small groups, you should always take a set of windflags (or some kind of wind indicators) when you head to the range or the prairie dog fields. And yes, if you pay attention to your windflags, you can easily cut your group sizes in half. Here’s proof…
Which Windflag to buy? For starters, MTM makes a simple, inexpensive flag sold on Amazon for $17.99. For more sophisticated flags CLICK HERE for Benchrest Central windflag vendors.
Miss a 5 mph Shift and You Could DOUBLE Your Group Size
The table below records the effect of a 5 mph crosswind at 100, 200, and 300 yards. You may be thinking, “well, I’d never miss a 5 mph let-off.” Consider this — if a gentle 2.5 mph breeze switches from 3 o’clock (R to L) to 9 o’clock (L to R), you’ve just missed a 5 mph net change. What will that do to your group? Look at the table to find out.
Values from Point Blank Ballistics software for 500′ elevation and 70° temperature.
Imagine you have a 6mm rifle that shoots half-MOA consistently in no-wind conditions. What happens if you miss a 5 mph shift (the equivalent of a full reversal of a 2.5 mph crosswind)? Well, if you’re shooting a 68gr flatbase bullet, your shot is going to move about 0.49″ at 100 yards, nearly doubling your group size. With a 105gr VLD, the bullet moves 0.28″ … not as much to be sure, but still enough to ruin a nice small group. What about an AR15, shooting 55-grainers at 3300 fps? Well, if you miss that same 5 mph shift, your low-BC bullet moves 0.68″. That pushes a half-inch group well past an inch. If you had a half-MOA capable AR, now it’s shooting worse than 1 MOA. And, as you might expect, the wind effects at 200 and 300 yards are even more dramatic. If you miss a 5 mph, full-value wind change, your 300-yard group could easily expand by 2.5″ or more.
If you’ve already invested in an accurate rifle with a good barrel, you are “throwing away” accuracy if you shoot without wind flags. You can spend a ton of money on fancy shooting accessories (such as expensive front rests and spotting scopes) but, dollar for dollar, nothing will potentially improve your shooting as much as a good set of windflags, used religiously.
New Wind Reading App — High Power Wind Lab
There is an innovative new Wind-Reading App, the High Power Wind Lab, that can help you figure your hold-offs in all wind conditions. This is available now for iOS devices, and an Android version is coming soon. In this video, our friend F-Class John reviews this sophisticated new Wind App:
MidwayUSA Foundation provides significant cash grants to youth shooting programs. Team grant applications are reviewed and decided upon by the MidwayUSA Foundation Board of Directors twice per year — in December and June. The current deadline to apply is June 15, 2026, just 12 days away. NOTE: Eligible teams and organizations must submit their application by the mid-June deadline.
MidwayUSA Foundation grants provide cash that youth shooting sports programs use to cover essential expenses, including ammunition, targets, entry fees, travel, and safety equipment. Programs with a MidwayUSA Foundation endowment receive 5% of their endowment balance. Youth shooting teams must have at least $2,000 in their Team Endowment Account before they can apply for a grant.
“The funding from MidwayUSA Foundation has helped our team to participate in more events throughout the season and buy gear for the team,” said Jason Giovannone, Heathwood Hall Highlanders Head Coach. This South Carolina youth shooting team has received nearly $50,000 in cash grants so far.
MidwayUSA Foundation’s endowment model helps youth shooting programs achieve financial stability. The Foundation’s nearly $500 million in endowment funds are invested, adding market earnings to every active endowment. And, along with industry sponsors, the public charity offers FREE fundraising product grants to help teams fundraise in their communities, and the Foundation’s website allows any donor the ability to give to the youth shooting team of their choice. These contributions are also matched, dollar-for-dollar with generous funding from Larry and Brenda Potterfield.
Since its inception, MidwayUSA Foundation has awarded over $99 million in cash grants to support youth shooting sports, including $7.6 million in 2026 alone. Teams are encouraged to apply for their grant every year and can do so through the Foundation’s online system. Learn more on the team grants webpage.
The MidwayUSA Foundation is a 501(c)(3) public charity providing long-term funding to youth shooting teams. Every donation made is 100% tax-deductible. The Foundation supports all shooting disciplines. For more information visit Midwayusafoundation.org or call 1-877-375-4570.
We really like to see this kind of major support for youth marksmanship programs. Young people are the future of recreational and competitive shooting.
Photo by SFC Brandon Green, 2018 National High Power Champion.
The prestigious CMP National Matches will be held at Camp Perry, Ohio this summer, July 12 through August 9, 2026. The President’s 100 Match runs Monday, July 27th, followed by Individual and Team Trophy Matches. And the Garand and Modern Military events kick off on August 1st, while 600-yard Mid-Range rifle matches run August 3-4, with Long Range following, concluding with the Palma Team match on August 9.
For those competing at Camp Perry this summer, we offer some insights from Tyrel Cooper, a multi-time National Champion. A past member of the USAMU, Cooper’s shooting resume includes five national championships (one each in 2008, 2011, 2012, and two in 2013). He won the 2013 NRA National Long Range Championship, as well as the 2013 NRA National Service Rifle Championship. In this article, written in 2014, Cooper explains the mental preparation that helped him win National Titles in 2013.
Below is a 2012 file photo of Ty Cooper shooting a service rifle. Cooper won the 2013 Long Range Championship using a Nesika-actioned bolt gun chambered in 7mm SAUM.
Mental Preparation by Tyrel Cooper Getting focused mentally is an important part of preparation for Perry. In 2011 I was chasing Sherri Gallagher, since then I have been chasing Brandon Green[.] If I get beat by a Service Rifle I am going to make him or her work for it. So there is your peak into my mental process. I go for the top and if I am hanging with them then the Service Rifle National Championship will come, Kind of like how I shoot for X’s and Tens will come.
Now I understand everyone is at different levels. You have to figure out what your goals are and then lie to yourself that you’ve already achieved them. Here is a trick that I used back in 2008: When I was a kid just starting out, my Dad made me read several books on shooting. One of them being With Winning In Mind by Lanny Bassham. One of the things I remember from his book is that he would make notes and place them where he would see them often. They contained his goals or stated he was already a world champion. I took a page from his book and did the same thing.
I made 3×5 cards and wrote my personal best 500 and 800 aggregate scores and taped on the horn of my truck, above the radio in my truck, on my laptop and a few other places I would see them often. Every time I saw those I would tell myself that I average those scores and I would get used to seeing them. By doing this you are lying to yourself to overcome the mental blocks the subconscious mind lays out for you.
I went from my worst year in 2007 to winning my first National Championship in 2008. I kind of slacked off in 2009 because I had reached my goals and didn’t set new ones and it showed, so I had to find new goals and motivation which I did and that pushed me back to the top.
Long story short, this is a mental sport and you have to figure out what you need to do to perform at your highest levels and breaking through those mental road blocks. You have to figure out how to get yourself to relax and control your mind keeping calm when you are shooting a personal best, either standing or on the day.
Here is a tip from my mental process from shooting. First I shoot for Xs, I took the line from the movie The Patriot and applied it to my shooting, “Aim small, miss small” and it is true. If you accept wide shots then you will keep shooting wide shots.
Winning Techniques for Rifle Competition
Slow, Solid, Smooth, Center
Always focus on the positive and good shots, and what you did physically and mentally, when you shot them. When I am nervous and need to calm myself down I tell myself: slow, solid, smooth, center.
Slow
I want my movement to be slow…
I can shoot Tens and Xs all day with slow movement.
Solid
Solid like a rock, a rock doesn’t move and that’s how I want my positions. By saying solid it reminds me to go through my little checks to make sure I am doing what I need to do make that happen.
Smooth
Smooth — that is my trigger word for smooth movement. You don’t want fast choppy movement but slow and smooth. This also reminds me to be smooth on the trigger. You can be smooth-fast or you can be smooth-slow but you have to be smooth and most people aren’t when they think they are. Just before leaving the USAMU, I walked up and down the line of five shooters during a rapid fire string and only one of them was smooth with their trigger control. It’s the second most important thing when it comes to shooting.
Center
This reminds me that I want my shots in the middle. It is just a positive reinforcement of where I want my shots to go. I shoot a reverse flat tire so it also kind of reminds me as to what I am looking for.
Countdown to CMP National Matches:
Story Tip from ELR Researcher. We welcome reader submissions.
Want to learn the basics of position shooting? Then you should check out an article by Gary Anderson, DCM Emeritus, in On the Mark digital magazine (Summer 2014, pp. 6-13). This article covers all the key elements: body position (prone, sitting, standing), sling use/adjustment, sight picture, aiming process, and trigger control. While this 8-page article was specifically written for Rimfire Sporter shooters, the techniques described by Anderson apply to all types of position shooting, whether you shoot air rifles, smallbore rifles, or centerfire rifles.
Here’s what Anderson says about aiming — how to keep your sights steady and get them centered on the middle of the target:
Trigger Contact and Center As soon as aiming at the target begins, the index finger must move from the trigger-guard to contact the trigger. It is important to get initial pressure on the trigger as soon as aiming begins. Then the shooter must focus on the sight picture and centering the sight picture movements over the aiming point. No one, not even champion shooters, can hold the aligned sights perfectly still. The sights are going to move a little bit or a lot, depending on the shooter’s skill level. The secret is to center those sight picture movements over the aiming point on the target (see trace illustration) before pulling the trigger.
When the sight picture movements on the target are centered, the last step in firing the shot is to add… smooth pressure on the trigger until the shot breaks.
Anderson also discusses the 5 Basics of Shot Technique:
BONUS: Olympic Gold Medalist Jamie Gray
Here’s an interesting video about three-position shooting. Produced by GOnra Media, this video demonstrates rifle hold and body alignment for prone, standing, sitting, and kneeling positions. Olympic Gold Medalist Jamie Gray demonstrates the proper stance and position of arms and legs for each of the positions. Ideally, in all of the shooting positions, the shooter takes advantage of skeletal support. The shooter should align the bones of his/her arms and legs to provide a solid foundation. A shooter’s legs and arms form vertical planes helping the body remain stable in the shooting position.
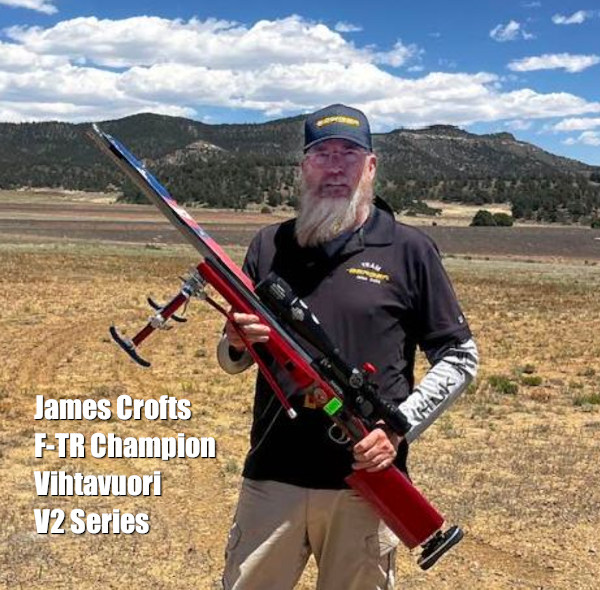
James Crofts of Team Berger has been crowned the 2026 F-TR Vihtavuori V2 Series Champion following an outstanding performance in Raton, New Mexico. Held May 13–16 at the NRA Whittington Center, the Vihtavuori V2 Finale is an invitation-only, long-range championship. The 3-day event features two, 32-shooter brackets in both F-TR and F-Open disciplines. Competitors earn their place in Ratopn by participating in F-Class Points Series qualifying matches, accumulating points based on their finishes. The top 32 shooters in each division advance to the Finale, where they compete in a double-elimination bracket to determine the champion.
Crofts competed in the F-Class Target Rifle (F-TR) category, which has strict equipment requirements. Rifles must weigh no more than 18 pounds, and competitors are limited to standard .308/7.62 NATO or .223/5.56 NATO chambers with no modifications. Crofts loads his .308 Win match ammo with Vihtavuori N150 powder in Lapua .308 Winchester Palma brass. His bullet choice is the Berger 208gr Long Range Hybrid Target, with a 0.689 G1 BC and 0.354 G7 BC.
“With the continued use and support of Berger and their components, I had 100% confidence in my ammunition,” said Crofts. “I knew if I missed or had a bad shot, it wasn’t the ammo — it was the conditions. Berger bullets, Lapua brass, and Vihtavuori powder are hands down the best.”
Berger congratulates James Crofts on his impressive V2 Series win at Raton, NM. What’s next? James will compete with Team USA this fall at the 2026 F-Class World Championships in Bisley, England.
At the request of our readers, we provide select “Deals of the Week”. Every Sunday afternoon or Monday morning we offer our Best Bargain selections. Here are some of the best deals on firearms, hardware, reloading components, optics, and shooting accessories. Be aware that sale prices are subject to change, and once clearance inventory is sold, it’s gone for good. You snooze you lose.
NOTE: All listed products are for sale to persons 18 years of age or older. No products are intended for use by minors.
Palmetto SA — Hot Trending Sale on ARs, Optics, Ammo
⏺️ » Huge discounts on guns and optics
This week there is a Major Sale at Palmetto State Armory. You’ll find great deals on AR lowers, complete ARs, Vortex optics and more. If you are looking to build an AR-based service rifle or varmint rig, this is an excellent opportunity. And there are great deals on ammo also.
MidwayUSA — Case Cleaning & Preparation SALE
⏺️ » Big savings on case prep tools and products
Brass prep is one of the most critical steps when it comes to reloading. If you need to step up your prep game, check out the Case Cleaning & Preparation Sale over at MidwayUSA. A wide variety of quality case prep products are on sale at significant savings — 15% to 30%. From tumblers to trimmers you’ll find everything you need to get your brass in tip-top shape.
As an Amazon affiliate, this site can earn revenues through sales commissions.
Gun Storage Check Week is the time to ensure your firearms are stored safely and securely. NSSF, the Firearm Industry Trade Association, is promoting Gun Storage Check Week, June 1-7, 2025, to remind gun owners to review their storage practices to prevent accidents, suicides and thefts. During this week, check your gun safe(s), and ensure your firearms are stored correctly and locked down properly. Also use secure gun cases when transporting firearms to the range. When traveling by air, use proper TSA-approved gun cases and comply with transport rules.
“Securely storing guns when they’re not in use can save lives. It’s really that simple,” said Joe Bartozzi, President and CEO of NSSF. “No one wants their gun in the hands of an unsupervised child, a person in crisis, someone who does not understand how to safely operate firearms, or a thief. If something bad happens because your gun isn’t stored securely, you’ll regret it, probably forever.”
This video covers gun safety rules and secure storage of firearms.
Gun Storage Check Week’s safety resources highlight many options to store firearms securely so that guns are off limits to unauthorized persons. Secure gun storage devices include:
Cable Locks — Available free of charge through NSSF’s Project ChildSafe® program Lock Boxes — Secure storage solution for guns kept for home security and in vehicles Lockable Gun Cases — for security, portability, and travel Full-size Gun Safes — For owners with multiple firearms to protect against fire and theft.
Enter to Win a Biometric Pistol Lock
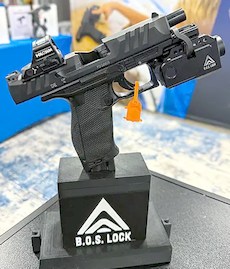
Visitors to GunStorageCheck.org can enter the Gun Storage Check Week Sweepstakes to win a B.O.S. Lock Fusion. This innovative firearm safety device mounts to a handgun’s accessory rail, combining a biometric slide lock with an integrated tactical light and green laser.
The B.O.S. Lock Fusion is the world’s first biometric slide lock that integrates a tactical light and laser into a single, high-performance locking device. Go to GunStorageCheck.org to register. One winner will be chosen.
NOTE: Gain 5 extra entries by watching any of the firearm safety or suicide prevention videos after you complete the entry form.


 There’s a simple, inexpensive “miracle device” that can cut your groups in half. If you’re not using this device, you’re giving away accuracy. The “miracle device” to which we refer is a simple wind indicator aka “windflag”. Using windflags may actually improve your accuracy on target much more than weighing charges to the kernel, or spending your life savings on the “latest and greatest” hardware.


 Getting focused mentally is an important part of preparation for Perry. In 2011 I was chasing Sherri Gallagher, since then I have been chasing Brandon Green[.] If I get beat by a Service Rifle I am going to make him or her work for it. So there is your peak into my mental process. I go for the top and if I am hanging with them then the Service Rifle National Championship will come, Kind of like how I shoot for X’s and Tens will come.


 As soon as aiming at the target begins, the index finger must move from the trigger-guard to contact the trigger. It is important to get initial pressure on the trigger as soon as aiming begins. Then the shooter must focus on the sight picture and centering the sight picture movements over the aiming point. No one, not even champion shooters, can hold the aligned sights perfectly still. The sights are going to move a little bit or a lot, depending on the shooter’s skill level. The secret is to center those sight picture movements over the aiming point on the target (see trace illustration) before pulling the trigger.