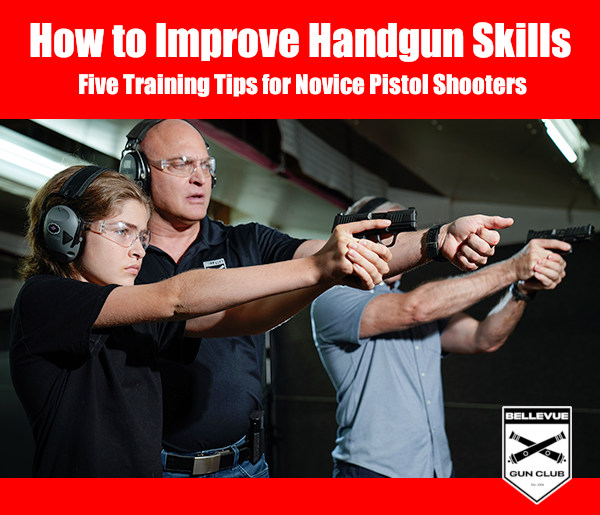
Photo from Training Program at Bellevue Gun Club, Washington State’s “premier indoor shooting facility”.
At AccurateShooter.com, our primary focus is precision target shooting with rifles. But it’s definitely fun to shoot pistols too, and we bet most of our regular readers own handguns. Here are five tips for shooting safely and accurately with handguns. These pointers will help you advance your skills and have more fun with your pistols and revolvers.
1. Make Sure Safety Is Number One
Whether you own one gun or one hundred, gun safety must always be your main priority. In this video, Smith & Wesson Team Captain Julie Golob covers the basics of gun safety.
2. Start with a .22 LR Handgun
We strongly recommend that new pistol shooters start off with a .22 LR rimfire handgun. The .22 LR cartridge is accurate but has very low recoil, less “bark” than a centerfire, and very little smoke and muzzle flash. New shooters won’t have to fight muzzle flip, and won’t develop a flinch from the sharp recoil and muzzle blast common to larger calibers. With the .22 LR, the trainee can focus on sight alignment, breathing, and trigger pull. When he or she has mastered those skills, move on to a .38 Special or 9mm Luger (9x19mm).
What gun to use? We recommend the 10-shot Smith & Wesson Model 617. This is ideal for initial training, shooting single action, slow-fire. You want to focus on sight picture and holding steady. Shown above is the 4″-barrel Model 617 which balances well. There is also a 6″-barrel version. It has a longer sight radius, but is a little nose-heavy. Both are great choices. They are extremely accurate and they boast a very clean, precise trigger.
If you prefer a semi-auto .22 LR pistol, we recommend the Browning Buck Mark series. Buck Marks are very accurate and very reliable. There are now 58 different Buck Mark models, priced at $469.99 to $839.99 MSRP. Retail prices start at about $330 for a basic Buck Mark Camper 22 UFX model. Like the S&W Model 617, a good Buck Mark will serve you for a lifetime.
3. Use Quality Targets with Multiple Aim Points
It’s common for new pistoleros to start shooting at cans or clay birds at a public range. That can be fun, but it’s better to start with proper targets, placed at eye level, at 7-10 yards. We like to use targets with large, brightly colored circles. Focus on putting 5 shots in a circle.
We recommend targets that have multiple bullseyes or aiming points — that way you don’t have to constantly change your target. There are also special paper targets that can help you diagnose common shooting problems, such as anticipating recoil. EZ2C makes very good targets with bright, red-orange aim points. You can also use the bright orange Birchwood Casey stick-on Target Dots (right). These come in a variety of diameters. We like the 2″ dot at 10 yards.
Too many new pistol shooters try to move right to rapid fire drills. It’s better to start slow, practicing the basics, under the guidance of a good mentor. If you belong to a club, ask if there are certified instructors who will help out. This Editor learned pistol shooting from a seasoned bullseye shooter, who got me started with a .22 LR revolver and very close targets. Over the course of a few range sessions we progressed to farther targets and faster pace. But the fundamentals were never forgotten. When starting your pistol training, it’s wise to view some instructional videos. Top Shot Champion Chris Cheng hosts an excellent Handgun 101 Series produced by the NSSF. We’ve linked one of these Handgun 101 videos for Tip #6.
5. SLOW DOWN — This Is Not a Race
When you learned to ride a bicycle, you started slow — maybe even with training wheels. The same principle applies to pistol shooting. When you get started with handguns, we recommend you shoot slowly and deliberately. Start with the handgun unloaded — just work on your sight alignment and breathing. With snap caps in place, try some dry-firing drills. Then progress to live fire. But be deliberate and slow. With the target at 20 feet, see if you can get three successive shot-holes to touch. Believe it or not, many common pistols are capable of this kind of accuracy (but you won’t see many shooters at indoor ranges who pursue that kind of precision). Once you master your form and accuracy, then you can work on your speed.
Do you enjoy shooting pistols for sport, or perhaps you carry a handgun for self-defense? If you’re like most of us, you might benefit from a “refresher course” on the fundamentals of handgun shooting. The NRA has created a useful Infographic that covers important basics of handgun marksmanship — key things such as Sight Alignment, Trigger Control, and Handgun Hold.
Here are the first two (2) lessons. Click the link below to see all SIX (6) training topics: Sight Alignment, Sight Focus, Trigger Control, Breath Control, Hold Control, and Follow-Through.
Video Shows Sight Alignment, Grip, Stance, Trigger Control and More
In this USAMU video, SGT Shane Coley talks about the basics of sight alignment and trigger control. But then SGT Coley talks about other important control factors such as grip, arm position, and body stance. For rapid-fire shooting, you need to have a good arm and body positioning to control recoil and get back on target quickly. This video is a valuable complement to the NRA Infographic because it demonstrates all the important pistol fundamentals during live fire, at the range.
At AccurateShooter.com, our primary focus is precision target shooting with rifles. But it’s definitely fun to shoot pistols too, and we bet most of our regular readers own handguns. Here are six tips for shooting safely and accurately with handguns. These pointers will help you advance your skills and have more fun with your pistols and revolvers. Top image courtesy Sanctuary Gun Club.
1. Make Sure Safety Is Number One
Whether you own one gun or one hundred, gun safety must always be your main priority. In this video, Smith & Wesson Team Captain Julie Golob covers the basics of gun safety.
2. Start with a .22 LR Handgun
We strongly recommend that new pistol shooters start off with a .22 LR rimfire handgun. The .22 LR cartridge is accurate but has very low recoil, less “bark” than a centerfire, and very little smoke and muzzle flash. New shooters won’t have to fight muzzle flip, and won’t develop a flinch from the sharp recoil and muzzle blast common to larger calibers. With the .22 LR, the trainee can focus on sight alignment, breathing, and trigger pull. When he or she has mastered those skills, move on to a .38 Special or 9mm Luger (9x19mm).
What gun to use? We recommend the 10-shot Smith & Wesson Model 617. This is ideal for initial training, shooting single action, slow-fire. You want to focus on sight picture and holding steady. Shown above is the 4″-barrel Model 617 which balances well. There is also a 6″-barrel version. It has a longer sight radius, but is a little nose-heavy. Both are great choices. They are extremely accurate and they boast a very clean, precise trigger.
If you prefer a semi-auto .22 LR pistol, we recommend the Browning Buck Mark series. Buck Marks are very accurate and very reliable. This rimfire pistol is available in a variety of models starting at under $350.00. Like the S&W Model 617, a good Buck Mark will serve you for a lifetime.
3. Use Quality Targets with Multiple Aim Points
It’s common for new pistoleros to start shooting at cans or clay birds at a public range. That can be fun, but it’s better to start with proper targets, placed at eye level, at 7-10 yards. We like to use targets with large, brightly colored circles. Focus on putting 5 shots in a circle. We recommend targets that have multiple bullseyes or aiming points — that way you don’t have to constantly change your target. There are also special paper targets that can help you diagnose common shooting problems, such as anticipating recoil. EZ2C Targets offers many great target designs with bright, red-orange aim points. You can also use the bright orange Birchwood Casey stick-on Target Dots (right). These come in a variety of diameters. We like the 2″ dot at 10 yards.
4. Shoot Outdoors If You Can
We recommend that new pistol shooters begin their training at an outdoor range. There are many reasons. First, the light is better outdoors. Indoor ranges can be dark with lots of shadows, making it harder to see your target. Second, sound dissipates better outdoors. The sound of gunfire echoes and bounces off walls indoors. Third, an outdoor range is a more comfortable environment, particularly if you can get out on a weekday morning. Indoor ranges, at least in urban areas, tend to be crowded. Many also have poor ventilation. If you can make it to an outdoor range, you’ll be happy. Many outdoor ranges also have some steel pistol targets, which offer a fun alternative to paper. When shooting steel however, we recommend polymer encased or lead bullets to avoid ricochets.
Too many new pistol shooters try to move right to rapid fire drills. It’s better to start slow, practicing the basics, under the guidance of a good mentor. If you belong to a club, ask if there are certified instructors who will help out. This Editor learned pistol shooting from a seasoned bullseye shooter, who got me started with a .22 LR revolver and very close targets. Over the course of a few range sessions we progressed to farther targets and faster pace. But the fundamentals were never forgotten. When starting your pistol training, it’s wise to view some instructional videos. Top Shot Champion Chris Cheng hosts an excellent Handgun 101 Series produced by the NSSF. We’ve linked one of these Handgun 101 videos for Tip #6.
6. SLOW DOWN — This Is Not a Race
When you learned to ride a bicycle, you started slow — maybe even with training wheels. The same principle applies to pistol shooting. When you get started with handguns, we recommend you shoot slowly and deliberately. Start with the handgun unloaded — just work on your sight alignment and breathing. With snap caps in place, try some dry-firing drills. Then progress to live fire. But be deliberate and slow. With the target at 20 feet, see if you can get three successive shot-holes to touch. Believe it or not, many common pistols are capable of this kind of accuracy (but you won’t see many shooters at indoor ranges who pursue that kind of precision). Once you master your form and accuracy, then you can work on your speed.
This 12″ Bullseye Pistol Diagnostic Target helps improve handgun marksmanship. The target diagnoses common problems with one-handed shooting based on shot impact zones. While this target is designed for righties, left-handed shooters can use the target too. Just observe the opposite tips.
Do you know someone who wants to get started in pistol shooting? Here’s a helpful resource. The NRA now offers its Basics of Pistol Shooting Course in an online format. That makes it easy to cover the “classroom” phase of the course on your own time. The $60.00 online course includes 11 step-by-step lessons (to be followed by live range training). CLICK HERE to enroll in online Pistol Training Course.
Train Online, Then Register for a Range Session
For the NRA Basics of Pistol Shooting course, Phase 1 is conducted in an online environment, completed on your own time (cost is $60.00, non-refundable). After successfully completing the online exam, students can register for Phase 2, the instructor-led training session. Phase 2 is conducted at your local range with an NRA-Certified Instructor. NOTE: There will normally be an additional fee for Phase 2. You must successfully complete BOTH Phase 1 and Phase 2 in order to receive your NRA Basics of Pistol Shooting course certificate.
Designed and developed by experts to accommodate busy schedules, the web-based course takes a blended learning approach to firearms training with both online and physical components. Students have 90 days to work through 11 online lessons before registering for Phase 2, the NRA Certified Instructor-led phase at a local range.
“Thanks to our online courses and network of more than 125,000 NRA Certified Instructors, it has never been easier to learn basic firearm skills,” said Kyle Weaver, NRA General Operations Exec. Director. The NRA offers other online training courses at Onlinetraining.nra.org. Along with pistol course, these offerings include Rifle Training, Shotgun Training, a Range Safety Office (RSO) course, and a Range Development and Operations course.
Know someone getting started with handguns? Here is a useful video focusing on safety:
Do you enjoy shooting pistols for sport, or perhaps you carry a handgun for self-defense? If you’re like most of us, you might benefit from a “refresher course” on the fundamentals of handgun shooting. The NRA has created a useful Infographic that covers important basics of handgun marksmanship — key things such as Sight Alignment, Trigger Control, and Handgun Hold.
Here are the first two (2) lessons. Click the link below to see all SIX (6) training topics: Sight Alignment, Sight Focus, Trigger Control, Breath Control, Hold Control, and Follow-Through.
Video Shows Sight Alignment, Grip, Stance, Trigger Control and More
In this USAMU video, SGT Shane Coley talks about the basics of sight alignment and trigger control. But then SGT Coley talks about other important control factors such as grip, arm position, and body stance. For rapid-fire shooting, you need to have a good arm and body positioning to control recoil and get back on target quickly. This video is a valuable complement to the NRA Infographic because it demonstrates all the important pistol fundamentals during live fire, at the range.
With rising crime rates in the USA, many Americans are taking a much more serious look at armed self-defense. We understand why citizens in large cities are more concerned than ever with the need to protect themselves, their families, and their homes and businesses.
Shotgun vs. Handgun — which is better for home defense? That question inspires strong opinions on both sides. We think the best answer may be “both”. There are some situations where a pistol is most handy, while there are other situations where the power (and lethality) of the shotgun clearly wins out. Some would argue that the shotgun offers an “intimidation” factor that may better resolve a threat without a shot being fired.
The NSSF, in cooperation with Thunder Ranch Training Center, has created an interesting video that examines the Shotgun vs. Handgun debate. As the Cheaper Than Dirt Blog notes: “The primary argument against the shotgun is a longer length leading to less maneuverability. On the other hand, the pistol offers better maneuverability, but lacks the stopping power of a shotgun”. Moreover, the pistol may be less accurate, according to some critics. This NSSF video looks at the question from a logical standpoint — making some surprising points.
As you can see in this still frame (above) from the video, the shooting stance of the pistol shooter (Clint) is NOT much more compact than that of the two shotgunners (compare actual muzzle positions). So a shotgun may actually be more handy inside a home than some people realize. Clint concludes that the gun selection debate “is all very easily solved by only one question: ‘If someone was going to run across a bedroom at you and they had a big knife, would you rather shoot him one time with a pistol or one time with a shotgun?’ When you answer the question you figure out why this [shotgun length] doesn’t really bother us. We simply take these [shotguns] and use them in a slightly different manner…”
In this video, Thunder Ranch Director Clint Smith explains why the overall length of a shotgun, as held in firing position against the shoulder, is not really that much greater than the “shooting stance length” of a handgun held in a proper firing position (with arms extended). Accordingly gun length/size should not be the deciding factor when choosing a firearm for home defense.
Whatever Weapon You Choose — Train with It
Fundamentally, you should use the firearm that is 100% reliable, and with which you have trained regularly. Mastery of a defensive firearm — whether shotgun or handgun — needs to be second-nature. You should be able to operate all the controls (safety, pump, decocker, slide, bolt handle etc.) by “instinct” based on hours of training. Likewise you should know how to operate the light/laser if your defensive firearm is so equipped. Importantly, you should be able to reload in darkness, and clear malfunctions without panicking.
Do you enjoy shooting pistols for sport, or perhaps you carry a handgun for self-defense? If you’re like most of us, you might benefit from a “refresher course” on the fundamentals of handgun shooting. The NRA has created a useful Infographic that covers important basics of handgun marksmanship — key things such as Sight Alignment, Trigger Control, and Handgun Hold.
Here are the first two (2) lessons. Click the link below to see all SIX (6) training topics: Sight Alignment, Sight Focus, Trigger Control, Breath Control, Hold Control, and Follow-Through.
Video Shows Sight Alignment, Grip, Stance, Trigger Control and More
In this USAMU video, SGT Shane Coley talks about the basics of sight alignment and trigger control. But then SGT Coley talks about other important control factors such as grip, arm position, and body stance. For rapid-fire shooting, you need to have a good arm and body positioning to control recoil and get back on target quickly. This video is a valuable complement to the NRA Infographic because it demonstrates all the important pistol fundamentals during live fire, at the range.
At AccurateShooter.com, our primary focus is precision target shooting with rifles. But it’s definitely fun to shoot pistols too, and we bet most of our regular readers own handguns. Here are six tips for shooting safely and accurately with handguns. These pointers will help you advance your skills and have more fun with your pistols and revolvers. Top image courtesy Sanctuary Gun Club.
1. Make Sure Safety Is Number One
Whether you own one gun or one hundred, gun safety must always be your main priority. In this video, Smith & Wesson Team Captain Julie Golob covers the basics of gun safety.
2. Start with a .22 LR Handgun
We strongly recommend that new pistol shooters start off with a .22 LR rimfire handgun. The .22 LR cartridge is accurate but has very low recoil, less “bark” than a centerfire, and very little smoke and muzzle flash. New shooters won’t have to fight muzzle flip, and won’t develop a flinch from the sharp recoil and muzzle blast common to larger calibers. With the .22 LR, the trainee can focus on sight alignment, breathing, and trigger pull. When he or she has mastered those skills, move on to a .38 Special or 9mm Luger (9x19mm).
What gun to use? We recommend the 10-shot Smith & Wesson Model 617. This is ideal for initial training, shooting single action, slow-fire. You want to focus on sight picture and holding steady. Shown above is the 4″-barrel Model 617 which balances well. There is also a 6″-barrel version. It has a longer sight radius, but is a little nose-heavy. Both are great choices. They are extremely accurate and they boast a very clean, precise trigger.
If you prefer a semi-auto .22 LR pistol, we recommend the Browning Buck Mark series. Buck Marks are very accurate and very reliable. This rimfire pistol is available in a variety of models starting at under $350.00. Like the S&W Model 617, a good Buck Mark will serve you for a lifetime.
3. Use Quality Targets with Multiple Aim Points
It’s common for new pistoleros to start shooting at cans or clay birds at a public range. That can be fun, but it’s better to start with proper targets, placed at eye level, at 7-10 yards. We like to use targets with large, brightly colored circles. Focus on putting 5 shots in a circle. We recommend targets that have multiple bullseyes or aiming points — that way you don’t have to constantly change your target. There are also special paper targets that can help you diagnose common shooting problems, such as anticipating recoil. EZ2C Targets offers many great target designs with bright, red-orange aim points. You can also use the bright orange Birchwood Casey stick-on Target Dots (right). These come in a variety of diameters. We like the 2″ dot at 10 yards.
4. Shoot Outdoors If You Can
We recommend that new pistol shooters begin their training at an outdoor range. There are many reasons. First, the light is better outdoors. Indoor ranges can be dark with lots of shadows, making it harder to see your target. Second, sound dissipates better outdoors. The sound of gunfire echoes and bounces off walls indoors. Third, an outdoor range is a more comfortable environment, particularly if you can get out on a weekday morning. Indoor ranges, at least in urban areas, tend to be crowded. Many also have poor ventilation. If you can make it to an outdoor range, you’ll be happy. Many outdoor ranges also have some steel pistol targets, which offer a fun alternative to paper. When shooting steel however, we recommend polymer encased or lead bullets to avoid ricochets.
Too many new pistol shooters try to move right to rapid fire drills. It’s better to start slow, practicing the basics, under the guidance of a good mentor. If you belong to a club, ask if there are certified instructors who will help out. This Editor learned pistol shooting from a seasoned bullseye shooter, who got me started with a .22 LR revolver and very close targets. Over the course of a few range sessions we progressed to farther targets and faster pace. But the fundamentals were never forgotten. When starting your pistol training, it’s wise to view some instructional videos. Top Shot Champion Chris Cheng hosts an excellent Handgun 101 Series produced by the NSSF. We’ve linked one of these Handgun 101 videos for Tip #6.
6. SLOW DOWN — This Is Not a Race
When you learned to ride a bicycle, you started slow — maybe even with training wheels. The same principle applies to pistol shooting. When you get started with handguns, we recommend you shoot slowly and deliberately. Start with the handgun unloaded — just work on your sight alignment and breathing. With snap caps in place, try some dry-firing drills. Then progress to live fire. But be deliberate and slow. With the target at 20 feet, see if you can get three successive shot-holes to touch. Believe it or not, many common pistols are capable of this kind of accuracy (but you won’t see many shooters at indoor ranges who pursue that kind of precision). Once you master your form and accuracy, then you can work on your speed.
With rising crime rates in the USA, many Americans are taking a much more serious look at armed self-defense. We understand why citizens in large cities are more concerned than ever with the need to protect themselves, their families, and their homes and businesses.
Shotgun vs. Handgun — which is better for home defense? That question inspires strong opinions on both sides. We think the best answer may be “both”. There are some situations where a pistol is most handy, while there are other situations where the power (and lethality) of the shotgun clearly wins out. Some would argue that the shotgun offers an “intimidation” factor that may better resolve a threat without a shot being fired.
The NSSF, in cooperation with Thunder Ranch Training Center, has created an interesting video that examines the Shotgun vs. Handgun debate. As the Cheaper Than Dirt Blog notes: “The primary argument against the shotgun is a longer length leading to less maneuverability. On the other hand, the pistol offers better maneuverability, but lacks the stopping power of a shotgun”. Moreover, the pistol may be less accurate, according to some critics. This NSSF video looks at the question from a logical standpoint — making some surprising points.
As you can see in this still frame (above) from the video, the shooting stance of the pistol shooter (Clint) is NOT much more compact than that of the two shotgunners (compare actual muzzle positions). So a shotgun may actually be more handy inside a home than some people realize. Clint concludes that the gun selection debate “is all very easily solved by only one question: ‘If someone was going to run across a bedroom at you and they had a big knife, would you rather shoot him one time with a pistol or one time with a shotgun?’ When you answer the question you figure out why this [shotgun length] doesn’t really bother us. We simply take these [shotguns] and use them in a slightly different manner…”
In this video, Thunder Ranch Director Clint Smith explains why the overall length of a shotgun, as held in firing position against the shoulder, is not really that much greater than the “shooting stance length” of a handgun held in a proper firing position (with arms extended). Accordingly gun length/size should not be the deciding factor when choosing a firearm for home defense.
Whatever Weapon You Choose — Train with It
Fundamentally, you should use the firearm that is 100% reliable, and with which you have trained regularly. Mastery of a defensive firearm — whether shotgun or handgun — needs to be second-nature. You should be able to operate all the controls (safety, pump, decocker, slide, bolt handle etc.) by “instinct” based on hours of training. Likewise you should know how to operate the light/laser if your defensive firearm is so equipped. Importantly, you should be able to reload in darkness, and clear malfunctions without panicking.
This 12″ Bullseye Pistol Diagnostic Target helps improve handgun marksmanship. The target diagnoses common problems with one-handed shooting based on shot impact zones. While this target is designed for righties, left-handed shooters can use the target too. Just observe the opposite tips.
Do you know someone who wants to get started in pistol shooting? Here’s a helpful resource. The NRA now offers its Basics of Pistol Shooting Course in an online format. That makes it easy to cover the “classroom” phase of the course on your own time. The $60.00 online course includes 11 step-by-step lessons (to be followed by live range training). CLICK HERE to enroll in online Pistol Training Course. (Note: An initial NRA age verification screen may appear first).
Train Online, Then Register for a Range Session
For the NRA Basics of Pistol Shooting course, Phase 1 is conducted in an online environment, completed on your own time (cost is $60.00, non-refundable). After successfully completing the online exam, students can register for Phase 2, the instructor-led training session. Phase 2 is conducted at your local range with an NRA-Certified Instructor. NOTE: There will normally be an additional fee for Phase 2. You must successfully complete BOTH Phase 1 and Phase 2 in order to receive your NRA Basics of Pistol Shooting course certificate.
Designed and developed by experts to accommodate busy schedules, the web-based course takes a blended learning approach to firearms training with both online and physical components. Students have 90 days to work through 11 online lessons before registering for Phase 2, the NRA Certified Instructor-led phase at a local range.
“Thanks to our online courses and network of more than 125,000 NRA Certified Instructors, it has never been easier to learn basic firearm skills,” said Kyle Weaver, NRA General Operations Exec. Director. The NRA offers other online training courses at Onlinetraining.nra.org. Along with pistol course, these offerings include Rifle Training, Shotgun Training, a Range Safety Office (RSO) course, and a Range Development and Operations course.
Know someone getting started with handguns? Here is a useful video focusing on safety:


 It’s common for new pistoleros to start shooting at cans or clay birds at a public range. That can be fun, but it’s better to start with proper targets, placed at eye level, at 7-10 yards. We like to use targets with large, brightly colored circles. Focus on putting 5 shots in a circle.


