Here’s a new option for hunters and tactical competitors who want to range targets and call windage/elevation corrections using their spotting scopes. Vortex is now offering Reticle Eyepieces for its Viper HD spotting scopes. Available in both MRAD and MOA versions, these fixed-power 33.5X eyepieces feature ranging reticles with handy hash marks. This allows target ranging, plus competitors can “make accurate shot calls… with subtension lines for holdover and windage corrections.”
Vortex states: “The all-new eyepiece makes measuring target range and calling shot corrections easy, with a diopter ring that allows shooters to get the reticle dialed to their eyes, and level with the horizon line, no matter how their scope is setup.”
Powering the new eyepiece is a fixed, 33.5X magnification ocular lens. This provided plenty of power most hunting and competition scenarios. The eyepiece glass is protected with ArmorTek and XR lens coatings. These easily-installed ranging eyepieces, both MRAD and MOA, are designed for a wide field of view so user won’t miss a single vapor trail or bullet splash.
Ranging MRAD — Hashmarked ranging reticle using MRAD-based subtension lines for ranging, holdover, and windage corrections. Secondary ranging references facilitate rapid range estimating.
Ranging MOA — Hashmarked ranging reticle using MOA-based subtension lines for ranging, holdover, and windage corrections. Secondary ranging references facilitate rapid range estimating.
These eyepieces have fixed, 33.5-power magnification. “Street Price” is about $200.00.
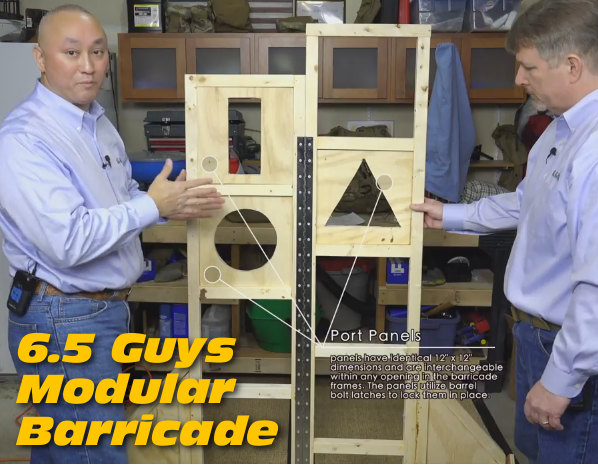
Here’s a great Do-It-Yourself project for tactical shooters. Ed and Steve of 65Guys.com have created a versatile wooden barricade designed for easy transport. The goal with this design was to create a stable barricade that offers a variety of shooting positions, but can also fit in the bed of a pick-up or the back of an SUV. The 69″ tall barricade is hinged in the middle, so it’s just 27″ wide. To deploy the Barricade you simply fold it open and then nest the lower wings in ground-level stands.
We call this the BYOB Project — Build Your Own Barricade. Anyone with basic wood-working skills should find the Barricade pretty easy to make. The only tricky part is cutting the side Dado joints for the left and right lower wings. But when you’ve got it completed, you have a low-cost unit that is versatile and sturdy yet easy to pack in a truck and carry out on the range. In the video below the 6.5 Guys showcase their Gen 2 barricade and explain how to build one just like it.
Looking at the 6.5 Guys Modular Barricade
The Modular Barricade was drawn up by Steve in PowerPoint and then dimensions added. Once the entire plan was created, Steve cut components to size and then used ordinary wood screws and wood glue to assemble the barricade frame. This was done to ensure maximum rigidity due to the light weight construction using 2″ x 2″ frame members. A long piano hinge was used to allow the Barricade to fold in half, while still having high torsional rigidity. Each of the Barricade openings are 12″ x 12″ square. This consistent ‘window’ spacing allows interchangeable panels with different cut-out shapes to be placed at varies heights/locations in the Barricade.
Modular Barricade Key Features
— Lightweight construction using low-cost 2×2 wood beams.
— Collapsible frame with center hinges for easy transport and deployment.
— Multiple Support levels at 6″ vertical intervals (6″ variance R to L).
— Modular port design allows ports to be changed and moved as desired.
6.5 Guys’ Modular Barricade — Construction Tips
The Modular Barricade can be constructed over a weekend with the proper materials and basic shop tools such as a power saw and electric screwdriver. Steve used a router for the side panel dado joints but a table saw could also be used for that task. Steve’s only real issue with the build involved the port panels — getting them to fit right. The 2″ x 2″ frame wood wasn’t always straight; even a small variation in the wood could cause a port panel to be too tight or too loose. Steve had to do a lot of extra sanding and planing to get the port panels to fit just right.
Where and How to Use the Barricade for Training
Because the 6.5 Guys’ Modular Barricade is so easy to move, you can simply pack it up and deploy it at your local range for practice. (Do ensure club/range rules allow shooting from barricades.) While the Barricade is designed to sit on the natural ground, the base stands can also be placed on concrete if your range does not allow deployment forward of the normal firing line. While you can use the Barricade for training on your own, Ed and Steve say novice shooters can benefit from a formal clinic.
In the video below, the 6.5 Guys discuss precision rifle training with Scott Satterlee, an instructor with Core Shooting Solutions. This video explains why new shooters should consider enrolling in a formal training clinic. Topics covered are: typical course format and “curriculum”, the gear needed to participate in a precision rifle clinic, and skills shooters should practice before attending the clinic.
Did you know you can damage your hearing even if you are wearing the best hearing protection available? Well, have you ever heard of concussion (or concussive) hearing loss? There is no amount of anything you can put in or over your ears to protect you from concussion loss. My audiologist explained to me the concussion comes through the facial bone structure and damages the ear’s tiny bones.
Editor’s NOTE: This a very important article that explains how you can suffer inner ear damage and hearing loss even if you use quality earplugs and/or muffs. Read that again — hearing loss can happen even with typical hearing protection. This kind of concussive hearing loss can result from shooting with muzzle brakes in confined spaces. Using a suppressor (aka sound moderator) can reduce the risk of concussive hearing loss. You may not have the ability to use a suppressor, but this article explains how you should be more mindful of your hearing.
Why I Use a Suppressor (Preventing Concussive Hearing Loss)
It must have been the road noise. I thought I was having a hard time hearing my five-year-old daughter speaking to me on my cell phone because of the road noise. That old SUV was kind of loud inside. Until I switched the phone to my left ear and suddenly I could hear her just fine. Wait, what just happened? I moved the phone back to the right ear and there was that muffled voice again. That’s when I knew I had a problem.
“What?” Lots of us in the shooting community have lost some hearing along the way due to our time on the range or in the field. Those of us who hunt have certainly discharged a firearm or three without ear protection and without concern for our hearing. After all, it’s just one shot, right? How much can it hurt?
Actually, that one shot DOES hurt your hearing. Any sound over 140 dB is immediate hearing loss. It just happens to be killing a small amount of our hearing so most of us continued the practice without a care. Living with hearing loss now makes me wish I could go back 20 years and better protect my hearing. I can’t change what I did in the past, but going forward I can certainly do the most to protect the hearing I still have.
I decided to shoot about a year’s worth of matches with just braked rifles. That year is when I lost significant hearing in my right ear and some in the left. I’ve gone back to shooting only suppressed rifles whenever possible.
I shot my first suppressed firearm, a .22 LR pistol, in 2003. After a few rounds I wondered why everyone (who can do so legally) didn’t shoot suppressed? No one drives without a muffler. Why would you? Point is I immediately appreciated the hearing protection benefits of suppressors. That passion got me into the business of selling suppressors and it wasn’t long before I was one of the biggest retailers for companies like AAC, SWR, SilencerCo, Ops Inc. and others. [Editor: The author’s business, Accurate Ordnance, no longer sells suppressors. So this article is NOT a sales pitch. Mark just wanted to share his experience so others might protect their hearing.]
Did you know you can damage your hearing even if you are wearing the best hearing protection available? You’ve heard guys say, “I’ll wear plugs and muffs, so I’ll be just fine shooting that .50 BMG!” Well, ever heard of concussion (or concussive) hearing loss? Yeah, I hadn’t either. I’ll sum it up the way the last audiologist I spoke with about my hearing loss did – there is no amount of anything you can put in or over your ears to protect you from concussion loss.
A hand grenade went off right next to a buddy of mine. He lost some hearing as a result of the blast. No one is really surprised by that. I mean it is an EXPLOSION. It’s loud. Duh. But I had no idea the blast from a muzzle brake could basically hurt my hearing the same way. The doctor explained to me the concussion comes through the facial bone structure and damages the ear’s tiny bones. Same thing as what can happen through any TBI (traumatic brain injury).
I’ve owned quite a few different suppressors over the years and have shot just about everything out there. I’m still as big a fan as ever. However, I wanted to see if using a suppressor in PRS (Precision Rifle Series) and similar matches was actually a hindrance. Some people feel the added length and weight of a suppressor can make getting into some shooting positions slower or problematic. So I decided to shoot about a year with a muzzle brake instead of a suppressor. I sure regret that decision…
Getting Headaches at PRS Matches Was Warning Sign
It is fairly common in PRS matches to shoot through pipes, vehicles, inside “shoot houses” and around other obstacles that echo a rifle’s blast. I noticed I was starting to get headaches about halfway through a day of PRS match shooting. I knew the issue wasn’t hydration. I mean look, if you are peeing every other stage down at the amazing CORE range facility in mid-summer you are NOT dehydrated. So, what was causing the headaches? It wasn’t until I went back to shooting suppressed in those same environments that it became clear the little mini concussions from that muzzle brake was causing my headaches. And of course the doctors confirmed that.
Let me stop here and say I am NOT anti-brake. Muzzle brakes are useful tools and for some situations are the best tools. An aggressive brake can be more effective at reducing recoil than a good suppressor. A suppressor does add some recoil reduction, just not as much as most quality brakes. Don’t forget to factor other variables, such as caliber and rifle weight, into the equation though. For example, a 15-lb 6mm Creedmoor rifle doesn’t need much recoil reduction in the first place.
So, I started shooting matches long before the PRS even existed and always shot suppressed in those days. The suppressors made communication with a partner or RO easier and it was just a more pleasant shooting experience. On the recommendations of a few people I decided to shoot about a year’s worth of matches with just braked rifles. That year is when I lost significant hearing in my right ear and some in the left. I’ve gone back to shooting only suppressed rifles whenever possible and especially at matches. I’ve only once or twice found the extra length of the suppressor made it a little more inconvenient to run a stage, but not by much. Trust me, the points I missed were not because I took two extra seconds getting the muzzle in a port or window.
My hearing is something I value and will do everything to protect from this point forward. You’ll never again see me on a match field with an un-suppressed rifle. To me the minimal gains of running a braked rifle aren’t worth losing more hearing.
Choosing a Suppressor — What to Consider
Okay, so I have hearing loss that I can’t get back and realize I need to go back to shooting matches with a suppressor. But which one? I’ll still be shooting matches with custom fit plugs so I just need something to add a little recoil reduction and kill that concussion.
At our shop, Accurate Ordnance, we generally recommend direct-thread suppressor solutions to our customers. The main reason for that is all the problems we’ve seen with other fast-attach muzzle devices. It doesn’t take much tolerance stacking to result in accuracy issues. There are a few exceptions for us and the Rugged Suppressors products top the list. Since the Razor 762 uses a muzzle brake adapter on the rifle to attach the suppressor, I can use the same suppressor on my .223 Rem training rifle. My primary match rifles are chambered in 6mm Creedmoor and 6.5 Creedmoor and the muzzle threads on those is a standard 5/8×24. My .223 Rem training rifle has .5×28 threads on the muzzle, which is standard for that caliber. Thus, the muzzle adapter interface lets me share the suppressors between all the rifles. And on that .223 Rem training rifle I have the option of switching the end cap on any of the Rugged products to a .223 aperture size, which makes the suppressors slightly more sound efficient (meaning quieter).
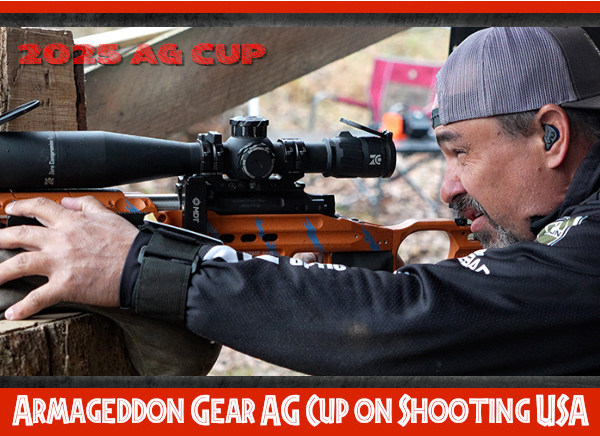
Precision Rifle fans should watch Shooting USA this week. On Wednesday, February 25, 2026 Shooting USA features coverage of the 2025 Armageddon Gear (AG) Cup Invitational. The 3-day AG Cup posts the biggest cash money match in precision rifle competition. This challenging multi-stage, elimination-format competition is one of the top tactical matches of the year. On the final day, the top competitors faced ten courses of fire to determine who will claim the Armageddon Gear AG Cup. This is an invitation-only match for America’s top Precision Rifle shooters, with the potential reward of huge cash prizes — $20,000 for the winner plus $1000 for each top scorer on the ten final courses of fire.
Shooting USA SHOW TIMES: This Shooting USA Episode airs Wednesday, February 25, 2026 at 9:00 PM Eastern and Pacific; 8:00 PM Central on the Outdoor Channel. In Canada, Shooting USA is broadcast on the Sportsman Canada Channel. If you miss the regular broadcast, you can stream the show online at any time on Vimeo for $0.99 per episode.
This Video Shows Highlights of the Armageddon Cup
The AG Cup is the brainchild of Tom Fuller, the owner of Armageddon Gear, and to say it’s a success is a bit of an understatement. This invitation-only match is the richest tactical/precision competition on the planet.
This AG Cup video has good footage of the stages in a previous 2022 AG Cup.
Armaggedon Gear — Tactical Accessories Armageddon Gear, founded by former U.S. Army Ranger Tom Fuller, sells support bags, gun cases, slings, suppressor covers, scope covers, and a wide variety of other accessories popular with the PRS/NRL crowd. Armageddon Gear now provides products to the U.S. Military, Law Enforcement, as well as PRS/NRL competitors.
AccurateShooter’s Target Page provides over 50 FREE downloadable targets. You’ll find all types of targets — sight-in targets, varmint targets, rimfire targets, bullseye targets, tactical targets, load development targets and more. CLICK HERE for all our free targets, including our popular LOAD DEV target.
On this load development target, all your load data fits neatly in the boxes under each target. The diamonds have 1/2″ sides and you can align your cross-hairs on the horizontal and vertical lines. When we test, we crank in a little elevation, setting the point-of-impact higher. That way our shots fall in the gray circles, leaving the red diamonds intact for precise aiming.
Storm Tactical Targets — Hundreds of FREE, Printable Targets
If you want an even greater selection of targets, specialized for PRS and NRL shooters, Storm Tactical offers a vast collection of tactical targets, available in three different versions: MOA, MIL Yards, and MIL Meters. These target sets were created with input from Sniper’s Hide. Storm Tactical also created a great rimfire target set. This includes side-by-side target blocks for fun, one-on-one competition. If you shoot NRL22 or just enjoy shooting with a buddy, we highly recommend the rimfire target set.
Overall there are 299 Storm Tactical Targets in four sets.
CLICK links to launch each Storm Tactical target collection. Then you can click the download icon to save to your hard drive. OR, you can scroll up and down to select the target(s) you like which you can tell your printer to print. We do recommend downloading the complete archives. File sizes are listed.
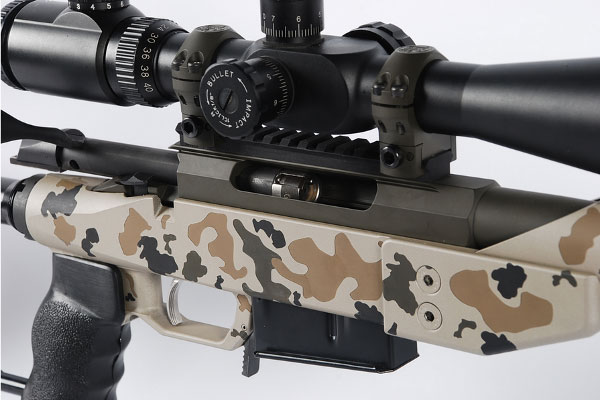
Here’s a Tikka T3 in Third Eye Tactical cerakoted chassis.
Rimfire Twin Target, for One-on-One Shooter Challenges
You’ll find this fun target on the third page of the Rimfire Target Pack. Just download the PDF file and instruct your printer to deliver page three. Or print out all six (6) rimfire targets if you like.
In this video, former Army Ranger sniper team leader Ryan Cleckner explains how proper head and scope position is a critical component to accurate shooting. Ryan finds that some shooters place the scope too far forward or too far rearward. If the scope is too far back you may have issues with eye relief and stock reach to shoulder. If it is too far forward, you may have cheek-weld problems or get neck strain. Cleckner cautions: “When you are in a good prone position, you don’t want any strain in your neck muscles or back.”
In the video, Cleckner offers a simple method to check your scope position:
“To see if your scope is set up properly … close your eyes, lay your head on your gun, get completely comfortable, and only when you are set-up, then open your eyes. If you can’t see clearly through your scope, CHANGE something [such as comb height or scope position]”.
“When you open your eyes, if you see some scope shadow [i.e. the black ring around the edge of the scope picture], figure out which way you need to move your head to get rid of that shadow, and then make adjustments to either your position, the rifle, or the scope.”
“Very often you’ll open your eyes and realize you need to move further back or further forward. Instead of moving your position [or head], move the scope and get it set up properly.”
Tip on Viewing Your Reticle:
Cleckner: “Sometimes it can be difficult to focus between the target and the reticle, even with the parallax adjusted properly. I recommend you focus only on the reticle. Just like the front sight on a rifle or a handgun, that reticle is what you can control, and it’s what matters. Focus on a crisp, clear reticle, in a stable platform, and all that’s left is trigger control.”
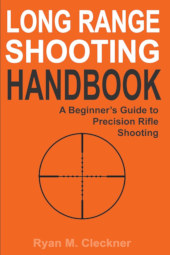
Long Range Shooting Handbook — A Good Resource Cleckner’s Long Range Shooting Handbook covers a wide range of topics important for precision marksmanship — both shooting skills and technical matters. You can view Sample Chapters from Ryan’s Book on Amazon.com. Cleckner’s book is designed as an intro to key concepts such as MOA vs. Mils, External Ballistics, and Environmental Effects. Included are personal tips and advice based on Cleckner’s years of experience as a sniper instructor and special operations sniper.
The Long Range Shooting Handbook is divided into three main categories: What It Is/How It Works, Fundamentals, and How to Use It. “What It Is/How It Works” covers equipment, terminology, and basic principles. “Fundamentals” covers the theory of long range shooting. “How to Use It” gives practical advice on implementing what you’ve learned, so you can progress as a skilled, long range shooter.
Ryan Cleckner was a special operations sniper (1/75 RGR) and he served as a U.S. Army sniper instructor. Currently he works as a firearms industry executive and practicing firearms attorney.
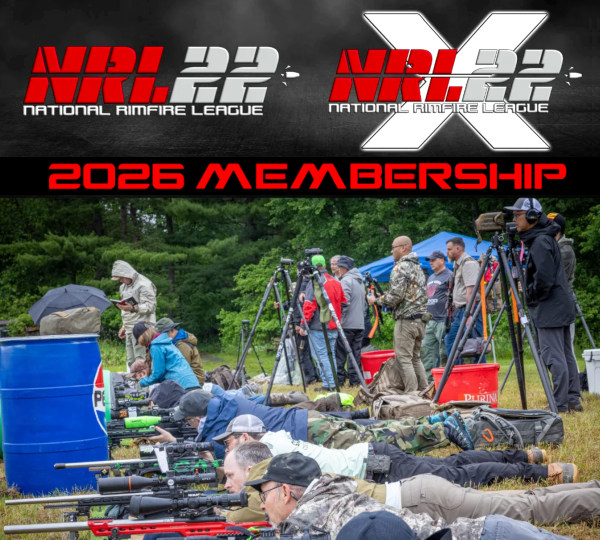
The National Rifle League (NRL) started off sponsoring major centerfire tactical matches, similar to PRS competitions. That proved successful so the NRL added a .22 LR Rimfire series, called NRL22. The NRL22 rimfire discipline has been a major success, as rimfire guns are fun to shoot and ammo is very affordable. The most popular NRL22 matches have drawn up to 200 rimfire competitors. And now there is a companion rimfire long-range series, NRL22X. Learn more about NRL22 and NRL22X at NRL22.com.
NRL22 offers competition shooting at relatively low expense. There are six (6) classes: Open, Base, Ladies, Young Guns (8-16), Old Guns (OG 60+), and Air Rifle. Base Class is for the budget-minded shooter — the combined MSRP of Rifle and Optic in 2026 may not exceed $1650.00 (so you could spend $950 on a rifle and $700 on a scope for example). That keeps the sport affordable.
Open, Youth, OG, and Ladies Classes have no price limits on rifle and optic. Visit NRL22.com to find an NRL22 match near you. CLICK HERE for the latest set of NRL22 rules (PDF). The NRL also sponsors NRL22X matches. These involve significantly longer distances for greater challenge. Currently, an NRL22 membership costs $60/year for adult classes or $25/year for Young Guns Class.
March 2023 NRL22 Course of Fire
For actual NRL22 competitors, this is a very useful video. It shows how shooting from a variety of positions, and it includes very cool through-the-lens views. This covers the NRL22 March 2023 course of fire.
NRL22 Competition with Base Class ($1200 Max) Rifle
One good thing about NRL22 competition is you don’t need to spend a fortune to compete. Base class is limited to $1200.00 for rifle and optic. You can do very well even at this budget level. This video, complete with through-the-lens imagery, shows an NRL22 match shot with a Base Class Ruger Precision Rimfire rifle.
NRL22 and NRL22X are not just for guys. The ladies enjoy the competition too and do very well. There is a separate Ladies class, but women can also compete in other classes. Photo by Jonathan Ocab.
Interview with NRL22 Founder Travis Ishida
This Vortex Nation video features an 80-minute interview with Travis Ishida, one of the original founders of the NRL22 and NRL22X disciplines. Travis told us that the NRL now runs 7-8 times as many rimfire matches as centerfire matches.
NRL22 Competition Guide — Match Procedures and Equipment
If you want a basic overview about NRL 22 Competition, there is a good NRL22 Competition Guide on the Widener’s website. This covers the classes, the rules, target dimensions, the types of supports used, and match strategies. Here are some samples:
Any rifle system that comes in under a combined MSRP of $1200 shall be eligible to compete in the Base class. This combined MSRP price is for the rifle and scope only. It excludes scope rings and bases, bipods, suppressors, data cardholders, magazines, spare magazine holders, auto bolt releases, aftermarket triggers, and extended magazine releases. Adjustments are also allowed in this division as well as adding rails of any type. If any shooter goes over the MSRP amount of $1200, they get bumped into Open class.
One of the most obvious rules is that all rifles must be chambered in .22 Long Rifle. Magnum and like rimfire cartridges are not allowed. It is recommended that whatever rifle you choose has a removable magazine rather than a fixed, tubular magazine since it’s harder to make safe, but they are allowed.
You can use any equipment in NRL22 unless a specific course of fire rules out using an item specifically. The only exception is tripods are never allowed. The sharing of equipment is allowed as well as slings to assist in unsupported positional shooting.
The steel target dimensions range from .25 inches wide to 6 inches wide. Some stages will require 10 rounds to be shot, while others may have you shoot 12 rounds. Most often, you’ll have 120 seconds to shoot a course of fire.
Ammunition Selection for NRL22 and NRL22X
Our friend F-Class John, a top F-Open competitor, has recently started tactical rimfire matches. He enjoys the challenge. And he admits a big part of the appeal is the MUCH cheaper ammunition. He has seen good results with relatively inexpensive Norma Tac-22 ammo, but he now favors SK ammo which he says offers great performance for the price. In this video, F-Class John tests SK Rifle Match Ammo vs. the premium Lapua Center-X ammo. He tested using a benchrest set-up with his MPA chassis rimfire rifle.
How to Register for NRL22 Competitions
Looking to get started in NRL22 or NRL22X (long range) competition? CLICK HERE to visit the NRL22 home page. The NRL22/NRL22X website has a registration page along with information on equipment rules, match locations, match rules, and the 2023 Match Schedule. CLICK HERE for NRL22 rules and CLICK HERE for NRL22X-specific Rules.
BONUS — Rimfire Practice Targets
SPECIAL BONUS–Rimfire Tactical Precision Targets
These FREE targets by DesertFrog are offered in Adobe Acrobat format for easy printing. CLICK HERE to download all six targets as a .ZIP archive.
This article Copyright 2025 AccurateShooter.com. Any reproduction without authorization gives rise to penalties under 17 U.S. Code § 501.
AccurateShooter’s Target Page provides over 50 FREE downloadable targets. You’ll find all types of targets — sight-in targets, varmint targets, rimfire targets, bullseye targets, tactical targets, load development targets and more. CLICK HERE for all our free targets, including our popular LOAD DEV target.
On this load development target, all your load data fits neatly in the boxes under each target. The diamonds have 1/2″ sides and you can align your cross-hairs on the horizontal and vertical lines. When we test, we crank in a little elevation, setting the point-of-impact higher. That way our shots fall in the gray circles, leaving the red diamonds intact for precise aiming.
Storm Tactical Targets — Hundreds of FREE, Printable Targets
If you want an even greater selection of targets, specialized for PRS and NRL shooters, Storm Tactical offers a vast collection of tactical targets, available in three different versions: MOA, MIL Yards, and MIL Meters. These target sets were created with input from Sniper’s Hide. Storm Tactical also created a great rimfire target set. This includes side-by-side target blocks for fun, one-on-one competition. If you shoot NRL22 or just enjoy shooting with a buddy, we highly recommend the rimfire target set.
Overall there are 299 Storm Tactical Targets in four sets.
CLICK links to launch each Storm Tactical target collection. Then you can click the download icon to save to your hard drive. OR, you can scroll up and down to select the target(s) you like which you can tell your printer to print. We do recommend downloading the complete archives. File sizes are listed.
Here’s a Tikka T3 in Third Eye Tactical cerakoted chassis.
Rimfire Twin Target, for One-on-One Shooter Challenges
You’ll find this fun target on the third page of the Rimfire Target Pack. Just download the PDF file and instruct your printer to deliver page three. Or print out all six (6) rimfire targets if you like.
Rifleshooter.com does some great original research — providing “hard data” you can’t find anywhere else. Here are the eye-opening results of Rifleshooter.com’s 6.5 Creedmoor barrel cut-down test. You may be surprised at the results. Read on…
What do you get when you cut a 6.5 Creedmoor-chambered barrel down to just over 16 inches? A lot more velocity than you might think. Our friends at Rifleshooter.com performed a barrel cut-down test with 6.5 Creedmoor test rifle, shortening the barrel from 27 to 16.1 inches in one-inch increments. Surprisingly, with a 142gr Sierra MK, the total velocity loss (as measured with a Magnetospeed) was just 158 FPS, an average of 14.4 FPS per inch of barrel length. With the lighter 120gr A-Max bullet, the total velocity loss was 233 FPS, or 21.8 FPS average loss per inch of barrel.
Test Procedure
Five (5) rounds of each type of cartridge were fired at each barrel length and the velocity data was recorded with a MagnetoSpeed V3 barrel-mounted chronograph. The rifle was then cleared and the barrel was cut back one inch at a time from 27″ to just over 16″. NOTE: During this winter test, the air temperature was a very chilly 23° F. One would expect higher velocities across the board had the outside temperature been higher.
The photo below shows how the barrel was cut down, inch-by-inch, using a rotary saw. The barrel was pre-scored at inch intervals. As the main purpose of the test was to measure velocity (not accuracy) the testers did not attempt to create perfect crowns.
6.5 Creedmoor vs. Other Mid-Sized 6.5mm Cartridges
The 6.5 Creedmoor is a very popular cartridge with the tactical and PRS crowd. This mid-size cartridge offers good ballistics, with less recoil than a .308 Winchester. There’s an excellent selection of 6.5mm bullets, and many good powder choices for this cartridge. When compared to the very accurate 6.5×47 Lapua cartridge, the 6.5 Creedmoor offers similar performance with less expensive brass. For a tactical shooter who must sometimes leave brass on the ground, brass cost is a factor to consider. Here’s a selection of various 6.5mm mid-sized cartridges. Left to right are: 6.5 Grendel, 6.5×47 Lapua, 6.5 Creedmoor with 120gr A-Max, 6.5 Creedmoor with 142gr Sierra MK, and .260 Remington.
When asked to compare the 6.5 Creedmoor to the 6.5×47 Lapua, Rifleshooter.com’s editor stated: “If you don’t hand load, or are new to precision rifle shooting, get a 6.5 Creedmoor. If you shoot a lot, reload, have more disposable income, and like more esoteric cartridges, get a 6.5×47 Lapua. I am a big fan of the 6.5×47 Lapua. In my personal experience, the 6.5×47 Lapua seems to be slightly more accurate than the 6.5 Creedmoor. I attribute this to the quality of Lapua brass.” Now that Lapua offers 6.5 Creedmoor brass with small primer pockets, the 6.5 Creedmoor is even more attractive.
The creator of Rifleshooter.com also operates a Custom Rifle Building enterprise and gun shop in Long Island, New York: 782 Custom Guns Ltd.. He tells us: “We offer an unparalleled level of gunsmith machine shop services in the Long Island region. From precision rifles (USMC M40A3/A5/A6 XM3 clones) to customized Remington 870 and Mossberg 590 shotguns, and customized 1911s, chances are if you can dream it, we can build it!”
Today we feature a modern switch-barrel PRS chassis rifle set up for quick changes between 6mm Creedmoor and 6.5 Creedmoor barrels. The owner, Forum member Jeff Cosgrove (aka “Punkur67″) uses the 6 CM barrel for competition, favoring the reduced recoil over its 6.5 mm big brother. He does use the 6.5 CM barrel for practice (given its better barrel life). The 6.5 CM barrel also gives him the chance to shoot a variety of factory 6.5 Creedmoor ammo.
- Terminus Zeus action with Quick Change (QC) barrel option.
– 6mm Creedmoor Pre-Fit Bartlein Heavy Varmint 400MODBB barrel for matches
– 6.5 Creedmoor Pre-Fit Benchmark Heavy Palma barrel for training
– MPA BA Competition chassis with full weight kit
– Zero Compromise Optic ZCO 5-27x56mm FFP scope
– TriggerTech Diamond trigger
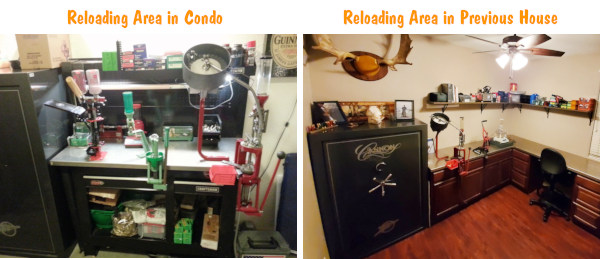
This rifle represents an evolution for Jeff. Each step along the way in his PRS journey, he has learned more about what he wants and needs in a competition rifle. And what you see here, from the $3760 ZC527 scope to his high-tech reloading equipment, represents pursuit of excellence. Jeff even created a modern, spacious man cave/reloading center in his new house (photos below).
Quick-Change Barrel System with Terminus Zeus QC Action
This rifle has two pre-fit barrels that work with the Terminus Zeus QC Action for fast and easy barrel swaps. To remove a barrel, you simply release two tension screws on the front of the action and then unscrew the barrel. To swap in a different pre-fit barrel, reverse the process and then tension the screws. The Terminus Zeus is 3-lug receiver with 60° bolt and integral recoil lug. Both the receiver and bolt are DLC-treated. Jeff reports this action is extremely smooth and has met all of his expectations. Some other Zeus features are threaded trigger pins for quick/easy trigger installation, and a roller-tipped cocking piece.
PRS Discipline Offers Fun, New Challenge for Long-Time Shooter
My name is Jeff Cosgrove, I live in Winchester, California and do commercial heating and air conditioning. I have shot for 20+ years but I found my interest in shooting was dwindling over time. I got somewhat bored with shooting paper at 100 yards or plinking cans out in the desert. About 18 months ago I decided I wanted to shoot long range. I picked up a used MPA in .300 Winchester Magnum and started shooting long range with a new buddy. That day I fell in love with guns all over again with more intensity than ever.
How I Got Started in PRS
With that new .300 WM I soon found my reloads were not up to my expectations (high ES/SD), so I purchased all new reloading hardware. One of my purchases was a used Benchsource Annealer. The guy I bought that from asked if I had ever tried PRS and he invited me to check out a match. So I went to a local PRS event as a spectator. I looked at many rigs on the firing line and took notes. By the end of the day I knew this was something I really wanted to do. I then acquired a used chassis rifle that I thought would work well for PRS. I went to a PRS match the following month but shot poorly.
After working with that first PRS rifle, a 6.5 CM with Stiller Tac30 action, MDT chassis, and Proof Carbon-wrapped barrel, I quickly learned that gun did not handle and balance the way I hoped.* It was too light in the front, the ergos were poor, and scope eye relief was not optimal. So I decided to build my own GEN 2 PRS rifle. This is the story of how I put together my new switch-barrel rig that I now use in competition.
PRS Rifle and Gear Selection — Learning What Works
Barrel availability was limited given the current shortages. Luckily I was able to obtain a 6mm Creedmoor pre-fit Bartlein Heavy Varmint 400MODBB from Southern Precision Rifles. The 6mm Creedmoor is notorious for being a barrel burner cartridge so I went with the special 400MODBB metal. Bartlein says that barrel life expectancy is 1.5 to 2 times longer than the standard 416 grade steel. I also purchased a 6.5 Creedmoor pre-fit Benchmark Heavy Palma barrel for training (Source: Straight Jacket Armory). With the Terminus Zeus quick change system I am able to swap from my match barrel to my trainer barrel in just a couple minutes. I loosen two set screws, unthread the barrel, thread the new barrel on, and torque the set screws to 10 inch-pounds. This also affords me caliber options in case I’m in a pinch for ammo. If I have some 6.5 CM loaded up and don’t have time to load 6mm Creedmoor for a match, then I’m covered.
For the trigger, I went with a TriggerTech Diamond Pro curve model. I have Timney, Jewell, and TriggerTech triggers in other rifles. I like them all but I liked the feel of the TT Diamond the best so that is what I used on this build. I set my triggers around 18-20 oz. — I am not a fan of ultra-light trigger pulls.
MPA BA Competition Chassis with Added Weight
I went with an MPA BA Comp chassis with full internal and external weight kit. I also have Gray Ops external weight on the handguard. I had the same chassis on my .300 WinMag and felt very comfortable with it. I took a PR1 class and found that, with a different gun, I had to force a comfortable hand position for proper trigger pull. After that class I grabbed my MPA and my hand fell in to the perfect position. I did not need to hunt or index my hand with the MPA. The built ARCA rail (RAT) lowered the rifles center of gravity more than my old setup with the ARCA rail bolted to the bottom of the handguard. With the current configuration, the rifle weighs in at 24 lbs. and balances three inches in front of the magwell. I now have the flexibility to add, subtract, or move approximately 6 lbs. of weight.
The Attraction of PRS/NRL Practical Competitions
I really enjoy PRS-style shooting because there seems to be a new challenge every time you compete — no matter what. With PRS I am shooting many different positions and ranges with the pressure of a stopwatch. This keeps things interesting for me. I have taken a few training classes to help establish good, clean fundamentals.
Jeff says it is hard to practice for the many unconventional shooting positions at PRS matches.
My biggest challenges so far have been: 1) building stable shooting positions that I have not practiced enough; 2) proper equipment selection; and 3) time management. Regarding the shooting positions — PRS/NRL is not like F-Class where you can always practice from one position. And it’s hard to practice for unusual set-ups (barriers and positions) you’ve not encountered before. Concerning equipment — you need some experience in the game to determine what really works best for you.
Innovative Zero Compromise Optic — Optimized for the Tactical Game
The scope is a Zero Compromise ZC527 (5-27x56mm FFP) with MPCT2 reticle. Zero Compromise Optic is a relatively new manufacturer, but their scopes are top-flight. The First Focal Plane ZCO has excellent glass that is extremely bright and clear. With a big 36mm main tube, the ZC527 offers 35 Mils Elevation and 21 Mils Windage adjustment. The field of view is 21 feet at 100 yards — one of the widest in the industry. The ZC527 also offers illuminated reticle and locking turrets. When I was at my first PRS match I looked through several different scopes. When I got behind a ZCO scope I knew this was what I wanted — the ZCO scope was super clear, super sharp, with very positive controls.
I put a protective wrap on the scope because with some of our PRS stages it is easy to scratch or dent the scope tube. You don’t want to bang up an expensive scope — the ZC527 retails for $3760.
Reloading for 6mm Creedmoor and 6.5 Creedmoor
When starting out with a new cartridge I like to search places like AccurateShooter.com and UltimateReloder.com for popular recipes used by knowledgeable shooters. I am all about paving your own way on certain things but with the consistency, higher cost, and limited supply of components these days I try to stick with the most common loads. I also want to limit barrel wear and get through load development quickly. I don’t want to chase loads for 300 rounds to ultimately land in the same place that so many other people have already found.
I start my new barrels with virgin brass and load three rounds at each charge weight in 0.2 grain increments. I put the most popular charge weight (for my chosen bullet) in the middle of my load range and load above and below to find a good node while paying close attention for pressure signs along the way. I use the 6.5 Guys spreadsheet (see below) to help analyze my results. With those results I like to re-test a narrower range with 5-10 rounds each charge weight in 0.2 grain increments. I again use the 6.5 Guys spreadsheet to make a final charge weight selection and then I move on to seating depth. I will load different depths to tighten the groups up.
Load Development Using 6.5 Guys Custom Spreadsheet
To hold and analyze my load development data I use the spreadsheet from 65Guys.com. It helps a ton with making a decision on your final load. This Excel spreadsheet works great and makes it simple to analyze your data. You can even copy and paste your chronograph data if your chrono logs on to a SD card.
In this 6.5 Guys video Steve provides an overview and tutorial for using the Excel load development analysis model that he has developed. The Excel Load Development Analysis Spreadsheet version 2.0 is FREE. Download from the 6.5 Guys Website.
In this video Steve explains some key statistical concepts for performing load data analysis. He also provides tips and guidance for determining the optimal load for your rifle as you analyze the load data you’ve collected.
New House, New Man Cave/Reloading Room
Jeff recently moved with his family into a great new house. One bonus of this move was that he upgraded from a cramped reloading area to a dedicated “Man Cave” that has ample space for his gun safes, multiple presses, and all his reloading components. Large upper and lower cabinets plus a dedicated “gun closet” provide plenty of storage. Read all about this move in this AccurateShooter Forum Thread.
Here is Jeff’s first reloading area years ago: “My first reloading setup was smashed in my two-bedroom condo so I had a very small bench that was very cluttered. I had to deal with the limited space I had but I made it work. Then in our first house I had a larger bench/cabinet, but it was still not ideal.”
Here is the new Man Cave in the new house — very open, spacious, with plenty of storage.
This animated GIF shows the new Man Cave move-in process start to finish:


 If you want an even greater selection of targets, specialized for PRS and NRL shooters,