SSG Amanda Elsenboss, now with the Pennsylvania National Guard, was the 2021 NRA National High Power Champion and 2019 NRA Long Range National Championship in 2019.
In the archives of On The Mark magazine, DCM Emeritus Gary Anderson, an Olympic Gold medal-winning shooter in his younger years, offers sage advice for competitive shooters.
In his article Ten Lessons I Wished I Had Learned as a Young Shooter, Anderson provides ten important guidelines for everyone involved in competitive shooting. Here are the Ten Lessons, but you should read the full article. Anderson provides detailed explanations of each topic with examples from his shooting career.
LESSON 1 – NATURAL ABILITY WILL NOT MAKE YOU A SHOOTING CHAMPION.
(You also need hard work, training effort and perseverance.)
LESSON 2 – ANGER IS THE ENEMY OF GOOD SHOOTING.
(The key to recovering from a bad shot is to stay cool, no matter what happens.)
LESSON 3 – BAD SHOTS CAN TEACH YOU MORE THAN GOOD SHOTS.
(Today, error analysis is one of the most powerful tools for improving scores.)
LESSON 4 – NEVER GO WITHOUT A SHOT PLAN.
(A shot plan is a detailed breakdown of each of the steps involved in firing a shot.)
LESSON 5 – PRACTICE IN BAD CONDITIONS AS WELL AS GOOD CONDITIONS.
(Most competitions are fired in windy conditions or where there are plenty of distractions.)
LESSON 6 – CHAMPIONS ARE POSITIVE, OPTIMISTIC PEOPLE.
(Negative shooters expect bad results; positive shooters expect to train hard to change bad results.)
LESSON 7 – IT’S NOT ABOUT WHETHER YOU WIN OR LOSE.
(It’s about how hard you try to win.)
LESSON 8 – YOUR DOG WON’T BITE YOU AFTER SHOOTING A BAD SCORE.
(Hopefully your coach, parents and friends won’t bite you either.)
LESSON 9 – YOUR PRESS CLIPPINGS CAN HURT YOU OR HELP YOU.
(Winning can go to our heads. We start thinking we are so good we don’t have to work hard any more.)
LESSON 10 — YOU NEVER SHOT YOUR BEST SCORE.
(Great champions are always looking for ways to improve.)
USAMU shooters on the firing line at the Wa-Ke’-De outdoor range in Bristol, IN. Photo courtesy USAMU.
About Gary Anderson Gary Anderson served as the Director of the Civilian Marksmanship Program (CMP) from 1999-2009, and is now DCM Emeritus. As a Nebraska farmboy, Gary grew up hunting and shooting. Dreams of winning an Olympic Gold Medal in shooting led Gary to the U.S. Army. In 1959, he joined the elite U.S. Army Marksmanship Unit. Just two years later, he won his first national championship.
At the 1962 World Shooting Championships in Egypt, Anderson stunned the shooting world by winning four individual titles and setting three new world records. At the 1964 Tokyo Olympics, Gary won the 300m free-rifle Gold Medal, setting a new world record in the process. At the 1966 World Shooting Championships in Germany, Anderson won three additional world titles. At the 1968 Olympics, Gary won a second gold medal in the 300m free-rifle event.
After his “retirement” from international competition, Gary competed in the National High Power Championships, winning the President’s National Trophy in 1973, 1975 and 1976. Over his competitive career, Anderson won two Olympic Gold Medals, seven World Championships, and sixteen National Championships. He is unquestionably one of the greatest American marksmen ever.
This USAMU article explores three different “Philosophies” of precision reloading. Some handloaders seek to produce ammo that yields the very tightest groups (without factoring in the wind). Other shooters load their ammo to deliver the highest safe velocity. That’s because a projectile launched at higher velocity will drift less in the wind. The theory is that even if fast ammo doesn’t produce the tightest groups in zero wind conditions, it will yield higher scores in a the real world (where the wind blows). Lastly, some handloaders favor ammo that is ultra-consistent across a wide temperature range. This last philosophy dictates selection of a powder that is temp-insensitive, even if it may not produce the very best raw accuracy (or speed).
What’s Your Handloading Philosophy?
Objectives of Reloading — Accuracy, Velocity, Temp Stability What do you, the reader, primarily value in your handloads?
Viewpoint ONE: Accuracy Trumps Everything
Some shooters prize consistent, excellent medium/long range accuracy enough that they’re willing to give up some extra velocity (and reduced wind deflection) to obtain that. Their underlying philosophy could be stated: “Superior accuracy is present for every shot, but the wind isn’t”. One’s ability to hold well, aim well and read the wind are all factors in making this type decision. The photo below shows stellar raw accuracy. This is an 0.67″, 10-shot group at 300-yards fired from a text fixture. The group measures just 0.67″. (This shows the USAMU’s 600-yard load with 75gr bullets).
Viewpoint TWO: Load to Highest Safe Velocity for Less Wind Drift
Some shooters value obtaining the highest safe velocity, even if one’s pure, consistent mechanical accuracy at medium/long range isn’t quite as brilliant. The theory here seems to be that a really good hold extracts as much mechanical accuracy from the rifle/ammo as possible, and faster bullets equal occasional “bonus” points snatched from the jaws of wind.
[For example] one of the USAMU’s many Service Rifle National Champions revealed his philosophy. It can be stated thus: a super-accurate, but [relatively] “slow” load “required him to have a Ph.D. in wind reading for every shot, while a faster, but less accurate load netted him more points.”
Note — this was not mere speculation; his score book data backed up his claims, due to less wind effects. Remember, however, this fellow has a consistent, National Championship-level hold, and other Champions on the same team would have opted differently.
Viewpoint THREE: Temperature Stability Is Key
Still another approach is to place heavy emphasis on fine accuracy with absolute stability in changing temperatures. When this writer was actively earning his Distinguished Rifleman badge, that was his goal. The reason? Sighting shots are not allowed in EIC (“Leg”) matches. The first shot out of the barrel was for score. It had to be 100% consistent, with very reliable, predictable elevation and wind deflection regardless of the ambient temperature — even if it wasn’t the lowest wind deflection possible.
Naturally, selecting a powder that is insensitive to temperature changes is a key element here. Elevation zeros and wind effects HAD to be consistent every time. Hunters and military snipers might be among those who fall into this camp, as well as those in pursuit of their Distinguished Rifleman badges.
Contrast that with a traditional High Power shooter who gets two sighter shots before each event (offhand, sitting rapid, prone rapid, prone slow fire.) If there is a zero change on any given day, he/she can correct during sighters. This writer well remembers talking with another very high-level Service Rifle competitor who was happy to have high temperatures boost the velocities of his ammunition above their usual level… As far as this SR competitor was concerned, 60-80 fps more velocity -– even if only due to high ambient temperatures -– meant less wind deflection, and he was mighty happy to have it.
Particularly in the summer, with hot daily conditions, you need to be concerned about temperature stability. Loads worked up in winter may not work in the summer time.
This article has been confined to NRA High Power Rifle competition, which has relatively generous 10-ring dimensions in relation to the accuracy of well-built competition rifles. Hopefully, it will provide food for thought. For some, this might be an opportunity to ensure that one’s load development approach helps them attain their desired results.
Editor’s Note: The CMP National Matches at Camp Perry are less than a month away. This article covers key points for rifle competitors at major matches. To do well, you want to be an “informed competitor” with a positive attitude and full knowledge of the course of fire and match rules.
Don’t Be “That Guy” (The Bad Apple on the Firing Line)
By SFC Norman Anderson, USAMU Service Rifle Team Member
You know the guy, he’s still talking at the coffee jug when his preparation period begins, then his magazines aren’t loaded when the command “STAND” is given, and finally, he doesn’t know the rules when he argues with the block officer as his target comes up marked “9 and No”. Although this guy might be the highlight of the “after match” activities, he is the proverbial bad apple on the firing line. With this example fresh in your mind, let’s go over how not to be “that guy”.
While the sport of High Power shooting is a hobby for most, all are passionate about performance throughout the day. In order to achieve your maximum performance each and every day, it is essential that you conduct yourself as a professional competitor. As a competitor, you have a personal responsibility to know the course of fire as well as the rules and procedures that apply to it and to be prepared to follow them. Knowing this will not only make you a better competitor, but it will enable you to resolve situations with other targets besides your own. So what does all this mean? I’ll explain…
Know the Course of Fire
Know the course of fire. It sounds easy enough, as we all shoot plenty of matches, but it’s more than that. If you think about it, how many people in the pits, for example, do not really know what is happening on the firing line? This leads to targets being pulled early during a rapid fire string or missing a shot during a slow fire string. In cases like this, the result is the same, delays in the match and upset competitors. To avoid being “that guy,” it is imperative that you stay tuned to the events as the day progresses. When you are at the range shooting a match, be at the range shooting the match.
At any firearms competition — be sure you know (and understand) the course of fire.
Know the Rules
Now, let’s discuss rules. As you have probably heard more than once, the rulebook is your best friend. Here is why. I can virtually guarantee that most competitors know some of the rules based only on the old “this is how we do it at home” adage. The funny part of that is, the same green NRA rulebook and orange CMP rulebooks are used to govern High Power matches all over the country.*
It is vital that all shooters be familiar with the rules as they are written, not with “how they are applied at home”. This creates consistency and continuity in how matches are conducted, from local club matches to state tournaments to National Championships. Knowledge is power when it comes to scoring targets under contention, what to do in the case of a malfunction, or even how to file a protest correctly. These rules are in place for a reason and it benefits everyone to both know and operate by these rules.
Maintain Composure and Humility — Exhibit Good Sportsmanship
One aspect of competing that cannot be forgotten is bearing. As I mentioned earlier, you must be prepared for both good and bad to happen. All too often we all see “that guy” (or that “that guy’s” gear) flying off of the firing line in disgust. Remember that we all must maintain our composure and humility in all conditions, not matter what happens. After all, it’s just a game. To put it into perspective, if it were easy, attendance would be a lot higher. Sportsmanship must be displayed in an effort to keep from ruining the day for all those around you. It doesn’t cost anything to smile, and smiling never killed anyone. So turn that frown upside down and keep on marching, better days will come.
Like a Boy Scout — Always Be Prepared
Lastly, I would like to cover preparedness. Being prepared goes beyond simply having your magazines loaded and a zero on your rifle. It means approaching the firing line, knowing what you are about to do, being ready for what is going to happen (good or bad), and being ready for the results. If you approach the firing line to merely shoot 10 shots standing in your next LEG match, you are not going to be pleased with the result. You must be prepared mentally and physically, not only for the next stage, but also the next shot. By being prepared physically (equipment ready), you give yourself peace of mind which is an essential part of being prepared mentally, and by being prepared mentally, you are less likely to become distracted and are more likely to maintain focus for each and every shot.
Conclusion — Informed Competitors Make for Better Matches
The culmination of these efforts results in a shooter that knows how to be ready for success on the range, but also and perhaps more importantly, a shooter who knows what it means to be a competitor. When you have a range full of competitors who know and follow the rules and proper match procedures, the match runs smoothly, everyone shoots well, and a good time is had by all. In the end, isn’t that what it’s all about?
* After this article was originally written, the CMP separated its rules into multiple Rulebooks, which can all be downloaded from the CMP.org/rulebooks page:
The CMP Highpower Competition Rules 2024 (27th Ed.) for CMP-sponsored and sanctioned matches for Highpower Rifle events in National Trophy Matches, Excellence-In-Competition (EIC) Matches, CMP Cup Matches and other CMP-sanctioned competitions.
The CMP Pistol Competition Rules 2024 (27th Ed.) for CMP-sponsored and sanctioned Pistol Matches in the National Matches, National Trophy Matches, Excellence-In-Competition (EIC) Matches, and other CMP-sanctioned competitions.
SSG Greg Markowski of the USAMU at Camp Perry, Ohio.*
The U.S. Army Marksmanship Unit (USAMU) fields pistol teams as well as rifle and shotgun competition squads. Consequently the USAMU’s Reloading Shop loads tens of thousands of pistol rounds every year. In this article, the USAMU’s handgun experts talk about reloading for handguns — with smart tips on how to achieve superior accuracy with 100% reliability. This article, which offers important insights on COAL, primers, crimps and more.
This video shows .45 ACP centerfire pistol competitors at Camp Perry
Precision Pistol Reloading — Recommended Methods
Optimize the Taper Crimp
One often-overlooked aspect of handloading highly-accurate pistol ammunition is the amount of crimp and its effect on accuracy. Different amounts of taper crimp are used with various handloads to obtain best accuracy. The amount is based on bullet weight, powder burn rate and charge, plus other factors. It is not unusual for our Shop to vary a load’s crimp in degrees of 0.001″ and re-test for finest accuracy.
Use Consistent Brass
Brass is also important to pistol accuracy. While accurate ammunition can be loaded using brass of mixed parentage, that is not conducive to finest results, particularly at 50 yards. It is important for the serious competitor/handloader to use brass of the same headstamp and ideally one lot number, to maximize uniformity. Given the volumes of ammunition consumed by active pistol competitors, using inexpensive, mixed surplus brass for practice, particularly at the “short line” (25 yards), is understandable. However [at 50 yards], purchasing and segregating a lot of high-quality brass to be used strictly for slow-fire is a wise idea.
Importance of Uniform COAL
Uniformity of the Case Overall Length (COAL) as it comes from the factory is also important to achieving utmost accuracy. More uniform case lengths (best measured after sizing) contribute to greater consistency of crimp, neck tension, ignition/burn of powder charge, and so on. Cartridge case-length consistency varies from lot to lot, as well as by maker. Some manufacturers are more consistent in this dimension than others. [Editor’s note: It is easy to trim pistol brass to uniform length. Doing this will make your taper crimps much more consistent.]
Primers and Powders — Comparison Test for Accuracy
Pay attention to primer brands, powder types and charges. Evaluating accuracy with a Ransom or other machine rest at 50 yards can quickly reveal the effect of changes made to handload recipes.
Bullet Selection — FMJ vs. JHP
Bullets are another vital issue. First, there is the question of FMJ vs. JHP. A friend of this writer spent decades making and accuracy-testing rifle and pistol bullets during QC for a major bullet manufacturer. In his experience, making highly-accurate FMJ bullets is much more difficult than making highly-accurate JHPs, in large part due to the way the jackets are formed. Small die changes could affect accuracy of FMJ lots dramatically. The CMP now allows “safe, jacketed ammunition” in Excellence-in-Competition (EIC) Service Pistol matches, although wadcutter ammunition is prohibited. Thus, the option to use very accurate JHP designs simplifies the life of CMP Service Pistol shooters in pursuit of the prestigious Distinguished Pistol Shot badge.
Hopefully, these tips will be helpful to any pistol shooters interested in accurate handloads, not just “Bullseye” shooters. Small tweaks to one’s normal routine can pay big dividends in improved accuracy and make practice and competition more rewarding. Stay safe, and good shooting!
TOP IMAGE: SSG Greg Markowski, a shooter/instructor with the USAMU, fires his pistol during the 2018 Civilian Marksmanship Program’s National Pistol Matches at Camp Perry, Ohio. At that event, Markowski claimed the General Mellon Trophy, General Patton Trophy and the General Custer Trophy. U.S. Army photo by Maj. Michelle Lunato/released by Defense Visual Information Distribution Service.
Photo 1: Three Near-Equal-Weight 7mm Bullets with Different Shapes
TECH TIP: Bullets of the same weight (and caliber) can generate very different pressure levels due to variances in Bearing Surface Length (BSL).
This article, from the USAMU Facebook Page, concerns reloading safety. In the relentless quest for more speed and flatter ballistics, some hand-loaders load way too hot, running charges that exceed safe pressure levels. Hint: If you need a mallet to open your bolt, chances are your load is too hot. Stay within safe margins — your equipment will last longer, and you won’t risk an injury caused by over-pressure. In this article, the USAMU explains that you need to account for bullet shape, diameter, and bearing surface when working up a load. Don’t assume that a load which is safe for one bullet will be safe for another even if both bullets are exactly the same weight.
How Bullet Profile and Bearing Surface Affect Pressure Levels
Today, we continue our handloading safety theme, focusing on not inadvertently exceeding the boundaries of known, safe data. Bullet manufacturers’ loading manuals often display three, four, or more similar-weight bullets grouped together with one set of load recipes. The manufacturer has tested these bullets and developed safe data for that group. However, seeing data in this format can tempt loaders — especially new ones — to think that ALL bullets of a given weight and caliber can interchangeably use the same load data. Actually, not so much.
However, bullet designs include many variables such as different bearing surface lengths, hardness, and even slight variations in diameter. In fact, diameters can occasionally range up to 0.001″ by design. Thus, choosing untested bullets of the same weight and caliber, and using them with data not developed for them can yield excess pressures.
This is only one of the countless reasons not to begin at or very near the highest pressure loads during load development. Always begin at the starting load and look for pressure signs as one increases powder charges.
Bullet Bearing Surface and Pressure
Bullet bearing surface length (BSL) is often overlooked when considering maximum safe powder charges and pressures. In Photo 1, note the differences in the bullets’ appearance. All three are 7 mm, and their maximum weight difference is just five grains. Yet, the traditional round nose, flat base design on the left appears to have much more BSL than the sleeker match bullets. All things being equal, based on appearance, the RN/FB bullet seems likely to reach maximum pressure with significantly less powder than the other two designs.
TECH TIP: Bullets of the same weight (and caliber) can generate very different pressure levels due to variances in Bearing Surface Length (BSL).
Bullet 1 (L-R), the RN/FB, has a very slight taper and only reaches its full diameter (0.284 inch) very near the cannelure. This taper is often seen on similar bullets; it helps reduce pressures with good accuracy. The calculated BSL of Bullet 1 was ~0.324″. The BSL of Bullet 2, in the center, was ~0.430″, and Bullet 3’s was ~ 0.463″. Obviously, bullets can be visually deceiving as to BSL!
Some might be tempted to use a bullet ogive comparator (or two) to measure bullets’ true BSL for comparison’s sake. Unfortunately, comparators don’t typically measure maximum bullet diameter and this approach can be deluding.
Note: Due to time constraints, the writer used an approximate, direct measurement approach to assess the bullets’ different BSLs. While fairly repeatable, the results were far from ballistics engineer-grade. Still, they are adequate for this example.
Photo 2: The Perils of Measuring Bearing Surface Length with Comparators
In Photo 2, two 7mm comparators have been installed on a dial caliper in an attempt to measure BSL. Using this approach, the BSLs differed sharply from the original [measurements]. The comparator-measured Bullet 1 BSL was 0.694” vs. 0.324” (original), Bullet 2 was 0.601” (comparator) vs. 0.430” (original), and Bullet 3 (shown in Photo 2) was 0.602” (comparator) vs. 0.463” (original). [Editor’s comment — Note the very large difference for Bullet 1, masking the fact that the true full diameter on this bullet starts very far back. You can use comparators on calipers, but be aware that this method may give you deceptive reading — we’ve seen variances just by reversing the comparators on the calipers, because the comparators, typically, are not perfectly round, nor are they machined to precision tolerances.]
Thanks to the U.S. Army Marksmanship Unit for allowing the reprint of this article.
Nikon offers eyepieces with reticles for its flagship Monarch Fieldscopes. Eyepiece reticles help spotters call shot corrections with precise click values (MOA or Mils).
Using a spotting scope seems simple. Just point it at the target and focus, right? Well, actually, it’s not that simple. Sometimes you want to watch mirage or trace, and that involves different focus and viewing priorities. Along with resolving bullet holes (or seeing other features on the target itself), you can use your spotting scope to monitor mirage. When watching mirage, you actually want to focus the spotting scope not on the target, but, typically, about two-thirds of the distance downrange. When spotting for another shooter, you can also use the spotting scope to watch the bullet trace, i.e. the vapor trail of the bullet. This will help you determine where the bullet is actually landing, even if it does not impact on the target backer.
In this video, SFC L.D. Lewis explains how to use a spotting scope to monitor mirage, and to watch trace. SFC Lewis is a former Army Marksmanship Unit member, U.S. Army Sniper School instructor, and current U.S. Army Reserve Service Rifle Shooting Team member. In discussing how precision shooters can employ spotting scopes, Lewis compares the use of a spotting scope for competition shooters vs. military snipers. NOTE: You may wish to turn up the audio volume, during the actual interview segment of this video.
The U.S. Army Marksmanship Unit (USAMU) fields pistol teams as well as rifle and shotgun competition squads. Consequently the USAMU’s Reloading Shop loads tens of thousands of pistol rounds every year. In this article, the USAMU’s handgun experts talk about reloading for handguns — with smart tips on how to achieve superior accuracy with 100% reliability. This article, which offers important insights on COAL, primers, crimps and more.
Precision Pistol Reloading — Recommended Methods
Optimize the Taper Crimp
One often-overlooked aspect of handloading highly-accurate pistol ammunition is the amount of crimp and its effect on accuracy. Different amounts of taper crimp are used with various handloads to obtain best accuracy. The amount is based on bullet weight, powder burn rate and charge, plus other factors. It is not unusual for our Shop to vary a load’s crimp in degrees of 0.001″ and re-test for finest accuracy.
Use Consistent Brass
Brass is also important to pistol accuracy. While accurate ammunition can be loaded using brass of mixed parentage, that is not conducive to finest results, particularly at 50 yards. It is important for the serious competitor/handloader to use brass of the same headstamp and ideally one lot number, to maximize uniformity. Given the volumes of ammunition consumed by active pistol competitors, using inexpensive, mixed surplus brass for practice, particularly at the “short line” (25 yards), is understandable. However, for the “long line” (50 yards), purchasing and segregating a lot of high-quality brass to be used strictly for slow-fire is a wise idea.
Importance of Uniform COAL
Uniformity of the Case Overall Length (COAL) as it comes from the factory is also important to achieving utmost accuracy. More uniform case lengths (best measured after sizing) contribute to greater consistency of crimp, neck tension, ignition/burn of powder charge, and so on. Cartridge case-length consistency varies from lot to lot, as well as by maker. Some manufacturers are more consistent in this dimension than others. [Editor’s note: It is easy to trim pistol brass to uniform length. Doing this will make your taper crimps much more consistent.]
Primers and Powders — Comparison Test for Accuracy
Pay attention to primer brands, powder types and charges. Evaluating accuracy with a Ransom or other machine rest at 50 yards can quickly reveal the effect of changes made to handload recipes.
This animation showing 1911 Pistol operation has over 30 million YouTube views:
Bullet Selection — FMJ vs. JHP
Bullets are another vital issue. First, there is the question of FMJ vs. JHP. A friend of this writer spent decades making and accuracy-testing rifle and pistol bullets during QC for a major bullet manufacturer. In his experience, making highly-accurate FMJ bullets is much more difficult than making highly-accurate JHPs, in large part due to the way the jackets are formed. Small die changes could affect accuracy of FMJ lots dramatically.
The CMP now allows “safe, jacketed ammunition” in Excellence-in-Competition (EIC) Service Pistol matches, although wadcutter ammunition is prohibited. Thus, the option to use very accurate JHP designs simplifies the life of CMP Service Pistol shooters in pursuit of the Distinguished Pistol Shot badge.
Hopefully, these tips will be helpful to any pistol shooters interested in accurate handloads, not just “Bullseye” shooters. Small tweaks to one’s normal routine can pay big dividends in improved accuracy and make practice and competition more rewarding.
In the archives of The First Shot (the CMP’s Online Magazine), SGT Walter E. Craig of the USAMU discusses physical conditioning for competitive shooters, particularly High Power competitors. Fitness training is an important subject that, curiously, is rarely featured in the shooting sports media. We seem to focus on hardware, or esoteric details of cartridge reloading. Yet physical fitness also matters, particularly for High Power shooters. In his article, Craig advocates: 1) weight training to strengthen the Skeletal Muscle System; 2) exercises to build endurance and stamina; and 3) cardiovascular conditioning programs to allow the shooter to remain relaxed with a controlled heart beat.
SGT Craig explains: “An individual would not enter a long distance race without first spending many hours conditioning his/her body. One should apply the same conditioning philosophy to [shooting]. Physical conditioning to improve shooting skills will result in better shooting performance[.] The objective of an individual physical training program is to condition the muscles, heart, and lungs thereby increasing the shooter’s capability of controlling the body and rifle for sustained periods.”
In addition to weight training and cardio workouts (which can be done in a gym), SGT Craig advocates “some kind of holding drill… to develop the muscles necessary for holding a rifle for extended periods.”
For those with range access, Craig recommends a blind standing exercise: “This exercise consists of dry-firing one round, then live-firing one round, at a 200-yard standard SR target. For those who have access only to a 100-yard range, reduced targets will work as well. Begin the exercise with a timer set for 50 minutes. Dry-fire one round, then fire one live round and without looking at the actual impact, plot a call in a data book. Continue the dry fire/live fire sequence for 20 rounds, plotting after each round. After firing is complete, compare the data book to the target. If your zero and position are solid, the plots should resemble the target. As the training days add up and your zero is refined, the groups will shrink and move to the center.”
Fitness training and holding drills help position shooters reach their full potential. Here is 6-Time U.S. National Long Range Champion John Whidden.
Training for Older Shooters
Tom Alves has written an excellent article A Suggested Training Approach for Older Shooters. This article discusses appropriate low-impact training methods for older shooters. Tom explains: “Many of the articles you will read in books about position shooting and the one mentioned above are directed more toward the younger generation of shooters in their 20s. If you look down the line at a typical high power match these days you are likely to see quite a few folks who are in their middle 30s and up. Many people in that age range have had broken bones and wear and tear on their joints so a training program needs to take that into account. For instance, while jogging for an extended period for heart and lung conditioning may be the recommended approach for younger folks, it may be totally inappropriate for older people.”
The USAMU has published a “how-to” article about bullet sorting. While many of us may sort bullets by base-to-ogive length (and/or weight), the USAMU story explores the “how and why” of sorting bullets by Overall Length (OAL). Read the article highlights below, and make your own decision as to whether OAL sorting is worth the time and effort. Bryan Litz of Applied Ballistics says that sorting by OAL is not a bad idea, but base-to-ogive bullet sorting probably represents a better investment of your time.
Bullet Sorting by Overall Length
We’d like to share a specialized handloading technique which we’ve long found beneficial to our long-range (600 yards and beyond) accuracy. Sorting of bullets for extreme long range (LR) accuracy is not difficult to do, but some background in theory is needed.
Here at USAMU’s Handloading Shop, we only sort individual bullets for the most demanding Long-Range applications and important competitions. Only the most accurate rifles and shooters can fully exploit the benefits of this technique. The basic sorting process involves measuring the Overall Length (OAL) of the bullets, and grouping them in 0.001″ increments. It’s not unusual to find lots of match bullets that vary as much as 0.015″-0.020″ in length throughout the lot, although lots with much less variation are seen as well. Even in bullet lots with 0.015″ OAL variation, the bullet base-to-ogive length will show much less variation. Hence, our basic sort is by bullet OAL. One obvious benefit of sorting is easily seen in the attached photo. The few bullets that are VERY different from the average are culled out, reducing probable fliers.
How does one know what OAL increments to use when sorting? The answer is simple. As each lot of bullets is unique in its OAL distribution, it’s best to sample your bullet lot and see how they are distributed. In the attached photo, you will see a set of loading trays with a strip of masking tape running along the bottom. Each vertical row of holes is numbered in 0.001″ increments corresponding to the bullets’ OAL. A digital caliper makes this task much easier. As each bullet is measured, it is placed in the line of holes for its’ OAL, and gradually, a roughly bell-shaped curve begins to form.
Note that near the center, bullets are much more plentiful than near the edges. At the extreme edges, there are a few that differ markedly from the average, and these make great chronograph or sighting-in fodder. We recommend using a sample of 200 bullets from your lot, and 300 is even better. Some bullet lots are very consistent, with a tall, narrow band of highly-uniform bullets clustered together over just a few thousandths spread. Other lots will show a long, relatively flat curve (less uniform), and you may also see curves with 2 or more “spikes” separated by several 0.001″ OAL increments.
Bullet Sorting — OAL vs. Base-to-Ogive vs. Weight
Expert advice from Bryan Litz, Applied Ballistics
I’m often asked what is a the best measure to sort bullets by, and the answer (to this and many other questions in ballistics) is: it depends.
Choosing to sort by overall length (OAL), base to ogive (BTO), bearing surface, weight, etc. can get overwhelming. Shooters typically look for something they can measure, which shows a variation and sort by that. It’s common for dimensional variations to correlate. For example, bullets which are longer in OAL are typically also shorter in BTO, and have longer noses. All these are symptoms of a bullet that was pushed a little further into the pointing die, or possibly had more than average lube while being swaged. So in essence, if you sort by BTO, you’re measuring one symptom which can indicate a pattern in the bullets shape.
So, the question still stands — what should you measure? You’ll always see more variation in OAL than BTO, so it’s easier to sort by OAL. But sometimes the bullet tips can be jagged and have small burrs which can be misleading. Measuring BTO will result in a lower spread, but is a more direct measure of bullet uniformity.
Then there’s the question of; how much variation is too much, or, how many bins should you sort into? Shooters who see 0.025” variation in BTO may choose to sort into 5 bins of 0.005”. But if you have only 0.005” variation in the box, you’ll still sort into 5 bins of 0.001”. What’s correct? You have to shoot to know. Live fire testing will answer more questions, and answer them more decisively than any amount of discussion on the subject. The test I recommend is to identify bullets on the extreme short end of the spectrum, and some on the extreme long end. Load at least 10 rounds of each, and take turns shooting 5-shot groups with them. If there is a difference, it will be evident. The results of the testing will answer your question of: should I sort based on X, Y, or Z?”
You can read more discussions on this and other similar subjects in our Accurateshooter.com Shooters’ Forum. Here’s a link to a thread discussing bullet sorting: Bullet Sorting Thread
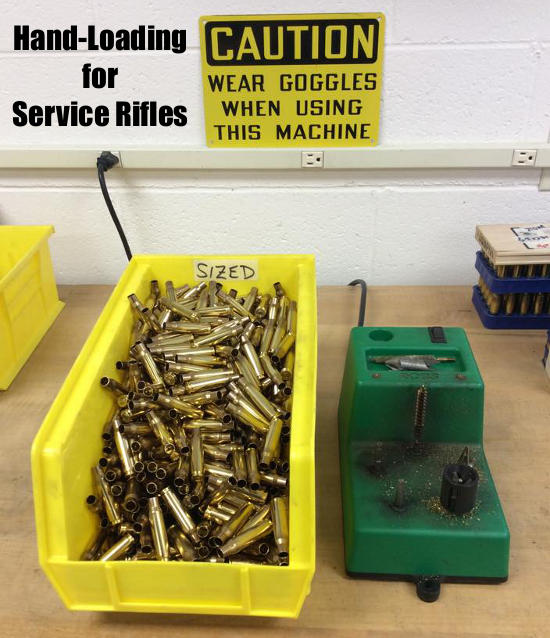
The U.S. Army Marksmanship Unit (USAMU) has published a great series of reloading “how-to” articles on its Facebook Page. This post covers key factors to consider when loading ammunition for Match Rifles and Service Rifles, with a particular focus on self-loading “gas guns”. Visit the USAMU Facebook Page regularly for other, helpful reloading and marksmanship tips.
We offer some “cardinal rules” to help new gas-gun handloaders with safety and efficiency. These address both Match Rifle and Service Rifle versions of the AR15, M1 Garand, M1A, and M110. However, they can also improve safe reloading for many other auto-loaders such as M1 Carbines, FALs, SIGs, etc. The author distilled these principles many years ago to help focus on the essential aspects of these rifles.
RULE ONE: Service Rifles Are Not Benchrest Rifles
Gas-guns require a relatively loose fit between ammunition and chamber (vs. bolt actions) for safe, smooth operation. Many techniques, such as neck sizing and keeping cartridge headspace quite tight, are popular in the extreme bolt gun accuracy realm. However, they are of little value with Service Rifles, and some could even be hazardous. Before adopting a specialized technique, seriously consider whether it is appropriate and beneficial in a gas-gun.
RULE TWO: Never Compromise Safety to Obtain Accuracy
Example: If choosing a brand of great, but ultra-sensitive match primers offers possibly better accuracy at the risk of slam-fires in your design of rifle, don’t do it! You are issued exactly two eyes and ten fingers (best-case scenario). Risking them trying to squeeze 0.25 MOA better accuracy out of an M1A, etc. simply isn’t worth it.
RULE THREE: Tailor the Precision to Your Individual Skill and Your Rifle’s Potential
This has been addressed here before, but bears repeating for newcomers. If you are struggling to break out of the Marksman Class, or using a CMP M1 “As-Issued,” then laboriously turning the necks of your 600-yard brass is a waste of time. Your scores will improve much faster by practicing or dry-firing. On the other hand, if the reigning champions anxiously check your scores each time you fire an event, a little neck-turning might not be so far-fetched.
Verifying Load Improvements — Accuracy hand-loading involves a wide variety of techniques, ranging from basic to rather precise. Carefully select those which offer a good return on investment for your time and labor. In doubt? Do a classic pilot study. Prepare ammo for at least three or four ten-shot groups with your new technique, vs. the same with your standard ammo. Then, pick a calm day and test the ammo as carefully as possible at its full distance (e.g. 200, 300, or 600 yards) to verify a significant improvement. A little testing can save much labor!
This video explains the procedure for ordering an M1 Garand from the CMP.
RULE FOUR: Be Your Own Efficiency Expert
Serious Service Rifle shooters generally think of ammunition in terms of thousands of rounds, not “boxes”, or even “hundreds”. Analyze, and WRITE DOWN each step in your reloading process. Count the number of times each case is handled. Then, see if any operations can be dropped or changed without reducing safety or accuracy. Eliminating just two operations saves 2000 steps per 1000 rounds loaded. Conversely, carefully consider any measurable benefits before adding a step to your routine.
RULE FIVE: In Searching for Greater Accuracy with Efficiency, Look for System Changes
For example, instead of marking your 300-yard rounds individually to differentiate them from your 200-yard ammo, would a simple change in primers work? If accuracy is maintained, using brass-colored primers for 200 and silver for 300 provides an indelible indicator and eliminates a step! Similarly, rather than spending hours selecting GI surplus brass for weight and neck uniformity, consider splurging on some known, high-quality imported match brass for your 600-yard loads. Results should be excellent, time is saved, and given limited shooting at 600 yards, brass life should be long.
RULE SIX: Check All Your Primers Before Packaging Your Loaded Ammo
This seems simple and even intuitive. However, many slam-fires (which were much more common when M1s and M1As were the standard) are due, at least in part, to “high” primers. Primers should be seated below flush with the case head. The USAMU has addressed this at length in a previous column, but each round should be checked for properly-seated primers before they are packaged for use.


 In the archives of On The Mark magazine, DCM Emeritus Gary Anderson, an Olympic Gold medal-winning shooter in his younger years, offers sage advice for competitive shooters.
Gary Anderson served as the Director of the Civilian Marksmanship Program (CMP) from 1999-2009, and is now DCM Emeritus. As a Nebraska farmboy, Gary grew up hunting and shooting. Dreams of winning an Olympic Gold Medal in shooting led Gary to the U.S. Army. In 1959, he joined the elite U.S. Army Marksmanship Unit. Just two years later, he won his first national championship.


 Know the Rules


 Use Consistent Brass
 Bullet 1 (L-R), the RN/FB, has a very slight taper and only reaches its full diameter (0.284 inch) very near the cannelure. This taper is often seen on similar bullets; it helps reduce pressures with good accuracy. The calculated BSL of Bullet 1 was ~0.324″. The BSL of Bullet 2, in the center, was ~0.430″, and Bullet 3’s was ~ 0.463″. Obviously, bullets can be visually deceiving as to BSL!

 Using a spotting scope seems simple. Just point it at the target and focus, right? Well, actually, it’s not that simple. Sometimes you want to watch mirage or trace, and that involves different focus and viewing priorities. Along with resolving bullet holes (or seeing other features on the target itself), you can use your spotting scope to monitor mirage. When watching mirage, you actually want to focus the spotting scope not on the target, but, typically, about two-thirds of the distance downrange. When spotting for another shooter, you can also use the spotting scope to watch the bullet trace, i.e. the vapor trail of the bullet. This will help you determine where the bullet is actually landing, even if it does not impact on the target backer.
 In the archives of