At the request of our readers, we provide select “Deals of the Week”. Every Sunday afternoon or Monday morning we offer our Best Bargain selections. Here are some of the best deals on firearms, hardware, reloading components, optics, and shooting accessories. Be aware that sale prices are subject to change, and once clearance inventory is sold, it’s gone for good. You snooze you lose.
NOTE: All listed products are for sale to persons 18 years of age or older. No products are intended for use by minors.
Palmetto State Armory — St. Patrick’s Day Sale
⏺️ » Big savings on hundreds of firearms, optics, ammo packs and more
Palmetto State Armory is running a big St. Patrick’s Day Sale this week. Hundreds of items are deeply discounted. There are truly amazing deals such as Savage Stevens 320 12ga Shotgun for just $169.99! You read that right, get a brand new pump shotgun for under $170.00. There are big discounts on pistols too — for example the Ruger LCP Max Compact .380 ACP carry pistol is now just $199.99, $200 off the $399.99 regular price. And there are many excellent optics on sale this week as well.
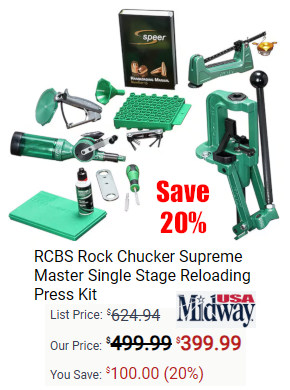
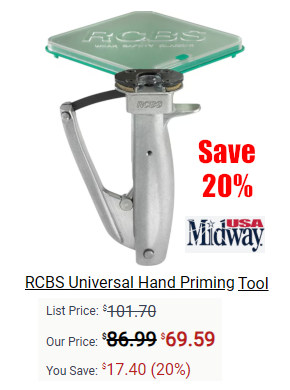
MidwayUSA — March Markdown Sale, Discounts up to 66%
⏺️ » Major sale on gear, bullets, primers, ammo and more
This month MidwayUSA is offering big savings on a huge range of products including scopes, reloading tools, gun vises, rifle rests, powder dispensers, camping gear, and reloading components (powder, primers, brass, bullets). Quality hunting ammunition is also on sale. The March Madness Markdown sale offers huge discounts on nearly 1400 products.
Before you load that new cartridge brass for the first time, run an expander mandrel down the case necks. This will iron out dents and provide more uniform neck tension. Chose a mandrel diameter that provides appropriate neck tension.
Lapua brass is so good that you’ll be tempted to just load and shoot, if you have a “no-turn” chamber. However, some minimal case prep will ensure more uniform neck tension. Keeping your neck tension very uniform allows more consistent bullet seating. That, in turn, usually yields better accuracy, and lower Extreme Spread and Standard Deviation (ES/SD). Lapua brass, particularly 6mmBR, 6.5×47, 6.5 Creedmoor, and .308 Win comes from the factory with tighter-than-optimal necks.
Before you seat bullets, at a minimum, you should inside chamfer the case mouths, after running an expander mandrel down the necks. The expander mandrels from both Sinclair Int’l (Brownells, $14.99 stainless, $24.99 Titanium Nitride coated) and K&M will both leave the necks with enough neck tension (more than .001″) so you can then seat bullets without another operation. We suggest putting a bit of lube on the mandrel before running it down the necks — but remove any lube that gets inside the necks before seating bullets. If you do a lot of loading you may benefit from a Titanium Nitride-coated mandrel.
Both Sinclair and K&M Tools make a die body specifically to hold expander mandrels. The $49.99 Sinclair version fits caliber-specific expander mandrels which measure approximately .001″ less than bullet diameter for each caliber. This is an updated “Gen II” design that completely captures the mandrel within the die so the mandrel cannot pull out. It also has an O-ring in the die cap that allows the mandrel to self-center within the case neck. Brownells offers two sizes of Sinclair die bodies for expander mandrels: .17 -.338 caliber (#749011715 $49.99); and .357 – .50 caliber (#749008843, $49.99). All Generation II dies are machined from stainless steel and the standard diameter 7/8-14 dies include the Sinclair Stainless Steel Split Lock Ring.
Once you run the expander mandrel down the necks of Lapua brass, after you account for brass spring-back, you’ll have about .002″ neck tension*. This will make the process of seating bullets go much more smoothly, and you will also iron out any dents in the case mouths. Once the case mouths are all expanded, and uniformly round, then do your inside neck chamfering/deburring. The same expander mandrels can be used to “neck-up” smaller diameter brass, or prepare brass for neck-turning.
Forum member Mike Crawford adds: “These expanders can also reduce runout from offset seating. Prior to bullet seating, expand the sized necks to force thickness variance outward. With the Sinclair system, the necks will springback fine, and will not be pulled out of center. This leaves plenty of tension, and bullets seated more centered. I do this, even with turned necks, to get improved seating.”
Mandrels vs. Expander Balls on Decapping Rods
If you haven’t acquired an appropriate expander mandrel for your brass, but you DO have a full-length sizing die with an expander ball, this will also function to “iron out” the necks and reduce tension. However, using a die with an expander ball will work the necks more — since you first size them down, then the ball expands them up again. Typically (but not always), run-out is worse when using an expander ball vs. an expander mandrel.
* This .002″ tension is what we have observed with Lapua 6mmBR, 6.5×47, 6.5 Creedmoor, and .308 Win brass. This might vary with much smaller or larger cases, and of course a different brand of brass might yield different results. If you get too little tension with your current mandrel, you can get a smaller-diameter mandrel from 21st Century Innovation, with stainless, Black Nitride, or Titanium nitride versions. The Nitride models have less friction.
Many shooters these days clean their cartridge brass ultrasonically, or wet-tumble their cases with stainless media (above). Both methods get brass clean and shiny, inside and out. However, when those wet-cleaning processes are completed, you’re left with a pile of soaking wet brass. How do you dry your brass quickly and efficiently, without unsightly water spots? Read on for some great answers…
In our Shooters’ Forum, Member Terry asked: “How do you dry your brass after Ultrasonic cleaning?” In a Reloading Forum Thread, many smart suggestions were posted. A dozen fellow members outlined a variety of effective case-drying procedures, which work equally well for both wet-tumbled brass and ultrasonically-cleaned cases. Here are the Top 10 brass-drying suggestions from our Forum members.
TOP TEN Ways to Dry Cartridge Brass After Wet Cleaning
1. Food Dehydrator — Shake the brass in towel to get the bulk of water off. Next leave in the food dehydrator for 45 minutes or until there are no signs of moisture inside the cases. — Lawrence97
2. Lyman 5-Level Case Dryer — Rinse off cleaning solution(s), then load brass by type into racks in Lyman Cyclone Case Dryer. This is easier to load/unload than food dehydrators and holds more cases.
3. Hot Water + Compressed Air — Rinse all your cases as a batch using scalding hot water from the kitchen sink. Hot water evaporates off of brass very very quickly. Then hit them with compressed air. Takes 10 minutes. Simple. — SG4247
4. Oven Dry in Pre-Heated Oven — After pre-heating to 200° or so, turn off oven and put brass inside on a tray. Most important! Tell your wife what you are doing so she doesn’t crank it up to 425 to heat pizza! — MClark
NOTE: Many other members suggested oven drying at 150-200°. We recommend turning OFF the oven so you don’t cook your brass if you forget to remove the cases.
5. Towel Dry then Warm with Heat Gun — Roll brass in a towel until no more water shakes out. Lay out on cardboard box top and blow off with Harbor Freight heat gun. $9.99 on coupon. Two minutes of heated air and about half hour of wait and they are good to go. This is with primers removed. — Shaggy357
6. Compressed Air, then Sun Dry Outside – I rinse the brass, then blow them out with compressed air. Then, dependent on the time of year, lay them on a towel in the sun. — HogPatrol
7. Dishwasher on Dry Cycle – In the winter, I drop my wet brass cases neck-down on the rack pegs in the dishwasher, then turn on the dry cycle. In the summer…well, I’m in Texas. They go to the porch for a bit. — Toolbreaker
8. Alcohol Rinse then Air or Oven Dry — Rinse in 90% Isopropyl alcohol and either let air dry or stick in 175° oven for half an hour. Alternatively, use a dehydrator. — Zipollini
9. Slow Air-Dry in Loading Blocks — I have a reloading block with holes drilled in it. I simply load the block up and let it air-dry in the cupboard for a couple of days. — JCS
10. Wipe with Towel Then Anneal Normally — This thread is stirring my OCD side. Seems complicated for just drying — my brass dries just fine when I anneal it. This entire process can’t take an hour per batch. When finished, the brass is cleaned, annealed, and ready to size. — CHLuke
Deprime, then tumble brass with stainless media, water, Lemishine, and dish detergent.
Shake them easily in a strainer to knock out most media then grab 4-5 pieces, shake them over the bucket for the last of the media then inside a towel.
Finally blow out the primer pockets and wipe with a towel, load in the Annealeez.


 Both Sinclair and K&M Tools make a die body specifically to hold expander mandrels. The $49.99

 5. Towel Dry then Warm with Heat Gun — Roll brass in a towel until no more water shakes out. Lay out on cardboard box top and blow off with Harbor Freight heat gun. $9.99 on coupon. Two minutes of heated air and about half hour of wait and they are good to go. This is with primers removed. — Shaggy357


