Smart gun owners know they need a good, solid gun safe. But when choosing a gun safe, what kind of lock should you select — electronic or mechanical? Both types have their advantages and disadvantages. This article will help you make the right choice for your needs and also get the most reliable performance from either type.
Gunsafes can be fitted with either an electronic keypad-style lock, or a conventional dial lock. In our Gunsafe Buyer’s Guide, we explain the important features of both dial and electronic lock systems. Many safe-makers will tell you that consumers prefer electronic locks for convenience. On the other hand, most of the locksmiths we’ve polled believe that the “old-fashioned” dial locks, such as the Sargent & Greenleaf model 6730, will be more reliable in the long run. CLICK HERE to learn more about the Pros and Cons of Mechanical (dial) Lock vs. Electronic (keypad) safe locking systems.
One safe supplier, The Safe Keeper, notes that mechanical (dial) locks tend to be more reliable over long periods: “When it comes to reliability, a mechanical lock is the way to go. Anything electronic is designed to fail sooner or later. For every 20 broken electronic locks we will get one mechanical. Bottom line is, it’s not that complicated to input a combination on a mechanical lock. Those extra 7 seconds just might save you from being locked out and having your safe drilled opened.”
This Liberty Safe video compares Mechanical (dial or key) vs. Electronic (keypad) safe locking systems.
Here is the opinion of RFB from Michigan. He is a professional locksmith with over two decades of experience servicing locks and safes of all brands and types:
What a Professional Locksmith Says:
For the convenience of quick opening, the electronic locks can’t be beat. However, for endurance and years of trouble-free use, the electronics can’t compare with the dial lock.
I’ve earned my living, the past 22 years, servicing locks of all types. This includes opening safes that can’t otherwise be opened. I do warranty work for several safe manufacturers (including Liberty). What I’ve learned in all those years is that manual dial locks have very few problems. The most common is a loose dial ring which can shift either left or right, which will result in the index point being in the wrong place for proper tumbler alignment. This is simple to fix.
Electronic locks, however, can have all kinds of issues, and none (except bad key-pad) are easy to fix, and when one goes bad, it must be drilled into to open it. IMO, it’s not a matter of ‘if’ an electronic lock will ultimately fail, but a matter of ‘when’ it will fail. Over the past 10 years or so, since electronics have become more and more prevalent, I’ve had to drill open bad electronic locks vs. bad manual dial locks on a ratio of about 20-1.
My professional opinion is to get the manual dial lock, unless you’ve got a good friend who is a locksmith/safecracker.
How Secure is Your Lock?
RFB tells us that both dial and electronic locks offer good security, provided it’s a good quality lock made by LaGard, Sargent & Greenleaf, Amsec, or Kaba/Ilco. However, RFB warns that “Some of the ‘cheaper’ locks (both manual and electronic) however, are very simple to bypass.
An electronic lock that’s glued or ‘stuck’ to the door with double-sided tape, and has its ‘brain’ on the outside of the lock in the same housing as the keypad, and merely sends power to an inner solenoid via a pair of wires through the door, is a thief’s best friend. The good ones have the brain inside the safe, inaccessible from the outside.
No amateur can ‘manipulate’ either a good manual or electronic lock. Both give you a theoretical one million possible combinations. I say ‘theoretical’ because there are many combinations that cannot, or should not, be used. You wouldn’t set your combo on a dial lock to 01-01-01 etc., nor would you set an electronic to 1-1-1-1-1-1, or 1-2-3-4-5-6.”
Tips for Dial Locks
RFB notes that “The speed, and ease of use, of a manual dial lock can be improved upon, simply by having your combo reset using certain guidelines. Avoid high numbers above 50. Having a 1st number in the 40s, 2nd number anywhere from 0-25, and 3rd number between 25 and 35 will cut dialing time in half, without compromising security. (For mechanical reasons I won’t get into here, the 3rd number of a good manual dial lock cannot — or should not — be set to any number between 95 & 20).”
Tips for Electronic Locks
Electronic locks can have the combination changed by the user much more easily than dial locks. That should be a good thing. However, RFB explains: “That can be a double-edged sword. More than a few times I’ve had to drill open a safe with an electronic lock that has had the combo changed incorrectly by the user, resulting in an unknown number that nobody can determine. Also, don’t forget that electronic locks have a ‘wrong-number lock-out’. I would NOT rely on the normal quickness of an electronic 6-number combo in an emergency situation. If for any reason (panic etc.) you punch in the wrong number several times, the lock will shut down for a 5-minute ‘penalty’.
Combo Manual and Electronic Locking Systems
Forum member ELR Researcher notes that some companies offer Combo Electronic and Manual lock systems: “You can get BOTH on the same safe[.] That said, I have ALWAYS been able to just change batteries on the very rare occasion when I forgot to replace a battery, and I’m right into my safe. Securam also offers a SafeLogic Xtreme model that has both types in one unit — see Securamsys.com. This offers “Push button access for everyday use [and] SpinDial Access for Xtreme situations.”
Replace Electronic Lock Batteries Every Year
To get the most life out of any electronic (keypad Lock), you should always change the battery at least once a year, whether it needs it or not. With some systems you should replace every 6 months! Low voltage won’t necessarily shut down the lock, but using it in a low voltage situation is bad for the electronics, and eventually will cause lock failure. So, If you do nothing else to maintain your digital-lock safe, replace the battery every year.
And get a fresh battery (with a release date) from the store — don’t just pull a battery out of a storage bin, even if it’s never been used. Old batteries can lose “juice” and physically degrade, even when in storage.
This article is Copyright 2025 AccurateShooter.com. No reproduction on any other website is authorized without payment of licensing fees or liquidated damages.
The 6.5 Creedmoor is now one of the most popular cartridges chambered in factory rifles. It found favor among hunters and PRS competitors, but then its little brother the 6mm Creedmoor became widely adopted because the 6mm version delivered less recoil, equivalent or better ballistics, and lower bullet cost.
There’s another Creedmoor cousin, the 22 Creedmoor, basically a 6mm Creedmoor necked down to .224 caliber. While this certainly can be used for PRS and tactical competition, the 22 Creedmoor seems to be ideally suited as a high-velocity varmint round — something to replace the 22-250. You get 22-250 class velocities with a more modern cartridge design, and high-quality brass.
LEARN MORE about the 22 Creedmoor
There is an excellent write-up in the GunsAmerica Digest about the 22 Creedmoor cartridge. Reviewer Jeff Cramblit built a 22 Creedmoor rifle and tested it with a variety of bullet weights. He concluded it worked best as a varminter, but could also do PRS duty, provided it is loaded under the 3200 fps velocity limit common in PRS matches. CLICK HERE to read full GunsAmerica 22 Creedmoor test report.
22 Creedmoor Ammunition, SAAMI Spec
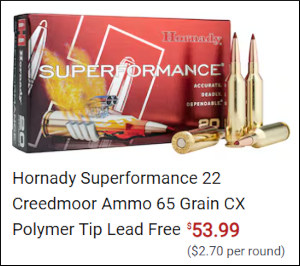
SAAMI (Sporting Arms & Ammunition Mfg’s Institute) officially approved the 22 Creedmoor Cartridge in February, 2024. The cartridge has become more popular over the last two years, so ammo production has increased. Loaded 22 Creedmoor ammo is available from Copper Creek, Gunwerks, Hornady, Nosler, and Spark Munitions. Copper Creek has produced the most 22 Creedmoor loaded ammo varieties, with 18 different bullet options from 68 grains to 95 grains, including two lead-free bullet types. Copper Creek also offers load development packs with either Peterson or Hornady brass. Below are five Cooper Creek loaded ammo options with Sierra and Berger bullets.
In addition, multiple companies now offer 22 Creedmoor cartridge brass: Alpha Munitions, Atlas ADG, Hornady, and Peterson Cartridge. The Peterson 22 Creedmoor brass is excellent.
Of course you can neck down high-quality Lapua 6mm Creedmoor brass. Lapua brass has outstanding consistency and durability. Choose from large primer or small primer types. Necking down is a relatively easy one-step operation with a neck-sizing or full-length sizing die. You’re just stepping down to .224 from .243 — not that big of a jump.
22 Creedmoor Brass from Peterson Cartridge
According to Derek Peterson, President of Peterson Cartridge, “We decided to build the tooling to make our .22 Creedmoor brass in response to the uptick in long-distance predator and varmint hunting. Plus the round is just straight-up fun to shoot. It is a low-recoil, flat shooting, wind-bucking round [that is] deadly accurate up to 800 yards.”
“When we designed the tooling for the .22 Creedmoor we set out to make casings with improved features”, Peterson added. “And we were successful. We increased the head hardness to tolerate higher pressures. And we increased our internal volume slightly to work better with the slow-burning powders [such as Reloder 26 or H1000].”
22 Creedmoor for Varmints — Video from the Varmint Fields of Eastern Oregon
Bullet Choices for 22 Creedmoor
If you have an appropriate twist-rate barrel, you can load the 22 Creedmoor with heavy 85-95 grain bullets. However, we think that, for varminting, the cartridge is better suited for lighter 65-80 grain bullets. This yields high velocities that provide explosive impacts on small varmints.
This GunsAmerica photo shows, L to R, 90gr Sierra MK, Hornady 88gr, 80gr, and 75gr .224 caliber bullets.
What is the Best Role for the 22 Creedmoor?
GunsAmerica tester Jeff Cramblit favors the 22 Creedmoor as a varmint round: “The performance of the 22 Creedmoor with 75-80 grain bullets makes it an outstanding varmint cartridge. I’ve seen claims of 80 grain Bergers at 3500 fps out of 26″ barrels, which would be devastating on any varmint. Loaded ammunition is available with bullets in the 70-75 range leaving 24” barrels at velocities around 3400+ fps, a bit more conservative than personal hand-loading, but still making it a very flat shooting, low recoiling round delivering impressive results.”
Jeff says the 22 Creedmoor will also work for PRS with heavier bullets: “I built the 22 CM to be a dual-purpose gun, or actually a 3-purpose gun. The first was for the coyotes and varmints previously mentioned. The second was for shooting PRS (Precision Rifle Series) style matches on occasion, and the third was for hunting deer-sized game. As with any multi-purpose tool there tends to be compromises.”
More Efficient Alternatives — the 22 BR and 22 BRA
If you already have a 6mmBR rifle, and you want a higher velocity cartridge for varmint shooting, you may want to consider just necking down your brass. We’ve shot the 22 BR in the varmint fields and a steel match. This cartridge offers excellent accuracy, and is very flat shooting. We recommend getting a fairly fast-twist barrel so you can shoot the longer, high-BC bullets if you want to use your 22 BR in local matches. You’ll find that shorter 40gr to 66gr varmint bullets shoot great even in the faster-twist barrels.
For more information on the 22 BR for varminting and target shooting, with recommended loads for 40gr to 90gr bullets, read our Accurate Shooter 22 BR Cartridge Guide.
If you want more velocity than a 22 BR offers, you can have your barrel chambered for the 22 BRA (BR Ackley). With its 40-degree shoulder, the 22 BRA offers a few more grains capacity, so you can get more FPS with all classes of bullets. Fire-forming is easy — just use a normal 22 BR load with good bullets and shoot. We’ve fire-formed a 22 BRA in a varmint match and it showed excellent accuracy — there’s no need to waste bullets fire-forming. Go ahead and fire-form during a fun match.
Beretta USA officially kicked off its 500-year anniversary with a celebration at the 2026 SHOT Show in Las Vegas, marking the start of a yearlong global tribute to the world’s oldest gun-producing company. The celebration began ahead of the show with Beretta’s exclusive, invite-only Beretta Range Day on Sunday, January 18. The event welcomed more than 200 media members and industry partners for a hands-on preview of Beretta’s newest product releases. Throughout the week, attendees had the opportunity to meet and engage with members of Team Beretta. Beretta’s 500th anniversary celebration will continue throughout 2026 with special product releases, storytelling initiatives, and global events honoring the company’s heritage and forward-looking vision.
Beretta is a huge gun industry company — the Beretta Holding Group now owns Sako, Tikka, Burris, Steiner, and Norma. Sako and Tikka were acquired in 2000, Burris Optics in 2002, and Beretta added Steiner-Optik and Norma via RUAG Ammotec. Beretta Holding provides a complete range of firearms, optics, and ammunition through these and a dozen other brands.
“SHOT Show 2026 marked the beginning of a once-in-a-lifetime celebration for Beretta”, said Cristian Capelli, Beretta USA General Manager. “From the range to the show floor, we were proud to bring together our partners, media, and friends of the brand to honor five centuries of innovation while showcasing the future of Beretta.”
Beretta’s 500th anniversary celebration will continue throughout 2026 with special product releases, storytelling initiatives, and global events honoring the company’s heritage and future plans. To learn more about Beretta Anniversary news and special releases, visit Beretta500.com.
Beretta Range Day Recap Product Review Videos
Beretta showcased numerous new firearms at the exclusive Range Day hosted just before SHOT Show 2026. A wide variety of guns were available for test firing including Beretta shotguns, SAKO and Tikka rifles, and multiple Beretta pistols, including the new Jaguar B22.
New Beretta Jaguar .22 LR Pistol
The new Beretta Jaguar B22 pistol is an advanced .22 LR rimfire pistol that comes in two variants, both tested in the above TFBTV video. The higher-priced competition model features a bronze-colored frame and substantial ported muzzle brake.
Tikka T3X Ace — Great New Chassis Rifle
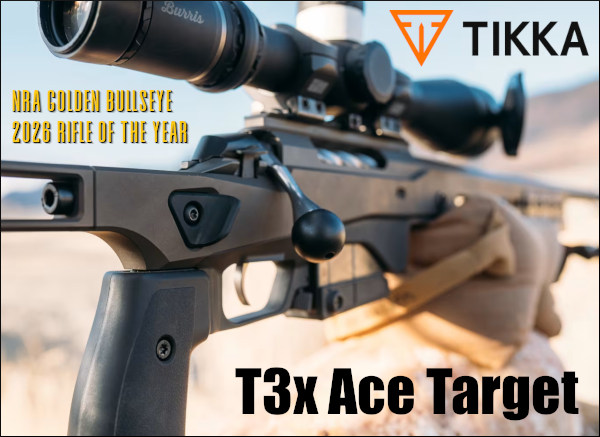
The Tikka T3x ACE Target rifle has been named the 2026 American Rifleman Golden Bullseye Rifle of the Year, a highly coveted award presented annually by NRA Media. This impressive factory rifle is a great choice for PRS/NRL competition. It boasts a good chassis with full-length ARCA rail, modular magwell, and adjustable cheekpiece. The action is smooth with a nice fluted bolt and big bolt handle knob. On top of the action is a +20 MOA Picatinny rail which helps with long-range shooting. This rifle has shown very good accuracy with factory ammo, aided by an excellent 2-stage trigger that adjusts from 2 to 4 pounds. T3x Ace Target available chamberings are .223 Rem, 6.5 Creedmoor, and .308 Win, all priced at $1799.00 at EuroOptic.com. The 6.5 Creedmoor with 26″ barrel would be our choice for PRS/NRL competition.
SAKO S20 — Great Hunting Rifle
About Beretta: Established in 1526, Beretta is the world’s longest-standing gun-making enterprise, with a legacy spanning 16 generations of continuous family ownership. For 500 years, firearms bearing the Beretta name have been trusted and used around the world. Beretta USA Corp. was established in 1977 and became the provider of the most widely deployed sidearm in the U.S. Armed Forces. Today, Beretta USA is part of Beretta Holding Group, which includes over 50 global subsidiaries and 20 noted brands. Beretta manufactures and distributes a complete range of firearms, accessories, and apparel.
Ever wish you could look inside your rifle, to see how the trigger and fire-control system work? Well now that is possible with the magic of 3D computer graphics. Modern software allows detailed “cutaway” side-views (see below), as well as 3D views with 360° rotation. The software can also provide X-Ray-type views into the gun’s internals — as you can see above. And computer animation can show the complete firing process from trigger pull to chambering of the next round.
Rem 700 Cutaway View from Right Side
This article provides some very cool 3-D “Cutaway View” animations of the popular Remington 700 action, probably the most successful American bolt-action ever created.
READERS — Take the time to watch the video! The Rem 700 animation is really outstanding! EVERY bolt-action shooter should watch this video all the way through.
Cutaway 3D Animation of Rem 700 Action — Watch Video
The Model 700 series of bolt-action rifles have been manufactured by Remington Arms since 1962. All are based on basically the same centerfire bolt action. They are typically sold with an internal magazine depending on caliber, some of which have a floor-plate for quick-unloading, and some of which are “blind” (no floor-plate). The rifle can also be ordered with a detachable box magazine. The Model 700 is a development of the Remington 721 and 722 series of rifles, which were introduced in 1948.
The Remington 700 is a manually-operated bolt action with forward, dual opposed lugs. It features “Cock On Opening”, meaning the upward rotation of the bolt when the rifle is opened cocks the firing pin. A cam mechanism pushes the firing pin’s cocking piece backward. The bolt face is recessed, fully enclosing the base of the cartridge. The extractor is a C-clip sitting within the bolt face. The ejector is a plunger on the bolt face actuated by a coil spring. The bolt is of 3-piece construction, brazed together (head, body. and bolt handle). The receiver is milled from round cross-section steel.
This video was made with the help of the World of Guns: Gun Disassembly interactive encyclopedia with 3D rendering. This remarkable web-based software allows users to view the inner workings of hundreds of different rifles and pistols — everything from a .22 LR Ruger to a .55-caliber Boys Anti-Tank rifle. There are also 25,000+ parts diagrams. This is a remarkable technical resource. SEE MORE HERE.
Much of the country is dealing with serious winter weather right now, with snow and very cold temperatures. For many shooting enthusiasts outdoor rifle shooting is replaced by indoor handgun shooting in the winter months. Pistol shooting is fun — that’s reason enough to head to an indoor range. In addition, all CCW permit holders should definitely practice regularly. For many people, indoor shooting can be done in the evening, after work, relatively close to home. Indoor ranges are most convenient for those who live near urban centers, where the biggest threats to public safety currently exist. This article talks about indoor firearms training and the proper procedures you should follow at indoor ranges.
This Video Covers Basic Gun Range Safety Rules and Etiquette
FIVE IMPORTANT SAFETY PROCEDURES for Indoor Ranges
1. Follow the Three Fundamental Rules for Safe Gun Handling
ALWAYS keep the gun pointed in a safe direction. ALWAYS keep your finger off the trigger until ready to shoot. ALWAYS keep the gun unloaded until ready to use.
2. Follow ALL Range Officer Instructions
ROs are the first and final authority on any range and their decisions are generally final. Arguing with a Range Officer may just get you thrown out.
3. Don’t Bother Others or Touch Their Guns
Respect other shooters’ privacy unless a safety issue arises. Do NOT engage other shooters to correct a perceived safety violation unless absolutely necessary – inform the RO instead. NEVER handle or touch another shooter’s firearm without their permission!
4. Know Your Range’s Rules
Review and understand any and all range rules and requirements/expectations. For example, what is the range’s maximum rate of fire? Are you allowed to collect your brass?
5. Know What To Do During a Cease Fire
IMMEDIATELY set down your firearm, pointed downrange, and STEP AWAY from the shooting booth (or bench). Range Officers do not want shooters trying to “secure/unload” their firearms in a cease fire situation — they want the shooters separated from their guns instantly.
BAD RANGE BEHAVIOR — Five Things NOT to Do at the Range
Here are the five worst behaviors we’ve seen at indoor ranges. These behaviors are both dangerous and inconsiderate. Any one of these behaviors can get you permanently banned from an indoor range.
1. Sweeping other individuals after loading a weapon behind the firing line is very bad. All your weapons should be empty until you reach your shooting station.
2. Turning the handgun sideways while trying to clear a malfunction or insert/remove a magazine. This will point the muzzle at a fellow shooter. Or, after shooting a gun, the shooter fails to clear the weapon and then places the gun somewhere near the shooting station with the muzzle in an unsafe position.
3. Reacting unpredictably when firing a high recoil handgun. We’ve seen people take a second shot by accident with the muzzle way off target.
4. Not obeying range commands — in particular continuing to shoot during called cease-fires.
5. Poorly aimed shooting that hits target frames or carriers, causing ricochets.
Double-Up on Hearing Protection When Shooting Indoors
When shooting indoors we recommend quality muffs with earplugs underneath, offering double protection. When inside an enclosed range, with other shooters blasting away right next to you, you really need effective hearing protection. But you also need to hear range commands and be able to communicate. That’s why we recommend electronic muffs with plugs underneath.
For indoor pistol shooting, we like the Howard Leight Impact Pro Muffs. These offer an impressive 30 dB Noise Reduction Rating (NRR). In addition, the electronic functionality allows you to hear all range commands clearly. These muffs are a good value. These are now available for $89.98 on Amazon (#ad). Howard Leight also makes good protective safety eyewear with ANSI Z87.1-2010 (High Impact) rating. These milspec, wrap-around Genesis safety glasses are $17.96 on Amazon (#ad) this week.
One Pistol, Two Barrels, Two Playing Cards — here’s a trick shot we just had to share. The talented Kirsten Joy Weiss does something we’ve never seen before, splitting TWO (2) playing cards with a unique, twin-barreled 1911-style pistol. Watch the video to see Kirsten pull off this double-barreled doozy of a trick, firing two bullets at the same time.
It took a few tries, but Kirsten makes the shot at the 3:14 time-mark:
Kirsten was enthusiastic about this unique trick: “Splitting two cards with two bullets fired at once? The double-barreled 1911 was just begging for a trick shot application. Arsenal Firearm’s 2011 A1 twin-barrel, 1911-style pistol is a heavy monster to wrangle, but a lot of fun to shoot!”
One of our Forum members complained that he wasn’t able to set his primers flush to the rim. He tried a variety of primer tools, yet no matter what he used, the primers still didn’t seat deep enough. He measured his primers, and they were the right thickness, but it seemed like his primer pockets just weren’t deep enough. He was mystified as to the cause of the problem.
Well, our friend Boyd Allen diagnosed the problem. It was the decapping rod. If the rod is adjusted too low (screwed in too far), the base of the full-diameter rod shaft (just above the pin) will contact the inside of the case. That shaft is steel whereas your case is brass, a softer, weaker metal. So, when you run the case up into the die, the shaft can actually stretch the base of the primer pocket outward. Most presses have enough leverage to do this. If you bell the base of the primer pocket outwards, you’ve essentially ruined your case, and there is no way a primer can seat correctly.
The fix is simple. Just make sure to adjust the decapping rod so that the base of the rod shaft does NOT bottom out on the inside of the case. The pin only needs to extend through the flash hole far enough to knock the primer out. The photo shows a Lyman Universal decapping die. But the same thing can happen with any die that has a decapping rod, such as bushing neck-sizing dies, and full-length sizing dies.
Whenever you use a die with a decapping pin for the first time, OR when you move the die to a different press, make sure to check the decapping rod length. And it’s a good idea, with full-length sizing dies, to always re-check the height setting when changing presses.
There are a variety of decapping dies currently on the market, with models available from LEE, Lyman, Hornady, RCBS, Redding, and Area 419 (at Brownells).
LEE Universal Decapping Die Costs Just $11.99
Speaking of decapping tools, Midsouth Shooters Supply sells the LEE Universal Decapping Die for just $11.99 (item 006-90292), a very good deal. There are many situations when you may want to remove primers from fired brass as a separate operation (prior to case sizing). For example, if your rifle brass is dirty, you may want to de-cap before sizing. Or, if you load on a progressive press, things will run much more smoothly if you decap your brass first, in a separate operation.
Decapping Dies for Cases with Smaller Flashholes
TAKE NOTE: Some Euro Small Flash Holes are spec’d at 1.5mm or 0.059″, and max out at about .062″, so these need a smaller die pin.
The low-cost LEE Universal Decapping Die will work with cartridges from 17 Fireball all the way up to big Magnums. However, NOTE that the decapping pin supplied with this Lee die is TOO LARGE for LAPUA 220 Russian, 6mmBR, 6.5×47, 6.5 Creedmoor, .308 Win (Palma) and Norma 6 PPC flash holes. Because the pin diameter is too large for these brass types, you must either turn down the pin, or decap with a different tool for cases with .059-.062″ flash-holes.
Brownells sells the impressive Area 419 Zero Universal Decapping Die. This features a spring-loaded decapping pin, with replaceable heads. The $50.00 die works with cases up to and including .338 Lapua length/diameter with no need for different inserts.
Redding makes a Universal Decapping Die with an optional smaller-diameter decapping rod for the smaller .059-.062″ flash holes found on the BR and PPC cases. The use of this die is explained in the video below:
For today’s Sunday GunDay story, we look at the legendary Remington 700, perhaps the most popular American bolt-action rifle of all time. After covering the history of the Rem 700 rifle, we provide an inside look at the Rem 700 through a series of cutaway animations. Then we explain how gunsmiths can enhance a Remington 700 action through “blueprinting” procedures.
Remington 700 Origins and History
After World War II, Remington Arms engineer Mike Walker began designing lower-cost alternatives to the Model 30, which resulted in the Model 721. These used a cylindrical receiver produced from cylindrical bar stock that could be turned on a lathe, rather than machined in a series of milling operations, which significantly reduced the cost of production. Further developments of the basic 721 action under the direction of Walker produced the Model 722 and Model 725, and ultimately in 1962, the Model 700.
Walker sought to increase the accuracy of the rifles, by utilizing tight tolerances in the chamber and bore, a short leade, and a very fast lock time. Like the earlier 721, the Remington 700 action was designed for mass production. Remington initially produced two variants of the Model 700, the ADL and BDL, in both long- and short-action versions. In 1969, Remington introduced upgrades for the rifle, including a longer rear bolt shroud, a jeweled bolt, and improved stock finishing. Four years later, production of left-handed Rem 700s began, to compete with the Savage Model 110, at that time the only major American-made left-bolt rifle.
Other Rem 700 versions include the titanium receiver 700ti, the 700 SPS (which replaced the ADL in 2005), and the CDL model. In addition to its development as a hunting rifle, the Model 700 also provided the basis for military and police sniper rifles, starting with the M40 rifle in 1966, which was initially ordered by the U.S. Marine Corps. The U.S. Army adopted the M24 Sniper Weapon System in 1986.
The Remington 700 is sold in both short action and long action variants. This photo is from the Big ED YouTube video comparing the two action lengths.
The Remington 700 is a manually-operated bolt action with two forward dual-opposed lugs. The bolt face is recessed, fully enclosing the base of the cartridge, The extractor is a C-clip sitting within the bolt face. The ejector is a plunger on the bolt face actuated by a coil spring. The bolt is of 3-piece construction, brazed together (head, body and bolt handle). The receiver is milled from round cross-section steel.
Rem 700 Cutaway Video Shows Components + Operation
Ever wish you could look inside your rifle, to see how the trigger and fire-control system work? Well now that is possible with the magic of 3D computer graphics. Modern software allows detailed “cutaway” side-views (see below), as well as 3D views with 360° rotation. The software can also provide X-Ray-type views into the gun’s internals — as you can see above. And computer animation can show the complete firing process from trigger pull to chambering of the next round.
READERS — Do take the time to watch the video! This Rem 700 animation is really outstanding! EVERY bolt-action shooter should watch this video all the way through.
The Model 700 series of bolt-action rifles have been manufactured by Remington Arms since 1962. All are based on basically the same centerfire bolt action. They are typically sold with an internal magazine depending on caliber, some of which have a floor-plate for quick-unloading, and some of which are “blind” (no floor-plate). The Model 700 is a development of the Remington 721 and 722 series of rifles, which were introduced in 1948.
The Remington 700 is a manually-operated bolt action with forward, dual opposed lugs. It features “Cock On Opening”, meaning the upward rotation of the bolt when the rifle is opened cocks the firing pin. A cam mechanism pushes the firing pin’s cocking piece backward. The bolt face is recessed, fully enclosing the base of the cartridge. The extractor is a C-clip sitting within the bolt face. The ejector is a plunger on the bolt face actuated by a coil spring. The bolt is of 3-piece construction, brazed together (head, body. and bolt handle). The receiver is milled from round cross-section steel.
Chassis Systems for Remington 700s
With the popularity of the Remington 700 series rifles, and the availability of Rem 700 barreled actions by themselves, many companies have created after-market chassis systems. This Brownells video reviews modern Accuracy Int’l chassis systems configured for Remington 700 barreled actions. Modular chassis systems have become particularly popular with PRS/NRL competitors.
The above video shows how a Rem 700 action can be upgraded with a carbon-wrapped barrel and new trigger, and then be easily installed in a modern MDT ESS Chassis.
Blueprinting Rem 700 Action — Making a Good Action Better
You may have heard the phrase “blueprinting an action”, but do you know what that really means? Do you know what operations are done to an action during the blueprinting process? To help you understand, gunsmith Bill Marr of RifleShooter.com has created a helpful article showing a Rem 700 blueprinting job start to finish. This article spotlights how the procedures can be done with manual tools. Bill, who runs 782 Custom Gunworks Ltd., can also perform many of these operations with modern automated machinery. In fact, Bill has written a follow-up article on Truing a Rem 700 receiver with a Lathe.
Bill explains: “Blue-printing, or truing a rifle action, ensures the receiver face, threads, lugs, bolt lugs, and bolt face are square to the center line of the receiver.” In Bill’s informative article, Bill shows how he blueprints a Remington 700 short action receiver with .308 Win bolt face. He covers the following procedures step by step:
Action Disassembly
Ream Minor Diameter of Receiver Threads
Square the Receiver Lugs
Square the Face of the Receiver
Lap the Bolt Lugs
Square the Bolt Face
Bill employed a variety of tools from Brownells to complete the blueprinting job, including: Remington 700 Armorer’s Kit; Manson Receiver Accurizing Kit; Bolt Lapping Kit; Bolt Face Truing Tool; Manson Receiver Ring Facing Cutter; Multi-Vise with Jaw Pads; Silicone Carbide Abrasive; and Do-Drill Cutting Oil>.
1. Truing the Receiver Face
Using the receiver facing tool, the front of the receiver is trued. The tool is placed over the tap and turned by hand. We used Do Drill to lubricate it.
2. Lapping the Lugs
The bolt lapping tool screws into the front of the action and applies rearward pressure on the bolt face. A little bit of lapping compound is placed on the front of the receiver lugs. The bolt handle is then raised and lowered repeatedly. Note — it is critical that we do not get any lapping compound on any other surfaces.
3. Truing the Bolt Face
On this bolt, the central part of the bolt face was low. After the truing operation, this Rem 700 bolt face is now completely square to the action.
IMPORTANT: Rifleshooter.com states: “This article highlights our project and is presented for information purposes only. This provides an overview of the process and should not be attempted without the guidance and supervision of an experienced gunsmith“.
If you like the idea of a Remington action custom rifle, you can order a wide variety of Remington 700 standard and custom shop actions from Pacific Tool & Gauge starting at $399.00 (see above).
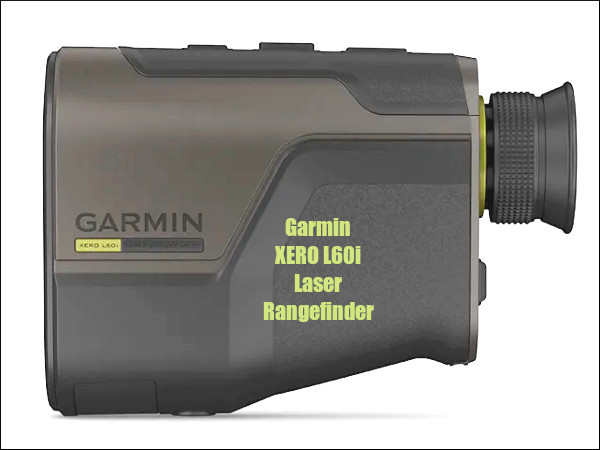
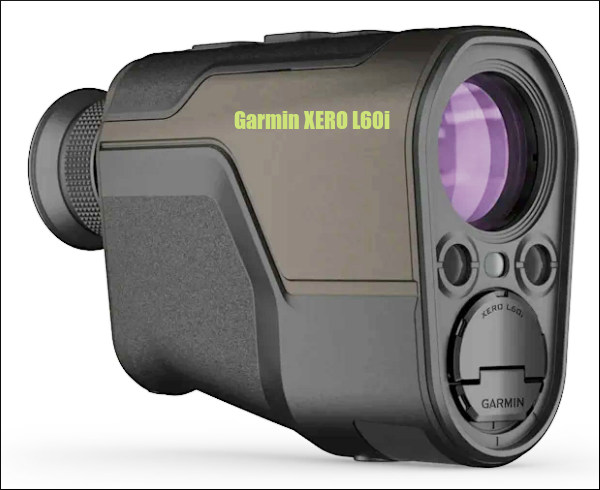
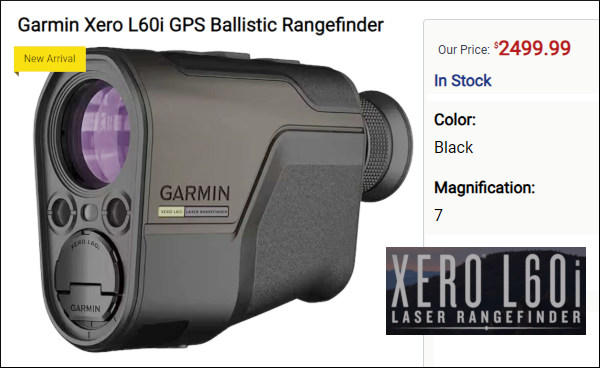
Garmin has introduced a new, very advanced laser rangefinder that raises the bar in terms of hand-held ranging technology. The new Garmin XERO L60i Laser Rangefinder represents a major breakthrough with key functions not found on other rangefinders. This XERO L60i unit has onboard ballistics to help calculate your hold. And there are onboard temperature, barometer, and humidity sensors. And the unit even has geo-memory that can tag a sighted location with GPS. But all that sensor tech and sophisticated ranging comes with a price. This Garmin XERO L60i unit has an MSRP of $2499.99. That’s $1000.99 more than the highly-regarded Leica Rangemaster CRF MAX rangefinder ($1499.00), and it is $1650.99 more than the excellent Leica RangeMaster CRF Pro ($849.00).
Notable features of the new Garmin XERO L60i:
High-resolution, full-color Overlay Display
Very sharp visual optics with 32mm objective and 7X magnification
Ranging out to 2000 yards for trees and out to 1500 yards for animals
Laser Locate feature to set GPS waypoint on previously ranged objects/animals
XERO L60i can access Applied Ballistics solver with AB Quantum Garmin App
Can range up to 1400 times with just two AAA Batteries*
This official Garmin video covers the notable features listed above.
This Garmin video shows how to employ XERO L60i advanced features in the field.
Want this Amazing Rangefinder? It’s in Stock Now at MidwayUSA
* The Garmin Xero L60i chronograph is powered by two user-replaceable 1.5V AAA lithium batteries, providing an operating life of approximately 1400 shots or ranges (based on a one-second range followed by a 10-second display). The unit is designed with an IPX7 water rating and operates between -20° to 60°C (-4° to 140°F).
UltimateReloader.com offers some of the most thorough firearms and reloading tool tests on the internet. And the Ultimate Reloader YouTube Channel now has over 1300 videos that showcase reloading tools, accurate firearms, precision optics, gunsmithing methods, and top-tier reloading components. For today’s Saturday at the Movies feature, we showcase ten videos created by Gavin Gear and his UltimateReloader team. These videos feature ELR Rifles, Peterson and Lapua brass, a brand new RCBS trimmer system, BAT actions, a handsome 6x47L Custom Rifle, the Athlon Rangecraft Chronograph, and Ultimate Reloader’s impressive new RifleBuilderPro Software System. Enjoy this Saturday Video Showcase.
Extreme Long Range — One Mile Shooting
In this video, Gavin meets with Paul Phillips, an ELR “King of Two Miles” past Champion. Paul explains the features in his .375-caliber rifle designed to shoot to one mile and beyond. Along with a big action to hold the very long cartridge, an ELR rifle needs a special high-angle optics rail to allow the needed elevation. In addition, a long-wheelbase chassis is optimal for greater stability and balance. Recoil is very significant so Paul’s rifle boasts a massive 6-port muzzle brake on the very long barrel (ELR barrels can run 34-36″). For his projectiles, Paul is running Berger’s impressive new 410gr .375 caliber Hybrid Target Bullet (6:25 time-mark).
Peterson Cartridge — How High-Quality Brass is Crafted
Ever wondered how modern, top-quality rifle brass is made? Then watch this informative video from start to finish. It shows how the brass cases are drawn (lengthened) in stages, how the primer pockets and rims are formed, how the shoulders and case necks are crafted, and then how the brass cases are machine-annealed for consistent strength and neck tension.
6x47L Rifle Build with BAT Action & Woox Furiosa Ultra Chassis
Gavin Gear has completed many impressive custom rifles. This handsome rifle is one of Gavin’s best efforts. Chambered for the 6-6.5×47 Lapua wildcat cartridge (aka 6x47L), this rifle has show great accuracy. It boast a handsome black BAT Hammerhead action and a wood/metal composite WOOX Furiosa Ultra chassis. This high-tech hybrid stock/chassis combines wood sections over a full-length, aerospace-grade aluminum skeleton chassis, giving it the “feel” of a wood stock with the strength and stability of a metal stock. Gavin likes the way the stock feels on the trigger hand in particular and the smooth wood cheekpiece is also very nice. Made in Italy, the Furiosa is offered in three versions all with wood sections on the forearm, grip area, and cheekpiece. Choose natural Walnut Brown, Micarta Black, or Midnight Grey.
NEW RCBS MatchMaster Precision Case Trimmer System
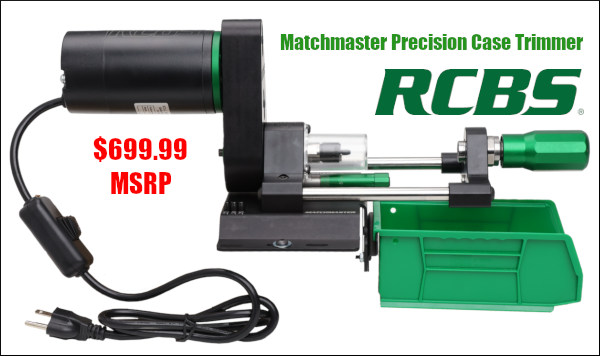
At SHOT Show 2026, RCBS introduced the new MatchMaster Precision Case Trimmer system. Developed with Henderson Precision, this is a high-speed, motorized system that trims, deburrs, and chamfers .22 to .30 caliber brass in one step. With a $699.99 MSRP, the MatchMaster trimmer features a 3-way carbide cutter, micrometer adjustment for 0.001″ accuracy, and a brass shavings catcher. It is designed for high-volume reloaders, offering fast, consistent, and automatic case prep. In this video, Gavin shows the features of this new RCBS power tool.
BAT Actions — Insider Look at Manufacturing
Full Story:https://bit.ly/3hD2d11 BAT Machine Co. makes some of the finest custom actions you can buy. Numerous national and world records have been set with BAT actions. To create this 31-minute video, Gavin traveled to Idaho to visit the BAT Machine production center in Post Falls, ID. Gavin talked with BAT’s founder Bruce Thom. The video features extensive footage of advanced CNC machines used to produce the superb BAT actions.
New 6GT Cartridge Brass from Lapua
It’s great that Lapua is now offering 6GT brass. Developed by George Gardner of G.A. Precision and Tom Jacobs of Vapor Trail Bullets, the 6GT was designed to have the efficiency of a 6mm Dasher without the need for case forming. It was also designed with a longer case body so it feeds better from magazines.
Even with the added capacity, the 6GT is still very efficient, and can achieve good velocities with less powder than a 6mm Creedmoor. With outstanding brass now being offered by Lapua, the 6GT becomes a very good choice for PRS/NRL competition, and even mid-range F-class competition. It’s longer than a Dasher case so it runs better in magazines, but it’s still more efficient than a 6mm Creedmoor or .243 Win.
RifleBuilderPro Gunsmithing Program Unveiled
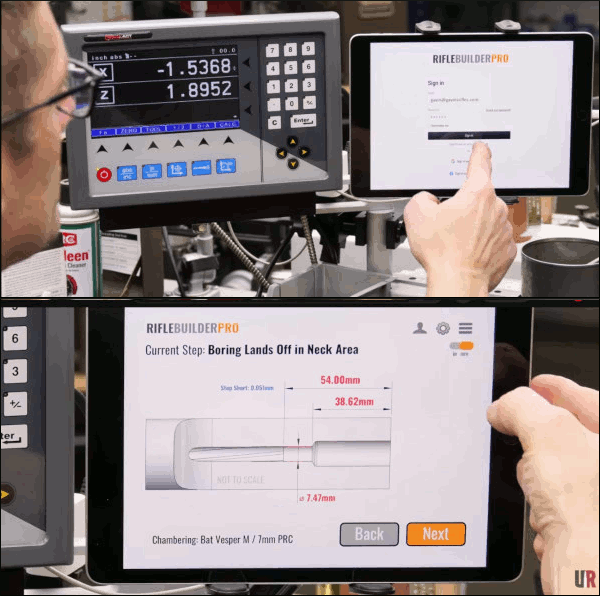
At SHOT Show 2026 Gavin Gear introduced an impressive new software/info system for gunsmiths and gun-building operations. Rifle Builder Pro provides key specifications and data for smithing operations. But it is more than just about machine controls — Rifle Builder PRO will be a subscription-based companion and digital reference library for Precision Rifle Gunsmiths, designed to help them achieve great results in less time. Subscribers will also automatically join an online community full of exclusive resources and support to improve their craft.
Rifle Builder PRO is currently targeted towards precision rifle gunsmiths working on bolt-action rifles but there are expansion plans to include additional types of rifle gunsmithing. At this time Rifle Builder Pro is still in development with a public Beta coming later this year. Sign up for email updates at RifleBuilderPro.com.
Athlon RangeCraft Chronograph (Two Videos)
Athlon’s Rangecraft Velocity PRO Doppler Radar Chronograph is a genuine rival to the popular Garmin. These two UltimateReloader vidoes cover the AThlon’s features, specs, and hardware. Then the video covers the testing process. The new Athlon Rangecraft Velocity Pro Radar Chronograph is an impressive and very affordable compact chrono, selling for $399.99 at most vendors. This employs Doppler radar allowing ultra-accurate velocity readings. Since the unit isn’t triggered by a muzzle blast, it can work with suppressors, muzzle brakes, and other muzzle devices.
The Rangecraft Vel Pro reads velocities between 65 FPS and 5000 FPS. So far field tests have shown that the Athlon Rangecraft chrono is reliable and picks up all shots fired with all types of rifles and pistols (even airguns). However the listed velocities may be a few FPS different than a Magnetospeed or Labradar. The unit includes a compact tripod.
BONUS: .223 Rem vs. 5.56x45mm — Ultimate Reloader’s Most Popular Video EVER with 7.8 Million Views
This video explains essential facts and corrects common misconceptions related to both .223/5.56 ammunition, as well as .223/5.56 rifles. Gavin provides insight on chamber specs, pressure levels, barrel twist rates, military 5.56 crimped brass, and other important topics. If you are new to the AR world, this video is definitely worth watching. And that’s why it now has garnered over 7.7 MILLION YouTube views, making it one of the most popular gun-related videos ever. Full Story:CLICK HERE for full written analysis of .223 Rem vs. 5.56x45mm with graphs and data.


 Gunsafes can be fitted with either an electronic keypad-style lock, or a conventional dial lock. In our Gunsafe Buyer’s Guide, we explain the important features of both dial and electronic lock systems. Many safe-makers will tell you that consumers prefer electronic locks for convenience. On the other hand, most of the locksmiths we’ve polled believe that the “old-fashioned” dial locks, such as the Sargent & Greenleaf model 6730, will be more reliable in the long run. CLICK HERE to learn more about the Pros and Cons of Mechanical (dial) Lock vs. Electronic (keypad) safe locking systems.
 Tips for Dial Locks
Replace Electronic Lock Batteries Every Year



 If you already have a 6mmBR rifle, and you want a higher velocity cartridge for varmint shooting, you may want to consider just necking down your brass. We’ve shot the 22 BR in the varmint fields and a steel match. This cartridge offers excellent accuracy, and is very flat shooting. We recommend getting a fairly fast-twist barrel so you can shoot the longer, high-BC bullets if you want to use your 22 BR in local matches. You’ll find that shorter 40gr to 66gr varmint bullets shoot great even in the faster-twist barrels.



 This video was made with the help of the
 Much of the country is dealing with serious winter weather right now, with snow and very cold temperatures. For many shooting enthusiasts outdoor rifle shooting is replaced by indoor handgun shooting in the winter months. Pistol shooting is fun — that’s reason enough to head to an indoor range. In addition, all CCW permit holders should definitely practice regularly. For many people, indoor shooting can be done in the evening, after work, relatively close to home. Indoor ranges are most convenient for those who live near urban centers, where the biggest threats to public safety currently exist. This article talks about indoor firearms training and the proper procedures you should follow at indoor ranges.





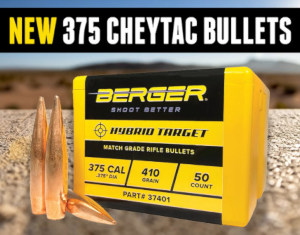 In this video, Gavin meets with Paul Phillips, an ELR “King of Two Miles” past Champion. Paul explains the features in his .375-caliber rifle designed to shoot to one mile and beyond. Along with a big action to hold the very long cartridge, an ELR rifle needs a special high-angle optics rail to allow the needed elevation. In addition, a long-wheelbase chassis is optimal for greater stability and balance. Recoil is very significant so Paul’s rifle boasts a massive 6-port muzzle brake on the very long barrel (ELR barrels can run 34-36″). For his projectiles, Paul is running Berger’s impressive new 410gr .375 caliber Hybrid Target Bullet (6:25 time-mark).