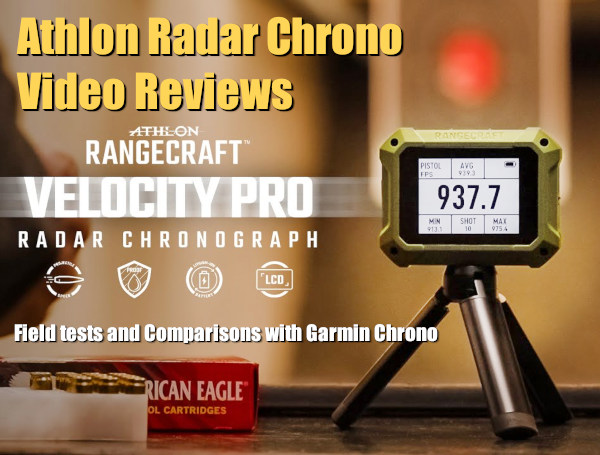
Today’s Movie Showcase features video reviews of the new Athlon Rangecraft radar chrono that offers exceptional performance for the price. At $399.99 MSRP, the new-for-2025 Athlon Rangecraft Velocity Pro Chronograph is about $200 cheaper than the popular Garmin Xero C1 Pro Chrono, which costs $599.99. So far, most tests show that this compact Athlon Chrono works very well and its Doppler Radar system is accurate. Velocities may be a few FPS faster that with a Garmin, but the ES/SD values are very close. If you are in the market for a new chronograph, definitely watch these videos. And take note — right now, for the Independence Day weekend, Brownells is offering a 15% off discount that can reduce the price of a new Athlon Chrono to $339.99 (use Code USA15 at checkout). NOTE — this deal may expire very soon!
Ultimate Reloader Test of Athlon Rangecraft Chronograph
Athlon’s NEW Rangecraft Velocity PRO Doppler Radar Chronograph is impressive, and it is a genuine rival to the popular Garmin. In this video Gavin Gear of UltimateReloader.com walks through the features and specs, and the hardware. Then the video covers the testing process and shows the workflow with this high-value, compact chrono.
Athlon Rangecraft Velocity Pro Chronograph, $399.99
The new Athlon Rangecraft Velocity Pro Radar Chronograph is an impressive and very affordable compact chrono, selling for $399.99 at most vendors. This employs Doppler radar allowing ultra-accurate velocity readings. Since the unit isn’t triggered by a muzzle blast, it can work with suppressors, muzzle brakes, and other muzzle devices. The Rangecraft Vel Pro reads velocities between 65 FPS and 5000 FPS. So far field tests have shown that the Athlon Rangecraft chrono is reliable and picks up all shots fired with all types of rifles and pistols (even airguns). However the listed velocities may be a few FPS different than a Magnetospeed or Labradar. Athlon also has a good Ballistics Lite App that works with this chrono — see video at 21:45 time-mark. The unit includes a compact tripod.
Athlon Rangecraft vs. Garmin Xero C1 — Chrono Comparison Test
Here are two short videos that show side-by-side comparison tests of the new Athlon Chrono with its main comparison, the Garmin. These vertical-format videos are easy to watch with your cell phone. The tester found the Athlon “had a faster calculation and refresh rate” than the Garmin. The Athlon also has “slightly larger display screen” and a two additional buttons for somewhat “easier ergonomics”. In this test the Athlon velocity readings were about 4 FPS faster than the Garmin.
Comparison Test: Athlon vs. Garmin vs. Magnetospeed
This 27-minute review by Full Circle Reloading starts with unboxing and set-up of the new Athlon Chrono. Then the video compares the features of the Athlon Rangecraft Chrono with the Garmin Xero C1 Pro chrono. Then, using a rifle fitted with a Magnetospeed barrel-mounted chrono, the host compares results from all three chronographs: Athlon, Garmin, and Magnetospeed. The results are very interesting. This is a “must-watch” video if you are considering upgrading from a Magnetospeed to a radar chronograph.
Field Test with 6mm ARC Rifle and 5.56 PSA Jackl and 9mm Pistol
This field test features two AR-type firearms (6mm ARC long barrel and 5.56 NATO 10.5″ barrel PSA Jakl) and a 9mm Springfield Echelon pistol. The tester says the fact that the Athlon is $200 less than the Garmin is “fantastic”. His Athlon Rangecraft Velocity Pro Doppler Radar unit performed very well with all the guns tested, delivering reliable velocity read-outs “without the fuss of barrel attachments or bulky setups”.
Athlon Chrono Integration with Athlon Ballistics Lite App
This 12.5-minute video shows how the Athlon Ballistics Lite App works with the new Athlon Rangemaster Chrono. The App “talks” to the unit via Bluetooth and so can then record the details of each shot including speed, deviation from average, Extreme Spread (ES), Standard Deviation (SD), and kinetic energy (after you’ve entered bullet weight). This information can be scrolled shot-by-shot as well as viewed in tables. You can create separate record for different firearms and different bullet types.
Brownells Athlon Chrono Feature and 15% Off Discount Code
As part of its July 4th weekend promotion, Brownells is offering 15% Off orders of $200 or more. To get this 15% discount, use Promo Code USA15 during checkout. And yes you can get a 15% discount on the popular new Athlon Rangecraft Radar Chronograph, with a $339.99 price after 15% discount. NOTE: This 15% discount may expire very soon.
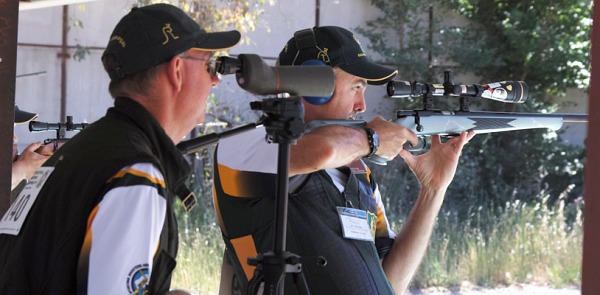
Editor: America’s birthday, the 4th of July, is just five days away. To help mark this historic occasion, today we feature a pair of patriotic rifles — a Light Gun and a big Heavy Gun both used in 1000-yard competition at the famed Williamsport Range in Pennsylvania. These rifles both feature handsome patriotic graphics featuring the U.S. Constitution and the Stars and Stripes.
Report by Andrew Murtagh
I’ve been a long range shooter for over two decades. Like most shooters in this game I’ve built, bought, and sold many rifles during my tenure. Here’s my tale of two special rifles, a Heavy Gun and a Light Gun, both sporting Patriotic stock graphics. I have shot both of these rifles in competition at Reade Range and The Original Pennsylvania 1000-Yard Club, aka “Williamsport”, where I have served as Club Vice-President.
My two Patriots were both acquired second-hand from a fellow shooter, Mike Bonchack. As purchased, they were very different from what they are now. I first decided to rechamber them using my reamers. The Light Gun (LG) is now chambered in 6×47 Lapua with 0.267″ neck, while the Heavy Gun (HG) is a 6mm Dasher with 0.266″ neck. After re-chambering the barrels, next I decided to get both guns up to maximum weight. The LG already had an adjustable weight system so it was easy to get it to 17 pounds. For the HG, I added an additional 25 pounds of lead/epoxy fill which was milled into the barrel channel and butt stock.
The Story Behind the Patriotic Graphics
I was initially going to have the LG painted until a close friend and fellow shooter, Tom Murtiff, suggested hydrographics. I landed on the patriotic theme because I’m a right-wing leaning Constitutionalist who still believes in the principles upon which our Founding Fathers built this nation. I wanted to express my support of our country’s Constitution and its Amendments. The search for the perfect patriot print was on.
This was my first hydrographic print experience and I was overwhelmed with the sheer number and variety of prints available. I spent a few days searching when I found the Amendment print. I then contacted Rick Schuh, owner of Boyzhid Hydrographics. He then prepped, hydro-dipped, and clear-coated the LG. Late in 2017 I purchased the HG and through a lengthy process in 2018 the metal work and stock additions were completed. I was now back in search of the perfect print. This was also lengthy, and I couldn’t find anything that spoke to me except for a suggestion to have “twin” rifles. I liked the idea — a pair of “Patriots!”
Rick was again employed to dip the Heavy Gun. That became a real undertaking because the stock alone (no metal attached) now weighed 35 pounds. He had to manufacture reinforced hangers to apply the graphics without flaw. The stock came out perfect to my eye, but not to his. On the bottom, which is rarely seen on any HG, he airbrushed a small flag to cover an area that stretched the print. Rick also made a jeweled plate for the toe of the butt.
I’m including this image so everyone can see Rick’s extra effort to make the HG perfect. I often joke with him about the added work no one would see. Well now the world can view his workmanship.
1000-Yard Heavy Gun Specifications:
Kelbly Stolle F-Class Panda dual-port, right eject with Kelbly Picatinny rail
Modified Ryan Miller HG stock bedded/pillared/weighted by David Powley
Bartlein 1:8.5-8″ gain-twist 0.236″ bore barrel
— chambered in 6mm Dasher 0.266″ neck by David Powley
Ryan Miller barrel-block fitted with nylon bushing by David Powley
Harrell’s muzzle brake
Jewell trigger
Optic One: NightForce 12-42x56mm NXS in Vortex rings
Optic Two: Leupold 7-35x56mm Mark 5 HD in Leupold rings
1000-Yard Light Gun Specifications:
BAT Machine B Action RB/LP/RE
McMillan MBR stock bedded by David Powley
Bartlein 1:8″-twist 0.237″ bore 30″ barrel
— chambered in 6×47 Lapua 0.267″ neck by David Powley
Harrell’s radial muzzle brake
Jewell trigger
NightForce 15-55x52mm Competition Scope in Harrell’s rings
Stock Graphics: Both rifles share a Patriot Constitution Hydrographic print (and clear-coat) by Rick Schuh of BoyzHid Hygrogaphics.
How to Succeed in the 1K Benchrest Games — Q & A with Andrew
Q: How Do You Choose a Chambering/Cartridge for a particular Match or Relay?
Andrew: Cartridge choice depends on the wind forecast. I always have several rifles with particular cartridge/loads for each depending on the forecast. If it’s a light wind day, say 4 to 8 mph with light gusts, I’ll be shooting either a 6×47 Lapua or a 6mm Dasher. If it’s blowing around 10 to 12 mph, I’ll campaign a 6×47 on its high node to get it down range flat. But if it’s really blowing or constantly changing direction, I shoot a big .300 WSM with either 200gr or 210gr bullet.
Q: What Is Your Load Development Method?
Andrew: Initial load development is always done over the chronograph at 100 yards until I get low ES/SD for 5 shots utilizing the same 10 pieces of absolutely perfect brass. Once I’m satisfied with the raw data I move to 1000 yards with a set of match brass and shoot 5-shot strings to find the best-performing exact powder charge. I have found this is usually within 0.20 grains of what performs well over the chronograph.
Q: What Brass, Primers, Powders, and Bullets Do You Use?
Andrew: I use Lapua brass for all things 6mm and Norma brass for my big .30 Cal stuff. I never change primers and shoot CCI BR2s or BR4s. I’m a Varget and H4350 fan. I’ve tried other powders, but they never were fruitful at 1K. Currently the only bullets I shoot are Sierra Match Kings. In the 6mm Dasher and 6×47 Lapua I use the 6mm 107gr SMK. In my .300 WSM I use .308-cal 200gr and 210gr SMKs.
Q: What Advice Do You Have for Novice 1000-Yard Competitors?
Andrew: Leave your ego at home and be willing to learn each and every time you come to the range. The discipline evolves rapidly and so must the shooter. It won’t take long to get left behind and become extremely frustrated with the game if you are not willing to learn and adapt. Find a tutor who is a great shooter and who is willing to mentor you. John Hoover and Tom Murtiff helped me and are very dear friends and great 1000-yard shooters. Believe me, having a good mentor takes years off the learning curve. Lastly, enroll in the Benchrest Shooting School offered by The Original Pennsylvania 1000 Yard Benchrest Club. I’m an instructor there and I, along with all the cadre, will help new shooters rapidly advance their skills.
Q: What’s the Secret to Judging the Wind? (In this discipline there are no target markers after each shot.)
Andrew: That’s the million-dollar question. What I do is find the condition that seems to hold. Once I’m committed into the record string, I follow it to the end. At Williamsport the wind flags can change at every distance so you simply need to pick one flag and hope it’s the one that remains truthful.
Long Range Competition Advice from a Leading 1K Benchrest Competitor
FIVE Key points to remember when shooting 1000-Yard benchrest
1. Be positive and have a clear state of mind when competing.
2. Bench set-up and shooting mechanics must always be the same — every shot. Then follow the shot through your optic.
3. Shoot two (2) shots before making a scope adjustment unless you’re under a minute of the sighter period.
4. Trust yourself and your equipment. You never want to second guess anything you put on the line.
5. Once you commit to shooting your record string, DO NOT STOP.
Andrew wanted to give credit to the many talented guys who have helped with his rifle builds and his reloading equipment. In alphabetical order, these are Mike Bonchack, John Hoover, Tom Murtiff, David Powley, and Rich Schuh (Boyzhid Hydrographics).
BONUS Topic — Case Prep and Loading for 1000-Yard Benrchest
Accurate loading, in my opinion, all starts with perfect brass. I always use Lapua or Norma brass, and when I buy it I try to purchase no less than 500 of the same lot. Most shooters sort by weight and I do as well, but it’s the last thing I do instead of the first. My reasoning behind this is simple, if I’m going to uniform primer pocket, ream and debur flash holes, turn necks, trim cases to length I’m removing lots of material. Therefore the weights change drastically from where they started. That said weight sort at the end, period. I do the entire lot at one time — a labor of love.
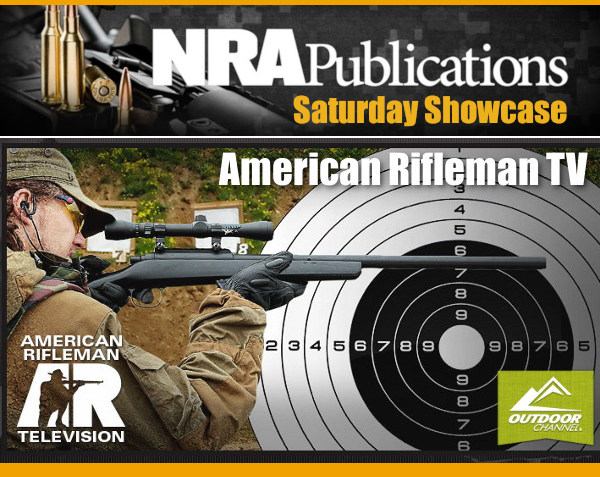
Most gun guys know that the NRA publishes a monthly magazine called American Rifleman. What you may not know is that NRA also offers a series of American Rifleman videos on YouTube, with recent American Rifleman TV episodes on the Outdoor Channel. For today’s Saturday Showcase we offer seven noteworthy NRA-produced gun videos currently hosted on YouTube.
Highlights from American Rifleman TV Episodes
Currently on YouTube you can access dozens of past episodes of the American Rifle television series, along with many recent gun/gear reviews. Here are seven NRA videos featuring important or interesting rifle types plus a Remington ammunition factory tour.
Remington Model 700 ADL and BDL
After Winchester came out with the Model 70, Remington Arms answered with the Model 700, one of the most recognized bolt-action designs of all time. The design emerged in 1962, as Remington sought to improve on its previous Models 721 and 722. Two versions of the Remington Model 700 existed at launch: ADL and BDL models. “You know, you could have it two ways. You had the ADL and the BDL,” said NRA Publications Editorial Director Mark Keefe. “You had the plainer ADL at a better price point, then you had the BDL and that had fleur-de-lis checkering and white spacers and a gloss finish and, you know, it was shinier.” The commercial market wasn’t the only area where the Model 700 was successful, as it was also adapted into the U.S. Army as the M24 sniper rifle. To this day, the Model 700 continues to be a popular bolt-action rifle platform for both commercial and military use.
CMP M1 Garand Matches
The Civilian Marksmanship Program (CMP) runs matches throughout the country, including the major summertime Camp Perry matches. This American Rifleman video covers the CMP’s M1 Garand Match, one of the most popular matches at Camp Perry every year. The Garand shoots the .30-06 Springfield cartridge. It is a surprisingly accurate semi-auto rifle, when fitted with an aftermarket barrel. The CMP recently started a program where the CMP is producing M1 Garands with completely new actions and barrels.
Model 1903-A3 Springfield — History of Wartime Rifle
While the U.S. Army’s Model 1903 Springfield rifle is one of the most well-recognized small arms of the 20th century, a lesser-known variant served as an important stop-gap rifle in the early years of World War II. Thanks to the efforts of engineers and arms designers at Remington, the U.S. Army eventually adopted an official pattern of the Springfield termed the “Model of 1903A3.” This NRA video covers the interesting history of the Springfield model 1903-A3.
Revival of Remington Ammunition Production by Vista Outdoor
Remington Ammunition filed for bankruptcy in July 2020. Vista Outdoor, owner of Federal, CCI, and Speer, purchased the assets of Remington Ammunition. This video explains how Vista Outdoor revived Remington’s Lonoke, Arkansas plant. “This is one of the largest ammunition manufacturing plants in the world. It was set up in 1969 by DuPont, who owned Remington at the time” notes Mark Keefe, NRA Publications editorial director. Over the first 18 months of Vista’s ownership of Remington Ammunition, the facility added more than 1500 employees and increased centerfire-handgun ammunition production more than 40 percent, while shotshell production increased 15 percent.
Henry U.S. AR-7 Survival Rifle
This is an interesting video of a compact rimfire rifle originally issued to U.S. Air Force crews. In the event a crew was downed in a wilderness area, the rifle could be assembled and used to shoot game for food. Civilian versions of this ultra-lightweight 3.5-lb rifle are also available. In this video, American Rifleman contributor Jeremiah Knupp puts the Henry U.S. AR-7 Survival Rifle to the water test. The civilian version is sold by Henry as the Henry U.S. Survival Rifle. With the action, barrel, and magazines housed INSIDE the stock assembly, this rifle can easily be carried in a pack or stowed in a vehicle.
Springfield M1A — Popular .308 Win (7.62×51) Semi-Auto Rifle
The M1A is one of the most popular rifles sold today by Springfield Armory. The M1A is a semi-auto version of the select-fire military M14 rifle developed in the 1950s. Designers adapted the action of the M1 Garand with a different gas system and dropped the 8-round internal magazine for 20-round detachable box magazines. Chambered for the 7.62×51 NATO cartridge, the M14 was adopted by the military in 1959, replacing the M1 Garand. However, its term as the official U.S. service rifle was short-lived, as Armalite was developing the M16, which evolved into the semi-auto AR15 for civilian use. Despite the M14 having a short-lived career as a service rifle, the semi-auto M1A remains quite popular for CMP rifle matches.
Barnes Bullets has started a new Barnes Bullet Points podcast running on YouTube. Hosted by Barnes Bullets’ Marketing Mgr. Dale Evans, this podcast offers a behind-the-scenes look into the design and production of Barnes Bullets products along with use of Barnes Bullets in hunting and shooting sports.
The Barnes Bullet Points podcast will cover a variety of topics, blending technical and educational segments with real-world adventures and conversations with hunters and competitors. You can subscribe to the Barnes Bullets YouTube channel, follow on Spotify or Apple Podcasts. New podcasts will be released weekly. The first two podcasts are live now.
Episode 1: The History of Barnes
Barnes Podcast Number 1, The History of Barnes, was released last week. On the podcast, Evans is joined by Andrew Sparks and Gregg Sloan. The three men discuss Barnes Bullets’ origins, where it is today and what lies ahead. Together, they introduce both Barnes Bullets as a company and explain the Podcast goals.
Episode 2: Deep Dive into the Bullets
Podcast Episode 2 features Barnes bullet families. Listeners will learn more about the design features and performance of popular Barnes bullets. In this 75-minute podcast, Dale Evans is joined by Gregg Sloan and Mitchell Kukson. The three men discuss the features of Barnes TSX, TTSX, and LRX bullets. The podcast discusses how to select the optimal bullet type (for various scenarios), and the experts explain the performance you can expect to see from each. Watch this full 55-minute Podcast below:
“The Barnes Bullet Points podcast is a great resource for our loyal fans and end users to learn more about the brand, the products we offer and the people that help develop them”, said Evans.
Hodgdon Powder Company (Hodgdon) offers a series of informative, “how-to” instructional videos through its online Reloading Data Center. These 3.5-minute videos present rifle, pistol, and shotshell reloading basics in an easy-to-understand, step-by-step format. These mobile-friendly, informative videos can also be viewed on a smart phone or tablet.
To watch the reloading videos go to the Reloading Data Center at hodgdon.com. Click to the right/left of the displayed video to switch between pistol, rifle, and shotgun videos. Or, for your convenience, we have embedded the Rifle and Pistol videos here. Just click to watch!
Click to Watch Hodgdon Rifle Reloading Video:
Click to Watch Hodgdon Pistol Reloading Video:
In addition to these videos, Hodgdon’s Reloading Data Center (RDC) provides a wealth of information on Hodgdon, IMR, Accurate, Winchester, and Ramshot propellants. Along with reliable load data, you’ll find explanations of reloading basics, safety procedures, plus answers to frequently asked questions (FAQ).
Ace tactical shooter and gunsmith Jim See of Elite Accuracy LLC has tested a Frankford Arsenal rotary brass tumbler. Like the older Thumbler’s Tumblers, this can tumble your cases in a liquid solution. The wet-tumbling process worked very well Jim reports. Posting on Facebook, Jim noted: “I was super impressed with the Frankford Arsenal rotary tumbler and cleaning packs they sent me. I ran 350 pieces of brass for one hour. They now look great.” Jim appreciated not having to deal with dry tumbling media, such as crushed walnut shells. Dry media produces dust and can leave residues or clog flash-holes.
Interestingly, Jim recommends you try wet-tumbling WITHOUT using stainless media. At least give it a try. Tumbling without media simplifies the process and you don’t have to worry about pins stuck in flash-holes or case-necks*. Jim reports: “Stainless steel pins come with the Frankford kit, but mine hit the trash right out of the box. There is no need to clean the inside of your cases 100% and that’s all the pins add to the equation. The brass bumping brass with hot water and Frankford’s liquid cleaner works great all by itself.” One wag stated: “That’s great to hear. Stainless steel pins are a PITA.”
Other Facebook posters concurred with Jim’s evaluation of the Frankford Arsenal Rotary Tumbler:
“I’ve had one for a couple years, and it works well. I usually run about 250-300 Dasher cases at once in it. But I use the pins because I’m OCD about clean brass.” — David W.
“I’ve had one for a year and a half and it definitely works with or without pins.” — Luke C.
“I got one about six months ago and have yet to use any stainless steel media [pins]. I just use some dawn, distilled water, and Lemi Shine®. Turns nasty 5.56 range brass bright and shiny.” — Brian D.
“I don’t use the pins either and use a combination of Dawn soap and Lemi Shine.” — Jon N.G.
This video shows how to assemble and operate the Frankford rotary tumbler. But note, Jim See does NOT feel that it is necessary to use stainless media.
How to Dry Your Brass — Hair Dryer Vs. Machine
The downside of wet tumbling is that you end up with a pile of wet brass at the end of the cleaning cycle. There are many ways to dry brass, from drying in the sun to using a kitchen oven (be careful not to “overcook” your brass). One Facebook poster asked Jim: “What is your drying method for wet brass, and how long does it take?”
Jim See replied: “To start I just drain off the dirty water, and rinse the brass with clean hot water. Then I roll the brass on a towel for 30 seconds and put the brass in a one-gallon bucket. Next I insert a hair dryer in the bucket (with the brass) and let it run for about 5 minutes. With this procedure, the drying process for me is done in less than 10 minutes.”
Jack Lanhart has another method: “I use a food dehydrator. It takes 30 to 45 minutes.”
For those who don’t want to mess with towels and hair dryers, Frankford Arsenal offers a matching Platinum Series Case Dryer that simplifies the process of drying brass. Lyman also makes an excellent Cyclone Case Dryer. These drying machines each cost about $65.00 and both have multiple levels so you can separate different types of cartridge brass. Lyman states that “The forced heated air circulation of the Cyclone will dry your brass inside and out within an hour or two, with no unsightly water spots.” The Lyman dryer can also be used for ultrasonically-cleaned gun parts.
*The Frankford Rotary tumbler does include media separators if you choose to use the provided pins or other media. CLICK HERE for diagram showing how to use media separators.
Forum member F-Class John is an avid F-Class competitor and expert handloader. John reviews reloading hardware and shooting-related products for his popular F-Class John YouTube Channel, which now boasts 500+ videos. John also does important product testing for AccurateShooter.com. Through his YouTube channel, John has reviewed many of the latest and greatest reloading tools and accessories. For today’s Video Showcase, we selected eight F-Class John product reviews. Products tested include front rests, AMP Annealer, Flavio Fare triggers, AutoDod IDOD power neck-turner, Henderson and Giraud case trimmers, Zero turret press, 21st Century arbor press, and Accuracy One concentricity checker.
If you like these informative videos, consider joining F-Class John’s Patreon Channel for live video meetings, more in-depth videos, and detailed explanations. Join Patreon via Patreon.com/fclassjohn for full length videos, live chats, and more.
SEB NEO-X and Rodzilla Raptor Front Rests
This video covers two outstanding front joystick rests, the SEB Neo-X and the Rodzilla Raptor. Both of these rests work great for both benchrest and F-Class shooters, centerfire and rimfire. Build quality is outstanding for both rests. Tester F-Class John observes: “Both are great units and user preference will really dictate which to get. I own both and find they give me consistent target acquisition.” To learn more about these two excellent front rests, visit TheRodzilla.com and/or SEB Rests USA.
Flavio Fare Triggers Tested
The Flavio Fare triggers are some of the best on the market. These are offered for various action types including Remington clones and custom actions. CLICK HERE for a discussion of these triggers on our Forum. The Flavio Fare Veloce Hunting Trigger (with safety) adjusts from 5 to 25 ounces pull weight and retails for $439.95. The Flavio Fare Whisper 2.1 BenchRest Trigger (no safety) adjusts from 0.7 to 2.8 ounces, and costs $449.95. Reviewer F-Class John says these Flavio Fare triggers are “smooth, crisp, with a wide range of trigger pull weights … I love these things.”
Annealing Made Perfect AMP Mark II DB Annealer
This detailed 9.7 minute review outlines the features of the latest AMP electronic annealing machine, the AMP Mark II DB. This uses a computer control to deliver precise annealing times and temperatures with a profile for your specific lot and brand of brass. One user praised this new AMP machine: “The touch screen is much more intuitive than the old one.” Another stated: “If you want to anneal the best way possible this is it. Does a torch work? Sure it does. The AMP does it far better and far more consistently.” A buyer confirmed this sophisticated new AMP is fast and efficient: “Just got one, a few days ago and it’s so easy to use. Without even trying, I easily anneal eight rounds per minute”.
Bryan Blake, a very clever machinist and gunsmith, has created an ultra-precise and speedy neck-turning machine. Bryan, who runs Blake Machine, Blake Barrel, and F-Class Products has created a system that uses twin precision cutter tips to turn case necks inside and out quickly and efficiently, with superior precision. This advanced IDOD Neck Turning Machine holds cases securely in a precision-machined spindle attached to an electric motor. Twin blades move precisely during the cutting process, milling the necks inside and out. The turned necks come out perfect every time, with the shoulders trimmed exactly (with doughnut removed) as well.
Henderson vs. Giraud Case Powered Case Trimmers
After adding the impressive Henderson Gen 3 Powered Trimmer to his inventory of tools. F-Class John became is a Henderson fan. He likes the speed, precision, and repeatability of the $779.00 Henderson machine, which trims-to-length and chamfers the case mouth all in one pass. Unlike some other trimming tools, the Henderson indexes off the overall case length NOT the shoulder. The Giraud trimmer is a very different design which indexes off the case shoulder, but it is also very precise. When set up correctly, it can trim brass with amazing consistency. As long as you have fire-formed brass with consistent base-to-shoulder dimensions, you should get very consistent trim lengths.
Zero Turret Press with Whidden Sizing Die
The Zero Press from Area 419 is arguably the best turret press ever crafted. It offers unrivaled precision, along with the highest-capacity turret head with NINE die/tool stations. Milled from billet aluminum and stainless steel, this press moves with the help of 14 bearings. In this video, F-Class John shows how to use a Whidden Gunworks full-length sizing die on the Zero Press. And John has two other video reviews of the $1275 Zero Press: 1. Zero Press First Thoughts Video; 2. Loading on a Zero Press.
21st Century Hydro Press and Standard Arbor Press
John notes: “You can’t really talk about precision reloading without taking about inline dies and arbor presses. For my money there’s nothing better than the lineup from 21st Century Shooting. They offer the Hydro Seater which is hands-down the best manual seater out there as well as their standard arbor press which is great for taking on the road to push back bullets as needed.”
Concentricity Checking with Accuracy One Gauge
Every serious hand-loader needs a quality concentricity gauge. The Accuracy One Concentricity Gauge boasts a smart design that delivers precise, repeatable results. We like the unit’s easy adjustability and its ability to work in a variety of configurations. The Accuracy One Gauge measures internal and external neck runout of cartridge cases as well as seated bullet runout. It can also measure the runout of the ogive, bearing surface, and boat-tail of individual bullets. And it can even measure your primer pocket runout. Reviewer F-Class John notes: “I think this is the best concentricity tool on the market. Such a tool is a necessity for new loaders or those who are always setting up new dies.”
This custom war wagon hauls varmint hunters around the Longmeadow Game Resort in Colorado.
Will you be heading to the varmint fields this summer? Proper planning is key to a safe, satisfying, and productive varmint holiday. Of course you’ll be busy reloading, but you should make a check-list of all the gear and supplies you need. Bring a variety of rifles if possible — you’ll need to switch off as one barrel gets hot, and the chambering that works best for your close shots may not be ideal for those longer shots out past 400 yards. Here are some tips from our Forum members that can help you shoot more effectively, and avoid problems on your varmint hunt. Here’s one key tip: at your shooting station, put a strip of surveyor’s tape on a tall stake to show the wind direction. Then shoot in the direction the wind blows. This will minimize the effect of cross-winds.
Varmint Safari Planning, Equipment, and Shooting Advice
From PatchHound: “The gear you bring will make or break a trip out to Prairie Dog land. A lot has to do with where you going and how far you are from [civilization]. For starters, bring lots of water. It will be hot in Wyoming in a few more weeks but it don’t hurt to bring warm clothes in case it snows. It’s best to wear leather boots unless you’re real good at dodging cactus while walking around. Good sunscreen [and a wide-brimmed hat] will save the day too. [What you need to bring] really depends on whether you’re shooting on some friendly ranch or 100 miles in the middle of [a wilderness area]. Good survival gear is a good thing to have for the latter!”
This photo is from a Dan Eigen TV Show video featuring a P-Dog hunt.
From Stoner25mkiv: “I’d suggest an adjustable bipod if you are going to do any walking. A laser rangefinder is a huge asset. Have a fanny pack or backpack for extra ammo, water, bore-snake, etc. when you go on your walkabouts. We also take a couple pivoting benches, heavy movers’ pad/blanket, sandbags (Uncle Bud’s Bulls Bag) for shooting from near the vehicle. Boonie hat for blocking the sun, sun glasses, sunscreen. High leather boots.
Anyway, on to the rifles…consider bringing a 17 HMR, .223 Ackley bolt gun, .223 Ackley AR, and a 243 WSSM. Some years the 17 HMR isn’t removed from its case. We had a couple windless days and the 17 was lots of fun. I’d walk into the dogtown and then lay down and wait. After five minutes or so I’d have dogs within easy rimfire range, and out to as far as I’d care to stretch the rimfire. 275 yards was about it.”
From CTShooter: “The .204 [Ruger] is a laser beam and good to 400 yards easy. Forget the rimfire! Do you have a portable bench that pivots? Bring bipod, binocs. Bring a LOT of water. I have a milspec sniper shooter’s mat/drag bag with shoulder straps. It is good to carry everything when you want to wander off and shoot prone with bipod. Here’s a view through my 6BR in ND.”
From RJinTexas: “In most of the locations that we’ll be shooting we’ll usually set up a minimum of 200 yards from the edge of a major dog town. We’ll start by working over the close-in dogs and shooting our way out, some of these towns may run in excess of 500/600 yards deep. I believe that a rimfire will put you at a distinct disadvantage. The only rimfire that will somewhat work is the 17 HMR and you can reload for your 204s for close to the cost of HMR ammo and you’ll be less apt to be under-gunned. Your 204 will work well out to 300/400 yards unless the wind is blowing hard. We classify a 10-mph crosswind as a very calm day and what makes it a little more challenging is that it is usually also gusting.”
From Wes (P1ZombieKiller): “[For my first PD trip] there are so many things I was not ready for. The one thing that I did bring (that no one told me about) was a canopy. I’m glad I did. Even though the weather was [near perfect], I know that sun can humble you real fast. With my pop-up canopy, I could shoot all day without getting killed by the sun. You had to tie the canopy down real well or the wind would blow it across the pasture.
We sat on shooting benches that pivot 360°, and are fast and easy to set up. Most all shots were 175-250 yards. I just felt comfortable at that range. It was more fun for me to be able to film the hits, and the camcorder I was using just did not get good video past 350 yards. The digital zoom distorted the image too much. I knew I would only get this one chance to film my first P-dog outing, and I wanted to get it on film for [posterity].”
Bring Multiple Rifles on Your Varmint Adventures
On our P-Dog adventures, we like to have multiple rifles — a .17 HMR for close work, then maybe a .20 Practical AR for 150-250 yards, then a larger caliber such as 6BRA, 6 Dasher or 6XC for those long shots. The classic 22-250 is also a wickedly effective varmint cartridge.
.20 Practical (20-223 Rem) AR-Platform Varminter
Here is a .20 Practical built by Robert Whitley. Whitley’s Ultimate Prairie Dog Rifle (PDR) features a 24″ Bartlein 11-twist cut-rifled barrel, DPMS side-charging upper, and a Jewell trigger. It is chambered in 20 Practical, a cartridge popularized by Warren “Fireball” Brookman.
This .20 Practical cartridge is simply the .223 Remington necked down to .204. You can use your existing .223 Rem brass — no special case-forming required! The 20 Practical is accurate, flat-shooting, and has almost no recoil. The advantage over the standard .223 Remington is that, grain for grain, the bullets have a higher BC and travel at a higher velocity for more dramatic effect on a small varmint. The ultra-low recoil allows you to easily see your hits, even without a muzzle brake. The 20 Practical, launching 40-grainers at about 3750 fps, shoots flatter than a .223 Rem with 55gr hollowpoints.
.17 HMR Savage A17 Varmint Rifle
We also like to have a Rimfire for the closer shots, inside 150 yards. The .17 HMR or .17 WSM are good choices. With a rimfire you save on ammo costs and you don’t waste precious centerfire barrel life.
This video shows a successful Prairie Dog hunt with a .17 HMR. Watch and you’ll see hits out to 160 yards (00:50), proving the effective range of the .17 HMR cartridge. The host is shooting a Savage A17 semi-auto .17 HMR rifle in a Boyds laminated stock.
The NRA Blog ran an feature on Silhouette shooting by NRA Silhouette Program Coordinator Jonathan Leighton. Here are selections from Leighton’s story:
NRA Silhouette Shooting
The loud crack from the bullet exiting the muzzle followed by an even louder ‘clang’ as you watch your target fly off the railing is really a true addiction for most Silhouette shooters. There is nothing better than shooting a game where you actually get to see your target react to the bullet. In my opinion, this is truly what makes this game so much fun.
Metallic Silhouette — A Mexican Import
Silhouette shooting came to this country from Mexico in the 1960s. It is speculated that sport had its origins in shooting contests between Pancho Villa’s men around 1914. After the Mexican Revolution the sport spread quickly throughout Mexico. ‘Siluetas Metalicas’ uses steel silhouettes shaped like game animals. Chickens up front followed by rows of pigs, turkeys, and furthest away, rams. Being that ‘Siluetas Metalicas’ was originally a Mexican sport, it is common to hear the targets referred to by their Spanish names Gallina (chicken), Javelina (pig), Guajalote (turkey) and Borrego (ram). Depending on the discipline one is shooting, these animals are set at different distances from the firing line, but always in the same order.
Before Steel There Was… Barbeque
In the very beginnings of the sport, live farm animals were used as targets, and afterwards, the shooters would have a barbeque with all the livestock and/or game that was shot during the match. The first Silhouette match that used steel targets instead of livestock was conducted in 1948 in Mexico City, Mexico by Don Gonzalo Aguilar. [Some matches hosted by wealthy Mexicans included high-ranking politicians and military leaders].
As the sport spread and gained popularity during the 1950s, shooters from the Southwestern USA started crossing the Mexican border to compete. Silhouette shooting came into the US in 1968 at the Tucson Rifle Club in Arizona. The rules have stayed pretty much the same since the sport has been shot in the US. NRA officially recognized Silhouette as a shooting discipline in 1972, and conducted its first NRA Silhouette Nationals in November of 1972.
Great Video of Silhouette Shooting in Canada with Drone Footage
Now There Are Multiple Disciplines
The actual sport of Silhouette is broken into several different disciplines. High Power Rifle, Smallbore Rifle, Cowboy Lever Action Rifle, Black Powder Cartridge Rifle, Air Rifle, Air Pistol, and Hunter’s Pistol are the basic disciplines. Cowboy Lever Action is broken into three sub-categories to include Smallbore Cowboy Rifle, Pistol Cartridge Cowboy Lever Action, and regular Cowboy Lever Action. Black Powder Cartridge Rifle also has a ‘Scope’ class, and Hunter’s Pistol is broken into four sub-categories. Some clubs also offer Military Rifle Silhouette comps.
Where to Shoot Silhouette
NRA-Sanctioned matches are found at gun clubs nation-wide. There are also many State, Regional, and National matches across the country as well. You can find match listings on the Shooting Sports USA website or contact the NRA Silhouette Department at (703) 267-1465. For more info, visit SteelChickens.com, the #1 website dedicated to Silhouette shooting sports.
One of the most fun things you can do with a firearm is to shoot reactive targets at relatively short ranges. For this kind of shooting, a rimfire gun is the way to go. Recoil is way less so you can transition targets quickly, and the cost of .22 LR ammo is a fraction of the cost of centerfire ammo. Rimfire is a bargain — you can get decent bulk .22 LR ammo for just six cents ($0.06) a round. Even cheap 9mm ammo can cost you twenty-four cents ($0.24) a round or more — that’s four times more expensive than .22 LR!
If you’re looking for a nice .22 LR pistol for gun games, we can recommend the SIG Sauer P322-COMP pistol. Designed for speed, accuracy, and flat shooting (low muzzle flip), this rimfire pistol is ready for competition right out of the box. It comes with a red dot optic, barrel-mounted compensator, slide-mounted racker, good trigger, and high-capacity (20- and 25-rd) magazines. READ P322 Manual.
We think this would be a good choice for fun action pistol matches. One YouTube viewer noted: “I applaud SIG… basically [the P322-COMP is] the first RFPO (Rimfire Pistol Open) factory option for Steel Challenge. Every other gun on the market you have to buy the optic, thumb rest, and compensator.”
SIG P322-COMP — Components and Features Video
NOTE: This 44-second video from SIG Sauer has detailed illustrations of all components with 3D rotation of the pistol so you can see it from all angles.
The SIG SAUER P322-COMP is a competition-ready .22 LR rimfire pistol with class-leading 25+1-round and 20+1-round capacity. It has a threaded barrel equipped with a 2-port compensator and comes with a factory-installed ROMEO Zero Elite Red Dot Optic. The polymer grip features an extended magazine catch, adjustable trigger shoe, sport takedown lever, 1913 rail, and integrated magwell. The Single Action Only hammer-fired action on the P322-COMP is completely enclosed in a two-tone competition alloy slide with a high viz fiber-optic front sight, plus front, rear, and top cocking serrations. The ambidextrous, slide-mounted racker ensures easy slide manipulation. The pistol ships with (1) 20-round magazine and (1) 25-round magazine.
P322-COMP Specs:
Caliber: .22 LR
Capacity: 20+1, 25+1
Barrel length: 4 inches
Sight Radius: 6 inches
Weight (w/magazine): 19.8 oz.
22Plinkster Review of P322-COMP Pistol
Note how fast 22Plinkster can hit multiple targets with this new brake-equipped pistol. No question this rimfire pistol would be fun to shoot on steel targets.


 From Wes (P1ZombieKiller): “[For my first PD trip] there are so many things I was not ready for. The one thing that I did bring (that no one told me about) was a canopy. I’m glad I did. Even though the weather was [near perfect], I know that sun can humble you real fast. With my pop-up canopy, I could shoot all day without getting killed by the sun. You had to tie the canopy down real well or the wind would blow it across the pasture.
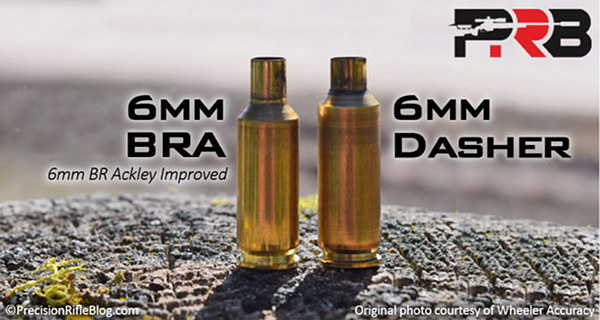


 The
The 
 Metallic Silhouette — A Mexican Import
 Before Steel There Was… Barbeque