Shooting steel silhouettes is fun. For many of us, the “instant gratification” of knocking down steel is more fun than shooting paper. In fact, this very website came into being because the founder enjoyed shooting 600-yard steel silhouette matches in Southern California. That lead him to building a 6mmBR rifle and starting 6mmBR.com which evolved to become AccurateShooter.com.
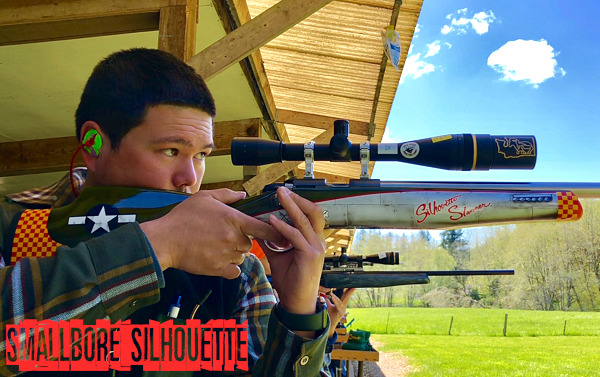
Today’s video showcase covers a variety of metallic silhouette shooting disciplines. There are the classic smallbore and centerfire silhouette formats, shot from a standing position. One of the world’s top silhouette shooters, Eric Mietenkorte, shows how to shoot silhouette standing. But we also show varmint silhouette matches shot from prone position and from the bench. The Editor’s 600-yard silhouette matches were initially shot from prone (F-class style), and then later from a bench. Both formats were fun.
We also feature a cool video from New Zealand, showing handgun silhouette matches hosted at a beautiful, verdant range in Kiwi country. The handgun shooters use a reclined, foot-forward prone position.
So, whether you shoot prone, sitting, or standing, shooting metallic silhouettes is fun and challenging. Hearing the clang of steel and seeing a metal silhouette tip over is true “instant gratification”.
Metallic Silhouette — A Mexican Import
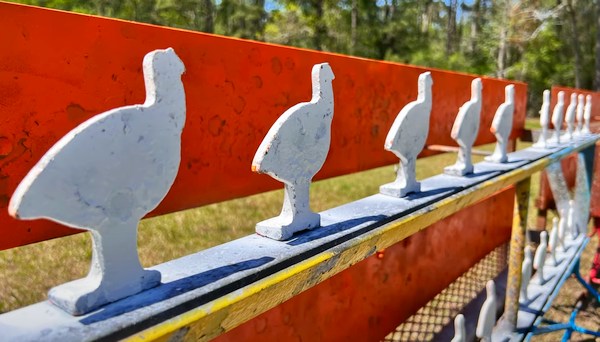
Silhouette shooting came to this country from Mexico in the 1960s. It is speculated that sport had its origins in shooting contests between Pancho Villa’s men around 1914. After the Mexican Revolution the sport spread quickly throughout Mexico. ‘Siluetas Metalicas’ uses steel silhouettes shaped like game animals. Chickens up front followed by rows of pigs, turkeys, and furthest away, rams. Being that ‘Siluetas Metalicas’ was originally a Mexican sport, it is common to hear the targets called by Spanish names Gallina (chicken), Javelina (pig), Guajalote (turkey) and Borrego (ram). Depending on the discipline one is shooting, these animals are set at different distances from the firing line, but always in the same order. CLICK HERE for NRA Rifle Silhouette Rules.
In this next video, silhouette champion Eric Mietenkorte talks about proper hold: “Consistency is key! Form a solid stance that is repeatable and allows you to have a natural point of aim. If you don’t come down on target adjust your feet, don’t rotate your body with your torso muscles.”
Erich explains his aiming method: “Pick a spot on the target and shoot for that. Try not to hesitate, if you’re on target, take the shot. It’s easy to get locked up by trying to make a great shot better. Make sure to follow through, keep that trigger pulled back. Don’t forget to have fun!”
Beautiful Rosebud Silhouette Range in Alberta, Canada
This video was created at the scenic Rosebud Silhouette and Benchrest Club in Alberta, Canada. The video offers an introduction to both centerfire (High Power) and smallbore Metallic Silhouette Rifle disciplines, including equipment and match format. These fun and challenging sports can be shot year-round, as you can see in the video below, which includes winter sequences.
Texas Varmint Benchrest Silhouette
If you like accurate rifles and reactive targets, you’ll enjoy this 48-minute video from Shooting USA TV, which features long-range varmint silhouette competition in Texas, the Lone Star State. We have participated in these kind of matches on the West Coast — they are definitely a ton of fun. The sport combines the pure accuracy of benchrest competition with the fun of knocking down critter targets. These are smaller than standard silhouettes, so it’s quite a challenge to hit them at 300 yards and beyond.
In this episode, host John Scoutten competes with his 6.5 Creedmoor PRS rifle. He found that 1-MOA Coyotes offered plenty of challenge at 385 meters! Most shooters at this Texas match use benchrest-grade rifles with premium front rests.
A similar Varmint Silhouette bench/prone match is held monthly at the Pala Range in Southern California. Prone shooters compete side-by-side with bench shooters. Ten steel “critter” targets are set at each of five yardages: 200m – Field Mice (“pikas”); 300m – Crows; 385m – Ground Squirrels; 500m – Jack Rabbits; 600 yards – Prairie Dogs. Competitors shoot 50 targets, 10 each at five different yardages, alternating among the five distances. So you might start at 500m then do 200m next, then do 600 yards etc. — the target distances are in mixed order to enhance the challenge.
Rimfire Speed Silhouette from the Bench
Fast and full of action, the Speed Silhouette competition is an exciting event shot on the clock. Competitors take 16 shots from 30 to 60 yards. The event is timed and the timer stops whenever the shooter finishes their final target by knocking it down. This event is a blast to shoot, and may even be more fun to watch live, as the results unfold within seconds of each relay start.
New Zealand Handgun Metallic Silhouette
New Zealand is one of the world’s most beautiful island nations, so we can’t think of a better venue for a silhouette match. This video features a handgun silhouette match with targets at multiple distances. The competitors use a special reclining position on the ground, with the handguns (mostly revolvers) aligned on the side of the leg.
Silhouette Shooting Scoring Procedures
This video from the Metallic Silhouette Shooters Society (MSSS) covers the basic rules of rimfire and centerfire silhouette matches. And then the video explains how the shooting strings during silhouette matches are scored. Yes the system is binary (knock-down vs. miss), but there are details, such as when a plate is hit but doesn’t fall. CLICK HERE for a second MSSS video that explains how to get started in silhouette shooting and lists the equipment you’ll need.
Pumpkin Blast event graphic from P2K Sports Range in El Cajon, CA.
Halloween (originally “All Hallows Eve”) is celebrated every year on October 31st — this upcoming Monday. That means it’s pumpkin time. Just how much fun can you have with pumpkins? Watch these six videos and find out. In the first video, the RatedRR team sends a few orange gourds to pumpkin heaven using Det Cord, C4, and binary explosives. The sequence starting at the 2:00 minute mark in the first video is truly amazing. WARNING: DO NOT TRY THIS AT HOME!
Oh, and as a bonus for you guys who like ladies who can shoot, we included a fun video with the enthusiastic YouTuber and gun enthusiast Babee Blue. She posted: “Had a leftover Halloween pumpkin and wanted to blow it up using a Ruger .270 Win rifle. Add some Tannerite and it made for quite the fun explosion. Doesn’t everybody blow up their leftover Halloween pumpkins?”
NOTE: For all the videos, if you don’t hear sound, then click the speaker icon.
Watch Pumpkin Blasting with Explosives
In this lead video, the RatedRR team blasts a collection of pumpkins using Det Cord, C4, and binary explosives. The sequence starting at the 2:00 minute mark is jaw-dropping — truly top-tier Hollywood-style colored explosions. WARNING: DO NOT TRY THIS AT HOME!
Pumpkin Face Carved in 5.5 seconds with Handgun
In two days, on October 31st, we celebrate Halloween (which was originally called All Hallows’ Eve). That means the neighborhood kids will be ringing doorbells as soon as it gets dark. No doubt some of you procrastinators will wait ’til the last minute to set out your Halloween decorations and Jack-O-Lanterns. Don’t worry, in the video below, our friend, 3-Gun ace Taran Butler, shows how to carve a pumpkin in just about 5.5 seconds, give or take a tenth. Taran performed this feat of speed-carving with his trusty Infinity handgun, chambered in 9mm Major.
Kirsten Carves Pumpkin Face with .22 LR Volquartsen
In this video, the lovely and talented Kirsten Joy Weiss shows off her impressive trick-shot skills. To help celebrate the gouls/goblins holiday, Kirsten “carved” a pumpkin using her semi-auto Volquartsen .22 LR rifle. Kirsten had to send a lot of rimfire rounds into her orange friend.
It turns out that Mr. Pumpkin’s posterior side was better than his front. On inspection, Kirsten saw that the most impressive Jack ‘O Lantern face appeared on the reverse side of her pumpkin. It turns out the little .22-caliber bullets worked better on exit than entry. Those “exit wounds” made a very successful Halloween face.
Babee Blue Blows Up Pumpkins with .270 Win and Tannerite
In this video, the popular Babee Blue uses a rifle to drill pumpkins that were filled with some Tannerite. The result is an impressive blast when Babee puts a .270 Win round into a pumpkin downrange. This is a fun video to watch, and Babee Blue is an enthusiastic pumpkin blaster.
Which Cartridge Best Destroys a Pumpkin
This video is more about pumpkin blasting than pumpkin carving. Hosted on the Garand Thumb YouTube Channel, this engaging video has been watched over 1.3 MILLION times. The shooters try a variety of cartridge types to determine which firearm destroys pumpkins the best? The host explains: “In this very spooky special we will be putting lead to gourd in the most kinetic way possible. Which gun will do the best? Only science can tell us.”
Carving Pumpkin with Smith & Wesson .44 Magnum Revolver
Hickok45 Carves Pumpkins with Handguns
To celebrate Halloween, here’s an example of master wheelgun marksmanship. Popular YouTube host Hickok45 skillfully creates a smiling face on a pumpkin using a S&W Model 29 .44 Magnum revolver. Hickok45 is using the classic blued, double-action revolver popularized by Clint Eastwood as Dirty Harry. To form the eyes he uses multiple shots then uses a string of shots to form the mouth, reloading his Model 29 along the way. Carving pumpkins with bullets has become a tradition for Hickok 45 — every year he puts a face on a pumpkin using a different firearm, typically a pistol, but he’s used other handguns and a couple rifles as well. SEE PUMPKIN Shooting Playlist. Happy Halloween!
Hornady recently unveiled a variety of new products for 2023. There are new ammo and bullet types, new firearms storage products, a new ammo storage locker, and an impressive new Precision Lab Scale with a 0.01 grain readout and hi/lo sensitivity settings. Among Hornady’s new ammo products, the new 7mm PRC is the most notable. This new 7mm magnum cartridge will initially be offered with three bullet types: 160gr CX Outfitter, 175gr ELD-X Precision Hunter, and 180gr ELD Match.
The new ammunition, bullet, reloading and security products will be available from stocking dealers, major retail sporting goods stores and their websites.
Ruger has created a helpful set of online resources for new Firearm owners. The New Firearm Owner Resources site features a Fundamentals of Firearms Ownership Video Series, Industry Resources for local “hands-on” training, as well as information on safe storage. In addition, this online Resource Center offers a full library of product instruction manuals along with suggestions for recommended safety equipment.
There are a variety of informative videos, hosted by Mark Gurney, Ruger Director of Product Management. These short (2 min. on average) videos provide key information for new gun owners. If you have friends or family members who are new gun owners, they should watch these videos.
Introduction for New Firearms Owners
Safety Rules — The FOUR Fundamental Safety Rules
Range Safety Equipment — What You Need
This video reviews essential Eye and Ear Protection for shooters.
When a hunter treks deep into the backcountry, he wants a tough yet light-weight rifle that’s easy to carry. But if the hunter is pursing very big game, such as a mature bull elk, he needs a rifle capable of shooting a large-caliber bullet at serious velocities. That’s what Kelbly’s offers with the impressive Nanook MG rifle. Built on a magnesium chassis, with a 26″ carbon-wrapped barrel and folding stock, the 7.9-lb Nanook MG is a long-range hunting rifle that’s easy to carry, yet can effectively shoot big-caliber cartridges capable of taking very large game.
The Kelbly’s Nanook MG offers the benefits of a chassis rifle with lighter weight through the use of carbon fiber components. Take a look — you’ll see carbon pistol grip, carbon cheek riser, and even a carbon buttstock beam. And the buttstock folds 180-degrees behind the chassis. This allows convenient carry when strapped to a backpack. With its folding stock, the Nanook MG is quite “packable” even with a 26″ barrel that allows high velocities from .300 PRC, .300 Norma Magnum, or .338 Lapua Magnum cartridges.
Photo courtesy Rocky Mountain Elk Foundation (RMEF). CLICK HERE to DONATE to RMEF.
Nanook MG — Modern Chassis Rifle for the Long Range Hunter
The Nanook MG is a modern, light-weight chassis rifle optimized for medium- and long-range game hunting. Key Nanook MG components are low mass, allowing an overall weight of just 7 lbs. 14 ounces (before scope) even with a 26″ barrel. The heart of the rifle is Kelbly’s new light-weight Nanook action that weighs just 26.5 ounces. The barreled action rides in a magnesium XLR Element 4.0 MG chassis fitted with a carbon fiber hand grip and cheek riser to save those precious ounces. To ease packing the rifle, the chassis is fitted with a folding buttstock. This allows the rifle to have a proper 26″-long barrel to deliver high velocity with big cartridges.
The carbon-wrapped Heavy Palma Contour barrel is crafted by Preferred Carbon and fitted with self-timing Klaw Muzzle Brake. Kelbly’s states these barrels give excellent 3-shot accuracy, enough shots for any hunting situation. That accuracy is aided by a premium Bix’N Andy Dakota trigger set at a crisp 2.5 pounds.
Q & A with Ian Kelbly about the Features of the Nanook MG Rifle
Q: What were Kelbly’s design goals in making the Nanook MG rifle?
Kelbly: Our design goal was to create an optimized long range hunting rifle. We wanted something easy to pack (i.e. light-weight with a folding stock), that still had a fairly long 26″ barrel. This barrel length allows the hunter to take full advantage of the .300 PRC, .300 Norma Magnum, or .338 Lapua Magnum cartridges. We also wanted to showcase our new Nanook action, fitted to a modern chassis rifle that was light enough for mountain hunting.
Q: What are the best features of the Nanook MG Rifle?
Kelbly: There are many important features in this turn-key hunting rifle. The magnesium XLR Element chassis boasts high strength and ruggedness, with no more weight than a synthetic stock. The carbon-wrapped barrel from Preferred Barrels offers ample length for high velocities, but significantly reduced weight compared to a normal stainless barrel. The Bix’N Andy Dakota single-stage trigger provides a super-crisp break with the adjustability of a high end competition trigger.
Q: What factors favor a Chassis Rifle for long-range hunting?
Kelbly: The XLR Element 4.0 MG chassis offers the modularity of a modern precision rifle, including a full-length ARCA Rail for bipod/tripod attachment, but with the weight of a synthetic stock. The chassis also features M-Lok slots for for attaching any accessories that the hunter would want. Another key feature is that this chassis design allows you to fold the buttstock for scabbard packs and easy carrying.
Q: How do the carbon-wrap barrel and folding stock benefit the hunter in the field?
Kelbly: The carbon barrel allows us to remove significant weight from the rifle. We also specify the rifle with a carbon buttstock and hand grip to allow for more weight savings. The folding stock makes transport and packing much easier by reducing the overall length. Carbon barrels are well-suited for hunting, as they have proven to be very repeatable on cold bore and follow-up shots. The only thing a carbon barrel can’t do well is sustained rapid fire for many shots, but that is not needed for big game hunting applications.
Q. What are good chambering options for the Nanook MG Rifle?
Kelbly: We offer the Nanook MG in .300 PRC, .300 Norma Magnum, and .338 Lapua Magnum. All chamberings include a self-timing Klaw Muzzle Brake.
The two-lug Nanook action, at just 26.5 ounces, is extremely light for a steel action. The action body is made of 416R steel while the bolt is 4140 steel. This action features built-in Picatinny rail, while the bolt boasts an aluminum handle plus teardrop bolt knob.
How to Make Your Elk Hunt a Success
A North American elk hunt represents the adventure of a lifetime for many. Before heading out on an elk hunt, you want to maximize your chances of success by having the right equipment, and by doing your homework before the hunt. This National Shooting Sport Foundation (NSSF) video offers good advice on planning your first elk hunt.
Success! Elk hunt photo from West Canyon Ranch, a private hunting ranch in Utah.
The 2022 NRA F-Class National Championships have been underway at the Ben Avery Range in Arizona this past week. The Mid-Range F-Class Nationals ran October 16-19, and the Long Range (1000-yard) event started on October 20 and concludes on Sunday, October 23, 2022. Many of the nation’s leading F-TR and F-Open shooters are battling it out at Ben Avery right now. The week of competition will conclude on Sunday October 23, 2022 with the final 1000-yard relays followed by award ceremonies.
Looking down-range with F-TR rifle at Ben Avery Shooting Facility in Phoenix, Arizona.
F-Class Shooting at Bisley Range in the United Kingdom
F-Class competition is popular around the world, and the UK is a major center of F-Class shooting in Europe. The Bisley range is justly famous, with a long heritage of shooting competitions. This video features the European F-Class Championship held at Bisley in 2015.
Highlights from Day 1 of 2021 F-Class Nationals
In 2021 the NRA F-Class National Championships were held at Camp Atterbury, Indiana. Here is interesting footage from Day 1 of the Long-Range 1000-yard match. The video is narrated by our friend Erik Cortina, a top F-class shooter and member of Team Lapua-Brux-Borden. Erik has a popular YouTube Channel featuring interviews with many top shooters as well as reloading and tech tips.
WICKED WINDS — At Ben Avery with 18-30 mph Winds
Long-range F-Class shooters will tell you that the winds can be the biggest challenge in a match. And things can get pretty wild at times as the Ben Avery range in Phoenix, site of the 2022 NRA F-Class National Championships. In this video, shooters fight through extremely strong 18-30 mph winds at 600 yards. In these kind of extreme conditions, a major unexpected gust can send your bullet off-target.
F-0pen rifle at the Berger SW Nationals at the Ben Avery Shooting Facility in Phoenix, AZ.
Front Rest Options for F-Open (and Benchrest) Competition
If you are shopping for a front rest, definitely watch this comprehensive 42-minute video from start to finish. This is probably the most informative video about premium shooting rests available on YouTube. Top F-Class shooter and video-maker F-Class John covers a wide selection of front rests, with some observations about coaxial bipods as well. John covers the impressive new SEB NEO-X, the easy-to-transport SEB Mini-X, the excellent Rodzilla Rest, the innovative 21st Century Hybrid Rest, the sleek Italian Lenzi Rest. And at the end of the video John reviews the very affordable Caldwell Fire Control Rest ($204.99 on Amazon), explaining how it can be a decent choice for shooters on a limited budget.
Newbie Perspective — First Time Shooting F-Class
Just getting started in F-Class? Then you would appreciate this video, which covers the experience of an F-Class novice from Australia. The host of the video shot his first F-Class match at 600 yards with the Brisbane Mariners Rifle Club (BMRC) in Brisbane, Australia. He was using a Tikka T3 factory rifle with a $40 bipod. He enjoyed the challenge and had a good experience. This video shows that club-level F-Class can be fun, even with a modestly-priced factory rig. NOTE: This video is filmed indoors after the match, NOT on the lovely BMRC range shown above.
Reloading for F-Class — Interview with Erik Cortina
In this Precision Rifle Network video, Erik Cortina of Team Lapua-Brux-Borden covers the reloading process for his F-Class rifle. All phases of reloading are noted — brass prep, annealing, primer seating, precision powder measuring (to the kernel), and bullet seating. Erik also talk about load testing and use of barrel tuners. Erik produces the EC Barrel Tuner which is used by many top competitors.
Building a Modern F-Open Stock for Competition
In this video, our friend F-Class John explains the process for building two custom laminated stocks for his F-Open rifles. John selected handsome, highly-figured African hardwoods, which were then laminated into layers with purple-tinted heart-wood and dark Wenge wood stringers in the middle. The stock-maker then sliced the wood into layers (1:02) and then glued the layers together (1:40). After final cutting, the stocks are shown at 2:00, and then the video shows how the stocks received their final finish. Both stocks are fitted with the R.A.D. recoil-reduction system. See the bedding at 19:00 and the fully finished rifles at 19:12 with barreled actions fitted.
Here is another beautiful F-Open stock, on the firing line at Ben Avery with a SEB Mini front rest. Note the metal side-bars on the front of the forearm. These metal fittings extend the stock’s “wheelbase” while also lowering the rifle’s center of gravity.
BONUS Video
Crazy Small F-Class Group — Five Shots in 1.3″ at 1000 Yards
This video might just make you slap your forehead and say “that’s amazing!” During a practice session, Erik Cortina had a camera set up on the firing line along with a ShotMarker system on the target 1000 yards away. Erik recorded himself nailing a 1.3″ five-shot group, with four of the shots all touching in just 0.3″. The full group size, 1.3″, works out to 0.124 MOA — amazing accuracy for a big 7mm cartridge! And the four touching shots in 0.3″ represent an insane 0.029 MOA cluster! (1 MOA at 1000 yards is 10.47″.) As this was not shot in a competition, Erik’s 1.3″ group doesn’t count as a record, but it just shows how accurate a modern F-Open rifle can be when all the stars align for a talented trigger-puller.
Rio 2016 World Cup Photo Courtesy ISSF and Team USA.
Would you like to try position shooting? Here are some tips from one of the best 3P shooters on the planet, Olympian Matt Emmons.
Matt Emmons is one of the USA’s top smallbore rifle competitors in recent decades. Emmons has competed on the U.S. National Team since 1997 and he has represented the USA in various rifle events at four Olympics Games — 2004, 2008, 2012 and 2016. Matt earned multiple Olympic medals: Gold in 2004 in Men’s 50m Prone*; Silver in 2008 in Men’s 50m Prone; and Bronze in 2012 in Men’s 50m 3X40. Although his specialty is Men’s 3-Position rifle, Emmons’ World Championship and Olympic Gold are in Men’s 50m Prone. He usually shoots an Anschütz or Bleiker .22LR rifle, with Eley Tenex ammo.
Here are shooting tips from Matt, courtesy Anschütz. Click image below to launch a large PDF file. Right-click the image and “save as” to download the poster-sized PDF.
Here Matt Shows the Kneeling Position. The other two positions are Standing and Prone.
CLICK Photo to Load Large PDF File
Three Sets of Hardware for Three Positions
You may be surprised to find that Matt often totes three complete sets of rifle parts to important matches — three buttplates, three cheekpieces, and three Centra sights with adjustable irises. Matt told Shooting Sports USA that he travels with “three sets for three positions. Our final is so fast that I need three sets of everything to allow a fast change-over between positions.” Matt carries his gear in an an Anschütz sport bag: “It’s similar to the big Ogio duffels with wheels, but lighter. I’ve worked with AHG/Anschütz for many years and I like their bag because all of my junk fits in it.”
*Emmons’s gold medal at the 2004 Summer Olympics in the prone position came while using a borrowed rifle. In April 2004, just prior to the Olympic Team Trials, Emmons discovered his rifle had been severely sabotaged in the supposedly secure locker room at the United States Olympic Training Center. The precisely tuned barrel and action were heavily damaged by what appeared to be a screwdriver. “I unpacked my gun and I noticed that something wasn’t right,” Emmons said. “Sure enough, somebody had done something to it. I shot it and I couldn’t get the shell out. I said, ‘Something’s wrong here’.” Emmons said it could not have been an accident: “Oh no, no,” Emmons said. “Somebody took a screwdriver and went in.” Emmons went on to the 2004 Summer Olympics, and his gold medal in the prone position event, using his former University of Alaska Fairbanks teammate, Amber Darland’s .22 rifle. He never found out who the saboteur was, but said “I’d like to know so I could shake their hand and say thanks.”
Hydro Press and Arbor Press from 21st Century Shooting
Gear Review by F-Class John
Inline dies, used with arbor presses, continue to dominate the world of precision reloading. While arbor presses have remained mostly unchanged, 21st Century Shooting offers the Hydro Bullet Seating Press, a radical departure from your average arbor press. If you are looking for improved “feel” and feedback on bullet seating pressure, you should definitely check out the Hydro Press. This design has been around for a while now but has remained unchallenged since its inception. The 21st Century Hydro Press still remains a category leader (and the choice of many top competitors) for good reason. It is offered for $300.00 or, with a variety of gauge options, for $367.00. You can add an extended base with loading block another $85.00. CLICK HERE for ordering options.
Arbor presses have traditionally worked by using a gear-driven ram operated with a rotating handle. This allows for a compact design but often lacks the tactile feel and smooth operation that many reloaders want. The 21st Century Hydro Bullet Seater works by using simple mechanical leverage coupled with a hydraulic pressure gauge to seat bullets in a smooth motion all while helping you keep track of seating pressures.
Editor: Many top shooters believe they can seat bullets with greater precision using the 21st Century Hydro Press. I personally get more consistent seating, which seems to improve accuracy and even help a bit with lowering ES. The Hydro Press gives you excellent feedback when seating bullets. That has helped me detect a case with too much neck tension, or a case that may have doughnut issues. When the gauge does something odd or spikes, you are alerted to a possible issue.
In this video, John Perkins of 21st Century Shooting Shows how the Hydro Seater functions.
You might be asking why or how simple a simple mechanical lever gives you an advantage over gear driven systems and the answer is simple, leverage. The Hydro Seater is equipped with a long arm that comes straight up and out from the front and uses a set of hinges that connect to the ram. This elongated arm provides lots of leverage allowing easy force modulation. This smoothly applies pressure to the seating die in one fluid motion. This transfer of power helps seat bullets smoothly in even the tightest of necks without any jerky or stuttering movements.
Working at the same time is a hydraulic pressure gauge using internal oil. I found this gauge was incredibly sensitive, accurate, and repeatable compared to spring-driven gauges. The Hydro gauge read-out really gives the user the chance to sort ammo by seating pressure should they choose. In my particular case I only use it to cull out noticeably high or low ones as “blow off” rounds and am perfectly happy if the rest fall within a given pressure range. The nice thing is that the press allows you to be as picky as you want.
Compact 21st Century Standard Arbor Press
Not to be outdone by its big brother, 21st Century offers a Standard Arbor Press as well, in both right-hand and left-hand versions. Affordably priced at $128.00, this small arbor press in made to the same exacting standards as the Hydro Seater and has some nice features of its own compared to other small arbors.
The large, knurled adjustment knob is one of my favorite features. It tightens securely, yet it allows for easy raising or lowering of the head unit without the need for hex wrenches. 21st Century’s basic arbor press also has a slightly canted lever arm which allows the user to apply pressure more easily and consistently compared to some other arbor presses. While this press is small enough to fit many range bags, it can be disassembled quickly with a single Allen wrench.
While I own the 21st Century Hydro Press for use at home, the Standard Arbor Press goes with me to out-of-town events, so I can adjust bullet seating depth at the match. I love using it for this purpose since the little press is so easy to transport, and then set up and use on the road. The seating action is smooth, and there is plenty of leverage.
Seating my bullets long before I travel gives me the ability to set them to adjust for any throat erosion that may occur. This also ensures my bullets are seated correctly, by eliminating any potential bullet weld or problems from the bullets accidentally bouncing in your luggage. I like the confidence of knowing that my bullets are properly seated before a big match, especially when it has been days or weeks since I loaded them.
New Generation Arbor Press from 21st Century
UPDATE: In addition to the Standard Arbor Press, 21st Century now offers a New Generation Arbor Press for $185. This features direct leverage action plus a light-weight return spring that provides enhanced “resistive feedback” when seating bullets. This Editor has used this New Generation Arbor Press and it does have improved seating “feel”. An extended base with loading block is available at extra cost.
21st Century explains: “Our New Generation Arbor Press is the perfect upgrade for shooters looking to get the most out of their hand dies. With many truly unique features… this press features a butter-smooth direct leverage action. The tight tolerances of this design and exclusion of friction-inducing gears ensures that the press exerts consistent pressure through its full range of motion with minimal effort. Leverage is increased through the incorporation of an extra-long press handle, reducing hand and arm fatigue. The return springs are strong enough to reset the press but do not diminish the operator’s ability to feel the resistive feedback generated by neck tension. Press head clearance is adjustable up to 9 inches.”
SUMMARY — 21st Century Makes Great Bullet Seating Presses
Whether you need a premium bullet-seating Press such as the Hydro Bullet Seater or a basic, easy-to-transport Arbor Press, 21st Century Shooting has a excellent option for you. The Hydro Press offers outstanding bullet seating “feel” and consistency, with an ultra-smooth operation. The basic Arbor Press is well-made, compact, and also yields excellent results. Both these presses are built for a lifetime of use, using high-quality materials.
Happy Halloween
Hickok45 Carves Pumpkin Faces with Handguns
To celebrate Halloween, here’s an example of master wheelgun marksmanship. Popular YouTube host Hickok45 skillfully creates a smiling face on a pumpkin using a S&W Model 29 .44 Magnum revolver. This is the classic blued, double-action revolver popularized by Clint Eastwood as Dirty Harry. This has become a tradition for Hickok 45 — every year he puts a face on a pumpkin using a different firearm, typically a pistol, but he’s used a couple rifles as well. This year’s 2022 pumpkin-carving effort was done with a suppressor-equipped 9mm Mini Uzi. SEE PUMPKIN Shooting Playlist for all Hickok45’s annual pumpkin blasts.
Want to see more? Hickok45 has also carved pumpkins with a dozen firearms. Here is a pumpkin carved with a genuine, WWI-era Colt 1911 carried by an American soldier in the Pacific theater.
And here is a rather grim-looking face applied using the .40 SW Glock 23.
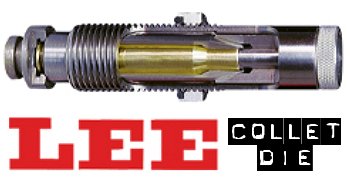
For those who prefer to neck-size their brass (rather than full-length-size), the LEE Collet Die is a popular, inexpensive option. It works by having collet tangs or “fingers” press the neck against a central mandrel. The benefit is that you get a very straight neck, which is sized consistently from top to bottom. Canadian shooter Jerry Teo explains: “LEE Collet Dies produce sized cases with very low runout (measured runout is under .001″ using a Sinclair concentricity gauge). You also don’t get the build-up of brass at the base of the neck, as can happen with bushing neck dies. The neck-shoulder junction stays nice and crisp.”
NOTE: For most handloading, we recommend FULL-LENGTH sizing of cases. You should always have a good Full-length sizing die for your brass. But there are some situations where neck-sizing may be useful. This article explains how to neck-size effectively with a LEE Collet Die.
Here’s a good video that explains how to use a Lee Collet Die to Neck-Size .243 Win brass:
TIP ONE — Adjusting Tension
LEE Collet dies don’t have a specific mechanical adjustment for neck tension. But you CAN easily modify the die to provide more or less tension. If you want to adjust the neck tension using a Lee Collet die, you can simply chuck the mandrel in a drill and reduce the diameter with some sand-paper (to increase neck tension) or you can order a mandrel the next caliber larger and turn it to whatever diameter you want (the larger the mandrel diameter, the less the neck tension). You can also order custom mandrels from Lee sized to any diameter you want.
Regarding neck tension, Boyd Allen makes an important point: “The only way to properly get more neck tension with collet dies is to either reduce the diameter of the mandrel, or order a smaller-diameter mandrel from Lee. I remind folks that adjusting the die position to have more toggle at the top of the ram stroke (not the factory recommended method), or leaning on the press handle with more force than recommended will NOT increase neck tension.”
TIP TWO — Polish and Tune for Easy Case Removal
Some users have complained that their Collet Dies grab the case-neck too firmly, making the case hard to remove. There are solutions to this problem. First inspect the collet fingers and smooth the inner surface up a bit with polishing compound or an extra-fine sanding pad. Second, you can open up the fingers a little bit. LEE recommends that if your Collet Die is sticking, take a steel punch and tap the fingers apart a little bit so that the natural “unloaded” position is wider. Lastly, you should lightly lubricate the outside of the collet fingers (see arrows) before you re-assemble the die. This will ensure they slide smoothly. Also, to prevent the collet fingers from closing too tight, never load up the die with your press without putting a case in place first. Without a case neck between the collet fingers and the mandrel, the collet can clamp itself too tight as you raise the ram.
TIP THREE — Always Have a Case Inside When Operating Collet Die
Our friend Boyd Allen tells us that you need to follow directions and NEVER operate the die without a case inside. Boyd explains: “This is because doing so will spring the quadrants of the collet inward so that they interfere with the insertion of a case, and the user will have to figure out how to undo the damage if the die is to operate properly. This advice would not be needed if everyone read the instructions before using the die…. but many times, they don’t. Another thing that I tell new users is to take the die apart so that they will have a better chance of understanding how it works.”
TIP FOUR — Size Twice and Spin Your Case 1/8th Turn
After reaching fully “down” on your press handle, withdraw the case about an inch and manually rotate it about 1/8th (NOT 1/4 or 1/2) turn while still in the shell-holder, then size again. This will place the die’s collet petals on the four “high spots” of the case neck and will result in a rounder, more evenly-sized neck with slightly more bullet tension. This takes only about one second more per case and is well worth the slight extra effort. (We thank reader Stonecreek for this smart tip).
Get CUSTOM Lee Collet Dies for Your Brass
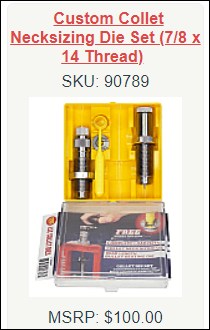
Yes LEE does make custom collet neck-sizing dies! LEE Precision currently offers Custom Collet Neck-Sizing Dies, made from two of your fired cases. LEE offers custom standard-thread (7/8×14) collet dies for $100.00 (plus S/H) and custom large-thread (1¼x12) collet dies for $300.00 (plus S/H). This is a good option if you run wildcats or have unusual chamber dimensions. CLICK HERE to ORDER.




 In two days, on October 31st, we celebrate Halloween (which was originally called All Hallows’ Eve). That means the neighborhood kids will be ringing doorbells as soon as it gets dark. No doubt some of you procrastinators will wait ’til the last minute to set out your Halloween decorations and Jack-O-Lanterns. Don’t worry, in the video below, our friend, 3-Gun ace
 Hickok45 Carves Pumpkins with Handguns


 Just getting started in F-Class? Then you would appreciate this video, which covers the experience of an F-Class novice from Australia. The host of the video shot his first F-Class match at 600 yards with the

 Matt Emmons is one of the USA’s top smallbore rifle competitors in recent decades. Emmons has competed on the U.S. National Team since 1997 and he has represented the USA in various rifle events at four Olympics Games — 2004, 2008, 2012 and 2016. Matt earned multiple Olympic medals: Gold in 2004 in Men’s 50m Prone*; Silver in 2008 in Men’s 50m Prone; and Bronze in 2012 in Men’s 50m 3X40. Although his specialty is Men’s 3-Position rifle, Emmons’ World Championship and Olympic Gold are in Men’s 50m Prone. He usually shoots an Anschütz or Bleiker .22LR rifle, with Eley Tenex ammo.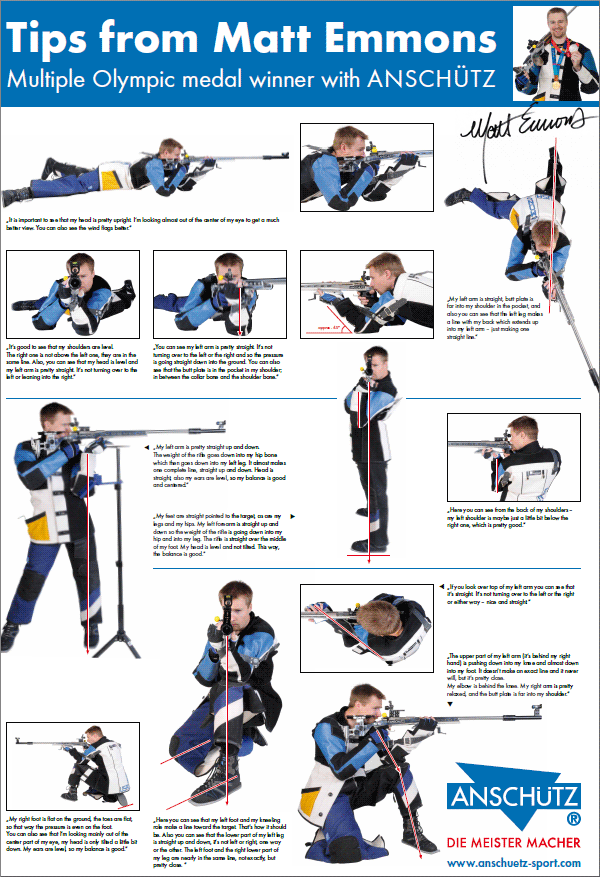


 TIP ONE — Adjusting Tension
 TIP TWO — Polish and Tune for Easy Case Removal