Think you can shoot fast with a bolt gun? Bet you can’t beat these Norwegian speed-demons. In 2019, Inge Hvitås set a Mad Minute World Record, putting 39 rounds inside a 16″ circle at 200 meters, all in a single minute. At the same match, another Norwegian ace fired 48 rounds in a minute, with 38 in the bullseye. Now that’s spectacular speed and accuracy. We first ran this story in 2019 when the record was set. Wikipedia reports this is still the current record. So we believe no one has ever put more rounds on a 16″ target at 200m (with a bolt-action rifle) than Inge Hvitås. We include videos showing Inge’s amazing sequence.
Watch Inge Hvitås Set New Mad Minute World Record:
NOTE: This video, hosted by Facebook, may be slow to load. But be patient — it’s amazing to watch! CLICK HERE to run this story all by itself, speeding up the video load.
Mad Minute World Record — 39 Hits in One Minute (60 seconds)
At the Haga shooting range in Norway, spectators witnessed spectacular speed shooting in 2019. Norwegian shooter Inge Hvitås set a Mad Minute Challenge World Record with 39 hits in ONE MINUTE at 200m. The target was a 40cm (15.75″) bullseye placed at 200m (218 yards). Fellow Norwegian Jesper Nilsstua also shot brilliantly, sending 48 rounds down-range in one minute. Jesper had 38 hits, missing the record by just one. Both shooters were using iron-sighted Sauer 200 STR target rifles, which are normally chambered for the 6.5×55 cartridge. For this event, magazines are limited to 5 rounds and shooters may use slings but no bipods or other support.
Amazing Bolt-Gun Cycling Speed — 48 Rounds in One Minute
Another Norwegian ace, Jesper Nilsstua, missed the Mad Minute Challenge record (by one hit), but boy was he fast. Dennis Santiago (who has done his own Mad Minute drill), was dazzled: “This dude didn’t get the new world’s record of 39 hits in 60 seconds. He ‘only’ got 38 hits after getting off an amazing 48 shots in 60 seconds. Watch the smoothness of his shooting. It’s amazing.”
NOTE to Readers: This video is hosted by Facebook. It may be slow to load. But it is worth watching.
For the Mad Minute Challenge in Norway, a standard 200m DFS target was used, with 1 point per hit within the black area which is 40cm (15.75″, or 6.9 MOA) in diameter.
Norwegian Mad Minute Challenge — Event Rules
The organizers of the event posted: “The Mad Minute Challenge [is] a modern edition of a old military drill. This is a place for sport shooters to … share experiences on the subject of speed shooting with bolt-action rifles. The Mad Minute Challenge is all about the sport! To make a attempt for the record everyone must follow these five simple rules:”
Rapid-Fire Shooting Comparison Video
To illustrate the remarkable speed of Norwegian champion Inge Hvitås, this video shows Inge (top of frame) compared with other skilled competitors shooting the same 1-minute course of fire in Lesja, Norway.
About the Original MAD MINUTE
“Mad Minute” was a pre-World War I term used by British Army riflemen during training at the Hythe School of Musketry to describe scoring a minimum of 15 hits on a target at 300 yards within one minute using a bolt-action rifle (usually a Lee-Enfield or Lee-Metford rifle). It was not uncommon during the First World War for riflemen to greatly exceed this score. The record, set in 1914 by Sergeant Instructor Alfred Snoxall, was 38 hits.
Listed as “Practice number 22, Rapid Fire” of The Musketry Regulations, Part I, 1909, this drill required at least 15 shots on the Second Class target at 300 yards. The exercise was just one of several annual tests to classify a soldier as a sharpshooter, first or second class shooter depending on the points achieved.
Research indicates the Second Class target was a 48″ x 48″ square with 24″ inner circle and 36″ outer circle. The sight mark was a central 12″ x 12″ shape representing a soldier. ALL hits scored points (3 for center circle, 2 for outer circle, 1 for outer square). NOTE: Though some sources say the Mad Minute drill used a 12″-diameter round target, this appears to be a mistake from Ian Hogg’s book “The Encyclopedia of Weaponry”. No other source mentions a 12″ circle, which would be a mere 3.82 MOA. In reality the true drill target was a 48″ x 48″ square, roughly 15 times larger. (From No.WikiPedia.)
NRA Media offers a series of informative videos about the Science of Shooting, covering a wide range of topics, from eye dominance to long-range ballistics. These videos feature high production values, with super-slow motion segments, as well as helpful computer graphics to illustrate the principles covered.
The videos are narrated by Jessie Harrison, a top action pistol shooter (and the first women ever to achieve USPSA Grand Master status). Jessie is assisted by talented shooters such as Top Shot Season 4 Champion Chris Cheng. There are 40 videos in the Firearm Science Video Series. Here are seven good NRA science videos, with links to others below.
BULLET TRAJECTORY — Factors at Play and Zeroing Strategies
Host Jessie Harrison (formerly Jessie Duff) and Veteran Air Force Sniper and Long Range Expert George Reinas help us understand the factors behind bullet trajectory. NOTE: There are some exaggerations in the graphics in the videos, and inconsistent terminology use, but it’s still a helpful basic primer on the subject of trajectories. This popular video has over 1 million YouTube views.
Olympic Gold Medalist Jamie Gray demonstrates the four positions used by competition shooters: Prone, Standing, Sitting, and Kneeling. Helpful overlay graphics show how the human skeleton aligns in each of these positions. This video should help hunters as well as competitive position shooters. If you shoot silhouette, definitely watch this video!
INTERNAL Ballistics — Cartridge Ignition and Bullet in Barrel
What happens inside the barrel of your gun when you pull the trigger? In this edition of Firearm Science, Jessie Harrison goes over internal ballistics, which studies the combustion of propellant, the pressure developed, and the motion of the bullet along the bore of the barrel. There are some good 3D animations showing how the powder charge ignites and the bullet moves through the barrel.
CHOKE TUBES and Shot Patterns — Shotgun Science
With over 2 million YouTube views, this shotgun-centric video is the most popular of all the NRA Firearms Science series videos. Here Olympic trap shooter Corey Cogdell explains how choke tubes affect a shotgun’s shot pattern in this edition of Firearm Science. We recommend that all Shotgun hunters watch this video — it explains the effect of choke tubes very well.
ZEROING RIFLES for Long Range — Tech Tips
The process of zeroing rifles for long range is covered in this Firearm Science video featuring George Reinas, a veteran Air Force sniper. George demonstrates how to adjust his scope to compensate for bullet drop at long range. Our friend Dennis Santiago was involved in the making of this video, which was filmed at the Burbank Rifle & Revolver Club in Southern California.
CHRONOGRAPHS — Calculating the Speed of a Bullet
This video shows a conventional chronograph with front and rear light sensors. The bullet first trips the front sensor and then the rear sensor as it flies over the unit. The difference in sensor time is used to calculate bullet speed. This is not the only kind of chrono in common use today. The popular MagnetoSpeed chrono works by tracking the bullet as it passes over two magnetic sensors mounted on a bayonet-style fixture on the barrel.
The high-tech LabRadar chronograph employs Doppler Radar to measure the speed of a bullet without the need to send the round directly over sensors. No need to set up tripods down-range. Just set the unit near your rifle’s muzzle, on the side. There is also an inertial trigger accessory for LabRadars. Interestingly, this video also explains how, in the days before electric lamps, digital processors, and radar, scientists used a mechanical “Ballistic Pendulum” to calculate bullet velocity using Newtonian physics. The Ballistic Pendulum (shown at right) was first used in the mid 1700s.
EYE DOMINANCE — How to Determine Which Eye is Dominant
Host Jessie Duff and longtime shooter Krystie Messenger demonstrate how eye dominance affects aim and teach you how to determine your dominant eye in this edition of Firearm Science. There are very simple tests you can do to determine your eye dominance. This Editor is right-handed but left-eye dominant. All competitive shooters should check for eye dominance. If you are cross-dominant, you can alter your head position or put a paper patch on one frame of your shooting glasses.
With the high cost and reduced availability of factory ammo, more shooters are loading their own ammo. When good 9mm pistol ammo was $10/box, it might be hard to justify handloading. Now that 50 rounds of factory 9mm can run $25 or more it certainly makes sense to reload. The same is true with rifle ammo if you shoot large quantities, or if you simply can’t find your preferred ammo for sale these days.
To increase productivity when reloading large quantities of ammunition, many shooters are thinking of getting a progressive press. Because multiple operations take place with a single pull of a lever, a progressive press can produce way more ammo in a given period of time than any single stage press. With a progressive, on the ram up-stroke, the multiple stations can simultaneously remove spent primer, full-length size case, drop powder, seat bullet, and crimp (if desired). Most progressives are also set up to prime cases with the ram in the lower position — though some guys prefer to prime manually.
Progressive presses aren’t just for high-output pistol ammo or bulk rifle ammunition. Good progressives can be adapted to do certain reloading tasks for top-on-the line match ammo. You might use a progressive for decapping, priming, and sizing, then throw powder and/or seat bullets separately. Some Champion shooters do use progressives to load their match ammo! For example 5-Time National Long Range Champion John Whidden and 2020 Berger SWN F-Open Champion Jay Christopherson both use progessive presses for some (but not all) operations.
To help you get started with progressive presses, here are six videos from UltimateReloader.com that cover seven popular machines, from the elite Mark 7 Evolution to the affordable Lee Loadmaster. With many of these machines you can add separate vertical bullet feeder systems that further increase loading efficiency. Machines Covered: Lyman Mark 7, Dillon XL-650, Dillon XL-750, Dillon RL-550c, RCBS Pro Chucker 7, Hornady Lock-N-Load AP, and Lee Load Master.
Mark 7 Evolution Press — Distributed by Lyman
Dillon XL-650 vs. Dillon XL-750
RCBS Pro Chucker 7 with Bullet Feeder
Dillon 550C with 6mm Creedmoor and 9x19mm
Hornady Lock-N-Load AP Progressive
Lee Load-Master Features and Loading 9mm
SAFETY BONUS — Why You Need a Lock-Out Die
The RCBS Lock-Out Die can also be used with some Dillon and Hornady progressive presses.
If you load pistol or rifle ammo with a progressive press, we strongly recommend you get a Lock-Out Die from RCBS. This unique reloading die will prevent your progressive press from advancing if the dispensed powder charge is more or less than about 0.3 grains too high or too low. The Lock-Out Die really works.
The Lock-Out Die works by using a central die detection rod that sets its vertical position based on the height of the powder column in the case. Through an ingenious design, if the powder column height is too low or too high, the rod locks in place as you start to pull the press handle. This halts the press before the ram can lift and the cartridge plate can advance. Unlike a beeping alarm system (which can be ignored or defeated), the Lock-Out Die physically stops the movement of the press ram and prevents a bullet being seated in the “problem” case.
It takes a bit of tweaking to get the Lock-Out Die detection rod setting just right, but once it is correctly positioned, the Lock-Out Die works smoothly in the background. The Lock-Out Die won’t interfere with the loading process unless it detects a high or low charge — and then it positively stops the progressive loading cycle.
While crafted for use in RCBS progressive presses, the RCBS Lock-Out Die can also be used on a Dillon XL Progressive or Hornady Lock-N-Load progressive — though it does take up one station which could otherwise be used for a final crimp die (after the seating die). This Editor has used the RCBS Lock-out die very successfully on an RCBS 2000 progressive press for many years.
News from New Zealand — AMP to Ship 10,000th Annealing Machine Annealing Made Perfect (AMP) can celebrate a real milestone. After shipping its very first induction annealer six years ago in February 2016, Annealing machine number #10,000 will leave the New Zealand factory next week. In that time, the AMP annealer has progressed from the original part-analogue Mark I through to today’s smart, fully digital Mark II annealer. Over the six years of production, over 55,000 annealing pilots have also shipped. Company president Alex Findlay says “AMP annealers are now standard equipment in many ballistics laboratories. We are proud that our annealer is considered mandatory on the reloading bench of precision marksmen worldwide. We export to every sports-shooting country. Our patented AZTEC system means that even a novice reloader can anneal with the same precision as a world champion.”
How the Computer-Controlled AMP Induction Annealing Machine Is Crafted
New Book about Annealing Made Perfect’s Business Development
To mark the occasion, AMP has released “Making Perfect”, a 320-page full-color book which chronicles the company’s growth from first concept in 2012, through the years of R&D, right up to today’s market-leading products, including the ground-breaking AMP Press diagnostic bullet seating instrument. This excellent book includes the full “Annealing Under the Microscope” series of research articles, which are fascinating reads for any AMP owner, or potential buyer.
In the process, Alex and Matt have worked with many of the leading figures of the shooting world. This fascinating book explains how two guys in New Zealand created a unique new product, and who helped them along the way. Alex send AccurateShooter a copy of this book recently, and we can affirm it is a well-written, interesting guide to the creation of the AMP annealer, and its remarkable technology. There are plenty of color photos that show, from start to finish, how the AMP machine was developed and perfected. AMP’s new Making Perfect Book is available on the AMP USA webstore with shipping from Las Vegas. It is also sold through AMP’s international webstore with shipping from New Zealand.
Shiny brass — it may not shoot more accurately, but it does make you feel better about your hand-loaded ammo. While it’s not necessary to get brass “bright and shiny” after every firing, it is a good idea to clean powder residue, grime, and grit off your brass before you run cases into sizing dies. There are many ways to clean cartridge cases. A quick wipe with solvent on a patch may suffice for recently-shot cases. Older brass with baked-on carbon may require lengthy tumbling. Ultrasonic cleaning is another popular option that gets your brass clean inside and out.
Sinclair International has a series of helpful videos on brass cleaning. These short “how-to” videos, hosted by Bill Gravatt, Sinclair’s past President and current Creedmoor Sports President, cover the various processes you can use — tumbling, ultrasonic cleaning, chemical cleaning, and cleaning by hand.
Video ONE — Cleaning Brass in Vibratory or Rotary Tumbler
TIP: Brass that has recently been shot will clean more easily than brass that has been sitting many days or weeks. If your tumbling media is fresh the job should be done in an hour or less. It’s your choice whether to tumble with primers removed or with primers still in the cases. If you choose to tumble with primers out, we suggest you deprime with a depriming die, rather that put dirty brass into your sizing die. Some people like to add a teaspoon of liquid polish to the media. This does work, cutting tumble time, and making your brass more shiny. However, if you add liquid polish, do that BEFORE you add the brass and let the tumbler run for a 15 minutes to get the polish completely mixed into the media. Otherwise you can else up with gooey gunk inside your cases — a very bad thing.
Video TWO — Ultrasonic Case Cleaning
TIP: There are many different types of solutions you can use. Soapy water suffices for some folks, particularly if you add a little Lemi-Shine. The Hornady One-Shot Sonic Clean and Lyman Turbo Sonic solutions both work well, and can be used multiple times, provided you strain the solution to remove dirt and grit after cleaning sessions. Many ultrasonic cleaning machines have timers. Experiment with dwell time to see how long you need to immerse your brass. A very small amount of Ballistol in the solution will help lubricate your necks on the inside. This can make bullet seating go more smoothly, with more consistent neck tension.
Video THREE — Chemical Cleaners (Soaking without Ultrasound)
TIP: After using chemical cleaners, such as the Iosso solution, you need to water-rinse your brass thoroughly. A kitchen strainer helps with this (see video at 0:20). Also, don’t forget your brass in the chemical solution — follow the manufacturers recommendations and don’t exceed the recommended dwell time. Chemical cleaners work surprisingly well to remove grease and grime, and the solution can be re-used multiple times. However, if you want your cases to look bright and shiny (like new brass), you will probably have to tumble. [Editor: A very effective new chemical cleaner is the Brass Monkey product from the makers of Wipe-Out and Carb-Out. Add a teaspoon to a gallon of water then soak your brass for 20-30 minutes. It really works — the cases clean up dramatically].
Video FOUR — Manual Cleaning (By Hand)
TIP: Keep some oversize patches in your range kit. At the end of your shooting sessions, wipe off your fired brass with a patch dampened with a mild, non-corrosive solvent (once again Ballistol works well). Before the carbon sets up on your brass it is very easy to remove. For tougher jobs, you can use 0000 Steel Wool (as Bill recommends in the video). You may find that timely hand-cleaning lets you avoid tumbling altogether — or you may choose to tumble (or ultra-sound) your brass only after a half-dozen or so firings.
Are sound suppressors useful in competition shooting? In some disciplines, and in venues where sound “moderators” are permitted, the answer is “yes”. In the November edition of Shooting Sports USA eZine, you’ll find an interesting article about the use of sound suppressors (aka “cans”). The article explores the use of suppressors in Europe and in tactical matches in North America. You’ll also find an explanation of the rules and regulations governing suppressor ownership and use in the United States.
Shooting Sports Editor Chip Lohman tests three rifles from the bench and found that sound suppressors did not harm accuracy. In fact, all three test rifles (one each in .223 Rem, .308 Win, and .338 Lapua Magnum), shot slightly better 5-shot groups at 200 yards when a suppressor was fitted to the barrel. However, the suppressors did alter point of impact. Interestingly, velocity standard deviation (SD) values were lower with suppressors in place for all three test rifles. This observation calls for further study.*
So the use of suppressors in competition could be a good thing. However, in the United States, current NRA rules prohibit the use of sound suppressors. NRA Rule 3.16.1 subsection (a) states: “Sound Suppressors are not authorized for use in High Power competition.” In addition, there are some practical problems with suppressors — the heat rising off of a naked suppressor can create mirage problems (that’s why some shooters wrap their cans with a cover).
Despite such issues, now commonly see suppressors on rifles used in tactical matches and PRS/NRL events. For example, many competitors in the Steel Safari field challenge match use suppressors. The photo below shows our friend Zak Smith competing in the Steel Safari with his suppressed Accuracy International rifle.
Commentary — What Can We Conclude?
Obviously, this three-rifle SSUSA test was not definitive. One well might observe different results with different types of suppressors, fitted to different kinds of rifles. Mounting a suppressor to any barrel will certainly affect harmonics and “tune”. But this SSUSA study does suggest that tactical shooters, who are allowed to use suppressors in competition, may find that the benefits of suppressors (significantly reduced recoil and less noise) outweigh any meaningful accuracy loss, at least in PRS-type matches.
NOTE: The article cautions that one should not extrapolate too much from the SD numbers, given the low number of test shots. Chronograph-maker Ken Oehler, when asked to comment on the SD values stated: “[You should] report the observed SDs, but draw no conclusions until… you can do more testing with larger sample sizes.”
Qualifications to Obtain a Suppressor
To legally obtain a suppressor, you must fill out Federal Forms and pay a $200 fee to the ATF. You must also pass BATFE background checks and otherwise comply with Federal and state laws. States can regulate suppressor ownership or use, so be sure to check the laws in your area. On the federal level, the process to acquire a suppressor is regulated under the National Firearms Act of 1934.
At the request of our readers, we provide select “Deals of the Week”. Every Sunday afternoon or Monday morning we offer our Best Bargain selections. Here are some of the best deals on firearms, hardware, reloading components, optics, and shooting accessories. Be aware that sale prices are subject to change, and once clearance inventory is sold, it’s gone for good. You snooze you lose.
1. Palmetto SA — S&W M&P15-22 Sport Rimfire Package, $449.99
⏺ Good, reliable rimfire AR clone for NRL22 and cross-training
This Smith & Wesson AR-style M&P15-22 provides the fun of an AR15 with the low cost of rimfire ammo. This can work well for cross-training or NRL22 matches. The S&W M&P15-22 SPORT features a slim M-LOK handguard that easily accepts a variety of accessories without removing the handguard. The M&P15-22 SPORT comes standard with removable Magpul MBUS front and rear folding sights. This $449.99 package includes 3 magazines and a nice gun case.
2. Midsouth — Lapua Brass in Stock, Many Types
⏺ Good prices on long-lasting, top-quality Lapua brass
Lapua is a top cartridge brass choice for competition, varminting, and hunting. Lapua cartridge brass has set world records in Benchrest, F-Class, and High Power competition. Right now Midsouth has a wide variety of top-quality Lapua brass at attractive prices. Lapua brass in stock now includes: .223 Rem, 6.5×47 Lapua, 6.5 Creedmoor, 6.5-284, .308 Win, .300 Norma Magnum, 8×57 IS/IRS, .338 Lapua Magnum, and more.
3. Precision Reloading — Hornady Auto Charge, $299.99
⏺ Good performance with convenient raised control panel
Every handloader needs a good, automated powder dispenser. The new-generation Hornady Auto Charge has many good features, including a smaller footprint, and adjustable trickle rates. This was you can customize the dispensing speed to your choice of powder. Haveing the control panel on top of the scale/dispenser also is handy. This is a very good deal — the same Hornady Auto Charge currently sells for $359.49 on Amazon.
4. Amazon — Universal Gun Cleaning Kit, $39.50
⏺ Great value for cleaning kit for pistols, rifles, and shotguns
This Universal Gun Cleaning Kit has just about everything you need to clean any firearm, all packed in a handy transport case. The kit includes jags, brushes, bore mops, slotted tips, and lots more. The fitted jags and slotted tips are made from solid brass and marked by caliber. The cleaning rods and accessory adapters are also made from brass. Included in this easy-to-carry kit are: 6 gun rods, 13 gun jags, 4 slotted tips, 9 gun mops, 14 bore brushes, 3 muzzle guards, 3 utility brushes, 3 accessory adapters, 4 polishing cloths, 100 cleaning patches, 2 oil bottles (empty), and even a gun cleaning mat. NOTE: For competition rifles, we recommend using high-quality ONE-PIECE cleaning rods.
5. EuroOptic — Vortex Close-Outs, Save Hundreds on Top Optics
⏺ Incredible bargains on Vortex scopes — save $300-$500
Shown above are just three (3) of the 15 Vortex scopes on sale, including red dots, 1-6X tactical models, hunting scopes, and both FFP MRAD and SFP MOA competition models. CLICK HERE to see all the Vortex close-out optics.
6. KYGUNCO — Turkey Season Shotgun Bargains, $210 and Up
⏺ Great low prices on shotguns for spring turkey season
7. MidwayUSA — Electronic Muffs with Walkie-Talkie, $54.83
⏺ Dual-function electronic muffs — great for range communications
Electronic earmuffs protect your hearing while allowing you to hear range commands. With these Walkie-Talkie muffs you also get 2-way communication capabilities. That lets you talk to folks in the pits or at a different section of your shooting club. The Walker Razor Slim Low Profile Electronic Earmuffs (NRR 23dB) with Walkie Talkie allows you to communicate with other FRS radios. That lets you give range commands or talk with friends without the need for a second radio. If you don’t need the two-way functionality, MidwayUSA also has the NRR 26 Walker’s Alpha Power Electronic Muffs for $39.99, and the slimmer NRR 23 Razor PRO Electronic Muffs for $39.99. All these options are excellent bargains.
⏺ Excellent, up-to-date resource with good powder/bullet data
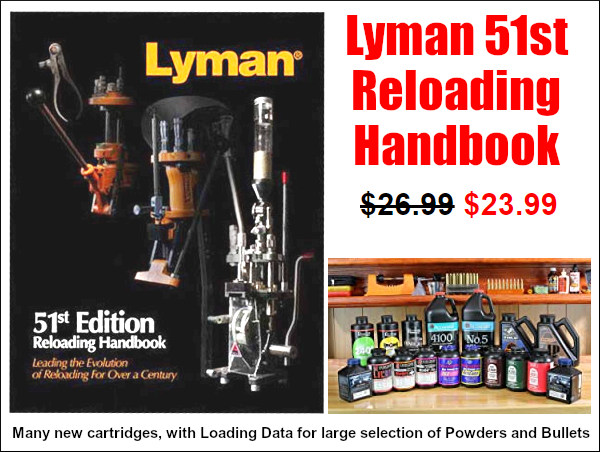
Lyman has released its new 51st Edition Reloading Handbook. This big, full-color edition includes both reloading guidance and extensive load data. New cartridges include: 224 Valkyrie, 22 Nosler, 24 Nosler, 6mm ARC, 6mm Creedmoor, 6.5 PRC, 6.8 Western, 300 PRC, and more. The book includes powders from Accurate, Alliant, Hodgdon, IMR, Norma, Ramshot, VihtaVuori, and Winchester. This Lyman Handbook also covers a huge selection of bullets from Barnes, Berger, Hornady, Lapua, Sierra, Speer, Swift and Winchester plus cast bullets. This latest 51st Edition has a new section about Progressive Presses along with How-To articles for single-station and turret presses. This soft-cover Handbook is on sale for $23.99 at Midsouth.
9. Locked&Loaded, CMMG .22 LR Conversion Kit for ARs, $129.99
⏺ Quick, easy .22 LR conversion kit for AR-platform rifles
Here’s a great way to save money when shooting your AR15. Shoot .22 LR at a fraction of the cost of .223 Rem ammo. Swapping your bolt carrier group with a CMMG Bravo Conversion .22 Bolt Group takes only seconds to install. This .22 Conversion Kit operates on direct blowback, so it does not need the gas tube for function. The Bravo Conversion Bolt Group system includes the stainless steel conversion bolt group along with one 25-round .22 LR magazine. If you need more mags, Palmetto State Armory sells the CMMG Bravo .22 Conversion Kit with THREE Magazines for $179.99.
10. Amazon — Large Digital Display Timer, $12.95
⏺ Use in Matches — Count-Down or Count-UP, handy big buttons
If you shoot in a discipline with time limits, or you time your firing strings during practice, having a reliable and easy-to-read timer is critical. One of our favorite timers is this very affordable Digital Display Timer with both count-up and count-down functions. It boasts an easy-to-read display and LARGE buttons making it perfect for F-Class, Palma, and other matches. This timer comes with both a built-in stand AND a strong magnet so you can position the timer conveniently.
How well can the little 6mm Dasher perform at 1000 yards when the conditions are good, and the shooter is riding a hot streak? Well here’s a shot-by-shot record of Scott Nix’s 4.554″ ten-shot group shot at the Deep Creek Range outside Missoula, Montana at the Northwest 1000-yard Championship a few years back. All 10 shots were centered for a 100-6X score. That’s about as good as it gets. If Scott had stopped after 5 shots, his group would have been under three inches.
Video Demonstrates Amazing 1000-Yard Accuracy
Watch the video. You can see the group form up, shot by shot. It’s pretty amazing. Scott’s first shot (at the 45-second mark of the video) was right in the X-Ring, and four of Scott’s first five shots were Xs. That’s drilling them! This video was recorded from the pits at the 1000-yard line, during record fire.
Deep Creek Range
The Deep Creek Range in Missoula, MT is one of the nicest places to shoot in the Intermountain West region. The range is located in the mountains within a few minutes drive of Missoula, and there is camping on-site. When conditions are good at Deep Creek, records get broken. To learn more about shooting at Deep Creek, contact Jamey Williams at jameydan[at]gmail.com.
Here is an aerial view of the Deep Creek Range (Drone video by David Gosnell):
Richard Franklin’s Step-by-Step Guide to Pillar Bedding
The Art of Stress-Free Stock Bedding
by Richard Franklin Richard Franklin prepared this article for our readers. Richard tells us: “I’m happy to do pillar-bedding work, but this is a job which many shooters can do themselves, with some practice and the right components. I do suggest you practice first on an old ‘beater stock’. When done right, you end up with a perfect fit of receiver to action, with no twisting, stretching, or compression forces being applied to the receiver through mis-alignment. That’s what I mean by ‘stress-free’.”
This article covers all the steps in the process. If you want to see more, Richard has a 200-minute DVD, Stress-Free Pillar Bedding, that shows the entire job–from start to finish–and contains many tips to help you achieve perfect results. Richard shows how to properly relieve the bedding area, how to make pillars, how to set up the barreled action, and how to test your work to ensure it is truly “stress-free”. In the DVD, Richard does a complete pillar bedding job on both a finished custom stock and a Remington stock. You can order the Pillar Bedding DVD by visiting the Instructional Video page on RichardsCustomRifles.com.
[Editor’s Note: This article was first published a decade ago. So, some of the listed bedding materials may have been enhanced slightly, or the product names may have changed. But the procedures described by Richard are still valid and still achieve great results.]
Before You Begin — Some Comments About Inletting
Richard told us: “You can’t do a great bedding job unless you start with really good inletting. Unfortunately, many ‘inletted stocks’ really require quite a lot of work to get the inletting right. You cannot inlet a stock 100% correctly just using a stock duplicator. That’s one reason I do bedding jobs only on the stocks I make. If the inletting isn’t right, you can have a myriad of problems–such as the holes for the action bolts being in the wrong place, or the stock not having enough clearance for the barrel or the trigger hanger. So, BEFORE you start your bedding job, make sure the inletting is really right. Don’t assume the inletting is really complete (and correct) just because the manufacturer claims that to be the case. This applies to both wood and fiberglass stocks.”
Pillars For Bedding
The BAT action featured in this article has three pillars, with the middle pillar sitting under the front of the trigger guard, and the third pillar at the rear of the guard. More typical installations will use two pillars. For either system, the installation procedures are the same.
In Photo 1, you will see part A, the bottom part of the front pillar which we call the “escutcheon”. Part B, which is a 1/4″ X 28 action bolt that is slightly longer than part C which is the top part of the front pillar. The two parts of the front pillar were machined as one piece and then the escutcheon was cut off just below the shoulder that is inside. This shoulder is for the head of the action bolt to tighten up against. I’ve found that a two-piece pillar has many advantages, particularly for hunting stocks where the underside of the stock is angled (i.e. not parallel with bore axis). I make the pillars I use, machining them from cut-off stainless barrel stubs.
Part D is a 1/4″ X 28 hex-head bolt with the head turned down to 1/4″ which permits the insertion of a hex-head driver to tighten and remove the bolt. This headless bolt will be inserted in the rear tang hole of the action and part E, the rear pillar will be placed on it.
STEP ONE — Getting Started
Photo 2 shows tape on recoil lug, pillars bolted in place and putty in voids. Release agent is polished to a very thin layer. The top half of the front pillar (part C) is placed on the action receiver ring and the bolt (part B) is inserted thru the pillar and tightened against the action. This bolt must have a tapered head on the underside so that, when it is tightened, it will center the top half of the front pillar around the action bolt hole. (This is also true for the middle pillar if the action has a middle bolt.)
PHOTO 2
The headless bolt is inserted into the rear tang hole of the action and the rear pillar is slipped down on it. You will notice in Photo 3, below, that the pillars have the hole drilled oversize so that a 1/4″ bolt has a little space around it. (I like to drill the pillars with a .260″ bit inside.)
The above scenario is the placement of the pillars prior to applying the bedding compound, which I call “Mud”. Devcon 10110 is my bedding compound of choice (and the only product I use) as the mud must set up as hard as concrete and most other epoxies will not do this. Also Devcon shrinks very little if at all. My comments on other bedding compounds are in the sidebar below.
STEP TWO — Relieving the Stock Before Bedding Relieving the right amount of wood in the area to be bedded–not too much, not too little–is very important to achieving the best results. You need to create some space for the mud to fill around the action, but you don’t want to alter the inletting too much.
PHOTO 3
Photo 3 shows the wood removed from the inside of the stock bedding area. Remove enough wood everywhere except along the top sides of the stock to allow at least 1/8″ to 3/16″ of room for the mud. Remove 1/4″ of wood behind the recoil lug. I like about .012″ clearance on the top inside edges.
NOTE: Leave a small area of original wood just behind the rear tang bolt hole as this wood will determine the elevation of the bedded action in the stock.
Photo 4 shows the tang area of the stock. Note the elevation wood left at tang. Be sure to leave some original wood for the action tang to sit on. This is very important.
STEP THREE — Wrapping Tape on the Barrel Photo 5 shows the barreled action in the vise. It also shows black electrical tape wrapped around the barrel just behind the front of the stock forearm. Wrap enough tape to hold the front of the barreled action at the proper elevation in the stock.
The idea is that the barreled action does not touch anything except the bit of original “elevation” wood left at the rear tang (behind the pillar) and the forearm resting on the electrical tape. This is very important to obtain 100% stress-free bedding. You want the bore of the barrel to be parallel with the top edge of the stock so wrap just the right amount of tape to ensure this. The tape also centers the barrel in the fore-arm. Done right, the barreled action will be contacting just at two points (tape in front, tang in rear) and the barrel’s bore will be parallel with the top of the fore-arm’s sidewalls.
Comments on Alternative Components and Methods
Bedding Compounds
There are at least a dozen popular products used for rifle bedding. At one time or another, Richard has tried most of them. Devcon 10110 “Plastic Steel® Putty” is the only compound he currently uses and the only product he endorses whole-heartedly. “The Devcon 10110 is expensive, but it is the best bedding product I’ve found. First, it sets up extremely hard. That is very important to the performance and longevity of the bedding job. You want it to get it as hard as concrete. You need it really hard so when you tension the action screws it doesn’t squish down or migrate. Some of the brown stuff other folks use is way too soft. Marine Tex is also too soft. Many products will shrink. Any compound that shrinks is useless in my book. Devcon has absolutely near-zero shrinkage. Acra-Glass I keep in my shop, as it is useful for stock repairs. However I would never bed with Acra-Glass.
Devcon also has just the right consistency — about that of peanut butter. So, it is easy to apply but not runny. It stays in place when I turn the stock upside-down. Devcon is also relatively forgiving to mix–the proportions of the two elements are not super-critical like some other products. I know Marine-Tex can give real problems if you don’t use just the right amount of catalyst. Overall, Devcon does everything you need it to do, and does it exceptionally well. Some other smiths think it’s too expensive–and yes I’ll use $10-$15 worth of Devcon in doing a typical bedding job. But I think the customer deserves the best possible, longest-lasting bedding, and that means Devcon. Among the products I’ve used, Bisonite is my second choice, but I think Devcon will last longer.”
Release Compounds
Richard tells us: “People use all sorts of release compounds and I’ve tried many. I strongly prefer Kiwi shoe polish (neutral color). With the Kiwi, I’ve never had an action stick in the stock. It goes on easy, and you can use a paper towel to polish it very thin and that’s a big benefit. If you have a thin layer of release compound the finished bedding is that much closer to the exact dimensions of the action. I’ve heard of guys using PAM spray. I don’t trust that stuff. The Brownells release compound goes on too thick. Car wax is not a great choice either because it can separate and it gets dusty as it dries. Go with the Kiwi stuff–a little can will last for years. But be sure to use the clear (neutral) kind so you don’t stain your stock or action.”
Clamping and Tension Materials
Read a few articles on pillar bedding and you’ll see many different systems for holding the barreled action to the stock when the bedding compound cures. We’ve seen surgical tubing used, or strips of bicycle inner tube. Some writers have even advocated using mechanical clamps (a bad idea). Richard has tried various tensioning set-ups over the years, and electrical tape is his strong recommendation: “First, let me say it’s crazy to use a C-Clamp or something like that. The clamp will cause a point-load where it attaches and that is just the opposite of what you want.”
Richard has tried many materials: “Surgical tubing I’ve found to be cumbersome to use, and it tends to loosen up during the curing time. Same thing with strips of inner tube. That’s bad news because any loosening or stretching will allow the action to shift. It’s absolutely critical that the action not move one bit while the bedding cures. Once you’ve bedded the action if it dries the wrong way you’ve screwed everything up. Using the electrical tape that isn’t an issue. The tape goes on very tight, doesn’t stretch (if you use enough turns) and I have no fears that the action will shift while curing. Just follow my advice and put a strip of paper towel under the electrical tape so you don’t mar the finish of the barrel or stock.”
Contoured vs. Straight (Flat-top) Pillars
Many factory rifles come with contoured (radiused) pillars, and many gunsmiths prefer to use these. The idea is that the contour provides a better fit with the bottom of round actions. Richard has tried contoured pillars and doesn’t recommend them. He explains: “Most of the contoured pillars don’t really match the contour of the action anyway. And every action is slightly different. Even some of the most favored custom actions aren’t exactly the same from one unit to another. What happens when the contour or curve of the pillar is too narrow is that the action touches just the extended top edges of the pillar (left and right of center). That is not as solid as when the action contacts the center of the pillar where the action screw runs. (And those sharp sides of curved pillars tend to point-load and dig into your action.) Also I feel you get a better match of the Devcon to the action with flat-top pillars. What you want is the bedding compound to cradle the action all the way around. I’ve found this works best with flat-top pillars and a very strong, hard compound like Devcon that doesn’t squish down or shrink.”
STEP FOUR–Applying Release Agent and Plumbers Putty
Failure to apply release agent (and putty) properly is a recipe for disaster. One of the most common mistakes novices make when doing bedding jobs is locking in the action. This happens by not covering enough of the action with release agent, not taping off the lug correctly, and not adding putty to plug any slots or spaces into which the mud can migrate. Remember, you are doing a bedding job, not a glue-in job! When you’ve completed the process, you want to be able to pop the action loose without difficulty.
PHOTO 6 — Showing putty and release agent before polishing, tape on lug.
First, remove the trigger, bolt release and spring, and anything else from the bottom of the action. Then, clean the action and recoil lug area with brake cleaner or parts degreaser. Apply plumbers’ putty to any hole or crevice that you don’t want the mud to get into. Wrap two layers of masking tape on the outside edges of the lug and trim with a razor blade. Do not apply tape to the front or back of the lug. (Apply tape to the front of the lug only if you do not have a way to remove the hardened mud). Let this tape go right around to the top of the action. Wipe the putty smooth with the brake parts cleaner. I highly recommend neutral Kiwi shoe polish as release agent. Apply liberally to the entire action using a Q-tip to get in around the lug (including front and rear of lug), bolt handle slot and loading port edges. Let the shoe polish dry for 10 minutes and then use a paper towel and buff and polish the release agent as thin as possible. You want any release agent to be as thin as possible so as to let the action set as close as possible to your bedding. You also want to apply release agent to the rear (headless) bolt.
STEP FIVE — Installing the Pillars
Now is the time to place the pillars. Screw the top half of the front pillar and middle pillar (if the action has a middle bolt) to the action with the tapered head bolt. Screw in the headless bolt and slip the pillar down around it. Apply release agent to the area of the guard around the rear bolt hole (and to the rear headless bolt). Apply top and bottom and from the inside out. We don’t want the guard stuck to the bedding. (This guard sits on the bolt head that is secures the middle pillar to the action. We need the guard in place to align the action in the stock.)
Install the trigger guard back in place on the stock as the guard is used to align the barreled action in the stock. Now is the time to make a trial run to ensure that everything fits properly. Slip the upside-down stock down over the pillars with the headless bolt coming up through the rear bolt hole in the guard. See Photo 7. Ensure that the stock is resting on two spots only–the tape you’ve wrapped around the barrel, and the little bit of wood you left behind the tang bolt. Ensure there is room everywhere around the action to accept the mud. The barreled action cannot be touching anywhere except the tape and the tang. Not even on the top edges of the stock.
STEP SIX — Applying the Mud
Mix up a generous portion of the Devcon 10110 Mud and apply to the pillars as shown in Photo 8. Do not get mud on top of the bolt head and front pillar(s). Do apply a little mud on top of the rear pillar and if a little gets on the headless bolt that is OK as you should have applied release agent to this bolt. This will properly bed the guard to the rear pillar. The front bolt that holds the front pillar need not have release agent applied to it. Note, as shown in Photo 8, each pillar has a bolt inserted.
PHOTO 8 — Showing mud on the pillars.
You cannot use too much mud as the hydraulic action of pressing the stock down on the barreled action is going to squeeze the mud everywhere it need to go and the excess will be forced out (falling on the floor for you to step in).
PHOTO 9 — Showing mud applied to stock.
Now apply the mud very generously to the stock as shown in Photo 9 above. If I am not bedding any portion of the barrel shank I will only apply a little mud behind the recoil lug area.
STEP SEVEN — Assembly and Compression
Now slip the upside-down stock down over the pillars as you did in the trial run. Ensure the stock is bottomed-out on the tape at the front end. Squeeze slowly, pressing the rear of the stock down and squeeze out the excess mud. After pressing the stock down, the action area should appear as in Photo 10. During the compression stage, stop a few times and use Q-tips to clean off the excess mud that is squeezing out between action and stock.
PHOTO 10 — Rifle right side up, with the mud squeezed out.
Cut a piece of paper towel about two inches wide by the length of the towel. Lay this on the stock 1.5″ in front of the action. Wrap black electrical tape around the stock and barrel, running the tape over the strip of paper towel. (The towel is to protect the stock finish.) Squeeze the stock and action together while taking wraps with the tape. If you have a skinny, pencil-thin barrel don’t apply too much pressure with the tape as the weak barrel can be curved slightly. That can cause the barrel to touch the stock when everything is done (not good). If you have a big, fat barrel don’t worry about deflection. With a heavy contour tube, whatever bend you put in the barrel will spring back when the tape is removed.
STEP EIGHT — Mud Removal and Curing Time
Using Q-tips, clean up very thoroughly around the front pillar and the bolt head. You need to be able to unscrew the bolt to separate the stock from the rifle and you do not want the bedding protruding above the pillar. (The escutcheon still has to have room to fit in there without touching the end of the pillar.) Before turning the rifle right-side-up, reach under with a few Q-tips and clean off the mud hanging there as it may get inside the action.
Turn the rifle right side up in the vise and, using lots of Q-tips, clean all of the mud off of everything. Remove the excess mud every place you can see it. Use a paper towel to wipe the stock as there could be some invisible mud hiding somewhere on the stock or action. After using Q-tips, I sometimes use Butch’s Bore Shine solvent. It does a good job of removing the mud residue (other solvents with ammonia would work well also).
When you’ve cleaned off all the excess mud. It’s time to let the bedding cure. Lie the rifle upside down with the weight on the rear of the action and about where the tape is on the barrel. Let the gun sit for about 8 to 10 hours or overnight. IMPORTANT, you should remove ALL the excess mud around the action before you let the rifle cure for this time period. Photo 11 shows the rifle upside down, but you want to have the excess mud cleaned off before curing.
PHOTO 11 — Position for curing the mud–but excess should be removed first.
IMPORTANT: Avoiding Mechanical Lock During Bedding
One major problem that can arise when novices bed their own stocks is mechanical lock. This occurs when some part of the action or barrel is trapped below the bedding. Effectively, the barreled action becomes anchored in the stock and can be very difficult to remove. Richard says avoiding mechanical lock is not that difficult, but you must be careful: “Locks usually occur because the bedding is applied too far up. Never, and I repeat, never, bed above the centerline of the action (bore axis), or the widest point of the action (whichever is lower). You need to leave the edge of the bedding at least 1/16″ below the centerline of the action and centerline of the bore axis. I normally leave about 1/8th of vertical clearance. If the widest point of the action is BELOW the bore axis, you have to keep the bedding below that. The other thing to watch out for are projections and holes in the sides of the action. All holes must be filled with plumbers’ putty. All projections–anything that sticks out–need to be removed. If some little part or fixture sticks out, even if you tape it over, and it is below the top of the bedding, it can lock the action in.”
STEP NINE — Popping the Barreled Action Loose
After the required curing time, you need to remove the barreled action to check the beading and fit the pillar escutcheons. If you cleaned away all the excess mud and there are no mechanical locks in the bedding, it should not be difficult to pop the stock loose. You can see how this is done in the short Video Clip from my DVD (Right-Click and “Save As” to download). Here is the procedure.
After the mud has set up and hardened, clamp the barrel in a vise with the gun upside down. The vise should camp just ahead of the forearm. Remove the bolt in the front pillar (and middle pillar) and the headless bolt. Remove the trigger guard.
With the left hand, apply upward pressure to the forearm and then with the right hand slap upward on the forearm. You will hear a crack like you might have busted the stock. Not to worry, that is just the bedding popping free. Now wiggle the stock up off the recoil lug as it is the only thing holding the stock down. [Editors Note: Here’s an older video clip that shows Richard “popping” the stock loose from the barreled action. CLICK HERE to download a 6 Meg Windows media file, or click these links for MPEG (2.3 megs), and Real Media (2.3 megs) versions.]
Remove the tape from the barrel and recoil lug and clean up the putty. Wipe the action down with brake parts cleaner. On the stock, remove the squeezed mud that went into the trigger and bolt release area. Relieve the lug area on both sides and the front. Lay the stock back on the barreled action. Be sure to check under the trigger guard to see if any cleanup of mud is required there. Then re-install the guard and insert the rear action bolt just snug (not tight).
STEP TEN — Installing the Pillar Escutcheons
Pillar escutcheons are a nice extra feature I add to my custom rifles. These are stainless, made from barrel stubs. The two-part front pillar is originally machined as one piece. I believe front pillars with the escutcheons (or outer ring) offer advantages over conventional pillars in terms of strength and alignment.
Before you actually install the escutcheons, you need to do some fit testing. Have a trial run at setting the front bolt to the proper length by placing the escutcheon in the hole and screwing in the bolt. Loosen off the back bolt to see if the bolt that is thru the escutcheon is holding the stock firmly in place. Retighten the rear bolt a wee bit.
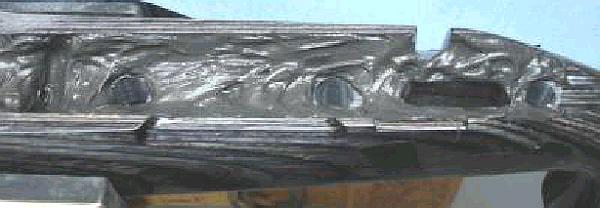
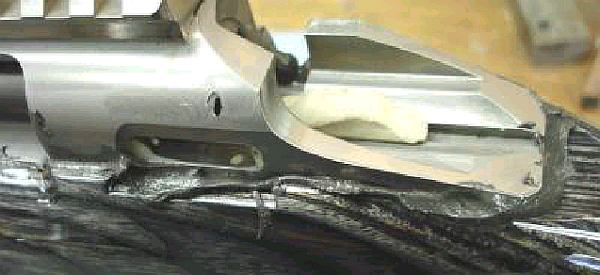
Apply release agent to the front bolt, being careful to not get it on the escutcheon. Insert an Allen wrench into the head of the bolt so you can hold it easily. Slip the escutcheon over the bolt. Apply mud to the escutcheon and around the bolt. Photo 12 shows how much mud to put on the escutcheon. You want enough so when you tighten the bolt it will force the mud everywhere it needs to go, even though a bit will be squeezed in around the bolt. Photo 13 shows how the escutcheon should look installed, with the bolt tightened. Photo 14 (below right) shows the escutcheon after the mud has been removed–be sure to remove the excess while the Devcon is still soft.
PHOTOS 13 and 14 — Showing escutcheon before (left) and after mud clean-up (right).
Clean up the excess mud with Q-tips and paper towels. You need to do this before the mud hardens. I used Butch’s Bore Shine as a solvent, once I have removed the excess mud with Q-tips and towels. When the escutcheons are cleaned up, you’ve finished working with the mud. Now let the stock lay for another 8 hours or so to allow the escutcheons to become.
After the mud has hardened around the escutcheon clamp the rifle back in the vise. Remove the back tang bolt first then the front bolt that is through the escutcheon. The bolt will be tight in the hole and sometimes may need to be punched out with a punch unless it has threads right to the head in which case it will screw out. Go in the hole with a .260” bit and clean the mud out of the front pillar. Let the bedding harden for a day or two and then torque the bolts with about 35 inch-lbs of torque on the front bolt and maybe 25 on the tang bolt.
The finished result is an even coat of Devcon with no voids, air pockets, fissures, and perfect stress-free support for the action, as shown in Photo 15.
Brownells’ Do-It-Yourself (DIY) video series provides logical, step-by-step installation help for triggers, stocks, and springs. Nine separate videos cover Brownells various DIY Kits. Not sure if you’re up to the project? Just watch each video to see what’s involved. The nine DIY kits are:
This video shows Remington 700 after-market trigger installation:
In the Do-It-Yourself videos, Brownells’ Gun Techs proceed step-by-step, showing you exactly how to install the parts on your gun. Each kit also comes with complete, illustrated instructions you can take to the bench. To learn more, click the links above, or CLICK HERE to visit Brownells’ DIY Kit online page.


Research indicates the Second Class target was a 48″ x 48″ square with 24″ inner circle and 36″ outer circle. The sight mark was a central 12″ x 12″ shape representing a soldier. ALL hits scored points (3 for center circle, 2 for outer circle, 1 for outer square). NOTE: Though some sources say the Mad Minute drill used a 12″-diameter round target, this appears to be a mistake from Ian Hogg’s book “The Encyclopedia of Weaponry”. No other source mentions a 12″ circle, which would be a mere 3.82 MOA. In reality the true drill target was a 48″ x 48″ square, roughly 15 times larger. (From No.WikiPedia.)


 This video shows a conventional chronograph with front and rear light sensors. The bullet first trips the front sensor and then the rear sensor as it flies over the unit. The difference in sensor time is used to calculate bullet speed. This is not the only kind of chrono in common use today. The popular





 Shiny brass — it may not shoot more accurately, but it does make you feel better about your hand-loaded ammo. While it’s not necessary to get brass “bright and shiny” after every firing, it is a good idea to clean powder residue, grime, and grit off your brass before you run cases into sizing dies. There are many ways to clean cartridge cases. A quick wipe with solvent on a patch may suffice for recently-shot cases. Older brass with baked-on carbon may require lengthy tumbling. Ultrasonic cleaning is another popular option that gets your brass clean inside and out.




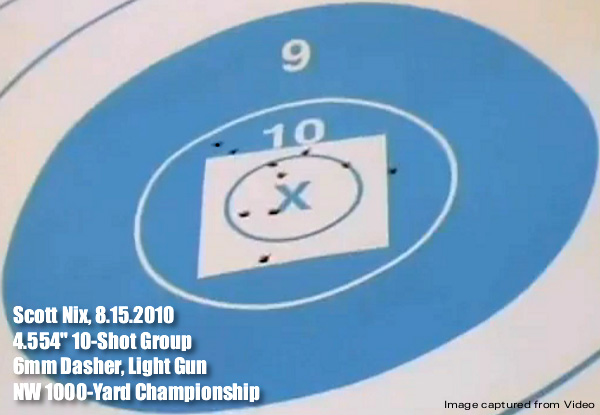
 How well can the little 6mm Dasher perform at 1000 yards when the conditions are good, and the shooter is riding a hot streak? Well here’s a shot-by-shot record of Scott Nix’s 4.554″ ten-shot group shot at the Deep Creek Range outside Missoula, Montana at the Northwest 1000-yard Championship a few years back. All 10 shots were centered for a 100-6X score. That’s about as good as it gets. If Scott had stopped after 5 shots, his group would have been under three inches.

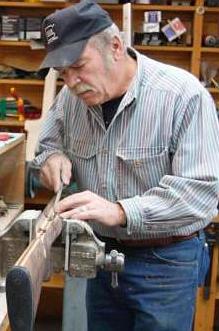 Richard Franklin prepared this article for our readers. Richard tells us: “I’m happy to do pillar-bedding work, but this is a job which many shooters can do themselves, with some practice and the right components. I do suggest you practice first on an old ‘beater stock’. When done right, you end up with a perfect fit of receiver to action, with no twisting, stretching, or compression forces being applied to the receiver through mis-alignment. That’s what I mean by ‘stress-free’.”
 Pillars For Bedding
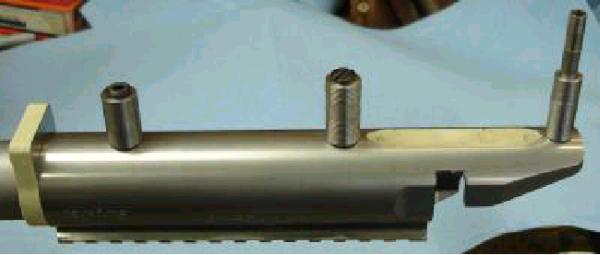

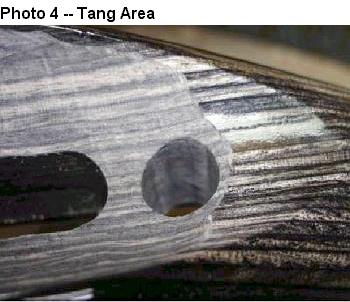 Photo 3 shows the wood removed from the inside of the stock bedding area. Remove enough wood everywhere except along the top sides of the stock to allow at least 1/8″ to 3/16″ of room for the mud. Remove 1/4″ of wood behind the recoil lug. I like about .012″ clearance on the top inside edges.
 The idea is that the barreled action does not touch anything except the bit of original “elevation” wood left at the rear tang (behind the pillar) and the forearm resting on the electrical tape. This is very important to obtain 100% stress-free bedding. You want the bore of the barrel to be parallel with the top edge of the stock so wrap just the right amount of tape to ensure this. The tape also centers the barrel in the fore-arm. Done right, the barreled action will be contacting just at two points (tape in front, tang in rear) and the barrel’s bore will be parallel with the top of the fore-arm’s sidewalls.
 Bedding Compounds
 Contoured vs. Straight (Flat-top) Pillars

 Install the trigger guard back in place on the stock as the guard is used to align the barreled action in the stock. Now is the time to make a trial run to ensure that everything fits properly. Slip the upside-down stock down over the pillars with the headless bolt coming up through the rear bolt hole in the guard. See Photo 7. Ensure that the stock is resting on two spots only–the tape you’ve wrapped around the barrel, and the little bit of wood you left behind the tang bolt. Ensure there is room everywhere around the action to accept the mud. The barreled action cannot be touching anywhere except the tape and the tang. Not even on the top edges of the stock.


 Before you actually install the escutcheons, you need to do some fit testing. Have a trial run at setting the front bolt to the proper length by placing the escutcheon in the hole and screwing in the bolt. Loosen off the back bolt to see if the bolt that is thru the escutcheon is holding the stock firmly in place. Retighten the rear bolt a wee bit.


