This is big news for the PRS/NRL and tactical game. Savage Arms has adapted its Impulse straight pull action for the tactical market. Savage’s new Impulse Elite Precision combines the award-winning Savage Impulse straight-pull action with a precision MDT aluminum alloy chassis. The ability to shoot faster, with less rifle movement, is potentially a game-changer for the tactical/precision rifle competitions where stages run “on the clock” and fast follow-up shots are very important. And with a $2499.00 MSRP (for 6mm Creedmoor and .308 Win), and $2719.00 for 6.5 Creedmoor, the Impulse Elite Precision qualifies for the PRS Production Division, which is now capped at $3000 for rifle and $2500 for optic under 2023 PRS Rules (2.3.1). The Production rifle max price was $2500.00 in 2022.
The new Impulse Elite Precision features a straight-pull action fitted in a ACC (adjustable core competition) chassis from Modular Driven Technologies™ (MDT). With a full-length ARCA rail, the Impulse Elite Precision can be easily customized for individual balance preferences. You can add weight and accessories on the fore-arm easily through the ARCA mounts. And the rear section offers adjustable length of pull and cheekpiece height. The ambidextrous bolt can be fitted on either right or left sides.
This Impulse straight-pull action is bedded in an Adjustable Core Competition chassis from Modular Driven Technologies (MDT). From its full-length ARCA rail to its nitride coatings, the Impulse Elite Precision is optimized for the PRS/NRL game.
“The Elite Precision has changed the way Savage shooters think about long-range capability,” said Jessica Treglia, Senior Brand Manager for Savage Arms. “The addition of the Impulse straight-pull action is going to add a new element of speed to an already efficient rifle. When split times are an important aspect of the competition, Impulse Elite Precision will be a game-changer.”
The new Impulse Elite Precision will initially be offered in seven chamberings: 6mm Creedmoor, 6.5 Creedmoor, 6.5 PRC, .308 Win, .300 PRC, .300 Win Mag, and .338 Lapua Magnum. MSRP for the rifle in the four smaller chamberings (all with 26″ barrels) is $2619.00 while the .300 PRC and magnums will cost $2839.00. The .300 PRC, .300 Win Mag, and .338 LM have 30″ barrels.
Hunting Version of Impulse Named 2021 Rifle of the Year
The Savage Impulse straight-pull hunting rifle recently won the coveted NRA American Hunter 2022 Golden Bullseye Award as Rifle of the Year. Previously, Guns & Ammo magazine editors also named Savage’s Impulse the 2021 Rifle of the Year.
Savage Impulse Straight-Pull Action — Overview
Savage’s Impulse series of straight-pull bolt rifles is the first American-designed and crafted straight-pull centerfire rifle. The new Impulse features an innovative Hexlock bolt-locking mechanism with six spherical bearings that move radially outward into a ring in the barrel extension, thereby locking the bolt in place. That barrel extension is held in the receiver assembly by four cross-bolts on the lower front section. Ahead of the barrel extension is a conventional recoil lug and a familiar Savage barrel nut.
Innovative Hexlock Bolt System in New Savage Impulse
When the bolt is closed, the Hexlock system holds it in place instead of conventional lugs. With the Hexlock, six (6) hardened steel bearings lock the bolt in place inside the receiver’s barrel extension. Savage says “As pressure increases, Hexlock’s hold tightens, ensuring that there can be no rearward movement of the bolt. Once the round has left the barrel, the pressure subsides, and the action can safely open again with the straight pull of the bolt handle.”
Savage Impulse — Hexlock System (Bolt Locks in Barrel Extension)
Sometimes smaller is better — at least when a more compact cartridge than the 9mm Luger (9x19mm) still packs the punch of the larger round.
Brand New Pistol Cartridge for Carry Guns
Federal has just released an all-new pistol cartridge, the 30 Super Carry. Designed expressly for CCW and personal defense applications, this new 30 Super Carry cartridge packs the punch of a 9mm Luger round (9x19mm), with a smaller casing, so you can fit more rounds in a magazine. A pistol that holds 10 rounds of 9mm Luger ammo can hold at least 12 rounds of 9mm Super Carry ammo. That’s a 20% increase in capacity.
In a defensive situation, that extra two rounds could make a difference. But importantly, the 30 Super Carry is not a weak round. You don’t give up stopping power or penetration when compared to the classic 9mm Luger cartridge. In Federal’s tests, penetration through heavy clothing was actually BETTER with the 30 Super Carry than the 9mm Luger (15.5″ vs. 14.5″). NOTE: The actual 30 Super Carry bullet diameter is 0.312″, slightly fatter than a “30 caliber” rifle bullet (0.308″).
Worthy Replacement to 9mm Luger?
Is this a useful alternative to the 9mm Luger? It depends. The new 30 Super Carry is definitely more effective than the .380 ACP so it beats that alternative. And velocity is actually higher than the 9mm Luger mainly because the 30 Super Carry shoots a lighter bullet — 100 grains vs. the typical 115-125 grain 9mm bullet. For many the key appeal of the new cartridge is the ability to carry more rounds OR carry the same number of rounds with a lower overall weight.
Federal’s New 30 Super Carry is 13% smaller than a 9x19mm, with very similar ballistics
Watch video for ballistics information and cartridge diagrams.
30 Super Carry Questions and Answers
How is the 30 Super Carry’s felt recoil compared to the 9mm Luger?
Recoil, flash and sound report provide a very similar shooting experience to 9mm Luger
How do the 30 Super Carry’s velocity and energy compare to 9mm Luger?
They are extremely similar. The 100-grain 30 Super Carry HST carries 347 foot-pounds of energy at the muzzle and has a velocity of 1250 fps; the 124-grain 9mm Luger HST has 364 foot-pounds of energy and a muzzle velocity of 1150 fps.
Do I need a different firearm to shoot the 30 Super Carry?
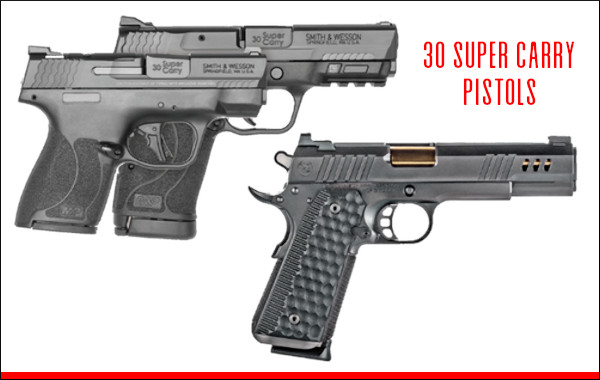
Yes, you need a firearm chambered for 30 Super Carry. Currently, Smith & Wesson and Nighthawk Custom offer these platforms.
How does the 30 Super Carry differ from older cartridges such as the 7.65×21 Parabellum, 7.65×20mm Longue, 32 Auto and others?
While there might be some coincidental similarities, the 30 Super Carry was fully developed from the ground up with no parent cartridge. Utilizing modern materials and designs, it provides vastly superior performance to seemingly similar historic cartridges.
What kind of accuracy can I expect from the 30 Super Carry?
The cartridge has proven to be an exceptionally accurate round, typically exceeding the accuracy of other popular carry cartridges.
NOTE: These answers are provided by Federal, the ammunition manufacturer.
Currently there are Smith & Wesson and Nighthawk Custom pistols factory-chambered for the new 30 Super Carry cartridge. If this round catches on, expect to see Glock, Ruger, and SIG offer this chambering.
For today’s Sunday GunDay story, we look at the legendary Remington 700, perhaps the most popular American bolt-action rifle of all time. After covering the history of the Rem 700 rifle, we provide an inside look at the Rem 700 through a series of cutaway animations. Then we explain how gunsmiths can enhance a Remington 700 action through “blueprinting” procedures.
Remington 700 Origins and History
After World War II, Remington Arms engineer Mike Walker began designing lower-cost alternatives to the Model 30, which resulted in the Model 721. These used a cylindrical receiver produced from cylindrical bar stock that could be turned on a lathe, rather than machined in a series of milling operations, which significantly reduced the cost of production. Further developments of the basic 721 action under the direction of Walker produced the Model 722 and Model 725, and ultimately in 1962, the Model 700.
Walker sought to increase the accuracy of the rifles, by utilizing tight tolerances in the chamber and bore, a short leade, and a very fast lock time. Like the earlier 721, the Remington 700 action was designed for mass production. Remington initially produced two variants of the Model 700, the ADL and BDL, in both long- and short-action versions. In 1969, Remington introduced upgrades for the rifle, including a longer rear bolt shroud, a jeweled bolt, and improved stock finishing. Four years later, production of left-handed Rem 700s began, to compete with the Savage Model 110, at that time the only major American-made left-bolt rifle.
Other Rem 700 versions include the titanium receiver 700ti, the 700 SPS (which replaced the ADL in 2005), and the CDL model. In addition to its development as a hunting rifle, the Model 700 also provided the basis for military and police sniper rifles, starting with the M40 rifle in 1966, which was initially ordered by the U.S. Marine Corps. The U.S. Army adopted the M24 Sniper Weapon System in 1986.
The Remington 700 is sold in both short action and long action variants. This photo is from the Big ED YouTube video comparing the two action lengths.
The Remington 700 is a manually-operated bolt action with two forward dual-opposed lugs. The bolt face is recessed, fully enclosing the base of the cartridge, The extractor is a C-clip sitting within the bolt face. The ejector is a plunger on the bolt face actuated by a coil spring. The bolt is of 3-piece construction, brazed together (head, body and bolt handle). The receiver is milled from round cross-section steel.
Chassis Systems for Remington 700s
With the popularity of the Remington 700 series rifles, and the availability of Rem 700 barreled actions by themselves, many companies have created after-market chassis systems. This Brownells Video reviews modern Accuracy Int’l chassis systems configured for Remington 700 barreled actions. Modular chassis systems have become particularly popular with PRS/NRL competitors.
Rem 700 Cutaway Video Shows Components + Operation
Ever wish you could look inside your rifle, to see how the trigger and fire-control system work? Well now that is possible with the magic of 3D computer graphics. Modern software allows detailed “cutaway” side-views (see below), as well as 3D views with 360° rotation. The software can also provide X-Ray-type views into the gun’s internals — as you can see above. And computer animation can show the complete firing process from trigger pull to chambering of the next round.
READERS — Do take the time to watch the video! This Rem 700 animation is really outstanding! EVERY bolt-action shooter should watch this video all the way through.
The Model 700 series of bolt-action rifles have been manufactured by Remington Arms since 1962. All are based on basically the same centerfire bolt action. They are typically sold with an internal magazine depending on caliber, some of which have a floor-plate for quick-unloading, and some of which are “blind” (no floor-plate). The Model 700 is a development of the Remington 721 and 722 series of rifles, which were introduced in 1948.
The Remington 700 is a manually-operated bolt action with forward, dual opposed lugs. It features “Cock On Opening”, meaning the upward rotation of the bolt when the rifle is opened cocks the firing pin. A cam mechanism pushes the firing pin’s cocking piece backward. The bolt face is recessed, fully enclosing the base of the cartridge. The extractor is a C-clip sitting within the bolt face. The ejector is a plunger on the bolt face actuated by a coil spring. The bolt is of 3-piece construction, brazed together (head, body. and bolt handle). The receiver is milled from round cross-section steel.
Blueprinting Rem 700 Action — Making a Good Action Better
You may have heard the phrase “blueprinting an action”, but do you know what that really means? Do you know what operations are done to an action during the blueprinting process? To help you understand, gunsmith Bill Marr of RifleShooter.com has created a helpful article showing a Rem 700 blueprinting job start to finish. This article spotlights how the procedures can be done with manual tools. Bill, who runs 782 Custom Gunworks Ltd., can also perform many of these operations with modern automated machinery. In fact, Bill has written a follow-up article on Truing a Rem 700 receiver with a Lathe.
Bill explains: “Blue-printing, or truing a rifle action, ensures the receiver face, threads, lugs, bolt lugs, and bolt face are square to the center line of the receiver.” In Bill’s informative article, Bill shows how he blueprints a Remington 700 short action receiver with .308 Win bolt face. He covers the following procedures step by step:
Action Disassembly
Ream Minor Diameter of Receiver Threads
Square the Receiver Lugs
Square the Face of the Receiver
Lap the Bolt Lugs
Square the Bolt Face
Using the receiver facing tool, the front of the receiver is trued. The tool is placed over the tap and turned by hand. We used Do Drill to lubricate it.
2. Lapping the Lugs
The bolt lapping tool screws into the front of the action and applies rearward pressure on the bolt face. A little bit of lapping compound is placed on the front of the receiver lugs. The bolt handle is then raised and lowered repeatedly. Note — it is critical that we do not get any lapping compound on any other surfaces.
3. Truing the Bolt Face
On this bolt, the central part of the bolt face was low. After the truing operation, this Rem 700 bolt face is now completely square to the action.
IMPORTANT: Rifleshooter.com states: “This article highlights our project and is presented for information purposes only. This provides an overview of the process and should not be attempted without the guidance and supervision of an experienced gunsmith“.
If you like the idea of a Blueprinted action, but do not have a good gunsmith nearby (or don’t want to wait many weeks), you can order high-grade blueprinted Remington 700 actions from Pacific Tool & Gauge starting at $637.99 (see above).
Today we showcase five YouTube videos that explain basic reloading processes. This article primarily focuses on the .45 ACP cartridge because this a very good choice for hand-loaders getting started. The .45 ACP is one of the easier cartridges to reload, because it has a large case diameter and large primer pocket, and because it operates at relatively low pressures (compared to rifle rounds).
We recommend that new reloaders consider starting with the .45 ACP cartridge. There are many reasons why the .45 ACP is a good choice for those just getting started in hand-loading:
1. The case is fairly short but has a relatively large diameter (and minimal taper), so it is easy to see inside the case. That helps you quickly check powder levels.
2. Many good powders (for the .45 ACP) will fill the case over 60%, so you will have an obvious overflow if you double-charge by accident.
3. The .45 ACP round runs at relatively low pressures, but delivers excellent accuracy.
4. Good .45 ACP brass lasts a long time, is easy to size, and is good for many reloads.
5. Along with 1911s, there are fine .45 ACP revolvers that shoot the round with moon clips.
6. The vast majority of .45 ACP brass uses large pistol primers (although there ARE some small primer pocket varieties*). We find that large primers are easier to pick up and handle if you are using a single primer tool.
The .45 ACP (Automatic Colt Pistol) cartridge is a rimless straight-walled handgun cartridge originally developed in 1904 by John Moses Browning for use in his prototype Colt semi-automatic pistol. After successful military trials, it was adopted as the standard chambering for Colt’s M1911 pistol.
For reloading, there are many good powder choices. We recommend Vihtavuori N320. This is very accurate and burns cleaner than some otherwise good powders, such as Accurate (AA) No. 5 and Unique.
Basic Reloading for the .45 ACP Cartridge
This is the most-viewed .45 ACP reloading video on YouTube. It is directed primarily for the novice or prospective reloader. It covers the basic processes: case inspection, cleaning, trimming, sizing, priming, powder filling, bullet seating, and crimping. The video creator notes: “Trimming pistol/revolver brass is optional and usually not necessary. it was included because that is what I did when I first began reloading, before I found out that handgun brass does not stretch as much as bottleneck rifle brass.”
How To Reload .45 ACP Start to Finish — Tutorial for Newer Reloaders
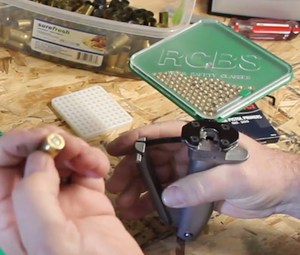
This is a detailed 20-minute video that shows the reloading process start to finish. The video shows how to clean the cases, deprime, and check them before loading.
In this video the cases are sized and bullets seated using a single-stage RCBS press. The cases are primed using an RCBS hand-priming tool which keeps multiple primers in a tray (see 8:55 time-mark). For efficiency, we recommend seating with a hand tool (or bench-mounted tool) vs. seating primers using the priming system on the press itself. The hand seating tool also gives you a better “feel” for setting the primers.
Safety First When Loading All Cartridges
Along with the first two instructional videos above, we include two important videos focused on reloading safety. In the first video, UltimateReloader’s Gavin Gear explains how to check your cartridge during the loading process to eliminate squib loads and other defects. In the second video, Starline Brass tech Hunter Pilant explains how to avoid double charges.
Load .45 ACP Safely — Avoid Squib Loads and Overcharges
You need to check the powder level of EVERY round you load. Do this visually BEFORE seating a bullet. (Or, with a progressive press, use a lock-out die that monitors powder levels). This is very important because a squib load (with little or no powder) can leave a bullet lodged in the barrel. A subsequent full, live round can cause a Kaboom with dire consequences.
Preventing Double Charges — Use a Case-filling Powder with .45 ACP
IMPORTANT TIP: Use a bulky powder that fills your case more than half way with a correct charge. “This will over-fill the case if it is double-charged, making it impossible to load. This is one safeguard that can keep you from making a big [mistake]” (Hunter Pilant, Starline). A bulky powder with high fill level will also be easier to see inside the case.
The Progressive Option — Loading .45 ACP on the Dillon 550B
Once you have mastered the basics of reloading for the .45 ACP, if you require large quantities of ammo, you may want to consider getting a progressive press. Progressive presses can significantly increase your ammo output, but there are also important safety considerations. You need to be careful about powder levels and priming. In this video, Gavin Gear explains how to reload safely with a Dillon 550B progressive press. The equivalent current model is the Dillon 550C.
.45 ACP Ammunition Loading Guide — Nosler Data
If you “roll your own” .45 ACP cartridges, there are many good powder choices. Our favorites are Vihtavuori N320, AA No. 5, and Hodgdon TiteGroup, but there are many other good choices. You’ll find these three recommended powders (plus many others) in the .45 ACP Load Data Charts from Nosler. Shown below are the Nosler Guides for 185gr bullets and 230gr bullets. Right-click each image below to access/download printable PDF files.
Click for PDF File
Click for PDF File
* However, be aware that CCI and other companies are now manufacturing .45 ACP brass with SMALL PRIMER POCKETS. Whenever you get new brass, be sure so check ALL the cases for primer size, and segregate large and small in two groups. Attempting to push a large primer into a small primer hole can lead to jams, or worse, dangerous detonation. Be CAREFUL!
This new mobile App helps shooters make the right wind hold and/or dial the correct amount of windage.
High Power Wind Lab Mobile App Product Review by F-Class John
When it comes to long range shooting, there are few things that make a bigger difference in hitting your target than being able to accurately adjust for wind angle/velocity changes. While it’s one thing to learn how to read the speed and direction of wind by looking at flags, mirage, or surface conditions, it’s another to know what to do with that information (how much to hold off/correct). Knowing how to process changing wind cycles and determine the right hold-off/correction often takes years or decades of practice to master.
Enter the High Power Wind Lab App which stands out as the only dedicated WSYWIG hold-off calculator on the market. Enter a few simple numbers from your favorite ballistic calculator and you’re ready to make adjustments to the wind direction and power dials, leaving the App to do the rest by telling you what your hold should be and if any additional windage should be added to your scope or sights. So after you input the data, then the App suggests the proper correction(s). Download the Wind Lab App for iPhones/iPads via the Apple App Store. NOTE: Android availability via Google Play is pending.
F-Class John Review of High Power Wind Lab App:
Starting up the App you’ll see a simple menu to start a session. The first field is for naming the session. This is helpful for those who save their strings and want to refer to them later but it’s not a required field. The next field is for choosing your target. The App offers the choice of High Power or F-Class targets at mid-range (600 yards) or long range (800-1000 yards). After picking the appropriate target, input the actual distance at which you’ll be shooting. After that, you’ll have to enter your load data. The next two fields will auto-populate for the date and then the shot list once you are done saving shots. The lower section allows you to change what’s visible on the screen (selecting the features you want to view). You can also choose MOA or MILS (milliradians) click values. For wind velocity values, you can select MPH, kilometers per hour, or meters per second.
High Power Wind Lab iPhone App in horizontal mode.
Once you’re done with the setting page, simply tap “start” to bring up the target display. The App can be used in portrait or landscape mode but for the best user experience I’d recommend using it in landscape. On the target page you’ll see four distinct sections. Along the bottom you’ll see the windage dial where you can add or subtract windage simply by moving it left or right. Above the windage dial, you’ll see wind flags that represent the power and above that the direction dial. On the right is the actual target where you see the bracket of where you should hold for the shot based on the information you put in along with color coded brackets to show you the margin of error. The target section also features a great shot calling feature that allows you to tap where you held, then tap where your actual impact was. These shots can be saved for future reference and the ability to do this really helps while you’re training.
Once you get used to how the wind direction and power inputs work the real power of this App comes to life as you can sit and practice what your calls should be from the comfort of your home. There are countless nights where I’ll sit in bed and spend ten minutes moving the power or direction through strange changes just so I can guess or track what happens and the more you practice with it, the more you’ll feel confident when you see those conditions occur at the range.
App Available Now for Apple and Android Mobile Devices
The High Power Wind Labs App is available now for iOS (Apple) mobile devices and Android devices. At $12.99 this App costs less than twenty 7mm match bullets. You could easily save that much in sighters in a couple range sessions. With its ability to calculate nearly every condition you’d encounter at a match you owe it to yourself to download it and start practicing. This interactive application is an invaluable tool for shooters that want to better understand the affects of wind on bullets over long distances.
High Power Wind Lab Description by Accuracy Software Ltd.
High Power Wind Lab is a visualization tool that helps shooters determine wind value based on observed conditions. The App efficiently calculates the sight correction necessary to hit the center of a target. Use High Power Wind Lab on and off the range to explore scenarios and better understand how wind affects the trajectory of a bullet. By interactively changing the wind velocity and wind angle, the display dynamically updates to show the calculated correction and a visualizes a range of possible outcomes if the shooter misreads the wind conditions. By changing the wind velocity and wind angle, the High Power Wind Lab shows the calculated correction as well as possible outcomes if the wind angle and velocity are misread. This interactive tool is invaluable for exploring the interplay of wind direction and velocity and the tradeoffs you need to make when deciding when to shoot and what correction to put on your gun.
The High Power Wind Lab is also a shot plotting and wind plotting tool that shows how wind conditions have developed over time and what the predominant conditions have been throughout a string of fire. That can be a very powerful “hindsight” tool when analyzing your results in a shooting session.
High Power Wind Lab Key Features Include:
Shot Plotting
Score Calculation
Record Keeping
Tablet Support
True MOA Corrections
Support for Custom Ammunition
Library of commonly-used Midrange and Long Range F-Class and High Power Rifle Targets
Hold-Over Function in High Power Wind Lab
This video, from the creator of the High Power Wind Lab, explains how the Hold-Over feature works. Holding over is commonplace in long range target shooting among those who use scoped rifles. This video demonstrates how to use High Power Wind Lab’s hold-over feature to accurately calculate the needed hold-over when engaging long range targets.
NOTE: If this Hold-Over video is not displaying on your browser, try another browser and/or use this YouTube link: https://youtu.be/WhpyymG15HE
Every month, GunGenius.com publishes a Top Selling Report. This reveals the Best Selling Guns for each category of firearms sold on GunBroker.com. This culminates in a GunGenius year-end report on the Top Selling Firearms of the Year in multiple categories, both new and used. As a special Feature, GunGenius now offers the Top 21 of 2022 for each category. In addition, GunGenius has Top 10 lists for specific types of firearms — rifles, handguns, and shotguns:
Here are the overall listings — the Top 21 among all gun types:
Top 10 Best-Selling Bolt-Action Rifles of 2021
We know most of our readers favor very accurate bolt-action rifles. In 2021, on Gunbroker.com, the Top 10 best-selling bolt-action rifles were, in order:
1. Ruger American Rifle
2. Tikka T3x
3. Savage Arms 10/110
4. Ruger Precision Rifle
5. Ruger Precision Rimfire
6. Bergara B-14
7. CZ-USA 457
8. Savage Arms Axis
9. Ruger American Rimfire
10. Remington 700
This video compares the top-selling Ruger American Rifle with second-ranked Tikka T3x:
The popular CZ 457, ranked #7 overall, is offered in various different configurations, including metal chassis and carbon-stocked versions. Here’s a field test.
CZ-USA 457 Varmint Precision Trainer and Chassis Models
Buying a Handgun? See What Others Choose
Looking to acquire a handgun for personal protection of home and family? There are countless options on the market. Your buying decision may be simplified by seeing what other consumers have chosen, as revealed by nationwide sales trends. You can check firearms sales figures using “Gun Genius”, a new data-crunching service of Gunbroker.com. On GunGenius.com you can select any type of firearm (handgun, rifle, shotgun) and see the top sellers for that category.
Along with pistols and revolvers as shown above, there are separate categories for: semi-auto rifles, bolt-action rifles, lever-action rifles, single-shot rifles, pump rifles, semi-auto shotguns, pump shotguns, over-and-under shotguns and more. You can also filter for sales trends (upwards and downwards). Drill down to see detailed product specifications and current prices.
With the Whidden Click-Adjustable Sizer Dies, you can change shoulder bump by .001″ (one-thousandth) with a simple click. Fast. Easy. Precise.
As handloaders have become more aware of shoulder bump and proper adjustment of the sizer die in recent years, there has become a need for an easier way to adjust the sizer die properly. For most folks, with their conventional dies, it takes lengthy trial trial and error to get the shoulder setback correct. Anyone who has done this can attest that it can be a slow and annoying job.
Whidden Gunworks has solved the problem with the innovative Click Adjustable Sizer Die. Patent No: 10,393,488. This die and lock ring work together to give the user a clicking feel to the adjustment just like a high end rifle scope. Each click moves the shoulder bump exactly .001″ so you can easily find the exact shoulder bump that you desire.
The Click Adjustable option is available on Whidden Custom Sizer dies as well (7/8”-14 format dies only)! Included with the Click Adjustable Sizer Die is a Shoulder Bump Gauge. This gauge attaches to standard calipers and allows measurement from the case shoulder to the base. Using the Shoulder Bump Gauge with the Click Adjustable Sizer Die will make the proper sizer die setup easier than ever before.
Click-adjustable die sets are available with both bushing and non-bushing configurations. Along with these complete die sets, Whidden Gunworks offers a separate click-adjustable ring to use with existing dies. Priced at $54.95, the Whidden Click-Adjust Lock Ring represents a modest investment for a major gain in die ease-of-use and precision adjustability.
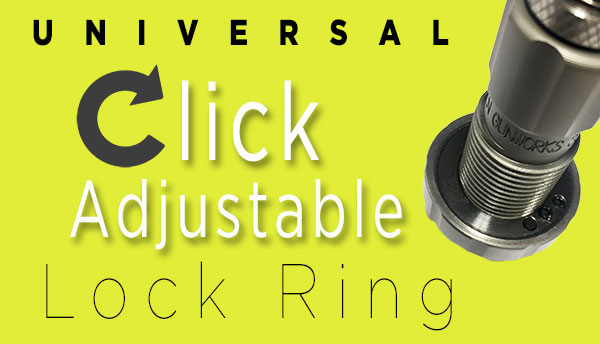
The Whidden Universal Click Adjustable Lock Ring you can instantly turn your sizer die into a Click Adjustable Die. This ring works with any 7/8 OD sizer of any brand with adjustable shoulder bump. Simple in design, the inner and outer ring can rotate independently of each other. Each click is metered in true 1 thousandths adjustment and has 0.100″ total available travel. These work great with nearly all sizing 7/8 OD sizing dies, and one verified purchaser noted: “Not only are they useful on reloading dies, but it’s the cat’s meow on the Giraud Power Trimmer Case Holders.”
Dillon Users Take Note: The Whidden Click Adjustable Sizing Die will not work with the Dillon 550 or 650 progressive reloading press systems. The Universal Click Adjustable Lock Ring is not compatible with the Dillon floating toolhead.
The online video format is a superior method of presenting information on reloading techniques, rifle maintenance, marksmanship skills, scope operation and much more. But with millions of videos on YouTube, it can be hard to cherry-pick the best videos for serious shooters and competitors. That’s why we offer this Saturday at the Movies Series. Each week we will select a variety of very informative videos by knowledgeable shooters and handloaders. Here are our first five Saturday Select videos for 2022.
Reading the Wind — How to Determine Wind Speed
Keith Glasscock is a top-tier F-Class shooter who has finished second at the F-Class Nationals multiple times. Keith is also a highly-respected wind coach with a background in commercial aviation — so he really understands wind and weather. In this video Keith explains the best techniques for reading the speed of the wind. He notes that you can’t simply rely on the Kestrel in your hand because the wind speed can vary significantly between the firing line and the targets. Keith shows how to look at multiple signs (including flags, grass movement, and mirage) to better understand wind velocity. See more of Keith’s videos on his Winning in the Wind YouTube channel.
Rodzilla T-Rex Front Rest Review — State-of-the-Art Beast
In this video our friend F-Class John reviews the impressive T-Rex front rest from Rodzilla.This recently-introduced joystick front rest from Rodzilla really represents significant innovation. The new T-Rex offers impressive capabilities based on the innovative design by creator Rod Brackage (the “Rod” in Rodzilla”> that can truly take your shooting experience to the next level. F-Class John used this rest in F-Open competition and really likes it. CLICK HERE for John’s full review with three videos and many more photos.
How BAT Actions Are Made and BAT Factory Tour
Note: This has loud music as the start — lower volume if at work.
Ultimate Reloader’s Gavin Gear is a skilled and respected video producer. This Ultimate Reloader video shows how top-end BAT rifle actions are crafted with modern CNC machinery. This is one of Gavin’s most popular videos, with 763,000+ views. If you are interested in accurate rifles for benchrest, F-Class, Long Range, or PRS/NRL you should definitely watch this video. Visit Gavin’s YouTube Channel to see dozens of other informative, well-made videos.
Protect Your Dog’s Hearing with Mutt Muffs
Do you take your dog(s) hunting, or to the shooting range? Well dogs need hearing protection too! Loud gunshots from pistols, rifles, or shotguns can cause permanent hearing damage to your canine. Prevent canine hearing loss with Mutt Muffs — protective earmuffs designed especially for dogs. In the Precision Riflecraft video, the host shows how to fit Mutt Muffs to your dogs and help your canines tolerate the muffs in place. Available in five sizes (XS, S, M, L, XL), these cost under $60 on Amazon.
How to Use Ballistics Solvers — Bryan Litz Lesson
A past national F-TR champion, Bryan Litz is a brilliant engineer and trained rocket scientist. He is also the founder of Applied Ballistics LLC (AB), the world’s leading source of ballistics software. AB software now comes integrated into some Kestrel handheld wind-reading units, with accompanying Applied Ballistics Apps that run on your mobile devices. In this short video Bryan explains how to use ballistics solvers to determine your bullet’s drop and drift at long range. If you don’t have the AB App on your smartphone you can also use the excellent JBM Ballistics Solver, available FREE on the internet.
Field Test and Hunt Review by Colton Reid
Dawn breaks. It’s a brisk 28 degrees. I sit concealed amongst a grove of fallen trees near the edge of a steep decline where I can see the canyon below and opposing hillsides. Snow blankets the mountainous slopes with patches of fir and naked aspen woven into the landscape. The soft glow of sunrise brightens southeastern slopes and illuminates a solitary statue of orange and green on an adjacent ridge. His presence alerts an already wary elk of the danger that moved in the night before.
It is second rifle season in Colorado and I have a cow elk tag in hand. I would love to say this is not my first rodeo, but in many ways it is. I’m on my first hunt in pursuit of an elk and my first hunt in Colorado. It is, however, the second test of my newest piece of hunting equipment — Leica’s latest, state-of-the-art Geovid 3200.COM 10×42 rangefinding binoculars.
Early morning light in Colorado, on a hunt for elk…
These laser rangefinder binoculars I purchased for myself from the good people at EuroOptic.com. I should note that I am not sponsored by EuroOptic or Leica. I happen to know a few people at EuroOptic and they are a knowledgeable friendly group who use the gear they sell.
When I evaluate optics I have a clear priority in how I rank them. At the top of the list is optical quality. That is, how clear is the optical image? How crisp are the edges? Can I resolve and distinguish similar small items? Anyone who has been hunting in the great American West knows that most of your time is spent behind optics of some sort, so it is best to buy optics that make it easier to spot your target and are easy on your eyes.
Second on the list is a combination of weight and durability. I tend to hunt rugged backcountry terrain, so weight is a big consideration for my trips. But if something is feather light but breaks when you sneeze? That isn’t good either. So a combination of a robust rubberized body with modest additional weight is desired. And since the Geovid 3200.COM is a combination optic, i.e. it includes a laser rangefinder, then that helps with weight since I don’t need a separate LRF.
Third on this list is the rangefinder’s performance. By performance I mean mostly accuracy and precision of the measurement. I can live with a max of 500 yards, as long as the measurement is correct and repeatable to within a handful of yards. If, however, the measurement is off by 10% (50 yards in the case of a 500-yard reading) or measurement to measurement varies by say 20 yards, then that will dramatically affect my ability to make an ethical shot.
The Geovid’s laser ranging beam showed excellent precision. Here it picks up a single male pronghorn (not broadside) at nearly 400 yards. The return was immediate.
Other considerations such as ergonomics or comfort are less important to me because they start to move away from “functional” requirements. That is, they don’t make a big difference when it comes to spotting and harvesting an animal. So while I do think about “nice to have” features when selecting equipment, they are of lower consideration than the functional requirements.
With my framework for evaluation laid out then, here is my assessment. The Leica Geovid 3200.COM 10x42s are high-quality rangefinding binoculars — well made, with good materials, and a thoughtful design. They weigh a mere 34.6 ounces (about 2 lbs.) and are built to withstand more than a few falls. They also come with both objective and ocular lens caps. Even though they are built tough, I would not take these into the field without some sort of binocular case. I personally use a Badlands Bino case (see top and bottom photos) but there are plenty of other good options.
This 6-minute Leica factory video shows the technical features and operations of the Geovid 3200.COM series of rangefinding binoculars. Worth watching:
The glass is amazing — remarkably good (and I have high standards). The image is extremely crisp, noticeably better than my tried and true pair of Swarovski Habicht 10×40 Porro prism binoculars. This matters because the exaggerated hand motion observed in higher power optics, aka “shake”, initially made me dizzy. Leica does offer a lower power unit, the Geovid 3200.com 8×42, for those who prefer less magnification. One could argue that the optics being too sharp means they aren’t a good fit, however, my philosophy is to get the best gear possible and figure out how to use it to the max potential. My solution here was an ultralight tripod to stabilize the image when glassing or if weight is a factor I place my arms on my knees while leaning against a tree or rock. Scouting with these binoculars over long periods on a stable platform is a pleasant experience. Shown belong is the Geovid mounted on my tripod.
The Geovids present a bright, crisp image, with excellent distance distinction (pop out effect) — all characteristics of high quality optics. The image at the edge of the field of view is less sharp, but that is typical, even for scientific glass. Because the binocular image quality is so good, the image quality change when I go to my spotting scope is a much shorter jump than with previous binoculars. That means I can resolve more items with the binoculars and therefore only go to my Swarovski spotting scope when I really want to clarify something. Overall A+ optics.
Over 950 yards — yes that is what we were looking for…
The rangefinder is top shelf. One innovation I like about these rangefinding binoculars is that Leica put the laser source outside of the optic tube. That means the source is unimpeded by additional optics allowing for more power transmission and reflection. They also implemented the patented Perger prism which incorporates the rangefinder into the base optical design as opposed to using extra optics to “modify” a non-laser rangefinder configuration. As an engineer I love the idea of function integration and minimizing components. It usually makes for a more efficient and superior performing design.
One other impressive feature is the ability to link to a rangefinder program. The Leica website explains: “Thanks to Bluetooth® connection, [the Geovid 3200.com] can be paired to either the Leica Hunting App to adjust and manage quickly and easily on the fly, or to a LINK-enabled Kestrel windmeter to get results from the Kestrel right in your Range Finder[.] In addition, users will benefit from various integrated atmospheric sensors, such as temperature, air pressure and inclination sensors, producing angle-compensated distance measering for shooting uphill or downhill with maximum precision.”
Testing Laser Ranging Performance
To test the Geovid’s laser rangefinder I did my usual measurement of different objects near my house and checked the accuracy with Google earth. I was able to consistently range larger objects (trees, hills, rocks) out to about 2200 yards, which is longer than I would ever shoot, but good when planning where to move for my next vantage point. I was also able to range a large reflective target (pedestrian overpass) out to a staggering 3300+ yards (see below).
In this video, the Geovid ranges a concrete pedestrian overpass at distance of 3334 yards.
I suspect the max range I can consistently get with large, non-reflective objects is somewhere around 2400 yards, but didn’t have the opportunity to test that specific distance. The rangefinder had some trouble at shorter distances and through thick branches. Around 25 to 45 yards I would get several yards variation when ranging tree trunks. Tall grass and a nest of tree branches would also interfere with the measurement. I would either get a slightly incorrect reading or no reading at all. This might come up if I am trying to range a buck bedded in tall grass. That is a drawback for me because that is a typical situation in archery. My workaround was to range nearby objects and estimate the handful of yards separation between the ranged item and target.
Summary: Geovid 3200.COM Rangefinding Binoculars Are Excellent
In summary, the Leica Geovid 3200.COM rangefinder binoculars are excellent in all key respects. The glass is top-notch and the rangefinding performance is very impressive. The modern Bluetooth connectivity is a plus. These Leica Geovids offer a slightly better price point than their equivalent competitors and are the optics I bought with my own money. I doubt you will be disappointed.
New for 2022 — Leica Geovid Pro 32 RangeFinding Binoculars
Smaller, Lighter, with Applied Ballistics and GPS Mapping Integration
Trading on the success of the Geovid 3200.COM series, on 1/6/2022, Leica announced a new smaller, lighter version, with enhanced software — the Leica Geovid Pro 32. Weight 30.6 ounces, this is about 4 oz. lighter than the original, and 0.83 inches shorter. With notably smaller objective lenses (32mm for the Pro 32 vs. 42mm with the Geovid 3200.com) these new Geovid Pro 32s should be easier to hold for extended periods, but they may give up a bit of low light capability compared to their bigger brothers.
The other big news is enhanced software in the Pro 32: “Leica Geovid Pro was built ground up to combine the on-board atmospheric sensors with NEW on-board Applied Ballistics[.] The Geovid Pro comes standard with Applied Ballistics Ultralight … upgradable to Applied Ballistics Sportsman or Elite. The Geovid Pro 32 now also offers advanced GPS tracking connectivity, Leica ProTrack, to guide the user to the target based on the last ranged measurement. The Geovid Pro 32 is the first premium rangefinder to feature GPS mapping integration through BaseMaps, Google Maps and Garmin mapping.”
Savage Arms has won a second major award for its innovative Savage Impulse straight-pull hunting rifle. This is the only straight-pull centerfire rifle currently produced by a major U.S. manufacturer. The rifle has won the coveted NRA American Hunter 2022 Golden Bullseye Award as Rifle of the Year. Previously, Guns & Ammo magazine editors named Savage’s Impulse the 2021 Rifle of the Year.
“The new Savage Impulse is more than just a good first attempt at an American-made straight-pull,” wrote American Hunter magazine’s Associate Editor David Herman. “It is a rifle that can take long-range precision shots with ease, yet is in its element stacking lead in rapid fashion. It would make an excellent addition to any serious hunter’s arsenal.”
Beth Shimanski, Savage’s Marketing Director, says the design is a game-changer for hunters: “The speed of Impulse’s straight-pull action has changed the way Americans think about hunting rifles. This design combines everything Savage has learned about accuracy and reliability with innovation that provides marksmen and women with new capabilities with new capabilities.”
Savage’s Impulse series of straight-pull bolt rifles is the first American-designed and crafted straight-pull centerfire rifle. The new Impulse features an innovative Hexlock bolt-locking mechanism with six spherical bearings that move radially outward into a ring in the barrel extension, thereby locking the bolt in place. That barrel extension is held in the receiver assembly by four cross-bolts on the lower front section. Ahead of the barrel extension is a conventional recoil lug and a familiar Savage barrel nut.
Savage Impulse Straight-Pull Rifle — Overview
Savage claims the new system offers the cycling speed of a semi-auto, with the accuracy of a bolt-action. However, based on the videos that Savage has posted, the cycling of the Impulse’s straight-pull bolt does not seem to be as smooth as some European straight-pulls, such as the Blaser R8, Merkel RX Helix, and Strasser RS 14. We’ve tried those Austrian/German rifles and you really can cycle them very smoothly. From the video the Savage Impulse appears to require somewhat more muscle and effort. Watch below. The video will launch at the 15-second mark for a comparison between the Impulse and a conventional Savage bolt-action:
Savage Speed Comparison — Impulse vs. Regular Bolt Action
Savage says: “Conventional bolt-actions require four steps to cycle the bolt. Impulse simplifies the process with a simple back-and-forth motion.”
Advantages of Straight-Pull Cycling System
What is the advantage of a straight-pull system? You should be able to cycle faster, and (ideally) maintain your cheek-weld and target view. Savage says: “The smooth bolt throw allows a shooter to cycle rounds intuitively, without the need for the standard four changes-of-direction common to a conventional bolt’s path-of-travel. Impulse reduces split times and allows a shooter to manipulate the bolt without losing [his] cheek weld. The bolt travels out and back and shooters don’t have to take their eyes off the target.” Sounds good, but if you watch the above videos, it’s not as wonderful as claimed. That said, if one slows down a bit, a straight pull should allow the shooter to maintain his cheek weld.
When the bolt is closed, the Hexlock system holds it in place instead of conventional lugs. With the Hexlock, six (6) hardened steel bearings lock the bolt in place inside the receiver’s barrel extension. Savage says “As pressure increases, Hexlock’s hold tightens, ensuring that there can be no rearward movement of the bolt. Once the round has left the barrel, the pressure subsides, and the action can safely open again with the straight pull of the bolt handle.”
Savage Impulse — Hexlock System (Bolt Locks in Barrel Extension)
The cleverly-designed, modular Impulse bolt can be disassembled without tools. And the bolt-handle can be moved to either side easily. Impulse barrels are connected via barrel extension which is held in the action/receiver by a lower-side four-bolt barrel clamp.


 This Impulse straight-pull action is bedded in an Adjustable Core Competition chassis from Modular Driven Technologies (MDT). From its full-length ARCA rail to its nitride coatings, the Impulse Elite Precision is optimized for the PRS/NRL game.




 This is a detailed 20-minute video that shows the reloading process start to finish. The video shows how to clean the cases, deprime, and check them before loading.




 Savage Arms has won a second major award for its innovative


