“Freedom is never more than one generation away from extinction. We didn’t pass it to our children in the bloodstream. It must be fought for, protected, and handed on for them to do the same, or one day we will spend our sunset years telling our children and our children’s children what it was once like in the United States where men were free.” — Ronald Reagan
Today marks the 24th anniversary of a tragic day in American history. Much like December 7th, 9/11 remains a “date which will live in infamy”. On this 11th day of September 2025, we think it is good for Americans to honor the sacrifice of the first responders who went to the World Trade Center (WTC) and who lost their lives. And we must remember all those who died as the towers collapsed. It is also a good time to remember those key values for which this nation stands — freedom, liberty, and justice for all. In a modern world where media sources and politicians seek to divide Americans and create hostility, the shared memory of 9/11 can perhaps serve to unite us.
Forum member Charlie NC posted: “Everybody remembers where they were when the attacks happened, and the emotions they felt. God bless the victims who died that day, and those who followed in the pursuit of justice. But at a terrible time our country was more united than at any other point in my lifetime. Hopefully may we regain that harmony again under better circumstances.”
Remembrance from 24 Years Ago — Days Before the Attack
Forum member David Joe was in New York City in September 24 years ago. David had actually been in the World Trade Center with his family just a few days before the attack. Here is his perspective on how the tragedy of 9/11 has changed life in America…
24 Years Ago at the World Trade Center…
Twenty-three years and a week ago, my wife, son, and unborn daughter spent five hours at the World Trade Center. We ate, took pictures everywhere, watched the tilting platform movie, pressed souvenir pennies, went to the top, talked to the employees and watched birthday flowers being delivered up the escalator to one of them. And that’s what we first thought about on the morning of 9/11…
By the evening of 9/11, I knew the world was different, and always would be. In all the years that have gone by, families like mine eventually travelled again, grew up and recognized at least once a year, the magnitude of the events of that day. Some think about it all the time and became more vigilant, and that is certainly, I hope, good.
Other families were directly involved daily in preventing terrorism from coming home again. Thousands of families lost relatives that day, and many more in the years after.
This can be very important — even life-saving. For example, with a hang fire, i.e. a round that does not fire immediately, it is vital to keep the gun pointed DOWN-RANGE. And with a squib load, which may have left a round inside the barrel, it is vital to UNLOAD and NOT take another shot! If you did, the gun could blow up in your hand when the second, full-charge bullet hits the trapped bullet.
The Five Topics Covered Are:
Misfeed (aka Tip-Up)
Double Feed
Stovepipe (Failure to Extract)
Misfire / Hangfire
Squib Load
1. Misfeed or Tip-Up: With any misfeed you should stop firing. With the muzzle pointed safely down-range, remove the magazine, then pull the slide back and remove the round that did not feed. Check the slide for dirt, debris, and check the round that did not feed. After re-inserting the magazine, make sure the mag is seated properly.
2. Double-Feed: This is a fairly common issue with some gun types with worn springs or cheap magazines. Again you want to remove the magazine. CTD states: “Remove the magazine and cycle the action until your double-fed rounds fall out — always keeping the muzzle pointed in a safe direction[.]”
3. Stove-Pipe: This occurs when the case of a fired round does not eject fully. There can be many causes — damaged extractor, low-pressure powder charge, dirty chamber, or greasy cartridge brass. In addition the issue is common with old, worn-out recoil springs. To avoid Stove-Pipes, replace the recoil spring every 4000 rounds, and make sure your chamber is clean and the extractor is not chipped or damaged.
4. Misfires and Hang-Fires: There are multiple causes for misfires (“click no bang”) and hang-fires (slow ignition). There can be a defective primer, the firing pin could be damaged, the powder many have been bad, or the case not filled properly. With a misfire, keep the gun pointed down-range at least one minute. If the case does not fire, eject it but leave it on the ground. With a hang-fire (delayed ignition after firing pin strike), keep the gun pointed down-range, then drop the magazine and eject the (new) unfired cartridge in the chamber and inspect the gun when completely empty.
5. Squib Load: A squib load is when the gun fires, but the actual case ignition is very light with little noise, smoke, or recoil. This can be because the case had a primer but no powder. Or it can be because the powder did not ignite. Squib loads can be very dangerous in rapid-fire situations. If you EVER get a squib load STOP immediately! Do NOT fire another round! This is because the squib may have left a bullet inside the barrel.
In discussions of ballistics, you’ll see references to “tangent”, “secant”, and “hybrid” bullet shapes. We know that, for many readers, these terms can be confusing. To add to the confusion, bullet makers don’t always identify their projectiles as secant or tangent designs. This article provides a basic explanation of tangent, secant, and hybrid ogive bullet designs, to help you understand the characteristics of these three basic bullet shapes.
Tangent vs. Secant vs. Hybrid
Most match bullets produced today use a tangent ogive profile, but the modern VLD-style bullets employ a secant profile. To further complicate matters, the latest generation of “Hybrid” projectiles from Berger Bullets feature a blended secant + tangent profile to combine the best qualities of both nose shapes. The secant section provides reduced drag, while the tangent section makes the bullet easier to tune, i.e. less sensitive to bullet seating depth position.
Berger Bullets ballistician Bryan Litz explains tangent and secant bullet ogive designs in a glossary section of his Applied Ballistics website, which we reprint below. Bryan then explains how tangent and secant profiles can be combined in a “hybrid” design.
How Bullet Ogive Curves are Defined
While the term “ogive” is often used to describe the particular point on the bullet where the curve reaches full bullet diameter, in fact the “ogive” properly refers to the entire curve of the bullet from the tip to the full-diameter straight section — the shank.
Understanding then, that the ogive is a curve, how is that curve described?
LITZ: The ogive of a bullet is usually characterized by the length of its radius. This radius is often given in calibers instead of inches. For example, an 8 ogive 6mm bullet has an ogive that is a segment of a circular arc with a radius of 8*.243 = 1.952”. A .30-caliber bullet with an 8 ogive will be proportionally the same as the 8 ogive 6mm bullet, but the actual radius will be 2.464” for the .30 caliber bullet.
For a given nose length, if an ogive is perfectly tangent, it will have a very specific radius. Any radius longer than that will cause the ogive to be secant. Secant ogives can range from very mild (short radius) to very aggressive (long radius). The drag of a secant ogive is minimized when its radius is twice as long as a tangent ogive radius. In other words, if a tangent ogive has an 8 caliber radius, then the longest practical secant ogive radius is 16 calibers long for a given nose length.”
Bryan Litz Explains Hybrid Design and Optimal Hybrid Seating Depths
Ogive Metrics and Rt/R Ratio
LITZ: There is a number that’s used to quantify how secant an ogive is. The metric is known as the Rt/R ratio and it’s the ratio of the tangent ogive radius to the actual ogive radius for a given bullet. In the above example, the 16 caliber ogive would have an Rt/R ratio of 0.5. The number 0.5 is therefore the lowest practical value for the Rt/R ratio, and represents the minimum drag ogive for a given length. An ogive that’s perfectly tangent will have an Rt/R ratio of 1.0. Most ogives are in between an Rt/R of 1.0 and 0.5. The dimensioned drawings at the end of my Applied Ballistics book provide the bullets ogive radius in calibers, as well as the Rt/R ratio. In short, the Rt/R ratio is simply a measure of how secant an ogive is. 1.0 is not secant at all, 0.5 is as secant as it gets.
Hybrid Bullet Design — Best of Both Worlds?
Bryan Litz has developed a number of modern “Hybrid” design bullets for Berger. The objective of Bryan’s design work has been to achieve a very low drag design that is also “not finicky”. Normal (non-hybrid) secant designs, such as the Berger 105gr VLD, deliver very impressive BC values, but the bullets can be sensitive to seating depth. Montana’s Tom Mousel has set world records with the Berger 105gr VLD in his 6mm Dasher, but he tells us “seating depth is critical to the best accuracy”. Tom says a mere .003″ seating depth change “makes a difference”. In an effort to produce more forgiving high-BC bullets, Bryan Litz developed the hybrid tangent/secant bullet shape.
With hunting season coming up soon, we know that many readers will be out in the field — with a set of binoculars. On most game hunts, you’ll speed a lot more time glassing with binocs than looking through your riflescope. With wide field of view and extended low-light capability, a good set of binoculars will be your most important game-finder. And with premium LRF binoculars, such as the ZEISS Victory series, one tool serves both for spotting and laser ranging.
“Without the stabilization of your binoculars [provided by] a tripod … you will be missing a majority of the game you are glassing for.” — Outdoorsmans.com
In this article, Vortex Optics’ Mark Boardman, an experienced hunter, explains the benefits of using a tripod with high-magnification binoculars. Everybody knows that powerful spotting scopes work best when mounted to a stable tripod or otherwise secured to a steady mount. Yet when most folks use binoculars, they never even think of using a tripod, despite the fact that tripod adapters are available for many premium binoculars.
Outdoorsmans Tripod Adapters Outdoorsmans.com sells tripod adapters for various kinds of binoculars. These really work: “Mounting your binoculars to a quality tripod is a must for the serious western hunter. Without the stabilization of your binoculars [by] mounting them to a tripod … you will be missing a majority of the game you are glassing for.”
A serious hunter should learn how to glass with tripod support, using methods outlined here. With binoculars offering more that 8X magnification, you can really benefit from a steady mount. You’ll be amazed at the difference the tripod will make.
Enjoy the Shooting Sports USA Archives
As we head into spring, many Americans will be spending more time at the range. And competitors will be shooting in rimfire and centerfire rifle matches throughout the country. Here’s an opportunity to learn competition skills, gun tuning methods, and reloading techniques from leading experts. A vast resource of great gun-related content available online for FREE. Check out the Shooting Sports USA Articles Archive. SSUSA maintains a vast digital library with hundreds of articles going back to June 2009.
It’s easy to find back issues of Shooting Sports USA magazine. Here’s how: First, navigate to the latest SSUSA Online Issue (September 2025). Then click on the “ARCHIVES” icon in the upper right area (indicated with red arrow). When you click on “ARCHIVES”, a window will open with a selection of Shooting Sports USA magazine covers/dates in a vertical column. The most recent issue (August 2024) will appear at the top left. You can then scroll down — use the vertical scroll bar to go from September 2025 all the way back to June 2009. Click any issue cover to read.
How to Find and Save Articles
To search back issues, select “MORE OPTIONS” from the toolbar (top left). Then click the “SEARCH” button. When that opens, select either “Search Archives” for ALL back issues or “Search Only this Issue”. When you’ve made your choice, enter your search term(s). For example, you can search for “Camp Perry” or “Palma” or “F-Class Championship”. You can also save any archived issue as a PDF for viewing offline. Just click “SAVE” to download the article you’re currently viewing/reading.
Read Sample Articles
Here are a three of our favorite SSUSA feature stories from recent years. There are hundreds of other informative articles worth reading.
F-Class fans will enjoy the coverage of the 2023 F-Class World Championships in the June 2023 issue of Shooting Sports USA. On the cover is our friend and Forum member Erik Cortina. The 2026 F-Class World Championship will be held at the at the world-famous Stickledown range at the Bisley Camp in the UK
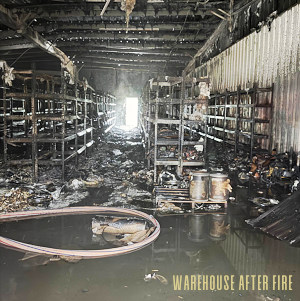
Powder Valley Outdoors (“Powder Valley”) is one of the leading reloading component and shooting supplies vendors in the country. Powder Valley has also been a strong supporter of AccurateShooter.com for over a decade. However, as you may have heard, Powder Valley suffered a warehouse fire recently. Thankfully no one was injured and Powder Valley is now fulfilling orders for customers.
Powder Valley is making great progress after the warehouse fire. The company now has a variety of products back in stock — powder, primers, brass, bullets, and more — and Powder Valley is fulfilling orders through trusted industry partners while Powder Valley gets its own warehouse back up and running. Orders can be placed now through the Powder Valley website. The staff at Powder Valley tells us: “Powder Valley would like to say thank you to the entire community for their incredible support and prayers through this time.” To support Powder Valley and place an order, visit PowderValley.com.
Powder Valley: Rising from the Ashes
When a devastating fire tore through Powder Valley’s main warehouse and offices, the loss was total. Everything melted, burned, and destroyed. But through it all, the Powder Valley team is standing strong — grateful that everyone is safe and determined to come back better than ever.
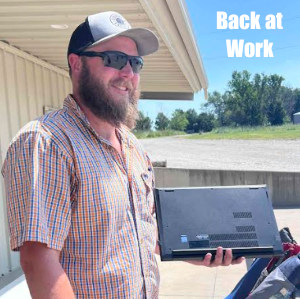
In the immediate aftermath, the team rallied to take care of customers. Kim and Kort from Customer Service worked to make sure orders and support didn’t stop. Jacob, laptop in hand, quickly transitioned to remote operations. Beau jumped in to handle inventory assessments in what was left of the office area. Owners Bryan and Noel Richardson also stepped forward, sharing their story with local news outlets about the impact of the fire and what Powder Valley means to their family and community.
The damage to the facility was extreme, and while Powder Valley is insured, dealing with insurance will take time. In the meantime, the company has partnered with trusted industry allies to fulfill orders, ensuring customers can still get what they need while keeping revenue flowing to sustain operations.
“Right now, working with industry partners was the fastest way to get back up and running,” the team explained. “It allows us to continue serving our customers and keep business moving while we navigate insurance and begin planning for our long-term home.”
The road ahead will be long — finding or building a new facility, reorganizing operations, and reestablishing full capacity. But the Richardson family and the entire Powder Valley team are unwavering in their commitment to the shooting sports community. “We’re going to get up and we’re going to keep swinging. We’re going to keep swinging”, Bryan said.
For now, every order placed with Powder Valley helps keep the lights on and supports the rebuild. And the company couldn’t be more grateful for the overwhelming outpouring of support from shooters and reloaders across the country. “This incredible community has given us strength and optimism to keep forging ahead,” the team shared. “From the bottom of our hearts — thank you.”
Proper eye protection is ‘must-have’ gear for shooting sports. In addition to providing reliable impact protection, good shooting glasses should be comfortable, fog-free, and not interfere with your preferred hearing protection. Those who require corrective lenses also need to consider the various options available. In a past episode of their Weekly Gear Review, the 6.5 Guys discuss a variety of shooting glasses they have tried, including examples from DeCot, Oakley, and Wiley-X. Ed and Steve outline the key considerations when choosing eye protection, and then review practical aspects of eyewear design and construction that enhance comfort and functionality in the field.
The 6.5 Guys (Ed and Steve) offer a number of smart tips consider safety eyewear, helping you select the most effective safety glasses at an affordable price. Here are the 6.5 Guys’ KEY Take-aways when choosing shooting glasses, including prescription eyewear:
Key Things To Consider When Choosing Eye Protection
1. Avoid polarized lenses or lenses that reduce light transmission significantly (except for action shooting in very bright conditions with large, close targets).
2. Avoid frame designs that interfere with prone shooting.
3. Avoid designs that easily fog.
4. Avoid frame designs with thicker temples that are uncomfortable to wear underneath hearing protection.
5. Select lenses with an appropriate degree of ballistic protection. CLICK HERE to learn more about eyewear safety standards.
6. When you get your prescription, be sure your ophthalmologist includes the interpupillary distance. This is a critical measurement particularly for heavier prescriptions.
7. If you have a complicated prescription select a vendor who will actually spend time with you to address any concerns.
Horrific .50 BMG Kaboom — Eye Saved by Protective Eyewear
Think you don’t need eye protection? Watch this video starting at 4:10. The screw-on barrel “cap” (chamber closure) of the .50 BMG action flies into the shooter’s face. Without eye protection the shooter would have definitely lost his right eye. (See video at 5:20 for analysis).
Safety First — Your Eyes Are Irreplaceable Accurate shooting begins and ends with the human eye. Your career as a marksman could be cut short if you don’t use good eye protection every time you go to the range and/or handle a firearm.
Every year, over 1,000,000 people suffer serious eye injuries. Shooting is hazardous; it is estimated that there are 30,000 firearms-related eye injuries each year (if you include paintball sports.) After paintball, general hunting accidents comprise most firearms-related eye injuries.
Quality eye protection need not be expensive. You can find comfortable, ANSI Z87.1-certified shooting glasses for under $10.00.
If you select shooting glasses carefully, and ensure that your eyewear is safety-certified, inexpensive shooting glasses can perform very well. But you need to avoid cheap, soft-plastic lenses that claim “impact resistance” without satisfying a testing standard.
“I have molested that rifle on several different occasions over the years. It is more beautiful in person if that is possible. Fine craftsmanship in every aspect.” — Forum Member Matt K.
Today’s Sunday GunDay feature is a “blast from the past”, part of our big Guns of the Week archive. Some years back, Forum member Corbin Shell told us he had a new, full-custom 1000-yard prone rifle. When he sent some photos of the maple-stocked masterpiece, our collective jaws dropped. Check it out — this is truly a “Maple Marvel”.
Corbin’s GunDay rig is an eye-catcher for sure. This is one handsome rifle, built with all-premium components and a stunning Curly Maple thumbhole stock with adjustable cheekpiece. The rifle is chambered in .243 Winchester. It features a custom stainless RBRP action Nesika R action, with keycuts in the bottom instead of recoil lug. A Grünig & Elmiger trigger has been specially modified (milled and pinned) to work with the Nesika action. The primary barrel is a 30″ Broughton 5R Palma-contour tube. Interestingly, Corbin has a second 30″ Broughton barrel chambered in 6mmBR for use at shorter ranges.
The trigger guard, fore-arm rail, cheek adjuster, and 4-way adjustable butt assembly are all custom metal, designed by Dan Gleason. The stock is cut from exhibition-grade fiddleback maple (from Cecil Fredi Gunstocks in Las Vegas) with a Gaboon Ebony tip wood and butt-plate spacer.
Fast and Accurate
Corbin tells us the gun will put five shots into the size of a quarter at 300 yards “when he does his part.” Corbin shoots pointed Berger 105gr VLDs and 45.5 grains of H4831SC. That load runs 3180 fps. He can push it faster, but “that’s where the node was and where it shoots best”, according to Corbin.
Forum member Jim Hardy has seen (and shot against) this beautiful rifle. Jim reports: “A casual observer might think that the trigger guard, cheek plate and butt plate hardware are Anschutz — as the stock takes on the Anschutz prone pattern. However, this is ALL custom metal. The G&E trigger breaks like a glass rod and will makes my BR triggers feel inferior at best. I had the pleasure of holding, shouldering, and lusting over this gun at Camp Perry… and it is even more impressive in person. The killer is that there is yet ANOTHER one in a beautiful, dark figured walnut owned by Corbin’s shooting partner. BTW, both guns will hammer at 1000 yards prone.”
Long Range Prone Shooting with the .243 Winchester
Is the .243 Winchester capable at 1000 yards? Absolutely. John Whidden has used the .243 Win to capture multiple NRA National Long-Range Championships. John selected the .243 Win because it offers excellent ballistics with manageable recoil. John says that, at least for a sling shooter, the .243 Win is hard to beat at long range. John explains that, while you CAN get somewhat better ballistics with a .284 Win or .300 WSM, you’ll pay a heavy price in increased recoil with those bigger cartridges.
Running at an impressive 3275 FPS from his .243 Win, Berger 6mm 105 grain Hybrids are hard to beat, according to Whidden: “My .243 Win shoots inside a 6.5-284 with 142-grainers. Nothing out there is really ahead of [the .243], in 1000-yard ballistics unless you get into the short magnums or .284s and those carry a very significant recoil penalty.” John has tried bigger cases: “In the past I did shoot the 6.5-284. I went to the .243 Win because it had similar ballistics but had much less recoil. It doesn’t beat me up as much and is not as fatiguing.” READ Whidden .243 Winchester Report.
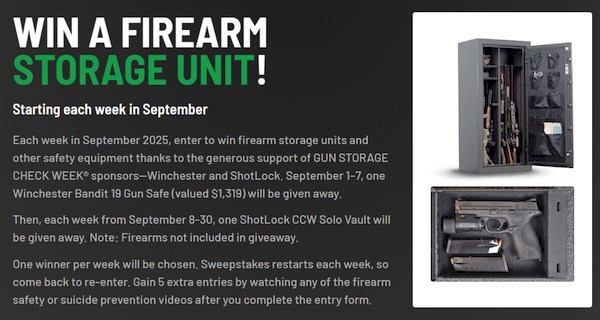
Make sure your firearms are stored securely. The NSSF’s Gun Storage Check Week runs September 1-7, 2025. This national awareness campaign is intended to ensure gun owners store their firearms securely, both to prevent theft and to reduce the risk of misuse and suicide.
Secure firearm storage is the most effective way to help prevent firearm accidents, suicides, and theft. Many secure storage options are available, including lock boxes, cable locks, and full-size safes, to secure firearms when not in use in homes and vehicles. When firearms are not under your direct control, you should place them in locked storage. We recommend large, heavy gun safes for rifle and shotgun storage. It’s best to buy a larger, heavier gun safe than you may think you need initially. We recommend your read our Gun Safe Buyers Guide.
We can do more to help prevent firearm-related accidents, suicides and thefts. During Gun Storage Check Week you should review storage practices and make changes, as needed, to prevent unauthorized access. “No one wants their gun in the hands of an unsupervised child, a person in crisis, an individual who lacks knowledge of safely operating firearms or a thief”, says Joe Bartozzi, President and CEO of NSSF.
Opportunity to WIN a FREE Winchester Gun Safe
Those who visit GunStorageCheck.org will have chances to win firearm storage units and other safety equipment thanks to the generous support of Gun Storage Check Week sponsors — Winchester and ShotLock. For the week of September 1–7, one Winchester Bandit 19 Gun Safe (valued $1,319) will be given away. Then, from September 8 through the 30th, one ShotLock CCW Solo Vault will be given away each week, with one winner per week. The Sweepstakes restarts each week, so come back to re-enter. Note: Firearms are NOT included in giveaway.
Many online vendors are running sales this Labor Day Holiday weekend. You’ll find score of products marked way down, plus discount codes that can save you 15% or more on your purchases. Some sales run through end-of-day (11:59 pm) on Monday, September 1st, while other Labor Day sales extend into next week. Be sure to check the sale schedules.
Brownells Labor Day Sale — 15% Off Plus Sale Pricing
Save now with Brownell’s Labor Day Sale which is already underway. You get 15% Off popular $200+ parts and gear orders with promo code: LABORDAY15. Plus there is special SALE Pricing on a vast selection of popular products including actions, barreled actions, triggers, magazines and ammo.
EuroOptic Labor Day Sale — Big Savings on Optics, Stocks & More
EuroOptic has a major Labor Day Sale with big savings on products from a dozen major brands. Discounts range up to 55% on Burris scopes, up to 47% on S&B scopes, up to 40% on Leupold and Leica optics, up to 47% on Meopta binoculars, up to 44% on GRS chassis/stocks, and up to 19% on Beretta shotguns and rifles. This is a great time to shop at EuroOptic with major savings on a huge range of products.
Not too long ago it was hard to find top-grade, American-made small rifle primers for under $110/1000. With this Labor Day Deal, you can get Federal’s superb GM205M Small Rifle Primers for just $64.99/1000 or $319.99/5000. PLus you can get FREE HazMat with code FHMLD25. If you shoot 3-Gun matches or are an active varminter with a .22-Cal rifle, this 55gr Bullet Special is a great deal — save a full $104 (44%) off the regular price. If you want either of these deals (or one of Midsouth’s other Labor Day Specials), don’t hesitate. These deals expire at 11:59 pm CT on September 1st, so act soon.
Primary Arms is running a huge Labor Day Sale, with major brand discounts on AR components (e.g. uppers and lowers), triggers, suppressors, and stocks. In addition there is a big Primary Arm Optics Closeout Sale with huge “Bonus Bucks” store credits. For example, with Primary Arms 3-18x50mm FFP Scope you get $100 in Bonus Bucks. This is a big sale, with new items appearing every few hours.
Sportsman’s Guide — Major Discounts and FREE Shipping $99+
For Labor Day weekend at Sportsman’s Guide there are up to 80% savings on select shooting gear and accessories, but with most savings 10% to 20%. A vast selection of hunting products are on sale including hunting blinds, tree stands, packs, camo clothing, boots and more. And bulk ammo from CCI, Fiocchi, and PMC is also on sale with major discounts for .380 ACP, 9mm, .223 Rem/5.56 NATO, 7.62×39, and .308 Win. For example, 1000 rounds of Blazer 9mm Ammo is $234.99, just $11.75 per 50rd box.
Ammunition Depot — Big Discounts On 16 Ammo Brands
If you need factory ammo for your rifles, pistols, or shotguns, head over to the Ammunition Depot. Right now there are discounts on a huge selection of ammo from 16 different ammo-makers including CCI, Federal, Fiocchi, Speer, Winchester and other big names. You can buy individual boxes, or bulk packs from 120 rounds up to 1000 rounds. On checkout you have two options. Use Code LABORDAY6P to save 6% on your ammunition order. OR, use Code LABORDAYFS to get FREE Shipping on $149+ ammo orders.
Enlightened Equipment — Outdoor Gear 20% Off + FREE Shipping
With hunting season right around the corner, now is the time to get your ultralight outdoor gear. Enlightened Equipment offers premium American-made sleeping quilts, apparel, and accessories for the outdoor enthusiast. They are currently running a great Labor Day sale that will save you 20% on all in-stock gear with FREE shipping across the USA.


 Hybrid Bullet Design — Best of Both Worlds?

 Outdoorsmans Tripod Adapters


 Accurate shooting begins and ends with the human eye. Your career as a marksman could be cut short if you don’t use good eye protection every time you go to the range and/or handle a firearm.
 Today’s Sunday GunDay feature is a “blast from the past”, part of our big