The question of barrel break-in is controversial. Some folks advocate an elaborate, lengthy cycle of shooting and brushing, repeated many times — one shot and clean, two shots and clean and so on. This, it is argued, helps barrels foul less and shoot more accurately. Others say minimal break-in, with patching and brushing after 10-15 rounds, is all you need. Still others contend that break-in procedures are a total waste of time and ammo — you should just load and shoot, and clean as you would normally.
We doubt if there will ever be real agreement among shooters concerning barrel break-in procedures. And one must remember that the appropriate break-in procedure might be quite different for a factory barrel vs. a custom hand-lapped barrel. This Editor has found that his very best custom barrels shot great right from the start, with no special break-in, other than wet patches at 5, 10, and 15 rounds. That said, I’ve seen some factory barrels that seemed to benefit from more elaborate break-in rituals.
What’s the best barrel break-in procedure? Well our friend Eric Mayer of Varminter.com decided to ask the experts. A while back Eric interviewed representatives of three leading barrel manufacturers: Krieger, Lothar-Walther, and Shilen. He recorded their responses on video. In order of appearance in the video, the three experts are:
Do I Need to Break-In a New Rifle Barrel?
Eric Mayer of Varminter.com says: “That is a simple question, [but it] does not necessarily have a simple answer. Instead of me repeating my own beliefs, and practices, on breaking-in a new rifle barrel, I decided to answer this one a bit differently. While we were at the 2016 SHOT Show, we tracked down three of the biggest, and most popular, custom barrel makers in the world, and asked them what they recommend to anyone buying their barrels, and why they recommend those procedures. We asked the question, and let the camera run!” Launch the video above to hear the answers — some of which may surprise you.
Long-Term Barrel Care — More Experts Offer Opinions
Apart from the debate about barrel break-in, there is the bigger question of how should you clean and maintain a barrel during its useful life. Some folks like aggressive brushing, other shooters have had success with less invasive methods, using bore foam and wet patches for the most part. Different strokes for different folks, as they say. In reality, there may not be one solution for every barrel. Different fouling problems demand different solutions. For example, solvents that work well for copper may not be the best for hard carbon (and vice-versa).
“Why worry about a little barrel fouling when the throat is subjected to a brutal 5,600° F volcano at 55,000 PSI? To investigate these and other questions about taking care of a match barrel, we spoke with a dozen experts and share their knowledge in this first of a series of articles.
After listening to folks who shoot, build barrels or manufacture cleaning solvents for a living, we concluded that even the experts each have their own unique recommendations on how to care for a match barrel. But they all agree on one thing — the gun will tell you what it likes best. Because the life expectancy of a match barrel is about 1,500 to 2,500 rounds, the objectives of cleaning one should include: preserve accuracy, slow the erosion, and remove fouling — all without damaging the gun. This article doesn’t claim that one cleaning method is better than the next. Rather, we set out to interject a little science into the discussion and to share some lessons learned from experts in the field.” — Chip Lohman
John Nosler lived 97 years, passing in 2010. During his long lifetime, John was an iconic figure in the shooting and hunting world. Considered a true pioneer in bullet and ammunition design, Nosler developed the famous Partition bullet in the 1940s. Born on April 4, 1913 in Brawley, California, John built his business from scratch. He founded his bullet company in 1948. He was considered to be one of the great innovators whose designs helped create the premium bullet category and influenced ammunition manufacturers worldwide.
Moose-Hunt Inspires Partition Bullet Design
While hunting in Canada, John experienced a bullet failure on the hide of a mud-caked bull moose. He then began developing a revolutionary new projectile, which he called the “Partition”, because of the barrier that separated the bullet into two sections. One year later, John and a friend traveled back to British Columbia with his new Partition bullets, which were designed to provide deep penetration and expansion. The men bagged two moose with two shots, and the rest is history.
NRA Golden Bullseye Pioneer Award
In recognition of his contribution to the shooting sports industry, John was the unanimous choice for the inaugural 2007 NRA Golden Bullseye Pioneer Award. The award was the highlight of a long and fruitful career. Even though he officially retired in 1988 when his son and daughter-in-law, Bob and Joan Nosler purchased the company, John still managed to come to the office on a daily basis until his health declined.
Today, John’s son Bob Nosler still presides over the company as president and CEO of Nosler, Inc., based in Bend, Oregon. Along with bullets, the company now produces cartridge brass, loaded ammunition, and hunting rifles.
To learn more about John Nosler and his innovative bullet designs, get your hands on Going Ballistic, a “Professional Memoir” told by John Nosler to outdoor writer Gary Lewis. CLICK HERE to find the Going Ballistic book on Amazon. It is offered in paperback for $19.99 or hard-cover for $53.76. There is also a $6.99 Kindle edition.
John Nosler remained an avid hunter and shooter even late in life. Gary Lewis recalled that, at age 92, John Nosler attended the opening of a new shooting range outside Bend, Oregon. Even in his nineties, Nosler managed to drill two shots inside nine inches at 1000 yards. John Nosler leaves a legacy that will benefit hunters and shooters’ nationwide. The John A. Nosler Endowment of The NRA Foundation, sponsors the NRA’s Basic Rifle Training Program which instructs novices in safe rifle handling.
Photo from Training Program at Bellevue Gun Club, Washington State’s “premier indoor shooting facility”.
At AccurateShooter.com, our primary focus is precision target shooting with rifles. But it’s definitely fun to shoot pistols too, and we bet most of our regular readers own handguns. Here are five tips for shooting safely and accurately with handguns. These pointers will help you advance your skills and have more fun with your pistols and revolvers.
1. Make Sure Safety Is Number One
Whether you own one gun or one hundred, gun safety must always be your main priority. In this video, Smith & Wesson Team Captain Julie Golob covers the basics of gun safety.
2. Start with a .22 LR Handgun
We strongly recommend that new pistol shooters start off with a .22 LR rimfire handgun. The .22 LR cartridge is accurate but has very low recoil, less “bark” than a centerfire, and very little smoke and muzzle flash. New shooters won’t have to fight muzzle flip, and won’t develop a flinch from the sharp recoil and muzzle blast common to larger calibers. With the .22 LR, the trainee can focus on sight alignment, breathing, and trigger pull. When he or she has mastered those skills, move on to a .38 Special or 9mm Luger (9x19mm).
What gun to use? We recommend the 10-shot Smith & Wesson Model 617. This is ideal for initial training, shooting single action, slow-fire. You want to focus on sight picture and holding steady. Shown above is the 4″-barrel Model 617 which balances well. There is also a 6″-barrel version. It has a longer sight radius, but is a little nose-heavy. Both are great choices. They are extremely accurate and they boast a very clean, precise trigger.
If you prefer a semi-auto .22 LR pistol, we recommend the Browning Buck Mark series. Buck Marks are very accurate and very reliable. There are now 58 different Buck Mark models, priced at $469.99 to $839.99 MSRP. Retail prices start at about $330 for a basic Buck Mark Camper 22 UFX model. Like the S&W Model 617, a good Buck Mark will serve you for a lifetime.
3. Use Quality Targets with Multiple Aim Points
It’s common for new pistoleros to start shooting at cans or clay birds at a public range. That can be fun, but it’s better to start with proper targets, placed at eye level, at 7-10 yards. We like to use targets with large, brightly colored circles. Focus on putting 5 shots in a circle.
We recommend targets that have multiple bullseyes or aiming points — that way you don’t have to constantly change your target. There are also special paper targets that can help you diagnose common shooting problems, such as anticipating recoil. EZ2C makes very good targets with bright, red-orange aim points. You can also use the bright orange Birchwood Casey stick-on Target Dots (right). These come in a variety of diameters. We like the 2″ dot at 10 yards.
Too many new pistol shooters try to move right to rapid fire drills. It’s better to start slow, practicing the basics, under the guidance of a good mentor. If you belong to a club, ask if there are certified instructors who will help out. This Editor learned pistol shooting from a seasoned bullseye shooter, who got me started with a .22 LR revolver and very close targets. Over the course of a few range sessions we progressed to farther targets and faster pace. But the fundamentals were never forgotten. When starting your pistol training, it’s wise to view some instructional videos. Top Shot Champion Chris Cheng hosts an excellent Handgun 101 Series produced by the NSSF. We’ve linked one of these Handgun 101 videos for Tip #6.
5. SLOW DOWN — This Is Not a Race
When you learned to ride a bicycle, you started slow — maybe even with training wheels. The same principle applies to pistol shooting. When you get started with handguns, we recommend you shoot slowly and deliberately. Start with the handgun unloaded — just work on your sight alignment and breathing. With snap caps in place, try some dry-firing drills. Then progress to live fire. But be deliberate and slow. With the target at 20 feet, see if you can get three successive shot-holes to touch. Believe it or not, many common pistols are capable of this kind of accuracy (but you won’t see many shooters at indoor ranges who pursue that kind of precision). Once you master your form and accuracy, then you can work on your speed.
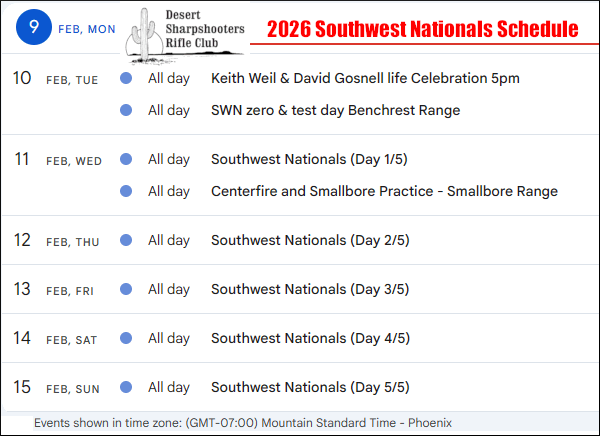
The 2026 Southwest Nationals (SWN) competition concludes this afternoon, February 15, 2026, at the Ben Avery range in Arizona. With skilled shooters in Sling, F-TR, and F-Open classes, the SWN is one of the USA’s most popular multi-class, long-range rifle events held annually. We’ll have a full report on SWN individual and team final results tomorrow.
To show the type of rifle that can win a SWN title, today we feature the .308 Winchester F-TR rifle of talented F-Class shooter Peter Johns. With this impressive rig, Peter won the F-TR Division at the 2020 Berger SW Nationals (SWN), after finishing second in 2019. And Peter also won mid-range AND long-range Texas State championships in 2019. Along the way Peter set a new 600-yard NRA National F-TR Record (200-18X), and tied the 600-yard F-TR Aggregate Record with 600-47X. This Sunday GunDay story features Peter and his trophy-grabbing .308 Win F-TR rifle.
How to Campaign a Winning .308 Winchester F-TR Rifle
Report by Peter Johns
I started contemplating F-Class shooting after talking with Darrell Buell at SHOT Show a decade ago. My first F-Class match was with a Savage VLP with a 26″ Shilen 7mm SAUM barrel and a Harris bipod. After that initial match in Texas I knew I had a lot to learn. I decided that F-TR was the place to start. This story follows my development as an F-TR shooter and showcases the rifle that delivered multiple F-TR match wins in 2019 and 2020.
Watch Peter Johns Shoot his .308 Win F-TR Rig
Equipment Showcase — Key Components of Peter’s F-TR Rifle
Omar Alonzo (Alonzo Custom Rifles, (713) 283-4384, Gunbuilder284@gmail.com) does all my gunsmithing. I believe this is one of the major reasons I have been doing so well in the last couple years. He does a phenomenal job with rifle bedding. He also fixed the timing on my action. The first barrel he chambered has really helped me win matches and set records.
In this Video, Peter talks about his key rifle components and gear:
McMillan Kestros BR Stock — I switched to a Kestros BR stock when they first came out. I painted the stock myself. I am very grateful to Kelly McMillan for letting me be one of the first to try them. The Kestros BR tracks better than any stock I have tried. NOTE — the Kestros was so light that I had to add a steel bar under the forearm to get closer to the F-TR weight limit with a 30″ HV barrel. [Editor: That has the advantage of lowering the center of gravity and the bar can slide fore/aft to adjust center of balance]. I use a SEB Bigfoot rear bag with slick ears and 3/4″ spacing. When I got the Kestros I thought the rear bag spacing was too wide but it worked so well I didn’t change.
Kelbly (Stolle) Panda Action and Krieger Barrel — My rig has a Kelbly Panda F-class action with a Bix’N Andy trigger. At the Berger SWN, I used a Krieger 1:10″-twist 30″ HV 4-groove barrel. It is superbly accurate. I have been bouncing between Krieger and Bartlein for barrels for the last few years. The best barrel I have had is a 30″ Krieger 4-groove HV, however the Bartleins have been very good as well.
Duplin Bipod with Articulating Feet — I really liked the Pohlabel articulating feet that are available for the SEB JoyPod so I asked Dan Pohlabel for permission to copy his feet. I bought some aluminum and made the best copy I could. Since SWN, Duplin has coming out with a new bipod with articulating feet which are considerably better than the feet I made. I use a board and a piece of stall mat with carpet glued on it for the bipod to sit on.
Vortex Golden Eagle Scope — I use the 15-60x52mm Vortex Golden Eagle on all my F-Class rifles. I see the mirage better with the Golden Eagle than any other scope and it tracks perfectly. I also use a Vortex Razor spotting scope with long eye relief lens on the line to help watch mirage and flags. I also use the Razor spotting scope to call wind for Team Texas.
Cleaning Procedure — Less is More — No Cleaning During SWN Long Range Event
Peter has learned that he can go for long round counts without cleaning: “I have found that my .308 Win rigs, for the most part, shoot really well dirty. I can usually get 300 or more rounds before cleaning. I cleaned my barrel at the 2020 SWN after the mid-range event and fouled it before the long-range. I did not clean my barrel again until I got home from the match.”
Peter does clean thoroughly when he gets home: “After a big match I clean my rifles with Boretech Eliminator and a bronze brush followed by Iosso until the majority of carbon is removed from the barrel, as verified with a Lyman borescope. After a thorough cleaning, I find that I need to shoot a bunch of foulers. I will usually go to my practice range and shoot a 20-shot practice match and I will see the accuracy tighten up in the back half.”
600-yard practice target on left. On right is 600-yard record match target shot at 2019 TX State Championships (on ShotMarker targets). This 200-18X was a NRA National Record for F-TR division.
Peter’s Match Load and Reloading Methodology
Loading for .308 Win F-TR — Do What Matters
My loading technique has evolved almost full circle from where I started. I went from the basics to doing every step a person could conceive. Then I decided to start testing all the different steps to see what didn’t matter or made things worse. I am now back to almost no steps in my reloading process. I don’t clean brass anymore. I just wipe the case off, lube, size, prime, and load. I anneal when I feel the necks getting inconsistent when seating the bullets. I pre-load all my ammo for matches. I tried seating them at the match but I didn’t find it to matter on the score card and it takes my focus away from conditions.
Peter’s 2020 SWN-winning .308 Win load consists of Berger 200.20X bullets, Lapua Palma brass, Federal 205M primers, and Varget powder. Peter revealed: “The Berger 200-grainers are running in the mid-2600 fps range. I have tried them much faster but found the best consistency at this speed.”
Peter measures powder to the kernel and also weighs/sorts other components. He runs Berger 200.20X bullets slightly off the lands in a 0.170 freebore chamber. Notably he tests a variety of powders, ascertaining each barrel’s particular preference: “In the last few years I have tried N140, N150, H4895, and Varget. I think they are all good powders for F-TR and the 200.20X bullet. This year I was using Varget. At the 2018 SWN I placed 4th with H4895, in 2019 SWN I got 2nd with N140. I find what powder my particular barrel likes best. I also test CCI BR4 and Fed 205M to see which my rifle likes best. This year I was using Fed 205M. I have been using Lapua Palma brass and it seems to last forever.” Peter full-length sizes with a Redding bushing FL die. He seats his Berger bullets with a Wilson inline seater.
Q & A with Peter Johns, F-TR Ace
Q: What was your biggest challenge at the 2020 Berger SW Nationals?
Peter: I think the biggest challenge was staying focused on conditions. I think the hardest thing for me to do is to stop shooting when the wind conditions are out of my ability to call accurately. I focused hard on this aspect of my game this year and it has paid off. This match is super well run and staff does an excellent job which allows the shooters to maintain their focus.
Q: What gear/hardware items give you an edge over the competition?
Peter: The Kestros BR stock (below) is not used by many F-TR shooters and I think it gives me a huge advantage over the competition. This stock fits me perfectly and tracks in such a manner that I can shoot fast and accurately when conditions are right.
Q: What is your advice for newcomers in F-Class and Long Range competition?
Peter: Go to a top gunsmith building F-Class rifles and do what he says. Competition is the best way to get better. So shoot as many matches as you can. Find top shooter rivals and strive to beat them.
Q: Do you have any specific Gun Handling Tips for F-TR shooters?
Peter: I shoot better with a really light grip and cheek pressure. I can shoot well with a heavier grip and cheek pressure but when the tension of a big match is going my pressure will vary and cause poor accuracy. The most consistent I can shoot is with light gun handling. I also focus on trying to watch the bullet hit through the scope to ensure good follow through and this prevents me from jerking the trigger. There are a bunch of ways to hold a rifle that have proven to be successful. I think a shooter needs to test and find what works best for them.
Q: What do you like most about F-Class and Long Range competition?
A. I really like technical things. F-Class is right in my wheel house for technical stuff. Also, the people in the shooting world are top notch. I enjoy talking with other shooters.
Q: Do you prefer individual events or team matches?
Peter: I prefer the team matches by far because it is a social event with collaboration and there is a lot more pressure. I put a lot of effort into learning the wind for the team matches which in the long run helps me with individual matches.
Peter Johns calls wind for Team Texas at 2018 F-Class Nationals in Raton.
Overcoming Serious Injury in U.S. Navy to Become a Top-Level Marksman
Peter Johns is a U.S. Navy veteran, rank Chief (E7). In 2006, during his duty aboard the U.S.S. Nimitz, Peter sustained very serious and extensive burns in a massive electrical fire. Showing great strength of character, Peter went through a tough, 4-year program of surgeries and rehab. The photo below shows Peter doing therapy during his recovery process.
Peter tells us: “As many of you know I was badly burned on board the U.S.S. Nimitz in 2006. That has limited me in my ability to compete in physical activities that I used to enjoy but F-Class has filled the gap for my competitive nature. I medically retired from the Navy as a Chief (E7) in 2010 after four years of surgeries and physical therapy. I was very surprised to find how accepting and nice people have been in the shooting community. I think the shooting community is comprised of the best people in the world.”
Happy Valentine’s Day
Today is February 14th, Valentine’s Day. To celebrate this romantic holiday, talented shooter Kirsten Joy Weiss has devised a cool trick shot with her .22 LR Volquartsen semi-auto rifle.
Kirsten wants to create a heart on a paper card. Braving winter weather, Kirsten drills three shots into a heart shape on her target. This trick shot is performed, Kirsten adds, “for the love of shooting”.
See more cool trick shots on Kirsten’s popular YouTube Channel which now boasts 339,000 subscribers. Learn more about Kirsten’s shooting background on her website, KirstenJoyWeiss.com.
The 2026 Southwest Nationals (SWN) start today, 2/11/2026, at the Ben Avery Range outside Phoenix, AZ. The big event starts with a 600-yard Mid-Range Match. Many of the nation’s most talented F-Class and sling shooters will be there. But no matter what your skill level, it is still possible to make major mistakes that can spoil the day and/or put you out of the running for the entire match. This article aims to help competitors avoid the big errors/oversights/failures, aka “train wrecks”, that can ruin a match.
Photo by Sherri Jo Gallagher.
In any shooting competition, you must try to avoid major screw-ups that can ruin your day (or your match). In this article, past F-TR National Mid-Range and Long Range Champion Bryan Litz talks about “Train Wrecks”, i.e. those big disasters (such as equipment failures) that can ruin a whole match. Bryan illustrates the types of “train wrecks” that commonly befall competitors, and he explains how to avoid these “unmitigated disasters”.
Urban Dictionary “Train Wreck” Definition: “A total @#$&! disaster … the kind that makes you want to shake your head.”
Success in long range competition depends on many things. Those who aspire to be competitive are usually detail-oriented, and focused on all the small things that might give them an edge. Unfortunately it’s common for shooters lose sight of the big picture — missing the forest for the trees, so to speak.
Consistency is one of the universal principles of successful shooting. The tournament champion is the shooter with the highest average performance over several days, often times not winning a single match. While you can win tournaments without an isolated stellar performance, you cannot win tournaments if you have a single train wreck performance. And this is why it’s important for the detail-oriented shooter to keep an eye out for potential “big picture” problems that can derail the train of success!
Train wrecks can be defined differently by shooters of various skill levels and categories. Anything from problems causing a miss, to problems causing a 3/4-MOA shift in wind zero can manifest as a train wreck, depending on the kind of shooting you’re doing.
Below is a list of common Shooting Match Train Wrecks, and suggestions for avoiding them.
1. Cross-Firing. The fastest and most common way to destroy your score (and any hopes of winning a tournament) is to cross-fire. The cure is obviously basic awareness of your target number on each shot, but you can stack the odds in your favor if you’re smart. For sling shooters, establish your Natural Point of Aim (NPA) and monitor that it doesn’t shift during your course of fire. If you’re doing this right, you’ll always come back on your target naturally, without deliberately checking each time. You should be doing this anyway, but avoiding cross-fires is another incentive for monitoring this important fundamental. In F-Class shooting, pay attention to how the rifle recoils, and where the crosshairs settle. If the crosshairs always settle to the right, either make an adjustment to your bipod, hold, or simply make sure to move back each shot. Also consider your scope. Running super high magnification can leave the number board out of the scope’s field view. That can really increase the risk of cross-firing.
2. Equipment Failure. There are a wide variety of equipment failures you may encounter at a match, from loose sight fasteners, to broken bipods, to high-round-count barrels that that suddenly “go south” (just to mention a few possibilities). Mechanical components can and do fail. The best policy is to put some thought into what the critical failure points are, monitor wear of these parts, and have spares ready. This is where an ounce of prevention can prevent a ton of train wreck. On this note, if you like running hot loads, consider whether that extra 20 fps is worth blowing up a bullet (10 points), sticking a bolt (DNF), or worse yet, causing injury to yourself or someone nearby.
3. Scoring/Pit Malfunction. Although not related to your shooting technique, doing things to insure you get at least fair treatment from your scorer and pit puller is a good idea. Try to meet the others on your target so they can associate a face with the shooter for whom they’re pulling. If you learn your scorer is a Democrat, it’s probably best not to tell Obama jokes before you go for record. If your pit puller is elderly, it may be unwise to shoot very rapidly and risk a shot being missed (by the pit worker), or having to call for a mark. Slowing down a second or two between shots might prevent a 5-minute delay and possibly an undeserved miss.
Photo by Sherri Jo Gallagher.
4. Wind Issues. Tricky winds derail many trains. A lot can be written about wind strategies, but here’s a simple tip about how to take the edge off a worse case scenario. You don’t have to start blazing away on the command of “Commence fire”. If the wind is blowing like a bastard when your time starts, just wait! You’re allotted 30 minutes to fire your string in long range slow fire. With average pit service, it might take you 10 minutes if you hustle, less in F-Class. Point being, you have about three times longer than you need. So let everyone else shoot through the storm and look for a window (or windows) of time which are not so adverse. Of course this is a risk, conditions might get worse if you wait. This is where judgment comes in. Just know you have options for managing time and keep an eye on the clock. Saving rounds in a slow fire match is a costly and embarrassing train wreck.
5. Mind Your Physical Health. While traveling for shooting matches, most shooters break their normal patterns of diet, sleep, alcohol consumption, etc. These disruptions to the norm can have detrimental effects on your body and your ability to shoot and even think clearly. If you’re used to an indoor job and eating salads in air-conditioned break rooms and you travel to a week-long rifle match which keeps you on your feet all day in 90-degree heat and high humidity, while eating greasy restaurant food, drinking beer and getting little sleep, then you might as well plan on daily train wrecks. If the match is four hours away, rather than leaving at 3:00 am and drinking five cups of coffee on the morning drive, arrive the night before and get a good night’s sleep.”
Keep focused on the important stuff. You never want to lose sight of the big picture. Keep the important, common sense things in mind as well as the minutia of meplat trimming, weighing powder to the kernel, and cleaning your barrel ’til it’s squeaky clean. Remember, all the little enhancements can’t make up for one big train wreck!
It’s October, the fall season, and that means rainy, wet weather is on the way in many areas of the country. With rain comes increased moisture in the air, i.e. increased humidity. And that, in turn, can affect how your powders perform by altering their burn rates.
Most shooters realize that significant changes in temperature will alter how powders perform. That’s why you want to keep your loaded ammo out of the hot sun, and keep rounds out of a hot chamber until you’re ready to fire. But there are other factors to be considered — HUMIDITY for one. This article explains why and how humidity can affect powder burn rates and performance.
We’ve all heard the old adage: “Keep your powder dry”. Well, tests by Norma have demonstrated that even normal environmental differences in humidity can affect the way powders burn, at least over the long term. In the Norma Reloading Manual, Sven-Eric Johansson, head of ballistics at Nexplo/Bofors, presents a very important discussion of water vapor absorption by powder. Johansson demonstrates that the same powder will burn at different rates depending on water content.
Powders Leave the Factory with 0.5 to 1.0% Water Content
Johansson explains that, as manufactured, most powders contain 0.5 to 1% of water by weight. (The relative humidity is “equilibrated” at 40-50% during the manufacturing process to maintain this 0.5-1% moisture content). Importantly, Johansson notes that powder exposed to moist air for a long time will absorb water, causing it to burn at a slower rate. On the other hand, long-term storage in a very dry environment reduces powder moisture content, so the powder burns at a faster rate. In addition, Johansson found that single-base powders are MORE sensitive to relative humidity than are double-base powders (which contain nitroglycerine).
Tests Show Burn Rates Vary with Water Content
In his review of the Norma Manual, Fred Barker notes: “Johansson gives twelve (eye-opening) plots of the velocities and pressures obtained on firing several popular cartridges with dehydrated, normal and hydrated Norma powders (from #200 to MRP). He also gives results on loaded .30-06 and .38 Special cartridges stored for 663 to 683 days in relative humidities of 20% and 86%. So Johansson’s advice is to keep powders tightly capped in their factory containers, and to minimize their exposure to dry or humid air.”
Confirming Johansson’s findings that storage conditions can alter burn rates, Barker observes: “I have about 10 pounds of WWII 4831 powder that has been stored in dry (about 20% RH) Colorado air for more than 60 years. It now burns about like IMR 3031.”
What does this teach us? First, all powders start out with a small, but chemically important, amount of water content. Second, a powder’s water content can change over time, depending on where and how the powder is stored. Third, the water content of your powder DOES make a difference in how it burns, particularly for single-base powders. For example, over a period of time, a powder used (and then recapped) in the hot, dry Southwest will probably behave differently than the same powder used in the humid Southeast.
Reloaders are advised to keep these things in mind. If you want to maintain your powders’ “as manufactured” burn rate, it is wise to head Johannson’s recommendation to keep your powders tightly capped when you’re not actually dispensing charges and avoid exposing your powder to very dry or very humid conditions.
Real-World Example — “Dry” H4831sc Runs Hotter
Robert Whitley agrees that the burn rate of the powder varies with the humidity it absorbs. Robert writes: “I had an 8-lb. jug of H4831SC I kept in my detached garage (it can be humid there). 43.5-44.0 gr of this was superbly accurate with the 115 Bergers out of my 6mm Super X. I got tired of bringing it in and out of the garage to my house for reloading so I brought and kept the jug in my reloading room (a dehumidified room in my house) and after a few weeks I loaded up 43.5 gr, went to a match and it shot awful. I could not figure out what was going on until I put that load back over the chronograph and figured out it was going a good bit faster than before and the load was out of the “sweet spot” (42.5 – 43.0 gr was the max I could load and keep it accurate when it was stored in less humid air). I put the jug back in the garage for a few weeks and I now am back to loading 43.5 – 44.0 gr and it shoots great again. I have seen this with other powders too.”
If you have two jugs of the same powder, one kept in a room in your house and one somewhere else where it is drier or more humid, don’t expect the two jugs of the same lot of powder to chrono the same with the same charge weights unless and until they are both stored long enough in the same place to equalize again.
The 2026 Southwest Nationals match takes place February 11-15, 2026 at the Ben Avery Shooting Facility in Phoenix. So many of our readers will be on the road headed to Arizona this week, with one or more match rifles in their cars or trucks. When crossing into different states with guns in a vehicle, you need to be mindful of all state and local laws and restrictions.
Five Worst States for Traveling with Firearms
This article appears in the Cheaper Than Dirt Shooter’s Log.
The U.S. is a patchwork of confusing and cumbersome laws that change the rules of what you can carry, where you can carry, and whether you can possess the firearm, ammunition of magazine at without running afoul of the local laws. Now, if every state was like Vermont, law abiding gun owners could freely travel with their firearms with no worries. Unfortunately, many states have a history of being hostile to traveling gun owners.
The federal “Firearms Owner Protection Act” allows travel through any state as long as the firearm is unloaded, in a locked case, and not easily accessible to the passengers. However, that is not to say that certain states that are less friendly to firearms have not created their own laws that would snare unsuspecting otherwise law-abiding firearm owners. This led us to name the Top 5 States to Avoid while traveling with a firearm this holiday season.
CONNECTICUT
Connecticut does not have any gun reciprocity agreements with other states. This means nonresidents are not allowed to carry handguns in Connecticut under a permit issued by another state.
HAWAII
Every person arriving into the state who brings a firearm of any description, usable or not, shall register the firearm within three days of the arrival of the person or the firearm, whichever arrives later, with the chief of police of the county where the person will reside, where their business is, or the person’s place of sojourn. GET Hawaii Firearms INFO HERE.
MASSACHUSETTS
Massachusetts imposes harsh penalties on the mere possession and transport of firearms without a license to carry. Prospective travelers are urged to contact the Massachusetts Firearms Records Bureau at (617) 660-4780 or contact the State Police. GET Massachusetts Firearms INFO HERE.
NEW JERSEY
New Jersey has some of the most restrictive firearms laws in the country. Your firearm must be unloaded, in a locked container, and not accessible in the passenger compartment of the vehicle. The New Jersey Supreme Court ruled that anyone traveling within the state is deemed to be aware of these regulations and will be held strictly accountable for violations. If you’re traveling through New Jersey, you need to comply with state laws on firearm transport, which are very strict. GET New Jersey Firearms INFO HERE provided by a New Jersey legal team.
NEW YORK
Use extreme caution when traveling through New York state with firearms. New York’s general approach is to make the possession of handguns and so-called “assault weapons” illegal. A number of localities, including Albany, Buffalo, New York City, Rochester, Suffolk County, and Yonkers, impose their own requirements on the possession, registration, and transport of firearms. Possession of a handgun within New York City requires a New York City handgun license or a special permit from the city Police Commissioner. This license validates a state license within the city. Even New York state licenses are generally not valid within New York City unless a specific exemption applies. Possession of a shotgun or rifle within New York City requires a permit, which is available to non-residents, and a certificate of registration.
More Scary States for Gun Owners
Here are six other jurisdictions (five states and DC) where you need to be wary when traveling. California, for example, treats all handguns in vehicles as “loaded” if there is ammunition loaded into an attached magazine. It’s wise, when in California, to have handguns unloaded in a LOCKED case, with all ammunition or magazines in a separate section of the vehicle. These states (and DC) all have laws that can trap unsuspecting gun-owners. Be wary.
California
Delaware
Dist. of Columbia
Illinois
Maryland
Rhode Island
Hornady will host the Zombies in the Heartland 3-Gun Match, May 29-31, 2026, at the Heartland Public Shooting Park in Grand Island, Nebraska. This is one of the nation’s most popular multi-gun reactive targets match. It attracts 400+ competitors each year. For complete event information, visit the official Zombies in the Heartland website or follow the Zombies in the Heartland Facebook page.
With an unusual and challenging course of fire, Zombies in the Heartland attracts shooters from across the country. Shooters will find exciting new reactive targets developed specifically for this match, with most targets breaking, falling over, or moving. Most participants will compete with a pistol, rifle, and shotgun. Alternatively, shooters can compete with a pistol-caliber carbine and shotgun in the PCC Division.
Reserve lodging at Best Western Plus, 2707 S. Locust Road, Grand Island, NE. Call (308) 675-5656 and mention Zombies match for reduced rates.
2025 Zombies in the Heartland 3-Gun Match Highlights
Ten competitive stages mimicking post-apocalyptic situations were featured. Professional and amateur shooters from across the country enjoyed specially developed reactive zombie targets. The Heartland Zombies match is a veritable theme park for shootists, with many fun stages and innovative targets. Many unique, reactive zombie targets have been developed specifically for this match. The use of paper targets has been minimized — so it’s mostly “bang and clang”. Rifles, pistols, and shotguns are used on most stages. There were also fun side-matches. Watch the video above to see this year’s action.
Starline Brass offers a series of videos with helpful reloading tips. Focused primarily on pistol cartridges, these short videos can help anyone get started with metallic cartridge reloading. If you load pistol rounds on a progressive, this video series is particularly helpful. The on-camera host is Hunter Pilant, son of Carroll Pilant of Sierra Bullets.
Preventing Double Charges
Tip: Use a bulky powder that fills your case more than half way with a correct charge. This will overfill the case if it is double-charged, making it very difficult to seat a bullet.
Tumble New Brass Before Loading the First Time
Tip: Tumble new pistol cartridge brass in used media for 30 minutes before loading for the first time. This will add enough graphite (carbon residue) to smooth case entry into dies. You can also lube the case mouths with graphite, or use spray lube.
Powder Through Expander — How to Eliminate Hang-ups
Tip: When loading pistol brass with a progressive press, sometime the powder-through expander is hard to remove, especially with short cases. There are two fixes — first, try deburring the inside of the case mouth on your cases. Second, the radius of the powder through expander plug can be modified to smooth entry and exit (see photo). Starline will do this modification for free.


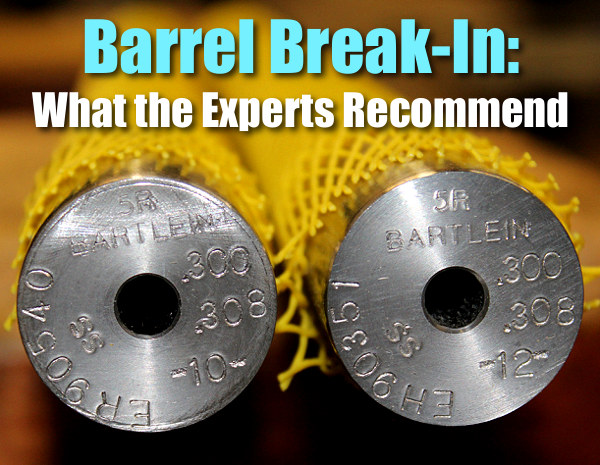
 Do I Need to Break-In a New Rifle Barrel?


 NRA Golden Bullseye Pioneer Award
 To learn more about John Nosler and his innovative bullet designs, get your hands on Going Ballistic, a “Professional Memoir” told by John Nosler to outdoor writer Gary Lewis.
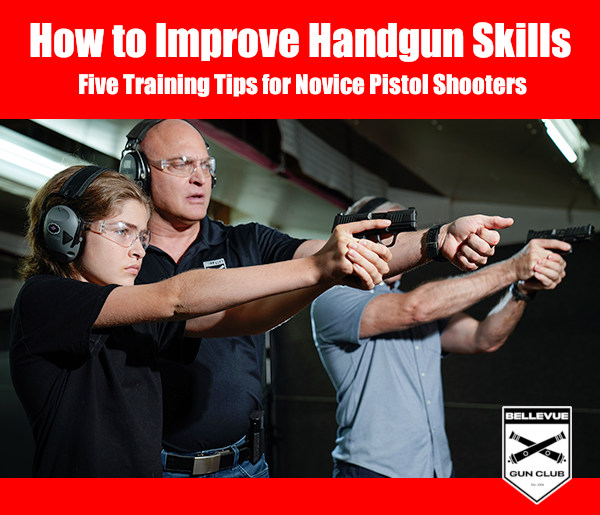


 It’s common for new pistoleros to start shooting at cans or clay birds at a public range. That can be fun, but it’s better to start with proper targets, placed at eye level, at 7-10 yards. We like to use targets with large, brightly colored circles. Focus on putting 5 shots in a circle.

 The
The 


 Happy Valentine’s Day


 Train Wrecks (and How to Avoid Them)


 4. Wind Issues. Tricky winds derail many trains. A lot can be written about wind strategies, but here’s a simple tip about how to take the edge off a worse case scenario. You don’t have to start blazing away on the command of “Commence fire”. If the wind is blowing like a bastard when your time starts, just wait! You’re allotted 30 minutes to fire your string in long range slow fire. With average pit service, it might take you 10 minutes if you hustle, less in F-Class. Point being, you have about three times longer than you need. So let everyone else shoot through the storm and look for a window (or windows) of time which are not so adverse. Of course this is a risk, conditions might get worse if you wait. This is where judgment comes in. Just know you have options for managing time and keep an eye on the clock. Saving rounds in a slow fire match is a costly and embarrassing train wreck.
 Tests Show Burn Rates Vary with Water Content