Ace tactical shooter and gunsmith Jim See of Elite Accuracy LLC has tested a Frankford Arsenal rotary brass tumbler. Like the older Thumbler’s Tumblers, this can tumble your cases in a liquid solution. The wet-tumbling process worked very well Jim reports. Posting on Facebook, Jim noted: “I was super impressed with the Frankford Arsenal rotary tumbler and cleaning packs they sent me. I ran 350 pieces of brass for one hour. They now look great.” Jim appreciated not having to deal with dry tumbling media, such as crushed walnut shells. Dry media produces dust and can leave residues or clog flash-holes.
Interestingly, Jim recommends you try wet-tumbling WITHOUT using stainless media. At least give it a try. Tumbling without media simplifies the process and you don’t have to worry about pins stuck in flash-holes or case-necks*. Jim reports: “Stainless steel pins come with the Frankford kit, but mine hit the trash right out of the box. There is no need to clean the inside of your cases 100% and that’s all the pins add to the equation. The brass bumping brass with hot water and Frankford’s liquid cleaner works great all by itself.” One wag stated: “That’s great to hear. Stainless steel pins are a PITA.”
Other Facebook posters concurred with Jim’s evaluation of the Frankford Arsenal Rotary Tumbler:
“I’ve had one for a couple years, and it works well. I usually run about 250-300 Dasher cases at once in it. But I use the pins because I’m OCD about clean brass.” — David W.
“I’ve had one for a year and a half and it definitely works with or without pins.” — Luke C.
“I got one about six months ago and have yet to use any stainless steel media [pins]. I just use some dawn, distilled water, and Lemi Shine®. Turns nasty 5.56 range brass bright and shiny.” — Brian D.
“I don’t use the pins either and use a combination of Dawn soap and Lemi Shine.” — Jon N.G.
This video shows how to assemble and operate the Frankford rotary tumbler. But note, Jim See does NOT feel that it is necessary to use stainless media.
How to Dry Your Brass — Hair Dryer Vs. Machine
The downside of wet tumbling is that you end up with a pile of wet brass at the end of the cleaning cycle. There are many ways to dry brass, from drying in the sun to using a kitchen oven (be careful not to “overcook” your brass). One Facebook poster asked Jim: “What is your drying method for wet brass, and how long does it take?”
Jim See replied: “To start I just drain off the dirty water, and rinse the brass with clean hot water. Then I roll the brass on a towel for 30 seconds and put the brass in a one-gallon bucket. Next I insert a hair dryer in the bucket (with the brass) and let it run for about 5 minutes. With this procedure, the drying process for me is done in less than 10 minutes.”
Jack Lanhart has another method: “I use a food dehydrator. It takes 30 to 45 minutes.”
For those who don’t want to mess with towels and hair dryers, Frankford Arsenal offers a matching Platinum Series Case Dryer that simplifies the process of drying brass. Lyman also makes an excellent Cyclone Case Dryer. These drying machines each cost about $65.00 and both have multiple levels so you can separate different types of cartridge brass. Lyman states that “The forced heated air circulation of the Cyclone will dry your brass inside and out within an hour or two, with no unsightly water spots.” The Lyman dryer can also be used for ultrasonically-cleaned gun parts.
*The Frankford Rotary tumbler does include media separators if you choose to use the provided pins or other media. CLICK HERE for diagram showing how to use media separators.
This custom war wagon hauls varmint hunters around the Longmeadow Game Resort in Colorado.
Will you be heading to the varmint fields this summer? Proper planning is key to a safe, satisfying, and productive varmint holiday. Of course you’ll be busy reloading, but you should make a check-list of all the gear and supplies you need. Bring a variety of rifles if possible — you’ll need to switch off as one barrel gets hot, and the chambering that works best for your close shots may not be ideal for those longer shots out past 400 yards. Here are some tips from our Forum members that can help you shoot more effectively, and avoid problems on your varmint hunt. Here’s one key tip: at your shooting station, put a strip of surveyor’s tape on a tall stake to show the wind direction. Then shoot in the direction the wind blows. This will minimize the effect of cross-winds.
Varmint Safari Planning, Equipment, and Shooting Advice
From PatchHound: “The gear you bring will make or break a trip out to Prairie Dog land. A lot has to do with where you going and how far you are from [civilization]. For starters, bring lots of water. It will be hot in Wyoming in a few more weeks but it don’t hurt to bring warm clothes in case it snows. It’s best to wear leather boots unless you’re real good at dodging cactus while walking around. Good sunscreen [and a wide-brimmed hat] will save the day too. [What you need to bring] really depends on whether you’re shooting on some friendly ranch or 100 miles in the middle of [a wilderness area]. Good survival gear is a good thing to have for the latter!”
This photo is from a Dan Eigen TV Show video featuring a P-Dog hunt.
From Stoner25mkiv: “I’d suggest an adjustable bipod if you are going to do any walking. A laser rangefinder is a huge asset. Have a fanny pack or backpack for extra ammo, water, bore-snake, etc. when you go on your walkabouts. We also take a couple pivoting benches, heavy movers’ pad/blanket, sandbags (Uncle Bud’s Bulls Bag) for shooting from near the vehicle. Boonie hat for blocking the sun, sun glasses, sunscreen. High leather boots.
Anyway, on to the rifles…consider bringing a 17 HMR, .223 Ackley bolt gun, .223 Ackley AR, and a 243 WSSM. Some years the 17 HMR isn’t removed from its case. We had a couple windless days and the 17 was lots of fun. I’d walk into the dogtown and then lay down and wait. After five minutes or so I’d have dogs within easy rimfire range, and out to as far as I’d care to stretch the rimfire. 275 yards was about it.”
From CTShooter: “The .204 [Ruger] is a laser beam and good to 400 yards easy. Forget the rimfire! Do you have a portable bench that pivots? Bring bipod, binocs. Bring a LOT of water. I have a milspec sniper shooter’s mat/drag bag with shoulder straps. It is good to carry everything when you want to wander off and shoot prone with bipod. Here’s a view through my 6BR in ND.”
From RJinTexas: “In most of the locations that we’ll be shooting we’ll usually set up a minimum of 200 yards from the edge of a major dog town. We’ll start by working over the close-in dogs and shooting our way out, some of these towns may run in excess of 500/600 yards deep. I believe that a rimfire will put you at a distinct disadvantage. The only rimfire that will somewhat work is the 17 HMR and you can reload for your 204s for close to the cost of HMR ammo and you’ll be less apt to be under-gunned. Your 204 will work well out to 300/400 yards unless the wind is blowing hard. We classify a 10-mph crosswind as a very calm day and what makes it a little more challenging is that it is usually also gusting.”
From Wes (P1ZombieKiller): “[For my first PD trip] there are so many things I was not ready for. The one thing that I did bring (that no one told me about) was a canopy. I’m glad I did. Even though the weather was [near perfect], I know that sun can humble you real fast. With my pop-up canopy, I could shoot all day without getting killed by the sun. You had to tie the canopy down real well or the wind would blow it across the pasture.
We sat on shooting benches that pivot 360°, and are fast and easy to set up. Most all shots were 175-250 yards. I just felt comfortable at that range. It was more fun for me to be able to film the hits, and the camcorder I was using just did not get good video past 350 yards. The digital zoom distorted the image too much. I knew I would only get this one chance to film my first P-dog outing, and I wanted to get it on film for [posterity].”
Bring Multiple Rifles on Your Varmint Adventures
On our P-Dog adventures, we like to have multiple rifles — a .17 HMR for close work, then maybe a .20 Practical AR for 150-250 yards, then a larger caliber such as 6BRA, 6 Dasher or 6XC for those long shots. The classic 22-250 is also a wickedly effective varmint cartridge.
.20 Practical (20-223 Rem) AR-Platform Varminter
Here is a .20 Practical built by Robert Whitley. Whitley’s Ultimate Prairie Dog Rifle (PDR) features a 24″ Bartlein 11-twist cut-rifled barrel, DPMS side-charging upper, and a Jewell trigger. It is chambered in 20 Practical, a cartridge popularized by Warren “Fireball” Brookman.
This .20 Practical cartridge is simply the .223 Remington necked down to .204. You can use your existing .223 Rem brass — no special case-forming required! The 20 Practical is accurate, flat-shooting, and has almost no recoil. The advantage over the standard .223 Remington is that, grain for grain, the bullets have a higher BC and travel at a higher velocity for more dramatic effect on a small varmint. The ultra-low recoil allows you to easily see your hits, even without a muzzle brake. The 20 Practical, launching 40-grainers at about 3750 fps, shoots flatter than a .223 Rem with 55gr hollowpoints.
.17 HMR Savage A17 Varmint Rifle
We also like to have a Rimfire for the closer shots, inside 150 yards. The .17 HMR or .17 WSM are good choices. With a rimfire you save on ammo costs and you don’t waste precious centerfire barrel life.
This video shows a successful Prairie Dog hunt with a .17 HMR. Watch and you’ll see hits out to 160 yards (00:50), proving the effective range of the .17 HMR cartridge. The host is shooting a Savage A17 semi-auto .17 HMR rifle in a Boyds laminated stock.
Probably the most popular centerfire rifle round in the Western Hemisphere is the .223 Remington and its metric match, the 5.56x45mm. Though many folks use “.223 Rem” and “5.56×45″ interchangeably, there are some meaningful differences in specifications for the original .223 Rem and the 5.56x45mm cartridge, as adopted by the U.S. military and NATO armies. The default chamber throats are slightly different and the .223 Rem is rated at 55,000 PSI vs. 62,366 PSI for the 5.56x45mm.*
.223 Rem vs 5.56x45mm — Key Differences
There is a truly outstanding, very thorough article on the subject, published by LuckyGunner.com.** This involved extensive testing, with pressure monitors, of 5.56x45mm ammo in .223 Rem chambers. Those tests revealed the peak pressures. Here is one of the ammo test charts:
NOTE: “The observed chamber pressure for Federal XM855 5.56mm ammunition in a .223 Rem chamber exceeded .223 maximum pressures, but not by a massive amount. The ninth shot (the red line) was an underpowered cartridge which exhibited significantly lower velocity and pressure than the other rounds, so it was excluded from the average velocity and pressure numbers for this chamber.”
And if you’re curious, LuckyGunner also fired .223 Rem ammo in a 5.56x45mm NATO-chambered AR15 rifle. As you would expect, the peak pressures were significantly lower, but the .223 Rem ammo still cycled the semi-auto AR-platform rifle perfectly well:
UltimateReloader.com Explains .223 Rem vs. 5.56x45mm
To explain the key differences between the .223 Rem and 5.56x45mm cartridges our friend Gavin Gear of UltimateReloader.com has created a very thorough 12-minute video. This covers the cartridge specifications and explains key considerations for hand-loaders. Gavin also addresses the oft-asked question “Can I shoot 5.56x45mm ammo in my .223 Rem chamber?” Gavin’s video is definitely worth watching. In fact, this is one of the most popular videos Gavin has ever created — it has been watched nearly 4.5 million times on YouTube.
What Exactly Is the 5.56x45mm NATO Cartridge?
The 5.56×45mm NATO is a rimless bottle-necked intermediate cartridge family standardized by NATO with development work by FN Herstal. It consists of the SS109, SS110, and SS111 cartridges. Under STANAG 4172, it is a standard cartridge for NATO forces as well as many non-NATO countries.
Bullet diameter: 5.70 mm (0.224 in)
Maximum pressure (EPVAT): 430.00 MPa (62,366 psi)
Maximum pressure (SCATP 5.56): 380.00 MPa (55,114 psi)
Case length: 44.70 mm (1.760 in)
Rifling twist: 178 mm or 229 mm (1 in 7 in)
Parent case: .223 Remington (M193)
Ammo-Maker Federal Premium Compares .223 Rem and 5.56x45mm
Here is a video from ammo-maker Federal Premium explaining the difference between .223 Remington and 5.56x45mm NATO. Federal states that you may experience excessive pressures when firing a 5.56x45mm in a standard .223 Remington chamber:
One leading gunwriter has addressed the question of shooting 5.56x45mm ammo in .223 Rem chambers. He advocates caution (for more info, SEE pressure tests by LuckyGunner.com):
“I have received a slew of questions — many from first time AR-type rifle buyers — about the .223 Rem and the 5.56×45 mm NATO cartridges. Can I shoot 5.56×45 mm NATO in my .223 and vice-versa? Are these the same cartridge?
Externally, the two cartridge cases are identical. The main differences are that 5.56×45 mm NATO operates at a higher chamber pressure (about 60,000 PSI versus 55,000 PSI on the .223 Rem.) and the 5.56’s chamber is slightly larger than that of the .223 Rem. Also, the throat or leade is longer in the 5.56×45 mm chamber. What does this mean? You should not shoot 5.56×45 mm NATO out of a rifle that is chambered in .223 Rem [with a standard short throat]. And be aware that some .223 Rem ammunition will not reliably cycle through some AR-style .223 Rem rifles, but it usually does. As a matter of fact, I have not encountered any difficulty with current .223 Rem. loads cycling through a 5.56 mm AR-style rifle.” — Mark Keefe, Editor, American Rifleman
* According to the official NATO proofing guidelines, the 5.56×45mm NATO case can handle up to 430.0 MPa (62,366 psi) piezo service pressure. The U.S. SAAMI lists Maximum Average Pressure (MAP) for the .223 Remington cartridge as 55,000 psi (379.2 MPa) piezo pressure with deviation of up to 58,000 psi (399.9 MPa). The chamber for military 5.56×45mm NATO has a longer throat prior to the bullet contacting the rifling which results in lower pressures when firing 5.56×45mm NATO ammunition. If 5.56×45mm NATO is used in rifles chambered for .223 Remington the bullet will be engraving the rifling when chambered. which can increase pressures past SAAMI Max levels. NOTE: The C.I.P. standards for the C.I.P. civilian .223 Remington chamber are much closer to the military 5.56×45mm NATO chamber.
** The full-length LuckyGunner article is well worth reading. It even provides specifications for a number of .223 Rem reamer types, and compares the original .223 Rem, the 5.56x45mm NATO, and the modern .223 Wylde chamberings.
Put the same load in a variety of barrels (with the same length and chamberings) and you’ll see a wide variance in muzzle velocity. In fact, it’s not unusual to see up to 100 fps difference from one barrel to the next. We demonstrated this with a comparison test of Lapua factory ammo.
Chron Testing Lapua Factory Ammo
At our Southern California test range some years ago, we chronographed Lapua 105gr 6mmBR factory ammo in three different 8-twist barrels of similar length. The results were fascinating. Lapua specs this ammo at 2790 fps, based on Lapua’s testing with its own 26″ test barrel. We observed a speed variance of 67 fps based on tests with three aftermarket barrels.
Barrel Velocity Variance
Brand ‘S’ and Brand ‘PN’ were pre-fit barrels shot on Savage actions. Brand ‘K’ was fitted to a custom action. All test barrels were throated for the 100-108 grain bullets, though there may have been some slight variances in barrel freebore. With a COAL of 2.330″, the rounds were “jumping” to the rifling in all barrels.
Among the four barrels, Brand ‘PN’ was the fastest at 2824 fps average — 67 fps faster than the slowest barrel. Roughly 10 fps can be attributed to the slightly longer length (27″ vs. 26″), but otherwise this particular barrel was simply faster than the rest. (Click Here for results of 6mmBR Barrel Length Velocity Test).
IMPORTANT: Results Are Barrel-Specific, Not Brand-Specific
These tests demonstrate that the exact same load can perform very differently in different barrels. We aren’t publishing the barrel-makers’ names, because it would be wrong to assume that ‘Brand X’ is always going to be faster than ‘Brand Y’ based on test results from a single barrel. In fact, velocities can vary up to 100 fps with two identical-spec barrels from the SAME manufacturer. That’s right, you can have two 8-twist, 26″ barrels, with the same land-groove configuration and contour, from the same manufacturer, and one can be much faster than another.
Don’t Demand More Than Your Barrel Can Deliver
We often hear guys lament, “I don’t get it… how can you guys get 2900 fps with your 6BRs and I can only get 2840?” The answer may simply be that the barrel is slower than average. If you have a slow barrel, you can try using more powder, but there is a good chance it may never run as fast as an inherently fast barrel. You shouldn’t knock yourself out (and over-stress your brass) trying to duplicate the velocities someone else may be getting. You need to work within the limits of your barrel.
Factory Ammo Provides a Benchmark
If you have a .223 Rem, 6mmBR, .243 Win, 6.5×47 Lapua, 6.5 Creedmoor, 6.5×55, .308 Win, .30-06 Springfield, or .338 LM Rifle, we recommend you buy a box of Lapua factory-loaded ammo. This stuff will shoot great (typically around half-MOA), and it can give you a baseline to determine how your barrel stacks up speedwise. [Editor’s NOTE: The original test was conducted in 2008. The velocity of current-production Lapua factory ammo might be higher or lower, so your results may vary.]
When you complete a new 6mmBR rifle, it’s definitely smart to get a box of the factory ammo and chronograph it. That will immediately give you a good idea whether you have a slow, average, or fast barrel. Then you can set your velocity goals accordingly. For example, if the factory 6BR ammo runs about 2780-2790 fps in your gun, it has an average barrel. If it runs 2820+ in a 26″ barrel (or 2835 fps in a 28″), you’ve got a fast tube.
There is an excellent article about primers on the Shooting Times website. We strongly recommend you read Mysteries And Misconceptions Of The All-Important Primer, written by Allan Jones. Mr. Jones is a bona fide expert — he served as the manager of technical publications for CCI Ammunition and Speer Bullets and Jones authored three editions of the Speer Reloading Manual.
This authoritative Shooting Times article explains the fine points of primer design and construction. Jones also reveals some little-known facts about primers and he corrects common misconceptions. Here are some highlights from the article:
Size Matters
Useful Trivia — even though Small Rifle and Small Pistol primer pockets share the same depth specification, Large Rifle and Large Pistol primers do not. The standard pocket for a Large Pistol primer is somewhat shallower than its Large Rifle counterpart, specifically, 0.008 to 0.009 inch less.
Magnum Primers
There are two ways to make a Magnum primer — either use more of the standard chemical mix to provide a longer-burning flame or change the mix to one with more aggressive burn characteristics. Prior to 1989, CCI used the first option in Magnum Rifle primers. After that, we switched to a mix optimized for spherical propellants that produced a 24% increase in flame temperature and a 16% boost in gas volume.
Foiled Again
Most component primers have a little disk of paper between the anvil and the priming mix. It is called “foil paper” not because it’s made of foil but because it replaces the true metal foil used to seal early percussion caps. The reason this little disk exists is strictly a manufacturing convenience. Wet primer pellets are smaller than the inside diameter of the cup when inserted and must be compacted to achieve their proper diameter and height. Without the foil paper, the wet mix would stick to the compaction pins and jam up the assembly process.
Primer Functionality and Primer Types Compared
This video looks at a variety of primer types from multiple manufacturers, foreign and domestic. The video explains the basics of how primers function, and then explains the key characteristics of standard primers, magnum primers, and mil-spec primers (designed for semi-auto rifles).
Father’s Day is Sunday, June 15, 2025. Many leading vendors are running Father’s Day sales and promotions. You’ll find major savings — up to 45% — on a wide selection of products. Scopes, reloading tools, dies, ammo, and reloading supplies are marked down this week. And there are deals on rifles, pistols, and shotguns.
Powder Valley Outdoors
Powder Valley Outdoors is running a major sale this week, June 10-15. There are discounts on ammo from Federal, CCI, Remington, Hornady, Barnes (and other mfgs.) with savings up to 39%. In addition, Hornady brass and reloading tools are on sale. From the Powder Valley Sale Page (left column) you can select the type of product and the manufacturer.
Palmetto State Armory
Palmetto State Armory (PSA) is running a Major Father’s Day Sale. A huge selection of products are on sale including AR uppers, AR lowers, complete rifles, handguns, scopes, ammo, triggers, magazines, and more. Shown below are four of the hundreds of sale items.
EuroOptic.com
If you need a scope, rangefinder, or a new hunting rifle, head over to EuroOptic.com this week. There are major deals on products from a dozen companies. There are great deals on optics from Sightron, Leupold, SIG Sauer, Eotech, and Meprolight with savings up to 45%. In addition, a wide range of firearms (rifles, pistols, shotguns) are discounted this week. There is also a Father’s Day Giveaway contest with the winner getting a new CZ Shadow 2 pistol valued at $1,449.00.
MidwayUSA Sales
MidwayUSA has some great items on sale as part of a Father’s Day Gearing Up Sale. In addition, there is FREE SHIPPING with orders over $99 (Code FS060325). Here are six noteworthy deals from MidwayUSA offered this week. There are hundreds of other bargains.
Brownells Specials This Week
Brownells is also running a sale this week, but not specifically for Father’s Day. There’s a large selection of products on sale right now including magazines, triggers, dies, cleaning rods, ammo, and even the popular Garmin Xero C1 chronograph. CLICK HERE to view all items on sale (2562 total as this is released).
Here’s a cool tool for your hand-loaders, particularly if you load large quantities of bulk ammo for a variety of firearms. Lyman’s handy Ammo Checkers check the diameters of reloaded rounds and factory ammo, so you can quickly confirm that your ammo fits a standard chamber. Just drop your loaded rounds in the Ammo Checker, and if the round fits into the gauge, it will fit in the gun’s chamber.
Lyman Ammo Checkers are multi-caliber — each orange block checks six or eight different cartridge types, with each caliber/cartridge name engraved on the gauge. Ammo Checkers are machined to SAAMI minimum chamber dimensions from solid blocks of 6061 T6 aluminum. Ammo Checkers are available in three versions covering most common handgun and rifle calibers:
Handgun Ammo Checker (#7833000) $32.99 on Amazon
Fits: 380 Auto, 9mm Luger, 38 Super, 40 S&W, 45 ACP, 38/357, 44 Spl/Mag, and 45 Colt
Why Use a Case Gauge?
We find that case gauges like the Lyman Ammo Checker are particularly useful for handgun reloaders using progressive presses. The chambers of many popular semi-auto pistols are partly unsupported. This allows the case to swell in the bottom quarter. The case may not be sized adequately by your sizing die, which can lead to misfeeds or malfunctions.
Additionally, if you have loaded a large quantity of ammo for a semi-auto rifle such as an AR15, it’s not a bad idea to check your cartridges before you load them into your magazines. All you need is one mis-sized round to cause a stoppage. That will ruin your day if you are competing in a Service Rifle match or 3-Gun event.
This USAMU article explores three different “Philosophies” of precision reloading. Some handloaders seek to produce ammo that yields the very tightest groups (without factoring in the wind). Other shooters load their ammo to deliver the highest safe velocity. That’s because a projectile launched at higher velocity will drift less in the wind. The theory is that even if fast ammo doesn’t produce the tightest groups in zero wind conditions, it will yield higher scores in a the real world (where the wind blows). Lastly, some handloaders favor ammo that is ultra-consistent across a wide temperature range. This last philosophy dictates selection of a powder that is temp-insensitive, even if it may not produce the very best raw accuracy (or speed).
What’s Your Handloading Philosophy?
Objectives of Reloading — Accuracy, Velocity, Temp Stability What do you, the reader, primarily value in your handloads?
Viewpoint ONE: Accuracy Trumps Everything
Some shooters prize consistent, excellent medium/long range accuracy enough that they’re willing to give up some extra velocity (and reduced wind deflection) to obtain that. Their underlying philosophy could be stated: “Superior accuracy is present for every shot, but the wind isn’t”. One’s ability to hold well, aim well and read the wind are all factors in making this type decision. The photo below shows stellar raw accuracy. This is an 0.67″, 10-shot group at 300-yards fired from a text fixture. The group measures just 0.67″. (This shows the USAMU’s 600-yard load with 75gr bullets).
Viewpoint TWO: Load to Highest Safe Velocity for Less Wind Drift
Some shooters value obtaining the highest safe velocity, even if one’s pure, consistent mechanical accuracy at medium/long range isn’t quite as brilliant. The theory here seems to be that a really good hold extracts as much mechanical accuracy from the rifle/ammo as possible, and faster bullets equal occasional “bonus” points snatched from the jaws of wind.
[For example] one of the USAMU’s many Service Rifle National Champions revealed his philosophy. It can be stated thus: a super-accurate, but [relatively] “slow” load “required him to have a Ph.D. in wind reading for every shot, while a faster, but less accurate load netted him more points.”
Note — this was not mere speculation; his score book data backed up his claims, due to less wind effects. Remember, however, this fellow has a consistent, National Championship-level hold, and other Champions on the same team would have opted differently.
Viewpoint THREE: Temperature Stability Is Key
Still another approach is to place heavy emphasis on fine accuracy with absolute stability in changing temperatures. When this writer was actively earning his Distinguished Rifleman badge, that was his goal. The reason? Sighting shots are not allowed in EIC (“Leg”) matches. The first shot out of the barrel was for score. It had to be 100% consistent, with very reliable, predictable elevation and wind deflection regardless of the ambient temperature — even if it wasn’t the lowest wind deflection possible.
Naturally, selecting a powder that is insensitive to temperature changes is a key element here. Elevation zeros and wind effects HAD to be consistent every time. Hunters and military snipers might be among those who fall into this camp, as well as those in pursuit of their Distinguished Rifleman badges.
Contrast that with a traditional High Power shooter who gets two sighter shots before each event (offhand, sitting rapid, prone rapid, prone slow fire.) If there is a zero change on any given day, he/she can correct during sighters. This writer well remembers talking with another very high-level Service Rifle competitor who was happy to have high temperatures boost the velocities of his ammunition above their usual level… As far as this SR competitor was concerned, 60-80 fps more velocity -– even if only due to high ambient temperatures -– meant less wind deflection, and he was mighty happy to have it.
Particularly in the summer, with hot daily conditions, you need to be concerned about temperature stability. Loads worked up in winter may not work in the summer time.
This article has been confined to NRA High Power Rifle competition, which has relatively generous 10-ring dimensions in relation to the accuracy of well-built competition rifles. Hopefully, it will provide food for thought. For some, this might be an opportunity to ensure that one’s load development approach helps them attain their desired results.
Precision Benchrest and F-Class shooters favor premium brass from Lapua, Norma, Peterson, or RWS. (Lake City also makes quality brass in military calibers.) Premium brass delivers better accuracy, more consistent velocities, and longer life. Shooters understand the importance of good brass, but many of us have no idea how cartridge cases are actually made. Here’s how it’s done.
The process starts with a brass disk stamped from strips of metal. Then, through a series of stages, the brass is extruded or drawn into a cylindrical shape. In the extrusion process the brass is squeezed through a die under tremendous pressure. This is repeated two or three times typically. In the more traditional “draw” process, the case is progressively stretched longer, in 3 to 5 stages, using a series of high-pressure rams forcing the brass into a form die. While extrusion may be more common today, RWS, which makes some of the most uniform brass in the world, still uses the draw process: “It starts with cup drawing after the bands have been punched out. RWS cases are drawn in three ‘stages’ and after each draw they are annealed, pickled, rinsed and subjected to further quality improvement measures. This achieves specific hardening of the brass cases and increases their resistance to extraordinary stresses.” FYI, Lapua also uses a traditional draw process to manufacture most of its cartridge brass (although Lapua employs some proprietary steps that are different from RWS’s methods).
After the cases are extruded or drawn to max length, the cases are trimmed and the neck/shoulder are formed. Then the extractor groove (on rimless cases) is formed or machined, and the primer pocket is created in the base. One way to form the primer pocket is to use a hardened steel plug called a “bunter”. In the photos below you see the stages for forming a 20mm cannon case (courtesy OldAmmo.com), along with bunters used for Lake City rifle brass. This illustrates the draw process (as opposed to extrusion). The process of draw-forming rifle brass is that same as for this 20mm shell, just on a smaller scale.
River Valley Ordnance explains: “When a case is being made, it is drawn to its final draw length, with the diameter being slightly smaller than needed. At this point in its life, the head of the draw is slightly rounded, and there are no provisions for a primer. So the final drawn cases are trimmed to length, then run into the head bunter. A punch, ground to the intended contours for the inside of the case, pushes the draw into a cylindrical die and holds it in place while another punch rams into the case from the other end, mashing the bottom flat. That secondary ram holds the headstamp bunter punch.
This video employs DEFORM-2D software to show the draw process for brass casings.
The headstamp bunter punch has a protrusion on the end to make the primer pocket, and has raised lettering around the face to form the headstamp writing. This is, of course, all a mirror image of the finished case head. Small cases, such as 5.56×45, can be headed with a single strike. Larger cases, like 7.62×51 and 50 BMG, need to be struck once to form a dent for the primer pocket, then a second strike to finish the pocket, flatten the head, and imprint the writing. This second strike works the brass to harden it so it will support the pressure of firing.”
Thanks to Guy Hildebrand, of the Cartridge Collectors’ Exchange, OldAmmo.com, for providing this 20mm Draw Set photo. Bunter photo from River Valley Ordnance.
Here’s a simple task you can do that will give your seater die a more perfect fit to your match bullets. You can lap the inside of the seater stem so that it matches the exact profile of the bullet. This spreads out the seating force over a larger area of the bullet jacket. That allows smoother, more consistent seating, without putting dents, creases, or sharp rings in your bullets.
This process is demonstrated here by our friend Erik Cortina of Team Lapua-Brux-Borden. Erik, one of the nation’s top F-Class shooters and a skilled machinist, explains: “Here I’m lapping my new seater die stem with lapping compound. I chuck up a bullet in the lathe and lap the inside of the seating stem. I put lapping compound on the bullet and also in the stem. You can do the same with a hand drill and bore paste. You can see in the piture below how much contact area the stem has on the bullet after being lapped. This bullet is a Berger 7mm 180-grain Hybrid. ”
It can be helpful but it’s not necessary to make your seating stem an exact match to a bullet, particularly if you’re loading hunting or varmint rounds. But it is helpful to do some mild internal stem polishing. This should eliminate any ring (or dent) that forms on the bullet jacket during seating.
Sharp edges on a seating stem can cause a ring to be pressed into the bullet jacket — especially with compressed loads that resist downward bullet movement.
Q2: Is there any down-side to the process?
Not really. However, if you shoot many different bullet types for a particular cartridge, you may not want to conform the stem aggressively to one particular bullet design. Lightly lap the inside of the stem to remove burrs/sharp edges but leave it at that. A light lap will prevent a ring forming when seating bullets.


 From Wes (P1ZombieKiller): “[For my first PD trip] there are so many things I was not ready for. The one thing that I did bring (that no one told me about) was a canopy. I’m glad I did. Even though the weather was [near perfect], I know that sun can humble you real fast. With my pop-up canopy, I could shoot all day without getting killed by the sun. You had to tie the canopy down real well or the wind would blow it across the pasture.
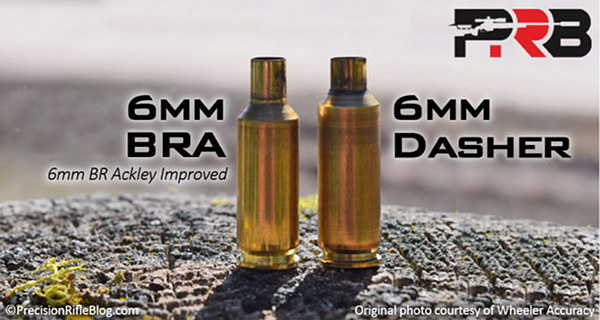


 Barrel Velocity Variance


 Precision Benchrest and F-Class shooters favor premium brass from


 The headstamp bunter punch has a protrusion on the end to make the primer pocket, and has raised lettering around the face to form the headstamp writing. This is, of course, all a mirror image of the finished case head. Small cases, such as 5.56×45, can be headed with a single strike. Larger cases, like 7.62×51 and 50 BMG, need to be struck once to form a dent for the primer pocket, then a second strike to finish the pocket, flatten the head, and imprint the writing. This second strike works the brass to harden it so it will support the pressure of firing.”


