Here’s a clever tip from Theodor Pettersen, one of our readers from Norway. Theodor writes: “I am an Norwegian shooter and reloader with 40 years of experience and practice. I would like to pass on a tip on how to improve the kinetic bullet puller (also known as an ‘impact puller’). Most of them use a 3-section collet which has three jaws held together with a rubber ring. It is very time-consuming when they pull apart, and have to be put together.
The three-piece collet can be exchanged with a shell holder that fits the cartridge from which you need to remove a bullet. The shell holder fits right into my RCBS bullet puller, and is much easier to use. I think it also will fit other makes of impact pullers.”
Thanks for the tip Theodore. We’ve tried it with a MidwayUSA-brand impact bullet puller and it works. We agree that the collets can be awkward to use, as the jaws can flip over when you’re installing the rubber retaining ring. Still, this editor normally prefers to use the collet, because it seems to be faster than a shellholder — so long as the rubber ring stays in place. The shellholder method is a good alternative though — if you’ve lost your collets or don’t have one that fits your brass.
Quick TIP: For ballistic tip bullets or bullets with tightly-pointed meplats, try putting a small wad of paper (or closed-cell foam) in the bottom of the impact puller chamber. This will cushion the bullet tip, preventing damage when the bullet drops out of the case.
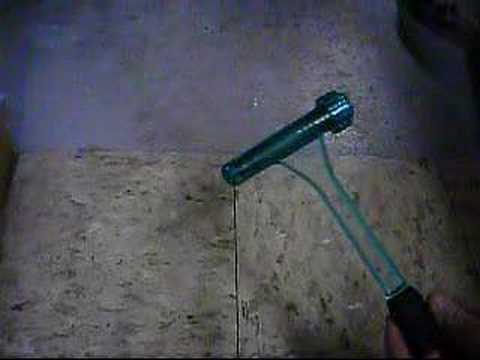
Kinetic Bullet Puller in Operation
Never used a kinetic bullet puller before? Here’s a video that shows you the proper technique. The best surface for the impact is something like a linoleum floor — very firm but not so hard that the plastic head cracks on impact. Note: In this video demo, there is no powder in the cartridge. If you are pulling bullets, powder will come out and you’ll want to have a pan to pour that into, as you recover the bullet.
Fire-forming improved cases can be time-consuming and expensive. Now with just a mallet, a Hornady hydro-forming die kit, and a little H20, you can form Dasher and other improved cartridge cases easily and safely. And you won’t consume costly bullets, powder, and primers, or use up precious barrel life.
Three or Four Whacks Produces a 95%-Formed Case
With a Hornady hydro-forming die, water pressure does the job of blowing out the shoulders of your improved case. The process is relatively simple. Place a spent primer in the bottom of a new piece of brass. Fill the case with water, and then slip it into a special Hornady shell-holder with no hole in the middle. Then you run the case up into the forming die. Now comes the fun part. You gently insert a plunger (hydraulic ram) from the top, and give it three or four stiff whacks with a mallet (or better yet, a dead-blow hammer). Remove the plunger and you have a 95% formed case, ready to load.
Forum member Walter Queen (aka Queen_Stick) acquired a Hornady Hydraulic forming die kit through our Forum Classifieds. He used this to form 6mm Dasher cases. Walter tested to see how many mallet blows would be required to form his dasher cases. Using a regular mallet, four or five blows was the magic number (with a Dead-blow hammer, one can often do the job with three strong whacks). Shown below are test cases with 1, 2, 3, 4, 5 and 10 (X) mallet strikes. Walter explained: “It helps to use a consistent yet aggressive swing with the mallet. I did a little test to show what’s happening to the case with each swing. The numbers on the cases refer to the number of swings with the mallet. The last case, with the ‘X’ on it, I actually hit it 10 times. The extra effort made no difference; anything beyond 5 swings is likely a waste of time!”
What’s the “happy face” case with the split shoulder? Well, as a test, Walter tried one older, work-hardened piece of brass. This split its shoulder on the third strike. Walter concluded: “You MUST have new brass, or freshly annealed brass. The ‘smiley case’ shows a split neck. For that case, on the third swing of the mallet the piston slammed down into the die and bottomed out [and] the water shot out of the split in the neck.”
Read More on RiflemansJournal.com
You can learn more about the hydro-forming process in a detailed article on German Salazar’s Rifleman’s Journal website. There, you’ll find more photos, and Walter provides helpful tips on how to hydro-form cases most efficiently (and with the least spilled H20). One tip is to “fill the cases with a syringe of some sort.”
Hornady supplies a shell holder made specifically for the hydro die; there’s no hole in the bottom of it. Just insert a spent primer into the primer pocket and you’re ready to go. The spent primer combined with the solid shell holder, keeps the water from seeping out of the primer pocket. The primer pushes out a little bit during this process, but it’s impossible for it to come out because of the way the shell holder is designed. The shell holder has a grove which allows the case to slide out of the shell holder even when the primer protrudes a bit.
How to Order Hydro-Forming Die Kits
Hydro-forming die kits, which include forming die, plunger, and special shell-holder can be ordered through the Hornady Custom Shop. Hornady can create a forming die kit for most popular cartridges, if you provide a die print or some full-formed sample cases. To order, contact Ben Syring at Hornady: 800-338-3220 (ext. 261) or bsyring [at] hornady.com. If you have an oddball wildcat, send Ben the specs for your chamber and three (3) pieces of fire-formed brass.
The latest Forster Products Catalog is now available. If you haven’t received a copy yet, you can download a digital PDF version, or submit a request for a print catalog.
Report from Jim Jewell: “Having read through the New Forster Catalog, I am pleased to report that it is as great a pictorial guide to important concepts and techniques for precision reloading as you are likely to find. It is best of all free!”
EURENCO, the company that currently owns and operates the Vihtavuori Oy powder plant in Finland issued a press release on March 12, 2013. In the release, EURENCO states that it is starting “to define a downsizing process that may ultimately result in stopping the production of nitrocellulose and propellant in Vihtavuori.” This sounds ominous, but understand that a plant closure in Finland won’t necessarily mean the end of Vihtavuori-brand powder (or at least alternative EURENCO powders with similar characteristics). This is because Eurenco has four (4) other modern powder production facilities. Additionally, we have confirmed that Nammo Lapua is current having “discussions” with EURENCO regarding the status of the Vihtavuori plant — but we have no more specifics about Nammo’s interest in the plant.
EURENCO Press Release about Vihtavuori Oy
In June 2012, EURENCO (France), the mother company of EURENCO Vihtavuori Oy
announced its willingness to divest from its operations in Finland, considering the deteriorated economical situation of the subsidiary and the insufficient prospects of the local defence market.
Since Patria confirmed it is not interested in buying back the Vihtavuori plant, EURENCO is now starting a co-operation negotiation to define a downsizing process that may ultimately result in stopping the production of nitrocellulose and propellant in Vihtavuori.
The detailed planning of the process will be known after negotiations with all relevant unions and with existing customers, since EURENCO has also to enter into discussions with its customers to inform about the situation and to define solutions to mitigate the consequences of this possible downsizing.
During the coming months, EURENCO will also remain open to enter into negotiation with any company interested in acquiring EURENCO Vihtavuori Oy.
Created in January 2004, EURENCO (European Energetics Corporation) is owned by
GROUPE SNPE. EURENCO has annual sales exceeding 200 Million €, more than 1000
employees, 5 modern production plants in Belgium (Clermont), Finland (Vihtavuori), France (Bergerac, Sorgues) and Sweden (Karlskoga), plus one commercial desk in Washington and one distribution company in Houston (USA). EURENCO Vihtavuori Oy has annual sales of 12 MEUR and about 120 employees.
Reloading components are in short supply right now — bullets, brass, powder, primers — you name it. But here’s some good news. Powder Valley Inc. (PVI) has received a huge shipment of Berry’s Mfg. plated bullets. PVI’s president Bryan Richardson said his company now has seven (7) tons of Berry’s bullets in stock, mostly copper-plated pistol bullets. PVI now has Berry’s bullets in all the popular pistol calibers, including: .32 (0.312), .380 (0.356), 9mm, .38/357, .40/10mm, .44 (0.429), and .45 (0.452). PVI also has some Berry’s rifle bullets in stock for: .30 carbine, 7.62×39, and 45-70.
If you own an RCBS ChargeMaster 1500 electronic powder scale/dispenser, or are thinking about purchasing one, here are a few tips that can cut your loading times and eliminate some petty annoyances.
Mute That Annoying Beep
Some ChargeMaster users complain about the loud beep at the end of each cycle. There’s a simple way to silence the beep — and you don’t have to cut any wires or permanently disable the speaker. To mute the beep, simply hold down the Zero button until “beep off” displays. Repeat this procedure to restore the beep function.
Activating the Auto-Dispense Mode
You can set the ChargeMaster to automatically dispense your pre-programmed charge as soon as you put the pan back on the scale. Simply press and hold the “Enter” button. The code “Auto” should then appear on the display. At this point, push “Disp” to dispense the first charge. When you replace the pan, the unit will automatically dispense the same charge. For some people this is an added convenience. You can always go back to the default manual dispense method by changing the dispense mode using the “Enter” button again.
Use a McDonald’s Straw to Reduce Over-Throws
Jaco Brink provided another useful tip to avoid “over-throws” (excess charge weight): “The RCBS employee advised me to take a McDonnell’s straw (because it is thicker than a normal straw), cut off about a half inch piece and put it into the tube where the powder exits. This caused the last part of an extruded powder to cluster less, and reduced the amount of overthrows dramatically.”
Instructional Video
The video below shows how to set up and calibrate a Chargemaster 1500. Be sure to level the unit carefully, both left to right and front to back. Starting at the 1:44 mark in the video you can see the unit dispense a 50-grain charge in 30 seconds. The slow, final trickle stage takes about half of the total time.
How to Shorten Dispensing Times
The last tip is for advanced users only. You can alter the programming settings to speed up powder dispensing dramatically. One user reported that, by re-programming his machine, his cut his dispensing time for a 30-grain load from 22 to 13 seconds “with no overthrows”. WARNING: once you change the parameters, there is no “restore” command to set everything back to the defaults. So proceed carefully. The speed enhancement procedure is described on the pages linked below:
There is a new player in the field of elite die-makers: Whidden Gunworks. John Whidden’s Georgia-based company is producing outstanding full-length sizing dies and micrometer-top seater dies for 7/8-14 thread presses. The dies look great, work great, and produce very straight and accurate ammo. The Whidden dies are finished beautifully inside and out. They are priced competitively and they are available for popular “extreme accuracy” cartridges such as the 6PPC, 6mmBR, 6mmBRX, 6 Dasher, 6XC, 6.5×47, .260 Rem, .284 Win, and .308 Win (and more). If you are looking for a die set for your new precision rifle, you should definitely check out the Whidden dies. Two-die set, FL Sizer and Micrometer-top Seater, costs $184.99. Sizer die alone is $74.99, while Seater die alone is $109.99.
Many of our Forum members have started using Whidden dies — and they are reporting very positive results. I personally own and use a set of Whidden dies, and I am very, very impressed with them. Here’s my report:
Editor’s Report on Whidden Dies I have a set of Whidden Gunworks dies for my personal 6BRDX (a chambering similar to 6 Dasher but with longer neck). The dies are excellent and they produce very straight ammo. My loaded rounds (made with a Whidden bushing-type FL sizer and Whidden micrometer-top seater) are showing less than .0015″ run-out measured on the bullet, with the majority closer to .001″ run-out. (This is with Lapua Scenar L bullets, which have great jacket uniformity and concentricity.)
One thing I immediately noticed about the Whidden seater die is that there is a very close correspondence between the seater “hash marks” and true changes in seating depth. By this I mean when you dial a value change of 10 on the micrometer scale, you get very close to a .010″ change in seating depth. It is not perfect, but it is definitely more precise than most other micrometer-top seater dies I’ve used (both hand dies and 7/8-14 thread screw-in types).
Cartridges loaded with my Whidden sizer and seater dies have proved very accurate. My 6BRDX is shooting in the mid-ones for five shots at 100 yards. I also have a micrometer-top Wilson inline seater die that was custom-bored with my chamber reamer. As far as I can tell, the ammo loaded with the screw-in Whidden seater is every bit as accurate as rounds loaded with the Wilson die using an arbor press. Additionally, with the Whidden micrometer die, I can hold extremely tight tolerances on base-to-bullet-ogive lengths.
In the past, with my 6mmBR, I favored an inline die because I thought it offered better control over seating depth. But given how well the Whidden seater works, I’m not sure I’d gain anything with my Wilson hand die. At least when used with a quality Harrell’s benchrest press, the Whidden seater gives up little or nothing to the hand die, and that’s big news in my experience.
You will like the look and feel of these Whidden dies. The finish inside and out is very, very good — the dies have a quality feel and run very smoothly. Both the sizer and seater have a fluted section — this offers a better “grip” when you’re screwing in the dies. The outside of the seater has a smooth, gloss-anodized finish — it exudes quality. The markings on the seater’s micrometer ring are crisp and very legible, with large, high-contrast white-on-black lines and numbers.
One other very cool feature of the Whidden sizing dies is that custom-sized tapered expanders will soon be offered. Whidden plans to offer expanders in .0005″ (one-half thousandth) increments. This is great if you have, say, a .265 bushing and a .266 bushing but you want just a little less neck tension than the .265 offers. With the tapered expander, I can use a 0.265 bushing followed by an 0.2655 expander — allowing more precise control of neck “grip”.
Whidden Die Features
Die Dimensions well-matched to PT&G reamers used for match chambers.
Sizing dies spec’d for easy chambering and extraction without overworking brass.
All sizers include shoulder datum collar to measure shoulder “bump” and headspace.
Neck bushing or no-neck bushing configurations.
Bushing dies use standard Redding/Wilson type bushings.
Neck diameter of non-bushing FL sizers can be set to customer specification.
Extended threads on short cartridge sizer dies such as BRs.
Coming soon: custom expander balls (in half-thousandth increments) to adjust neck tension and provide minimum working of the case neck.
Seater: Floating sleeve on micrometer seater enhances concentricity of loaded rounds.
Seater: Large, high-contrast markings for easy adjustment.
Custom Dies for Wildcats or Your Cartridge
Custom-made for your wildcat or standard cartridge.
Can work from fired brass or a chamber drawing to match your chamber exactly.
Neck-bushing die, or no-bushing die with neck diameter bored to customer specification.
Available Die Sets
Here is the current caliber list. Micrometer seaters are available in all calibers listed below except 22BR and 22 BRX.
John Whidden Talks about Sizers, Seaters, and Expanders
There are two sides to our die business. First we are stocking dies in many calibers that are of interest to those who visit this website (such as the 6PPC, 6mm Dasher, 6.5×47 Lapua, .260 Rem, 7mm Shehane, .308 Winchester). These dies are a good fit to the “match chamber” reamers and very few people with these calibers should have to have “Pure Custom” dies made. We have both sizers and micrometer-top seaters ready to go for the many cartridge types listed above. The sizer dies will include a shoulder datum collar that makes it easy to measure shoulder “bump” during the full-length sizing process. This is important to control headspace precisely.
On the “Pure Custom” side, we have a huge amount of flexibility. We can make one-of-a-kind sizers and seaters for wildcats in a short period of time and at an excellent price. We can work with the customer to make full-length sizers, neck sizers, shoulder bump dies, small base dies, or most anything else they can need. We can of course provide micrometer-top seaters for these cartridges as well. We can make non-bushing sizers with specific neck inside diameters tailored to customer specifications.
We will also be offering custom-sized expanders. These expanders will fit our dies as well as Redding dies. Our tapered expanders will be available in .0005” (one-half thousandth) increments for the common calibers. In our shop we have had excellent results using expanders in the dies as long as the expanders provided the correct amount of neck tension and didn’t overwork the brass. Expanders have gotten a bad reputation in recent years but we find them to be excellent tools when the same precision is applied to their use that careful handloaders apply to the rest of their process. Expanders can be most valuable for those who choose not to neck-turn their brass (because the expander pushes neckwall variations to the outside).
One last thing — many gunsmiths with their own wildcats (or “specialty” chambers) have asked us to provide dies for their customers. We gladly do batches of custom dies and encourage gunsmiths to contact us. — John Whidden
Jeffrey Block has created a great new FREE software program, OnTarget, that measures shot groups quickly and precisely. All you need is a photo or scan of your target. The program allows you to set your target distance, and provides caliber-specific tools to precisely mark the center of each shot. Once you’ve marked each bullet hole, Jeff’s OnTarget program automatically calculates group center, maximum group spread (CTC), average distance to center, group width and height, and group offset from point of aim. The program will even measure multiple groups on the same target.
After just a few minutes spent learning the program’s tool buttons, we were able to plot shot groups on a variety of targets with ease. Once you select the target distance and bullet diameter, figuring group size is a simple matter of centering a circle tool over each bullet hole. Then the program “connects the dots” and provides all the info you could want automatically.
The program worked with bullet holes as small as 17 caliber and as large as 50 caliber. It is very precise, but remember that if your target photo was taken at an angle, distorted perspective can cause slight errors in measurement. Therefore, for the ultimate precision, you want to start with a flat scan of the target.
OnTarget Compared to Measuring Manually
We found OnTarget to be especially useful for groups with widely dispersed bullet holes, or very small bullet holes, such as 17 caliber holes. We’ve found that it’s difficult to measure 17-cal group sizes with a standard caliper, because the tool itself obscures the tiny holes. With OnTarget, the program can zoom up your target view, making it much easier to plot the center of each shot. And with a widely dispersed group of shots, the program automatically finds the two most distant shots. You can’t mistakenly pick the wrong pair of shots to measure.
Flash Tutorial Shows How It Works
Jeff created an excellent animated Animated Tutorial demonstrating OnTarget’s functions. It shows how to import a target image or scan, how to set target distance and scale, how to set bullet size and circle each bullet hole, and how to save the marked and measured target. VIEW OnTarget TUTORIAL
MEASURING REAL TARGETS — Actual Examples
Here are examples we created with OnTarget. The first photo shows a 17 Mach 2 target. These tiny 17-cal holes are notoriously hard to measure. With OnTarget, it’s a snap. You just load the target image into the program, zoom in with the controls, and then click on the center of the holes. The program automatically calculates group size, displaying measurements in both inches and minutes of angle (MOA)
Original Target (with ruler for scale)
Target Captured and Displayed in Program
Detail of Group, Enlarged by Program
10-shot Groups? — No Problem
Here’s another target, showing 6mm bullet holes at 600 yards. The first image shows the target image loaded into the program with the ten holes circled in red.
Target Displayed in Program
For this target we have used the Aiming Point option. The Aim Point was set at the center of the “X” and the program calculates average distance from the Aim Point. Very cool.
Detail of 10-Shot Group, Enlarged by Program
No Scanner Needed
The OnTarget program grabs target scans directly from a flatbed scanner using Microsoft’s Windows Image Acquisition system. But don’t worry if you don’t have a scanner. You can just take a digital photo of your target and OnTarget will import it quickly and easily. To set target scale, a simple tool allows you to mark a known length on the target (such as the diameter of the “X” Ring), and the program will then size the target accordingly. Is OnTarget precise and accurate? Here’s what Forum Member Steve W. says: “I used the extreme spread measurement of a group on one of my 600-yard match targets… as it was officially scored at the match. By clicking the +—+ icon, then clicked the cursor in the centers of the two extreme spread holes, I then entered that value in the reference window. After that it was simple because the bullet placement cursor’s circle was the same size as the black outline of the actual bullet holes on the picture of the target. OnTarget’s measurement came up within .006″ of the official 2.772 inch measurement of the group. That’s pretty darned close; well inside the human judgment of aligning the tips of a micrometer on the bullet holes.”
Bottom Line — Great Program — Download It Today
Jeffrey Block has done a great service for shooters by creating the FREE OnTarget program. It is easy to learn, it functions great, and it can save you time and effort measuring targets. It also lets you easily archive and compare multiple targets produced during load development or rifle testing. You can record ammo type, date, location, weather etc. in note fields accessed by “Group Info” and “Target Info” tabs.
Keep in mind that OnTarget was NOT created to replace existing methods for scoring competition targets. But for all other target measuring purposes it does a great job. Visit Jeff’s website, OnTargetShooting.com, view the tutorial, and check out OnTarget for yourselves.
To learn more about OnTarget, see more measuring samples, and read advanced Power-User Tips, visit our full OnTarget Product Review.
At SHOT Show we checked out a versatile and well-designed new tool from Forster Products — the new Datum Dial Ammunition Measurement System. This handy device measures a variety of important dimensions: 1) cartridge headspace from base of case to shoulder datum; 2) cartridge length from base of case to bullet ogive; 3) bullet base to bullet ogive; and 4) bullet bearing surface (requires two tools).
The complete Datum Dial Kit consists of a dial-holder mount and three precision machined dials. The mount clamps to your sliding-jaw calipers. The mount holds a black ring or one of two supplied gold rings. The black ring has 5 precision-diameter holes that let you check headspace (on shoulder datum) for nearly all modern cartridge types.
Swap in one of two available gold rings to measure to bullet ogive index points. The two gold dials (five holes each) give you 10 different bullet diameter choices, covering the vast majority of common pistol and rifle bullet sizes. This lets you measure both base of bullet to ogive and base of cartridge case to bullet ogive. We really like this dual functionality, as it allows you to quickly sort bullets, plus you can measure your loaded rounds as they come out of the seating die. I have found that accuracy is enhanced when you maintain close base-to-ogive tolerances on your loaded rounds.
Watch Video to See Datum Dial Features and Functions
Replace a Bin Full of Comparator Inserts
It is important to understand that the Datum Dial system replaces a comparator body and a complete set of caliber-specific comparator inserts. You no longer need a box full of inserts, with one for each caliber that you load. The Datum Dial Complete Kit includes: One dial-holder mount (which clamps on your calipers), one black headspace dial, two (2) gold bullet diameter dials, and a plastic storage box. The Datum Dial Kit is available right now. MSRP is $157.00, and “street price” should be $20 or so lower. Additional dials or caliper jaw mounts are sold separately.
RCBS has a new made-in-USA single-stage reloading press. With its innovative “moving die/static cartridge” design, the new RCBS Summit Press definitely demonstrates “out of the box” thinking. Unlike other presses, the case does not move. Rather, the reloading die comes down to the case. With the press bolted on your reloading bench, all operations of the Summit take place ABOVE the bench-top.
The new Summit Press features a rugged cast-iron frame with all-steel linkages. The press is very strong with minimal flex and slop in use. This allows you to “bump” your case shoulders and seat bullets with great precision and repeatability. The handle can be switched from right to left side (good for southpaws), and the open-front design provides good access, facilitating quick die changes. The 4.5-inch opening allows you to work with tall cases. Beneath the shell-holder is a spent primer catcher.
The new Summit press has a beefy 2-inch diameter ram, with compound linkages for plenty of leverage. A zerk fitting is included for easy lubrication. The press will accept larger bushings for oversize 1-inch dies.
Summit Press for $207.94
The new Summit Press (RCBS item #09290) lists for $269.95. However, Midsouth Shooters Supply offers the Summit Press for $207.94. An optional short handle costs $15.27 at Midsouth ($19.95 MSRP).
RCBS Summit Press Features:
• Bench-top operation
• Massive 2-inch diameter ram
• Ambidextrous handle
• Compound leverage
• 4.50-inch operating window
• Spent primer catcher
• Full frontal access
• Accepts bushings for 1″ die bodies
• Press adapter bushing
• Zerk lubrication fitting
• Made in USA
Product tip by EdLongrange. We welcome reader submissions.




 The latest Forster Products Catalog is now available. If you haven’t received a copy yet, you can download a digital PDF version, or submit a request for a print catalog.
 EURENCO, the company that currently owns and operates the Vihtavuori Oy powder plant in Finland issued a press release on March 12, 2013. In the release, EURENCO states that it is starting “to define a downsizing process that may ultimately result in stopping the production of nitrocellulose and propellant in Vihtavuori.” This sounds ominous, but understand that a plant closure in Finland won’t necessarily mean the end of Vihtavuori-brand powder (or at least alternative EURENCO powders with similar characteristics). This is because Eurenco has four (4) other modern powder production facilities. Additionally, we have confirmed that Nammo Lapua is current having “discussions” with EURENCO regarding the status of the Vihtavuori plant — but we have no more specifics about Nammo’s interest in the plant.
 If you own an RCBS ChargeMaster 1500 electronic powder scale/dispenser, or are thinking about purchasing one, here are a few tips that can cut your loading times and eliminate some petty annoyances.
 I have a set of Whidden Gunworks dies for my personal 6BRDX (a chambering similar to 6 Dasher but with longer neck). The dies are excellent and they produce very straight ammo. My loaded rounds (made with a Whidden bushing-type FL sizer and Whidden micrometer-top seater) are showing less than .0015″ run-out measured on the bullet, with the majority closer to .001″ run-out. (This is with Lapua Scenar L bullets, which have great jacket uniformity and concentricity.)


 Available Die Sets
 There are two sides to our die business. First we are stocking dies in many calibers that are of interest to those who visit this website (such as the 6PPC, 6mm Dasher, 6.5×47 Lapua, .260 Rem, 7mm Shehane, .308 Winchester). These dies are a good fit to the “match chamber” reamers and very few people with these calibers should have to have “Pure Custom” dies made. We have both sizers and micrometer-top seaters ready to go for the many cartridge types listed above. The sizer dies will include a shoulder datum collar that makes it easy to measure shoulder “bump” during the full-length sizing process. This is important to control headspace precisely.
 After just a few minutes spent learning the program’s tool buttons, we were able to plot shot groups on a variety of targets with ease. Once you select the target distance and bullet diameter, figuring group size is a simple matter of centering a circle tool over each bullet hole. Then the program “connects the dots” and provides all the info you could want automatically.


 The complete Datum Dial Kit consists of a dial-holder mount and three precision machined dials. The mount clamps to your sliding-jaw calipers. The mount holds a black ring or one of two supplied gold rings. The black ring has 5 precision-diameter holes that let you check headspace (on shoulder datum) for nearly all modern cartridge types.

 RCBS Summit Press Features:


