The Making of MatchKings — How Sierra Produces SMKs
All Sierra bullets begin life as a strip of gilding metal, an alloy consisting of 95% copper and 5% zinc. To meet Sierra’s strict quality requirements, the gilding metal requires three times more dimensional and quality control standards than is considered standard in the copper manufacturing industry.
A blanking press stamps out a uniform disc and forms the cup that will be drawn into the MatchKing jacket. The cup is then polished and sent to a draw press to be drawn into a jacket that is longer than needed for the future MatchKing, thus allowing for the trim process. Press operators constantly check concentricity to ensures jacket quality. The jackets then go to a trimmer where they are visually inspected again.
After being polished a second time, the jacket travels to the bullet press. In the meantime, 80-pound lead billets are being extruded into lead wire for the cores where great care is taken so that the core wire is not stretched. The core wire is lightly oiled before continuing to the bullet press to be swaged.
The lead core wire and trimmed jacket meet at the bullet press where the first stage forms a boattail on the jacket. The lead core is then formed on top of the bullet press and fed down into the jacket. In one stroke of the press, the MatchKing is formed.
Quality control technicians pull samples from each lot of MatchKings to make sure they meet Sierra’s stringent standards. Samples are then sent to Sierra’s 300-meter underground test range (shown below) to be shot for accuracy on mechanical mounts referred to as “unrestricted return to battery rests” that Sierra designed and built in-house.
After inspection, the bullets are placed in the familiar green box along with reloading labels. They are then shrink-wrapped and shipped all over the world.
Some years ago, the folks at TargetWorkz published a a handy set of plans for a 48-inch tall self-supporting target stand. This makes a great do-it-yourself project. To create a sturdy, self-supporting target frame, all you need are some 2x4s, 1x2x48 furring strips, plus fasteners. The target holder, which supports an 18×24 inch cardboard target backer, separates from the base for easy transport.
Note: There is no cross-piece shown in the plan, but we do recommend putting wood crosspieces at the top of the target stand and about 18″ up from the bottom. This will make the frame more rigid, and will allow the frame to work even if the cardboard is badly “shot up”. Use a T-square to set the crosspieces before attaching them with screws.
Alternative Target Stand May from ABS or PVC Pipe
If you like this kind of project, but want to build a frame that is taller, yet can break down into sections, we also have an article showing you how to build a nice frame with inexpensive ABS or PVC tubing. VIEW ABS/PVC Tubing Target Frame Plans.
Are you seeing unpredictable changes in Point of Impact on your target? Think you may have a scope issue? Well maybe not — when was the last time you checked your BARREL?
Yes scopes do fail, and scope bases/rings do get loose. But sometimes problems with erratic POI shifts are caused by a LOOSE BARREL. This issue came up a while back in our Shooter’s Forum. One member complained that his zero was shifting from day to day — by as much as two inches at 100 yards. He was convinced he had a scope problem, based on erratic POI:
“I think my scope loses 1 to 3 MOA per day. When I shot my rifle Monday it was dead on. On Tuesday it was 1″ low. Then on Wednesday it was 1 or 2″ lower. I don’t get it. — the elevation knob never touched. Scope will track and return to zero that day perfect. Yes EVERYTHING has been checked, nothing loose. What is the chance the erector tube spring has gone south? For the record this is a Vortex GE. Never had a bad scope, but this has me wondering”. — LB
On Forum member told LB to send the scope right back to the manufacturer. Two other members suggested mounting the scope on a different rifle to test. Good advice. That’s generally a smart strategy before you conclude a scope has gone bad…
Could Problem Be the Scope Base?
Two Forum members, ExPiper and Dickn52, suggested checking the scope base, recounting their past experiences with troublesome bases. This was intelligent — anyone with a POI problem should check all the optics attachments:
“Went crazy one day chasing my impacts on a 100-yard target. Shots would group fine for three then go nuts for 4-5. I cranked and un-cranked for about an hour. Then I reached up and the base wobbled on the rifle. Removed scope, tightened base screws and back in business.” — Dickn52
“Years ago I had a problem [where] shots were climbing with almost every shot. I was blaming the scope. However, when removing the scope I noticed that the 20 MOA base was cracked and getting wider with every shot. Needless to say I replaced the base and the problem was solved. — ExPiper
Eureka Moment — The problem was the BARREL, not the Scope
There were many helpful suggestions, but member PirateAmmo steered LB to the real problem — a loose BARREL: “We had a problem on a home-built AR-platform rifle once, barrel was loose a tad…”
Member Snert chimed in: “Yep — I had a PPC that suddenly went 19″ low. Picked up gun off bench by barrel and felt a wiggle. I tightened the barrel and the POI went 19 inches up”.
Problem Solved — Barrel Tightened up and POI Back to Normal
The gentleman with the POI problem took the advice of PirateAmmo and checked his barrel. BINGO! Low and behold, the barrel WAS loose.
LB posted: “Barrel loose by about 2%, checked it twice before and didn’t find it the first two times”.
After LB re-tightened his barrel, his rifle started shooting normally again. No more shooting low by 1-2 inches. Problem solved. The fix didn’t cost a penny and now LB doesn’t have to send a perfectly good optic back to the manufacturer.
Lesson learned? Check ALL the variables before you assume a scope has gone bad. Along with the barrel, also check your action screw tension, and of course the scope base and rings.
Need a top-notch Ballistics App for your iPhone or iPad? Start with Ballistic: Advanced Edition (AE), the number 1 (i.e. most installed) App for iOS systems (iPhones and iPads). Ballistics AE (Advanced Edition) is the most popular iOS ballistics program for many good reasons. It offers a full feature set with Ballistic Solver, Ballistic Comparison (with up to 8 projectiles), Target Log (records group sizes), Advanced WindKit, and more. The Ballistic: Advanced Edition software is easy to use, with nice controls. Underneath it all is the proven JBM Ballistics calculator. And here’s the kicker — this excellent mobile App software is now FREE to download and install on iPhones and iPads!
This Video Explains How to Set Up and Use Ballistic: Advanced Edition
Full-featured and easy to use, Ballistics AE has been refined over many years, and it supplies rock-solid solutions derived from JBM Ballistics solver (created by James B. Millard). Unlike some other Apps, Ballistics AE is STABLE on iPhones (with various OS levels). What’s cool is that Ballistics AE is now available for FREE for both iPhones and iPads. This software is now provided by Federal Premium Ammunition, with in-App purchase functionality.
We’ve used the Ballistic: Advanced Edition program on an iPhone 5S, iPhone 6, and iPad, and it performed well. Here are some of the features we liked:
1. Mirrors output from online version of JBM Ballistics we often use for initial calculations.
2. Controls are simple to use and (mostly) intuitive.
3. Handy comparison feature lets you compare ballistics for different projectiles side by side.
4. Advanced Wind Kit allows you to account for complex wind situations.
5. Projectile and BC Databases are very comprehensive.
6. Software is regularly updated to match Apple OS changes.
This article is Copyright 2025 AccurateShooter.com. No republication is authorized. Any appearance of this story on another site obliges that site to pay liquidated damages and/or licensing fees.
Forum member Jacob spotted this simple, but effective set of scope ring inserts on the Brownells Website. With these inserts, you can use a scope with 1″-diameter main tube in 30mm rings. Non-marring, matte black Delrin sleeves surround the scope tube so it can fit larger-diameter rings. Each sleeve comes in two parts for easy installation around your scope tube. This way you can use the same 30mm rings for all your scopes.
Ring Reducers are sold as front/rear kits. Cost is $16.99 for the Delrin 30mm to 1″ converters, item 084-000-091WB. There are also sets that reduce 30mm rings to 26mm, and 1″ rings to 3/4″ or 7/8″.
Note: These Brownells units simply function as plastic bushings. Unlike Burris Signature Ring inserts, they do not allow you to “pre-load” windage or elevation. If your rings are misaligned, the Brownells Ring Reducers won’t correct that problem.
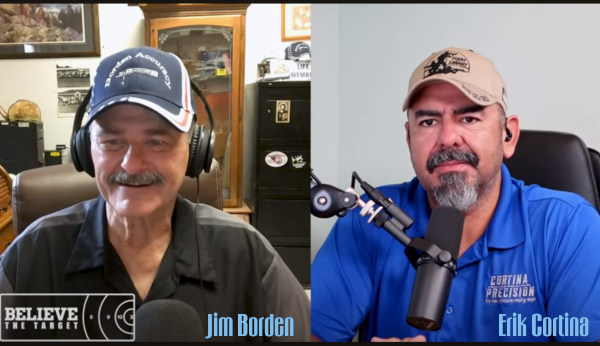
Every wondered how modern rifle actions are designed and crafted? Want to know the fine details of firing pin function and bolt lock-up? Then you should definitely watch this highly informative YouTube video. Top F-Class shooter Erik Cortina of Cortina Precision interviews Jim Borden, an engineer whose Borden Accuracy company produces some of the best rifle actions ever made. This is one of the better Erik Cortina video interviews. You’ll learn quite a bit from watching the video. The full video runs over two hours, so you may want to watch in segments over a couple of days.
Viewers have praised this interview, saying it has a wealth of information:
Gunsmith Alex Wheeler observed: “I consider Jim a friend even though we have never met. Definitely one of the guys that really gets actions. There’s not as many of them as you would think. He was the first timed action out there that had good ignition, at least in my opinion. It was a great interview. I do hope he has him on again.”
“Agreed. Jim is full of information and really does a good job on his actions. This [Cortina] interview with Jim Borden was excellent.” — Jud96
“I really like Jim’s explanations on why ductility is so important in an action. Especially in the critical areas that basically form 90 degree surfaces, such as where bolt lugs meet the bolt body. There is a lot of great info in this interview.” — Jackie Schmidt
“I have enjoyed all of Erik’s interview videos, which are very informative. But I agree [that] this interview with Jim Borden is the best. I learned a lot. Thank you Erik and Jim!” — Alexander-M
About Jim Borden and Borden Accuracy
Jim began shooting high power silhouette and benchrest matches in the mid 1970s while working for a Fortune 500 company as an engineer. In the early 1980s he began building rifles for himself and then for others. Jim has a background as a gunsmith, machinist, registered mechanical engineer, engineering instructor, project manager, hunter, and benchrest competitor.
In benchrest competition Jim has set ten world records and won 11 National Championships thereby earning induction into the Benchrest Hall of Fame. Jim also served six terms as President of the International Benchrest Shooters (IBS).
Jim operates Borden Rifles/Borden Accuracy with his wife Joan, sons Jim Junior and John, daughter Andrea Mecca and son-in-law John (Mike) Mecca. Jim is also an outstanding photographer. Below is a stunning eagle image photographed by Jim Borden.
Borden Accuracy — A Success Story
Borden Accuracy/Borden Rifles has been a source for precision benchrest and hunting rifles for many years. Jim started doing his own gunsmithing while competing in benchrest and High Power silhouette matches. Jim launched his business in 1987, working nights and weekends while still employed at P&G. The business became full-time in 1995 with Jim and his wife Joan doing the work. The business was expanded in 1999 with the construction of the new Springville, PA facility and the addition of sons Jim Jr. and John to the staff. Daughter Andrea Mecca joined the staff in May 2016 as machinist and machine operator and Son-in-law John Mecca came onboard in January 2000.
Jim and company began making Rimrock benchrest and Rimrock hunting actions in 2001. They added Borden Alpine and Timberline actions in 2006. These actions are made in an advanced manufacturing facility which has three CNC vertical machining centers, 1 CNC lathe and 2 CNC turning centers, three manual lathes, a manual knee mill, a surface grinder, a cylindrical grinder and wire EDM machine. To learn more, visit BordenRifles.com, call 570-965-2505, or send email to info [at] bordenrifles.com.
Sherri Jo Gallagher, the second woman in history to win the NRA High Power National Championship, sports Eye Protection at Camp Perry. The first lady High Power Champion was Sherri’s mother, Nancy Tompkins.
In response to a Bulletin article about Protective Eyewear, one of our Canadian readers posted a personal story. His account demonstrates the importance of wearing eye protection whenever you shoot — no matter what type of firearm you are using — even air rifles. We hope all our readers take this to heart. All too often at rifle matches we see shooters, even some top competitors, risking their vision by failing to wear eye protection.
Eye and Hearing Protection are now MANDATORY for Highpower Rifle competitors and Pistol shooters in all CMP-affiliated matches. The 2020 CMP Highpower Rifle, Pistol, and CMP Games Rulebooks all contain the following rule: “All competitors and competition officials are required to wear appropriate eye and hearing protection when on shooting range firing lines during highpower rifle or pistol firing. All competitors must comply with this requirement before they can participate in a CMP sponsored or sanctioned competition. Competitors are responsible for selecting their eyewear and hearing protection.”
Eye Protection — Lesson Learned by Nicholas from Canada
As a boy on a mixed farm on the plains the first shooting stick I owned was a Red Ryder BB gun. My Dad bought it for me as I showed a keen interest in the shooting and hunting sports. I was about 9 years old at the time.
We had literally thousands of sparrows in our large farm yard and they liked to roost on the steel railings in the barn loft. I took to slowly thinning out their ranks by flashlight at night as these little winged pests settled in the farm buildings.
One evening as I slayed sparrow after sparrow in the barn loft — with about a dozen farm cats following me to consume these easy meals, I fired at another bird centered in my flashlight beam.
However, my aim was a bit low — and the copper pellet hit the steel beam square on. Instantly I felt a sharp pain as the BB bounced back and hit me squarely between the eyes on the bridge of my nose – drawing blood from the partial penetration into the skin. A half inch either way and I’d have lost an eye!
Never, never, never shoot at any target with a steel background with any firearm, even a BB gun – is the hard lesson I learned, and wear the best shooting glasses that money can buy!
PLEASE REMEMBER THAT!!
Editor’s Comment: Among competitive pistol shooters, the use of safety eyewear is universal. You’ll never see Rob Leatham, Julie Golob, or Jerry Miculek competing without eye protection — for good reason. The handgun sports’ governing bodies effectively enforce mandatory eye protection policies. We wish the same could be said for competitive rifle shooting. We often see benchrest, High Power, and F-Class competitors shooting without eye protection. We’ve heard all the excuses, yet none of them trump the safety considerations involved.
We recommend that all shooters and hunters employ eye protection whenever they use firearms or are at a location where live fire is taking place. You only have two eyes. A tiny bullet fragment or ricochet is all it takes to cause permanent blindness in one or both eyes. As rifle shooters, we place our eyes a couple inches away from a combustion chamber operating at pressures up to 70,000 psi. I know quite a few guys who will religiously put on safety glasses when running a lathe or a drill press, yet the same guys won’t use eye protection when shooting their rifles — simply because it is “inconvenient”. That’s nuts. It doesn’t matter is you are a cub scout or a multi-time National Champion — you should wear eye protection.
I will give you a personal example. A year ago I was shooting a 9mm pistol. One of the cartridges had a primer burst outward blowing small particles, some brass, and a piece of the pistol’s extractor right back into my eyes. Thankfully I was wearing good wrap-around safety glasses. No injuries at all. But without those safety glasses, this could have been very serious. I always wear safety glasses with ALL firearms. Shown below is the same kind of primer blow-out I experienced, but with a .270 Win rifle cartridge.
Be wise — protect your eyes. To learn more about eyewear safety standards, and to learn about the latest options in ANSI Z87-certified protective eyewear, read our article on Eye Protection for Shooters.
Setting optimal bullet seating depth is very important for maximum accuracy. While some cartridges and barrels may deliver good accuracy with a wide range of bullet seating depths, other barrels may be more fussy, and may strongly prefer a specific seating depth, such as .006″ in the lands or .020″ off. To get this kind of precision, you need to know the exact position of the lands in your barrel. In addition, because barrel throats tend to move as the round count goes up, you should check the position of the lands regularly on a competition rifle.
Today’s Saturday Videos demonstrate a number of methods for finding Length to Lands in your rifle barrel. We start with the most common method — using the Hornady O.A.L. Gauge with a threaded modified case. With some practice, and a refined touch, this is actually very accurate. After this, we offer videos that have alternative methods, each with its pros and cons. You should find a method that works for you, that can achieve results within a couple thousandths for multiple measurements.
Finding Cartridge Length to Lands with O.A.L. Gauge
Probably the most common method to find length to lands is using a Hornady O.A.L. Gauge Tool with a comparator on a set of calipers. We regularly use this method with a custom modified case for our 6mmBR rifle. Using the technique described below, we can get results within .0015″ or so three out of four times. We do recommend taking multiple measurements. As explained below, be consistent and do NOT push the gray plastic rod too fast or with too much force.
During this measurement process, the modified case, with a bullet in its neck, is inserted in the chamber. Go slow, take your time. Here are FIVE TIPS that will help you get repeatable and reliable length-to-lands measurements with the Hornady O.A.L. Gauge:
1. Start with a clean chamber and clean barrel throat.
2. Make sure the modified case is fully screwed down and seated on the O.A.L. Gauge. It can sometimes unscrew a bit during repeated measurements.
3. Insert the modified case slowly and gently, but ensure the shoulder of the modified case is fully seated on the end of the chamber.
4. Push the gray plastic rod GENTLY. It is common for the bullet to be tilted a bit. You want to allow the bullet to self-center in the throat BEFORE you apply much pressure. Then tap a couple times and push until you feel resistance. Do NOT push too hard — that will jam the bullet in the lands.
5. Repeat the measurement at least 3 more times. If you follow our instructions, you should, typically, get a repeatable measurement, within 0.0015″ or so, 3 out of 4 times.
NOTE: We’ve seen some folks struggle to get repeatable measurements with this tool. In most cases, they were going too fast and pushing too hard on the gray rod, creating a hard jam.
Brownells — Using Hornady O.A.L. Gauge with Modified Case
This Brownells video shows how to use the modified (threaded) case for the cartridge your rifle shoots. Attach it to the O.A.L. Gauge, then insert a bullet into the case neck and slide the tool into the chamber. It takes a little practice to get consistent results. After getting the measurement in the barrel, you ascertain the length to lands using a Hornady Bullet Comparator attached to your calipers.
Making Your Own Modified Case — Threading the Case End
This helpful video from our friend Gavin Gear of UltimateReloader.com shows how to create a custom modified case to use with a Hornady O.A.L. Gauge. You need to drill out the primer pocket area, then tap and thread the bottom of the case.
Ultimate Reloader Shows 3 Ways to Find the Lands
This video shows three different ways to measure distance to lands. First Gavin Gear shows how to use a Hornady O.A.L. Gauge with Modified Case. The second methods shows how to use a bit of Loctite INSIDE the neck to secure a bullet. Be sure there is NO Loctite on the outside of the neck — you don’t want that in your chamber! You place the case with bullet into the chamber, then close bolt to seat the bullet. After waiting 5-10 minutes for the Loctite to set, you remove the cartridge gently. The third method (time-mark 16:50) is a Jam method using a bolt with the firing pin assembly and ejector removed (so there is no extra pressure on the case). Gavin notes: “The bullet ogive can be colored with a permanent marker if you want to indicate lands contact.”
About this third Jam method, ace F-Class shooter Erik Cortina posted: “My method is actually the last one that Travis showed. The one where you let the lands push bullet in. But it is neck tension dependent. I also put die wax in bullet ogive to prevent it from sticking in the lands. The method of seating bullet deeper and deeper until bolt closes is the Alex Wheeler method. As you said, there are a tons of ways to measure this.”
Finding Length to Lands the Speedy Way
Here is another method to find length to lands that can work with an unmounted barrel. This method is explained by Thomas “Speedy” Gonzales, a top gunsmith and ace benchrest shooter. Speedy drops a case with bullet seated into the chamber and then adjusts the seating depth with an inline seating die until there is no sticking or resistance felt. He can then adjust the true length to lands easily with his micrometer seating die. If you don’t have a modified case and do not want to partially disassemble your bolt to take measurement, you might want to use Speedy’s method.
Finding Length to Lands Using Bolt Movement — Primal Rights
This video shows how to remove the firing pin assembly in your bolt. This way the bolt can be used to advance a case with bullet smoothly into the chamber. Then the bullet seated in the case neck will move back to “first touch” contact position. Then extract the case slowly and measure.
The video host states: “Overall length gauges and modified cases tend to be close, but never as precise as we would like them to be. Here we describe how to measure the length to your lands in your rifle as precisely as possible, using a caliper and bullet comparator.” NOTE: The host says a store-bought Modified Case may not deliver that exact same length from case base to lands as your own fired case. That is true, but as long as the commercial Modified Case gives you repeatable results, you have a functional reference point which you can then use to test seating depths relative to that measurement.
Finding Length to Lands Using Bullet in Case With Split-Cut Neck
Here is a common method that requires no special tools. Simply take a fired (no primer), neck-sized case and split the necks down vertically with a Dremel. Done right, this will hold the bullet in place when you chamber the unloaded round. As the bullet touches the rifling it will move back. As the cartridge chambers, the bullet slides back into the case to give you length to lands. This is not super-accurate but it is probably good enough for finding the length to lands for a hunting rifle. The video maker explains: “No need to purchase gauges for this if you are willing to sacrifice one case. With a little time and patience you can get good results with this method.” Further Explanation.
How to Adjust Tension — Length and Number of Neck Cuts
Forum member Andris Silins, who uses this method, explains: “I made the neck cuts using a Dremel with a cut-off wheel. You can adjust tension two ways. First, you can make the cuts longer or shorter. Longer cuts = less tension. If you used only three cuts instead of four you would get more tension. The trick is to be gentle when you open and close the bolt. If you ram the bolt closed you may wedge the bullet into the lands. When you open the bolt it helps to keep a finger or two near by to guide the case out straight because the ejector wants to push it sideways.” READ MORE.
Finding the Lands with HK Rifleworks
This is another video that demonstrates how to disassemble the bolt so that the firing pin assembly and spring does not apply pressure on the empty case which would affect the bullet as it touches the lands. The video maker shows how to use a Brownells bolt disassembly tool to quickly take the bolt apart (3:20 time-mark). Once you have a repeatable measurement, you know exactly where is “first touch”. Then you can adjust your seating depth to be into the lands, or jumping the bullets. Many benchrest shooters like to load “into the lands”. PRS/NRL shooters and hunters will generally prefer to jump their bullets .0020″ or more.
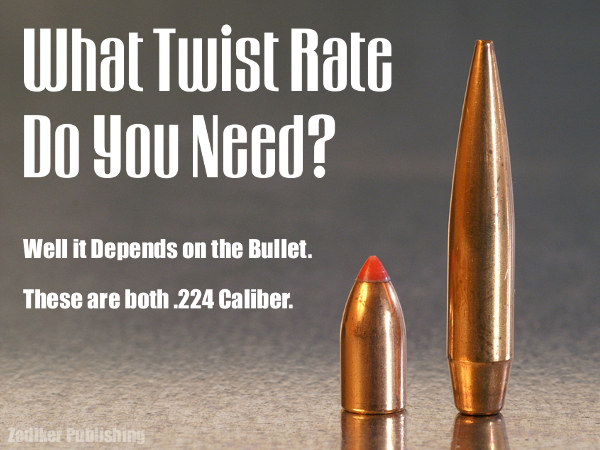
Here’s an extreme range of .224-Caliber bullets: 35gr varmint bullet and 90gr match bullet. Of course, along with bullet length/design, you need to consider MV when choosing twist rate.
Even with the same caliber (and same bullet weight), different bullet types may require different rates of spin to stabilize properly. The bullet’s initial spin rate (RPM) is a function of the bullet’s muzzle velocity and the spin imparted by the rifling in the barrel. You want to ensure your bullet is stable throughout flight. It is better to have too much spin than too little, according to many ballistics experts, including Bryan Litz of Applied Ballistics. The late Glen Zediker put together some basic tips concerning barrel twist rates and bullet stability. These come from Glen’s book, Top Grade Ammo.
Choosing the Right Twist Rate
I’d always rather have a twist too fast than not fast enough. Generally… I recommend erring toward the faster side of a barrel twist decision. 1:8″ twist is becoming a “new standard” for .224 caliber, replacing 1:9″ in the process. The reason is that new bullets tend to be bigger rather than smaller. Don’t let a too-slow twist limit your capacity to [achieve] better long-range performance.
Base your next barrel twist rate decision on the longest, heaviest bullets you choose to use, and at the same time realize that the rate you choose will in turn limit your bullet choices. If the longest, heaviest bullet you’ll shoot (ever) is a 55-grain .224, then there’s honestly no reason not to use a 1:12″. Likewise true for .308-caliber: unless you’re going over 200-grain bullet weight, a 1:10″ will perform perfectly well.
Bullet Length is More Critical than Weight
Bullet length, not weight, [primarily] determines how much rotation is necessary for stability. Twist rate suggestions, though, are most usually given with respect to bullet weight, but that’s more of a generality for convenience’s sake, I think. The reason is that with the introduction of higher-ballistic-coefficient bullet designs, which are longer than conventional forms, it is easily possible to have two same-weight bullets that won’t both stabilize from the same twist rate.
Evidence of Instability
The tell-tale for an unstable (wobbling or tumbling) bullet is an oblong hole in the target paper, a “keyhole,” and that means the bullet contacted the target at some attitude other than nose-first.
Increasing Barrel Length Can Deliver More Velocity, But That May Still Not Provide Enough Stability if the Twist Rate Is Too Slow
Bullet speed and barrel length have an influence on bullet stability, and a higher muzzle velocity through a longer tube will bring on more effect from the twist, but it’s a little too edgy if a particular bullet stabilizes only when running maximum velocity.
My failed 90-grain .224 experiment is a good example of that: I could get them asleep in a 1:7″ twist, 25-inch barrel, which was chambered in .22 PPC, but could not get them stabilized in a 20-inch 1:7″ .223 Rem. The answer always is to get a twist that’s correct.
These tips were adapted from Glen’s popular 2016 book, Top-Grade Ammo. That work, now getting harder to find, has numerous helpful articles on technical topics. Berger Bullets also has a FREE online Twist Rate Stability Calculator, developed by Applied Ballistics.
Here is a simple technique that can potentially help you load straighter ammo, with less run-out (as measured on the bullet). This procedure costs nothing and adds only a few seconds to the time needed to load a cartridge. Next time you’re loading ammo with a threaded (screw-in) seating die, try seating the bullet in two stages. Run the cartridge up in the seating die just enough to seat the bullet half way. Then lower the cartridge and rotate it 180° in the shell-holder. Now raise the cartridge up into the die again and finish seating the bullet.
Steve, aka “Short Range”, one of our Forum members, recently inquired about run-out apparently caused by his bullet-seating process. Steve’s 30BR cases were coming out of his neck-sizer with good concentricity, but the run-out nearly doubled after he seated the bullets. At the suggestion of other Forum members, Steve tried the process of rotating his cartridge while seating his bullet. Steve then measured run-out on his loaded rounds. To his surprise there was a noticeable reduction in run-out on the cases which had been rotated during seating. Steve explains: “For the rounds that I loaded yesterday, I seated the bullet half-way, and turned the round 180 degrees, and finished seating the bullet. That reduced the bullet runout by almost half on most rounds compared to the measurements from the first test.”
Steve recorded run-out measurements on his 30 BR brass using both the conventional (one-pass) seating procedure, as well as the two-stage (with 180° rotation) method. Steve’s measurements are collected in the two charts above. As you can see, the run-out was less for the rounds which were rotated during seating. Note, the change is pretty small (less than .001″ on average), but every little bit helps in the accuracy game. If you use a threaded (screw-in) seating die, you might try this two-stage bullet-seating method. Rotating your case in the middle of the seating process won’t cost you a penny, and it just might produce straighter ammo (nothing is guaranteed). If you do NOT see any improvement on the target, you can always go back to seating your bullets in one pass. READ Forum Thread..


 About Jim Borden and Borden Accuracy
 Borden Accuracy — A Success Story

 In response to a Bulletin article about
 Eye Protection — Lesson Learned
 Editor’s Comment: Among competitive pistol shooters, the use of safety eyewear is universal. You’ll never see Rob Leatham, Julie Golob, or Jerry Miculek competing without eye protection — for good reason. The handgun sports’ governing bodies effectively enforce mandatory eye protection policies. We wish the same could be said for competitive rifle shooting. We often see benchrest, High Power, and F-Class competitors shooting without eye protection. We’ve heard all the excuses, yet none of them trump the safety considerations involved.


 Increasing Barrel Length Can Deliver More Velocity, But That May Still Not Provide Enough Stability if the Twist Rate Is Too Slow


