However, if you don’t have a printer, don’t want to pay for commercial targets or adhesive target stickers, then there IS an interesting option. One of our Forum members has created his own Custom TARGET STAMP. Using an INK PAD, this creates a black multi-ring bullseye on paper that matches the exact dimensions of a competition target (SEE Top Photo).
Forum member JimmyMac wanted a target that replicates a competition multi-ring bullseye. He wanted to be able to stamp this bullseye quickly and easily on blank paper. Shown below is the custom stamp he created to accomplish that task. JimmyMac posted: “I took dimensions of a 100-yard group target and had a stamp made to transfer to the paper of my choice. Not revolutionary by any stretch, but works good. I may do a UBR score target stamp next.” JimmyMac purchased the target stamper through an online vendor: “I bought mine online. I provided a template. They did the rest. Here is the stamp and the ink that goes inside.” READ FORUM Thread for more information.
There are a large variety of ink-using target stamps available now on Amazon. Some of these are “self-inking” for convenience, while others require a separate ink pad to function. Here are some of the many target stampers currently offered. There are many target pattern and target size options.
This article is Copyright 2023 AccurateShooter.com. Republication by any other website or media violates Federal copyright law and obliges that third party to pay statutory penalties and damages.
For many Americans, real incomes have stayed flat in recent years, while inflation has increased the cost of living very significantly in the past three years. Accordingly, it’s important to save money whenever possible. Prices are going up, but wages aren’t following (for most of us). Here are seven ways shooters can save money on gear purchases and other shooting-related expenses.
1. Watch for Our Deals of the Week. Every Monday, in our Daily Bulletin, AccurateShooter.com offers some of the best deals to be found. We search the web to find great deals on ammo, reloading components, optics, tools, firearms, gun safes, electronics and more. It’s not unusual to find savings of 20-35% through our Deals of the Week. And many of our vendors are now offering special deals just for AccurateShooter.com readers.
2. Check Out the Forum Classifieds. There are great deals to be found every day in the AccurateShooter Shooters’ Forum. The latest deals are displayed in the right column of every Forum page. To see all the listings, browse through the Forum MarketPlace section which has four main categories:
Guns, Actions, Stocks, & Barrels
Tools, Dies, Rests, Reloading Components & Misc
Scopes, Optics, Sights, Rings, Bases Etc.
Commercial Sales by Paid Sponsors
3. Share a Ride to Matches. Fuel prices are on the rise — Regular-grade gasoline is over $5.00 per gallon in California now and around $3.50/gallon nationwide. With many shooters living 30-100 miles from the nearest range, fuel remains a big part of a shooter’s hobby budget. We’d say 90% of shooters drive solo to matches, often in large, gas-guzzling trucks. If you drive 200 miles round-trip to attend a match in a 20-mpg vehicle, you’ll burn over $35.00 worth of gasoline on your trip. That adds up. By simply sharing the ride with one fellow shooter you cut your fuel expenditures in half. And, if you alternate vehicles with a buddy from one match to the next, you save on vehicle wear and tear. At $0.55/mile (overall operating costs) consider the savings.
4. Use Discount Codes to Save. It’s always smart to check for discount codes before you buy. In the Daily Bulletin, we feature “Deals of the Week” every Monday morning, and we provide discount Coupon Codes when available. These can reduce the price substantially or lower shipping costs. Search codes for Brownells, Creedmoor Sports, EuroOptic, Graf’s, Midsouth, Powder Valley, Sportsman’s Warehouse, KYGUNCO, MidwayUSA, and Precision Reloading. Check your email also — some discount codes are only announced in email newsletters. If you can’t find a Coupon Code for your preferred vendor, visit Gun.deals and/or RetailMeNot.com. Both those sites list current coupon codes, and RetailMeNot.com covers thousands of vendors.
5. Shop for “Demo” Optics. Modern high-quality optics can easily cost $1500.00 or more, often exceeding the value of the rifle on which they are mounted. However, you can often save 20-30% by purchasing demo optics. These are normally display units used at trade shows. They may have slight ringmarks, but otherwise they are “as new”, having never been carried in the field or used on a rifle that has fired live ammo. When purchasing demo scopes, you should always ask about the warranty before consummating the sale. However, most demo scopes from name-brand manufacturers come with full factory warranties. EuroOptic.com and SWFA.com are two respected vendors that offer a good selection of demo optics.
6. Train with Rimfire Rifles. Good match-grade centerfire, hand-loaded ammo, counting premium bullets, powder, primers, and brass (figuring 10X loads), can now exceed $1.50 per round. And if your $600 (as chambered and fitted) competition barrel is toast after 1500 rounds, add $0.40 for barrel deprecation per shot. So you’re approaching two bucks a round total! By contrast, you can get quite good .22 LR target ammo for under $0.18 per round. Good rimfire barrels last a long, long time, so you don’t have to be concerned about wearing out your barrel quickly. A quality rimfire barrel can retain its accuracy for 7,000 rounds or more. If you run the ballistics, a .22 LR round at 100 yards can emulate the wind drift experienced by a centerfire cartridge at long range. This allows for effective cross-training with much less expensive ammo.
7. Take Advantage of Factory Rebates. There are some attractive rebates available right now from quality manufacturers such as Hornady, Smith & Wesson, Beretta, SIG Sauer, Walther, Winchester, and more. You have to be a bit wary because rebates are typically used to move less-popular merchandise. But some rebates apply to very wide range of merchandise, so it’s hard to go wrong. The current Smith & Wesson rebate is up to $100 and applies to rifles as well as some of the most popular S&W semi-auto pistols. Just make sure that, when you buy a product, you retain the sales slip and the original packaging (it’s also wise to print out online orders). To qualify for the rebate, you may need to mail in a product identification code found on the box, along with your original sales receipt.
The Vortex Blog contains an interesting article featuring recommended gear for a coyote hunting trip in late winter/early spring. This Vortex article covers all the items you’ll need: rifle, optics, shooting sticks, insulated clothing, Laser Rangefinder, game calls, carry packs and more.
In the article intro, Vortex notes: “Winter snow and cold temps don’t get Vortex’s Bill Krivanek down. In fact, quite the opposite. This time of year, he’s fired up about calling coyotes and putting a little fur on the ground. “There’s so much to love about these crafty critters”, said Bill. “They nearly always have the advantage. When you get one to come in to shooting range, you’ve really accomplished something. It’s as exciting as hunting gets.” Click the links below for more information about the Vortex Scope and Rangefinder used by Krivanek.
Complete Gear List for Cold Weather Hunting
A. Gloves
B. Milwaukee 2103 Headlamp
C. King’s Camo Snow Shadow®, Insulated Bibs
D. King’s Camo Snow Shadow®, Insulated Jacket
E. Vanguard Scout B62 Bipod
F. Knit Hat
G. Vortex Viper HD3000 Laser Rangefinder
H. FOXPRO® Shockwave Electronic Game Call
I. Open Reed & Closed Reed Mouth Calls
J. Red Rock Outdoor Gear Pack
K. HS Strut Deluxe 2-Way Strut Seat
L. Hornady 55gr V-Max Varmint Express
M. Vortex Viper HS 2.5-10x44mm Scope
N. Aero Precision AR-15
O. Banish 30 Silencer Central Suppressor
CLICK HERE to read the FULL Article with a complete description of each item, shown in the lead photo above. Here are three gear commentaries:
Aero Precision AR Rifle: Bill primarily hunts the Midwest where harsh winters are the norm. You can tell that from the custom rattle-can, snow-camo paint job on his well-worn AR-15. Chambered in .223 Rem, he likes the practical functionality and fast follow-up shots the AR-platform offers — particularly when you call in multiples. His AR is from Aero precision and been an absolute workhorse. Brand of AR-15 doesn’t matter much to Bill, but it does need to be accurate and reliable.
Shooting Sticks: In coyote country, you often need to bring your own rest. A set of shooting sticks is a necessity for Bill. He runs the Vanguard Scout B62 Bipod. These B62 units are fast to deploy, stabilize the rifle, and are easy to adjust when that dog comes in from a spot you didn’t anticipate. They have a swivel head for smooth panning when tracking a moving dog in your scope and easy turns to get on target fast with minimal movement.
Riflescope: Shots are shorter in the Midwest, with a general max of 300 yards. Most are much closer. Bill’s riflescope is the tried-and-true Vortex Viper HS 2.5-10x44mm. The low end of 2.5 with its wide field of view is just as important as the high end of 10. It’s incredibly durable and the optics speak for themselves.
Winter Solace in the Backcountry
There is a nice thread in our Forum appropriately entitled “Winter Time”. You’ll find some great backcountry images taken by our Forum members. Winter is a special time in the outdoors. Forum member JDP explains: “Winter is the best time to shoot! One of the few of life’s ironies that works in my favor. The range is empty and barrels keep cool, no bugs, no waiting on people, no mirage. Yup, this world needs more thin blooded snow birds. This cool weather is terrible and dangerous, tell your friends! Do people get lonely while shooting or something? It’s the true holiday season in multiple ways.”
Forum member DNorton posted: “I live way up north where our white sandy beaches look like this!”
March 20th, just one week away, is the Spring Equinox, the official first day of spring. So the outdoor season will be underway soon. Do you have a good first-aid kit in your vehicle to deal with possible injuries to family members of all ages? For just $17.00 on Amazon you can get an excellent kit from Be Smart/TRI, the #1 maker of First Aid Kits in the USA. Don’t delay, we expect this sale price to go up soon.
TRI’s Be Smart Get Prepared First Aid Kit has 201 items inside a sturdy case with shoulder strap and carry handle. There is also a handy, detachable mini pouch with key essentials for first aid on-the-go. You can easily bring the mini-pouch along on a bike ride or hike.
This multi-purpose First Aid Kit includes:
• 50 – Bandages 3/4 x 3
• 30 – Bandages 3/8 x 1 1/2
• 6 – Bandages Closure
• 3 – Knuckle Bandages
• 1 – Tapes – .5 x 2.5yd Waterproof
• 10 – Cotton Tips – 2.75″”/10 Pack
• 4 – Finger Splints
• 1 – First Aid Guide
• 4 – Gauze Pad – 2 x 2 / 4 ply
• 4 – Gauze Pad – 4 x 4 / 4 ply
• 1 – Gauze Pad – 5 x 9
• 2 – Nitrile Gloves
• 1 – Instant Cold Pack – 5 x 6
To help ensure that outdoor adventures remain safe and trouble-free, the CTD Shooters’ Log has a helpful Essential Summer Survival Guide. This is worth reading before you venture away from civilization.
Here are some highlights of the article with links for MORE INFO:
First Aid Kits for Campers
You should never venture outside without a first aid kit close at hand. While exploring the outdoors, all types of accidents can occur—from cuts, scrapes, and burns to broken limbs and severe allergic reactions.
Basic Survival Skills
Basic survival skills are a necessity if you plan to spend any amount of time outdoors. These five tips, plus a how-to on what to pack in a lightweight, basic survival kit will help if you are ever stuck, lost, stranded or injured in the field.
How to Treat Burns
Fireworks, barbeques and campfires — in the summer we are frequently around fire, which increases our chance of getting burned. A first-degree burn is most likely home treatable, while a third degree burn requires immediate medical attention. Learn how to spot the differences between minor and severe burns.
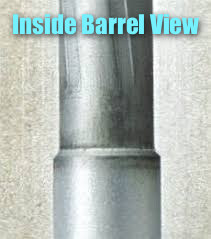
The question of barrel break-in is controversial. Some folks advocate an elaborate, lengthy cycle of shooting and brushing, repeated many times — one shot and clean, two shots and clean and so on. This, it is argued, helps barrels foul less and shoot more accurately. Others say minimal break-in, with patching and brushing after 10-15 rounds, is all you need. Still others contend that break-in procedures are a total waste of time and ammo — you should just load and shoot, and clean as you would normally.
We doubt if there will ever be real agreement among shooters concerning barrel break-in procedures. And one must remember that the appropriate break-in procedure might be quite different for a factory barrel vs. a custom hand-lapped barrel. This Editor has found that his very best custom barrels shot great right from the start, with no special break-in, other than wet patches at 5, 10, and 15 rounds. That said, I’ve seen some factory barrels that seemed to benefit from more elaborate break-in rituals.
What’s the best barrel break-in procedure? Well our friend Eric Mayer of Varminter.com decided to ask the experts. A while back Eric interviewed representatives of three leading barrel manufacturers: Krieger, Lothar-Walther, and Shilen. He recorded their responses on video. In order of appearance in the video, the three experts are:
Do I Need to Break-In a New Rifle Barrel?
Eric Mayer of Varminter.com says: “That is a simple question, [but it] does not necessarily have a simple answer. Instead of me repeating my own beliefs, and practices, on breaking-in a new rifle barrel, I decided to answer this one a bit differently. While we were at the 2016 SHOT Show, we tracked down three of the biggest, and most popular, custom barrel makers in the world, and asked them what they recommend to anyone buying their barrels, and why they recommend those procedures. We asked the question, and let the camera run!” Launch the video above to hear the answers — some of which may surprise you.
Long-Term Barrel Care — More Experts Offer Opinions
Apart from the debate about barrel break-in, there is the bigger question of how should you clean and maintain a barrel during its useful life. Some folks like aggressive brushing, other shooters have had success with less invasive methods, using bore foam and wet patches for the most part. Different strokes for different folks, as they say. In reality, there may not be one solution for every barrel. Different fouling problems demand different solutions. For example, solvents that work well for copper may not be the best for hard carbon (and vice-versa).
“Why worry about a little barrel fouling when the throat is subjected to a brutal 5,600° F volcano at 55,000 PSI? To investigate these and other questions about taking care of a match barrel, we spoke with a dozen experts and share their knowledge in this first of a series of articles.
After listening to folks who shoot, build barrels or manufacture cleaning solvents for a living, we concluded that even the experts each have their own unique recommendations on how to care for a match barrel. But they all agree on one thing — the gun will tell you what it likes best. Because the life expectancy of a match barrel is about 1,500 to 2,500 rounds, the objectives of cleaning one should include: preserve accuracy, slow the erosion, and remove fouling — all without damaging the gun. This article doesn’t claim that one cleaning method is better than the next. Rather, we set out to interject a little science into the discussion and to share some lessons learned from experts in the field.” — Chip Lohman
The Legal Brief is a feature of TheGuncollective.com that focuses on firearms rules and regulations. In this Legal Brief video, Attorney Adam Kraut explains key State and Federal regulations governing firearms, and explains how to ensure compliance with all applicable laws.
This five-minute video explains barrel length rules for rifles and shotguns, and also explains the best (and most fool-proof) methods to measure your barrel. In addition, the video explains how to measure firearm overall length. A rifle or shotgun which is less than 26 inches overall can also be classified as a “Short-barreled” rifle/shotgun subject to the NFA. NOTE: Under federal law “If the rifle or shotgun has a collapsible stock, the overall length is measured with the stock EXTENDED”.
Highlights of LEGAL BRIEF Discussion of Barrel Length and Firearm Overall Length
The ATF procedure to measure the length of a barrel is to measure from the closed bolt or breech face to the furthest end of the barrel or permanently attached muzzle device. ATF considers a muzzle device that has been permanently attached to be part of the barrel and therefore counts towards the length.
How to Measure Barrel Length: Drop [a] dowel or rod into the barrel until it touches the bolt or breech face, which has to be closed. Mark the outside of the rod at the end of the muzzle crown (if you don’t have a permanently attached muzzle device) or at the end of the muzzle device if it is permanently attached. Remove the rod and measure from the mark to the end of the rod. That is your barrel length[.]
Remember, if the barrel length is less than 16 inches, it is possible that the firearm could be a short barrel rifle (if you are building a rifle or it is already on a rifle) and if the barrel length is less than 18 inches, it is possible the firearm could be a short barrel shotgun (again if you are building a shotgun or it is already a shotgun). Both of these firearms would be subject to the purview of the National Firearms Act and would require the firearm to be registered accordingly.
How to Measure Overall Length:The overall length of your rifle or shotgun may also classify it as a Short Barrel Rifle or Short Barrel Shotgun. The overall length of a firearm is the distance between the muzzle of the barrel and the rearmost portion of the weapon measured on a line parallel to the axis of the bore. … If the rifle has a permanently attached muzzle device, that is part of the overall length. … If the rifle or shotgun has a collapsible stock, the overall length is measured with the stock extended.
Here is some useful information for FFLs and gun dealers. The NSSF now offers a special online training course: “Completion of the ATF Form 4473 2023 Edition”. NSSF members can access this web-based course via the SHOT University Online education center.
Why do you need to learn about the latest ATF Form 4473? Well the Bureau of Alcohol, Tobacco, Firearms and Explosives (ATF) revised the form in December 2022 to reflect new statutory requirements imposed by the Bipartisan Safer Communities Act, the NICS Denial Notification Act, and the ATF Final Rule 2021R-05F. Use of the latest December 2022 edition Form 4473 is mandatory as of April 1, 2023.
This training series reviews key elements of the 6-page Form 4473, as well as tips for identifying and correcting common errors made by both buyers and sellers. The training series has three segments:
Module 1: Overview of Form 4473
Module 2: Completing Form 4473, Sections A-B
Module 3: Completing Form 4473, Sections C-E
The NSSF states that “All FFL counter salespeople, compliance officers, records keepers, and license holders should consider these SHOT University Online courses to be vital training to enhance FFL training and help reduce errors when using the new form.”
FFLs can order the December 2022 edition of the Form 4473 through the ATF Distribution Center, and the form is available for download at www.atf.gov. Use of the December 2022 edition is mandatory beginning April 1, 2023. At that time, use of the May 2020 edition must be discontinued. The new Form 4473 and continuation sheets are available from the ATF in both English and Spanish. A PDF version is offered online also.
SHOT University Online and the “Completing the Form 4473 2023 Edition” series are available as part of NSSF member benefits. For this and other instructional offerings, paid NSSF members should log in at SHOT University’s home page with their username and password, then click on the course of their choice.
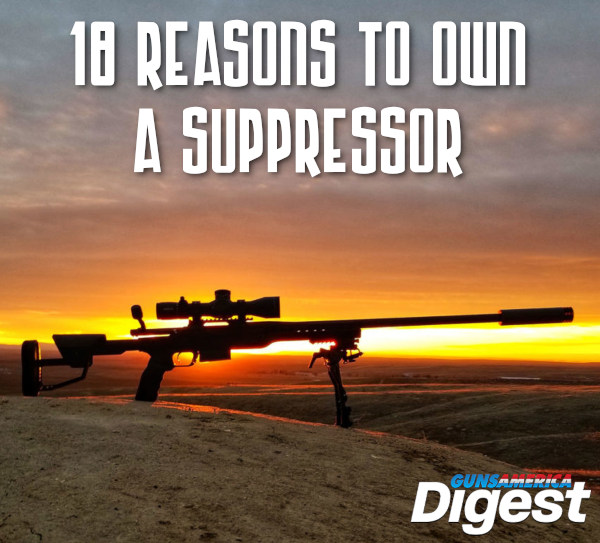
Read full story in GunsAmerica Digest for all 18 reasons to own a suppressor.
Do you own a suppressor yet? If you live in a state where silencers are allowed, there are many good reasons to get a modern suppressor. The process for acquisition has been streamlined. Vendors such as SilencerCo can now handle most of the legal paperwork required. And the choice of suppressors is greater than ever before.
Along with basic noise reduction, what are the key reasons to get a suppressor? There are actually many. True Pearce, Editor of the GunsAmerica Digest, has written an excellent article about the benefits of suppressors: Why a Silencer Might Prevent Dementia & 17 Other Reasons You Need a Suppressor. Here are FIVE of the 18 reasons outlined in the article. We recommend you read the full story to access ALL 18 reasons. That full article has worthwhile insights for anyone considering getting a suppressor.
Reason — Protect Your Hearing
Owning and using a suppressor helps prevent hearing loss. Hearing loss is a legitimate health concern that all firearms owners should be concerned about. Firearms are loud. The average firearm without a suppressor is between 140-165 dB and creates what is called an impulse noise (i.e. a noise that lasts for less than one second).
OSHA’s limit for impact/impulse noise is 140 dB…. Every time you fire a gun (including a .22 LR) without hearing protection or a suppressor, you can permanently lose hearing and it never returns. Surgery and hearing aids cannot restore the hearing you lose — it’s gone forever. Suppressors do not make your gun silent! However, they can make the impulse noise much less than 140 dB.
Reason — Reduce Muzzle Blast
A suppressor reduces or eliminates muzzle blast. Traditionally, we associate flinching with recoil, and while recoil can contribute to flinching, many shooters are finding that when using a suppressor on a caliber with no recoil they don’t suffer from the concussion, noise, and blast. As a result, they don’t close their eyes, flinch, or jerk the trigger.
Reason — Reduce Felt Recoil
A suppressor … reduces recoil or kick. Nobody that’s telling the truth enjoys getting punched in the shoulder, and that’s essentially what happens when you shoot a lightweight centerfire magnum rifle. Suppressors are very effective at slowing the recoil down or [reducing it significantly]. I personally observed a small (70-lb) 12-year-old boy shoot a 5.5-pound 6.5 PRC with a suppressor. After shooting he got up smiling and said, “That didn’t kick at all!”.
Reason — Reduce Muzzle Rise to Keep Your View on Target
Suppressors reduce muzzle rise and make it possible to stay on target through your shot [so you can watch the trace and impact]. This allows you to make your own wind calls and corrections.
Reason — Reduce Dust and Dirt Kicked Up from Muzzle Blast
Suppressors prevent snow, dust, dirt, or other debris from blowing up when you shoot prone. If you’ve shot much with muzzle brakes, you know this is a real thing.
While many AccurateShooter.com readers load their own competition centerfire rifle ammunition, we all still need factory ammo for our rimfire rifles in .17 and .22 calibers. And most of the 60+ million American handgun owners rely on factory-made ammunition for their pistols and revolvers.
Today’s video collection showcases state-of-the-art ammunition factories in Europe and the United States. You can see the extremely accurate Lapua .22 LR ammo being produced, as well as excellent centerfire ammunition being made by Norma, Remington, Sellier & Bellot and other makers.
From the creation of lead bullet cores to the final packing of ammunition, you can see it all in these videos. Watch primers being made, brass being annealed, bullets being jacketed, tips being inserted, and every phase of production. Weighing and testing procedures are also revealed.
Modern Ammo Production in Multiple Facilities
This 11.5-minute video shows highly automated bullet and ammunition production in multiple facilities in Europe and the USA. You can see bullets produced from start to finish beginning with lead smelting. Then watch pistol and rifle cartridges being made on modern, computer-controlled assembly lines. Watch from start to finish. Here are some notable highlights:
00:10 — Lead Melting Pots and Billet Caster
01:20 — Lead made into strings and then formed into bullets
01:50 — Brass alloy sheets fed into machine and then punched (2:10-2:35).
03:35 — Lead pistol cores being produced
04:15 — Pistol ammo being packaged
06:15 — Ammo loaded into belts
07:15 — Completed primers being shuttled then loaded into brass (Second factory)
07:20 — Bullets being seating into rifle ammunition
07:32 — Cartridge case-neck treatment
07:42 — Robot arm loads finishes cartridges into boxes
08:04 — Cups being pressed (Third Factory S&B)
08:45 — Cartridge case draw
09:06 — Priming pistol cases
09:20 — Bullet production and weight control (10:02)
10:08 — Cartridge assembly and cartridge sealing (10:38)
11:00 — Pistol ammo packaging
Lapua Rimfire Ammunition Production in Germany
This video shows Lapua rimfire ammo production in Schönebeck, Germany. The video shows quantities of the excellent X-ACT .22 LR ammunition being produced and packaged. Starting at the one-minute mark, you can see the ammo being inspected with advanced scanning machines. Then at 1:16 time-mark you can see the ammo accuracy-tested in a tunnel, with results displayed on a computer screen (1:27).
Norma Ammunition Production in Sweden
In this video, the RecoilTV team lead by EIC Iain Harrison ventures to Sweden to visit the Norma ammunition production plant in Huvudentré, Sweden. Demand for Norma ammo has risen dramatically. A Norma marketing manager notes that production has doubled in the last three years.
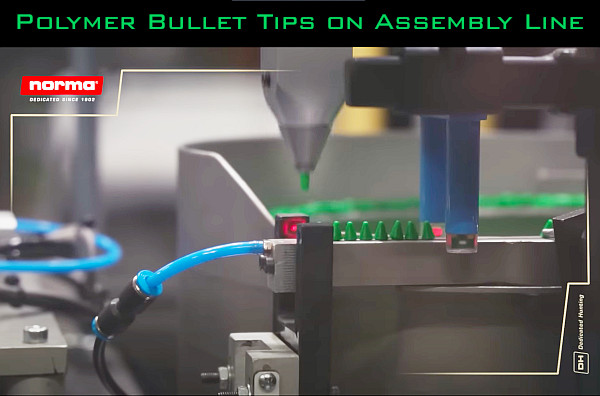
This second Norma ammunition video shows close-ups of the production process and the machinery used for centerfire ammo. This was filmed at the Norma factory in Åmotfors, Sweden, which has operated continuously for over 120 years. Among the many interesting highlight is a sequence showing how polymer bullet tips are inserted. See 6:50 time-mark.
Sellier & Bellot Ammunition Factory in Czech Republic
In this video, Larry Vickers of Vickers Tactical tours a Sellier & Bellot ammunition plant in the Czech Republic. This video shows details of primer production as well as bullet-making, brass-making, and production-line cartridge manufacturing.
Remington Ammunition Plant Re-Opened by Vista Outdoors
This video shows ammo production at the re-opened Remington ammunition plant in Lonoke, Arkansas. “This is one of the largest ammunition manufacturing plants in the world” said Mark Keefe, NRA Publications editorial director. “It was set up in 1969 by DuPont, who owned Remington at the time. They do it all here. Cases, bullets, centerfire rifle, centerfire pistol, rimfire and shotshell.” It’s great to see this plant back in production after Remington Ammunition filed for bankruptcy in 2020 and the assets of the Remington conglomerate were auctioned off. Ultimately, Vista Outdoor, owner of Federal, CCI and Speer, purchased the assets of Remington Ammunition and got the Lonoke plant running again, better than ever.
This article is Copyright 2023 AccurateShooter.com. Republication on any other site gives rise to statutory penalties and compensatory damages.
It is estimated that over 21.5 million Americans are currently licensed/permitted to carry concealed weapons.* And with the 2022 U.S. Supreme Court decision in NYSRPA v. Bruen, we can expect that number to increase significantly. That landmark case stated that the Second Amendment guarantees citizens the right to bear arms outside their homes.
There are now seven (7) major business entities which provide insurance coverage and legal services for CCW holders. These providers are listed below. We suggest, BEFORE you commit to any particular policy/membership, you comparison shop at least three different options. We also recommend you read the full 3400-word GunDigest Article that examines, in detail, the coverage offered by these seven companies:
Factors to Consider When Choosing a Gun Insurance Program:
Attorney Fees and Expert Fees
The key benefit of any CCW insurance plan is coverage for attorneys fees. If you need a lawyer for a civil case or criminal defense, the fees pile up very fast. Good lawyers can charge $400-$500 per hour, and a trial can go on for many days. GunDigest explains: “If your case goes to trial you might find a bill that runs up to six figures.” You should check to see if a policy covers lawyer retainer, hourly fees, expert fees, AND potential damages.
Bail Bond Coverage
If you are involved in an incident, and an arrest is made, you want to avoid spending time in a jail cell. That’s why it’s important to have a CCW insurance plan that will quickly provide funding for bail bonds. As GunDigest notes: “bail-bond coverage is typically part of a sound concealed carry insurance policy”.
Multi-State Coverage
Gun laws vary among states, and state insurance laws vary as well. This affects the coverage an insurance program can and will provide. When choosing a policy, ask questions to determine how coverage may vary from state to state. With some programs you can purchase additional coverage for trips outside your home state. These can be time-limited for cost savings.
Policy Limits (Dollar Amounts)
When considering a CCW insurance program you need to look at the policy limits — the amount the program might pay to provide legal assistance and potentially settle a claim. You need to read the fine print here, just as you would with an automobile or home policy.
The detailed GunDigest article on CCW Insurance Coverage, notes that there are some additional factors to consider when choosing CCW Insurance:
“You’ll find there are other areas covered by some concealed carry insurance plans worth contemplating. Many of them fall within the policies themselves, however, some cost extra. In many cases, CCW policies go well beyond legal expenses and cover some other aspects you might not have considered:”
Crime Scene Clean Up
Negligent Discharge
Spouse And Family Self-Defense
Property Damage
Firearms Replacement
Work Loss Coverage
Personal Use Of Firearm (non-defensive)
* According to a recent estimate by the Crime Prevention Research Center (CPRC), over 21.5 million Americans are now licensed to carry a firearm in the United States. And the numbers are growing — the NRA-ILA posted that the number of concealed handgun permits reached 18.66 million in 2019 – a 304% increase since 2007.


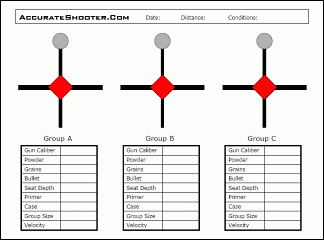 AccurateShooter.com has a page with dozens of FREE printable targets including many sets of multi-aimpoint targets and our very popular Three Row Diamond and Circle Target with load data tables (see photo at right).


 2. Check Out the Forum Classifieds. There are great deals to be found every day in the AccurateShooter
  3. Share a Ride to Matches. Fuel prices are on the rise — Regular-grade gasoline is over $5.00 per gallon in California now and around $3.50/gallon nationwide. With many shooters living 30-100 miles from the nearest range, fuel remains a big part of a shooter’s hobby budget. We’d say 90% of shooters drive solo to matches, often in large, gas-guzzling trucks. If you drive 200 miles round-trip to attend a match in a 20-mpg vehicle, you’ll burn over $35.00 worth of gasoline on your trip. That adds up. By simply sharing the ride with one fellow shooter you cut your fuel expenditures in half. And, if you alternate vehicles with a buddy from one match to the next, you save on vehicle wear and tear. At $0.55/mile (overall operating costs) consider the savings.
 4. Use Discount Codes to Save. It’s always smart to check for discount codes before you buy. In the Daily Bulletin, we feature “Deals of the Week” every Monday morning, and we provide discount Coupon Codes when available. These can reduce the price substantially or lower shipping costs. Search codes for Brownells, Creedmoor Sports, EuroOptic, Graf’s, Midsouth, Powder Valley, Sportsman’s Warehouse, KYGUNCO, MidwayUSA, and Precision Reloading. Check your email also — some discount codes are only announced in email newsletters. If you can’t find a Coupon Code for your preferred vendor, visit
  5. Shop for “Demo” Optics. Modern high-quality optics can easily cost $1500.00 or more, often exceeding the value of the rifle on which they are mounted. However, you can often save 20-30% by purchasing demo optics. These are normally display units used at trade shows. They may have slight ringmarks, but otherwise they are “as new”, having never been carried in the field or used on a rifle that has fired live ammo. When purchasing demo scopes, you should always ask about the warranty before consummating the sale. However, most demo scopes from name-brand manufacturers come with full factory warranties.
  6. Train with Rimfire Rifles. Good match-grade centerfire, hand-loaded ammo, counting premium bullets, powder, primers, and brass (figuring 10X loads), can now exceed $1.50 per round. And if your $600 (as chambered and fitted) competition barrel is toast after 1500 rounds, add $0.40 for barrel deprecation per shot. So you’re approaching two bucks a round total! By contrast, you can get quite good .22 LR target ammo for under $0.18 per round. Good rimfire barrels last a long, long time, so you don’t have to be concerned about wearing out your barrel quickly. A quality rimfire barrel can retain its accuracy for 7,000 rounds or more. If you run the ballistics, a .22 LR round at 100 yards can emulate the wind drift experienced by a centerfire cartridge at long range. This allows for effective cross-training with much less expensive ammo.


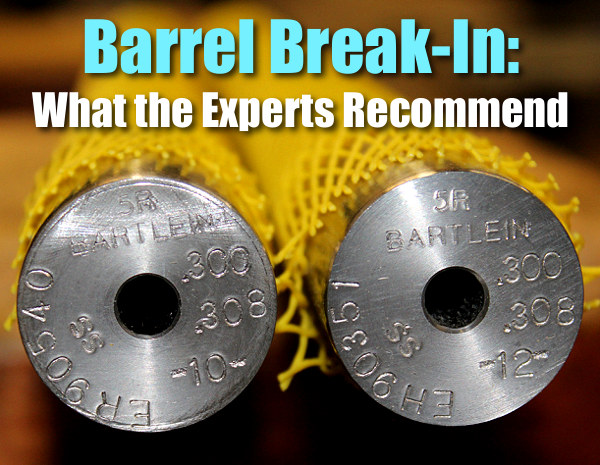
 Do I Need to Break-In a New Rifle Barrel?