At AccurateShooter.com, our primary focus is precision target shooting with rifles. But it’s definitely fun to shoot pistols too, and we bet most of our regular readers own handguns. Here are six tips for shooting safely and accurately with handguns. These pointers will help you advance your skills and have more fun with your pistols and revolvers. Top image courtesy Sanctuary Gun Club.
1. Make Sure Safety Is Number One
Whether you own one gun or one hundred, gun safety must always be your main priority. In this video, Smith & Wesson Team Captain Julie Golob covers the basics of gun safety.
2. Start with a .22 LR Handgun
We strongly recommend that new pistol shooters start off with a .22 LR rimfire handgun. The .22 LR cartridge is accurate but has very low recoil, less “bark” than a centerfire, and very little smoke and muzzle flash. New shooters won’t have to fight muzzle flip, and won’t develop a flinch from the sharp recoil and muzzle blast common to larger calibers. With the .22 LR, the trainee can focus on sight alignment, breathing, and trigger pull. When he or she has mastered those skills, move on to a .38 Special or 9mm Luger (9x19mm).
What gun to use? We recommend the 10-shot Smith & Wesson Model 617. Tthis is ideal for initial training, shooting single action, slow-fire. You want to focus on sight picture and holding steady. Shown above is the 4″-barrel Model 617 which balances well. There is also a 6″-barrel version. It has a longer sight radius, but is a little nose-heavy. Both are great choices. They are extremely accurate and they boast a very clean, precise trigger.
If you prefer a semi-auto .22 LR pistol, we recommend the Browning Buck Mark series. Buck Marks are very accurate and very reliable. This rimfire pistol is available in a variety of models starting at under $350.00. Like the S&W Model 617, a good Buck Mark will serve you for a lifetime.
3. Use Quality Targets with Multiple Aim Points
It’s common for new pistoleros to start shooting at cans or clay birds at a public range. That can be fun, but it’s better to start with proper targets, placed at eye level, at 7-10 yards. We like to use targets with large, brightly colored circles. Focus on putting 5 shots in a circle. We recommend targets that have multiple bullseyes or aiming points — that way you don’t have to constantly change your target. There are also special paper targets that can help you diagnose common shooting problems, such as anticipating recoil. EZ2C Targets offers many great target designs with bright, red-orange aim points. You can also use the bright orange Birchwood Casey stick-on Target Dots (right). These come in a variety of diameters. We like the 2″ dot at 10 yards.
4. Shoot Outdoors If You Can
We recommend that new pistol shooters begin their training at an outdoor range. There are many reasons. First, the light is better outdoors. Indoor ranges can be dark with lots of shadows, making it harder to see your target. Second, sound dissipates better outdoors. The sound of gunfire echoes and bounces off walls indoors. Third, an outdoor range is a more comfortable environment, particularly if you can get out on a weekday morning. Indoor ranges, at least in urban areas, tend to be crowded. Many also have poor ventilation. If you can make it to an outdoor range, you’ll be happy. Many outdoor ranges also have some steel pistol targets, which offer a fun alternative to paper. When shooting steel however, we recommend polymer encased or lead bullets to avoid ricochets.
Too many new pistol shooters try to move right to rapid fire drills. It’s better to start slow, practicing the basics, under the guidance of a good mentor. If you belong to a club, ask if there are certified instructors who will help out. This Editor learned pistol shooting from a seasoned bullseye shooter, who got me started with a .22 LR revolver and very close targets. Over the course of a few range sessions we progressed to farther targets and faster pace. But the fundamentals were never forgotten. When starting your pistol training, it’s wise to view some instructional videos. Top Shot Champion Chris Cheng hosts an excellent Handgun 101 Series produced by the NSSF. We’ve linked one of these Handgun 101 videos for Tip #6.
6. SLOW DOWN — This Is Not a Race
When you learned to ride a bicycle, you started slow — maybe even with training wheels. The same principle applies to pistol shooting. When you get started with handguns, we recommend you shoot slowly and deliberately. Start with the handgun unloaded — just work on your sight alignment and breathing. With snap caps in place, try some dry-firing drills. Then progress to live fire. But be deliberate and slow. With the target at 20 feet, see if you can get three successive shot-holes to touch. Believe it or not, many common pistols are capable of this kind of accuracy (but you won’t see many shooters at indoor ranges who pursue that kind of precision). Once you master your form and accuracy, then you can work on your speed.
Happy Thanksgiving folks. Major gun and optics makers, tool crafters, and large outdoor gear vendors are offering great bargains for Black Friday week. Expect discounts from 10% to 30% on a wide range of quality products.
While some sales are set for Friday, November 24th only, most of the featured Black Friday Sales have already started. And some of these promotions run through Cyber Monday (11/27/2023). Find other sales at Gun.Deals.
Most of the showcased vendors offer discounts on a large inventory selection — in some cases, everything in stock is discounted 10%, 15%, 20% or more. For other sellers, only specific items are on sale, so we’ve identified those particular deals. In addition to the ten sellers showcased below, Brownells is offering big Discount Code savings on nearly all products. Get 15% OFF your Brownells orders with Code BF15.
Come back tomorrow for Part Two of our Black Friday Sales Showcase!
21st Century Innovation 20% Off One-Day Sale
21st Century Innovation makes some of the very best tools and hardware for precision handloaders. 21st Century’s Arbor Presses, Neck-turning lathes, Concentricity Gauges, and other tools rank at the very top. And now you can get these superb products at a huge 20% discount. Virtually all 21st Century hardware (except the Hybrid-X Shooting Rest) will be 20% OFF for ONE DAY ONLY, Friday November 23, 2023. Use Coupon Code 20BFRI2023 at checkout to save 20%.
Annealing Made Perfect (AMP) — $200 Off MK II Black Friday Sale
AMP Annealers are the most advanced annealing system on the planet. With such high demand for these products, you’ll rarely see a discount on AMP Annealing machines. But this year, for Black Friday, AMP will offer a U.S. $200.00 discount on the advanced MK II (MK2) Annealer “while stocks last”. AMP will will run a countdown clock which will hit zero at 12:00 noon USA Pacific time / 3.00 pm USA Eastern on Thursday, November 23rd (Thanksgiving day 2023). At that point, AMP MK II Annealers will be added to stock at $1,395.00, a $200 discount off regular $1,595.00 price. NOTE: This sale is limited “while stocks last”.
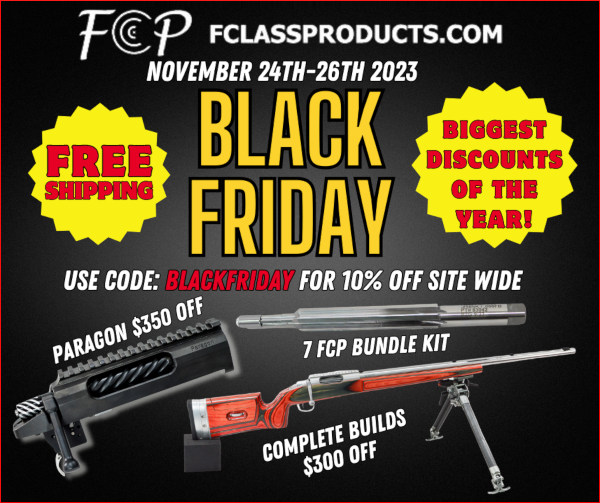
F-Class Products Black Friday Sale
The biggest F-Class Products (FCP) sale ever conducted is happening this week. Sale items include the new Paragon actions, 7 FCP Bundle Kit, two in-stock F-TR complete rifles ready to go, and much more! Save 10% off sitewide with discount code BLACKFRIDAY.
Graf’s Black Friday Promotions and Savings
If you need ammo, bullets, powder, or primers, head over to Grafs.com this week. Graf’s is running a series of promotions. For example you can get 7 lbs. of tumbling media for FREE with a $200 purchase of the excellent Peterson brass. In addition, you can get FREE Hazmat if you buy $150 or more of powder and/or primers. Note: The Free Hazmat offer ends Saturday 11/25/2023 at 11:59 pm CT.
Palmetto State Armory Black Friday Sale
Need an AR Upper/Lower or a carry pistol? Then definitely check out the Black Friday Sale at Palmetto State Armory. Save 20% or more on AR components, handguns, optics, accessories and more. There are also excellent deals on ammunition, such as CCI Blazer 9mm for just $13.99/box.
Area 419 Black Friday and Cyber Monday Sales
Area419 is running a great extended Black Friday Promo for the next few days. You’ll find significant discounts on most Area 419 products, including tools, scope mounts, muzzle brakes, and Arcalock products. In addition, the superb Area419 Zero Press goes on sale 11/27/2023, and a variety of reloading products will be discounted for Cyber Monday.
Precision Reloading Early Black Friday Sale
Precision Reloading has been running an early Black Friday Sale, with items discounted starting Monday, 11/20/23. New items are added daily through 11/27/2023. Some of the hot deals are: Berger Bullets and Ammo, Hornady Products (including tools, dies, ammo), and Starline Brass. With the full Black Friday Sale, for orders over $79.00, you can get 10% Off Sitewide with code BLACK23. That code should work through 11/26/23 at 11:59 pm.
EuroOptic — 10% Off Black Friday Nightforce Sale
This week you can save big bucks on Nightforce scopes which are rarely discounted this much. With the EuroOptic Black Friday Sale you save 10% on Nightforce NX8 and ATACR scopes. This 10% discount can be worth $175 to $395 in savings! In addition, EuroOptic is offering some sales tax rebates.
Weatherby 15% Off Rifles, 20% Off Ammo, 15-25% Off Gear
Right now, through an extended Black Friday Sale, Weatherby is running its “biggest rifle discount of the year”, with 15% Off Weatherby Mark V and Vanguard rifles. Plus ammunition and and brass is discounted 20%. In addition, Weatherby is offering up to 25% off accessories, hunting gear, clothing, gun cases, and other products sold through the Weatherby online store.
Springfield Armory 20% Off Black Friday Week Sale
You can save 20% sitewide now at the Springfield Armory online store. NOTE: Springfield Armory rifles and handguns are NOT sold direct through the website, so this sale applies to AR Uppers, airguns, pistol slide assemblies, optics, magazines, holsters, apparel, and other accessories.
Talented sharpshooter Kirsten Joy Weiss is featured in an episode of NRA All Access. The show covers Kirsten’s development as a competitive shooter, and her success as a trick-shot artist with her own popular YouTube channel. Here’s the All Access segment featuring many of Kirsten’s most famous trick shots.
During the video Kirsten also talks about her background in shooting and how she wants to be a good ambassador for the shooting sports, “spreading the positive reality of shooting”. Kirsten explains: “The fun challenge and joy of shooting is important to me because I really wanted to be a positive example. So when the media says the ‘guns are a bad thing and nobody does anything good with guns’, they can say ‘Well, what about her [Kirsten]’?”
Kirsten: “I think that it’s important for young girls to have somebody that they can look up to… I feel responsibility to show young shooters coming up, especially females, that you can respect yourself and shoot a gun as well.”
A gifted “natural” shooter, Kirsten started shooting fairly late — at age 16. Despite her relatively late start, she learned very quickly, and managed to earn a place on the University of Nebraska shooting team. That literally opened up a new world for Kirsten: “During the course of my career, I’ve had a lot of success. I’ve gone to World Cups… in Zagreb, Croatia, in Munich, Germany. I’ve won National Championships, and got on to the U.S. Olympic short list, so it’s been a good career.”
Proper Cheek Weld
No matter what your discipline — smallbore, silhouette, High Power, F-Class, or even PRS — it’s vital to have a consistent cheek weld for every shot. You want your head to be in the same position on the stock each time. This helps ensure proper eye-to-sights/optic alignment and consistent rifle balance.
In this video, Kirsten explains how to find the best position for your head on the stock, which may require adjusting the cheekpiece and/or length of pull. Then Kirsten demonstrates how to maintain consistent cheek weld shot after shot.
Kirsten tells us: “A lot of people don’t think of shooting as a sport, but it absolutely is, and I would even go so far as to say that it is an art form.” We don’t know if this is art, sport, or magic, but very few shooters have the skill or flexibility to make this upside-down shot…
Looking for culinary inspiration for your holiday gatherings? The NRA Blog offers three special (and delicious) Wild Game Recipes for your family feasts: Honey Mustard Planked Wild Turkey Breast, Mushroom-Stuffed Wild Boar Roast with Black Truffle Sauce, and BBQ Brined Pigeon. These recipes come from some of the country’s best chefs, and they all seem mouth-watering. You’ll find a full list of ingredients plus step-by-step cooking tips.
One of the many advantages to hunting is the assortment of game you can gather that lasts for an extended period of time. Just because it’s Thanksgiving doesn’t mean you have to stick with a whole turkey from the store and a ham hock.
We have three unique spins on wild game recipes that will suit your dining table perfectly. Even if you’re one of those hunters who enjoys a quick hunt the morning of Thanksgiving, these recipes will make your holiday more delicious than ever. — NRABlog.com
Mushroom-Stuffed Wild Boar Roast with Black Truffle Sauce
Gettin’ Gobblers — Turkey Hunting Tips on GetZone Video
And for those folks who hope to harvest their own gobbler for the Thanksgiving holiday, GetZone.com offers a turkey hunting video with expert guidance on Turkey hunting, specifically stalking and shot placement: “When it comes to shotgun hunting, you don’t want to get BBs in the meat, so the most common (and lethal) shot with a shotgun is a headshot.”
This photo is from GetZone.com, a website that provides information on shooting and hunting. CLICK HERE to watch a GetZone video on turkey hunting. Work Warning: When you click photo, a loud audio track may start immediately, so turn down the audio volume.
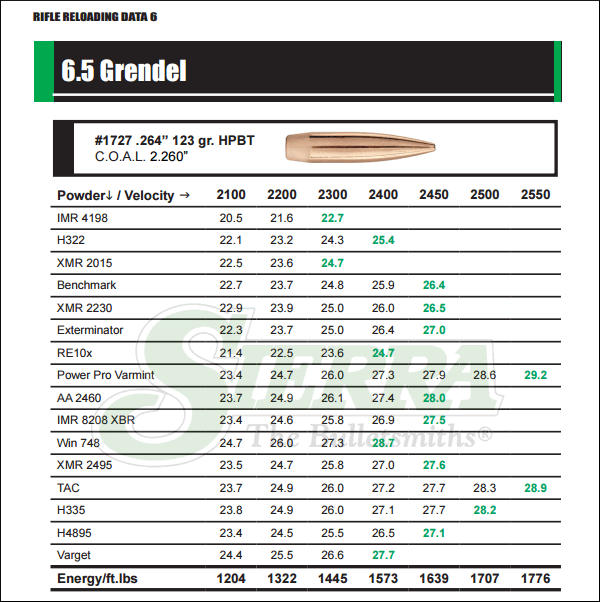
Sierra Bullets has released load data for the 6.5 Grendel, a popular cartridge that works equally well in bolt guns and AR15-platform gas guns. Sierra published comprehensive 6.5 Grendel load data, covering 19 powders and eight (8) different bullets from 85 to 130 grains. NOTE: Hornady-brand brass (see below) was used for Sierra’s 6.5 Grendel tests, not the stronger Lapua 6.5 Grendel brass. Hand-loaders using Lapua 6.5 Grendel brass may need to adjust their loads. Also Winchester WSR primers were used. We imagine most precision hand-loaders will prefer CCI or Federal primers.
Sierra Bullets Tested for 6.5 Grendel Load Data
85gr HP (#1700)
100gr HP (#1710)
107gr HPBT (#1715)
In developing its 6.5 Grendel load data, Sierra tested a very wide selection of propellants, 19 in all. For the 85gr to 100gr varmint bullets, modern powders such as XMR 2230, Power Pro Varmint, and Ramshot TAC offered the best velocity in the 24″ test barrel. For the heavier 120gr to 130gr match bullets, Sierra tested a selection of powders. Highest velocities came with Power Pro Varmint and TAC. If you’re looking for best accuracy, consider the slower burn-rate powders such as IMR 8208 XBR and Varget — but you’ll sacrifice some speed. Overall, Sierra’s latest 6.5 Grendel load data is an excellent addition to the 6.5 Grendel knowledge base. Thanks Sierra!
Here are Sierra’s 6.5 Grendel Load Data Charts for Sierra’s 123gr HPBT, 130gr HPBT, and 130gr TMK. There are a five other tables for lighter-weight Sierra bullets.
History of the 6.5 Grendel Cartridge
The 6.5 Grendel originated as a 6mm PPC necked up to 6.5 mm. After Alexander Arms relinquished the “6.5 Grendel” Trademark, the 6.5 Grendel was standardized as an official SAAMI cartridge. It has become popular with target shooters and hunters alike because it is accurate, efficient, and offers modest recoil. Good for small to medium game, the 6.5 Grendel is available in lightweight hunting rifles, such as the Howa Mini Action Rifle. And the 6.5 Grendel is one of the most accurate cartridges suitable for modern AR-15 platform rifles.
One side has MOA (Minute of Angle) grid for MOA-based scopes. Flip target over for MIL adjustment grid.
Here’s a clever product that can speed up the process of sighting-in your rifles, whether you have a scope with MOA-based clicks or an optic with MIL-based clicks. Sport Ridge offers a pair targets that are printed on BOTH sides with precise grids based on your scope’s click values. One side has an MOA-based grid while the other side of the target has 1/10th Milliradian grid.
Choose between two, double-sided printed targets: the 16″x16″ 100-yard Precision Rifle Target and the 10″x10″ 25/50-yard AR15 Sight-In Target. For both target types, side one has an MOA-based grid for scopes with 1/4-MOA or 1/8-MOA click values. Flip the target over to use the grid for MIL scopes with 1/10th Milliradian click values.
Sport Ridge’s Premium Precision Sight-In Targets allow you to adjust the point of impact quickly because the target’s grid boxes precisely match the click values of MOA and MIL measurement systems. Sport Ridge states: “No more guesswork at matching your optic’s adjustment value, saving your ammunition and time spent sighting-in firearms.” Get the 16″x16″ Precision Target 40-pack for $39.95, or the 10″x10″ AR Target 10-pack for $5.99.
Manufacturer Video Explains How to Sight-In with MOA/MIL Grid Target:
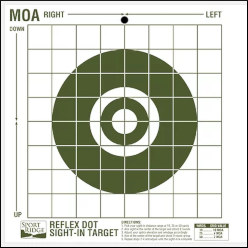
For MOA-type scopes, Sport Ridge also offers a single-sided Reflex Sight-In target with an MOA-based adjustment grid. This has a large center sighting bullseye so it can be used to confirm MOA-based click values at longer ranges (300+ yards) with rifles. Or use it at close range (for 10, 25, or 50 yards) for red-dot equipped pistols or shotguns. A 10-pack is $5.99, or get a 25-pack for $13.99.
REFLEX DOT SIGHT-IN TARGET
• Large Central Bull with MOA Grid
• Table of distance MOA optic click values
• Grid adjustment in direction Up/Down, Left/Right
This video explains general principles of sighting-in rifles, including dialing to Point of Impact:
Thanksgiving is just two days away. What better way to celebrate the Thanksgiving season than to practice your marksmanship shooting some bearded gobblers (of the paper variety). Here’s our custom Turkey Target, ready for family fun. This special Turkey Bullseye Target was created by our friend and Forum member Pascal (aka “DesertFrog”). CLICK HERE for FREE Turkey Target.
If you prefer color targets, here’s another turkey target, courtesy of the NRA. Hone your skills on a trio of turkeys. The target features three red bullseyes, centered on the gobblers. You can print the target in black and white, but they look best in color. Click the image below to download a FREE printable PDF file.
Get a Full Set of Animal Targets
For your convenience, we’ve packaged the Turkey Target along with five (5) other varmint/animal-themed targets. These are all offered in .pdf (Adobe Acrobat) format for easy printing.
It’s great to be able to access online load data for your cartridges. You can quickly get load data for a particular powder and bullet weight. However, there are times when we prefer to consult old-fashioned printed/bound load manuals. The primary reason is that manuals produced by bullet- and tool-makers will, for a particular cartridge, include data for powders from multiple manufacturers. Having a single source can save you time and trouble. For example, if you want to find 6.5 Creedmoor loads using H4350 (Hodgdon), Reloder 16 (Alliant), and N150 (Vihtavuori) you would have to visit three different powder-maker websites, one after another. OR you can pick up a modern load manual and find everything in one place.
There are many excellent printed load manuals on the market. We have used the Berger Manual, Sierra Manual, Nosler Manual, Lyman Manual, and Hornady Manual. We like the Berger and Sierra manuals for match rifle cartridges, and the Nosler, Lyman, and Hornady manuals for hunting loads and pistol cartridges.
The Lyman Reloading Manuals have earn praise over the years:
“Every other reloading book I’ve used favors their own bullets over every other manufacturers. With Lyman you get an honest representation of a wide variety of different… manufacturers. [Lyman has] a ton of reloading data on just about any bullet style you can imagine. I’ve tried a wide range of their recipes and everyone I’ve tried has been spot on. The overall breadth of information this book covers is impressive.” Review by RangetoReal.com.
Nosler #9 Manual Features New Cartridges
If you are looking for fairly recent cartridge/bullet/powder information, in late 2020 Nosler released the Nosler Reloading Guide #9, the latest in a respected series of Nosler load manuals.
This 800-page guide covers 101 cartridge types. New in this edition you’ll find the popular 6mm Creedmoor, 6mm XC, 6.5 PRC, and 7.62×39, along with 20 Nosler, 22 Nosler, 24 Nosler, 27 Nosler and 33 Nosler. This manual is a good resource for PRS shooters and hunters. The Nosler #9 book draws from thousands of hours in the Nosler Ballistic Lab, along with the experience of many respected experts.
The book is available for $31.99 at Midsouth or $29.95 on Amazon. Keep in mind that much of the book’s latest load data is available for free on the Nosler.com online LOAD DATA Center. But to get ALL the data, PLUS all the technical articles, you’ll need to buy the book.
Along with the Nosler #9 Manual (above), here are four other recommended Reloading Manuals:
Here Are Four General Instructional Books That Cover Reloading Procedures:
POWDER BURN RATE TABLE
Here is the most recent powder burn rate chart from Hodgdon/IMR that we could find. Click links below to access printable PDF. Note, some readers have suggested a couple powder ranking issues in the table. However, this is the latest official version from the Hodgdon website, released in October 2022.
Shown is the Redding Model 15-P Competition Piloted Inside Chamfering Tool with pilot rod that centers in the case flash hole. Also shown is a Forster 45° Rocket Tool.
There are a wide variety of reloading tools designed to cut a slight chamfer in case necks and deburr the edge of the case mouth. You don’t need to spend a lot of money for an effective tool. A basic “rocket-style” 45° chamfering tool, such as the Forster, actually does a pretty good job taking the sharp edge off case mouths, particularly if you use a little scotch-pad (or steel wool) to smooth the edge of the cut. The Forster chamfer tool, shown below, is a nicely-made product, with sharper cutting blades than you’ll find on most other 45° chamferers. It costs $24.99 at Brownells.com.
Redding sells a handy piloted chamfering tool with a 15° inside cutting angle and removable accessory handle. This Redding Model 15-P chamferer works really well, so long as you have consistent case OALs. The pilot rod (which indexes in the flash hole) is adjustable for different cartridge types (from very short to very long). This ensures the concentricity of the inside neck chamfer to the case mouth. This quality tool works with cases from .22 to .45 Caliber, and retails for $36.99.
Sinclair International offers a 28° carbide chamferer with many handy features (and sharp blades). The $28.99 Sinclair Carbide VLD Case Mouth Chamfering Tool will chamfer cases from .14 through .45 caliber. This tool features a removable 28° carbide cutter mounted in the green plastic Sinclair handle. NOTE: A hex-shaft cutter head power adapter can be purchased separately for $19.99 (Sinclair item 749002690). This can be chucked in a power screwdriver or used with dedicated power drives when doing large volumes of cases.
Many folks feel they can get smoother bullet seating by using a tool that cuts at a steeper angle. We like the 22° cutter sold by Lyman. It has a comfortable handle, and costs just $12.99 at MidsouthShooterssupply.com. The Lyman tool is an excellent value, though we’ve seen examples that needed sharpening even when new. Blade-sharpening is easily done, however.
K&M makes a depth-adjustable, inside-neck chamferer (“Controlled Depth Tapered Reaper”) with ultra-sharp cutting flutes. The latest version, which costs $59.95 at KMShooting.com, features a central pin that indexes via the flash hole to keep the cutter centered. In addition, the tool has a newly-designed handle, improved depth-stop fingers, plus a new set-screw adjustment for precise cutter depth control. We caution, even with all the depth-control features, if you are not careful, it is easy to over-cut, slicing away too much brass and basically ruining your neck. We think that most reloaders will get better results using a more conventional chamfer tool, such as the Forster or Redding 15-P.
One last thing to note — tools like the K&M and the Sinclair chamferer are often described as VLD chamferers. That is really a misnomer, as bullets with long boat-tails actually seat easily with very minimal chamfering. In reality, these high-angle chamferers may be most valuable when preparing brass for flat-base bullets and bullets with pressure rings. Using a 22° or 28° chamferer can reduce the risk of cutting a jacket when using VLD bullets though — so long as you make a smooth cut.
At the request of our readers, we provide select “Deals of the Week”. Every Sunday afternoon or Monday morning we offer our Best Bargain selections. Here are some of the best deals on firearms, hardware, reloading components, optics, and shooting accessories. Be aware that sale prices are subject to change, and once clearance inventory is sold, it’s gone for good. You snooze you lose.
NOTE: All listed products are for sale to persons 18 years of age or older. No products are intended for use by minors.
1. Midsouth — Hodgdon and Vihtavuori Powders in Stock
⏺ Ultra-popular Hodgdon and VV powders now available at good prices
Many super-popular Hodgdon and Vihtavuori (“VV”) powders are in stock right now at Midsouth. That’s right, you can order Hodgdon Varget, H4350, and H4831SC right now for $50.99/lb (or $43.62/lb for 8-lb H4350, H4831sc). And other Hodgdon powders are available starting at $36.99/lb. Plus many popular Vihtavuori powders are in stock at Midsouth including VV N133, N150, N310, N550, N560 and more.
2. Sportsman’s WH — Savage Axis Rifle/Scope Combo, $369.99
⏺ Truly great deal for hunting rifle with Bushnell 4-12X Scope
Here’s a shockingly good deal on a scoped Savage hunting rifle. The Sportsman’s Warehouse exclusive Savage AXIS XP rifle features a black synthetic stock paired with a carbon steel, button-rifled sporter barrel, plus a Bushnell scope. Right now this rig is offered in many chamberings for just $369.99 with optic: .223 Rem, .243 Win, 6.5 Creedmoor, .270 Win, .308 Win, .30-06 Springfield, and .350 Legend. This package rifle is ready to go hunting, thanks to a mounted and bore-sighted Bushnell 4-12x40mm scope.
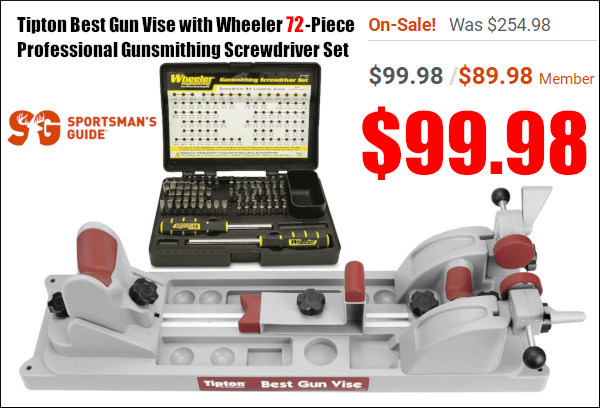
3. Sportsman’s Guide — Tipton Best Gun Vise + Wheeler Gunsmithing Kit, both for $99.98
⏺ Outstanding gun vise PLUS a 72-piece gunsmithing driver set
This is a great $99.98 combo kit for working on rifles and shotguns. This is a super deal — the same gun vise with a lesser 43-piece tool kit costs $139.99 at MidwayUSA and the 72-bit kit sells for $64.99 by itself. The Tipton Best Gun Vise is stable with plenty of storage for solvents, patches, small tools and parts. The vise can adapt to hold a variety of long guns, including ARs. Along with the Gun Vise, you get a 72-piece Wheeler screwdriver kit with two driver handles and 70 bits (Standard, Phillips, Allen, and Torx).
⏺ Great deal on covert carry gun after $150 Rebate
Beretta Tomcats are slim, compact, metal-framed .32 ACP semi-auto pistols. These are good “deep concealment” guns that can be carried in a pocket or purse. Currently Beretta Tomcat Pistols are on sale at Palmetto State Armory. Choose from a wide variety of finishes and colors for $399.99. But right now there is a $150 Beretta Rebate good through 12/31/2023. With the $150 factory rebate, your net cost for a Tomcat pistol is just $249.99.
⏺ Versatile storage cabinet at very reasonable price
If you already have a good gun safe, but need a rugged security cabinet to hold optics, tools, stocks, and other valuables, consider this. The Homak First Watch Steel Security Cabinet is made from thick steel and features a pry-resistant door frame and heavy-duty locking plate. Choose either 8-gun or 10-gun capacity for the same $179.99 sale price (or $161.99 for Sportsman’s Guide members). This Homak Security Cabinet includes a fixed metal shelf and plastic barrel rest kit.
⏺ Great spotting scope for the price with rock-solid warranty
Having a quality spotting scope can help when in the field, at matches, or just having fun at the range. We found a great deal on the Vortex Diamondback 20-60x60mm spotting scope, now just $249.99 at MidwayUSA with FREE Shipping. This spotting scope has good light transmission throughout the magnification range. Sharpness is good, and this spotter is protected by Vortex’s VIP Unlimited Lifetime Warranty. If you need a bigger objective, MidwayUSA also has the 20-60x80mm version for $324.99.
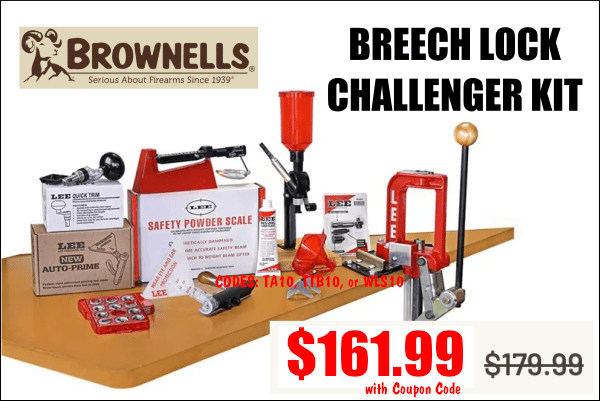
7. Brownell’s — LEE Breechlock Kit, $161.99 with Discount Codes
⏺ Get a complete reloading kit for less than the cost of a single-stage press
Would you like to grab a complete reloading setup for under $175.00? Brownells offers the Lee Breechlock Press Package for a low $174.99 price. But it gets better — enter Brownells 10% Off codes TA10, TTB10, or WLS10 at checkout to bring the price down to a crazy low $161.99 (before tax/shipping). This is a great deal on a complete reloading package with all the essentials — Press, Powder Measure, Scale, Priming Tool, Chamfer Tool, Shellholders, and more.
⏺ Good budget-priced laser rangefinder plus binoculars combo set
If you need affordable optics for a late-fall hunt, consider the Bushnell Prime Rangefinder/Binoculars combo. For just $189.99 you get a compact, 1300-yd-rated bright-lens laser rangefinder plus Prime 10×42 binoculars with EXO Barrier lens coating. This combo is a great bargain. The Bushnell Prime 1300 LRF by itself is $164.99 on Amazon. So you effectively get the 10×42 Bushnell binoculars for just $25.00.
⏺ Amazing price on good knife with very solid reviews
Everyone can use a good, handy folding knife to carry in the field or use at home. This rugged, spring-assist Tac-Force Folding Bowie Knife has a 3.5″ stainless spearpoint blade and measures about 9″ when folded. The inboard part of the blade has serrations for cutting ropes and tubing. Priced under ten bucks, this Tac-Force knife has earned excellent reviews (71% 5-star, 15% 4-star) from verified purchasers. Watch Amazon’s customer videos to see how the blade opens rapidly with spring assist.
⏺ Easy to see hits at distance, convenient 200-target roll
When shooting plain paper targets, it can be hard to see impacts. With these handy 4″ Splatterburst Targets your hits instantly display in bright yellow upon impact. Spend more time shooting and less time looking for shots. These adhesive targets peel off the 200-ct roll and then stick firmly to your target backer. Get a roll of 200 adhesive targets for $25.99 on Amazon. That works out to just 13 cents per target.
As an Amazon Associate, this site earns from qualifying purchases.


 It’s common for new pistoleros to start shooting at cans or clay birds at a public range. That can be fun, but it’s better to start with proper targets, placed at eye level, at 7-10 yards. We like to use targets with large, brightly colored circles. Focus on putting 5 shots in a circle. We recommend targets that have multiple bullseyes or aiming points — that way you don’t have to constantly change your target. There are also special paper targets that can help you diagnose common shooting problems, such as anticipating recoil. EZ2C Targets offers many great target designs with bright, red-orange aim points. You can also use the bright orange Birchwood Casey stick-on Target Dots (right). These come in a variety of diameters. We like the 2″ dot at 10 yards.


 Happy Thanksgiving folks. Major gun and optics makers, tool crafters, and large outdoor gear vendors are offering great bargains for Black Friday week. Expect discounts from 10% to 30% on a wide range of quality products.


 A gifted “natural” shooter, Kirsten started shooting fairly late — at age 16. Despite her relatively late start, she learned very quickly, and managed to earn a place on the University of Nebraska shooting team. That literally opened up a new world for Kirsten: “During the course of my career, I’ve had a lot of success. I’ve gone to World Cups… in Zagreb, Croatia, in Munich, Germany. I’ve won National Championships, and got on to the U.S. Olympic short list, so it’s been a good career.”


 For MOA-type scopes, Sport Ridge also offers a single-sided


 Nosler #9 Manual Features New Cartridges