We first ran this story a few years back. But it’s still a very interesting subject for benchrest shooters. Shown above, the 30 BR (a 6mmBR necked up to .30 caliber) currently rules the benchrest-for-score game. However, a 30 BR Improved offers some potential advantages, particularly when the winds are strong or tricky. In this article Al Nyhus explains his 30 BRX wildcat. Running Hodgdon H4198, Al says he gets an easy 150 -200 FPS more than the conventional 30 BR. That can translate to less drift in the wind. It also lets you pursue a higher speed node, which can lead to improved accuracy with some barrels.
Forum member Al Nyhus is a top-level score shooter who has competed successfully with the 30 BR cartridge in VFS (Varmint for Score) matches. Al has been working on an “improved” 30 BR cartridge that delivers extra velocity. Al’s 30 BRX cartridge is inspired by the 6mm BRX cartridge, popular in 600-yard benchrest and across-the-course competition. The 6mm BRX cartridge maintains the same sidewall profile and shoulder angle as the parent 6mmBR case. Likewise, the 30 BRX retains the 30° shoulder used on the popular 30 BR cartridge.
Al reports: “Thought you might like to see what I’ll be working with in my VFS gun this season. It’s a true 30 BRX — a 30 BR with the shoulder moved forward 0.100″ with the standard BR shoulder angle. Stan Ware of SGR Custom Rifles built one last season for Steve Grosvenor and I was really impressed by the performance of Steve’s gun. The 30 BR barrel on my VFS gun needed replacing, so the new 30 BRX got the nod.”
30 BRX Delivers 150-200 FPS More Velocity than 30 BR
Al says his 30 BRX gives a solid 150-200 fps speed gain over the 30 BR at the top, while needing just 2.5-3.0 more grains of Hodgdon H4198 to do so. A 30 BR case holds on average 40.8 grains of water, while the 30 BRX holds 42.3 grains (roughly 4% more). So the 30 BRX delivers a 7% increase in velocity with a mere 4% increase in H20 capacity. That’s pretty good efficiency. [Editor’s Note: Assuming 34 grains of H4198 is a typical 30 BR match load, Al’s increase of 2.5-3.0 grains for the 30 BRX represents roughly a 7.5-8.5% increase in actual powder burned. That explains the higher velocities.]
Why did Nyhus decide to try an “improved” 30 BR?
Al explains: “The 30 BRX was created to operate at a [higher] velocity level than can be achieved with the standard 30 BR case, while at the same time keeping the easy-tuning characteristics of the standard 30 BR case. We also wanted to use the same powders currently used with the 30 BR and maintain similar operating pressures.” Is the 30BRX harder to shoot because of the increased velocity? Al doesn’t think so: “In a 13.5-lb HV gun, the 30 BRX case is a pleasure to shoot with just a flea bite of recoil.”
Will the 30 BRX Become Popular in Score Competition?
The 30 BR is already an exceptionally accurate cartridge that dominates short-range Benchrest for Score competition. Will the 30 BRX make the standard 30 BR obsolete? Nyhus doesn’t think so. However, Al believes the 30 BRX offers a small but important edge in some situations: “On any given day, it’s the shooter that hits the flags best and makes the fewest mistakes that ends up on top. No amount of velocity will save you when you press the trigger at the wrong time. Missing a switch or angle change at 200 yards that results in 3/4″ of bullet displacement on the target can’t be compensated for with another 200 fps. That’s the hard fact of benchrest shooting. But on those days when, as Randy Robinett says, ‘our brains are working’, the BRX may offer enough of an advantage to turn a close-but-no-cigar 10 into an ‘X’ at 200 yards. Or turn a just-over-the-line 9 into a beggar 10.” Given the fierce competition in Score matches, an extra 10 or another X can make the difference between a podium finish and also-ran status.
Rimfire Benchrest can be fun and rewarding. It can also be frustrating because sourcing superior lots of ammo is a never-ending challenge. Still we like rimfire benchrest because you don’t need to load at the range. Plus rimfire barrels last a very long time (our friend Joe Friedrich set an ARA Benchrest record with a 100,000+ round-count barrel). Here’s a great video from the National Rimfire Benchrest Association of Ireland (NRBAI). Production quality is excellent! We highly recommend you watch this video, which does a great job illustrating both the fun and challenge of rimfire benchrest competition.
If you’ve never seen 50m Rimfire Benchrest competition, this video is well worth watching:
“If you need to get your mind away from everything… then look down a scope, concentrate, and be disciplined.”
“Comradery is one of our organization’s key traits… there are no barriers of gender, age or mobility. Just a very diverse, bunch of good people enjoying a sport together.”
“The skill, in brief, is having the ability to hit the equivalent of the top of a pinhead at 50 meters, in all conditions with a .22 round. Not easy, especially when you have to do it 50 times to get a maximum score of 500 [points], 250 per sheet.”
Back in the USA — The New National 50 Benchrest League
If this article has motivated you to try rimfire benchrest competition back here in the good ol’ USA, there is a new organization that can help. Launched just a couple seasons ago, the National 50 Benchrest League has easy-to-understand rules, and offers competition with a wide variety of rifles, even including air rifles. The whole idea was to make competition more affordable and get more shooters on the firing line. There are three classes — Pellet, Sportsman, and PRO. One can be very competitive in the Sportsman Class with a basic factory .22 LR rig or Air Rifle.
N50 competition is unique in allowing air rifle shooters to compete side-by-side with rimfire shooters. This allows folks to compete without the cost of expensive “top-dollar” rimfire ammo. Pellets are relatively inexpensive, and yes air is still free!
About N50 — The National 50 Benchrest League
Commentary by Joe Friedrich, Open Grove Benchrest
The new National 50 Benchrest League (N50) is a unique shooting experience. We shoot air rifles with pellets and slugs alongside .22 LR Rimfire shooters. We currently have sanctioned clubs throughout the USA offering competition and good fellowship.
N50 has three Classes: Pellet, Sportsman, and PRO. The first Pellet Class is strictly for pellet airguns ranging in calibers from .177-.30 using Diabolo-style pellets from various manufacturers.
The second class is the Sportsman Slug/Rimfire. This combined class allows any factory air rifle shooting commercially-made slugs in calibers from .177-.30 to compete against any factory rimfire that utilizes a factory-barreled action with no attachments to barrel. Pellet air rifles may also compete in this class.
The third class is the PRO Class, and no you do not have to have some magic card that says “Professional” to compete. This class allows purpose-built air rifles, and what we call “unlimited” rimfire rifles to compete. Three types of loads are allowed in PRO Class: .177 slug air-driven, .22 slug air-driven, and any .22 LR ammunition.
Another point — in N50, competitors are allowed to move up in class — you aren’t restricted to a “lower” division. For example, Pellet Class shooters can also move up to shoot in Sportsman and Pro. In addition, Factory rimfires are allowed in Pro Class. This way shooters with the less-expensive rifles can shoot more relays and also see how they compete with the unlimited rigs. It’s all about having fun.
We wanted to make N50 as simple as we could combining air rifles with rimfire so folks who have a factory rimfire can participate and have fun. We also did not want a lot of classes, so combining the two gun types would be simpler. To be honest we were worried that the rimfires will outpace the air rifles, but that was not the case at this year’s Nationals.
Air Rifle on beautifully crafted, plated Pappas Rest.
National 50 Benchrest League Rules and Course of Fire
The official N50 website, National50.net, lists N50 rules, classes, courses of fire, and membership requirements. There are currently 16 affiliated clubs nationwide, with more coming soon.
And the 2022 N50 National Championship is coming up soon. The event, for rimfire rifles and air rifles, will be held August 26-28, 2022 at the Whittington Center in Raton, New Mexico
General Rules — Here are some of the more notable N50 General Rules that apply to N50 matches:
Target Distance: 50 yards
Match Times: 20 minutes per target
Targets: Official targets produced and distributed by N50
Aggregate Score: Cumulative score of 3 targets shot in sequence on same day
Scoring: No competitor shall score their own target
As far as hardware, N50 is pretty open. For all 3 classes, any scope is allowed and any trigger is allowed. For all 3 classes, stocks are unrestricted, stocks may be bedded, and rifle weight is unlimited. However, the Sportsman Class must retain factory barrel and action. N50 competitors in all classes may use 1-piece rests, 2-piece rests, bags, or bipods — whatever they prefer.
CLICK HERE for a free, printable version of the N50 practice target shown above. After clicking, SCROLL DOWN the page and you will see the left and right target sections that will print on 8.5×11″ paper. You can also purchase the Official N50 11″ x 17″ printed Match Targets for $25 per 100 plus shipping.
Credit Boyd Allen for finding this NRBAI Benchrest Video
To get the best accuracy out of any benchrest rifle, you need to find the optimal position of front rest and rear bag. The important point to remember is that each rig is different. One gun may perform best with the front rest right at the tip of the forearm (Position ‘D’ in photo), while another gun will work best with the rest positioned much further back. This Editor’s own 6mmBR rifle has a laminated stock that is pretty flexy in the front. It shoots best with the front rest’s sandbag located a good 6″ back from the forearm tip (position ‘A’).
Here’s some benchrest advice that can help you reduce vertical and shoot tighter groups… without spending another penny. Many benchrest shooters spend a fortune on equipment and devote countless hours to meticulous handloading, but they never experiment with their rifle’s position/balance on the bags. This article explains why you should test your rifle in various positions. What you learn may surprise you (and improve your scores).
Next time you go to the range, experiment with the position of your rifle on the front rest, and try a couple different positions for the rear bag. You may find that the rifle handles much better after you’ve made a small change in the placement of your gun on the bags. Recoil can be tamed a bit, and tracking can improve significantly, if you optimize the front rest and rear bag positioning.
This competitor has the front rest positioned fairly far forward but not all the way out. Note the stop on the front rest — this limits forward stock travel.
A small change in the position of the forearm on the front rest, or in the placement of the rear bag, can make a big difference in how your gun performs.
Balance Your Gun BEFORE You Spend Hours Tuning Loads
In the pursuit of ultimate accuracy, shooters may spend countless hours on brass prep, bullet selection, and load tuning. Yet the same shooters may pay little attention to how their gun is set-up on the bags. When you have acquired a new rifle, you should do some basic experimentation to find the optimal position for the forearm on the front rest, and the best position for the rear bag. Small changes can make a big difference.
Joel Kendrick, past IBS 600-yard Shooter of the Year, has observed that by adjusting forearm position on the front rest, he can tune out vertical. He has one carbon-fiber-reinforced stock that is extremely rigid. When it was placed with the front rest right under the very tip of the forearm, the gun tended to hop, creating vertical. By sliding the whole gun forward (with more forearm overhang ahead of the front sandbag), he was able to get the whole rig to settle down. That resulted in less vertical dispersion, and the gun tracked much better.
Fore/aft stock position is important even with very wide fore-ends.
Likewise, the placement of the rear bag is very important. Many shooters, by default, will simply place the rear bag the same distance from the front rest with all their guns. In fact, different stocks and different calibers will NOT behave the same. By moving the rear bag forward and aft, you can adjust the rifle’s overall balance and this can improve the tracking significantly. One of our shooters had a Savage 6BR F-Class rifle. By default he had his rear bag set almost all the way at the end of the buttstock. When he slid the rear bag a couple inches forward the gun tracked much better. He immediately noticed that the gun returned to point of aim better (crosshairs would stay on target from shot to shot), AND the gun torqued (twisted) less. The difference was quite noticeable.
A small change in the position of the forearm on the front rest, or in the placement of the rear bag, can make a big difference in how your gun performs. You should experiment with the forearm placement, trying different positions on the front rest. Likewise, you can move the rear bag back and forth a few inches. Once you establish the optimal positions of front rest and rear bag, you should find that your gun tracks better and returns to battery more reliably. You may then discover that the gun shoots smaller groups, with less vertical dispersion. And all these benefits are possible without purchasing any expensive new gear.
Vertical stringing is a common problem that all precision shooters will face sooner or later. In addition to ammo inconsistencies, many other factors can cause vertical stringing. Accordingly, it’s important that you analyze your gun handling and bench set-up systematically.
EDITOR: Folks, READ THIS ARTICLE! You WILL benefit. There are some VERY important insights here. You’ll learn ways to set up your gun better, and check for various technical issues. That can save you time at the range and save you money spent on expensive bullets and powder.
In this article, Hall of Fame benchrest Shooter Speedy Gonzalez explains how to eliminate mechanical and gun-handling problems that cause vertical spread in your groups. Speedy’s article addresses the many human and the hardware factors that can cause vertical.
Speedy Gonzalez, noted shooter, gunsmith and member of the Benchrest Hall of Fame, offers these pearls of wisdom to help you eliminate vertical in your shot strings. Remember that vertical can result from myriad gear issues and gun-handling mistakes. Try to isolate one item at a time as you work to improve your groups.
BAGS and REST–VERY IMPORTANT
• Front Rest Wobble — You will get vertical if the top section of the front rest is loose. Unfortunately, a lot of rests have movement even when you tighten them as much as you can. This can cause unexplained shots.
• Rifle Angle — If the gun is not level, but rather angles down at muzzle end, the rifle will recoil up at butt-end, causing vertical. You may need to try different rear bags to get the set-up right.
• Front Bag Tension–Vertical can happen if the front sand bag grips the fore-arm too tightly. If, when you pull the rifle back by hand, the fore-arm feels like it is stuck in the bag, then the front bag’s grip is too tight. Your rifle should move in evenly and smoothly in the sand bags, not jerk or chatter when you pull the gun back by hand.
• Sandbag Fill — A front sandbag that is too hard can induce vertical. Personally, I’ve have never had a rifle that will shoot consistently with a rock-hard front sandbag. It always causes vertical or other unexplained shots.
• Bag Ears — If the channel between the Rear Bag’s ears is not in line with the barrel, but is twisted left or right, this can affect recoil and vertical consistency. And take note — if the bag is off-axis quite a bit, you can also get horizontal stringing.
• Reliability — ALL your bench equipment must work flawlessly. If it doesn’t, get it fixed or get rid of it. We need all our attention on wind flags.
GUN HANDLING and BENCH TECHNIQUE
• Be Consistent — You can get vertical if your bench technique is not the same every shot. One common problem is putting your shoulder against the stock for one shot and not the next.
• Free Recoil — Free recoil shooters should be sure their rifle hits their shoulder squarely on recoil, not on the edge of their shoulder or the side of their arm.
• Head Position — Learn to keep your head down and follow-through after each shot. Stay relaxed and hold your position after breaking the shot.
• Eyes — Learn to shoot with both eyes open so you can see more of the conditions.
• Last Shot Laziness — If the 5th shot is a regular problem, you may be guilty of what I call “wishing the last shot in”. This is a very common mistake. We just aim, pull the trigger, and do not worry about the wind flags. Note that in the photo above, the 5th shot was the highest in the group–probably because of fatigue or lack of concentration.
• Last Shot Low — I hear a lot of discussion about low shots in a group and apparently this occurs a lot on the 5th shot. If your 5th shot that goes out most of the time, you can bet you are doing something at the bench.
• Seating — When possible, bring your own stool so that you can sit comfortably, at a consistent height, every time you shoot.
LOAD TUNING
• Find the Sweet Spot — A load that is too light or too heavy can cause vertical problems. When you’ve tuned the load right, you should see a reduction in vertical. Even 0.1 grain may make a difference, as will small changes in seating depth.
• Primers — If you’re getting vertical, and everything else looks fine, try another brand of primers. And remove the carbon from the primer pockets so the primers seat uniformly every time.
• Case Prep — When you chamfer the inside of your case necks make sure they are smooth enough that they don’t peel jacket material off when you seat the bullet. Bullets with J4 Jackets (like Bergers) and Lapua Scenar bullets seem more prone to jacket scratching or tearing than Sierra bullets.
• Shell Holders — Keep shell holders clean, in both your press and priming tool. I have seen so much dirt/crud in shell holders that the cases end up get sized crooked because the rim is not square to the die.
• Water in Cases — I see people walking around with case necks turned up in the loading block. A lot of the time there is condensation dropping from the roof of your loading area. If one drop of water gets in a case you are in trouble. How many times have you had a bad low shot when it has been raining and you have been walking around with your cases turned up in your block?
MECHANICAL and HARDWARE ISSUES
• Barrel Weight — A lot of rifles are muzzle-heavy. Some rifles have too heavy a barrel and this causes vertical, especially when shooting free recoil. Basically the gun wants to tip forward. The remedy is to trim or flute the barrel, or add weight in the rear (if you can stay within weight limits).
• Unbalanced Rifle — If the rifle is not balanced, it does not recoil straight, and it will jump in the bags. If the rifle is built properly this will not happen. Clay Spencer calls this “recoil balancing”, and he uses dual scales (front and rear) to ensure the rifle recoils properly.
• Firing Pin — A number of firing-pin issues can cause vertical. First, a firing pin spring that is either too weak or too strong will induce vertical problems. If you think this is the problem change springs and see what happens. Second, a firing pin that is not seated correctly in the bolt (in the cocked position) will cause poor ignition. Take the bolt out of rifle and look in the firing pin hole. If you cannot see the entire end of firing pin it has come out of the hole. Lastly, a firing pin dragging in bolt or shroud can cause vertical. Listen to the sound when you dry fire. If you don’t hear the same sound each shot, something is wrong.
• Trigger — A trigger sear with excessive spring load can cause problems. To diagnose, with an UNLOADED gun, hold the trigger in firing position and push down on sear with your thumb. If it is hard to push down, this will cause vertical problems.
• Stock Flex — Some stocks are very flexible. This can cause vertical. There are ways to stiffen stocks, but sometimes replacement is the best answer.
SCOPE ISSUES
• Lock Rings — This year alone I have seen nine lock rings on scopes that are not tight. Guess what that does to your group? Make sure yours are tight.
• Big Tubes Need Tension — We’ve observed that some 30mm scope rings are not getting tight enough, and scopes are slipping in the rings under recoil. This will cause point of aim movement.
• Windage Bases — If you’re using a conventional-style single dovetail with rear windage adjustment, make sure both sides of the windage screws are tight. This can induce both windage AND vertical issues since the rear ring is held down by the windage tension.
AWARENESS of CONDITIONS and READING WIND
• Basic Wind-Reading Rule–If you do not know how to read wind flags or are very inexperienced, try to shoot your group with the flags all going in one direction.
• Rate of Fire — The longer you wait between shots when a condition is changing, the more the condition change will affect your shots.
• Look Far and Wide — Learn to look at the whole field of flags, not just the row in front of you. Many times a change quite a ways out will cause shot to go out of your group well before that change shows up in front of your bench.
• Don’t Fear the Wind — When you realize that the wind is your friend you will become a much better benchrest shooter. By this I mean that wind skills can separate you from other shooters who have equally good equipment. To learn how to read the wind, you must practice in challenging winds, not only in good conditions.
• Watch Wind Direction AND Velocity — Pay attention to angle changes on flags. Even though you see the same windspeed indicators, angle changes make a big difference in your groups.
• Watch While You Wait — Between courses of fire, whenever possible, watch conditions on the range. That way you will be aware of any changes in conditions since your last group and you will be mentally prepared for the new condition.
SPECIAL ADVICE for HUNTING RIFLES
• Clean That Barrel — Most hunting rifle barrels do not get cleaned enough. If you keep barrel clean it will shoot better for you. You should clean your barrel well after every 10 to 12 shots. If you’re lazy, just use Wipe-Out.
• First Shot Inconsistency — Most hunting rifles will not put the first shot (after cleaning) with the subsequent shots. So, after cleaning, if you have a rifle that tosses that first shot high or wide, then shoot one fouling shot before going hunting or before you shoot for group.
• Barrel Heat — Thin-contour “sporter” barrels WILL change point of impact as they heat up. When testing loads for your hunting rifle, take your time and don’t let the barrel get hot on you.
When a rifle isn’t shooting up to it’s potential, we need to ask: “Is it the gun or the shooter?” Having multiple shooters test the same rifle in the same conditions with the same load can be very revealing…
When developing a load for a new rifle, one can easily get consumed by all the potential variables — charge weight, seating depth, neck tension, primer options, neck lube, and so on. When you’re fully focused on loading variables, and the results on the target are disappointing, you may quickly assume you need to change your load. But we learned that sometimes the load is just fine — the problem is the trigger puller, or the set-up on the bench.
Here’s an example. A while back we tested two new Savage F-Class rifles, both chambered in 6mmBR. Initial results were promising, but not great — one gun’s owner was getting round groups with shots distributed at 10 o’clock, 2 o’clock, 5 o’clock, 8 o’clock, and none were touching. We could have concluded that the load was no good. But then another shooter sat down behind the rifle and put the next two shots, identical load, through the same hole. Shooter #2 eventually produced a 6-shot group that was a vertical line, with 2 shots in each hole but at three different points of impact. OK, now we can conclude the load needs to be tuned to get rid of the vertical. Right? Wrong. Shooter #3 sat down behind the gun and produced a group that strung horizontally but had almost no vertical.
Hmmm… what gives?
>
Shooting Styles Created Vertical or Horizontal Dispersion
What was the problem? Well, each of the three shooters had a different way of holding the gun and adjusting the rear bag. Shooter #1, the gun’s owner, used a wrap-around hold with hand and cheek pressure, and he was squeezing the bag. All that contact was moving the shot up, down, left and right. The wrap-around hold produced erratic results.
Shooter #2 was using no cheek pressure, and very slight thumb pressure behind the tang, but he was experimenting with different amounts of bag “squeeze”. His hold eliminated the side push, but variances in squeeze technique and down pressure caused the vertical string. When he kept things constant, the gun put successive shots through the same hole.
Shooter #3 was using heavy cheek pressure. This settled the gun down vertically, but it also side-loaded the rifle. The result was almost no vertical, but this shooting style produced too much horizontal.
A “Second Opinion” Is Always Useful
Conclusion? Before you spend all day fiddling with a load, you might want to adjust your shooting style and see if that affects the group size and shape on the target. Additionally, it is nearly always useful to have another experienced shooter try your rifle. In our test session, each time we changed “drivers”, the way the shots grouped on the target changed significantly. We went from a big round group, to vertical string, to horizontal string.
Interestingly, all three shooters were able to diagnose problems in their shooting styles, and then refine their gun-handling. As a result, in a second session, we all shot that gun better, and the average group size dropped from 0.5-0.6 inches into the threes — with NO changes to the load.
That’s right, we cut group size in half, and we didn’t alter the load one bit. Switching shooters demonstrated that the load was good and the gun was good. The skill of the trigger-puller(s) proved to be the limiting factor in terms of group size.
Want to shoot better scores at your next match? Here’s a smart, inexpensive do-it-yourself project from the good folks at Criterion Barrels. For less than a dollar or two in materials, in just a few minutes you can create a handy, effective mirage shield, custom-fitted to your favorite rifle.
All precision shooters should be familiar with mirage, a form of optical distortion caused primarily by variations in air temperature. Savvy shooters will use mirage as a valuable tool when gauging wind speed and direction. Natural mirage is unavoidable, but there are many techniques designed to limit its influence in long-range marksmanship.
A form of mirage can be produced by the barrel itself. Heat rising from the barrel may distort sight picture through your optics, leading to erratic results. Mirage caused by barrel heat can be reduced dramatically by a simple, light-weight mirage shield.
How to Make a Mirage Shield
A mirage shield is an extremely cost-effective way to eliminate a commonly-encountered problem. Making your own mirage shield is easy. Using old venetian blind strips and common household materials and tools, you can construct your own mirage shield for under one dollar.
Materials Required:
1. Vertical PVC Venetian blind panel
2. Three 1”x1” pieces adhesive-backed Velcro
3. Ruler or tape measure
4. Scissors or box cutter
5. Pencil or marker
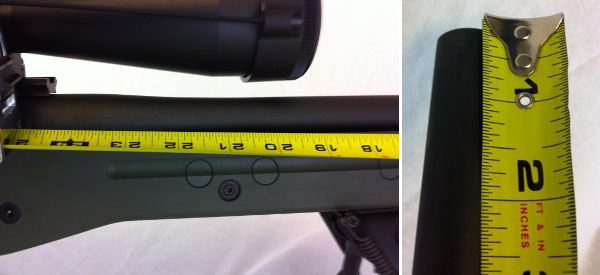
1. Measure the distance from the end of the receiver or rail to the crown of the barrel.
2. Using a pencil and ruler, measure the same distance and mark an even line across the blind.
3. Cut across the line using scissors or a box cutter, shortening the blind to the required length. (Remember, measure twice, cut once!)
4. Expose the adhesive backing on the loop side of the Velcro. Center and apply the Velcro strips on the barrel at regular intervals.
5. Expose the adhesive backing of the fuzzy side of the Velcro.
6. Place the blind on the upper side of the barrel. Apply downward pressure. Once the Velcro has secured itself to the barrel, separate the two sides. Proceed to mold both sides of the Velcro to fit the contour of their respective surfaces.
7. Reaffix the blind. Barrel related mirage is now a thing of the past!
NOTE: You can attach the Velcro on the opposite side of the blind if you want the blind to curve upwards. Some folks thinks that aids barrel cooling — it’s worth a try.
How to Remove and Re-Attach the Mirage Shield
Removal of your mirage shield is accomplished by simply removing the blind. You can un-install the Velcro by pulling off the strips and then gently removing any adhesive residue left behind using an appropriate solvent. (Simple cooking oil may do the job.) Caution: With fine, high-polish blued barrels, test any solvent on a non-visible section of the barrel. Before storing the gun, re-oil the barrel to remove active solvents and residual fingerprints.
Available for under $230.00 including front bag, the Caldwell Fire Control front rest is a very good value. It makes the co-axial, joystick design more affordable than ever. We used the Fire Control front rest when testing our Ultimate Varminter 20 Practical AR. Once we removed some sand from the tri-lobe front bag, the rest worked quite well.
Get a Fire Control Rest for $220.99
Right now you can get the Caldwell Fire Control Front Rest for just $220.99, an 18% savings off the regular price. The $220.99 Amazon price is a great deal for guys on a tight budget who want a modern joystick-style front rest (this same Caldwell rest sells for up to $269.99 elsewhere).
With the conversion described in this article, you can put together a system that works pretty darn well, and is more than adequate for many applications, including prairie-dog hunting (from a bench). Put the money saved into a nice custom, hand-lapped barrel or some bullets for your varminter.
Upgrading Fire Control Front Rest with Sinclair Top
While most Fire Control owners are happy with the product, many have wanted to replace the tri-lobe front bag with a more conventional front bag from Protektor or Edgewood. This isn’t as easy as it looks because the width of the Fire Control top is too narrow for most standard 3″-wide front bags. On a “special order” basis, Protektor has crafted some narrower leather front bags that fit pretty well, but some shooters have decided to “upgrade” the entire front assembly.
Forum member Doug M. (aka DrJeckyl), has come up with an elegant solution that allows a Sinclair Int’l Benchrest Rest Top to be fitted to the Fire Control Rest. Doug notes: “The Caldwell Fire Control is a nice rest for the money, but it comes up short in the rest top department. The Sinclair RT-3 [or its replacement, the Gen II B/R top] fits perfect with minor modifications.” Shown below are the main components:
To adapt the Sinclair RT-3 or Gen II B/R top, Doug merely had to drill a couple holes in the RT-3 baseplate, and adapt a spacer to get the height correct: “The Caldwell factory top has a raised mounting portion so a 1/8″ piece of stock will be needed as a spacer to the flat-bottom RT-3. The spacer needs to be cut to the same length as the movable portion on the rest. And you should plan the mounting accordingly so the left thumbscrew clears the vertical height column at full left position (there is a cutaway in the rest under the thumbscrew that allows for easy access to the screw).” We labeled the photo with dimensions, but Doug cautions you should measure your own original plate to insure the drill locations are correct for your unit.
The completed installation, with the RT-3 installed on the Fire Control rest, is shown at the top of this article. Doug says it works very well. To learn more about this conversion, with Doug’s measurements for the hole-spacing and his specs on the fasteners, go to the original thread in our Shooter’s Forum. NOTE: Sinclair no longer sells the RT-3 top, but Sinclair’s $89.99 Gen II B/R top can be converted just as easily. LINK to Fire Control Rest Top Conversion Forum Thread.
Every Saturday we present interesting, informative videos for our Daily Bulletin readers. Here we feature five YouTube videos that offer a ton of useful information for serious shooters. We start with a great video about setting up rifle, rest, and bag on the bench. Then Hall-of-Fame benchrest shooter Speedy Gonzalez shows smart methods for cleaning barrels. Next F-Class Ace Keith Glasscock explains how to optimize your rifle after travel. In the fourth video, AutoTrickler inventor Adam MacDonald shows how to optimize the AutoTrickler V4. Next the truly outstanding 21st Century Power Neck-Turning lathe is showcased.
How to Set Up Your Rifle, Rest, and Bag on the Bench
To get the best results in benchrest shooting, you need to set up all the gear on your bench properly. That includes front rest placement, rear bag position, spotting scope set-up, and placement of cartridge holder/caddy, and possibly an elbow/forearm rest. When setting up the hardware, you need to align the front rest and rear bag properly to get optimal tracking. In addition you want to make sure the rear bag doesn’t slide or rotate a bit from shot to shot. And you also want to set your seat height/location so the shooter’s position is optimal and comfortable. This helpful video shows how to set up your rifle and gear for a benchrest match or load development/practice at the range. Credit to Boyd Allen for finding video.
Cleaning Barrels with Speedy — Smart Techniques
There are many effective methods to clean barrels. But some are more efficient that others and can help you do the job more quickly, with less effort. Here respected gunsmith and Hall-of-Fame benchrest shooter Speedy Gonzalez shows his procedures for cleaning competition barrels. He uses Sharpshoot-R Liquid Patch-Out and Wipe-Out Accelerator as primary solvents. Watch carefully — Speedy has some clever techniques for starting a patch in the rifling, and he is also careful about exiting the muzzle when brushing. Speedy also explains the importance of keeping your rods clean. And he prefers nylon brushes because, as the barrel starts to get wear in the throat, “the bronze bristles will actually start eating into that and you’ll see little grooves if you have a good borescope.” (See video 00:38-01:35)
Getting Rifle Ready After Traveling — Keith Glasscock
Keith Glasscock is one of America’s top F-Class shooters, having finished Second at the National Championships multiple times. Keith, who has an engineering background, runs the popular Winning in the Wind YouTube channel. There you’ll find great advice on wind reading, load tuning, precision reloading and many other topics. In this video, Keith offers very smart advice on how to re-assemble your rifle after you have traveled to a match or practice destination. Keith explains how to check the fasteners on the gun and set up the scope properly if you removed it while traveling.
Adjusting AutoTrickler V4 with its Inventor, Adam MacDonald
Adam MacDonald is the brilliant Canadian engineer who created the AutoTrickler series of automated powder dispensing systems. These work with advanced scales to dispense powder rapidly, but with a precise final trickle accurate to a single kernel. In this video, Adam explains how best to adjust and calibrate the AutoTrickler V4 when using powders that flow at different rates.
21st Century Power Neck-Turning Lathe — Great Tool
Turning case-necks can be tedious and tough on older hands if you’re using hand-held tools. Quite a few years ago 21st Century released a great compact, neck-turning lathe that delivers superb, consistent results. This Editor uses that original lathe with hand crank and I can affirm that it works great. It is easy to use, fast, and the turned necks come out smooth with consistent rim thickness. But you still had to turn a crank. Well, in 2018, 21st Century created an upgraded Power Neck-Turning Lathe with an electric motor and lever to advance the cases to the cutter. The power head glides on stainless steel guide rails. Power is controlled with a red button in the feed handle.
This advanced, powered mini-lathe is absolutely superb. It works brilliantly and makes the task of turning case-necks fast and VERY easy. And there is even a 3-Way trimmer upgrade that will trim cases to length at the same time as the necks are turned.
BONUS — How to Spot Fake Online Sellers of Components
With the shortage of premium reloading components, particularly powder and primers, many handloaders are desperate to find components when even big companies such as Midsouth and MidwayUSA are completely sold out. Enter the scammers. There are criminals, many based overseas, who have created entire websites designed to steal your money. You might find such a site when searching for “Varget powder in stock” or “CCI BR4 primers”. These sites look like regular business webstores, with product photos and modern shopping cart systems. But it’s all a scam.
Key giveaways are: 1) The site does NOT take Visa, Mastercard, or Discover but requires payment with Zelle, Venmo, Bitcoin, or AppleCash only; and 2) The site has hard-to-find powders, such as Varget and H4350, that nobody else has, and you can put thousands of pounds in the shopping cart.
Bottom line here — if the site allows you to order vast amounts of powder and/or primers, and does not take ANY major Credit Card types, it is almost surely a scam. If you see links to pay with Crypto-Currency (such as Bitcoin) run away!
How to Fill Shooting Sandbags Most Effectively
For both front and rear Edgewood bags, start by looking for the black nylon/cordura flap. This flap will have white stiches running along both sides. Note that the flap is actually two pieces of nylon/cordura which are sewn together. These two pieces must be separated at the end where there are no stitches in order to insert a funnel or other filling device.
Hold the bag so that the flap is pointed straight up and fill half way. Using a blunted rod and alternating between filling and packing, begin packing the sand firmly into the bag until the shape is uniform and you are satisfied with the firmness. Slam the base of the bag firmly on the bench several times to compact and evenly seat the sand. Then, check to see if more sand needs to be added. Repeat this process for the ears if you are filling a rear bag. Note that as the sand continues to condense during use, the bag may occasionally require additional sand until it reaches maximum capacity. NOTE: This tip is from Creedmoor Sports, which carries Edgewood Shooting Bags.
Edgewood offers an innovative rear Twisted Gater bag with an unusual asymmetrical footprint. This provides arm/hand support for the shooter while still providing superb rear support for your bench rifles.
SANDBAG Fill Options — Yes Weight Matters
For most shooting applications, “heavy is good” when it comes to sandbags. The more your sandbag weighs, the better it will resist movement or mis-alignment that can throw off a shot. In order to increase the weight of their rear bags, serious shooters have turned to exotic sand formulations that offer greater density (hence higher weight by volume) than plain silica sand (aka “play sand”).
In this article, Jason Baney reviews three popular alternatives to play sand for rear sandbags. He tested each variety to determine its density, i.e. how much volume it would displace per pound. Then he calculated how much each type of sand would weigh in various sizes of rear sandbags: standard, large, and ultra-large (Bigfoot). Check our Rapid Reference Chart to see how much weight you can add to your sandbag by switching to heavy sand.
Is heavy sand worth the added expense? For serious shooters, the answer is yes. More mass equals more stability, and a more stable bag will help you shoot tighter groups. By switching from conventional sand to Zircon or Chromite, you can DOUBLE the weight of sand in your rear bag.
Shown above are the latest SEB Bigfoot Bags. Note that the bags sit perfectly flat — there is no bulge on the bottom even though the bags are “packed to the brim with sand”.
Heavy Sand — Weighing the Benefits by Jason Baney
Many serious Benchrest shooters fill their sand bags with “heavy sand”. This practice may seem “overkill” to most shooters, but its benefits are realized quickly when shooting from a bench. Heavy sand is more dense than normal silica “play sand” and therefore makes the sandbag heavier and more stable. How much heavier is the heaviest sand? Check the chart below and you’ll see that Zircon sand weighs essentially TWICE as much as ordinary play sand. More weight equals more inertia opposing bag movement, plus more gravity-induced “stiction” on the bottom of the bag. In other words, using heavy sand helps your rear bag stay planted on the bench during a string of fire. When you shoot a hard-recoiling gun, the difference between a bag filled with play sand vs. Zircon is very noticeable. The Zircon-filled bag stays put. The play sand-filled bag may not.
Rapid Reference Chart
Comparative Sand Weights by Sandbag Size
SandBag Type
Play Sand
Riverbed Sand
Chromite
Zircon
Standard 5″x6″
5.1 lbs.
7.9 lbs.
9.9 lbs.
10.1 lbs.
Large 6″x8″
6.8 lbs.
10.5 lbs.
13.2 lbs.
13.4 lbs.
BigFoot 6″x13″
10.2 lbs.
15.8 lbs.
19.7 lbs.
20.1 lbs.
Weight Increase Compared to Play Sand
Zincon +98%
Chromite +94%
Riverbed Sand +55%
The Benefits of Heavier Sand
Heavy Sand helps your sandbag resist the tendency to shift or change alignment (relative to the stock) during recoil. This ability to maintain sandbag alignment is vital when shooting competitive Benchrest, either short-range or long-range. Having to fight a “migrating” rear bag during a group at 1000 yards will not do anything to help your accuracy. In non-competitive use, heavy sand can still benefit shooters. Friction from the stock on the rear bag, or bumping the bag on recoil with either a body part or pistol grip can move a lighter bag out of place and necessitate realigning the bag to get on target.
Of course there are some shooting situations where you don’t need (or don’t want) maximum sandbag weight. During a “walk-around” varmint session you may prefer a lighter bag. Beanbags that I carry around the groundhog fields stay filled with plastic beads, making the bag handier to tote. But, any rear bag used on a bench will be as heavy as I can make it while still using “sand” as filler.
Heavy Sand, Lead Shot, and Competition Rules
Some will say, “Well if you want a heavier sandbag, why not just add lead shot?” That is a great idea, but as far as I know, it is also illegal in every form of Benchrest competition. The material in sandbags must actually be “sand”, and only sand. It’s tempting to filter in a mix of shot and sand to increase weight, but that would also violate the rules.
Heavy Sand — Available Types and Properties
Heavy sand comes in several different varieties. In this article we tested three types: Zircon, Chromite, and commercial Riverbed sand (Exo-Terra brand “Reptile Sand”). All these are heavier alternatives to normal silica “play sand.” There are other types of Heavy Sand not tested here, such as Garnet Sand, which is between Chromite and Zircon in weight.
Sources: Sinclair Int’l sells black “Heavy Sand”, basically chromite. Large quantities of Zircon and Chromite are available from IFS Industries, and other industrial suppliers.
Exo-Terra Riverbed sand (amber). Available at pet stores.
Silica “Play Sand” (tan or light gray). Available at Home/Garden stores.
Zircon — Heavy-Weight Champion
To my knowledge, “Dupont Zircon M” is the heaviest “sand” that a normal human can acquire. It is also the most expensive. Zircon is a very light tan/brown color and is very similar in appearance to normal sandbox “play sand”. Zircon is normally rated as having the greatest density among heavy sands and it has the smallest particle size, though some Chromite sand density values overlap the Zircon numbers.
1.00 pound of Zircon displaces 149cc vs. 295cc for Play Sand. So, that means Zircon is 98% heavier than an equal volume of Play Sand.
CONSUMER TIP: Real ZIRCON sand is TAN in color, not black or dark gray. Some “heavy sand” vendors promise Zircon but deliver a dark gray sand that is something else entirely!
Chromite — Almost as Heavy as Zircon, and 30% Cheaper
Chromite sand is nearly the same density as Zircon but it costs quite a bit less. Chromite typically sells for about 25-30% less than Zircon (comparing bulk prices of both types of sand). Chromite sand is black in color. So when you buy “heavy sand,” make sure you are getting what you pay for.
1.00 pound of Chromite displaces 152cc vs. 295cc for Play Sand. So, that means Chromite is 94% heavier than an equal volume of Play Sand.
Riverbed Sand — Weighs Less but Costs More than Chromite
Riverbed sand, is about 30% less dense than Zircon or Chromite, but is about 150% more dense than silica sand. Depending upon where you buy this sand, and the quantity, you will most likely pay more for this sand than you would Zircon or Chromite. Riverbed sand is a conglomerate of several different sizes and colors and appears red and black. Unless you are unable to get Zircon or Chromite, I would not bother with the riverbed sand.
1.00 pound of Riverbed Sand displaces 190cc vs. 295cc for Play Sand. So, that means Riverbed Sand is 55% heavier than an equal volume of Play Sand.
Density/Volume Testing and Weight Comparisons
All four sand varieties mentioned above were tested for volumetric density by weight. Each type of sand was weighed out to 1.00 lbs. on a commercial postal scale. Each 1.00 lb sample of sand was then poured loosely into a 600ml beaker and shaken minimally to level the top surface. This served to determine the volume that the sand occupied.
1.00 pound of sand displaced the following volumes:
Zircon: 149 cc
Chromite: 152 cc
Riverbed sand: 190 cc
Play Sand: 295 cc
How do the density-volume numbers translate to the real world? Here is an estimate of how much each sand would weigh in various sizes of rear bag:
Standard Bunny Ear Bag
5″ by 6″ footprint or about 1500cc
Zircon: 10.1 lbs.
Chromite: 9.9 lbs.
Riverbed Sand: 7.9 lbs.
Play Sand: 5.1 lbs.
Protektor Doctor Bag
6″ by 8″ footprint or about 2000cc
Zircon: 13.4 lbs.
Chromite: 13.2 lbs.
Riverbed Sand: 10.5 lbs.
Play Sand: 6.8 lbs.
Seb BigFoot Rear Loaf Bag
6″ by 13″ footprint or about 3000cc
Zircon: 20.1 lbs.
Chromite: 19.7 lbs.
Riverbed Sand: 15.8 lbs.
Play Sand: 10.2 lbs.
Conclusions and Recommendations
What’s the best choice? For most users, we recommend Chromite. Chromite delivers nearly the same bag weight as Zircon but is more economical to buy. But for those who demand the maximum weight in their sandbag (without consideration of cost), Zircon is the top choice because it is sold at a finer grade (higher density) than Chromite. However, Chromite will save you money, and deliver very nearly the same amount of weight by volume. When purchased in bulk, Chromite is typically 25-30% LESS expensive than Zircon.
I would not suggest using the Riverbed sand unless you really need to fill a sandbag immediately and can’t wait to locate a source for either Zircon or Chromite. Keep in mind that Sinclair Int’l and other major mail-order vendors do sell heavy sand (though Zircon and Chromite may be much less expensive when purchased in larger quantities from local industrial sources.) The price of the Riverbed sand will vary quite a bit depending on the pet store and quantity bought. The Riverbed sand I tested, Exo-Terra Reptile sand (photo right), was fairly expensive as purchased at a pet store.
Bottom Line: When it comes time to fill your new rear bag, you may want to save a few dollars and go with cheaper Chromite sand, but if you want to gain every bit of weight possible, step up to the heavier Zircon.
Lenzi Rear bags work very well and are popular with top competitors. This are sold through PMA Tool.
Credit our buddy Joe Friedrich for this simple yet effective accessory for your benchrest rifle. Joe shoots a .22 LR benchrest rig with a barrel tuner. When he added weights to his tuner, he found his rifle no longer balanced well. He wanted to add some weight in the rear without drilling holes in the stock. He also wanted the weight to be removable, and easily placed on another rifle in his stable. He wanted a weight that could be moved from gun to gun as needed.
At a local sporting goods shop Joe found a 1.5-lb ankle weight that comes in a padded, tubular elastic cover. It’s like a 1.5-lb sausage in a soft, stretchy nylon cover. (Imagine a really fat, heavy bungee cord). Joe simply attached a plastic zip tie at the end to make a loop that fits perfectly over his buttstock. CLICK HERE for full-screen photo.
To “tune” the rifle’s balance, Joe just slides the ankle weight fore and aft on the stock. We have tried this moveable ankle weight on a variety of different BR stocks (including a McMillan Edge) and it worked perfectly. This is a great invention, and would work with sporter rifles and ARs just as well.
NOTE: Obviously, this ring will increase the measured weight of your rifle. So, if you are competing in a registered match with weight restrictions, you have to ensure that your rifle still makes class weight limits with the ankle weight ring in place.


 Forum member Al Nyhus is a top-level score shooter who has competed successfully with the 30 BR cartridge in VFS (Varmint for Score) matches. Al has been working on an “improved” 30 BR cartridge that delivers extra velocity. Al’s 30 BRX cartridge is inspired by the 6mm BRX cartridge, popular in 600-yard benchrest and across-the-course competition. The 6mm BRX cartridge maintains the same sidewall profile and shoulder angle as the parent 6mmBR case. Likewise, the 30 BRX retains the 30° shoulder used on the popular 30 BR cartridge.


 If this article has motivated you to try rimfire benchrest competition back here in the good ol’ USA, there is a new organization that can help. Launched just a couple seasons ago, the


 In this article, Hall of Fame benchrest Shooter Speedy Gonzalez explains how to eliminate mechanical and gun-handling problems that cause vertical spread in your groups. Speedy’s article addresses the many human and the hardware factors that can cause vertical.
  • Front Bag Tension–Vertical can happen if the front sand bag grips the fore-arm too tightly. If, when you pull the rifle back by hand, the fore-arm feels like it is stuck in the bag, then the front bag’s grip is too tight. Your rifle should move in evenly and smoothly in the sand bags, not jerk or chatter when you pull the gun back by hand.


 >
>


 How to Fill Shooting Sandbags Most Effectively
 For most shooting applications, “heavy is good” when it comes to sandbags. The more your sandbag weighs, the better it will resist movement or mis-alignment that can throw off a shot. In order to increase the weight of their rear bags, serious shooters have turned to exotic sand formulations that offer greater density (hence higher weight by volume) than plain silica sand (aka “play sand”).
 Many serious Benchrest shooters fill their sand bags with “heavy sand”. This practice may seem “overkill” to most shooters, but its benefits are realized quickly when shooting from a bench. Heavy sand is more dense than normal silica “play sand” and therefore makes the sandbag heavier and more stable. How much heavier is the heaviest sand? Check the chart below and you’ll see that Zircon sand weighs essentially TWICE as much as ordinary play sand. More weight equals more inertia opposing bag movement, plus more gravity-induced “stiction” on the bottom of the bag. In other words, using heavy sand helps your rear bag stay planted on the bench during a string of fire. When you shoot a hard-recoiling gun, the difference between a bag filled with play sand vs. Zircon is very noticeable. The Zircon-filled bag stays put. The play sand-filled bag may not.
 Dupont Zircon M (pale tan): 165-175 lb/cu.ft; avg. particle size 0.01″.

 Zircon — Heavy-Weight Champion
 Chromite — Almost as Heavy as Zircon, and 30% Cheaper
 Riverbed Sand — Weighs Less but Costs More than Chromite


 I would not suggest using the Riverbed sand unless you really need to fill a sandbag immediately and can’t wait to locate a source for either Zircon or Chromite. Keep in mind that

 Credit our buddy Joe Friedrich for this simple yet effective accessory for your benchrest rifle. Joe shoots a .22 LR benchrest rig with a barrel tuner. When he added weights to his tuner, he found his rifle no longer balanced well. He wanted to add some weight in the rear without drilling holes in the stock. He also wanted the weight to be removable, and easily placed on another rifle in his stable. He wanted a weight that could be moved from gun to gun as needed.


