|
|
February 23rd, 2015
Some of our readers have questioned how to set up their body dies or full-length sizing dies. Specifically, AFTER sizing, they wonder how much resistance they should feel when closing their bolt.
Forum member Preacher explains:
“A little resistance is a good, when it’s time for a big hammer it’s bad…. Keep your full-length die set up to just bump the shoulder back when they get a little too tight going into the chamber, and you’ll be good to go.”
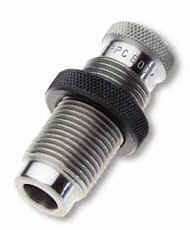 To quantify what Preacher says, for starters, we suggest setting your body die, or full-length sizing die, to have .0015″ of “bump”. NOTE: This assumes that your die is a good match to your chamber. If your sizing or body die is too big at the base you could push the shoulder back .003″ and still have “sticky case” syndrome. Also, the .0015″ spec is for bolt guns. For AR15s you need to bump the shoulder of your cases .003″ – .005″, for enhanced reliability. For those who have never worked with a body die, bump die, or Full-length sizing die, to increase bump, you loosen lock-ring and screw the die in further (move die down relative to shell-holder). A small amount (just a few degrees) of die rotation can make a difference. To reduce bump you screw the die out (move die up). Re-set lock-ring to match changes in die up/down position. To quantify what Preacher says, for starters, we suggest setting your body die, or full-length sizing die, to have .0015″ of “bump”. NOTE: This assumes that your die is a good match to your chamber. If your sizing or body die is too big at the base you could push the shoulder back .003″ and still have “sticky case” syndrome. Also, the .0015″ spec is for bolt guns. For AR15s you need to bump the shoulder of your cases .003″ – .005″, for enhanced reliability. For those who have never worked with a body die, bump die, or Full-length sizing die, to increase bump, you loosen lock-ring and screw the die in further (move die down relative to shell-holder). A small amount (just a few degrees) of die rotation can make a difference. To reduce bump you screw the die out (move die up). Re-set lock-ring to match changes in die up/down position.
That .0015″ is a good starting point, but some shooters prefer to refine this by feel. Forum member Chuckhunter notes: “To get a better feel, remove the firing pin from your bolt. This will give you the actual feel of the case without the resistance of the firing pin spring. I always do this when setting up my FL dies by feel. I lock the die in when there is just the very slightest resistance on the bolt and I mean very slight.” Chino69 concurs: “Remove the firing pin to get the proper feel. With no brass in the chamber, the bolt handle should drop down into its recess from the full-open position. Now insert a piece of fire-formed brass with the primer removed. The bolt handle should go to the mid-closed position, requiring an assist to cam home. Do this several times to familiarize yourself with the feel. This is how you want your dies to size your brass, to achieve minimal headspace and a nearly glove-like fit in your chamber.”
We caution that, no matter how well you have developed a “feel” for bolt-closing resistance, once you’ve worked out your die setting, you should always measure the actual amount of shoulder bump to ensure that you are not pushing the shoulder too far back. This is an important safety check. You can measure this using a comparator that attaches to your caliper jaws, or alternatively, use a sized pistol case with the primer removed. See Poor Man’s Headspace Gauge.
October 1st, 2013
 The 6.5×47 Lapua necked down to 6mm is a popular wildcat. However, we’ve learned that, when necking down a 6.5×47 Lapua case to 6mm, simply running the brass into a 6-6.5×47 full-length sizer won’t give the best results. Reader “Fireball”, who has worked with both a 6-6.5×47 and a 22-6.5×47, offers this tip: “You don’t want to bring the 6.5mm case all the way down to 6mm in one step — it’s too big of a jump. First, to smooth entry, run a 6.5mm expander in the case mouth, and chamfer the outside of the case mouth — be sure to remove all burrs. Apply some lube to the neck. Then, if you have a .257 bushing, put that in a 6BR bushing neck die, and run the case up [for initial reduction].” Then, use your 6mm die for the final step. The 6.5×47 Lapua necked down to 6mm is a popular wildcat. However, we’ve learned that, when necking down a 6.5×47 Lapua case to 6mm, simply running the brass into a 6-6.5×47 full-length sizer won’t give the best results. Reader “Fireball”, who has worked with both a 6-6.5×47 and a 22-6.5×47, offers this tip: “You don’t want to bring the 6.5mm case all the way down to 6mm in one step — it’s too big of a jump. First, to smooth entry, run a 6.5mm expander in the case mouth, and chamfer the outside of the case mouth — be sure to remove all burrs. Apply some lube to the neck. Then, if you have a .257 bushing, put that in a 6BR bushing neck die, and run the case up [for initial reduction].” Then, use your 6mm die for the final step.
Alternatively, you can use a Redding 6BR body die initially. The body die will funnel the neck down about half way. Body dies are pretty inexpensive ($29.99 at Grafs.com, Item #RED75317). After running the brass through the 6BR body die, then you can run the case into the Forster 6-6.5×47 Full-length sizing die. The Forster die is excellent — it sizes a no-turn neck just about perfectly, so long as you do an intermediate step first.”
October 21st, 2012
Some of our readers have questioned how to set up their body dies or full-length sizing dies. Specifically, AFTER sizing, they wonder how much resistance they should feel when closing their bolt.
Forum member Preacher explains:
“A little resistance is a good, when it’s time for a big hammer it’s bad…. Keep your full-length die set up to just bump the shoulder back when they get a little too tight going into the chamber, and you’ll be good to go.”
To quantify what Preacher says, for starters, we suggest setting your body die, or full-length sizing die, to have .0015″ of “bump”. NOTE: This assumes that your die is a good match to your chamber. If your sizing or body die is too big at the base you could push the shoulder back .003″ and still have “sticky case” syndrome. Also, the .0015″ spec is for bolt guns. For AR15s you need to bump the shoulder of your cases .003″ – .005″, for enhanced reliability. For those who have never worked with a body die, bump die, or Full-length sizing die, to increase bump, you loosen lock-ring and screw the die in further (move die down relative to shell-holder). A small amount (just a few degrees) of die rotation can make a difference. To reduce bump you screw the die out (move die up). Re-set lock-ring to match changes in die up/down position.
That .0015″ is a good starting point, but some shooters prefer to refine this by feel. Forum member Chuckhunter notes: “To get a better feel, remove the firing pin from your bolt. This will give you the actual feel of the case without the resistance of the firing pin spring. I always do this when setting up my FL dies by feel. I lock the die in when there is just the very slightest resistance on the bolt and I mean very slight.” Chino69 concurs: “Remove the firing pin to get the proper feel. With no brass in the chamber, the bolt handle should drop down into its recess from the full-open position. Now insert a piece of fire-formed brass with the primer removed. The bolt handle should go to the mid-closed position, requiring an assist to cam home. Do this several times to familiarize yourself with the feel. This is how you want your dies to size your brass, to achieve minimal headspace and a nearly glove-like fit in your chamber.”
We caution that, no matter how well you have developed a “feel” for bolt-closing resistance, once you’ve worked out your die setting, you should always measure the actual amount of shoulder bump to ensure that you are not pushing the shoulder too far back. This is an important safety check. You can measure this using a comparator that attaches to your caliper jaws, or alternatively, use a sized pistol case with the primer removed. See Poor Man’s Headspace Gauge.
|


