Each Wednesday, the U.S. Army Marksmanship Unit publishes a reloading “how-to” article on the USAMU Facebook page. A while back the USAMU’s reloading gurus looked at the subject of cartridge run-out and what can be done to produce straighter ammo. Tasked with producing thousands of rounds of ammo for team members, the USAMU’s reloading staff has developed smart methods for improving concentricity, even with budget=price dies. For other hand-loading tips, visit the USAMU Facebook page.
Minimizing Runout with Standard Seating Dies
This USAMU article explains how to set up standard bullet seating dies dies to minimize Total Indicated Run-out (TIR). The loading process is described using a single-stage press since most handloaders have one. A high-quality run-out gauge is essential for obtaining consistent, accurate results.
Having sized, primed, and charged our brass, the next step is bullet seating. Many approaches are possible; one that works well follows. When setting up a standard seating die, insert a sized, trimmed case into the shellholder and fully raise the press ram. Next, back the seating stem out and screw the die down until the internal crimping shoulder touches the case mouth.
Back the die out ¼ turn from this setting to prevent cartridge crimping. Next, lower the press ram and remove the case. Place a piece of flat steel (or window glass, which is quite flat) on the shellholder and carefully raise the ram.
Place tension on the die bottom with the flat steel on the shellholder. This helps center the die in the press threads. Check this by gently moving the die until it is well-centered. Keeping light tension on the die via the press ram, secure the die lock ring. If one were using a match style, micrometer-type seating die, the next step would be simple: run a charged case with bullet on top into the die and screw the seating stem down to obtain correct cartridge OAL.
However, with standard dies, an additional step can be helpful. When the die has a loosely-threaded seating stem, set the correct seating depth but don’t tighten the stem’s lock nut. Leave a loaded cartridge fully raised into the die to center the seating stem in the die. Then, secure the stem’s lock nut. Next, load sample cartridges and check them to verify good concentricity.
One can also experiment with variations such as letting the seating stem float slightly in the die to self-center, while keeping correct OAL. The run-out gauge will show any effects of changes upon concentricity. However, this method has produced excellent, practical results as evidenced by the experiment cited previously. These results (TIR Study 2) will reproduced below for the reader’s convenience.
First, however, let’s examine run-out figures of some factory-loaded match ammunition. This should give readers who are new to TIR gauges some perspective about the TIR ranges one might encounter.
TIR Study 1: 50 rounds Lake City M852 Match 7.62mm
(168 gr. Sierra MatchKings)
0.000” – 0.001” = 2%
0.001” – 0.002” = 30%
0.002” – 0.003” = 16%
0.003” – 0.004” = 22%
0.004” – 0.005” = 14%
0.005” – 0.006” = 14%
0.006” – 0.007” = 0%
0.007” – 0.008” = 2%
TIR Study 2: 50 rounds of .308 match ammo loaded using carefully-adjusted standard dies, vs. 50 using expensive “Match” dies from the same maker.
Standard dies, TIR:
0.000” — 0.001” = 52%;
0.001”– 0.002” = 40%;
0.002”– 0.003” = 8%.
None greater than 0.003”.
Note: both samples were loaded using the O-Ring method, i.e. with a rubber O-Ring placed under the locking ring of the Full-length sizing die to allow that die to float.
These tips are intended to help shooters obtain the best results from inexpensive, standard loading dies. Especially when using cases previously fired in a concentric chamber, as was done above, top-quality match dies and brass can easily yield ammo with virtually *no* runout, given careful handloading.
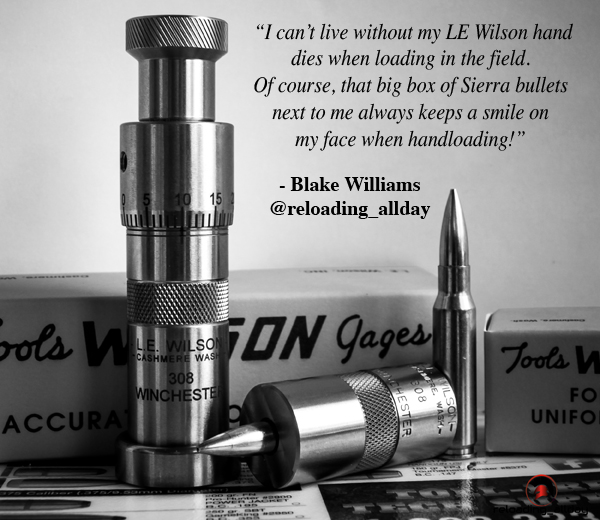
Sierra Bullets asked a few hand-loaders to reveal their favorite reloading tool or accessory: “What is your favorite ‘don’t know how you ever lived without it’ piece of reloading equipment?” Some of the answers are listed below. We were interested to see some high-tech, micro-processor items mentioned, such as the AMP Annealer, and the AutoTrickler powder dispenser. Old standbys, such as the rugged RCBS Rockchucker and Dillon 650, also made the favorites list. You can nominate your own favorite reloading hardware in the comments section of the Sierra Bullets Blog.
Sierra Bullets Ballistic Technician Philip Mahin answered: “A comparator gauge to measure from the base of a case to the ogive of the bullet. This bypasses the tip of the bullet, so I can repeat the same seating depth the next time I visit a specific combination.”
Bill, Editor of Rifleshooter.com, answered: “I have so many favorite reloading tools, it’s hard to pick one. But if I had to, it would be my Forster Co-Ax press. I like the ease [with which] you can change dies and that it doesn’t require traditional shell holders. It’s a great tool to have!”
Sierra Bullets Ballistic Technician Duane Siercks answered: “I don’t know that you would actually call this equipment, but the item that comes to mind would be my reloading room/shoot house. I had always had to squeeze everything into a corner or even an unheated shed. After we bought our current house, I built a garage and placed it so that I had a window looking down a 250-yard range. I built a dedicated room with heat and A/C. It contains my reloading bench and a shooting bench. The shooting bench lets me slide open the window and shoot down the range. It is very handy to not have to load everything up to go to the range. It also makes load development a lot simpler and efficient. I don’t know how I ever got along without it.
I also wonder what I did before I acquired the Lyman 1200 DPS Powder Dispenser. This has made the process so much simpler and much easier. I also have a Lee Precison Universal Decapping Die that I would gladly spend the money on again. This may be a small thing, but it certainly is handy. The Lee would accommodate some very large cases that some of the others were too small for.”
Jon Addis answered: “Putting an A&D FX-120i scale with AutoTrickler and Auto-Throw on the bench has changed the way I reload. It’s kernel accurate in about 15 seconds. Saves time and reduces a variable. And of course, the system is made better by the Area 419 Billet Adjustable base for the trickler and Billet Powder Cup.”
This video shows the AutoTrickler V2 and Auto-Throw Combo:
Sierra Bullets Chief Ballistician Tommy Todd answered: “A brass annealing machine and a RCBS Chargemaster complimented with a Sartorious scale.”
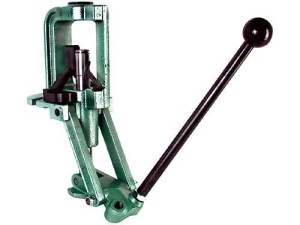
Sierra Bullets Ballistician Gary Prisendorf answered: “RCBS Rock Chucker Press, it’s built like a tank, and it will last me a lifetime.”
Sierra Bullets Production Manager Chris Hatfield also answered: “RCBS Rock Chucker single-stage reloading press.”
Jeremy Kisner answered: “My Giraud trimmer has taken [three operations] and combined them into one easy task. I can now size my brass and then sit down and trim, chamfer, and debur to a 0.001″ tolerance in one motion.”
Dan Blake answered: “My Annealing Made Perfect (AMP) annealer. With consistent neck tension being one of the largest contributions to small Extreme Spread on muzzle velocities, I believe this induction annealer is truly the best on the market.”
This manufacturer-produced video shows how the AMP annealing machine operates:
Trevor Aldinger answered: “Area 419 Master Funnel Kit. In the past I’ve used plastic funnels and even other metal ones. This system fits case necks and flows much better than any others I’ve used, and there is no static since it’s metal. We spend a lot of time and money to get precise charges, I don’t want to lose or miss a kernel because of a cheap funnel.”
Tyler Riley answered: “My RCBS bench primer (priming tool). It has a lot more leverage than a hand primer and still has a good feel to how tight primer pockets are. Makes it much easier on my hands to prime large runs, especially new brass with tight pockets.”
Craig Arnzen answered: “My Annealeez [annealing machine] is one of the best tools in my reloading room. Neck tension is SO important, and annealing every firing really helps with that. This is an inexpensive tool that can anneal a lot of cases at once, and help me produce more consistent ammo.”
Josh Temmen answered: “Time is critical for me so my RCBS Chargemasters are indispensable (pun intended.) They cut down on time at my reloading bench while maintaining the weight tolerances required for long range shooting.”
Josh Bartlett answered: “I have my Dillon 650 set up with Whidden floating tool heads to do decapping and sizing on my match ammo. The case feeder and progressive function of the press save me a TON of time when doing lots of several hundred rounds.”
Ryan Brandt answered: “… A quality set of calipers. My reloading room is full of very nice equipment but little does more to satisfy my perfectionism than a good check with the calipers.”
A fire in the home is always to be feared. And a fire in your reloading room can be disastrous. Near your reloading bench you probably have flammable solvents, and maybe gunpowder. What would happen if an electrical fire started in your reloading room? Would you be alerted? Do you have a proper fire extinguisher at hand?
Here’s a true story from Forum Member Joe O. (aka “Joecob”) that provides a valuable safety lesson. After Joe started up his old tumbler, an internal connector worked loose, causing an arc which started a fire in his basement reloading area. Luckily Joe had a functioning smoke detector, and a fire extinguisher.
Very few of us would worry about fire when we plug in a tumbler or other AC-powered reloading tool. But there is always the possibility of a malfunction and a fire. Quick thinking (and a handy extinguisher) prevented serious damage to Joe’s reloading room and house — but things could have been worse (much worse), had Joe not responded quickly.
Fire in the Reloading Room — Report by Joecob
The day before ‘Sandy’ hit I was cleaning brass the way I always have. I set the vibratory tumbler on the back of my reloading bench in the basement. I loaded the media hopper with 40 fired empty brass cases (and walnut media), plugged the cord in, turned the tumbler on and went back upstairs to watch TV. I could hear the tumbler running in the background.
About half an hour later I heard the basement smoke alarm go off. I ran downstairs. Flames were licking from the melting plastic of the tumbler.
I grabbed the nearby ABC cannister extinguisher and squirted out the fire and soaked the charred bench areas with water. Good thing I had the extinguisher! And I was glad I religiously store powder and primers properly — away from the bench (and everything else).
What caused the fire? It looks like an internal AC connector finally vibrated loose enough to arc and ignite the plastic. WHEH! I had been using that thing for 25 years the same way without mishap. Guess I should have known to periodically check the guts of a thing that plugs in and vibrates for a living?
Today I went out and bought a new even bigger ‘Pro’ ABC extinguisher, plus a dual-detector smoke alarm, and an ultrasonic cleaner. That experience was scarier than the storm. I hope this true account might help someone else to avoid a bad experience.
In his account, Joe refers to an “ABC” cannister fire extinguisher. The “ABC” refers to the fire classification rating: Class A (trash, wood, and paper), Class B (liquids and gases), and Class C (energized electrical equipment) fires. There are many brands of ABC-rated extinguishers.
The rechargeable Kidde 210 unit (sku 21005779) contains four pounds of a multipurpose monoammonium phosphate dry chemical extinguishing agent. It has a discharge time of 13 to 15 seconds, a discharge range of 10 to 15 feet, and an operating pressure of 100 PSI. The seamless aluminum cylinder measures 4.5 inches in diameter and 15.7 inches tall. The Kidde 210 has a 6-year limited warranty. This is Amazon’s #1 Best Seller among Fire Extinguishers.
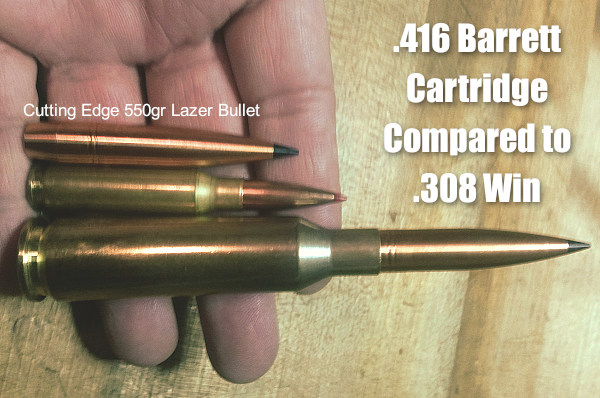
In the ELR game, particularly the King of 2 Miles (KO2M), it’s “go big or go home”. The top shooters run large-capacity cartridges that push large-caliber, ultra-high BC bullets at very high velocities. Bullets launched by cartridges such as the .416 Barrett can sustain supersonic velocities at Extreme Long Ranges — and that’s what it takes to win. The .416 Barrett can launch a 550-grain solid bullet at 3000+ FPS.
Photo from ELR Competitor Corbin Shell.
2018 and 2019 Kings of 2 Miles Loaded on RCBS Presses
So how do you load jumbo cartridges such as the .416 Barrett? It takes a big, heavy, super-strong reloading press. We’ve learned that the last two Kings of 2 Miles, Paul Phillips (2019) and Robert Brantley (2019) both loaded their KO2M ammo on RCBS AmmoMaster .50 BMG presses. Phillips loaded .416 Barrett ammo, while Brantley loaded custom .416 MCS rounds.
In 2018, Robert Brantley topped the field using his custom .416 MCS loads perfected on the AmmoMaster .50 BMG Press. This year, Brantley took a close second to 2019 KO2M winner Paul Phillips. Both Phillips and Brantley use the AmmoMaster .50 BMG single stage press kit and RCBS .416 Barrett dies to hand-load for extreme long-range. “My ammo has been much more consistent after switching to the RCBS press and dies,” remarked Phillips, who runs the Global Precision Group. Brantley said he uses RCBS products for most of his reloading needs — from the dies and AmmoMaster, to the ChargeMaster and Brass Boss. His custom .416 MCS loads launch a 550-grain bullet more than 3,100 fps.
Gage Pin Die System Product Review by F-Class John
Consistent neck tension is often considered key to precision reloading. Neck tension (or interference as it’s more accurately known) helps ensure that the bullet is held with a known amount of pressure ensuring a consistent release each time. The more common expansion method employs expander mandrels. However, there is another lesser-known but very effective method — using GAGE PINS. This article reviews a unique Porter’s Precision Products Reloading Die designed to work with high-quality Gage Pins.
Gage Pins, long-time tool of machinists, are used to measure the size of a bored hole. They come in a variety of sizes and classes. In the reloading world, most people use ZZ Gage Pins that are sized .0005″ apart and are accurate to .0002″. The nice thing about Gage Pins is that you can order them in either a + or – size which means their accuracy errors on one side or the other so by ordering sets of + and – you can effectively make half-sizes. It’s this flexibility and great range of sizes that make Gage Pins so attractive.
For all the good that Gage Pins can do, until now there has not been a handy way to use them in a reloading press. Some folks tried using a bullet puller to hold the Gage Pin. But on many presses, this can be inconvenient because of long handles or unusual height requirements. As a result, I have mostly resorted to using conventional expander mandrels.
But now I have started using precision Gage Pins, thanks to a special new Gage Pin die system from Porter’s Precision Products in Texas. Not long ago I received a video from a friend showing someone using a custom die specifically made for holding Gage Pins. It turns out that Porter’s Precision Products out of Texas makes a custom Gage Pin Die product that consists of a die body, collet, and die cap. Porter’s Precision also sell a wide range of Gage Pins that have been nicely tapered to prevent damage to brass.
Using the Porter’s Precision Gauge Pin Die for Expanding Necks
Using the Porter’s Precision Gage Pin die is pretty straight forward with one caveat. The instructions are very clear that the collet must be inserted at an angle into the threaded cap to help ensure it tightens correctly otherwise damage to the collet may occur. Once you do this a couple times it becomes very simple and shouldn’t be a concern, especially since there’s rarely a ready to actually remove the collet unless you’re changing from one caliber range to another.
With the cap and collet now threaded onto the die body, choose the Gage Pin you want to use, insert it into the collet and tighten the cap down. Once the pin is where you want it, use a set of wrenches to firmly tighten the cap down and you’re ready to go. Thread the die in your press and simply adjust the height to ensure the Gage Pin is being inserted fully into the neck of your brass. You want to make sure the entire neck is being expanded without damaging the rim by pushing it to far up inside the die.
General Thoughts — Gage Pins vs. Expander Mandrels
The actual use of Gage Pins on case neck doesn’t vary from expander mandrels. They both accomplish the same goal and which tool you choose really comes down to personal preference. Where Gage Pins really shine is in their durability and the vast selection of sizes/diameters/tolerances. You can even find long-wearing, reduced friction carbide Gage Pins, but they do cost more.
For me, using the Porter’s Precision Die allowed smooth operation and Porter’s Gage Pins are really well-made. This makes expanding a dream even without any lube in the necks (although I still recommend lube when using a steel Gage Pin, as opposed to carbide). If you’ve been in the market for a way to help expand your necks with enhanced consistency, give Gage Pins a try using the Porter’s Precision Gage Pin Die.
Here is a simple technique that can potentially help you load straighter ammo, with less run-out (as measured on the bullet). This procedure costs nothing and adds only a few seconds to the time needed to load a cartridge. Next time you’re loading ammo with a threaded (screw-in) seating die, try seating the bullet in two stages. Run the cartridge up in the seating die just enough to seat the bullet half way. Then lower the cartridge and rotate it 180° in the shell-holder. Now raise the cartridge up into the die again and finish seating the bullet.
Steve, aka “Short Range”, one of our Forum members, recently inquired about run-out apparently caused by his bullet-seating process. Steve’s 30BR cases were coming out of his neck-sizer with good concentricity, but the run-out nearly doubled after he seated the bullets. At the suggestion of other Forum members, Steve tried the process of rotating his cartridge while seating his bullet. Steve then measured run-out on his loaded rounds. To his surprise there was a noticeable reduction in run-out on the cases which had been rotated during seating. Steve explains: “For the rounds that I loaded yesterday, I seated the bullet half-way, and turned the round 180 degrees, and finished seating the bullet. That reduced the bullet runout by almost half on most rounds compared to the measurements from the first test.”
Steve recorded run-out measurements on his 30 BR brass using both the conventional (one-pass) seating procedure, as well as the two-stage (with 180° rotation) method. Steve’s measurements are collected in the two charts above. As you can see, the run-out was less for the rounds which were rotated during seating. Note, the change is pretty small (less than .001″ on average), but every little bit helps in the accuracy game. If you use a threaded (screw-in) seating die, you might try this two-stage bullet-seating method. Rotating your case in the middle of the seating process won’t cost you a penny, and it just might produce straighter ammo (nothing is guaranteed). If you do NOT see any improvement on the target, you can always go back to seating your bullets in one pass. READ Forum Thread..
The February 2013 edition of Shooting Sports USA magazine has an interesting feature by Glen Zediker. In this Transporting Success, Part I article, Zediker explains the advantages of loading at the range when your are developing new loads or tuning existing loads. Glen, the author of the popular Handloading for Competition book, discusses the gear you’ll need to bring and he explains his load development procedure. In discussing reloading at the range, Glen focuses on throwing powder and seating bullets, because he normally brings enough sized-and-primed brass to the range with him, so he doesn’t need to de-prime, re-size, and then re-prime his cases.
Zediker writes: “Testing at the range provides the opportunity to be thorough and flexible. You also have the opportunity to do more testing under more similar conditions and, therefore, get results that are more telling. Once you are there, you can stay there until you get the results you want. No more waiting until next time.”
Zediker starts with three-shot groups: “I usually load and fire three samples [with] a new combination. I’ll then increase propellant charge… based on the results of those three rounds, and try three more. I know that three rounds is hardly a test, but if it looks bad on that few, it’s not going to get any better.”
Glen reminds readers to record their data: “Probably the most important piece of equipment is your notebook! No kidding. Write it down. Write it all down.”
There’s More to the Story…
Editor’s Note: In Zediker’s discussion of loading at the range, he only talks about throwing powder and seating bullets. In fact, Glen opines that: “there is little or no need for sizing.” Well, maybe. Presumably, for each subsequent load series, Zediker uses fresh brass that he has previously sized and primed. Thus he doesn’t need to de-prime or resize anything.
That’s one way to develop loads, but it may be more efficient to de-prime, re-size, and load the same cases. That way you don’t need to bring 50, 80, or even 100 primed-and-sized cases to the range. If you plan to reload your fired cases, you’ll need a system for de-priming (and re-priming) the brass, and either neck-sizing or full-length sizing (as you prefer). An arbor press can handle neck-sizing. But if you plan to do full-length sizing, you’ll need to bring a press that can handle case-sizing chores. Such a press need not be large or heavy. Many benchresters use the small but sturdy RCBS Partner Press, on sale now at Amazon for $77.99. You may even get by with the more basic Lee Precision Compact Reloading Press, shown in Zediker’s article. This little Lee press, Lee product #90045, retails for under $35.00.
We have all been there…..you place a piece of tumbled brass in the shell-holder of your press, raise it into the die, and suddenly it is like somebody hit the brakes. The case is stuck in the die. Your first instinct is to reverse it out. You crank on the handle, and BANG! The rim rips off the case head and you are looking at a piece of brass stuck in the die.
A stuck case is one of the boo-boos that all of us reloaders have faced from time to time. If proper lubrication is applied, then it should not be a problem. No matter if you are a seasoned reloader or new to it, this situation can happen. Take your time, use the proper procedures, and you will be back in business in no time! This article explains how to avoid stuck cases (through proper lubrication) and how to use a stuck case removal system.
What Causes Stuck Cases
One of the first common mistakes reloaders face is the stuck case. It can be caused by too much or too little lube. Too much and a vacuum can be formed causing the case to become suctioned into the die. Too little lube and friction is the culprit. So what is the cure? There is no exact cure, but the best lube that we have found so far is just a dab of Imperial Sizing Die Wax on your fingers and applied in a thin coat on the body of the case, not the shoulder or neck. Too much of this wax can cause the vacuum effect, or can eventually load your die up with gobs of residue. If it is applied to the shoulder area, or the leftover wax moves up into the shoulder region of the die, you will see dents or dimples in the shoulder. [AccurateShooter.com Editor’s Note: For normal full-length sizing of small cases such as 220 Russian/PPC, 6mmBR, 6.5 Grendel, or 6.5×47 Lapua we recommend Ballistol (aerosol) lube. It is very slippery, goes on very thin, and does not gum up the die.]
A great way to ensure that your dies are clean is to use a simple chamber mop with a dab of your favorite solvent on it and clean out the die. Be sure all of the solvent is out after cleaning by spraying the die out with Quickscrub III or use a clean chamber mop. If you are storing your dies, you can apply a thin coat of a good oil to protect the steel such as TM oil or Starrett M1 Spray.
Using a Stuck Case Removal Kit
If you do stick a case in your die there are a few good stuck case removal kits available. Each one works in a similar fashion. I have found the Hornady kit very effective and easy to use.
Basically what you do is remove the die from the press. Unscrew the decapping assembly and pull it out as far as you can. You then need to drill/tap threads into the stuck case head (this is why it is suggested to unscrew the decapping assembly as far as you can to get it clear of the drill bits). Once this is done screw the die back into the press. You then install the included shellholder attachment on the shellholder ram, and thread it into the case via a small wrench. With some elbow grease you can reverse the stuck case out of the die with the leverage of the press, and not damage the die.
However if the case is stuck….REALLY stuck, you may pull out the threads on the case and you are still left with a stuck case in the die without any way to pull it out. If the case is really difficult to remove even with the use of a stuck case removal kit, do not try to be Hercules with the press ram. Here is a trick that may work. Take the die with the stuck case and place it in your freezer for a couple of hours. Then repeat the removal with the cold die. The freezing temperatures may cause the brass to contract, and make removal easier. If this does not work it is recommended to send it to the die manufacturer. They will be able to remove the case without damaging the die.
Another fix if you can remove the decapping assembly completely is to use a tap hammer and a punch or small wooden dowel to knock the stuck case out. This isn’t the best way since it is very possible that you will damage the die internally or externally on the threads, or both. Send the die to the manufacturer to have this done properly. You will be happier in the long run.
This article appears courtesy Sinclair International. It first appeared in Sinclair’s Reloading Press Blog.
While Varget and Reloder 15 remain in short supply, you can often find IMR 4320 powder back in the shelves of local gun stores. IMR describes IMR 4320 as follows: “Short granulation, easy metering, and perfect for the 223 Remington, 22-250 Remington, 250 Savage and other medium burn rate cartridges.” This older-generation powder isconsiderably more temp sensitive than the Hodgdon Extreme propellants, but in the right application, it looks to be a viable alternative for folks who can’t source Varget, Reloder 15, and even H4895.
IMR 4320 Shoots Well in the .308 Winchester
A while back, GS Arizona wrote an excellent Riflemans Journal article, IMR 4320 — the Forgotten Powder. GS developed IMR 4320 loads for his .308 Win Palma rifle and competed with IMR 4320-powered ammo at long range matches. He concluded that: “[IMR 4320] appears to be a very useful alternative to some of the harder-to-get powders. The load is working extremely well at 1000 yards. In the [2009] Arizona Palma State Championship, several high-placing competitors were using the 4320 load. We got sub X-Ring elevation at 1000 yards from several rifles, and that’s all I’m looking for in a Palma load.”
IMR 4320 Works for Dasher Shooter
Forum member FalconPilot shoots a 6mm Dasher with Berger 105gr Hybrids. Looking for an alternative to Varget, he decided to give IMR 4320 a try. The results were good. FalconPilot reports: “I’ve been looking for other options (besides Reloder 15, which I love, but it’s really dirty). While at a gun shop in Ohio, I ran across 8 pounds of IMR 4320. I had never even heard of it, much less tried it. Getting ready for upcoming mid-range shoots, I loaded five rounds with IMR 4320 to the exact same specs as my winning Varget loads for the 6mm Dasher. This recipe was 32.7 grains of powder, Wolf SMR primer, Berger Hybrid 105 jumped fifty thousandths.” Falcon pilot tested his IMR 4320 load at 600 yards:
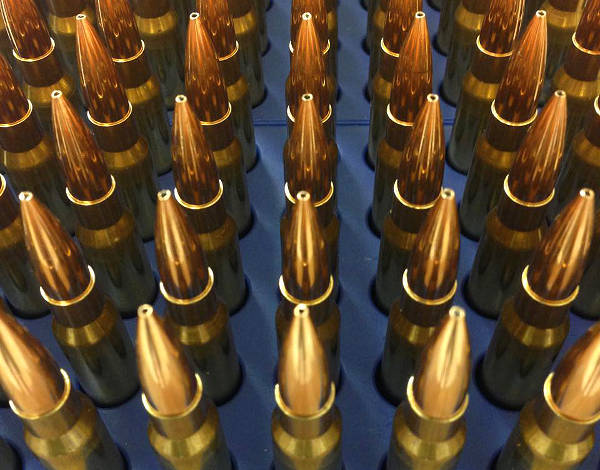
As you can see from the photo at the top of this article, FalconPilot had good results — a 1.5″ group at 600 yards. He reports: “This group was shoot during the middle of the day, mirage bad, scope set to 25X. It looks like IMR 4320 is a [very close] replacement for Varget… with a tad bit slower burn rate.” FalconPilot tell us the accuracy with IMR 4320 rivals the best he has gotten with Varget: “This gun has always shot under 2 inches [for 5 shots] at 600 yards, and most of time shoots 1.5 to 1.7 inches.”
For comparison purposes, here are Heat of Explosion and Burn Rate values from QuickLOAD for IMR 4320, and for the popular Reloder 15 and Varget powders. You can see that these powders have similar characteristics “by the numbers”:
Manufacturer
Powder Brand
Heat of Explosion
Burning Rate Factor
IMR
4320
3890
0.5920
Alliant
Reloder 15
3990
0.5200
Hodgdon (ADI)
Varget
4050
0.6150
WARNING — When changing from one powder to another, always start with manufacturer’s stated load data. Start low and work up incrementally. Never assume that loads will be equivalent from one powder to another, even powders with similar burn rates.
What Other Forum Members Say:
I was using IMR 4320 in the mid 70s in my .222 Rem. Darned great powder and I never had a load that was not accurate from the .222 to .30-06 with that powder. — 5Spd
A fine powder overshadowed by the nouveau wave of “gotta have the newest — make me a better shot” powders. Try 4320 in a 22-250 — what a well-kept secret! IMR 4320 meters very well and is a flexible alternative to many of the hard-to-find powders so much in demand. — AreaOne
IMR 4320 was my “go to” powder in my .223 for many many years. This powder and Winchester 55gr soft point bulk bullets (the cheapest bullet I could buy at the time) accounted for thousands of prairie dogs, coyotes, and anything else that needed shooting. I still use IMR 4320 in some .223 loads and am very happy with it still. — pdog2062
I’ve been using it in a .308 Win for several years. I think it is very sensitive to temperature and always waited till the last minute to load my ammo with a close eye on the weekend forecast at the range. IMR 4320 Works pretty good for 155gr Palma and 168gr Hybrid [bullets] in my .308. — JayC
IMR 8208 XBR is also good — if you can find it
Another good substitute for Varget powder in a .223 Rem or .308 Winchester is IMR 8208 XBR. In our own .308 Win tests, this generated slightly more velocity than Varget, with good ES/SD. However, this very good IMR 8208 XBR powder is out-of-stock at many vendors.
RCBS makes some of the most rugged and durable reloading products you can buy. The RCBS Rock Chucker press is legendary — for good reason. The Editor uses one that has been in my family over twenty years. I also own an RCBS 2000 progressive press that has loaded many thousands of rounds, and features the excellent APS strip priming system. RCBS is serious about reloading, so this company has created a very complete series of instructional videos showing reloading precedures and equipment. You’ll find over 60 videos on the RCBS Video Resources Page and RCBS YouTube Channel.
We encourage readers to check out the RCBS Videos. They can help you master the basics of handloading — case prep, priming, sizing, and bullet seating. In addition, these videos can help you select the right equipment for your loading bench. Videos show presses, case tumblers, ultrasonic cleaning machines, powered case prep centers, and more.
Here are three of our favorite RCBS Reloading videos, along with links to a dozen more:
Basic Safety Precautions for Reloading
Every novice hand-loader should watch this video. It covers the key safety principles you should follow, such as “Don’t use components of unknown origin”. We would add — always double check the labels on your powder bottles, and if you don’t know 100% what powder is in your powder measure — dump it out. Some of the most serious injuries have occurred when reloaders put pistol powder in rifle cases.
Setting Up the Sizing Die Correctly
This video address the common complaint some novices have when their hand-loadeed cartridges won’t chamber properly. Kent Sakamoto explains how to set up the sizing die properly to size the case body and bump the shoulder.
Choosing a Case Cleaning System
Here Kent Sakamoto looks at the three main types of brass cleaning systems: Vibratory Tumbler, Wet Tumbler (with media), and Ultrasonic Cleaning Machine. Kent reviews the pros and cons of each system.
More RCBS Reloading Videos
Here are twelve more helpful videos from RCBS. These cover both reloading techniques and reloading equipment. There are currently over 60 videos on the RCBS YouTube Channel.


 Sierra Bullets Ballistician Gary Prisendorf answered: “

 A fire in the home is always to be feared. And a fire in your reloading room can be disastrous. Near your reloading bench you probably have flammable solvents, and maybe gunpowder. What would happen if an electrical fire started in your reloading room? Would you be alerted? Do you have a proper fire extinguisher at hand?
 I grabbed the nearby ABC cannister extinguisher and squirted out the fire and soaked the charred bench areas with water. Good thing I had the extinguisher! And I was glad I religiously store powder and primers properly — away from the bench (and everything else).


 There’s More to the Story…
 A stuck case is one of the boo-boos that all of us reloaders have faced from time to time. If proper lubrication is applied, then it should not be a problem. No matter if you are a seasoned reloader or new to it, this situation can happen. Take your time, use the proper procedures, and you will be back in business in no time! This article explains how to avoid stuck cases (through proper lubrication) and how to use a stuck case removal system.

 While Varget and Reloder 15 remain in short supply, you can often find IMR 4320 powder back in the shelves of local gun stores. IMR describes IMR 4320 as follows: “Short granulation, easy metering, and perfect for the 223 Remington, 22-250 Remington, 250 Savage and other medium burn rate cartridges.” This older-generation powder is considerably more temp sensitive than the Hodgdon Extreme propellants, but in the right application, it looks to be a viable alternative for folks who can’t source Varget, Reloder 15, and even H4895.


