Sierra Bullets has published load data for the 6mm Creedmoor cartridge, a necked-down version of the popular 6.5 Creedmoor. Sierra has released very comprehensive 6mm Creedmoor load data, covering fifteen (15) different bullets from 55 to 110 grains. NOTE: Hornady-brand brass was used for Sierra’s 6mm Creedmoor load tests, not the newer, stronger Lapua 6.5 CM brass with small primer pockets. Hand-loaders using Lapua 6.5 Creedmoor brass necked to 6mm may have to adjust their loads.
Sierra writes: “As soon as the 6.5 Creedmoor was released in 2007, a 6mm version was being envisioned. After the 6mm Creedmoor demonstrated its worth at 1000 yards it began to catch the attention of Precision Rifle Series (PRS) competitors. The 6mm Creedmoor is a great fit for those looking for an AR platform-friendly cartridge. It delivers velocities very similar to the .243 Win and yet fits the AR10 magazine length[.] The 30-degree shoulder makes this a very efficient case and helps prolong case life as well. The 6mm Creedmoor works well with powders such as H4350, [RE-16], RE-17, and Ramshot Hunter for heavier long-range bullet weights. Slightly faster powders such as RE-15, Win 760, and Vihtavuori N540 work well with lighter weight bullets.”
Sierra Bullets Tested for 6mm Creedmoor Load Data
55gr BlitzKing (#1502)
60gr HP (#1500)
70gr HPBT (#1505)
70gr BlitzKing (#1507)
75gr HP (#1510)
In developing its 6mm Creedmoor load data, Sierra tested a very wide selection of propellants, two dozen overall. For the smaller bullets, fast-burning powders such as Benchmark, H4895, and CFE223 were tested. For the heavier 100+ grain bullets, Sierra tested a selection of medium-burn-rate powders including H4350, Reloder 16, Reloder 17, Varget, and Superformance. Sierra did a very thorough job. We know this information will be welcomed by 6mm Creedmoor shooters.
Don’t know what powder to try first? For the 107-110 grain bullets, if you want best accuracy and low ES/SD, our Forum members recommend Alliant Reloder 16 and Hodgdon H4350. If you are seeking max velocity with the 110-grainer, look at Hodgdon Superformance and Reloder 19.
Here are Sierra’s 6mm Creedmoor Load Data Charts for 90-95 grain bullets plus the 107gr MK and 110gr MK. There are five other tables for other bullet types.
BONUS: PRB 6mm Creedmoor and 6.5 Creedmoor Load Survey
The Precision Rifle Blog compiled Load Data from PRS Competitors, for both 6mm Creedmoor and 6.5 Creedmoor. This is a good place to start. PRB surveyed the match loads for “173 of the top-ranked precision rifle shooters in the country”. One cautionary note: These PRS guys may be loading fairly hot, so work up gradually, 0.3 grains at a time. CLICK HERE.
Here are some really smart tips for hand-loaders compiled by Sierra Bullets. These suggestions were submitted by Sierra’s Facebook fans — and some are very valuable indeed. Some of these tips will help you load more accurate ammo. Other selections will help you stay SAFE — which should always be your #1 priority. For example, we concur with the advice to “Check and Double Check. Everything. Every Time”. Also definitely keep “One powder on the bench at a time” — that could be a life-saver. You may want to print these “words of wisdom” and place them on a wall in your loading room.
Reloading Safety Tips — Sound Advice
ALWAYS START LOW: “Just because a load manual says X grains of X powder with X bullet is max, your rifle could reach max pressure a grain or two before what the book says. Start low and work up.” — Walter Coats
BE SAFE and CAREFUL: “Check and double check. Everything. Every time. Only one type of powder on the bench at a time.” — Glen Lundgren
DON’T RUSH: “Be patient, don’t be in a hurry, have fun and find your rhythm. Just tell your family you’re putting yourself in ‘time-out’. They will understand.” — Erik Dyal
POWDER RULE #1: “One powder on the bench at one time, it might save your life.” — James A. Kimery
STAY FOCUSED: “Relaxed but concentrated attention. Have fun enjoying a great hobby and pastime but stay focused.” — Jim Caldwell
POLICE LOADING AREA: “Keep your reloading bench area clean and put items away ASAP.” — Eric J. Ford
BE PATIENT: “Focus, Focus, Focus — be patient — it AIN’T a race.” — William Stanley
RECORD YOUR LOADS: “Write down on a small card what you’re loading – bullet weight, powder weight, type of powder, and primer. And put it in the powder hopper. I am unloading .45 FMJ because I forgot what type powder was in the hopper.” — Michael Conniff
HAVE a PROCEDURE for INTERRUPTIONS: “If, for any reason, you have to leave the bench while in the process of dropping powder charges, turn the next case to be charged upside down in the loading block so you know where you left off.” — Bill Tinsley
LABEL EVERYTHING: “OCD is a good habit to have with your loading bench. CLEARLY label everything!” — Andy Pynckel
HAVE a GOAL: “Never start reloading or developing a load without a specific goal in mind. Second keep meticulous records.” — Peter Eick
RESEARCH THE JOB: “Read all you can about it before you start!” — Keith Shively
KEEP TRACK of the Brass: “I put all my primed brass upside down (primer up) and as I charge the casing, I (of course) flip it primer down.” — Mark Ewing
Ever wondered what caused a particular bulge or marking on a case? And more importantly, does the issue make the case unsafe for further use? Sierra Bullets Ballistic Technician Duane Siercks offers some insight into various issues and their causes in two Case Diagnostic articles from the Sierra Blog.
Incipient Case-Head Separation
This is a Winchester .308 Win case that has a real issue. This case has a very obvious incipient case head separation in the process of becoming a complete failure.
This is most commonly caused by over-sizing the case causing there to be excess headspace on the case. After a few firings and subsequent re-sizing, this case is just about ready to come completely apart. Proper die adjustment is certainly a requirement here. Of course this case is not safe to reuse.
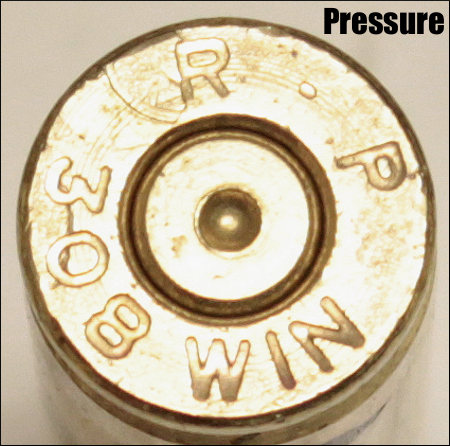
Excessive Pressure (Load Too Hot)
If you will notice in the picture of the case rim, there are two pressure signs to notice. First, look at the primer. It is basically flattened to about the max of what could be considered safe. If this was the only pressure sign noted, I would probably be fine with this load, but would constantly keep an eye on it especially if I was going to use this load in warmer temperatures. This load could easily cross into the “excess pressure” realm very quickly.
There is another sign of pressure that we cannot ignore. If you’ll notice, there is an ejector mark apparent that is located over the “R” of the R-P headstamp. This absolutely tells us that this load would not have been in the safe pressure range. If there were any of these rounds loaded, they should not be fired and should be dis-assembled. This case should not be reloaded.
Split Case-Neck
Here we have an R-P .22-250 case that has died the death. Everything looks fine with this case except the neck is split. This case must be tossed.
A split neck is a normal occurrence that you must watch for. It is caused by work-hardening of the brass. Brass cases get harder with age and use. Brand new cases that are stored for a period of time can become hard enough that they will split like this case within one to two firings. I have had new factory loads do the same thing. Then as we resize and fire these cases repeatedly, they tend to get harder and harder. Eventually they will split. The life of the case can be extended by careful annealing practices. This is an issue that would need to be addressed in an article by itself. Of course this case is no longer usable.
In the classes that I teach, I try to use examples like this to let the students see what they should be looking for. As always, if we can assist you, whether you are new to reloading or very experienced, contact us here at Sierra Bullets by phone at 1-800-223-8799 or by email at sierra@sierrabullets.com.
Dented Case Body
Here we have a Lake City 7.62×51 (.308 Win.) case with two heavy marks/dents in the case body.
This one may be a bit of a mystery. It appears as if this case may have been caught in the action of a semi-auto rifle when the firearm jammed or the case failed to clear during the cycling process. I probably would not reload this case just to prevent any feeding problems. This also appeared to be a factory loaded round and I don’t really see any pressure issues or damage to the case.
Multiple Problems — Lake City 5.56×45 unknown year.
This case has suffered multiple failures and cannot be re-used. First its has have a very rounded shoulder that is split. Upon first look it was obvious that this round had been a victim of excess pressure. The firearm (perhaps an AR?) was apparently not in full battery, or there was possibly a headspace issue also. While taking a closer look, the primer was very flat and the outside radius of the primer cup had been lost. High pressure! Then I also noticed that there was an ejector mark on the case rim. This is most certainly an incident of excessive pressure. This case is ruined and should be discarded.
It is very important to observe and inspect your cases before each reloading. After awhile it becomes second nature to notice the little things. Never get complacent as you become more familiar with the reloading process. If ever in doubt, call Sierra’s Techs at 1-800-223-8799.
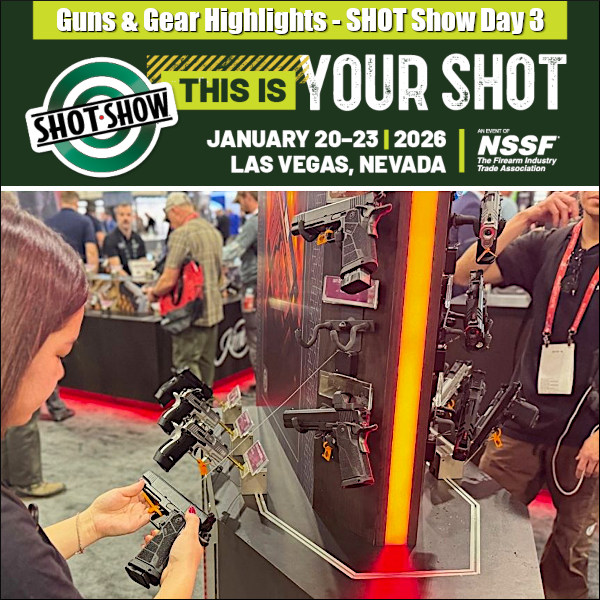
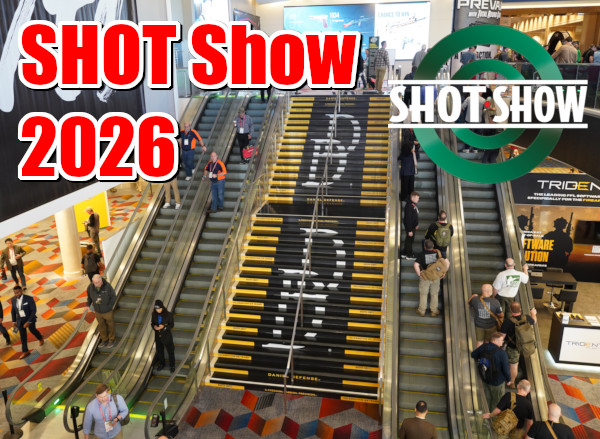
It’s now Day 3 at SHOT Show 2026. There are impressive new offerings from hundreds of manufacturers. In today’s story we feature some notable new rifles, pistols, and suppressors. To learn more about new-for-2026 products, check out the SHOT Show Blog which had these recent features:
SHOT Show is one of the biggest trade shows of the year among ALL industries. This year there are thousands of exhibitors spread out over two exhibit halls the combined size of 14 football fields (19 acres)! This is the 9th largest trade show in the USA, promoting an industry that supports over 380,000 jobs and generates over $26 billion in wages.
Savage Revamps Multiple Rifle Models
As displayed at SHOT Show 2026, Savage Arms has updated its rifle line-up, including the Savage 110, signaling a major refresh across multiple platforms. While specifics are still limited, these changes point toward improved features and modern refinements throughout the lineup. This video features GunsAmerica Media Editor True Pearce, who recently tested many new firearms at Industry Day at the Range.
New CZ Rimfire Match Rifle for Position Shooting Competitions
The new CZ 457 Target is a break-through. This is the first high-end rimfire rifle CZ has crafted for high-level 3P competition. Purpose-built for ISSF 3-position and 3P Olympic competition, the new CZ 457 Target in .22 LR features a fully-adjustable aluminum chassis, fully-adjustable trigger and a longer, 26-inch Match barrel with 12 grooves and a target crown.
New Rifle Builder PRO Platform
At SHOT Show 2026 our friend Gavin Gear has introduced an impressive new software/info system for gunsmiths and gun-building operations. RifleBuilderPro.com provides key specifications and data for smithing operations. But it is more than just about machine controls — Rifle Builder PRO will be a comprehensive platform for precision gunsmiths including: Comprehensive cartridge and rifle action information, Integrated tooling solutions, Digital machining companion, Training for seasoned machinists and newcomers, and Online community. Stay tuned for a more complete report in the weeks ahead.
New Trends in Suppressors — Elimination of NFA Tax Stamp Fee
Thanks to the Trump Administration, the expensive cost of a Tax Stamp for a Silencer/Suppressor has been eliminated. You still have to fill out paperwork, but suppressors are now MUCH more affordable. The $200 NFA tax stamp for suppressors (silencers) and other items like Short-Barreled Rifles (SBRs) was eliminated effective January 1, 2026, meaning the monetary fee is now $0, but the registration process through the ATF (forms, background checks, fingerprints) remains mandatory. The change significantly lowers the cost barrier to owning these items, making them more accessible, but does not remove them from National Firearms Act (NFA) oversight.
The elimination of NFA fees is creating a huge growth in the suppressor markets. At SHOT Show 2026 several suppressor makers have showcased innovative designs and affordable options. This video reviews Dead Air Silencers and the cutting-edge technology behind their most innovative suppressor designs with lightweight titanium construction. Highlighted in this video are the RXD910Ti and RXD22Ti, highlighting their advanced materials, impressive sound suppression, and multi-platform versatility. Also featured is the Nomad Ti OTB, an over-the-barrel design.
Evolution of SIG Sauer’s M7 Military Rifle — Updates
In this video, TFBTV’s James Reeves chats with SIG Sauer about the SIG M7 rifle and what has changed since the M7’s adoption by the U.S. Army. While the M7 has already entered service, SIG explains that the platform is still evolving through the Army’s Product Improvement Effort, driven by real soldier feedback rather than a ground-up redesign. Updates focus on reducing weight, shortening the system with an 11-inch barrel, refining the suppressor, and improving handling without walking back the performance goals of the 6.8×51 cartridge. This conversation breaks down what was changed, why it was changed, and how the M7 continues to mature as the Army\s next-generation service rifle.
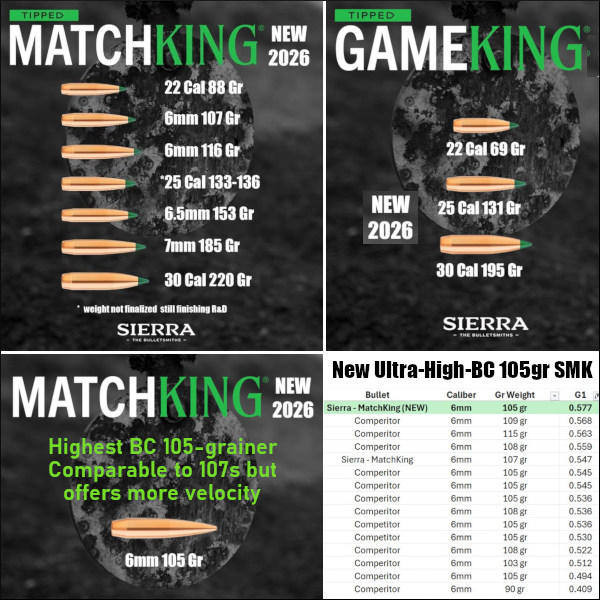
New High-BC Sierra MatchKings and New GameKing Bullets
Sierra has released a large selection of new match and hunting projectiles. There are new GameKings, 7 new tipped MatchKings, and two impressive new all-metal MatchKings — .22 Cal 77gr and 6mm 105gr. The new 105-grainer MK caught our attention. Sierra claims that its new 105gr MatchKing is the highest BC 105-grain bullet available, delivering an unmatched blend of speed and high BC. Sierra says the new 105gr SMK (non-tipped) offers the BC performance of heavier bullets while maintaining the velocity advantage of a lighter projectile.
Beretta B22 Jaguar .22 LR Pistol
The team at All4Shooters.com spotted a cool new rimfire handgun, the Beretta B22 Jaguar. This new blowback semi-auto handgun is an innovative chassis gun. Controls are ambidextrous and you can even choose left-side or right-side ejection. The mechanical system is Ruger-type, with a bolt that is cocked by operating the two rear serrated ears. The double-stack magazine has a capacity of 15 rounds. The standard B22 Jaguar pistol is priced at $699.00, while the B22 Jaguar Competition, featuring match barrel, compensator, and thumb rest, is $999.00.
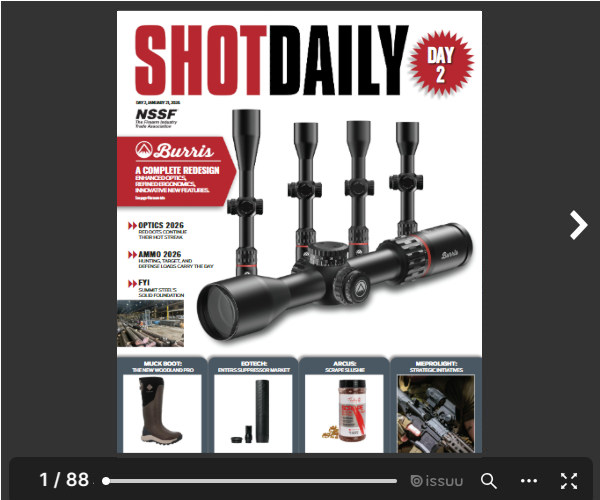
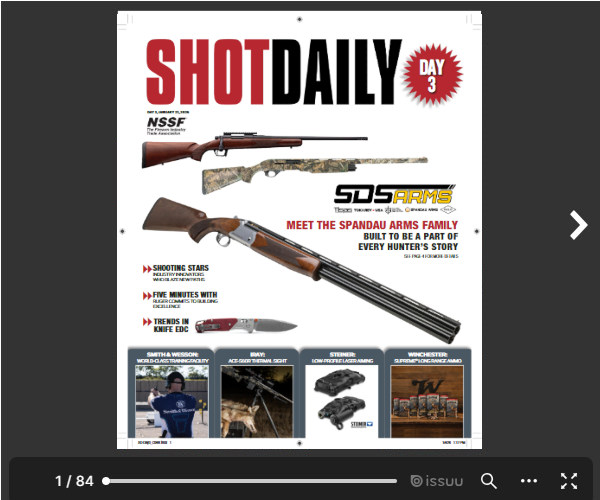
SHOT Daily Magazines Feature New Guns, Optics, Products
Want more information on new firearms and gun gear? Then check out SHOT Daily Magazine. Shown below are the digital edition covers for the SHOT Daily Day 2 and Day 3 magazines distributed at SHOT Show. The Day 2 issue features new scopes and ammo products while the Day 3 issue features a variety of topics including notable shooters. Click either Day 2 or Day 3 cover pages below to launch the full digital versions which you can read online for free.
The Making of MatchKings — How Sierra Produces SMKs
All Sierra bullets begin life as a strip of gilding metal, an alloy consisting of 95% copper and 5% zinc. To meet Sierra’s strict quality requirements, the gilding metal requires three times more dimensional and quality control standards than is considered standard in the copper manufacturing industry.
A blanking press stamps out a uniform disc and forms the cup that will be drawn into the MatchKing jacket. The cup is then polished and sent to a draw press to be drawn into a jacket that is longer than needed for the future MatchKing, thus allowing for the trim process. Press operators constantly check concentricity to ensures jacket quality. The jackets then go to a trimmer where they are visually inspected again.
After being polished a second time, the jacket travels to the bullet press. In the meantime, 80-pound lead billets are being extruded into lead wire for the cores where great care is taken so that the core wire is not stretched. The core wire is lightly oiled before continuing to the bullet press to be swaged.
The lead core wire and trimmed jacket meet at the bullet press where the first stage forms a boattail on the jacket. The lead core is then formed on top of the bullet press and fed down into the jacket. In one stroke of the press, the MatchKing is formed.
Quality control technicians pull samples from each lot of MatchKings to make sure they meet Sierra’s stringent standards. Samples are then sent to Sierra’s 300-meter underground test range (shown below) to be shot for accuracy on mechanical mounts referred to as “unrestricted return to battery rests” that Sierra designed and built in-house.
After inspection, the bullets are placed in the familiar green box along with reloading labels. They are then shrink-wrapped and shipped all over the world.
For load development, some guys shoot 3-shot groups. Other guys shoot 5-shot groups, or even 10-shot strings. But for testing its projectiles, Sierra Bullets takes it to another level entirely. A while back Sierra was testing its .30-Caliber 175gr HPBT MatchKing in the Sierra underground tunnel. The results appear above — a FIVE HUNDRED Round group!
500 Shots Form 0.82 MOA Group at 300m (328 yards)
Sierra’s trigger-pullers sent five full boxes of bullets down-range at a single target. The photo above shows the result of 500 shots taken in a 300 meter test tunnel. The raw group size, edge to edge of the farthest shots, is about 3.13 inches, as shown on the calipers’ metal linear scale. Subtract a .308″ nominal bullet diameter* to get the 2.823″ on the digital readout. So you’re seeing a 2.823″ group at 300 meters (328 yards). One MOA at this distance is 3.435″ so this 500-round group is 2.823 divided by 3.435 or 0.82 MOA (0.8218 MOA to be precise).
This 500-round group was shoot as part of a pressure/velocity test for a commercial customer. The cartridge was .308 Winchester, loaded at 2.800″. The powder was Reloder 15. A 26″ barrel was shot from a return to battery rest. The gun was cleaned every 125 rounds and two foulers shot.
What do you think — could you beat this group from a bench for 500 rounds?
One Facebook poster joked: “500-round group? Everyone knows anything less than 1000-round groups are a waste of time and statistically irrelevant.”
Sierra’s 300 Meter Testing Tunnel
Ever wonder how (and where) Sierra tests its bullets? The answer is underground, in a 300-meter test tunnel located under Sierra’s factory in Sedalia, Missouri. The photo above shows the construction of the tunnel back in May, 1990. Like most bullet manufacturers, Sierra does live-fire bullet testing of its projectiles. Sierra’s 300-meter test range is the longest, manufacturer-owned underground bullet test facility in the world. In years past, Sierra offered free visits to the test tunnel as part of a factory tour.
* Normally, to get an exact group size, you should subtract the TRUE bullet hole size, which is usually smaller than the nominal bullet diameter. E.g. a .308 bullet hole may show on paper as .298 or so. But here, for simplicity, we are subtracting .308″ because we do not have the original target to measure.
Sierra BulletsBallistic Technician Gary Prisendorf has written a nice essay about how reloading can become a life-time hobby, a rewarding pastime that can bring together a father and son…
Memories of My Father — Reloading As a Life-Time Hobby
by Gary Prisendorf
For as long as I can remember I have been around reloading. I have tons of childhood memories of my father reloading and shooting. I remember how he would let me help him load his ammunition, by letting me clean primer pockets or wipe the sizing lube off of his cases. I really thought I was doing something. Well, I guess I was, I was spending quality time with my father doing something that would become a great hobby and eventually land me a great job working for Sierra Bullets.
If you are a reloader, teach someone. You may just give them a hobby for the rest of their life and who knows, you could help them find an enjoyable career, doing something that they love.
— Gary Prisendorf
I remember watching my father sizing cases on his Herters press, dropping his powder charges with a Belding & Mull powder measure and weighing powder charges with his Texan scales. Heck, I can even remember when he would buy powder at a local pawn shop, and they would weigh it out and put it in a paper sack. He would save his empty powder cans, wrap them with masking tape and write what the powder was on them with a black magic marker.
When I was in Junior High, I got my first shotgun, a 20 gauge Mossberg 500 and within a couple of weeks my father came home with a 20 gauge Lee Load-All and a pound of Blue Dot. He gave me a crash course on how to use it, and got me up and running with a couple of safe loads. I put a lot of shells through that old 20 gauge.
From that day forward I was hooked. If I got a new gun, I was loading ammunition for it. I don’t buy factory ammunition unless I just want to shoot it up so I can get some once fired brass. I reload everything that I shoot, except for rimfire stuff, and if I could figure out how to do that safely, I would probably load that too.
Through the years I have learned to appreciate things — such as once-fired military .30-06 cases that can be converted to obscure cartridge types. And I know the value of a five-gallon bucket of lead wheel weights that will be melted down and cast into bullets.
I remember finding 19 once-fired Norma 7.7×58 Arisaka cases laying on the ground at a public shooting range, and it was like Christmas came early. I must have looked for that 20th case for about thirty minutes, but I never did find it.
I can’t thank my father enough for getting me started in reloading, he gave me a great hobby, many wonderful memories and taught me the skills that gave me a career doing something that I love.
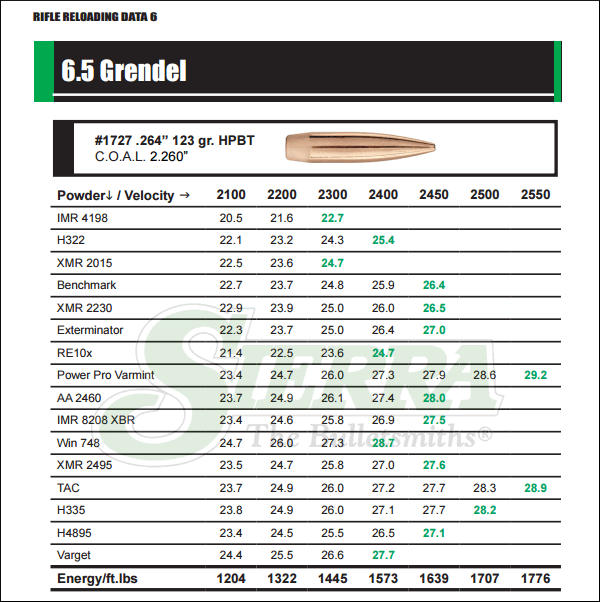
Sierra Bullets has released load data for the 6.5 Grendel, a popular cartridge that works equally well in bolt guns and AR15-platform gas guns. Sierra published comprehensive 6.5 Grendel load data, covering 19 powders and eight (8) different bullets from 85 to 130 grains. NOTE: Hornady-brand brass (see below) was used for Sierra’s 6.5 Grendel tests, not the stronger Lapua 6.5 Grendel brass. Hand-loaders using Lapua 6.5 Grendel brass may need to adjust their loads. Also Winchester WSR primers were used. We imagine most precision hand-loaders will prefer CCI or Federal primers.
Sierra Bullets Tested for 6.5 Grendel Load Data
85gr HP (#1700)
100gr HP (#1710)
107gr HPBT (#1715)
In developing its 6.5 Grendel load data, Sierra tested a very wide selection of propellants, 19 in all. For the 85gr to 100gr varmint bullets, modern powders such as XMR 2230, Power Pro Varmint, and Ramshot TAC offered the best velocity in the 24″ test barrel. For the heavier 120gr to 130gr match bullets, Sierra tested a selection of powders. Highest velocities came with Power Pro Varmint and TAC. If you’re looking for best accuracy, consider the slower burn-rate powders such as IMR 8208 XBR and Varget — but you’ll sacrifice some speed. Overall, Sierra’s latest 6.5 Grendel load data is an excellent addition to the 6.5 Grendel knowledge base. Thanks Sierra!
Here are Sierra’s 6.5 Grendel Load Data Charts for Sierra’s 123gr HPBT, 130gr HPBT, and 130gr TMK. There are a five other tables for lighter-weight Sierra bullets.
History of the 6.5 Grendel Cartridge
The 6.5 Grendel originated as a 6mm PPC necked up to 6.5 mm. After Alexander Arms relinquished the “6.5 Grendel” Trademark, the 6.5 Grendel was standardized as an official SAAMI cartridge. It has become popular with target shooters and hunters alike because it is accurate, efficient, and offers modest recoil. Good for small to medium game, the 6.5 Grendel is available in lightweight hunting rifles, such as the Howa Mini Action Rifle. And the 6.5 Grendel is one of the most accurate cartridges suitable for modern AR-15 platform rifles.
by Sierra Bullets Ballistic Technician Gary Prisendorf
Occasionally someone will ask, “Why did I get a flyer that didn’t go in with the rest of my group?” If I had an answer that would stop flyers from happening, I would be rich.
There are many reasons why this can happen. Everything from gripping a forearm differently to variations in the brass casing, the list goes on and on. Most of the time the flyer is usually shooter induced and sometimes what you may think is a flyer, is just part of your group. There are a lot of shooters, that go out and test a load and they may shoot a 3/8” group at 100 yards and think that load is good. But I have seen far too many times that you can shoot another group, same load, same rifle and the next time you may get a 1 ¼” group.
The total opposite can also occur. You may shoot a 1 ¼” group and turn around and follow it with a 1/2″ group without changing anything. If you only shot the one group, you might decide that load wasn’t any good and move on to something else without really knowing what that load was capable of.
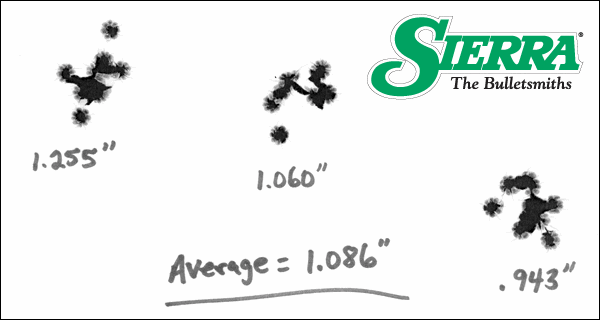
To really determine how a particular load is performing we need to shoot multiple groups and take an average of the group sizes to really see what that rifle/load combination is really capable of.
I suggest shooting a minimum of three 5-shot groups and averaging the group sizes before deciding if the load is acceptable or not. Obviously the more rounds you shoot for a group and the more groups that you shoot, you will get a much better representation of what that particular combination can do.
Now I’m not saying to go out and shoot 30 groups with 50 rounds in each group to determine how well your load is shooting. That would be a bit pointless, in some cases it would be time to re-barrel your rifle before your load development was finished.
In most cases, I feel that three to five, 5-shot groups will give you a pretty good representation of how a load will perform in that specific firearm.
by Sierra Bullets Ballistic Technician Paul Box
All of us who have been in reloading and shooting for any period of time have read how sectional density has been regarded as a bullet’s ability to penetrate. Back before high velocity came along and modern bullet design, the easiest way to get more “power” and penetration was by increasing the diameter and mass. After all, a bowling ball will hurt more than a golf ball, right?
Let’s take a closer look at sectional density.
The formula for calculating sectional density is pretty simple and straight forward. Take the bullet weight and divide by 7000. This number is then divided by the bullet diameter squared Two bullets of equal weight and the same diameter will have equal sectional sectional density. No regard is given to the bullet construction. This is where the fly hits the soup in considering sectional density as far as penetration is concerned.
Section Density Formula: (Bullet Weight divided by 7000) divided by Bullet Diameter squared.
Bullet construction is the biggest factor in how it is able to penetrate. The best example I can think of here is to look at the Sierra .224 55 Gr. FMJBT GameKing #1355 compared to the 55 Gr. BlitzKing #1455. Both are .224 and weigh 55 grs. Both have a sectional density of .157. But there is a huge difference in their construction. The FMJ has a thick jacket and is designed to penetrate. The BlitzKing is designed for fast and rapid expansion with little concern for how deep they will penetrate.
The next time you’re choosing a bullet, look at the construction and less at the sectional density number. It’s all about the construction anyway. If you have any questions or would like to discuss sectional density or bullet penetration further, please give us a call at 800-223-8799 or shoot us an email at sierra@sierrabullets.com.