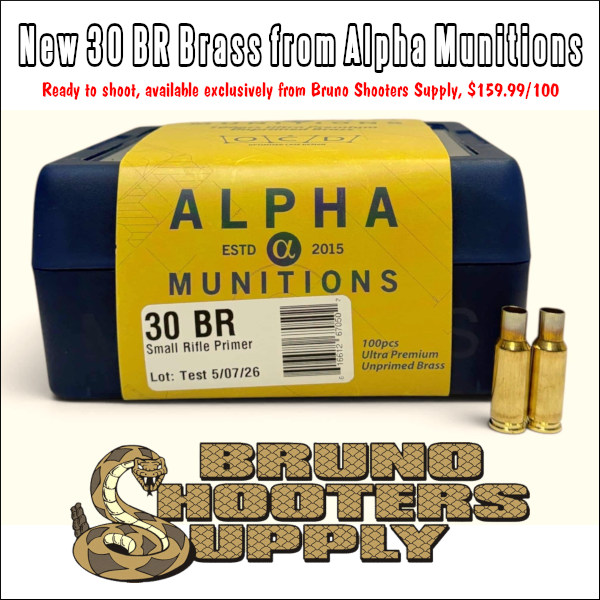
Here is great news for score benchrest shooters. For years 100/200 yard score competition has been dominated by the 30 BR cartridge, which offers outstanding accuracy and consistency with .30-caliber bullets. But creating a .30 BR cartridge took time and effort forming the brass from a parent typically using Lapua 6mm BR Norma brass or Peterson 7mm BR brass.
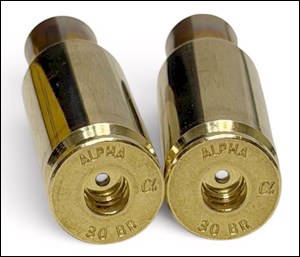
Now that has changed. Alpha Munitions now offers excellent, ready-to-shoot 30 BR brass. No separate fire-forming or hydro-forming is required. This Alpha 30 BR brass has shown excellent accuracy both with a no-turn neck and as turned for a tighter chamber. Case life is excellent as Alpha brass is strong with good longevity. This impressive new 30 BR brass is now available exclusively through Bruno Shooters Supply. It is IN STOCK now and priced at $159.99 for 100 pieces.
Ace benchrester and gunsmith Speedy Gonzales has praised this new Alpha 30 BR brass: “Well fellow score shooters, the days of expanding 6mm or 7mm brass up to make 30 BR brass are just about over. UPS just dropped off the test samples for me to test, and should be in full production soon. I will post a full video after testing and give you all the full report. 30 BR brass by Alpha will be sold exclusively through Bruno Shooters Supply and has an order list up and running[.]”
This was one of our 25 Most Popular Articles in past years. We’re repeating it for those of you who may have missed it the first time around. These diagrams were created by the South Texas Shooting Marksmanship Training Center (STMTC).
There was an excellent article about Mirage created for the South Texas Marksmanship Training Center (STMTC). This article explains what causes mirage and how mirage can move the perceived aiming point on your target. Most importantly, the article explains, in considerable detail, how you can “read” mirage to discern wind speeds and wind directions.
Mirage Is Your Friend
While hot days with lots of mirage can be frustrating, mirage can reveal how the wind is flowing (and changing). If you learn how to recognize and read mirage patterns, you can use that information to shoot higher scores. That’s why many leading long-range shooters tell us: “Mirage is your friend.” As the STMTC article explained: “A mirage condition is not a handicap, since it offers a very accurate method of perceiving small wind changes[.]”
Mirage Illustrated with Diagrams
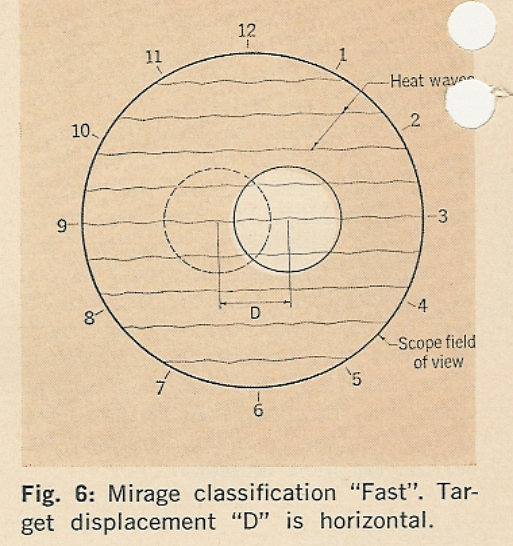
With simple but effective graphic illustrations, this is one of the best explanations of mirage (and mirage reading) we have found on the internet. This is a “must-read” for any serious competitive shooter. Here is a brief sample from the article, along with an illustration. NOTE: the full article is six times longer and has 8 diagrams.
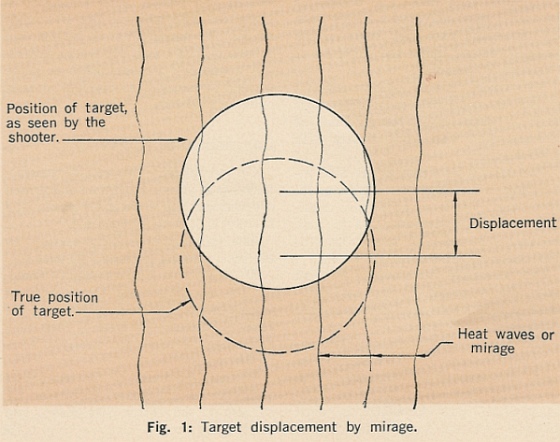
The term “mirage” as used by the shooter does not refer to a true mirage, but to heat waves and the refraction of light as it is bent passing through air layers of different density. Light which passes obliquely from one wind medium to another it undergoes an abrupt change in direction, whenever its velocity in the second medium is different from the velocity in the first wind medium; the shooter will see a “mirage”.
The density of air, and therefore its refraction, varies with its temperature. A condition of cool air overlaying warm air next to the ground is the cause of heat waves or “mirage”. The warm air, having a lower index of refraction, is mixed with the cooler air above by convection, irregularly bending the light transmitting the target image to the shooter’s eye. Figure 1 shows (greatly exaggerated) the vertical displacement of the target image by heat waves.
Heat waves are easily seen with the unaided eye on a hot, bright day and can be seen with spotting scope on all but the coldest days. To observe heat waves, the scope should be focused on a point about midway to the target. This will cause the target to appear slightly out of focus, but since the high power rifle shooter generally does not try to spot bullet holes, the lack in target clarity is more than compensated by clarity of the heat waves.
Story tip from Boyd Allen. We welcome reader submissions.
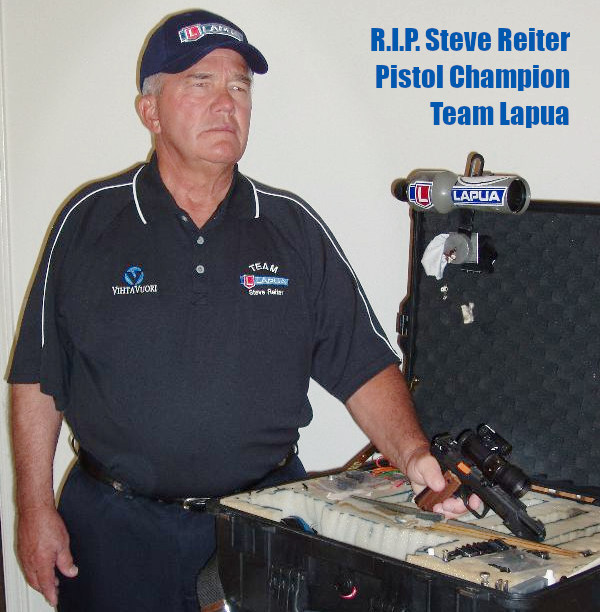
Capstone Precision Group and Team Lapua USA announce with deep sadness the passing of Steve Reiter, one of the most accomplished competitive pistol shooters in history and a foundational member of Team Lapua in the United States. Steve passed away on May 18, 2026. In the slow-fire pistol shooting disciplines, Steve is probably the greatest American shooter ever.
Reiter was among the original members of Team Lapua USA when the program was established in 2009, helping to define the standard for excellence, sportsmanship, and brand representation that continues today. Throughout his career, he served not only as a world-class competitor, but also as a dedicated ambassador for the shooting sports.
Steve Reiter’s record in high-level competition is extraordinary:
34 National Championship titles, including five National Championships at Camp Perry
63 National Records, including a historic .22 Aggregate score of 899, the highest ever recorded
40+ Regional Championships
First-ever Quadruple Distinguished Marksman under the CMP
Triple Distinguished Marksman under the CMP
Two-time President’s 100 Champion in Pistol
Two-time National Trophy Individual Match Champion in Pistol
10-time Winner of the National Match High Senior Pistol Trophy
Five-time Winner of Citizens’ Military Pistol Trophy
Canada International Service Pistol Champion
Two-time Free Pistol National Champion
Seven-time Interservice Champion
Standard Pistol National Champion
Member of the 1980 U.S. Olympic Team (Free Pistol)
Reiter continued to compete at an elite level well into his later years, achieving many Senior titles. Following his retirement from active competition, Reiter remained an integral part of Team Lapua as an Emeritus Member, continuing to mentor shooters and support the sport he loved.
Steve Reiter Senior Championships:
2017 NRA National Pistol Championships — 1st Place, Super Senior
2013 NRA National Pistol Championship — Grand Senior Champion
2014 Mid-Winter Championship — 1st Place
2014 Indoor National Sectional Championship — 3rd Place and new Senior National Record
“Steve Reiter was more than a champion—he was one of the foundational figures of Team Lapua in the United States,” said Adam Braverman, Vice President of Sales & Marketing for Capstone Precision Group. “His achievements speak for themselves, but what truly set Steve apart was the way he carried himself and the impact he had on others. He represented our brand with integrity, passion, and a genuine love for the shooting sports. Steve helped shape what Team Lapua stands for today, and his legacy will continue to inspire our team and the broader shooting community for years to come.”
In 2022, the Civilian Marksmanship Program (CMP) honored Reiter by establishing the Reiter Cup National Champion Trophy. This award is presented to the winner of the Match Pistol 2700 Any Sights National Championship, which recognizes the highest combined scores from the .22, .45 ACP, and Centerfire 900 Aggregate matches held during the annual National Matches at Camp Perry.
Beyond his competitive accomplishments, Reiter was widely respected for his humility, sportsmanship, and commitment to growing the shooting sports community. His influence extended far beyond the firing line, impacting countless shooters, teammates, and fans across generations. Capstone Precision Group and Team Lapua extend their deepest condolences to Steve’s family, friends, and the entire shooting sports community.
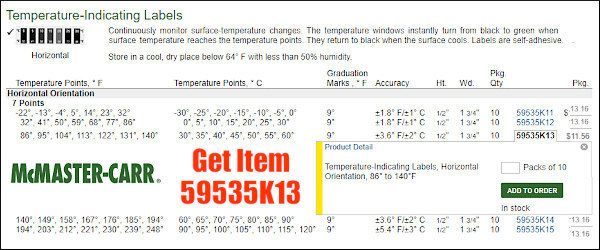
The official start of summer (6/21/2026) is just one month away, and temperatures are starting to heat up. We are already seeing unseasonably hot conditions in some areas of the country. You never want your barrels to get too hot, which can happen more quickly in summertime. Accuracy suffers when barrels over-heat, and excessive heat is not good for barrel life. So how do you monitor your barrel’s temperature? You can check if the barrel is “warm to the touch” — but that method is not particularly precise. There is a better way — using temperature-sensitive strips. McMaster.com (an industrial supply house) offers stick-on temp strips with values from 86° F to 140° F. A pack of ten (10) of these horizontal strips (item 59535K13) costs $11.56. That’s a mere $1.16 per barrel for strips — cheap insurance for your precious barrels. For best barrel life, you should try to keep your barrels under 120 degrees F.
NOTE: On the McMaster.com website, you’ll need to scroll down to the multi-use “Temperature Indicating Labels”. Then click on the horizontal label and select item 59535K13, as shown below.
Forum member Nomad47 says: “I have temperature strips (bought at McMaster-Carr) on all my barrels. I try not to shoot when the barrel gets to 122 degrees or higher[.]” Here are photos of the McMaster-Carr temp strips on Nomad47’s customized Savage.
Creedmoor Sports now offers handy Temp Strips, with 3-packs for $12.95. These have colored temp range markers so you can quickly see if your barrel is getting too hot. Creedmoor Sports notes: “The temperature range of 30-160° spaced in 10° increments fit most … shooting situations. The 1″-wide 6″-long LCD strip will provide many years of service. In general, we recommend that if a barrel begins to reach 140°, it is too hot and continuing to shoot at these temperatures accelerates barrel wear These barrel temperature strips use a 3M® adhesive and will stick to blued, parkerized and stainless barrels.”
Bad things can happen if your barrel gets too hot. First, with some barrels, the point of impact (POI) will shift or “walk” as the barrel heats up excessively. Second, even if the POI doesn’t change, the groups can open up dramatically when the barrel gets too hot. Third, if the barrel is very hot, the chamber will transfer heat to your loaded cartridge, which can lead to pressure issues. Finally, there’s considerable evidence that hot barrels wear out faster. This is a very real concern, particularly for varmint shooters who may shoot hundreds of rounds in a day. For this reason, many varminters switch among various guns, never letting a particular barrel get too hot.
Neconos.com offers BAR-L Temp Strips that visually display heat readings from 86 to 140 degrees. Think of these strips as compact, unbreakable thermometers that monitor barrel heating.
Put a strip on the side of the barrel and the barrel’s temp will be indicated by a stripe that changes from black to green. There is also a “general purpose” strip that reads to 196 degrees (see bottom row). The Benchrest model strip (86°F to 140°F) is in the middle. These Bar-L temp strips cost $12.70 each, or $25.00 for a 3-pack.
NOTE: These strips can be permanently fixed to the barrel with the heavy-duty clear plastic tape strip provided with the BAR-L Temp strip.
Here’s something all shooters need — a smartphone App that calculates bullet-hole group sizes from your own photos. The Ballistic-X App is simple to use. Take a photo of your target, set some values (such as bullet diameter and distance to target), then use the touchscreen to place circles around each hole. The App will calculate group size (in MOA or Mils), distance to point of aim, and provide all the info in an overlay. Then click “save” to record your group for posterity!
This App works well, is relatively easy to set-up, and costs just $7.99. It is available for both Android devices and iOS (Apple) devices. There are other ways to measure group sizes from target images, such as the excellent On-Target program, which we have used for years. However On-Target requires a software installation on a Windows platform desktop or laptop. Ballistic-X is a simple, easy-to-install App with versions for both Android and iOS (Apple) Mobile devices.
The Ballistic-X App has a relatively easy-to-use interface. Of course you can choose either MOA or Milrad group values, and Inch or Metric dimensions. There are various labeling options that provide useful info for Load Development. There is even an ATZ (Adjustment To Zero) feature for adjusting your turrets.
How to Use Ballistic-X App
1. Select Photo Source — Choose Camera to take new photo or get image from Photo Library.
2. Set Reference Values — Select Bullet Diameter and enter Distance to Target.
3. Establish Scale on Image — Mark two points on target photo to set scale. For example, if the target has a 1″-square grid lines, mark two points on grid for 1″ distance.
4. Mark Point Of Aim — Put the central X on the aim point.
5. Designate Shot Locations — Place the green circles around each shot.
6. Finalize Data Display — Position Overlay, select size/color options, and export file.
Android Options — Range Buddy FREE App
Along with Ballistic-X, there is another Mobile App, Range Buddy, that also measures shot groups. Range Buddy is currently offered for Android devices only. It is FREE, but has adverts. Range Buddy isn’t bad, but users complained about the program crashing, and there are compatibility issues with newer phones. We recommend you pay $7.99 and stick with Ballistic-X.
Here’s a cool video from the University of Mississippi Womens’ Shooting Team a decade ago. The gals from Ole Miss challenge their marksmanship skills with a variety of tiny targets — grapes, pencil erasers, and playing cards on edge. The results are filmed with ultra-high-speed cameras so you can watch the moment of impact. This is a fun, feel-good video. Enjoy.
These young ladies were training for competition at the Ole Miss Invitational Tournament in Oxford, Mississsippi. For more information, visit OldMissSports.com.
To understand the heart and mind of a champion, watch this video profiling Jessie Harrison. This talented lady is arguably the best female action pistol shooter in history. No other woman has amassed as many championships or set so many speed-shooting records. Over the past two decades Jessie Harrison (who has also competed with with married names Jessie Duff and Jessie Abbate) has earned dozens of major titles including twenty-two U.S. Practical Shooting Association (USPSA) Ladies Championships. Jessie won her 22nd USPSA title at the 2021 USPSA Race Gun Nationals in Alabama.
Jessie is one of the hardest-working athletes in the shooting game. Jessie is America’s “leading lady” — perhaps the winningest female pistol shooter in the game today. The drive and dedication that has made Jessie a success are revealed in this video from Weatherby.
Jessie Harrison’s Will to Win
Jessie explains how hard work brings titles: “To prepare for a championship, I’m on the range constantly.
My office is the gun range — that’s where I do my work.
I travel the country pullin’ the trigger, makin’ brass, smelling gunsmoke. I have to make sure that I’m in control because… there is no other person on the line with me, helping pull the trigger.
I have to pay attention to my foot placements, my set-ups, my positions, gettin’ the gun clean out of the holster, my reloads. I can’t think about it when I’m shooting. I can’t think about these small things. I have to focus on the sights and pulling the trigger. It’s just me and the gun.
[When] I step out on to the range, I simply have to be perfect — I have to be the best… I won’t settle for anything less.”
First-Ever Female Grand Master
Jessie Duff is the first woman in history to earn the title of USPSA Grand Master (GM), the highest rating conferred by the U.S. Practical Shooting Association (USPSA). To earn this prestigious ranking, Duff had to maintain an average above 95% in shooting classification courses, something never before achieved by a lady shooter. Jessie finished 2013 with a 95.39% average.
Over the years, the U.S. Army Marksmanship Unit (USAMU) published a series of reloading articles on its Facebook Page. In this article, the second in a 3-part series, the USAMU covers the process of loading competition pistol ammunition. The authors focus on two key elements — the taper crimp and the quality/uniformity of the original brass. If you shoot pistol competitively, or just want to maximize the accuracy of your handguns, read this article. The taper crimp tips are very important.
Loading Accurate Competition Pistol Ammunition — Part 2 of 3
One often-overlooked aspect of handloading highly-accurate pistol ammunition is the amount of taper crimp used, and its effect on accuracy. (NOTE: this article pertains to loading for semi-autos — revolver crimp techniques involve some quite different issues.) Briefly, different amounts of taper crimp are used with various handloads to obtain best accuracy. The amount is based on bullet weight, powder burn rate and charge, plus other factors such as case neck tension. During machine-rest testing of experimental Service Pistol ammunition, many variables are examined. Among these, our Shop often varies a load’s crimp in degrees of 0.001″ when re-testing for finest accuracy.
How to Measure Taper Crimp on Pistol Cartridges
One question that often arises is, “How do I measure the taper crimp I’m putting on my cartridges?” Using the narrow part of one’s dial caliper jaws, carefully measure the case diameter at the exact edge of the case mouth on a loaded cartridge. It’s important to take several measurements to ensure consistency. Also, be sure to measure at several places around the case mouth, as case wall thickness can vary. After measuring 2-3 cartridges with a given crimp setting, one can be confident of the true dimension and that it can be repeated later, if needed.
However, for good results, one must use brass from one maker due to variances in case wall thickness. For example, the same degree of crimp that imparts a measurement of 0.471″ with Brand X brass may result in 0.469″ with Brand Y. Thus, for best accuracy, using brass from the same manufacturer is important — particularly for 50-yard Slow Fire. In a perfect world, it is better still to use brass from one lot number if possible. With the popularity of progressive presses using interchangeable tool heads, keeping separate tool heads adjusted for each load helps maximize uniformity between ammunition lots.
Brass Uniformity and Accuracy
Brass is important to pistol accuracy. While accurate ammunition can be loaded using brass of mixed parentage, that is not conducive to finest results, particularly at 50 yards. It is important for the serious competitor to pay attention to his brass – even if only for the 50-yard “Slow Fire” portions of “Bullseye” matches and practice. By segregating brass as described above, and additionally keeping track of the number of times a given batch of cases has been fired, one can ensure case neck tension and case length are at their most uniform.
Given the large volumes of ammunition consumed by active pistol competitors, using inexpensive, mixed surplus brass for practice, particularly at the “short line” (25 yards), is understandable. In NRA Outdoor Pistol (“Bullseye”), the 10-ring is relatively generous — especially for a well-trained shooter with an accurate pistol and load. However, for the “long line” (50 yards), purchasing and segregating a lot of high-quality brass to be used strictly for slow-fire is a wise idea. To keep track of your brass on the line, use a unique headstamp marking with 1 or 2 colors of marking pen ink.
Uniform Cartridge Overall Length is Important
Cartridge case Overall Length (OAL) uniformity as it comes from the factory is important to achieving utmost accuracy. More uniform case lengths (best measured after sizing) contribute to greater consistency of crimp, neck tension, ignition/burn of powder charge, headspace (rimless cartridges), etc. Cartridge case-length consistency varies noticeably by maker and, with lesser manufacturers, also from lot to lot. Some manufacturers are more consistent in their dimensions than others, and also in the hardness/ductility of their brass. Similarly, pay attention to primer brands, powder lot numbers, etc.
Consider Using a Lock-Out Die with Progressive Presses
When reloading pistol ammo with a Progressive press, we strongly recommend the use of a lock-out die, or other system that can detect double charges or low charges. If your progressive is manually advanced, the possibility of a double charge is very real — and that can have disastrous consequences.
On UltimateReloader.com website you’ll find an excellent two-part series on the function and set-up of the RCBS Lock-Out Die. This die prevents loading if a high or low powder charge is detected. The video below shows setup of the RCBS Lock-Out Die on the Dillon XL-650 progressive press.
Here’a useful article by Sierra Bullets Media Relations Manager Carroll Pilant. This story, which originally appeared in the Sierra Bullets Blog, covers some of the more common ammo problems that afflict hand-loaders. Some of those issues are: excessive OAL, high primers, and improperly-sized cases. Here Mr. Pilant explains how to avoid these common problems that lead to “headaches at the range.
I had some gentlemen at my house last fall getting rifle zeros for an upcoming elk hunt. One was using one of the .300 short mags and every 3rd or 4th round would not chamber. Examination of the case showed a bulge right at the body/shoulder junction. These were new cases he had loaded for this trip. The seating die had been screwed down until it just touched the shoulder and then backed up just slightly. Some of the cases were apparently slightly longer from the base to the datum line and the shoulder was hitting inside the seating die and putting the bulge on the shoulder. I got to thinking about all the gun malfunctions that I see each week at matches and the biggest percentage stem from improper handloading techniques.
One: Check Your Cases with a Chamber Gage
Since I shoot a lot of 3-gun matches, I see a lot of AR problems which result in the shooter banging the butt stock on the ground or nearest solid object while pulling on the charging handle at the same time. I like my rifles too well to treat them that way (I cringe every time I see someone doing that). When I ask them if they ran the ammo through a chamber gage, I usually get the answer, “No, but I need to get one” or “I didn’t have time to do it” or other excuses. The few minutes it takes to check your ammo can mean the difference between a nightmare and a smooth running firearm.
A Chamber Gauge Quickly Reveals Long or Short Cases
Size Your Cases Properly
Another problem is caused sizing the case itself. If you will lube the inside of the neck, the expander ball will come out a lot easier. If you hear a squeak as the expander ball comes out of a case neck, that expander ball is trying to pull the case neck/shoulder up (sometimes several thousandths). That is enough that if you don’t put a bulge on the shoulder when seating the bullet … it can still jam into the chamber like a big cork. If the rifle is set up correctly, the gun will not go into battery and won’t fire but the round is jammed into the chamber where it won’t extract and they are back to banging it on the ground again (with a loaded round stuck in the chamber). A chamber gage would have caught this also.
Oversizing cases also causes problems because the firing pin doesn’t have the length to reach the primer solid enough to ignite it 100% of the time. When you have one that is oversized, you usually have a bunch, since you usually do several cases at a time on that die setting. If the die isn’t readjusted, the problem will continue on the next batch of cases also. They will either not fire at all or you will have a lot of misfires. In a bolt action, a lot of time the extractor will hold the case against the face of the breech enough that it will fire. The case gets driven forward and the thinner part of the brass expands, holding to the chamber wall and the thicker part of the case doesn’t expand as much and stretches back to the bolt face. If it doesn’t separate that time, it will the next time. When it does separate, it leaves the front portion of the case in the chamber and pulls the case head off. Then when it tries to chamber the next round, you have a nasty jam. Quite often range brass is the culprit of this because you never know how many times it has been fired/sized and in what firearm. Back to beating it on the ground again till you figure out that you have to get the forward part of the case out.
Just a quick tip — To extract the partial case, an oversized brush on a cleaning rod [inserted] and then pulled backward will often remove the case. The bristles when pushed forward and then pulled back act like barbs inside the case. If you have a bunch of oversized case that have been fired, I would dispose of them to keep from having future problems. There are a few tricks you can use to salvage them if they haven’t been fired though. Once again, a case gage would have helped.
Two: Double Check Your Primers
Another thing I see fairly often is a high primer, backwards primer, or no primer at all. The high primers are bad because you can have either a slam fire or a misfire from the firing pin seating the primer but using up its energy doing so. So, as a precaution to make sure my rifle ammo will work 100% of the time, I check it in a case gage, then put it in an ammo box with the primer up and when the box is full, I run my finger across all the primers to make sure they are all seated to the correct depth and you can visually check to make sure none are in backwards or missing.
Three: Check Your Overall Cartridge Length
Trying to load the ammo as long as possible can cause problems also. Be sure to leave yourself enough clearance between the tip of the bullet and the front of the magazine where the rounds will feed up 100%. Several times over the years, I have heard of hunters getting their rifle ready for a hunt. When they would go to the range to sight in, they loaded each round single shot without putting any ammo in the magazine. On getting to elk or deer camp, they find out the ammo is to long to fit in the magazine. At least they have a single shot, it could be worse. I have had hunters that their buddies loaded the ammo for them and then met them in hunting camp only to find out the ammo wouldn’t chamber from either the bullet seated to long or the case sized improperly, then they just have a club.
Four: Confirm All Cases Contain Powder
No powder in the case doesn’t seem to happen as much in rifle cartridges as in handgun cartridges. This is probably due to more handgun ammo being loaded on progressive presses and usually in larger quantities. There are probably more rifle cartridges that don’t have powder in them than you realize though. Since the pistol case is so much smaller internal capacity, when you try to fire it without powder, it usually dislodges the bullet just enough to stick in the barrel. On a rifle, you have more internal capacity and usually a better grip on the bullet, since it is smaller diameter and longer bearing surface. Like on a .223, often a case without powder won’t dislodge the bullet out of the case and just gets ejected from the rifle, thinking it was a bad primer or some little quirk.
For rifle cases loaded on a single stage press, I put them in a reloading block and always dump my powder in a certain order. Then I do a visual inspection and any case that the powder doesn’t look the same level as the rest, I pull it and the one I charged before and the one I charged after it. I inspect the one case to see if there is anything visual inside. Then I recharge all 3 cases. That way if a case had powder hang up and dump in the next case, you have corrected the problem.
On progressive presses, I try to use a powder that fills the case up to about the base of the bullet. That way you can usually see the powder as the shell rotates and if you might have dumped a partial or double charge, you will notice as you start to seat the bullet if not before. On a progressive, if I don’t load a cartridge in one smooth stroke (say a bullet tipped over sideways and I raised the ram slightly to reset it) Some presses actually back the charge back adding more powder if it has already dumped some so you have a full charge plus a partial charge. When I don’t complete the procedure with one stroke, I pull the case that just had powder dumped into it and check the powder charge or just dump the powder back into the measure and run the case through later.
This 12″ Bullseye Pistol Diagnostic Target helps improve handgun marksmanship. The target diagnoses common problems with one-handed shooting based on shot impact zones. While this target is designed for righties, left-handed shooters can use the target too. Just observe the opposite tips.
Do you know someone who wants to get started in pistol shooting? Here’s a helpful resource. The NRA now offers its Basics of Pistol Shooting Course in an online format. That makes it easy to cover the “classroom” phase of the course on your own time. The $60.00 online course includes 11 step-by-step lessons (to be followed by live range training). CLICK HERE to enroll in online Pistol Training Course.
Train Online, Then Register for a Range Session
For the NRA Basics of Pistol Shooting course, Phase 1 is conducted in an online environment, completed on your own time (cost is $60.00, non-refundable). After successfully completing the online exam, students can register for Phase 2, the instructor-led training session. Phase 2 is conducted at your local range with an NRA-Certified Instructor. NOTE: There will normally be an additional fee for Phase 2. You must successfully complete BOTH Phase 1 and Phase 2 in order to receive your NRA Basics of Pistol Shooting course certificate.
Designed and developed by experts to accommodate busy schedules, the web-based course takes a blended learning approach to firearms training with both online and physical components. Students have 90 days to work through 11 online lessons before registering for Phase 2, the NRA Certified Instructor-led phase at a local range.
“Thanks to our online courses and network of more than 125,000 NRA Certified Instructors, it has never been easier to learn basic firearm skills,” said Kyle Weaver, NRA General Operations Exec. Director. The NRA offers other online training courses at Onlinetraining.nra.org. Along with pistol course, these offerings include Rifle Training, Shotgun Training, a Range Safety Office (RSO) course, and a Range Development and Operations course.
Know someone getting started with handguns? Here is a useful video focusing on safety:


 Now that has changed. Alpha Munitions now offers excellent, ready-to-shoot 30 BR brass. No separate fire-forming or hydro-forming is required. This Alpha 30 BR brass has shown excellent accuracy both with a no-turn neck and as turned for a tighter chamber. Case life is excellent as Alpha brass is strong with good longevity. This impressive new 30 BR brass is now available exclusively through Bruno Shooters Supply. It is IN STOCK now and priced at $159.99 for 100 pieces.
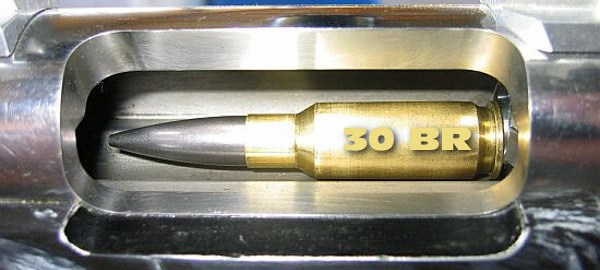


 Beyond his competitive accomplishments, Reiter was widely respected for his humility, sportsmanship, and commitment to growing the shooting sports community. His influence extended far beyond the firing line, impacting countless shooters, teammates, and fans across generations. Capstone Precision Group and Team Lapua extend their deepest condolences to Steve’s family, friends, and the entire shooting sports community.


 Jessie Harrison’s Will to Win


 Oversizing cases also causes problems because the firing pin doesn’t have the length to reach the primer solid enough to ignite it 100% of the time. When you have one that is oversized, you usually have a bunch, since you usually do several cases at a time on that die setting. If the die isn’t readjusted, the problem will continue on the next batch of cases also. They will either not fire at all or you will have a lot of misfires. In a bolt action, a lot of time the extractor will hold the case against the face of the breech enough that it will fire. The case gets driven forward and the thinner part of the brass expands, holding to the chamber wall and the thicker part of the case doesn’t expand as much and stretches back to the bolt face. If it doesn’t separate that time, it will the next time. When it does separate, it leaves the front portion of the case in the chamber and pulls the case head off. Then when it tries to chamber the next round, you have a nasty jam. Quite often range brass is the culprit of this because you never know how many times it has been fired/sized and in what firearm. Back to beating it on the ground again till you figure out that you have to get the forward part of the case out.


