Eurooptic vortex burris nightforce sale


teslong borescope digital camera barrel monitor


As an Amazon Associate, this site earns a commission from Amazon sales.


June 20th, 2019

Lyman Case Trim Xpress Gear Review with Video

Lyman case trim xpress trimmer brass cartidge should indexing adjustable trimming

Great Case Trimmer for under $130.00
We think Lyman’s new Case Trim Xpress will be a “game changer” for hand-loaders. If you’re like most of us, trimming your brass to length has been a dull, laborious and time-consuming process unless you shell out $500 or more for a top-of-the-line unit. Lyman has broken that mold by releasing an accurate, easy-to-adjust, shoulder-indexing, carbide-bladed, and SPEEDY case trimmer for under $130.00! Given its outstanding performance for the price, the Lyman Case Trim Xpress is a definite winner.

Lyman case trim xpress trimmer brass cartidge should indexing adjustable trimming
CLICK photo for full-screen view of Case Trim Xpress unit.

Lyman Case Trim Xpress “Hands-On” Review

Review by F-Class John
Case trimming can be one of the most boring and tedious steps in the reloading processes. This is largely because of outdated tools that either require manual turning, clunky pilot systems, or difficult adjustments. In order to overcome these obstacles, you might have to spend $500 for some premium systems. But that has changed with Lyman’s introduction of the new Case Trim Xpress. This bright orange wonder delivers premium trimming performance at a budget price. Available for around under $130, this trimmer offers an easily-adjustable cutting head plus a smart, shoulder-indexing bushing system to improve consistency and speed up the trimming process.

Video Shows How Carbide Cutter Head Adjusts Easily with Index Wheel

The Lyman Case Trim Xpress comes with the main trimming unit, power cord, and 10 bushings in a storage case. These 10 orange bushings let you trim more than 50 popular cartridge types (yes including the 6mmBR, 6.5 Creedmoor, and .308 Win of course). Set-up was simple and straight-forward. Install the bushing you need, turn the unit on and slowly push a piece of brass towards the cutting head. Once the brass is fully depressed, you can start adjusting the dial one click at a time until the case makes contact. Then you start making progressive adjustments and trim until you reach your desired length. The process is so simple that it’ll leave you wondering how you ever used anything else.

Lyman case trim xpress trimmer brass cartidge should indexing adjustable trimming

Once the machine was adjusted for our brass, we were amazed at how easily and quickly cases could be trimmed. The unit is fairly hefty, so we found it pretty stable just sitting on the bench. If you wish, the unit can also be screwed down for added stability, using the holes in the lower “wings” of the orange housing. There’s a dial adjustment on the side that controls cutter rotation speed (RPM). In our testing, the trimmer worked well across its entire RPM range. These means you can do fast, quick cuts or make slow and precise cuts, as you prefer. And you can adjust the cutter speed to the type of brass you are trimming.

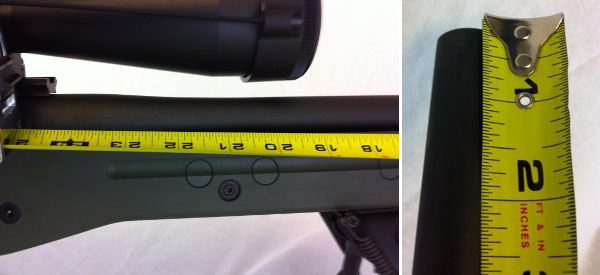
As for trim length control, the adjustment dial has good, positive clicks and the trim length holds very constant. Even after trimming 80+ pieces of brass, we observed trim consistency held within .001″.

Lyman case trim xpress trimmer brass cartidge should indexing adjustable trimming

One of the things that sets the Case Trim Xpress apart from most trimmers is how it indexes off the shoulder. This ensures that case lengths from mid-shoulder to end of neck are identical for every case (whether they have been sized or not). This is critical for consistent reloading results and will help ensure that every case is optimally positioned in your chamber. A cutting system that indexes off the shoulder is arguably better than a system than merely trims to a given case OAL for both fired and unfired cases.

Another great feature is that this trimmer can be mounted flat on a bench-top, on the underside of a shelf, or even on a vertical wall surface (if oriented horizontally). You can choose different mountings because the clear plastic shroud that catches brass shavings can rotate. This allows the shavings exit port to be orientated to any point on the circle. We liked being able to choose various mounting configurations. Employing little-used wall or shelf space opens up precious bench-top real estate.

Summary — Outstanding Performance for the Price
Overall the Case Trim Xpress is hard to beat for the price. It is one of the few power trimmers we can recommend without hesitation. The machine trims quickly and accurately, the cutter-depth control is precise and easy to use. And the variable speed control is great. Of course we do wish the machine could also de-burr and chamfer brass. But of course that would add quite a bit to the cost, and would probably require a completely different cutting system. For trimming-to-length only, Lyman’s Case Trim Xpress is probably the best trimmer currently available for under $200. This unit should definitely be on the short list of anyone shopping for a variable-speed motorized trimmer.

Permalink - Videos, Gear Review, Reloading 2 Comments »
June 20th, 2019

One Dollar DIY: Make a Mirage Shield from a Venetian Blind

make your own mirage shield for rifle

make your own mirage shield for rifleWant to shoot better scores at your next match? Here’s a smart, inexpensive do-it-yourself project from the good folks at Criterion Barrels. For less than one dollar in materials, in just a few minutes you can create a handy, effective mirage shield, custom-fitted to your favorite rifle.

All precision shooters should be familiar with mirage, a form of optical distortion caused primarily by variations in air temperature. Savvy shooters will use mirage as a valuable tool when gauging wind speed and direction. Natural mirage is unavoidable, but there are many techniques designed to limit its influence in long-range marksmanship.

A form of mirage can be produced by the barrel itself. Heat rising from the barrel may distort sight picture through your optics, leading to erratic results. Mirage caused by barrel heat can be reduced dramatically by a simple, light-weight mirage shield.

How to Make a Mirage Shield

A mirage shield is an extremely cost-effective way to eliminate a commonly-encountered problem. Making your own mirage shield is easy. Using old venetian blind strips and common household materials and tools, you can construct your own mirage shield for under one dollar.

Materials Required:
1. Vertical PVC Venetian blind panel
2. Three 1”x1” pieces adhesive-backed Velcro
3. Ruler or tape measure
4. Scissors or box cutter
5. Pencil or marker

1. Measure the distance from the end of the receiver or rail to the crown of the barrel.

make your own mirage shield for rifle

2. Using a pencil and ruler, measure the same distance and mark an even line across the blind.

make your own mirage shield for rifle

3. Cut across the line using scissors or a box cutter, shortening the blind to the required length. (Remember, measure twice, cut once!)

4. Expose the adhesive backing on the loop side of the Velcro. Center and apply the Velcro strips on the barrel at regular intervals.

make your own mirage shield for rifle

5. Expose the adhesive backing of the fuzzy side of the Velcro.

6. Place the blind on the upper side of the barrel. Apply downward pressure. Once the Velcro has secured itself to the barrel, separate the two sides. Proceed to mold both sides of the Velcro to fit the contour of their respective surfaces.

7. Reaffix the blind. Barrel related mirage is now a thing of the past!

make your own mirage shield for rifle
NOTE: You can attach the Velcro on the opposite side of the blind if you want the blind to curve upwards. Some folks thinks that aids barrel cooling — it’s worth a try.

How to Remove and Re-Attach the Mirage Shield
Removal of your mirage shield is accomplished by simply removing the blind. You can un-install the Velcro by pulling off the strips and then gently removing any adhesive residue left behind using an appropriate solvent. (Simple cooking oil may do the job.) Caution: With fine, high-polish blued barrels, test any solvent on a non-visible section of the barrel. Before storing the gun, re-oil the barrel to remove active solvents and residual fingerprints.

Permalink Competition, Tech Tip 3 Comments »
June 20th, 2019

How To Pull Bullets Using Press-Mounted Collet Tools

Collet Bullet Puller Hornady RCBS Press Mount Reloading

Do you have some ammo that got loaded incorrectly, perhaps with the wrong powder? Then you’ll want to disassemble the ammo for safety’s sake. You can use an impact puller to do this task, but if you have more than a dozen rounds or so, you may prefer to use a collet-style bullet puller. These work very quickly and positively, making quick work of big jobs. The efficiency of the collet-style puller is worth the investment if you frequently disassemble ammo. These devices retail for under $25.00 (collets sold separately). Normally, you’ll need a specific collet for each bullet diameter. But collets are not that costly, so this isn’t a big deal, particularly if you only load a few calibers, such as .223, 6mm, and .308.

Hornady and RCBS use different mechanisms to tighten the collet around the bullet. On Hornady’s Cam-Lock Bullet Puller, a lever-arm on the top of the bullet puller serves to tighten the collet around the bullet. Simply rotate the lever from the vertical to the horizontal position to grab the bullet. Lower the ram to remove the case. The bullet will drop out when you return the lever arm to the vertical position. This is demonstrated in the video below:

Hornady Cam-Lock Bullet Puller Demonstrated

Collet bullet-pullers resemble a loading die with a lever or handle on the top. They screw into a standard reloading press. Hornady and RCBS both make collet-style bullet pullers. They use the same basic principle — the device tightens a collet around the bullet, and then the bullet is separated from the case by lowering the press ram. NOTE: Collet pullers may leave small marks on your bullets, unlike impact (kinetic) pullers.*

Hornady collet bullet pullerLike the Hornady tool, the RCBS Bullet Puller employs a collet to grab the bullet. However, the RCBS tool tightens the collet in a different way. The head of the RCBS tool is threaded internally. By rotating the lever arm clockwise in a horizontal circle you squeeze the collet around the bullet. To remove the bullet, after lowering the press ram, simply spin the lever arm back in the opposite direction. The use of the RCBS tool is demonstrated in this video:

RCBS Collet Bullet Puller Demonstrated:

WARNING: When removing bullets from loaded cartridges, always make sure there are no obstructions or debris in your shell-holder or under the loaded round. NEVER engage a primer seating accessory on your press when working with loaded rounds. You can cause a round to discharge by contacting the primer! Also, we recommend you keep your head and torso away from the bullet puller tool at all times.

*By contrast, impact pullers rarely mark bullets, particularly if you put a little bit of foam or paper wadding in the closed end of your impact puller. When dismantling loaded rounds, powder kernels can get trapped in the wadding, so you should remove and replace the wadding before changing to cartridges loaded with a different powder type (assuming you intend to save the powder).

Permalink Reloading, Tech Tip 1 Comment »