California “1-in-30″ Firearm Ban Struck Down in Ninth Circuit Decision
The Ninth Circuit Court of Appeals has ruled that a California law restricting gun purchases to just one every 30 days is absolutely unconstitutional. With a unanimous 3-0 decision, a Ninth Circuit panel held that California’s “one-gun-per-month” gun ban law clearly violates the Second Amendment of the U.S. Constitution. The full Ninth Circuit ruling in Nguyen v. Bonta can be viewed at firearmspolicy.org/nguyen.
“California has a ‘one-gun-a-month’ law that prohibits most people from buying more than one firearm in a 30-day period. The district court held that this law violates the Second Amendment. We affirm. California’s law is facially unconstitutional because possession of multiple firearms and the ability to acquire firearms through purchase without meaningful constraints are protected by the Second Amendment and California’s law is not supported by our nation’s tradition of firearms regulation”, wrote Ninth Circuit Judge Forrest. At the end of the 24-page decision, Judge Forest added: “The Second Amendment expressly protects the right to possess multiple arms. It also protects against meaningful constraints on the right to acquire arms because otherwise the right to ‘keep and bear’ would be hollow.”
Plaintiffs in the case included two FFL gun dealers, the Firearms Policy Coalition (FPC), the Second Amendment Foundation (SAF), San Diego County Gun Owners PAC, and six private citizens including Michelle Nguyen, for whom the case is named.
The Nguyen v. Bonta lawsuit challenged the California statute that only allows for the purchase of one handgun or semi-automatic centerfire rifle, from a licensed dealer within a 30-day period. Plaintiffs secured a summary judgment win at the District Court, which California then appealed to the Ninth Circuit. The Ninth Circuit affirmed the District Court decision, striking down the gun rationing law as impermissible under the Second Amendment.
Firearms Policy Coalition Praises Result
“As this decision shows, the right to keep and bear arms cannot be limited by an arbitrary cap on the number of guns that can be acquired at one time”, explained FPC President Brandon Combs. “We have a right to buy more than one gun at a time just as we have a right to buy more than one bible at a time. FPC is proud to have secured the rights of peaceable people and will continue to fight forward until we eliminate immoral laws like this everywhere.”
Second Amendment Foundation Predicts Progress in Fighting California Gun Laws
“Today’s decision claws back a portion of Second Amendment rights stolen by California’s government”, said SAF Exec. Director Adam Kraut. “California’s one-gun-per-month law was in clear violation of the Second Amendment, as affirmed by the unanimous decision in the Ninth Circuit. This ruling is one step closer to liberating the people of the state from the totalitarian ideals of those in power who believe the right to keep and bear arms is a second-class right.”
“There was no doubt the one-gun-per-month restriction was put in place to circumvent the ability of citizens to exercise their full Second Amendment rights,” said SAF founder and Exec. V.P. Alan M. Gottlieb. “This ruling is a victory for all who believe in the fundamental right to keep and bear arms[.]”
Ace tactical shooter and gunsmith Jim See of Elite Accuracy LLC has tested a Frankford Arsenal rotary brass tumbler. Like the older Thumbler’s Tumblers, this can tumble your cases in a liquid solution. The wet-tumbling process worked very well Jim reports. Posting on Facebook, Jim noted: “I was super impressed with the Frankford Arsenal rotary tumbler and cleaning packs they sent me. I ran 350 pieces of brass for one hour. They now look great.” Jim appreciated not having to deal with dry tumbling media, such as crushed walnut shells. Dry media produces dust and can leave residues or clog flash-holes.
Interestingly, Jim recommends you try wet-tumbling WITHOUT using stainless media. At least give it a try. Tumbling without media simplifies the process and you don’t have to worry about pins stuck in flash-holes or case-necks*. Jim reports: “Stainless steel pins come with the Frankford kit, but mine hit the trash right out of the box. There is no need to clean the inside of your cases 100% and that’s all the pins add to the equation. The brass bumping brass with hot water and Frankford’s liquid cleaner works great all by itself.” One wag stated: “That’s great to hear. Stainless steel pins are a PITA.”
Other Facebook posters concurred with Jim’s evaluation of the Frankford Arsenal Rotary Tumbler:
“I’ve had one for a couple years, and it works well. I usually run about 250-300 Dasher cases at once in it. But I use the pins because I’m OCD about clean brass.” — David W.
“I’ve had one for a year and a half and it definitely works with or without pins.” — Luke C.
“I got one about six months ago and have yet to use any stainless steel media [pins]. I just use some dawn, distilled water, and Lemi Shine®. Turns nasty 5.56 range brass bright and shiny.” — Brian D.
“I don’t use the pins either and use a combination of Dawn soap and Lemi Shine.” — Jon N.G.
This video shows how to assemble and operate the Frankford rotary tumbler. But note, Jim See does NOT feel that it is necessary to use stainless media.
How to Dry Your Brass — Hair Dryer Vs. Machine
The downside of wet tumbling is that you end up with a pile of wet brass at the end of the cleaning cycle. There are many ways to dry brass, from drying in the sun to using a kitchen oven (be careful not to “overcook” your brass). One Facebook poster asked Jim: “What is your drying method for wet brass, and how long does it take?”
Jim See replied: “To start I just drain off the dirty water, and rinse the brass with clean hot water. Then I roll the brass on a towel for 30 seconds and put the brass in a one-gallon bucket. Next I insert a hair dryer in the bucket (with the brass) and let it run for about 5 minutes. With this procedure, the drying process for me is done in less than 10 minutes.”
Jack Lanhart has another method: “I use a food dehydrator. It takes 30 to 45 minutes.”
For those who don’t want to mess with towels and hair dryers, Frankford Arsenal offers a matching Platinum Series Case Dryer that simplifies the process of drying brass. Lyman also makes an excellent Cyclone Case Dryer. These drying machines each cost about $65.00 and both have multiple levels so you can separate different types of cartridge brass. Lyman states that “The forced heated air circulation of the Cyclone will dry your brass inside and out within an hour or two, with no unsightly water spots.” The Lyman dryer can also be used for ultrasonically-cleaned gun parts.
*The Frankford Rotary tumbler does include media separators if you choose to use the provided pins or other media. CLICK HERE for diagram showing how to use media separators.
This story first ran in 2010. But to mark our long-standing friendships with shooter Joe Friedrich and chassis builder Gary Eliseo, we wanted to reprise the article for 2025. Joe’s Eliseo-chassis 6mmBR rifle delivered some of the most amazing 100-yard accuracy with factory ammo we’ve ever seen, in any rifle, in any caliber. This gun produced groups in the “ones” with Lapua factory ammo. Read on to learn more.
Amazing Accuracy from 6mmBR Tubegun
What kind of accuracy do you think a tubegun can deliver with factory ammo — during barrel break-in? Perhaps 0.6″ at 100 yards, half-MOA if the conditions are perfect? Well you may want to change your preconceptions about tubeguns — and factory ammo. This Eliseo R5 repeater, smithed by John Pierce with a Pierce CM action and Broughton 5C barrel, shot the Lapua 90gr factory ammo into flat ONEs during the break-in session. A day later, in tricky 8-14 mph winds, the gun nailed a witnessed and software-measured 0.174″ 5-shot group using the 105gr factory ammo. That would be impressive for a “full-race” benchgun with precision handloads. For an across-the-course rifle shooting factory ammo, it’s pretty amazing.
Eliseo Tubegun Shoots in the Ones
This accurate rifle belongs to our friend (and designated expert trigger-puller) Joe Friedrich. During the initial break-in session, since his reloading dies had not yet arrived, Joe decided to start with some Lapua factory-loaded 6BR ammo he had on hand. After doing a few two-shot-and-clean cycles (with patches and nylon brush), Joe decided to try a 3-round group just to see if the Broughton barrel had some potential. To his astonishment, the Eliseo R5 put three rounds in 0.100″ (photo below left). Joe then cleaned the barrel again, shot a couple foulers and tried a 4-shot group. The results were just as stunning — 4 shots in a mere 0.104″ but three in virtually one hole (photo below right).
You Can’t Believe How This Gun Shoots
Joe called your Editor and said “You can’t believe how this gun shoots with factory ammo!”. So we arranged a photo session for the next afternoon, where I could verify the rifle’s accuracy. Well it turned out the conditions were way more challenging than when Joe broke in the barrel the day before. Winds were running 8-14 mph and were swinging through 180 degrees half-way down the range. Joe fired a few 90s through the Oehler chronograph at my request, then opened a box of Lapua 105gr factory ammo. It took about four rounds for the barrel to settle in after being cleaned the night before. Then Joe got serious, and with your Editor looking over his shoulder, he drilled a 0.174″ five-shot group in switching winds, doping every shot. Joe felt the gun could have shot tighter but he missed one wind call.
Serious Accuracy with a Multi-Purpose Rifle
So there you have it — a tubegun that shoots in the ones with factory ammo. Joe says that, at least with the 90s, the Elesio R5 shoots as well as his 6 PPC. Joe stressed that “steering the tubegun is hard work. You really have to concentrate compared to a purpose-built bench gun like my PPC. With the tubegun, everything has to be perfect on every shot — hand position, cheek position, stock position in the bag. If you’re off just a little bit, it’s easy to steer the gun the wrong way and send a shot out of the group.”
Accuracy Great But Fouling Heavy and ES Could Be Better
Have there been any negatives to Joe’s 6BR tubegun experiment so far? Well, the Broughton 5C barrel, while phenomenally accurate, shows signs of being a bad fouler. Copper built up pretty quickly over the first 25 rounds or so. We saw best accuracy with a recently-cleaned barrel. Hopefully the fouling will lessen as the barrel polishes in with use. And the canted land barrel is slower than average with the factory ammo. Lapua rates its 90gr naked-bullet ammo at 2950 fps with a 26″ tube. In Joe’s 27.5″ barrel we only averaged 2901 fps. With the 105gr factory ammo, which is rated at 2790 fps, we averaged just 2694 fps. That’s quite disappointing. Also the ES on the factory ammo, slightly over 50 fps for both bullet types, wasn’t particularly good. Still, the overall results were stunning. This gun shoots better than many long-range benchrest rifles running carefully-developed handloads — and it does that with factory ammo, right out of the box.
Rimfire Benchrest Plus N50 Competition — Fun and Affordable
Joe Friedrich is a superb benchrest shooter, who has won many matches and set National Records in ARA rimfire benchrest competition. Here is Joe with “Sweet Pea”, his favorite .22 LR rimfire rig. With over 100,000 rounds through the Benchmark barrel, this well-worn rifle set an ARA 4-target Aggregate record! READ about Sweat Pea Record HERE.
The National 50 Benchrest League
Joe Friedrich is one of the founders of the National 50 Benchrest League (N50). Launched just a few years ago, N50 has easy-to-understand rules, and offers competition with a wide variety of rifles, both .22 LR rimfire rigs and air rifles. There are three classes — Pellet, Sportsman, and PRO. One can be very competitive in the Sportsman Class with a basic factory .22 LR rig or Air Rifle.
The 2025 N50 National Championship will take place August 22-24, 2025 at the NRA Whittington Center in New Mexico. Benchrest competition will be held at Whittington Coors Benchrest range, on the west side of the Whittington facility. CLICK HERE to register for the August event.
N50 competition is unique in allowing air rifle shooters to compete side-by-side with rimfire shooters. This allows folks to compete without the cost of expensive “top-dollar” rimfire ammo. Pellets are relatively inexpensive, and yes air is still free!
About N50 — The National 50 Benchrest League
Commentary by Joe Friedrich, Open Grove Benchrest
The National 50 Benchrest League (N50) offers a unique shooting experience. We shoot air rifles with pellets and slugs alongside .22 LR Rimfire shooters. We currently have sanctioned clubs throughout the USA offering competition and good fellowship.
N50 has three Classes: Pellet, Sportsman, and PRO. The first Pellet Class is strictly for pellet airguns ranging in calibers from .177-.30 using Diabolo-style pellets from various manufacturers.
The second class is the Sportsman Slug/Rimfire. This combined class allows any factory air rifle shooting commercially-made slugs in calibers from .177-.30 to compete against any factory rimfire that utilizes a factory-barreled action with no attachments to barrel. Pellet air rifles may also compete in this class.
The third class is the PRO Class, and no you do not have to have some magic card that says “Professional” to compete. This class allows purpose-built air rifles, and what we call “unlimited” rimfire rifles to compete. Three types of loads are allowed in PRO Class: .177 slug air-driven, .22 slug air-driven, and any .22 LR ammunition.
Another point — in N50, competitors are allowed to move up in class — you aren’t restricted to a “lower” division. For example, Pellet Class shooters can also move up to shoot in Sportsman and Pro. In addition, Factory rimfires are allowed in Pro Class. This way shooters with the less-expensive rifles can shoot more relays and also see how they compete with the unlimited rigs. It’s all about having fun.
We wanted to make N50 as simple as we could combining air rifles with rimfire so folks who have a factory rimfire can participate and have fun. We also did not want a lot of classes, so combining the two gun types would be simpler.
Air Rifle on beautifully crafted, plated Pappas Rest.
National 50 Benchrest League Rules and Targets
The official N50 website, National50.net, lists N50 rules, classes, courses of fire, and membership requirements. Downloadable practice and Match targets are also available (scroll down linked page).
Assembly Diagram: Here are all the components of the target frame. The overall maximum assembled dimensions are roughly 26″ wide, 41″ deep, and 66″ tall (the cardboard is 2 x 3 feet).
One of the easiest ways to build a portable target stand is to use PVC pipe and connectors. Utah .308 Shooter “Cheese” has created a simple yet sturdy target frame, and he’s shared his design so you can build a similar frame easily and at low cost. The components are wood furring strips, 2″-diameter PVC pipes (and connections), and a 2’x3′ sheet of cardboard. The PVC base can be glued together, or, for easier transport and storage, you can leave some or all of the connections free. “Cheese” tells us: “I didn’t glue any of it together so I could disassemble it, shove it in a bag and take it anywhere.”
“All the parts are just pushed together and not glued. That way I can break it down and carry it all in a bag. Also, if a buddy (not me!) happens to shoot the stand, I can easily replace just the damaged piece. The last 6 inches of the furring strips are wittled-down a bit so they can be pushed into the upright pipes with a little friction. The cardboard is 2 x 3 feet, and I use a staple gun to attach it to the furring strips. Then I just staple the target onto the cardboard and go at it.
Of course you can modify the dimensions as desired. I chose the black ABS pipe over white PVC simply for cost — black ABS is a little cheaper. You can also glue some or all of the parts together, it’ll just be larger for transporting. In windy conditions, the thing likes to come apart. Duct tape might work well.
For weight, I thought about filling the two end pipes with sand and gluing test caps on each of their ends. The test caps still allow the pipes to slip into the elbows.”
Add Anchors or Internal Weight for Stability
On a very windy day, a PVC stand can shake or even topple over. There are a couple solutions to this. Some people fill the PVC pipe sections with sand to add weight, or you can put short sections of Re-BAR inside the long legs. One GlockTalk forum member noted: “I built [a frame] almost identical to this. I also take four pieces of wire coathanger bent into an inverted “U” shape to anchor the frame to the ground. It is so light that wind will knock the stand over [without anchors].”
You can find photos of a similar home-made PVC target stand (with a slightly different rear section) on the Box of Truth website. This also employs a PVC tubing base with wood uprights. We’ve also seen all-PVC target stands, but we’ve found that it is easier to attach the cardboard to wood strips than to PVC pipe. Also, if the upper section is wood, you can fit different height targets, while using the same base.
Forum member F-Class John is an avid F-Class competitor and expert handloader. John reviews reloading hardware and shooting-related products for his popular F-Class John YouTube Channel, which now boasts 500+ videos. John also does important product testing for AccurateShooter.com. Through his YouTube channel, John has reviewed many of the latest and greatest reloading tools and accessories. For today’s Video Showcase, we selected eight F-Class John product reviews. Products tested include front rests, AMP Annealer, Flavio Fare triggers, AutoDod IDOD power neck-turner, Henderson and Giraud case trimmers, Zero turret press, 21st Century arbor press, and Accuracy One concentricity checker.
If you like these informative videos, consider joining F-Class John’s Patreon Channel for live video meetings, more in-depth videos, and detailed explanations. Join Patreon via Patreon.com/fclassjohn for full length videos, live chats, and more.
SEB NEO-X and Rodzilla Raptor Front Rests
This video covers two outstanding front joystick rests, the SEB Neo-X and the Rodzilla Raptor. Both of these rests work great for both benchrest and F-Class shooters, centerfire and rimfire. Build quality is outstanding for both rests. Tester F-Class John observes: “Both are great units and user preference will really dictate which to get. I own both and find they give me consistent target acquisition.” To learn more about these two excellent front rests, visit TheRodzilla.com and/or SEB Rests USA.
Flavio Fare Triggers Tested
The Flavio Fare triggers are some of the best on the market. These are offered for various action types including Remington clones and custom actions. CLICK HERE for a discussion of these triggers on our Forum. The Flavio Fare Veloce Hunting Trigger (with safety) adjusts from 5 to 25 ounces pull weight and retails for $439.95. The Flavio Fare Whisper 2.1 BenchRest Trigger (no safety) adjusts from 0.7 to 2.8 ounces, and costs $449.95. Reviewer F-Class John says these Flavio Fare triggers are “smooth, crisp, with a wide range of trigger pull weights … I love these things.”
Annealing Made Perfect AMP Mark II DB Annealer
This detailed 9.7 minute review outlines the features of the latest AMP electronic annealing machine, the AMP Mark II DB. This uses a computer control to deliver precise annealing times and temperatures with a profile for your specific lot and brand of brass. One user praised this new AMP machine: “The touch screen is much more intuitive than the old one.” Another stated: “If you want to anneal the best way possible this is it. Does a torch work? Sure it does. The AMP does it far better and far more consistently.” A buyer confirmed this sophisticated new AMP is fast and efficient: “Just got one, a few days ago and it’s so easy to use. Without even trying, I easily anneal eight rounds per minute”.
Bryan Blake, a very clever machinist and gunsmith, has created an ultra-precise and speedy neck-turning machine. Bryan, who runs Blake Machine, Blake Barrel, and F-Class Products has created a system that uses twin precision cutter tips to turn case necks inside and out quickly and efficiently, with superior precision. This advanced IDOD Neck Turning Machine holds cases securely in a precision-machined spindle attached to an electric motor. Twin blades move precisely during the cutting process, milling the necks inside and out. The turned necks come out perfect every time, with the shoulders trimmed exactly (with doughnut removed) as well.
Henderson vs. Giraud Case Powered Case Trimmers
After adding the impressive Henderson Gen 3 Powered Trimmer to his inventory of tools. F-Class John became is a Henderson fan. He likes the speed, precision, and repeatability of the $779.00 Henderson machine, which trims-to-length and chamfers the case mouth all in one pass. Unlike some other trimming tools, the Henderson indexes off the overall case length NOT the shoulder. The Giraud trimmer is a very different design which indexes off the case shoulder, but it is also very precise. When set up correctly, it can trim brass with amazing consistency. As long as you have fire-formed brass with consistent base-to-shoulder dimensions, you should get very consistent trim lengths.
Zero Turret Press with Whidden Sizing Die
The Zero Press from Area 419 is arguably the best turret press ever crafted. It offers unrivaled precision, along with the highest-capacity turret head with NINE die/tool stations. Milled from billet aluminum and stainless steel, this press moves with the help of 14 bearings. In this video, F-Class John shows how to use a Whidden Gunworks full-length sizing die on the Zero Press. And John has two other video reviews of the $1275 Zero Press: 1. Zero Press First Thoughts Video; 2. Loading on a Zero Press.
21st Century Hydro Press and Standard Arbor Press
John notes: “You can’t really talk about precision reloading without taking about inline dies and arbor presses. For my money there’s nothing better than the lineup from 21st Century Shooting. They offer the Hydro Seater which is hands-down the best manual seater out there as well as their standard arbor press which is great for taking on the road to push back bullets as needed.”
Concentricity Checking with Accuracy One Gauge
Every serious hand-loader needs a quality concentricity gauge. The Accuracy One Concentricity Gauge boasts a smart design that delivers precise, repeatable results. We like the unit’s easy adjustability and its ability to work in a variety of configurations. The Accuracy One Gauge measures internal and external neck runout of cartridge cases as well as seated bullet runout. It can also measure the runout of the ogive, bearing surface, and boat-tail of individual bullets. And it can even measure your primer pocket runout. Reviewer F-Class John notes: “I think this is the best concentricity tool on the market. Such a tool is a necessity for new loaders or those who are always setting up new dies.”
This custom war wagon hauls varmint hunters around the Longmeadow Game Resort in Colorado.
Will you be heading to the varmint fields this summer? Proper planning is key to a safe, satisfying, and productive varmint holiday. Of course you’ll be busy reloading, but you should make a check-list of all the gear and supplies you need. Bring a variety of rifles if possible — you’ll need to switch off as one barrel gets hot, and the chambering that works best for your close shots may not be ideal for those longer shots out past 400 yards. Here are some tips from our Forum members that can help you shoot more effectively, and avoid problems on your varmint hunt. Here’s one key tip: at your shooting station, put a strip of surveyor’s tape on a tall stake to show the wind direction. Then shoot in the direction the wind blows. This will minimize the effect of cross-winds.
Varmint Safari Planning, Equipment, and Shooting Advice
From PatchHound: “The gear you bring will make or break a trip out to Prairie Dog land. A lot has to do with where you going and how far you are from [civilization]. For starters, bring lots of water. It will be hot in Wyoming in a few more weeks but it don’t hurt to bring warm clothes in case it snows. It’s best to wear leather boots unless you’re real good at dodging cactus while walking around. Good sunscreen [and a wide-brimmed hat] will save the day too. [What you need to bring] really depends on whether you’re shooting on some friendly ranch or 100 miles in the middle of [a wilderness area]. Good survival gear is a good thing to have for the latter!”
This photo is from a Dan Eigen TV Show video featuring a P-Dog hunt.
From Stoner25mkiv: “I’d suggest an adjustable bipod if you are going to do any walking. A laser rangefinder is a huge asset. Have a fanny pack or backpack for extra ammo, water, bore-snake, etc. when you go on your walkabouts. We also take a couple pivoting benches, heavy movers’ pad/blanket, sandbags (Uncle Bud’s Bulls Bag) for shooting from near the vehicle. Boonie hat for blocking the sun, sun glasses, sunscreen. High leather boots.
Anyway, on to the rifles…consider bringing a 17 HMR, .223 Ackley bolt gun, .223 Ackley AR, and a 243 WSSM. Some years the 17 HMR isn’t removed from its case. We had a couple windless days and the 17 was lots of fun. I’d walk into the dogtown and then lay down and wait. After five minutes or so I’d have dogs within easy rimfire range, and out to as far as I’d care to stretch the rimfire. 275 yards was about it.”
From CTShooter: “The .204 [Ruger] is a laser beam and good to 400 yards easy. Forget the rimfire! Do you have a portable bench that pivots? Bring bipod, binocs. Bring a LOT of water. I have a milspec sniper shooter’s mat/drag bag with shoulder straps. It is good to carry everything when you want to wander off and shoot prone with bipod. Here’s a view through my 6BR in ND.”
From RJinTexas: “In most of the locations that we’ll be shooting we’ll usually set up a minimum of 200 yards from the edge of a major dog town. We’ll start by working over the close-in dogs and shooting our way out, some of these towns may run in excess of 500/600 yards deep. I believe that a rimfire will put you at a distinct disadvantage. The only rimfire that will somewhat work is the 17 HMR and you can reload for your 204s for close to the cost of HMR ammo and you’ll be less apt to be under-gunned. Your 204 will work well out to 300/400 yards unless the wind is blowing hard. We classify a 10-mph crosswind as a very calm day and what makes it a little more challenging is that it is usually also gusting.”
From Wes (P1ZombieKiller): “[For my first PD trip] there are so many things I was not ready for. The one thing that I did bring (that no one told me about) was a canopy. I’m glad I did. Even though the weather was [near perfect], I know that sun can humble you real fast. With my pop-up canopy, I could shoot all day without getting killed by the sun. You had to tie the canopy down real well or the wind would blow it across the pasture.
We sat on shooting benches that pivot 360°, and are fast and easy to set up. Most all shots were 175-250 yards. I just felt comfortable at that range. It was more fun for me to be able to film the hits, and the camcorder I was using just did not get good video past 350 yards. The digital zoom distorted the image too much. I knew I would only get this one chance to film my first P-dog outing, and I wanted to get it on film for [posterity].”
Bring Multiple Rifles on Your Varmint Adventures
On our P-Dog adventures, we like to have multiple rifles — a .17 HMR for close work, then maybe a .20 Practical AR for 150-250 yards, then a larger caliber such as 6BRA, 6 Dasher or 6XC for those long shots. The classic 22-250 is also a wickedly effective varmint cartridge.
.20 Practical (20-223 Rem) AR-Platform Varminter
Here is a .20 Practical built by Robert Whitley. Whitley’s Ultimate Prairie Dog Rifle (PDR) features a 24″ Bartlein 11-twist cut-rifled barrel, DPMS side-charging upper, and a Jewell trigger. It is chambered in 20 Practical, a cartridge popularized by Warren “Fireball” Brookman.
This .20 Practical cartridge is simply the .223 Remington necked down to .204. You can use your existing .223 Rem brass — no special case-forming required! The 20 Practical is accurate, flat-shooting, and has almost no recoil. The advantage over the standard .223 Remington is that, grain for grain, the bullets have a higher BC and travel at a higher velocity for more dramatic effect on a small varmint. The ultra-low recoil allows you to easily see your hits, even without a muzzle brake. The 20 Practical, launching 40-grainers at about 3750 fps, shoots flatter than a .223 Rem with 55gr hollowpoints.
.17 HMR Savage A17 Varmint Rifle
We also like to have a Rimfire for the closer shots, inside 150 yards. The .17 HMR or .17 WSM are good choices. With a rimfire you save on ammo costs and you don’t waste precious centerfire barrel life.
This video shows a successful Prairie Dog hunt with a .17 HMR. Watch and you’ll see hits out to 160 yards (00:50), proving the effective range of the .17 HMR cartridge. The host is shooting a Savage A17 semi-auto .17 HMR rifle in a Boyds laminated stock.
Yes, folks, it’s officially summer now. This year’s Solstice, considered the official start of summer, transpired Friday, June 20, at 7:42 PM PT. We hope you have fun this summer with friends and family. To help ensure those summer adventures remain safe and trouble-free, the CTD Shooters’ Log has prepared a helpful Essential Summer Survival Guide. This is worth reading before you venture away from civilization.
Here are some highlights of the article with links for MORE INFO:
First Aid Kits for Campers
You should never venture outside without a first aid kit close at hand. While exploring the outdoors, all types of accidents can occur—from cuts, scrapes, and burns to broken limbs and severe allergic reactions.
Basic Survival Skills
Basic survival skills are a necessity if you plan to spend any amount of time outdoors. These five tips, plus a how-to on what to pack in a lightweight, basic survival kit will help if you are ever stuck, lost, stranded or injured in the field.
How to Treat Burns
Fireworks, barbeques and campfires — in the summer we are frequently around fire, which increases our chance of getting burned. A first-degree burn is most likely home treatable, while a third degree burn requires immediate medical attention. Learn how to spot the differences between minor and severe burns.
Probably the most popular centerfire rifle round in the Western Hemisphere is the .223 Remington and its metric match, the 5.56x45mm. Though many folks use “.223 Rem” and “5.56×45″ interchangeably, there are some meaningful differences in specifications for the original .223 Rem and the 5.56x45mm cartridge, as adopted by the U.S. military and NATO armies. The default chamber throats are slightly different and the .223 Rem is rated at 55,000 PSI vs. 62,366 PSI for the 5.56x45mm.*
.223 Rem vs 5.56x45mm — Key Differences
There is a truly outstanding, very thorough article on the subject, published by LuckyGunner.com.** This involved extensive testing, with pressure monitors, of 5.56x45mm ammo in .223 Rem chambers. Those tests revealed the peak pressures. Here is one of the ammo test charts:
NOTE: “The observed chamber pressure for Federal XM855 5.56mm ammunition in a .223 Rem chamber exceeded .223 maximum pressures, but not by a massive amount. The ninth shot (the red line) was an underpowered cartridge which exhibited significantly lower velocity and pressure than the other rounds, so it was excluded from the average velocity and pressure numbers for this chamber.”
And if you’re curious, LuckyGunner also fired .223 Rem ammo in a 5.56x45mm NATO-chambered AR15 rifle. As you would expect, the peak pressures were significantly lower, but the .223 Rem ammo still cycled the semi-auto AR-platform rifle perfectly well:
UltimateReloader.com Explains .223 Rem vs. 5.56x45mm
To explain the key differences between the .223 Rem and 5.56x45mm cartridges our friend Gavin Gear of UltimateReloader.com has created a very thorough 12-minute video. This covers the cartridge specifications and explains key considerations for hand-loaders. Gavin also addresses the oft-asked question “Can I shoot 5.56x45mm ammo in my .223 Rem chamber?” Gavin’s video is definitely worth watching. In fact, this is one of the most popular videos Gavin has ever created — it has been watched nearly 4.5 million times on YouTube.
What Exactly Is the 5.56x45mm NATO Cartridge?
The 5.56×45mm NATO is a rimless bottle-necked intermediate cartridge family standardized by NATO with development work by FN Herstal. It consists of the SS109, SS110, and SS111 cartridges. Under STANAG 4172, it is a standard cartridge for NATO forces as well as many non-NATO countries.
Bullet diameter: 5.70 mm (0.224 in)
Maximum pressure (EPVAT): 430.00 MPa (62,366 psi)
Maximum pressure (SCATP 5.56): 380.00 MPa (55,114 psi)
Case length: 44.70 mm (1.760 in)
Rifling twist: 178 mm or 229 mm (1 in 7 in)
Parent case: .223 Remington (M193)
Ammo-Maker Federal Premium Compares .223 Rem and 5.56x45mm
Here is a video from ammo-maker Federal Premium explaining the difference between .223 Remington and 5.56x45mm NATO. Federal states that you may experience excessive pressures when firing a 5.56x45mm in a standard .223 Remington chamber:
One leading gunwriter has addressed the question of shooting 5.56x45mm ammo in .223 Rem chambers. He advocates caution (for more info, SEE pressure tests by LuckyGunner.com):
“I have received a slew of questions — many from first time AR-type rifle buyers — about the .223 Rem and the 5.56×45 mm NATO cartridges. Can I shoot 5.56×45 mm NATO in my .223 and vice-versa? Are these the same cartridge?
Externally, the two cartridge cases are identical. The main differences are that 5.56×45 mm NATO operates at a higher chamber pressure (about 60,000 PSI versus 55,000 PSI on the .223 Rem.) and the 5.56’s chamber is slightly larger than that of the .223 Rem. Also, the throat or leade is longer in the 5.56×45 mm chamber. What does this mean? You should not shoot 5.56×45 mm NATO out of a rifle that is chambered in .223 Rem [with a standard short throat]. And be aware that some .223 Rem ammunition will not reliably cycle through some AR-style .223 Rem rifles, but it usually does. As a matter of fact, I have not encountered any difficulty with current .223 Rem. loads cycling through a 5.56 mm AR-style rifle.” — Mark Keefe, Editor, American Rifleman
* According to the official NATO proofing guidelines, the 5.56×45mm NATO case can handle up to 430.0 MPa (62,366 psi) piezo service pressure. The U.S. SAAMI lists Maximum Average Pressure (MAP) for the .223 Remington cartridge as 55,000 psi (379.2 MPa) piezo pressure with deviation of up to 58,000 psi (399.9 MPa). The chamber for military 5.56×45mm NATO has a longer throat prior to the bullet contacting the rifling which results in lower pressures when firing 5.56×45mm NATO ammunition. If 5.56×45mm NATO is used in rifles chambered for .223 Remington the bullet will be engraving the rifling when chambered. which can increase pressures past SAAMI Max levels. NOTE: The C.I.P. standards for the C.I.P. civilian .223 Remington chamber are much closer to the military 5.56×45mm NATO chamber.
** The full-length LuckyGunner article is well worth reading. It even provides specifications for a number of .223 Rem reamer types, and compares the original .223 Rem, the 5.56x45mm NATO, and the modern .223 Wylde chamberings.
Put the same load in a variety of barrels (with the same length and chamberings) and you’ll see a wide variance in muzzle velocity. In fact, it’s not unusual to see up to 100 fps difference from one barrel to the next. We demonstrated this with a comparison test of Lapua factory ammo.
Chron Testing Lapua Factory Ammo
At our Southern California test range some years ago, we chronographed Lapua 105gr 6mmBR factory ammo in three different 8-twist barrels of similar length. The results were fascinating. Lapua specs this ammo at 2790 fps, based on Lapua’s testing with its own 26″ test barrel. We observed a speed variance of 67 fps based on tests with three aftermarket barrels.
Barrel Velocity Variance
Brand ‘S’ and Brand ‘PN’ were pre-fit barrels shot on Savage actions. Brand ‘K’ was fitted to a custom action. All test barrels were throated for the 100-108 grain bullets, though there may have been some slight variances in barrel freebore. With a COAL of 2.330″, the rounds were “jumping” to the rifling in all barrels.
Among the four barrels, Brand ‘PN’ was the fastest at 2824 fps average — 67 fps faster than the slowest barrel. Roughly 10 fps can be attributed to the slightly longer length (27″ vs. 26″), but otherwise this particular barrel was simply faster than the rest. (Click Here for results of 6mmBR Barrel Length Velocity Test).
IMPORTANT: Results Are Barrel-Specific, Not Brand-Specific
These tests demonstrate that the exact same load can perform very differently in different barrels. We aren’t publishing the barrel-makers’ names, because it would be wrong to assume that ‘Brand X’ is always going to be faster than ‘Brand Y’ based on test results from a single barrel. In fact, velocities can vary up to 100 fps with two identical-spec barrels from the SAME manufacturer. That’s right, you can have two 8-twist, 26″ barrels, with the same land-groove configuration and contour, from the same manufacturer, and one can be much faster than another.
Don’t Demand More Than Your Barrel Can Deliver
We often hear guys lament, “I don’t get it… how can you guys get 2900 fps with your 6BRs and I can only get 2840?” The answer may simply be that the barrel is slower than average. If you have a slow barrel, you can try using more powder, but there is a good chance it may never run as fast as an inherently fast barrel. You shouldn’t knock yourself out (and over-stress your brass) trying to duplicate the velocities someone else may be getting. You need to work within the limits of your barrel.
Factory Ammo Provides a Benchmark
If you have a .223 Rem, 6mmBR, .243 Win, 6.5×47 Lapua, 6.5 Creedmoor, 6.5×55, .308 Win, .30-06 Springfield, or .338 LM Rifle, we recommend you buy a box of Lapua factory-loaded ammo. This stuff will shoot great (typically around half-MOA), and it can give you a baseline to determine how your barrel stacks up speedwise. [Editor’s NOTE: The original test was conducted in 2008. The velocity of current-production Lapua factory ammo might be higher or lower, so your results may vary.]
When you complete a new 6mmBR rifle, it’s definitely smart to get a box of the factory ammo and chronograph it. That will immediately give you a good idea whether you have a slow, average, or fast barrel. Then you can set your velocity goals accordingly. For example, if the factory 6BR ammo runs about 2780-2790 fps in your gun, it has an average barrel. If it runs 2820+ in a 26″ barrel (or 2835 fps in a 28″), you’ve got a fast tube.
In years past, one of our favorite features on the NRA Blog was the Friday Feast Recipe of the Week. In the past, the NRA Blog offered up a new delicious food recipe each Friday. Sadly the Friday Feast has not been updated for quite some time, but you can still see dozens of past Friday Feast recipes with this link:
Today’s featured Friday Feast combines two things we love — Italian pasta and Elk meat. Article author Emily Rupertus shares our passion for pasta: “I love pasta. I can’t get enough of it! So when I came across this Classic Elk Lasagna, I couldn’t resist sharing with you! You have to try this perfect twist on a classic comfort food.” After assembling your Lasagna in a big cast-iron skillet and covering with tin-foil, bake the Elk Lasagna in a 400° oven for 30 minutes. Then remove the foil, add more cheese and continue to bake uncovered for ten more minutes.
Ingredients
1/2 Package of Lasagna Noodles
1 lb Ground Elk Meat (you can substitute ground venison or antelope)
1 Medium Sweet Onion (chopped)
2 Cloves Garlic (chopped)
2 tablespoons Olive Oil
3 Cups Tomato Sauce
32 oz. Ricotta Cheese
1 Cup Parmesan Cheese
1 8 oz. Fresh Mozzarella Cheese (sliced)
2 eggs


 Amazing Accuracy from 6mmBR Tubegun


 You Can’t Believe How This Gun Shoots
 Joe Friedrich is one of the founders of the


 One of the easiest ways to build a portable target stand is to use PVC pipe and connectors. Utah .308 Shooter “Cheese” has created a simple yet sturdy target frame, and he’s shared his design so you can build a similar frame easily and at low cost. The components are wood furring strips, 2″-diameter PVC pipes (and connections), and a 2’x3′ sheet of cardboard. The PVC base can be glued together, or, for easier transport and storage, you can leave some or all of the connections free. “Cheese” tells us: “I didn’t glue any of it together so I could disassemble it, shove it in a bag and take it anywhere.”


 From Wes (P1ZombieKiller): “[For my first PD trip] there are so many things I was not ready for. The one thing that I did bring (that no one told me about) was a canopy. I’m glad I did. Even though the weather was [near perfect], I know that sun can humble you real fast. With my pop-up canopy, I could shoot all day without getting killed by the sun. You had to tie the canopy down real well or the wind would blow it across the pasture.
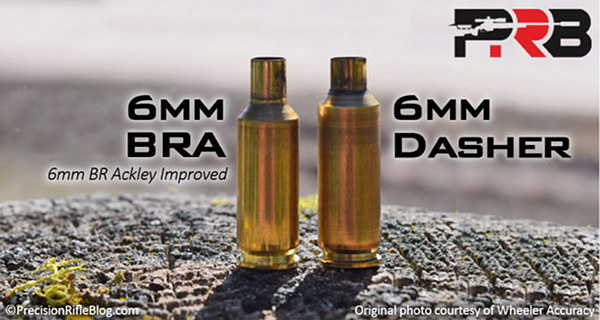


 Yes, folks, it’s officially summer now. This year’s Solstice, considered the official start of summer, transpired Friday, June 20, at 7:42 PM PT. We hope you have fun this summer with friends and family. To help ensure those summer adventures remain safe and trouble-free, the CTD Shooters’ Log has prepared a helpful


 Barrel Velocity Variance


