When neck-turning cases, it’s a good idea to extend the cut slightly below the neck-shoulder junction. This helps keep neck tension more uniform after repeated firings, by preventing a build-up of brass where the neck meets the shoulder. One of our Forum members, Craig from Ireland, a self-declared “neck-turning novice”, was having some problems turning brass for his 20 Tactical cases. He was correctly attempting to continue the cut slightly past the neck-shoulder junction, but he was concerned that brass was being removed too far down the shoulder.
Craig writes: “Everywhere I have read about neck turning, [it says] you need to cut slightly into the neck/shoulder junction to stop doughnutting. I completely understand this but I cant seem to get my neck-turning tool set-up to just touch the neck/shoulder junction. It either just doesn’t touch [the shoulder] or cuts nearly the whole shoulder and that just looks very messy. No matter how I adjust the mandrel to set how far down the neck it cuts, it either doesn’t touch it or it cuts far too much. I think it may relate to the bevel on the cutter in my neck-turning tool…”
Looking at Craig’s pictures, we’d agree that he didn’t need to cut so far down into the shoulder. There is a simple solution for this situation. Craig is using a neck-turning tool with a rather shallow cutter bevel angle. This 20-degree angle is set up as “universal geometry” that will work with any shoulder angle. Unfortunately, as you work the cutter down the neck, a shallow angled-cutter tip such as this will remove brass fairly far down. You only want to extend the cut about 1/32 of an inch past the neck-shoulder junction. This is enough to eliminate brass build-up at the base of the neck that can cause doughnuts to form.
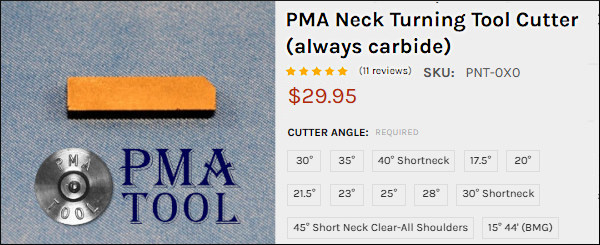
The answer here is simply to use a cutter tip with a wider angle — 30 to 40 degrees. The cutter for the K&M neck-turning tool (above) has a shorter bevel that better matches a 30° shoulder. There is also a 40° tip available. PMA Tool and 21st Century Shooting also offer carbide cutters with a variety of bevel angles to exactly match your case shoulder angle*. WalkerTexasRanger reports: “I went to a 40-degree cutter head just to address this same issue, and I have been much happier with the results. The 40-degree heads are available from Sinclair Int’l for $15 or so.” Forum Member CBonner concurs: “I had the same problem with my 7WSM… The 40-degree cutter was the answer.” Below is Sinclair’s 40° Cutter for its NT-series neck-turning tools. Item NT3140, this 40° Cutter sells for $14.99. For the same price, Sinclair also sells the conventional 30° Cutter, item NT3100.
Al Nyhus has another clever solution: “The best way I’ve found to get around this problem is to get an extra shell holder and face it off .020-.025 and then run the cases into the sizing die. This will push the shoulder back .020-.025. Then you neck turn down to the ‘new’ neck/shoulder junction and simply stop there. Fireforming the cases by seating the bullets hard into the lands will blow the shoulder forward and the extra neck length you turned by having the shoulder set back will now be blended perfectly into the shoulder. The results are a case that perfectly fits the chamber and zero donuts.”
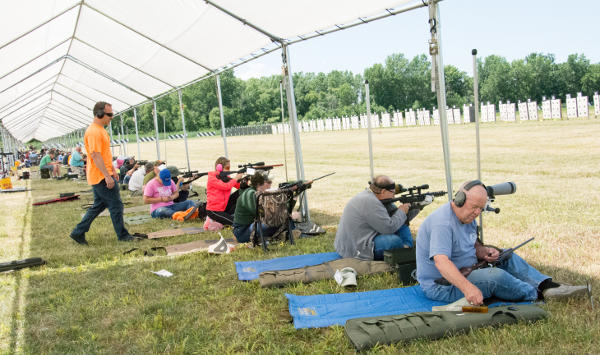
Today Shooting USA TV features the annual President’s Rifle Match at Camp Perry, Ohio. Also known as the “President’s 100″, this major Service Rifle match attracts nearly one thousand competitors to the historic ranges of Camp Perry each summer. This is a challenging, multi-stage modern service rifle competition that is a tough test of marksmanship skills. In the President’s 100 match, competitors shoot at 200, 300, and 600 yards from standing and prone. NOTE: This week’s TV episode also features the M1 Garand rifle in a History’s Guns segment.
Shooting USA SHOW TIMES: This Shooting USA Episode airs Wednesday, August 6, 2025 at 9:00 PM Eastern and Pacific; 8:00 PM Central. If you miss the regular broadcast, you can stream the show online at any time on Vimeo for $0.99 per episode.
This video is from a previous Shooting USA episode about the President’s 100 Match.
Looking downrange at the 600-yard targets. Camp Perry photos courtesy Dennis Santiago.
The historic National President’s 100 Match is a huge event. In recent years, there have been over 1000 ranked competitors from throughout the nation, making this one of the biggest rifle events of the year. The top 100 competitors overall in the President’s Rifle Match are designated as the President’s 100. They receive President’s 100 medallions and certificates.
The President’s 100 Rifle Match is richly steeped in history. This unique match was first held in 1878. Here’s the view from the line at 600 yards:
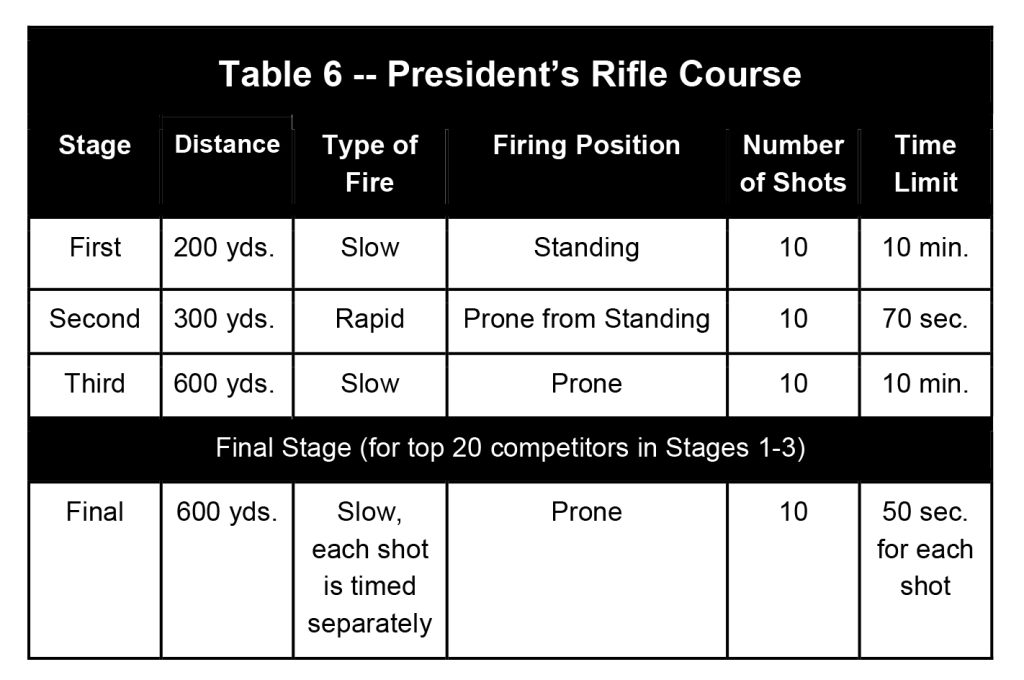
President’s 100 Course of Fire
There is a three-yardage, four-stage Course of Fire for the President’s Rifle Match Course of Fire. Firing is done on the SR target at 200 and 300 yards and the MR target at 600 yards. Scores in stages 1-3 determine the President’s 100 and the final rankings of competitors in 21st place and below. Scores in stages 1-4 determine the match winner and the final rankings in places 1-20. If there is a tie for first place (equal total and X-count), the tied shooters will continue to fire one-shot-at-a-time until the tie is broken. No sighters are permitted in National Trophy Rifle Matches.
Origins of the President’s Match The National Rifle Association’s President’s Match was instituted in 1878, as the American Military Rifle Championship Match. In 1884, the name was changed to the President’s Match for the Military Rifle Championship of the United States. It was fired at Creedmoor, New York until 1891. In 1895, it was reintroduced at Sea Girt, New Jersey. Today, the match is held at Camp Perry, Ohio.
The President’s Match was patterned after the Queen’s Match for British Volunteers. That British competition was started in 1860 by Queen Victoria and the NRA of Great Britain to increase the ability of Britain’s marksmen following the Crimean War.
The tradition of making a letter from the President of the United States the first prize began in 1904 when President Theodore Roosevelt personally wrote a letter of congratulations to the winner, Private Howard Gensch of the New Jersey National Guard.
After a hiatus in the 1930s and 1940s, The President’s Match was reinstated in 1957 at the National Matches as “The President’s Hundred.” The 100 top-scoring competitors in the President’s Match were singled out for special recognition.
At the 2018 National Matches, SFC Brandon Green (then with the USAMU) shot a 400-20X score to win the President’s 100 match. That set a new national record for the prestigious President’s 100 Match. No other competitor had ever achieved a perfect 400 score — not dropping a point in 40 shots — in the President’s 100 match since the event began (in its current form) in 1894.
E-Targets at 2025 National Matches — Rimfire and Centerfire
After years of testing, the Civilian Marksmanship Program (CMP) will make full use of eTargets at the 2025 National Rifle Matches at Camp Perry, which run July 20 through August 9, 2025. The advanced Kongsberg eTargets will be used at all Highpower rifle matches, National Trophy Rifle competitions, and Rifle Games events. In addition the eTargets will be used for the Rimfire Sporter Match on July 20 and the National Mid/Long Range Matches in August. The use of eTargets eliminates the need for pit duty, drastically cutting down the duration of each match. CLICK HERE to learn more about Camp Perry eTargets.
These matches are conducted by the CMP and Ohio National Guard. Since their inception, the National Matches have become a huge, national shooting sports event with over 4,500 annual participants.
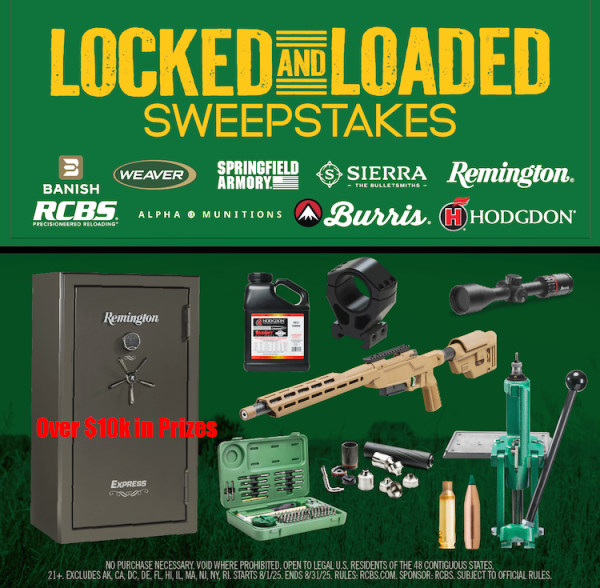
RCBS Launches Locked & Loaded Sweepstakes This month RCBS is running big new contest — the Locked & Loaded Sweepstakes. The winner will receive over $10K worth of prizes from leading manufacturers. Major prizes include a Springfield Armory Model 2020 Heatseeker chassis rifle, Remington Gun Safe, and Banish 30-V2 Suppressor.
Running August 1–31, 2025, the sweepstakes brings together an impressive lineup of brands. One lucky winner will take home a fully loaded prize package valued at over $10,000, featuring premium equipment from RCBS, Hodgdon, Springfield Armory, Banish Suppressors, Burris Optics, Alpha Munitions, Remington Ammunition, Sierra Bullets, Weaver Mounts, and Remington Safes.
The Sweepstakes is open for entries August 1 through August 31, 2025. No purchase is necessary. Must be 21+ years and a resident of the 48 contiguous U.S. states. (Some restrictions apply.)
One grand prize winner will get a prize package worth over $10,000:
RCBS – Rock Chucker Supreme Master Reloading Kit, MatchMaster Die Set
Springfield Armory – Model 2020 Heatseeker Bolt-Action Rifle
Remington – Express Series Gun Safe with Free Shipping
BANISH Suppressors – BANISH 30-V2 Suppressor + Tax Stamp fees
Burris Optics – XTR PS 3.3-18 Scope and XTR Signature Rings
Weaver Mounts – Deluxe Tool Kit & Scope Mounting Kit
Hodgdon Powder – 8 pounds of Winner’s Choice of Powder
Alpha Munitions – Case of Alpha Cartridge Brass
Remington Ammunition – Case of Rifle Primers
Sierra Bullets – 500 Bullets
“We’re proud to team up with some of the best [industry] brands to deliver a sweepstakes that truly outfits a shooter from top to bottom,” said Joel Hodgdon, RCBS Marketing Director. “This prize pack has it all.”
NO PURCHASE OR PAYMENT IS NECESSARY TO ENTER OR WIN. PURCHASE DOES NOT IMPROVE CHANCES OF WINNING. OPEN TO LEGAL RESIDENTS OF THE 48 CONTIGUOUS UNITED STATES, 21+. VOID in AK, CA, DC, DE, FL, HI, IL, MA, NJ, NY, RI & WHERE RESTRICTED OR PROHIBITED.
Here is gunsmith Richard King, with his updated Martini Mark III smallbore rifle.
This is the kind of family-friendly, “feel-good” story we like. A few years back, Texan Richard King created a rimfire benchrest rifle using a classic Martini Mark III smallbore action. He fitted the gun with a new flat, wide forearm and a new buttstock, allowing the gun to sit steady on the bags and track smoothly. The narrow action was also fitted with a cantilevered top rail to hold a high-magnification scope.
Here is Vicki King, with Martini Mark III and her trophy.
But here’s the best part. A decade ago, back in 2014, Richard provided this updated classic to his wife Vicki, who proceeded to win a rimfire benchrest match (Vintage class) with the old Martini. Richard reports: “Here is my lovely wife with her High Overall Vintage trophy. That is a Martini Mark III that I re-stocked in walnut for 50-yard, .22-caliber benchrest matches. It’s great to have her shooting with me again.”
Bravo Richard — kudos to you AND to your lovely bride. It’s great to see a couple shooting together. It’s also great to see a classic rifle brought back to the winner’s circle with some inspired stock-work, new optics mount, and other smart upgrades. Old rifles never die… at least if they find their way to a great smith like Richard King.
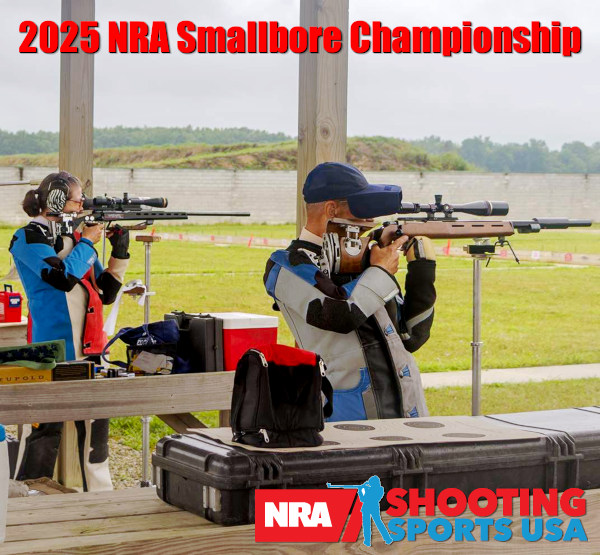
2025 NRA National Smallbore Rifle Championship
The 2025 NRA National Smallbore Rifle Championship was held at the Cardinal Shooting Center in Marengo, Ohio. This included a three-position event as well as a prone event. The 3P match involved Prone, Kneeling, and Standing positions. Michael O’Connor won the 3P Championship with a score of 2352-126X. Finishing second was Cameron Zwart (2330-116X) and Denise Loring finished third (2325-100X).
Notably, along with winning the 2025 Three-Position title, O’Conner secured the 2025 NRA Lones Wigger Iron Man Trophy, awarded for the highest combined score across both Smallbore Rifle National championships — Three-Position and Prone.
The NRA Smallbore Championship at the Cardinal Center ran July 20-29, with the Three-Position Championship concluding on July 29. This was the first year the NRA has hosted the Smallbore Nationals — both Conventional Prone and Three-Position — at the Cardinal Shooting Center. Participants say the event proved quite successful. CLICK HERE for Shooting Sports USA Match Report.
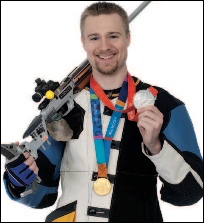
Rio 2016 World Cup Photo Courtesy ISSF and Team USA
Would you like to try smallbore position shooting? Here are some tips from one of the best 3P shooters on the planet, Olympian Matt Emmons.
Matt Emmons competed in the Three-Position Event at the Rio Olympics, his fourth Olympic appearance. Matt has competed on the U.S. National Team since 1997, medaling in three Olympic games: Gold in 2004 in Men’s 50m Prone; Silver in 2008 in Men’s 50m Prone; and Bronze in 2012 in Men’s 50m 3X40. Although his specialty is Men’s 3-Position rifle, Emmons’ World Championship and Olympic Gold are in Men’s 50m Prone. He usually shoots an Anschütz or Bleiker .22LR rifle, with Eley Tenex ammo.
In this video, Matt explains 50m 3-Position Shooting For Smallbore and Air Rifles.
Here are shooting tips from Matt, courtesy Anschütz. Click image below to launch a full-screen PDF file.
CLICK Photo to Load Large PDF File
Here Matt Shows the Kneeling Position. The other two positions are Standing and Prone.
Three Sets of Hardware for Three Positions
You may be surprised to find that Matt often totes three complete sets of rifle parts to important matches — three buttplates, three cheekpieces, and three Centra sights with adjustable irises. Matt told Shooting Sports USA that he travels with “three sets for three positions. Our final is so fast that I need three sets of everything to allow a fast change-over between positions.” Matt carries his gear in an an Anschütz sport bag: “It’s similar to the big Ogio duffels with wheels, but lighter. I’ve worked with AHG/Anschütz for many years and I like their bag because all of my junk fits in it.”
Want to improve your understanding of Ballistics, Bullet Design, Bullet Pointing, and other shooting-related tech topics? Well here’s a treasure trove of gun expertise. Applied Ballistics offers dozens of FREE tech articles on its website. Curious about Coriolis? — You’ll find answers. Want to understand the difference between G1 and G7 BC? — There’s an article about that.
“Doc” Beech, technical support specialist at Applied Ballistics says these articles can help shooters working with ballistics programs: “One of the biggest issues I have seen is the misunderstanding… about a bullet’s ballistic coefficient (BC) and what it really means. Several papers on ballistic coefficient are available for shooters to review on the website.”
Credit Shooting Sports USA Editor John Parker for finding this great resource. John writes: “Our friends at Applied Ballistics have a real gold mine of articles on the science of accurate shooting on their website. This is a fantastic source for precision shooting information[.] Topics presented are wide-ranging — from ballistic coefficients to bullet analysis.”
Here are six (6) of our favorite Applied Ballistics articles, available for FREE to read online. There are dozens more, all available on the Applied Ballistics Education Webpage. After Clicking link, select Plus (+) Symbol for “White Papers”, then find the article(s) you want in the list. For each selection, then click “Download” in the right column. This will send a PDF version to your device.
Forum members Larry Medler has come up with a smart little invention — a simple, inexpensive Empty Chamber Indicator for rimfire rifles. It is made from a section of plastic “weed-wacker” line and a wooden ball from a hobby shop. Larry says he was inspired by Juniors who used something similar for their 17-Caliber Air Rifles.
How to Make the Empty Chamber Indicator
Construction Method: First, drill a 7/64″ diameter hole all the way through the 1″-diameter wooden ball. Then enlarge half of that 1″-long hole using a 13/64” diameter drill. Next insert an 8″ piece of heavy duty (0.095″ diameter) weed wacker line through the ball, leaving about 2″ on the side with the bigger-diameter hole. Then, with the short end of the line, fold over the last half-inch so the line is doubled-over on itself. Then slide the line into the ball, stuffing the doubled-over section through the 13/64″ (large) hole. Finally, pull the longer end of the line until the doubled-over section is flush with the outside of the ball. This gives you a sturdy line attachment without messy adhesives. When the assembly’s complete, hold the ECI by the tail and dip the ball in yellow paint. If you’re making more than one ECI, you can drill horizontal holes in a spare block of wood and use that as a drying rack.
At a Rimfire Sporter match like this, all shooters must have an Empty Chamber Indicator.
The Empty Chamber Indicator for Smallbore Rifles
Larry explains: “At all Highpower rifle matches, silhouette matches, and other shooting events I have attended, Open Bore Indicators (OBI), or what are now called Empty Chamber Indicators (ECI) have been mandatory. The NRA’s yellow ECI for Highpower rifles is easy to use and has been well-received by the shooters. However, I had not seen a truly workable ECI for 22 rimfire rifles — until I visited Michigan’s Washtenaw Sportsman’s Club where I saw juniors using ECIs for their 17 Caliber Air Rifles. Someone at the club made the empty chamber indicators by attaching an 8″ piece of weed wacker line to a 1″-diameter wooden ball, painted bright yellow. I now make similar ECIs for the 22 rimfire silhouette matches I run.”
Empty Chamber Indicators for Centerfire Rifles
If you need an Empty Chamber Indicator for your centerfire rifles, you may want something heftier than the Weed Wacker + Ball ECI shown above. Thankfully, MTM makes a handy orange polymer Chamber Safety Flag. You can get an 8-pack of MTM Chamber flags (4 each for pistol and rifle) for just $8.99 at MidwayUSA. If you prefer a more heavy-duty, bright green flag, MidwayUSA also offers a 6-pack of green SME Chamber flags for $7.49. These polymer SME flags have a dual diameter shaft so they fit a bit more securely. See both types below.
At the request of our readers, we provide select “Deals of the Week”. Every Sunday afternoon or Monday morning we offer our Best Bargain selections. Here are some of the best deals on firearms, hardware, reloading components, optics, and shooting accessories. Be aware that sale prices are subject to change, and once clearance inventory is sold, it’s gone for good. You snooze you lose.
NOTE: All listed products are for sale to persons 18 years of age or older. No products are intended for use by minors.
1. Cabela’s — Springfield Model 2020 .22 LR Rifle, $299.99
⏺️ » Great price on a versatile bolt-action rimfire rifle
Want an inexpensive rimfire rifle for plinking, steel matches, or NRL22 competition? Consider the Springfield Model 2020 .22LR Target rifle, now just $299.99 at Cabela’s. This rifle sells for up to $499.99 elsewhere, so you can save $200 with this deal. This rifle has a sage color stock with black webbing. This model features a 20″, heavy profile, straight taper barrel with a 1/2″ x 28 threaded muzzle. It is chambered in .22 LR and comes with a 10-round rotary magazine. The rifle is designed for accuracy, with a free-floated barrel and a Rem 700-style adjustable trigger.
2. EuroOptic — Bushnell Optics Closeout Sale
⏺️ » HUGE discounts on Bushnell scopes, rangefinders, binoculars
If you’re building a new rifle or planning a hunt, check out EuroOptic’s current Bushnell Closeout Sale. From red dots to scopes to rangefinders there’s something for everyone. Most sale items are discounted at least 25% with some discounted over 50%. Along with individual scopes, there are some binoculars/rangefinder combo kits now 46% off — a good option for hunters.
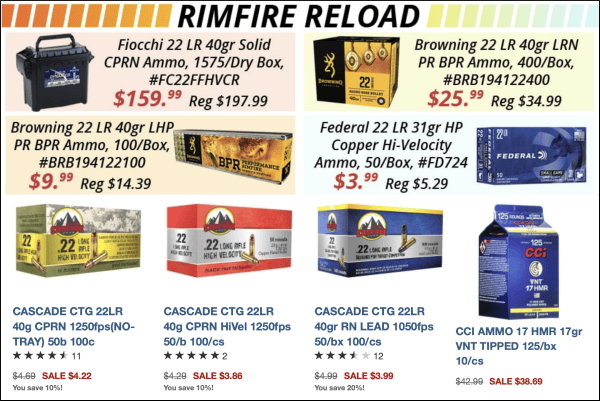
3. Graf & Sons — Rimfire Ammo Sale
⏺️ » Very good .22 LR, 22 WMR, 17 Mach2, and 17 HMR ammo prices
With low cost ammo and low recoil, shooting rimfire rifles is fun and popular. Modern rimfire ammo can also be very effective on varmints. Right now Graf’s is running a big Rimfire Ammo Sale. You’ll find the full selection of rimfire ammo types, both .17 and .22 calibers, on sale. Discounted brands include Aguila, Armscor, Browning, Cascade, CCI, and Federal — with deals from 50rd boxes to 1000rd packs.
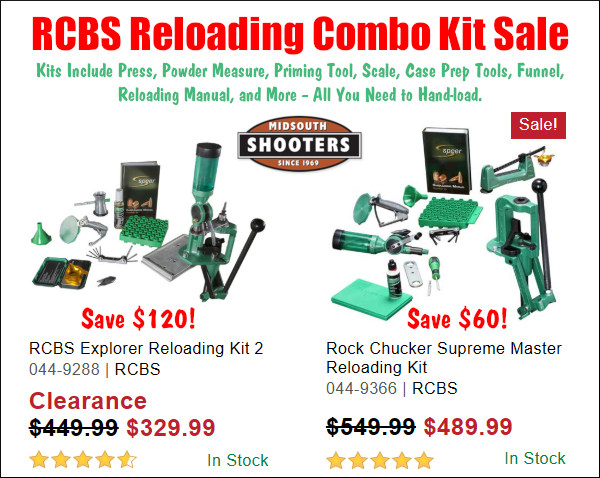
4. Midsouth — RCBS Reloading Combo Kit Sale
⏺️ » Save over $100 on popular RCBS press/gear combo kits
If you are getting started in reloading, consider the RCBS Explorer Reloading Kit 2 now $120 off the regular price at Midsouth. If you prefer a bigger press and want a manual scale, check out the RCBS Rock Chucker Supreme Master Reloading Kit now $60.00 off. Both kits include nearly all the essential equipment you need except dies and shell holders. Both systems represent very good values.
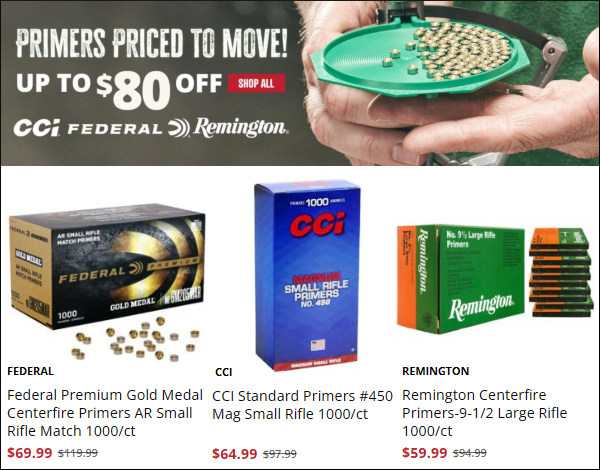
5. Natchez — CCI, Federal, Remington Primer Sale, Save 20-40%
⏺️ » Good opportunity — major discounts on rifle and pistol primers
Natchez is running a major primer sale with big discounts. You can save $25 to $60 per 1000 on CCI, Federal, and Remington, and Federal pistol and rifle primers. With this summer Primer Sale expect to save 20-40% on rifle, pistol, and shotgun primers. And yes, popular CCI BR2 and CCI 450 primers are in stock.
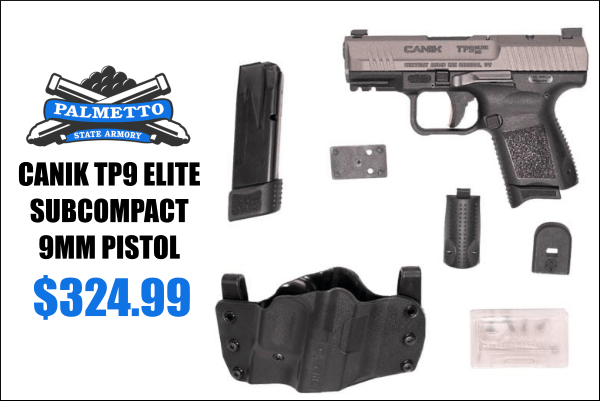
6. Palmetto SA — CANIK TP9 Elite 9mm Pistol, $324.99
⏺️ » Great deal on handy 9mm carry pistol with holster and REBATE
Here’s a good compact carry pistol at a great price. This CANIK TP9 Elite subcompact 9mm pistol boasts good ergonomics, a good trigger, an optics-ready slide, and a 12+1 magazine. Owner reviews have been very positive. The TP9 Elite ships with two interchangeable back straps for better hand fit plus a factory Kydex-style holster. With a tungsten cerakote slide finish this pistol is built to last. NOTE: Now through September 30, 2025, this pistol also qualifies for a CANIK Manufacturer’s Rebate, making this an even better deal.
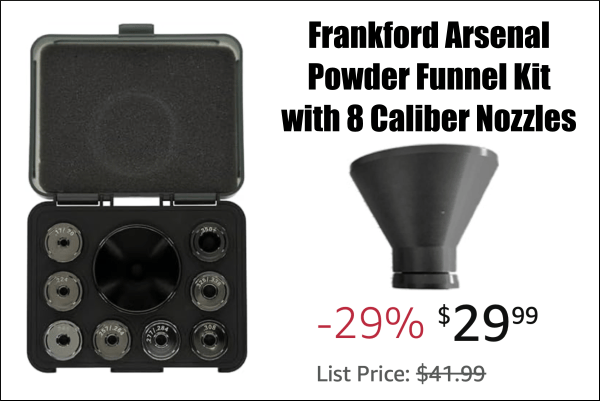
7. Amazon — Frankford Arsenal Powder Funnel Kit, $29.99
⏺️ » Good kit with 8 nozzles that fit brass necks precisely
This is a very worthwhile reloading tool. The Frankford Arsenal Aluminum Powder Funnel Kit (#ad) includes 8 interchangeable nozzles, eliminating the need for caliber-specific funnels. Each nozzle fits over the neck of your brass, providing a smooth surface for powder to flow while avoiding spills. Overall, this funnel kit allows you to dispense powder into your brass with greater efficiency and uniformity.
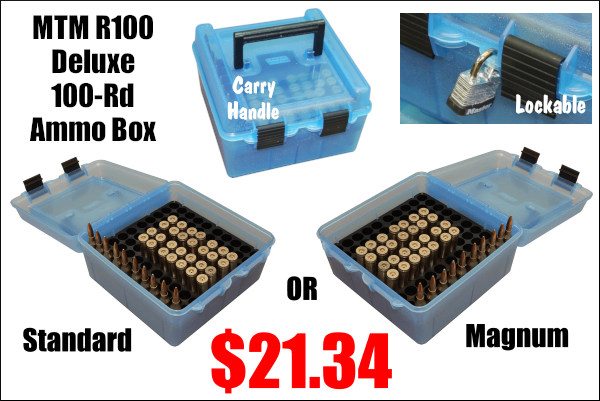
8. Amazon — MTM Large 100rd Ammo Box with Carry Handle
⏺️ » Secure, lockable 100rd ammo carrier with handle
Do you wish you could keep all 100 rounds of brass together in one box? We recommend the MTM R-100 series ammo case (#ad). Chose the version for standard size ammo or a model for magnum size cases. This is offered in rugged polypropylene in semi-translucent blue, or medium green. These stackable cases boast a large, strong handle plus a flange for locking. This is a great choice for shooting matches with multiple relays, or extended varmint adventures.
9. Amazon — Cordless Blower and Vacuum, $33.24
⏺️ » Handy, compact dual-function tool for reloading room
Made of aluminum alloy, the iDOO Cordless Duster & Vacuum (#ad) is a handy tool for your reloading room. This dual-function device works BOTH as a vacuum machine and as a fan, blowing away dust. With its powerful brushless motor, the iDOO compressed air duster can blow away dust and or use it as a vacuum to clean particles and case trimmer metal shavings.
10. Amazon — Portable Charger w/ Built-in Cables
⏺️ » Very handy battery pack with multiple cable types
With modern battery-powered shooting accessories needing power at the range, it’s wise to have a good charging source. We like this 20000mAh Fast Charging 22.5W Power Bank (#ad). This portable charger boasts 5 outputs and comes with multiple charging cables for various port types. This unit can charge up to 5 devices simultaneously ensuring your chronographs and other electronic gear are always ready to go.
As an Amazon affiliate, this site can earn revenues through sales commissions.
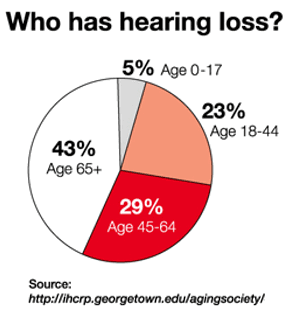
OK, you’ve paid the tax stamp and acquired your new suppressor (aka “silencer” or “moderator”). Do you still need to wear earplugs or muffs? Absolutely. Even with that expensive new “can”, your rifle could be generating over 140 decibels (dB) of noise — about the same as as an unmuffled 9mm pistol shot. That’s loud enough to create permanent hearing loss with repeated exposure.
Firearms Are Loud: 140 dB to 175 dB
Audiology group ASHA explains: “Exposure to noise greater than 140 dB can permanently damage hearing. Almost all firearms create noise that is over the 140-dB level. A small .22-caliber rifle can produce noise around 140 dB, while big-bore rifles and pistols can produce sound over 175 dB. Firing guns in a place where sounds can reverberate, or bounce off walls and other structures, can make noises louder and increase the risk of hearing loss. Also, adding muzzle brakes or other modifications can make the firearm louder. People who do not wear hearing protection while shooting can suffer a severe hearing loss with as little as one shot[.] Audiologists see this often, especially during hunting season when hunters and bystanders may be exposed to rapid fire from big-bore rifles, shotguns, or pistols.” Source: ASHA, Recreational Firearm Noise Exposure.
Suppressors, On Average, Reduce Noise Levels about 30 Decibels
In an article for Ammoland, gunwriter Sam Hoober says that you can expect about 30 decibels (dB) of noise reduction from the average suppressor: “Looking at a few different products, SilencerCo attests their suppressors reduce the sound pressure of a 9mm gunshot to anywhere from 125.7 dB to 131.5 dB, depending on the model. Advanced Armament Co, another popular supplier, attests a 23 dB to 33 dB reduction or down to 127 dB. Liberty Suppressors, another manufacturer, attests a reduction of 24 dB to 38 dB, depending on model and other factors. In short, we can presume something on the order of 30 dB of attenuation as an average.”
Using that 30 dB number you can quickly discern that you’ll still need hearing protection — good hearing protection — when shooting any suppressed firearm (even a .22 LR). “Spikes of 130 dB and more can result in permanent hearing damage instantly”. Source: NRA Blog.
The Myth of the “Quiet” .22 LR
The NRA Blog notes that “many rimfire shooters, particularly those using the beloved .22 Long Rifle cartridge, argue that the small .22 LR caliber doesn’t produce enough sound to damage your hearing”. So, is that really true. or is it a myth?
In fact, a .22 LR can be much louder than you think — a .22 LR pistol can produce sound levels of 134 dB. That’s well above the normal human pain threshhold.
Sound Levels for Common Noises:
9mm Luger pistol: 160 dB
Jet aircraft engine (near): 140 dB
.22 LR pistol: 134 dB
Normal human pain threshold: 120 dB
Noisy Nightclub: 110 db
Riding Motorcycle at 65 mph: 103 db
Power Lawnmower: 95 dB
Hearing damage possible: 85 dB (sustained for 8+ hours)
Ringing Telephone: 80 dB
Normal conversation: 60 dB
The Risk of Hearing Loss
Hearing loss can be progressive and irreversible. If you are a shooter, this is serious business. As the NRA Blog cautions: “You may not even realize you’re harming your hearing. Hearing loss occurs gradually, and can go effectively unnoticed until symptoms become severe. By then, the damage is done.”
Nobody wants to go deaf. But we often see shooters without effective hearing protection when they are walking around a few yards behind the firing line. That’s bad — even if you are away from the firing line, gunshot noises can damage your hearing. You MUST use effective hearing protection every time you go to the range. Good foam earplugs costs mere pennies but they can prevent deafness in your later years. Many folks also wear muffs over plugs.
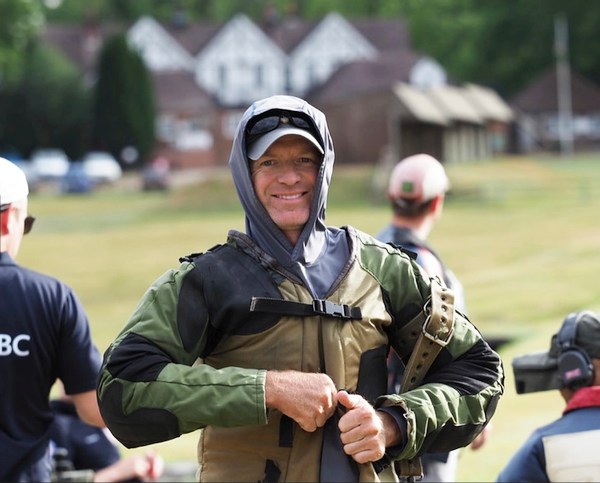
Brandon Green has established himself as one of the greatest marksmen on the planet with an historic victory at the Bisley Range in the United Kingdom last week. Brandon, U.S. Army veteran and past USAMU shooter, won the HM King’s Prize match, the first American in history to do so. Shooting Sports USA declared that: “Nothing comes close to the prestige of the King’s Prize at Bisley — and this year, it has a new champion: Brandon Green, the first American ever to win the event in its 156-year history.”
Brandon Green, a multi-time U.S. National Highpower and Long Range Champion, shows his form at Bisley.
Brandon won the King’s Prize on “V-Count”, the equivalent of “X-Count” in the USA. It was a remarkable come-from-behind victory. With 100 shooters in the final day of the King’s match, Brandon worked his way from 30th to First Place, finishing (as champion) with 299-41V. In second was Britain’s P.D. Sykes who finished with 299-37V. Sykes only dropped one point in this entire match and that was on his last and final shot! That one lost point at 1000 yards gave Brandon the win.
Shooting Sports USA explains: “It all came down to the final shot from Sykes, who had a chance to seal the win with a perfect score. But, after he fired a four just outside the five-ring, it meant the title would belong to Green.” READ Shooting Sports USA King’s Match Report.
Shooting Sports USA reports: “The format of the King’s Prize ensures no lead is safe: scores from the Second Stage carry over into the Final, while the First Stage is dropped. A dozen shooters entered the final round with a perfect 150, but high winds and mounting pressure began to thin the field almost immediately. Green methodically climbed the leaderboard — 13th by the halfway point at 900 yards, then fourth after a flawless 75-11V string. By 1000 yards, only one shooter, Britain’s P.D. Sykes, remained clean. The stage was set for a dramatic finish — and Green didn’t flinch. The final string of fire saw Green shoot another perfect 75-10V at 1,000 yards — something only two competitors in history had previously achieved in the King’s Final.”
We had a chance to talk to Brandon after his return to the USA. He told us that the match was really a transformation from disappointment to celebration. Days before in the Bisley Corporation match he finished in the bottom half, only scoring 39 out of 50 possible points. But he used that experience to learn about the range conditions, flag movement, and weather. He took that knowledge to the King’s Match, dropping only one point in three days, and shooting perfectly at 900 and 1000 yards on the Stickledown range on the final day. That performance secured his historic victory.
Brandon Green Rifle Components
Here are the key components of Brandon Green’s King’s Match-winning rifle:
Barrel: Krieger Barrels 32″, 1:12″-twist stainless barrel.
Action: Kelbly Kodiak Single Shot Action, aluminum with Picatinny rail.
Trigger: Bix’N Andy 2-Stage Competition modified with custom spring links to comply with 1.5 kg (3.3-lb) Imperial Meeting Bisley rules.
Rear Sight: Mudcats Precision Machine Mechanical Sight, 1/8-MOA click Elevation, 1/4-MOA click Windage.
Stock: Foundation Stocks custom special single shot version based on Foundation Exodus stock. Brandon installed a 3-way adjustable buttstock, and modified the cheek-piece with an offset plate to move the cheek-piece forward.
Rifle Load and Ammunition
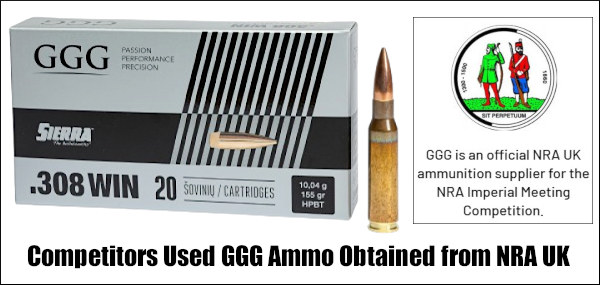
Brandon was shooting a .308 Win rifle with GGG 155gr .308 Win (7.62×51) ammo supplied by the match organizers. GGG, short for Giraitės Ginkluotės Gamykla, is the sole ammunition manufacturer in the Baltic states, and is the official ammo supplier to the NRA UK for the Bisley competitions. The bullets were believed to be Sierra 155-grain HPBT MatchKings. Brandon affirmed this was very good ammo — he opined that it is probably capable of 0.5 MOA accuracy at 100 yards. The powder used by GGG is not known, but some shooters observed it performed very much like Winchester StaBALL.
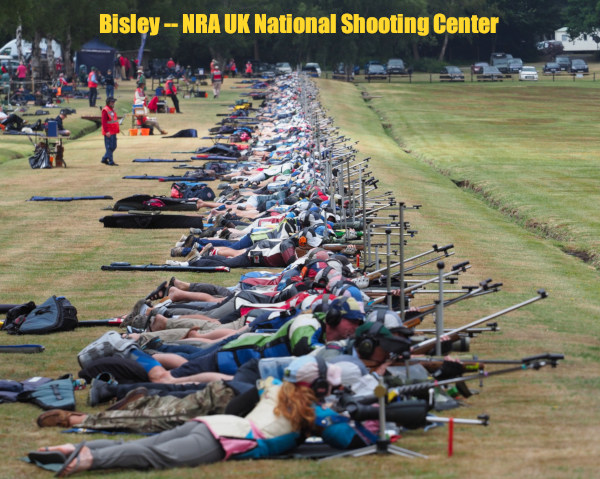
This competition was originally the “Queen’s Prize”, as it was first awarded in 1860 by Queen Victoria. Now that Charles III reigns over the United Kingdom, this championship is called the King’s Prize. The match was moved from Wimbledon Common to Bisley in 1890 and has drawn the best marksmen in the world ever since. The competition involves multiple days of .308 Win (Fullbore) target rifle shooting, a discipline demanding great “hard-holding” skills, an ultra-accurate rifle, and world-class wind-reading.
This is a match using .308 Win-chambered, iron-sighted rifles, shooting at multiple ranges out to 1000 yards. This year was challenging, with switchy wind conditions on the final day at the Bisley Stickeldown Range. Stickledown was “unforgiving” last week, but Brandon Green nailed an impressive 299-41V, dropping just one point overall to take the King’s Prize.
The internet was buzzing with praise for Brandon, and his fellow U.S. National Rifle Team members congratulated him. On his Facebook page, Brandon thanked his fans and team-mates: “Thanks guys, I really appreciate the kind words. I was talking to the 2015 world champion Ben Emms before we started and he said that all you have to do is keep yourself in it to the end and it will all sort itself out. That was the absolute best piece of advice that I could have gotten yesterday. Thanks again buddy!” In an interview on PrecisionRifleBlog.com, Brandon added: “Focus on shooting your match — don’t get wrapped up in what everyone else is freaking out about.”
NRA of the UK — 156th Imperial Meeting
This year’s 156th Imperial Meeting included a number of individual and team competitions. The individual events and overall match concluded with ceremonies for the King’s Prize winner, Brandon Green. After he was announced the King’s Prize winner, Brandon was carried from the range by chair, lifted by his competitors, accompanied by the marching band, Range Officers, fellow competitors and spectators.
Brandon’s superb performance made him the first American marksman to win the King’s Prize (and ride the chair) in the 156‑year history of the event. The NRA UK posted: “Precision, poise, and proof that hard work pays off. Congrats, Brandon!”


 When neck-turning cases, it’s a good idea to extend the cut slightly below the neck-shoulder junction. This helps keep neck tension more uniform after repeated firings, by preventing a build-up of brass where the neck meets the shoulder. One of our Forum members, Craig from Ireland, a self-declared “neck-turning novice”, was having some problems turning brass for his 20 Tactical cases. He was correctly attempting to continue the cut slightly past the neck-shoulder junction, but he was concerned that brass was being removed too far down the shoulder.


 The National Rifle Association’s President’s Match was instituted in 1878, as the American Military Rifle Championship Match. In 1884, the name was changed to the President’s Match for the Military Rifle Championship of the United States. It was fired at Creedmoor, New York until 1891. In 1895, it was reintroduced at Sea Girt, New Jersey. Today, the match is held at Camp Perry, Ohio.
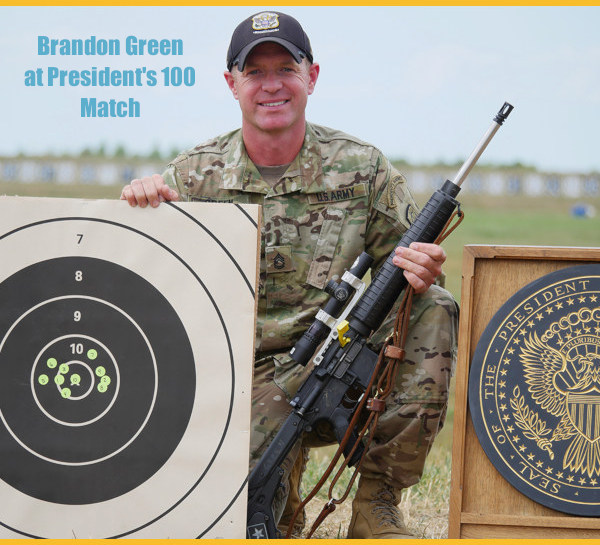


 Would you like to try smallbore position shooting? Here are some tips from one of the best 3P shooters on the planet, Olympian Matt Emmons.
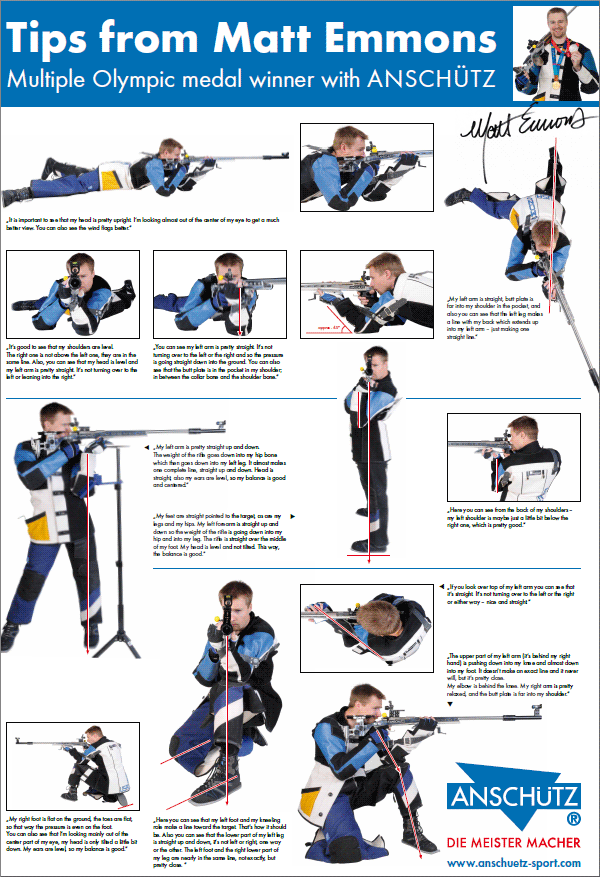


 The Risk of Hearing Loss
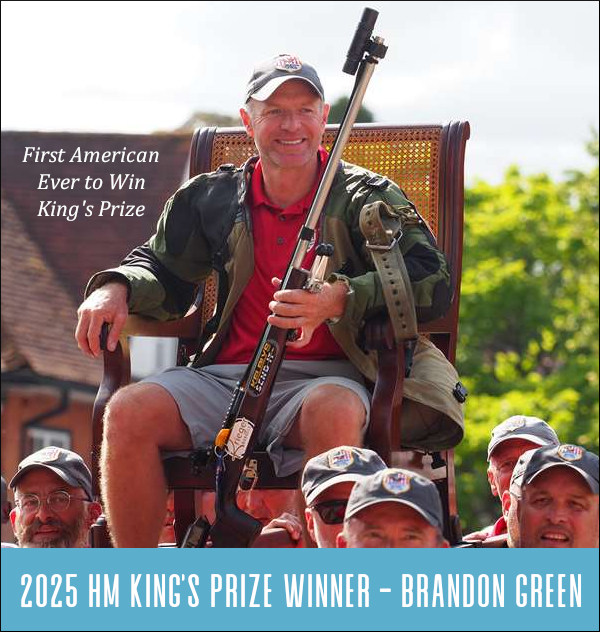


