This article comes from the Criterion Barrels website. It provides good, conservative advice about barrel cleaning. Understand that cleaning methods may need to be adapted to fit the amount and type of fouling (and the particular barrel). In general, we do try to minimize brushing, and we follow the procedures Criterion recommends respecting the crown/muzzle. We have also had very good success using wet patches followed by Wipe-Out bore foam. Along with the practices outlined by Criterion below, you may want to try Wipe-Out foam. Just be sure to use a fitted cleaning rod bore guide, to keep foam out of the action recesses and trigger assembly.
The above video shows how to apply Wipe-Out or other bore-cleaning foam. We use a slightly different method. First, we use 3-4 wet patches to remove loose carbon fouling. Then we apply the foam as shown, but usually from the muzzle end (with bore guide in chamber). Here’s the important point — after 20-30 minutes, once the bubbles have dissipated, we apply the foam a second time, getting more of the active ingredients into the barrel. We then patch out, as shown, after 3-4 hours.
What is the Best Way to Clean a Rifle Barrel?
We are asked this question quite frequently alongside requests for recommended break-in procedures. Improper barrel cleaning methods can damage or destroy a barrel, leading to diminished accuracy or even cause a catastrophic failure. When it comes to barrel maintenance, there are a number of useful techniques that we have not listed. Some techniques may work better with different barrel types. This series of recommendations is designed to incorporate a number of methods that the Criterion Barrels staff has used successfully both in the shop and on their personal rifles. Please feel free to to list your own recommendations in the below comments section.
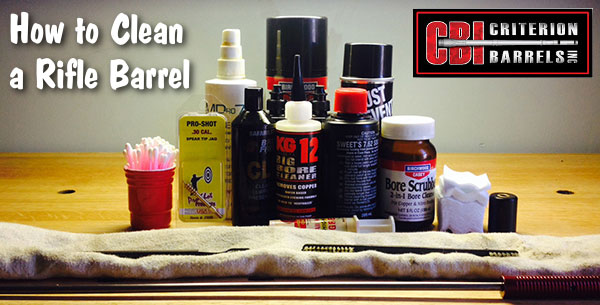
We recommend the use of the following components during rifle cleaning:
• Cloth patches (sized for the appropriate caliber)
• Brass jag sized properly for your bore [Aluminum and Nylon Jags also work]
• One-piece coated cleaning rod
• General bore cleaner/solvent (Example: Hoppes #9)
• Copper solvent of your choosing (Example: Sweets/KG 12)
• Fitted cleaning rod bore guide
• Plastic AP brush or toothbrush
• Q-Tips
• Plastic dental picks
• CLP or rust preventative type cleaner
There are a number of schools of thought relating to the frequency in which a barrel should be cleaned. At minimum we recommend cleaning a barrel after each shooting session to remove condensation, copper, and carbon build-up. Condensation is the greatest immediate threat, as it can cause the barrel to rust while the rifle sits in storage. Copper and carbon build-up may negatively impact future barrel performance, increasing the possibility of a failure in feed or function. Fouling should be removed whenever possible.
The below tips will help limit the wear of different parts of your barrel during routine maintenance, helping extend the life of the barrel and improving its performance.
The Lands and Grooves
This portion of the barrel may experience reduced efficiency due to copper fouling and cleaning rod damage. If copper fouling takes place during the initial break-in of the rifle, make sure to check our barrel break-in article.
For regular maintenance we suggest using a single piece coated cleaning rod rather than the traditional segmented rod or bore snake. While segmented rods and bore snakes may be convenient for field use, the corners between the segments may bow out and catch on the lands, scraping along the length of the rifling. Residual grit and particles from expended cartridges may also get caught between segments, resulting in an abrasive surface working its way down the length of the barrel. Most bore snakes will remove significant amounts of carbon fouling, but may fall short in the removal residual carbon buildup and copper fouling during deep cleaning. Good rods can be sourced from multiple manufacturers, but we have found good results using both Pro-Shot and Dewey brand products.
General cleaning requires the use of patches rather than nylon or brass bore brushes. Brass brushes may be required when aggressive cleaning is required, but can lead to unnecessary wear on the barrel if used frequently. This is not due to the nature of the soft brushes themselves, but from the abrasive particles of grit that become embedded in the material that is being run repeatedly through the bore. We recommend the use of bore guides when cleaning from both the muzzle and breech. These bore guides will help serve to protect the crown and throat from cleaning rod damage.
If significant resistance develops while running the cleaning rod through the bore, no attempt should be made to force it in further. Back the rod out and inspect the barrel to determine the cause of the resistance. The jag may be pushing between a bore obstruction and the rifling, digging a divot into the barrel before pushing the obstruction back through the muzzle. One way to minimize the risk of a stuck rod is by utilizing a slightly smaller patch during the initial push.
The process of cleaning the length of the rifling is relatively straightforward:
1. Check to make sure the rifle is safely unloaded.
2. Carry out any necessary disassembly procedures prior to cleaning.
3. Remove bolt (if possible) and insert fitted cleaning rod bore guide in action.
4. Soak a patch in bore solvent (similar to Hoppes #9).
5. Center and affix the patch on the brass jag, inserting it into the chamber end of the barrel. A misaligned patch may cause the jag to damage the lands of the rifling, so make sure the patch is centered on the jag. [Note, an aluminum or nylon jag will not show a “false positive”.]
6. Run the patch the full length of the barrel, retracting it upon reaching the end of the muzzle.
7. Let the solvent sit for a minute.
8. Continue to run patches through the bore until carbon residue is minimized.
9. Run a dry patch through the bore to ensure carbon residue has been removed.
10. Soak a patch in copper solvent (Sweet’s or KG-12).
11. Run the patch through the bore, leaving it to sit for 3-5 minutes (do not let solvent sit for more than 15 minutes.*)
12. Repeat this process until no blue residue remains on the patches.
13. Run a patch of Hoppes #9 and a dry patch through the bore to neutralize the copper solvent.
14. Inspect the barrel prior to reassembling the rifle, verifying that no bore obstructions remain.
*Please note that some ammonia-based copper solvents may prove to be corrosive if left sitting in the barrel for an extended period of time. It is essential that these solvents be removed within 15 minutes to avoid ruining the bore.
The Crown
The crown is the portion of the barrel where the bullet loses contact with the lands and grooves and proceeds to exit the firearm. The area most critical to accuracy potential is the angle where the bullet last touches the bore of the barrel.
Avoid damage to this area by using a plastic toothbrush and CLP type cleaner to scrub the crown from the exterior of the barrel. Even the most minimal variation in wear to the crown will negatively impact barrel performance, so be careful to avoid nicking or wearing away this part of the barrel.
Whidden Gunworks makes great sizing and seating dies. The Whidden full-length sizing die with neck bushing is very popular because it allows you to “tune” the neck tension by using different bushings, with larger or smaller inside diameters. In this video, John Whidden explains how to choose a the right bushing size for use with your neck-sizing and full-length sizing bushing dies.
For most applications, John suggest starting with the caliper-measured outside diameter of a loaded cartridge (with your choice of bullet), and then SUBTRACT about three thousandths. For example, if your loaded round mics at .333, then you would want to start with a 0.330 neck bushing. John notes, however, that you may want to experiment with bushings, going down a thousandth and up a thousandth. With thin In addition, as your brass ages and the necks harden, you may want to change your bushing size.
Quick Tip: Try Flipping Your Bushings
You may also want to experiment with “flipping” your neck bushings to alternate the side that first contacts the neck of the case. (One side of the bushing is usually marked with the size, while the other side is unmarked.) So try “number side up” as well as “number side down”.
Some folks believe that one side of the bushing may allow a smoother entry, and that this can enhance concentricity. Other people think they can get very slightly more or less neck tension depending on how the bushing is oriented. This is a subtle effect, but it costs nothing to experiment.
If one bushing orientation proves better you can mark the “up” side with nail polish so that you can always orient the bushing optimally. NOTE: We have confirmed that some bushings are actually made with a slight taper. In addition, bushings may get distorted slightly when the brand name and size is stamped. Therefore there IS a reason to try both orientations.
Here’s a November video bonus for our Daily Bulletin readers. Today we showcase three of the most amazing 3D “cutaway” gun animations ever created. Watch the operations of a pump shotgun, bolt-action rifle, and semi-automatic pistol. The superb cutaway views show details of the firearms’ internal parts, and show how ammunition cycles start to finish. Each of these videos took hundreds of man-hours to create, and each has been watched many millions of times.
Remington 870 Pump-Action Shotgun
This 3D animation shows how a Remington 870 pump-action shotgun works. The animation is superbly done, showing every aspect of the internal operation. Folks, if you have any interest in shotguns you should definitely watch this video start to finish. This shotgun video has received 3.9 million views in just 10 days!
The video’s talented creator, Matt Rittman states: “Cinema 4D was used to create each individual part, as well as animating everything. Substance Painter was used to create the wood stock and fore-end textures. Corona renderer was used for final output of lighting and textures.” See more of Matt’s 3D videos on his popular YouTube Channel.
This 3D animation showing how a Mauser Karabiner 98K (KAR 98K) bolt-action rifle works. The Karabiner 98K is a controlled-feed bolt-action rifle based on the famous Mauser M98 system. Video creator Matt Rittman notes: “Cinema 4D was used to create each individual part, as well as animating everything. Substance Painter was used to create the wood stock texture. Corona renderer was used to render everything. This animation took me over 500 hours to create.” This video has been watched over 21 million times!
Every bolt-action rifle owner should watch this remarkable video. It shows key processes which are common to many actions — Cocking the Bolt, Feeding from magazine, Engagement of Bolt Lugs, Activation of Trigger and Movement of Firing Pin, and Extraction with Ejection. The modeling of the inside of the bolt and fire-control group is excellent. This really is a superb video that will help rifle owners understand what happening inside their guns as the bolt is cycled. See more of Matt’s 3D videos on his popular YouTube Channel.
This 3D animation demonstrates how a modern semi-automatic, double-action-only Glock 19 handgun works. Cinema 4D was used to create each individual part, as well as animating everything. Substance Painter was used to create the main textures. Corona renderer was used to render everything. This animation took me over 500 hours to create. one of the most-watched gun videos ever created, this Glock 19 animation has been viewed over 78.6 MILLION times!
Video Highlights for Glock 19 Pistol
0:00 Intro
0:11 Basic Function
0:39 Case Extraction
0:47 Cartridge Loading
1:02 Trigger Reset
About Matt Rittman, the 3D Animator/Artist These three amazing videos were all created by the gifted computer graphics artist Matt Rittman. On his Matt Rittman YouTube Channel, Matt states: “I’m a 3D Generalist/Motion Designer from Des Moines, Iowa. I have always enjoyed animation and illustrating how things work. I’m especially interested in cars and anything mechanical.
My aim for this channel is to provide easy to understand how-it-works 3D animations. I will occasionally be releasing tutorials centered around Cinema 4D and the different capabilities of the software.”
Splatterburst 1″ circles, 62 per sheet, 10-pk $9.99. These can be pasted on other paper backers.
We’ve all seen conventional splatter targets with a single large black bullseye. When a shot hits the target, a halo (usually neon yellow) appears around the bullet hole. This makes it easier to see your shot placements indoors, or at long range outdoors. Today we feature a variety of other targets that also offer the cool halo/splatter effect. We’ve found grids, multiple bull targets, sheets with 62 one-inch circle pasters, handgun training targets, and even white background splatter targets (that produce black halos). Try out some of these targets for fun (kids love plinking with splatter targets).
Ruger has created a helpful set of online resources for new Firearm owners. The New Firearm Owner Resources site features a Fundamentals of Firearms Ownership Video Series, Industry Resources for local “hands-on” training, as well as information on safe storage. In addition, this online Resource Center offers a full library of product instruction manuals along with suggestions for recommended safety equipment.
There are a variety of informative videos, hosted by Mark Gurney, Ruger Director of Product Management. These short (2 min. on average) videos provide key information for new gun owners. If you have friends or family members who are new gun owners, they should watch these videos.
Introduction for New Firearms Owners
Safety Rules — The FOUR Fundamental Safety Rules
Range Safety Equipment — What You Need
This video reviews essential Eye and Ear Protection for shooters.
Do you own an RCBS electronic powder dispenser? If you do, take the time to watch this ChargeMaster Tuning video from 8541 Tactical. This nine-minute video demonstrates how to re-program your ChargeMaster to “tune” the dispensing process. The video shows the exact programming procedures to follow, step-by-step. Some folks want a faster powder flow — others tune their machines for a more reliable drop (with fewer over-runs). One cheap and popular modification is to insert a 1″-long section of a McDonald’s plastic straw in the ChargeMaster’s silver dispensing tube. This works surprisingly well to smooth kernel drop and prevent “clumping” that can cause an over-charge. The McDonald’s straw MOD is demonstrated in this video, starting at the 6:22 mark.
Large-Diameter Dispensing Tube Mod
Many folks have had success with the McDonald’s straw modification demonstrated in the above video. However, some folks would like to get even better flow performance (with virtually no clumping). Forum Member Frank B. has come up with a new option using a brass hose fitting with a large outside diameter. The hose fitting (with tape wrapped around the barbed nose section) is placed inside the RCBS dispensing tube (have some kind of wrap — you don’t want metal-on-metal). Here’s how the unit looks installed:
Frank tells us: “I have found a cure for the over-throw problem. It is a simple 1/4″ barbed hose nipple. I wrapped a couple layers of tape around the barbed end for a snug fit. With this in place, I have thrown 100+ charges of Varget without a single overthrow. The ID of the barbed end needs to be approximately 3/16″ to feed a steady flow. This works because of the larger ID at the drop.”
Frank adds: “You can see in the photo that the powder is not stacking up. You can watch it drop one grain at a time. Hope this will take the aggravation out of your case charging.” For best performance with this brass fitting MOD, we recommend de-burring and smoothing out the front edge of the brass fitting over which the kernels drop.
Brass fitting mod suggested by Boyd Allen. We welcome reader submissions.
While many AccurateShooter.com readers load their own competition centerfire rifle ammunition, we all still need factory ammo for our rimfire rifles in .17 and .22 calibers. And most of the 65+ million American handgun owners rely on factory-made ammunition for their pistols and revolvers.
Today’s video collection showcases state-of-the-art ammunition factories in Europe and the United States. You can see the extremely accurate Lapua .22 LR ammo being produced, as well as excellent centerfire ammunition being made by Norma, Remington, Sellier & Bellot and other makers.
From the creation of lead bullet cores to the final packing of ammunition, you can see it all in these videos. Watch primers being made, brass being annealed, bullets being jacketed, tips being inserted, and every phase of production. Weighing and testing procedures are also revealed.
Modern Ammo Production in Multiple Facilities
This 11.5-minute video shows highly automated bullet and ammunition production in multiple facilities in Europe and the USA. You can see bullets produced from start to finish beginning with lead smelting. Then watch pistol and rifle cartridges being made on modern, computer-controlled assembly lines. Watch from start to finish. Here are some notable highlights:
00:10 — Lead Melting Pots and Billet Caster
01:20 — Lead made into strings and then formed into bullets
01:50 — Brass alloy sheets fed into machine and then punched (2:10-2:35).
03:35 — Lead pistol cores being produced
04:15 — Pistol ammo being packaged
06:15 — Ammo loaded into belts
07:15 — Completed primers being shuttled then loaded into brass (Second factory)
07:20 — Bullets being seating into rifle ammunition
07:32 — Cartridge case-neck treatment
07:42 — Robot arm loads finishes cartridges into boxes
08:04 — Cups being pressed (Third Factory S&B)
08:45 — Cartridge case draw
09:06 — Priming pistol cases
09:20 — Bullet production and weight control (10:02)
10:08 — Cartridge assembly and cartridge sealing (10:38)
11:00 — Pistol ammo packaging
Lapua Rimfire Ammunition Production in Germany
This video shows Lapua rimfire ammo production in Schönebeck, Germany. The video shows quantities of the excellent X-ACT .22 LR ammunition being produced and packaged. Starting at the one-minute mark, you can see the ammo being inspected with advanced scanning machines. Then at 1:16 time-mark you can see the ammo accuracy-tested in a tunnel, with results displayed on a computer screen (1:27).
Norma Ammunition Production in Sweden
In this video, the RecoilTV team lead by EIC Iain Harrison ventures to Sweden to visit the Norma ammunition production plant in Huvudentré, Sweden. Demand for Norma ammo has risen dramatically. A Norma marketing manager notes that production has doubled in the last three years.
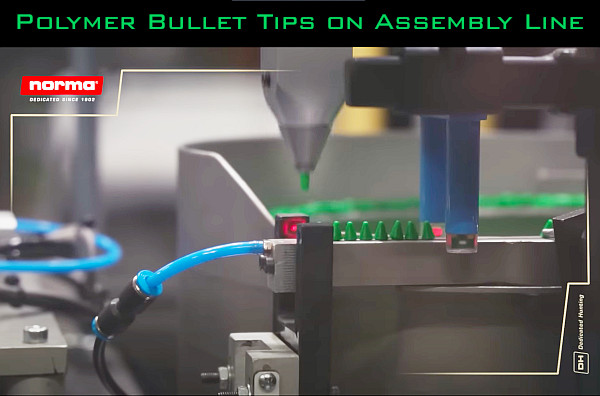
This second Norma ammunition video shows close-ups of the production process and the machinery used for centerfire ammo. This was filmed at the Norma factory in Åmotfors, Sweden, which has operated continuously for over 120 years. Among the many interesting highlight is a sequence showing how polymer bullet tips are inserted. See 6:50 time-mark.
Sellier & Bellot Ammunition Factory in Czech Republic
In this video, Larry Vickers of Vickers Tactical tours a Sellier & Bellot ammunition plant in the Czech Republic. This video shows details of primer production as well as bullet-making, brass-making, and production-line cartridge manufacturing.
Remington Ammunition Plant Re-Opened by Vista Outdoors
This video shows ammo production at the re-opened Remington ammunition plant in Lonoke, Arkansas. “This is one of the largest ammunition manufacturing plants in the world” said Mark Keefe, NRA Publications editorial director. “It was set up in 1969 by DuPont, who owned Remington at the time. They do it all here. Cases, bullets, centerfire rifle, centerfire pistol, rimfire and shotshell.” It’s great to see this plant back in production after Remington Ammunition filed for bankruptcy in 2020 and the assets of the Remington conglomerate were auctioned off. Ultimately, Vista Outdoor, owner of Federal, CCI and Speer, purchased the assets of Remington Ammunition and got the Lonoke plant running again, better than ever.
This article is Copyright 2024 AccurateShooter.com. Republication on any other site gives rise to statutory penalties and compensatory damages.
More and more shooters are “wet-tumbling” their brass (in liquid) with reusable polishing media, rather than using dry media in a vibratory tumbler. The “wet-cleaning” method works best with a rotary tumbler fitted with a water-tight, horizontal drum to hold your brass, cleaning solution, and stainless, pin-type media. The rotary tumbler of choice has been the Thumler’s Tumbler Model B Heavy-Duty. That is a great, sturdy machine, but now you have a more affordable option.
Frankford Arsenal offers “Platinum Series” rotary tumblers designed to clean cartridge brass with liquid and stainless media. The watertight, polymer drum rides on four rollers which rotate the drum around its horizontal axis. Two filters are provided so you can quickly separate your brass and media. A built-in timer allows you to set tumbling sessions up to three hours. There is a large, 7-liter unit and a smaller, 3.3-liter tumbler. Frankford Arsenal says the big version will clean up to 1000 cases of .223 Rem brass. That’s impressive capacity.
Rotary Tumbler Sources Online
The Frankford Arsenal Platinum Series rotary tumblers are sold by major retailers including Grafs.com, Midsouth, MidwayUSA, and Amazon. It’s wise to shop multiple vendors to find the best current pricing.
Amazon often has very competitive pricing on the Frankford Arsenal Rotary Tumblers, both the big, high-capacity 7-liter unit ($179.97) and the smaller 3.3-liter tumbler ($84.99).
How to Wet-Clean Your Brass in a Rotary Tumbler On our main Accurateshooter.com website, you’ll find a comprehensive review of the STM system for cleaning cartridge brass with stainless media. To clean brass with stainless media, start with five pounds of small stainless pins sold by StainlessTumblingMedia.com. Place these along with a gallon of water, a little liquid cleaner, and two pounds of cartridge brass in a rotary tumbler, and run the machine for one to four hours. After cleaning be sure to inspect all your primer holes. CLICK HERE for Brass Cleaning System Review.
Forum Member Tests STM System
Our reviewer, Forum member Jason Koplin, purchased the STM media and a new Thumler’s Tumbler. He then tested the STM cleaning procedure on his own brass, including some extremely dirty and tarnished “range pick-up” brass. Jason was thoroughly impressed with how well the STM process worked — as you can see from the “before and after” photos below. Brass which looked like it was ready for the scrap heap was restored to “like-new” appearance. The process works equally well on both rifle brass and pistol brass. Jason observed that one surprise benefit of the STM cleaning procedure is a big reduction in noise. Jason said the water-filled rotary tumbler was much quieter than his vibratory tumblers. One tip though — you should always inspect every cartridge carefully after wet-tumbling with stainless media. With large-flash-hole brass it is possible to have a pin stuck in a flash hole. This is rare, but it CAN happen.
33XC — Popular ELR Cartridge
Paul Phillips is a past King of 2 Miles (K02M) winner. The founder of the Global Precision Group, Paul is one of the top ELR marksmen on the planet. He has also been a team-mate of past K02M winners.
In 2019, Paul had this rifle built for the 25-lb max, .338 caliber-or-under ELR Class. This is chambered for the 33XC, an efficient cartridge devised by 11-time National HP Champion David Tubb. With promising initial testing at 500 yards, it looks like Paul’s 33XC project is a success. The rifle’s first match was the NRA Extreme Long Range Championship held in 2019 at Camp Atterbury, Indiana.
Paul reports: “The 33XC is ready… I have tested loads from 3100-3450 FPS and and will settle on a load around 3250 FPS [which is] my most accurate load so far. The Peterson Cartridge brass is really working well.”
Paul states he would like to look for a higher node from 3300-3400 GPS: “Next stop is with the Applied Ballistics LLC mobile labratory and radar testing with a PDM.” Paul cautions: “I encourage everyone to start low and work up. Every chamber, barrel, and components are a little different.”
During initial testing, Paul’s 33XC put three shots in 0.27″ at 100. Then, at 500 yards, the rifle produced a 3-shot group around 1/3-MOA with just 1.22 inches of vertical. That’s pretty impressive for early testing. Paul will also be trying some Berger bullets soon. When he determines the most accurate load, Phillips will stretch the rifle’s legs, shooting out to 2500 yards and beyond.
Quote: “The Cutting Edge Bullets are not the highest BC but they are very stable and consistent at ELR (sub-sonic) ranges and that’s the most important factor in finding the best ELR bullet. I actually test all my bullets at sub-sonic speeds to make sure they are consistent and stable. Finding a good load at 500 yards is just the first part. The real test is shooting them at sub-sonic speeds and see how consistently they group. This is what gives you the highest percentage to impact at 2 miles and beyond.”
This rifle features a BAT action mated to a 34″ Bartlein barrel chambered for David Tubb’s new 33XC cartridge. Paul Phillips is currently running Cutting Edge 275gr Lazer solid bullets. Paul notes: “I also have a .338 Lapua Magnum barrel and 300gr Berger bullets for the restricted class in France.” Paul gave special thanks to Alex Wheeler for doing the metal work and Alex Sitman for doing the bedding.
Rifle Component List
Action: BAT Machine CTH dual-port action
Trigger: Bullet Central Bix’N Andy
Barrel: Bartlein 1:8″-twist barrel (34″)
Chambering: 33XC for Peterson brass
Stock: McMillan A6 Super Mag, Bedding Alex Sitman
Scope: Nightforce Optics 7-35x56mm F1 ATACR.
Bipod: Duplin Rifles
Paul Phillips notes: “Alex Sitman has been bedding rifles stocks for most of his life. I believe that [bedding] is a very important … to keep consistent accuracy and repeatable zeros after traveling all over the globe.”
Even with the TacomHQ Charlie Tarac scope prism in place, the rifle makes the 25-pound weight limit with Duplin Rifles bipod. Paul says: “I love it when a plan comes together!! I’m under by 2 ounces!”
About the 33XC (eXtra Capacity) Cartridge
David Tubb invented the 33XC cartridge because he thought the CheyTac cases were too much trouble — requiring a larger action, oversize presses, and ultra-expensive dies. The 33XC was designed to fit .338 Lapua Magnum-size actions and use normal reloading presses.
The 33XC (eXtra Capacity) has 137.5 grains of H2O capacity with over 125 grains of usable powder capacity while leaving the 0.393″ neck unfilled for bullet seating.
The 33XC has a .338 Lapua Magnum lineage. Think of it as a better, 35°-shoulder .338 LM. David explains: “The 33XC uses standard reloading dies along with a 7/8″ x 14 TPI reloading press. There is no fire-forming — all case ‘improving’ has already been done with a production case that has 20 grains more powder capacity, 35-degree shoulder, and longer neck compared to a .338 Lapua Magnum. This puts the various .338 Lapua wildcats and the Rem Ultra Mag Improved into the ‘also ran’ category. They simply can’t compete with the velocities attainable with the 33XC.”
The 33XC is based off of a .580″ bolt head. Tubb states that “A fired case will extract with little effort when using a properly-polished chamber with a maximum powder charge after resizing with the Superior Shooting Systems FL sizing die.” Tubb’s 33XC die reaches the case head which is important for accuracy. Peterson Cartridge produces the 33XC brass for Superior Shooting Systems. This high-quality brass costs $260 for 100 cases (i.e. $2.60 per case), and can be purchased directly from Superior Shooting Systems.
Bonus Video — Global Precision Group Team Makes 4-Mile Hit
With a .416 Barrett rifle, Team GPG makes a 4-mile impact that is captured on video during team practice. James Devoglaer was shooting his GPG spec .416 Barrett with Team Captain Paul Phillips doing the ballistics and wind. Spotters were David Parrish and Derek Rodgers. Forward Observers were John Droelle and Mauro Del Mastro. Approximately 60 shots were taken before impact. There were four 3-shot groups that measured under 2 MOA at 4 miles. The .416 Barrett cartridges were loaded with 550gr Cutting Edge bullets and Vihtavuori powder.
Jewell triggers are still the most-used triggers on competition benchrest and F-Class rifles and they are also popular for hunting, varmint, and tactical rifles (with or without safeties). While a Jewell trigger can work for years with minimal maintenance, if the trigger becomes gunked up, it may be necessary to disassemble the trigger for a thorough cleaning. Our friends Ed and Steve, aka the 6.5 Guys, have produced a helpful video that shows how to disassemble and then reassemble a Jewell trigger.
Why You May Need to Disassemble Your Jewell Trigger — the 6.5 Guys
Jewell triggers are a popular choice in the sport of long range precision shooting, and like everything else require regular cleaning and maintenance. In most cases they can be cleaned with charcoal lighter fluid or dropped into an ultrasonic cleaner. Should the situation require, they can be completely disassembled according to the Jewell Trigger Manual.
We ran into a situation where we had to dissemble a trigger due to the entrapment of some sticky dirt that couldn’t be removed with an ultrasonic cleaner. Our first step was to find some step-by-step instructions but we couldn’t find anything.
Recognizing that other shooters might be in the same situation we produced a step-by-step guide and video, published in full on 65Guys.com. These instructions will work with a left- or right-handed trigger. In our case we worked with a left-handed BR model trigger with safety and bolt release.
Step-by-Step Instructions are provided on 65Guys.com website. We recommend you read all the instructions carefully before you even think about disassembling your trigger. This video explains the process so you can get a sense of what is involved.



 Quick Tip: Try Flipping Your Bushings

 These three amazing videos were all created by the gifted computer graphics artist Matt Rittman. On his




 On our main


 33XC — Popular ELR Cartridge


