Reactive targets — whether balloons, steel gongs, or clay birds — always add fun to a range session. But precision shooters may want something more challenging (i.e. smaller) than a clay bird when shooting inside 300 yards. For a change of pace, try shooting at inexpensive pool cue chalks. Less than 1″ square, these will test your marksmanship skills. (If you need a bigger target, that also makes a nice puff of “smoke”, try charcoal briquettes).
Pool Cue Chalks — Cheap, Fun, Dramatic
If you’re looking for a small target that makes a nice big cloud of color when hit, try billiard chalks — those little blue cubes you use to dust the end of pool cues. Measuring about 7/8″ per side, billiard chalks make very challenging targets at 100 and 200 yards. When you hit them, if you nail the circular “dimple” in the middle, they disintegrate impressively, tossing blue “smoke” in all directions. Billiard chalks are inexpensive. You can buy a dozen chalks online for about $3.00 — just 25 cents each. And the prices drop with more quantity. One gross of chalks (that’s 144 pieces) costs just $24.95 at ozonebilliards.com. That’s 17 cents each.
To see actual hits on chalk at 100 and 200 yards, watch the video below. (WARNING: Soundtrack is loud and advertisement may play before movie. Flash plug-in required for playback, so you may see a note that a Flash file is loading.) The movie-maker cautions that: “You’ll notice (in the video) that some of the hits are ‘wiffs’ instead of ‘poofs’. If you look at the picture above, you’ll see the 1/2 inch dimple in the cube face. If you don’t put the bullet in that dimple, it’ll ‘wiff’ on you.” Note — this video may not be available on some mobile devices or computers with Flash disabled.
Watch Billiard Chalks Explode with Blue Smoke When Hit:
NOTE: This movie requires Flash to run.
Forum members who have tried Billiard Chalks say they are definitely fun to shoot. Member Blake says: “[These are] satisfying and cheap reactive targets — I have a 72ct box of [chalks] in every color. They work great if you hit them in the center with anything more powerful than a 22 LR, and they don’t leave much mess to clean up.” Blake offers attachment tips: “I use double-stick tape on the back to hold them onto target rails. Just make sure you stick them to steel so that they have something nice & hard to crush against when you hit them. Put them on thin plywood and they’ll just punch right through!”
Here’s the super-speedy way to turn case-necks. Our friend Erik Cortina figured out how to turn his match cartridge case-necks using his milling machine. Erik told us: “While in Raton [a while back], Mid Tompkins told me that he turns his brass on milling machine. He said he could do about 500 in two hours, so I decided to try it.”
Erik fitted a Don Nielson “Pumpkin” neck-turner to the mill, and he used a modified 21st Century case holder to secure the brass. As you can see from this video, Erik was very successful with the process. The tool spins at 1500 rpm, turning Lapua 6.5-284 cases that have been necked up to 7mm.
Video Shows Eric Cortina Neck-Turning Cases with Milling Machine:
Cartridge Brass: Lapua 6.5-284 necked up to 7mm
Lubricant: Lithium grease inside and outside of neck
Neck-Turner: Nielson Pumpkin running at 1500 RPM
It’s hard to argue with Erik’s results. Here are his turned Lapua cases, which have neck-wall thickness consistent to two ten-thousandths of an inch. Think you could do better turning manually?
Some of Erik’s Facebook friends had questions about this process:
Q: Who makes the shell-holder?
Erik Cortina: I did! The shell-holder you can get from 21st Century. I Tig-welded a punch as a handle.
Q: I love the idea of working smarter not harder! Any galling issues? What are your mitigation techniques?
Erik Cortina: No issues. I use lithium grease in spray can. Makes a foam that I dip necks into.
Q: Shouldn’t either the case or the cutter be floating to allow most precise neck turning?
Erik Cortina: Up until [I tried this] I believed the same thing. I was going to build a floating case holder but decided to try rigid setup on a few cases before I built it. Results were great. Neck thickness doesn’t vary more than .0002″, which is same as when I was doing it with floating case holder on the lathe.
Q: Any problems with the Pumpkin changing the cut as it heats up?
Erik Cortina: No — there were no issues with that.
NOTE: Erik Cortina is a very skilled machinist who custom-crafted fittings used for this process. This kind of neck-turning with a milling machine may not be for the everyday hand-loader!
Nielson “Pumpkin” Neck-Turner
The circular orange cutting fixture on Erik’s Milling Machine is a Don Nielson “Pumpkin” neck-turning tool. Don designed this tool to be used by hand or with power. The Pumpkin boasts an eccentric mandrel that allows the cut to be adjusted easily in precise .0001″ increments. Benchresters like this as it allows for very precise control of cut depth and neck-wall thickness.
Nielson Neck Turner with carbide mandrel. Photo Courtesy Butch’s Reloading.
As part of NRA Women TV, hunting guide Kristy Titus hosts a series of videos that explain important strategies and shooting skills for hunters. Titus, co-host of the Team Elk TV show, is a certified instructor who has hunted around the globe. She grew up in the outdoors, running pack mules in Oregon with her father. In these videos, Kristy discusses demonstrates field positions that can be employed during a hunt. She also explains preparation for a hunt, including fitness training.
Click each link below to watch other Kristy Titus Hunting Videos.
“When it comes to bolt-action rifle fit, there is no ‘one size fits all’,” says Titus. “When picking out your rifle [consider options] after the purchase to ensure you are as comfortable as possible.”
One Pistol, Two Barrels, Two Playing Cards — here’s a trick shot we just had to share. The talented Kirsten Joy Weiss does something we’ve never seen before, splitting TWO (2) playing cards with a unique, twin-barreled 1911-style pistol. Watch the video to see Kirsten pull off this double-barreled doozy of a trick, firing two bullets at the same time.
It took a few tries, but Kirsten makes the shot at the 3:14 time-mark:
Kirsten was enthusiastic about this unique trick: “Splitting two cards with two bullets fired at once? The double-barreled 1911 was just begging for a trick shot application. Arsenal Firearm’s 2011 A1 twin-barrel, 1911-style pistol is a heavy monster to wrangle, but a lot of fun to shoot!”
Brownells is a well-known retailer of guns, gun parts, tools, accessories, ammo, and pretty much everything gun related. Brownells has a very active video production department that releases new “how-to” and product information videos every week. These videos offer helpful advice on gun cleaning/maintenance, reloading, as well as selecting/assembling components for various kinds of rifles. There now over 1000 videos on the Brownells YouTube Channel, this really is a remarkable resource.
One of our favorite regular Brownells video features are the Quick Tip Cartridge Comparisons. Brownells tech staffers look at a pair of cartridge types and reveal the noteworthy differences. Here are three recent Cartridge Comparison videos from Brownells.
1. 6.5 Creedmoor vs. .260 Remington
Brownells Gun Tech Caleb Savant compares and contrasts the 6.5 Creedmoor rifle cartridge with the older .260 Remington. Both cartridges are often loaded to nearly the same overall length (OAL), but with more of the bullet inside the neck for the .260 Rem. The .260 Remington is basically a .308 Winchester necked down to 6.5mm (.264″). The 6.5 Creedmoor has a shorter case, with a more modern 30-degree shoulder angle. With the same cartridge OAL, that can make it possible to load longer-ogive, higher-BC bullets. However, with a long-freebore chamber, the .260 Rem can certainly run any high-BC 6.5mm bullet made.
The .260 Remington can, theoretically, generate a bit more velocity at the muzzle because its longer case holds a bit more powder. However, with high-quality Lapua brass, in the real world, the 6.5 Creedmoor comes pretty darn close to .260 Rem performance with any given bullet weight. Moreover, the 6.5 Creedmoor is available with small primer pocket brass from Lapua. This brass may give a higher number of reloading cycles before case-head expansion becomes a problem. For the hunter, both choices are good, but the older .260 Rem may feed a bit better from a magazine, given the .260’s case taper and longer body. Overall, we favor the 6.5 Creedmoor for its versatility and efficiency, but the .260 Rem is a good cartridge too.
2. 6.8 SPC vs. 6.5 Grendel
Brownells Gun Tech Caleb Savant compares two medium-caliber cartridges that can work in AR15-platform rifles: the 6.5 Grendel and the 6.8 SPC (aka 6.8mm Remington “Special Purpose Cartridge”). The 6.5 Grendel is typically loaded with a high-BC .264″ bullet, while the 6.8 SPC has a larger-diameter .277″ bullet. Both have the same 2.26″ OAL as the AR-15’s standard .223 Remington / 5.56 NATO round. The big difference is the 6.5 Grendel’s faster velocity and flatter trajectory. With the same bullet weight, Brownells says the 6.5 Grendel will be about 100 fps faster than the 6.8 SPC. Given a 100-yard zero, the 6.5 Grendel will drop about 8.5″ at 300 yards, while the 6.8 SPC will drop 10.5″ at the same range. The 6.5 Grendel is probably a better choice for long-range targets, at least when loaded with a higher-BC bullet. A big difference is brass. You can get superb Lapua brass for the 6.5 Grendel. Not so for the 6.8 SPC, which really has never developed into a widely popular accuracy round.
3. 7.62×51 NATO vs. .308 Winchester (Subtle differences)
Brownells Technician Caleb Savant talks about the .308 Winchester and 7.62x51mm NATO. Most shooters know that both rounds have the same external dimensions. In fact, the military 7.62×51 was developed from the civilian .308 Winchester. So… can they be used interchangeably? The 7.62×51 cartridge normally can be fired from any rifle chambered in .308 Winchester because the 7.62 is spec’d for a lower pressure than SAAMI max in the .308 Win. However, we have encountered some British and Austrian 7.62×51 NATO milsurp ammo that was VERY hot — more than a typical commercial .308 Win Load. Accordingly you should always be careful when shooting new 7.62×51 ammo in your rifles. Likewise you should be careful about shooting higher-pressure .308 Win in some 7.62 NATO rifles. The 7.62×51 NATO chamber is slightly longer, and the cartridge’s case is typically a bit thicker, so it will “flow” and expand into the extra space. NOTE: Some newer rifles with 7.62×51 NATO chambers ARE made to handle .308 Win ammo. Check the owner’s manual or contact your rifle’s manufacturer to find out for sure.
Believe it or not, here is a cartridge that makes a .338 Lapua Magnum look like a toy. The 14.5x114mm cartridge was designed as a MG and rifle-fired anti-materiel round. To translate from the metric system to caliber and inches, the round is a mammoth .57 caliber which measures 4.49 inches to the case mouth, and 6.13 inches overall. That jumbo-sized case holds a whopping 655 grains of powder. Commonly-loaded projectiles weigh 920-1030 grains. The 993gr armor-piercing projectile has a muzzle velocity of approximately 1006 meters per second (3300 fps) and can penetrate 30-32 millimeters of RHA steel at a range of 500 meters.
The top photo comes from Elardus De Lang, a Forum member who works at the Truvelo Manufacturers Armoury in South Africa. Elardus also provided an impressive video showing the massive 14.5x114mm being shot from prone with a Truvelo-built bolt-action rifle. Elardus tells us: “Here is a video, with a slow-motion ending, of our 14.5x114mm anti-materiel rifle being fired in our indoor testing facility. This caliber is a true beast! It propels a 993gr Armor-Piercing Incendiary bullet to 3300 fps, burning 480 grains of powder in the process. [This shows] that rifles of that power level can actually be shootable. The concussion indoors is something to experience……every shot feels like you are being punched in the face, and the heat from the muzzle flash actually hits you like a wave!”
14.5x114mm Cartridge Design and Dimensions
The 14.5×114mm has 42.53 ml (655 grains H2O) cartridge case capacity. The exterior shape of the case was designed to promote reliable case feeding and extraction in bolt action rifles and machine guns alike, under extreme conditions. Cartridges typically use lacquered steel cases, but some countries also use brass cases for the 14.5x115mm.
All dimensions are in millimeters (mm). Americans would define the shoulder angle at alpha/2, or 22.5 degrees. The common rifling twist rate for this cartridge is 455 mm (1:17.91″) with eight lands/grooves. According to official guidelines, the 14.5×114mm can handle up to 360 MPa (52,213 psi) piezo pressure.
14.5x114mm Cartridge History
The 14.5×114mm (.57 Cal) is a heavy machine gun and anti-materiel rifle cartridge used by the Soviet Union, the former Warsaw Pact, modern Russia, and other countries. It was originally developed for the PTRS and PTRD anti-tank rifles, but was later used as the basis for the KPV heavy machine gun that formed the basis of the ZPU series anti-aircraft guns that is also the main armament of the BTR series of armoured personnel carriers from the BTR-60 to the BTR-80 and for heavy anti-material sniper rifles. The cartridge was designed in 1939 and first issued in 1941.
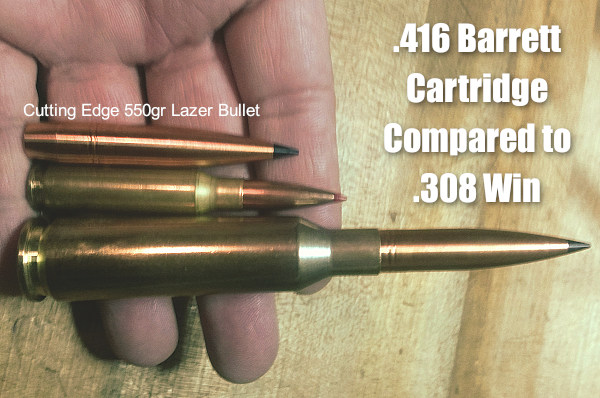
In the ELR game, particularly the King of 2 Miles (KO2M), it’s “go big or go home”. The top shooters run large-capacity cartridges that push large-caliber, ultra-high BC bullets at very high velocities. Bullets launched by cartridges such as the .416 Barrett can sustain supersonic velocities at Extreme Long Ranges — and that’s what it takes to win. The .416 Barrett can launch a 550-grain solid bullet at 3000+ FPS.
Photo from ELR Competitor Corbin Shell.
2018 and 2019 Kings of 2 Miles Loaded on RCBS Presses
So how do you load jumbo cartridges such as the .416 Barrett? It takes a big, heavy, super-strong reloading press. We’ve learned that the last two Kings of 2 Miles, Paul Phillips (2019) and Robert Brantley (2019) both loaded their KO2M ammo on RCBS AmmoMaster .50 BMG presses. Phillips loaded .416 Barrett ammo, while Brantley loaded custom .416 MCS rounds.
In 2018, Robert Brantley topped the field using his custom .416 MCS loads perfected on the AmmoMaster .50 BMG Press. This year, Brantley took a close second to 2019 KO2M winner Paul Phillips. Both Phillips and Brantley use the AmmoMaster .50 BMG single stage press kit and RCBS .416 Barrett dies to hand-load for extreme long-range. “My ammo has been much more consistent after switching to the RCBS press and dies,” remarked Phillips, who runs the Global Precision Group. Brantley said he uses RCBS products for most of his reloading needs — from the dies and AmmoMaster, to the ChargeMaster and Brass Boss. His custom .416 MCS loads launch a 550-grain bullet more than 3,100 fps.
Loading with RCBS AmmoMaster .50 BMG Press
This video shows reloading with the RCBS AmmoMaster .50 BMG press. While this video shows .50 BMG cases being loaded, the principles are the same for loading the .416 Barrett used by both Brantley and Phillips. Big cases need big presses!
Derek Rodgers Shooting the .375 CheyTac at K02M in 2017
Another ELR ace, 2017 King of 2 Miles champion Derek Rodgers, favored the .375 CheyTac cartridge. For his successful K02M quest, Derek ran Cutting Edge Bullets in Peterson brass with Hodgdon H50BMG powder. The video below shows Derek in action at the 2017 KO2M event.
The KO2M competition is a two-day extreme long-range (ELR) match held at the NRA Whittington Center outside Raton, New Mexico. Teams consist of one shooter and up to two wind coaches/spotters, who fire on steel targets ranging from about 1,500 to 3,500 yards.
If you have ANY interest in custom rifle actions, you MUST watch this video from UltimateReloader.com. Folks, definitely watch the video — it is VERY informative! To produce this video, Ultimate Reloader’s Gavin Gear visited the BAT Machine facility in Post Falls, Idaho, and interviewed BAT owner Bruce Thom.
In the video Bruce Thom demonstrates how BAT Machine actions are created from start to finish. Bruce shows every stage of the process, employing multiple high-tech machines. It’s impressive — Forum members say that this is a “must-watch” video. Gunsmith Jackie Schmidt noted: “Great Video. Even though I have been in the machine shop business for 50 years, I still marvel at the new innovations in precision machining. Bruce has a very down-to-earth, common sense approach to explaining what to many seems like machining wizardry.” And Mark T. posted: “Watched it last night. Excellent video and excellent machining practices — precision from beginning to end.”
Click Arrow to Watch Video
For further explanation of the action production processes, with step-by-step listing of how receivers and bolt assemblies are created, read Gavin Gear’s full BAT Machine Article on UltimateReloader.com.
BAT Machine Company Was Started 29 Years Ago
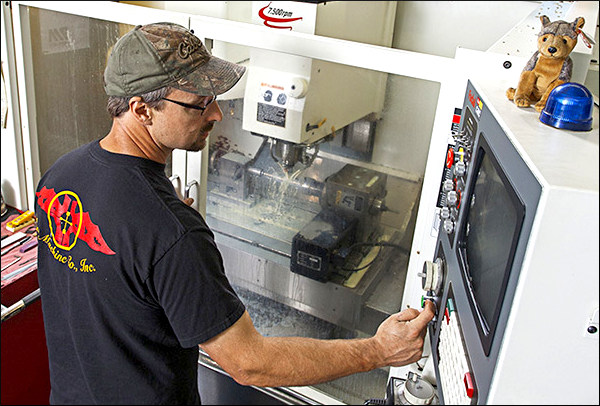
Back in 1991, Bruce Thom started BAT Machine Company, which was incorporated later in 1996. Bruce’s shop stared with manual machines, quickly moving to CNC machines later in the 1990s. BAT Machine quickly achieved a following among benchrest shooters for crafting superb actions that exhibited flawless function and superb machining. Those qualities, benchrest competitors realized, helped produce tiny groups, win matches, and set benchrest records. BAT Machine now makes rifle actions for a wide variety of disciplines: F-Class, PRS, ELR, hunting, and of course short- and long-range benchrest.
BAT Action Body Machining Stages
As shown in the video, here are the major stages for the fabrication of a BAT Machine receiver body:
1. Start: raw 17-4 stainless round bar (higher toughness than typical barrel/receiver steel)
2. Heat treat
3. Bore central hole (for EDM wire), face ends
4. EDM machining (cut bore and raceways)
5. True OD, cut receiver threads and lug seats
6. Cut tang and related features
7. Finish machining including body OD, integral lug (if equipped)
Final Production Stages — Polishing and Deburring
After the receiver body and bolt are machined, they go through a deburring and polishing process.
In the image above you can see the stages. At left is a receiver body straight from machining. Some hand work is typically performed to break interior edges that are sharp from machining. In the center, the receiver shows can see the initial polish stage. During this stage, machining marks are removed by coarse polishing. Additionally for receivers that will be nitrided, that will be done next. But for actions that are NOT nitrided, a final polish brings the parts up to a high luster, as show on the right.
After polish (and nitriding if that applies) the bolts and receivers get a finish assembly, and testing for proper smooth functioning. The receivers are then registered with the ATF and shipped to the customer.
How do you trim your cases? We use a variety of tools, including power case trimmers. But our go-to trimmer for Benchrest-type cartridges is the L.E. Wilson Trimmer unit, now available in a handsome and durable stainless assembly. This thing is slick. It trims very precisely with the use of Wilson case holders combined with a micrometer-type stop for length control. As sold complete with micrometer, quick clamp, and metal stand, this Wilson Stainless Trimmer is $154.95 at Creedmoor Sports. We think that’s a fair price for a unit that can last a lifetime, trimming many thousands of cases.
In this video, Bill Gravatt of Creedmoor Sports demonstrates the Stainless Wilson trimmer with micrometer length control. Gravatt offers helpful operational tips to improve trimming efficiency, so this video is worth watching even if you’ve used a Wilson trimmer before:
Tips for Trimming with Wilson SS Micrometer Trimmer:
1. After inserting brass in the case holder, tap the case lightly to ensure it seats fully.
2. When starting your case-trimming session, do one or two test cases to check cut length. Adjust length with micrometer, then test length again. If “good to go”, set length stop. NOTE: Release the Stop Screw to make major adjustments. Use the Micrometer to make fine adjustments, in .001″ increments.
3. After trimming operations, be sure to chamfer case mouth after cutting to remove burrs. NOTE: After you have made the chamfer, we recommend gently spinning the chamfer tool backwards a couple times in the case neck. This will burnish/smooth the newly-cut champing, which helps with bullet seating.
Features of Deluxe Wilson Stainless Case Trimmer with Micrometer
— Long lasting Stainless finish with Micrometer adjustment.
— New 304 Stainless Steel Handle included with Micrometer Trimmer.
— Rotary-style clamp swings to secure case-holder — quick and easy.
— Larger stop screw adjustment from 3/8″ (old) to 1/2″ (new) with increased width on stop nut. Coated with black oxide for a long lasting durable finish.
— Made in the USA with American Steel.
— Power Adaptor compatible.
Sniper’s Hide offers a training class for novice shooters getting started in the PRS/NRL precision rifle game. This Precision Rifle Fundamentals course covers equipment selection, using shooting supports, rifle handling, SFP scope basics, and much more. The Precision Rifle Network video below covers a Sniper’s Hide class offered at the Sure Shot Range, near Vinton, Iowa. This video covers the class both in the field and in the classroom, and has interviews with participants.
One participant praised the course: “As a novice shooter, this [Sniper’s Hide Class] was probably the best money I have spent. It helped me learn all my equipment, how to use rear bags, how to figure out dope… and for the dollar, it’s the best money I’ve spent so far.”
Another student concurred: “I’ve been through all kinds of training, including the military and law enforcement, and I have to say the is one of the best, if not THE best class I’ve ever been in.”
Joel from the Precision Rifle Network stated: “At the end of four days, from two back-to-back precision rifle courses, we sent approximately 4500 rounds down-range. All in all, I would say this is some of the finest precision rifle training you can find ANYwhere.”
Another Video from Frank Galli of Sniper’s Hide
Frank Galli, aka “Lowlight”, is the head honcho of Sniper’s Hide. In the video below, Galli offers a series of shooting tips he calls the “Long Range Shooting W.T.F”. No that’s not what you think it is — no cuss words are involved. “W.T.F.” stands for Wind, Trajectory, and Fundamentals of Marksmanship. To shoot well, Frank says, you first must gauge the wind correctly. Second, you must know the trajectory of your load in your rifle — i.e. know your ballistics. If you want to hit a target at long range, you must start with a rock-solid zero, determine an accurate muzzle velocity, and know the Ballistic Coefficient of the bullet. Plug all that into a good ballistic program (along with elevation, temp, and air pressure) and you should have your point of impact (within a click or two) out to 1000 yards.
Watch Video for Tips about Wind-Reading, Ballistics, and Shooting Fundamentals:
The third element of “W.T.F” is “F” for “Fundamentals of Marksmanship”. This actually involves multiple factors — body position (relative to the rifle), finding your natural point of aim, proper head alignment behind the scope, pre-loading the bipod, breathing modulation, trigger control, follow through, recoil management and more. Frank addresses all these “fundamentals” in the second half of the video, starting at the 3:40 time-mark.
Books for Precision Rifle Training
Along with the Videos above, here are two recommended print publications. These both offer a wealth of useful information for PRS competitors and those interested in tactical/practical style shooting. In addition these books will also benefit hunters. They provide good tips on shooting positions, ranging, supports (bipod, tripod, bags) and more.
Practical Shooter’s Guide
Thinking of getting started in the Practical/Tactical shooting game? Looking for ways to be more stable when shooting from unconventional positions? Then you may want to read Marcus Blanchard’s Practical Shooter’s Guide (A How-To Approach for Unconventional Firing Positions and Training). Unlike almost every “how to shoot” book on the market, Blanchard’s work focuses on the shooting skills and positions you need to succeed in PRS matches and similar tactical competitions. Blanchard provides clear advice on shooting from barricades, from roof-tops, from steep angles. Blanchard says you need to train for these types of challenges: “I believe the largest factor in the improvement of the average shooter isn’t necessarily the gear; it’s the way the shooter approaches obstacles and how they properly train for them.”
Long Range Shooting Handbook
Ryan Cleckner’s Long Range Shooting Handbook is the best-selling modern book on practical rifle skills. A former U.S. Army sniper instructor, Cleckner is knowledgeable, and his text is well-organized and chock full of good information. You can view Sample Chapters on Amazon.com.
Ryan Cleckner’s highly-regarded Long Range Shooting Handbook is designed as an intro to important fundamental concepts such as MOA vs. Mils, External Ballistics, and Environmental Effects. Included are personal tips and advice based on Cleckner’s years of experience as a sniper instructor and special operations sniper.
The Long Range Shooting Handbook is divided into three main categories: What It Is/How It Works, Fundamentals, and How to Use It. “What It Is/How It Works” covers equipment, terminology, and basic principles. “Fundamentals” covers the theory of long range shooting. “How to Use It” gives practical advice on implementing what you’ve learned, so you can progress as a skilled, long range shooter. This book will benefit any long-range shooter, not just PRS/NRL competitors.