“March Madness”, the annual NCAA college basketball tournament, is already underway — the 2026 Men’s March Madness tournament runs from March 17 to April 6, 2026. Here’s a clever guest article by Hap Rocketto that examines the game of B-Ball and explains why shooting targets is actually more difficult than shooting hoops. This story originally appeared in the Hap’s Corner section of Pronematch.com. Hap is a rare talent in the gun world — a serious shooter who also has unique insights, and a great sense of humor. We recommend you visit Pronematch.com to enjoy the many other interesting Hap’s Corner postings.
by Hap Rocketto
I know shooting is tougher than basketball…. Come on, just how difficult is it for five tall guys to help each other toss a big ball into a basket? Granted basketball is more physically demanding than shooting a rifle, but I think that blasting a quarter-size group into the center of the target at 100 yards all by yourself is a far more difficult task than working as a team to dunk a ball.
Therefore, in the style of former Late Night talk show host David Letterman, I have constructed a list of ten reasons why rifle shooting is tougher than basketball.
TOP TEN REASONS Why Rifle Shooting is Tougher Than Basketball
10. When you get tired in basketball the coach just calls time out and replaces you with someone fresh. Not so in shooting.
9. When’s the last time a basketball player had to make a shot with the sun in his eyes?
8. How often does a basketball player have a perfectly good shot blown out by the wind?
7. If a basketball player places a shot a little higher than intended, no problem. The backboard causes the ball to bounce into the basket. No such luck in shooting.
6. Rifle matches commonly run all day. When was the last time you saw a basketball game run more than an hour or so?
5. If you’re not making your shots in basketball, you can just pass the ball to someone who is hot. No such convenience in shooting.
4. Rifle bullets travel faster than the speed of sound (roughly 300 meters per second). Basketballs top out at around 15 meters per second.
3. A basketball player can shoot from anywhere on the court that is convenient and comfortable. All riflemen shoot from the same distance.
2. A basketball player may shoot as often as the opportunity arises and is not limited to the number of shots taken. A rifle match requires that each rifleman shoot the same number of record shots. If they shoot more than allowed, then a penalty follows.
1. And the Number One reason why shooting is tougher than basketball is that, if you miss a shot in basketball you, or a team mate, can just jump up, grab the ball, and try again. Try that in shooting.
The only real similarity between the two sports is that a competitor attempts to score points by shooting. In rifle it is through a hard-hold and easy squeeze in prone, sitting, kneeling and standing; while in basketball it is via hook shots, jump shots, lay-ups, or the dramatic, ever crowd-pleasing, slam dunk.
About the Author: Hap Rocketto is a Distinguished Rifleman with service and smallbore rifle, member of The Presidents Hundred, and the National Guard Chief’s 50. He is a National Smallbore Record holder, a member of the 1600 Club and the Connecticut Shooters’ Hall Of Fame. A historian of the shooting sports, his work appears in Shooting Sports USA, the late Precision Shooting Magazine, The Outdoor Message, the American Rifleman, the CMP website, and Pronematch.com.
Credit John Puol for finding this article and communicating with Hap Rocketto.
Enjoy the Shooting Sports USA Archives
As we head into spring, many Americans will be spending more time at the range. And competitors will be shooting in rimfire and centerfire rifle matches throughout the country. Here’s an opportunity to learn competition skills, gun tuning methods, and reloading techniques from leading experts. A vast resource of gun-related content is available online for FREE. Check out the Shooting Sports USA Articles Archive. SSUSA maintains a vast digital library with hundreds of articles going back to June 2009.
It’s easy to find back issues of Shooting Sports USA. Here’s how: First, navigate to the latest SSUSA Online Issue. Then click on the “ARCHIVES” icon in the upper right area (indicated with red arrow). When you click on “ARCHIVES”, a window will open with a selection of Shooting Sports USA magazine covers/dates in a vertical column. The most recent issue (November 2025) will appear at the top. You can then scroll down — use the vertical scroll bar to go from November 2025 (the latest issue) all the way back to June 2009. Click any issue cover to read.
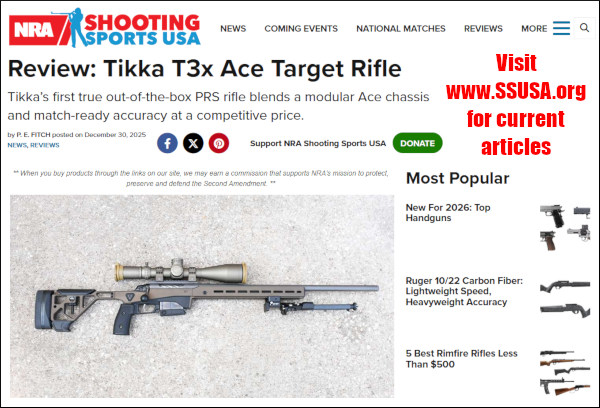
NOTE: It’s wise to use these archived digital magazine resources while you can. The NRA will continue the Shooting Sports USA website, but it has halted release of the monthly Shooting Sports USA digital magazines. Thankfully however, there will be new content posted regularly on the Shooting Sports USA website at SSUSA.org. Shown below is a review of the Tikka T3x Ace Target rifle from December 2025.
Click photo to read online Tikka T3x review.
How to Find and Save Articles
To search back issues, select “MORE OPTIONS” from the toolbar (top left). Then click the “SEARCH” button. When that opens, select either “Search Archives” for ALL back issues or “Search Only this Issue”. When you’ve made your choice, enter your search term(s). For example, you can search for “Camp Perry” or “Palma” or “F-Class Championship”. You can also save any archived issue as a PDF for viewing offline. Just click “SAVE” to download the article you’re currently viewing/reading.
Read Sample Articles
Here are a couple of our favorite SSUSA feature stories from recent years. There are hundreds of other informative articles worth reading.
To support the growing community of new shooters and hunters, Nosler has released a useful, informative video that can help prepare beginners for their first experience at a shooting range. This video was filmed at the Redmond Rod & Gun Club in Central Oregon.
Editor: Regular readers — if you have a friend or family member who is new to shooting, have them watch this video. It does a good job outlining important range etiquette along with safe practices.
Training at a gun range is critical to building foundational firearms skills. Unfortunately, this process can be intimidating for new shooters who are unsure of what a trip to the range fully entails. In this video Randy Newberg (Nosler Pro-Staffer) illustrates key points to help shooters feel safe and confident at any range.
The 7-minute First Trip to the Shooting Range video covers key considerations that apply to all ranges: necessary equipment, firearm safety, range commands, and range etiquette. Differences between indoor and outdoor ranges, as well as range restrictions to consider before your visit are also covered. Newberg also notes: “Before you leave your house, double-check to make sure your firearm is empty”. (Editor: Yes we’ve seen people open their gun cases only to discover their rifle, pistol, or shotgun WAS loaded!)
Important Firearms Safety Rules at the Range
Treat every firearm as if it were loaded.
Always keep your gun pointed in a safe direction.
Never point your firearm at anything you do not intend to shoot.
Always keep your finger off the trigger until your sights are on the target and you are ready to fire.
Always be sure of your target and what is beyond it. (Do NOT shoot unless you know exactly what your shot is going to strike.)
Always comply with ALL Range Commands (and make sure you can hear commands).
Experienced Shooters Should Help Newcomers Learn Safe Procedures
Nosler’s video includes a call-to-action for experienced hunters and shooters to help mentor those new to the sport. As a seasoned shooter you can accompany a new shooter to the range, showing him or her the right procedures. This includes placing rifles on the bench, setting up targets during cease-fires, and properly unloading and clearing weapons. As a mentor, you can also share educational resources that benefit newcomers, and share your effective/safe reloading methods.
It’s easy to lust for those rare showpiece rifles at high-end auctions, but the author cautions readers to target the best deals, stick to your plan, and honor your monetary limits.
Buying at Gun Auctions — Be Crazy, Crazy Good
By Dave Buffington
“They’re crazy!” — You hear that all the time about live gun auctions. People love to rant about how people pay too much money for too many guns at too many auctions. It’s natural. And wrong.
I’ve been attending live gun auctions regularly for more than a decade — as many as 40 a year. I’ve learned that for every item that sells for a silly price, several sell for fair money and some — more than a few — have turned out to be great buys.
Two years ago, I bought a competition-grade STI 1911 in excellent condition for $670 at a live auction. And at the height of the gun-buying frenzy a while back, I scored a highly desirable, rarely-found Anschütz 54.18 MSR in new-in-box condition for just $1,800. I then flipped that Anschütz for $3,000 just two weeks later. That $1200 gain represents a 66% profit — not bad for a little savvy shopping at an auction.
This beautiful SAKO L461 Vixen was a great auction buy … and it is half-MOA accurate as well.
Sweet SAKO L461 Score at Auction
Can you score an awesome deal at a live auction? Absolutely. Above is a .222 Rem SAKO L461 Vixen I got at auction for $1500.00 including Leupold Vari-X II 3-9x40mm scope. Note the highly-figured stock. My SAKO L461 is the “deluxe” model with rosewood forearm tip and grip cap. A similar .222 Rem SAKO L46 (below) with fairly plain wood (and no scope) is selling for $3995.95 at the Custom Shop, a Montana purveyor of fine firearms. I got my SAKO for 38% of the Custom Shop price! SAKO fans will note that the L461 has an internal top-loading 5-shot magazine while the older L46 has a 3-round removable clip. And most folks believe that the newer L461 model (like mine) has a better trigger.
Compare the author’s $1500 Auction-purchased SAKO L461 (above) with this $3995.00 Custom Shop Inc. SAKO L46. This is proof that live auctions can deliver some impressive bargains:
Can you make a mistake? Yes, I’ve bought junk and paid too much for it. But I’ve learned that knowledge is the best vaccine against gun buying mistakes. That’s our next topic.
Know The Auctions
Finding live auctions takes a bit of research, especially during the pandemic. But estates still need to be settled, collections still need to be shrunk and so, guns still need to be sold. Read your local newspaper and shoppers guides. Use online auction search services like AuctionZip.com.
And once you’ve found an auction, know the auctioneer’s rules. Some do background checks. Some don’t. Some charge sales tax. Some don’t. Some charge a “buyer’s premium”. Some don’t. If you’re not sure, ask.
Know Your Targets — Stick to Your List and Avoid Impulse Buys
Especially at the all-gun auctions, it’s easy to be entranced by all the handsome-looking hardware, but some of my worst gun buys have been the impulse buys made at auctions.
So start with a list of guns you want — for target shooting, collecting, whatever — and stick to it. Get to know those guns, research them and for goodness sake, know the potential pitfalls. Some Winchester 52s are prone to the “crack of death”. Certain Brownings from the late 60s and early 70s are afflicted with “salt wood”. You need to know which ones.
Know The Bidding Process
Auction newbies tend to worry a lot about how to bid. I know I did. But don’t. Remember, it’s the job of the auctioneer to get your bid, and once a good auctioneer spots you as a bidder, believe me, he won’t lose you.
The key is to get spotted. So don’t be shy. The auctioneer will likely start the bidding at some reasonable number. As a matter of theater, he’ll then start going down until someone actually bids. Then he’ll start going up again. When you’re ready to jump in, raise your hand and make sure the auctioneer spots you. If you’re not sure, shout something. (“Here!” works fine.) After that, don’t fuss about technique. Just nod yes or no the next time the auctioneer looks at you. (Ziegler Auction photo by Nathan Merkel)
Do understand one small but important detail: The price the auctioneer calls is the price he is looking for, not the price he has. For example, if you’ve bid $250, you’ll then hear him calling for the next increment up — such as “$300, $300, do I hear $300?”.
Misunderstanding that process can lead you to bid against yourself. 99% of auctioneers won’t let it happen, but as I can attest, it’s still embarrassing.
Know Your Price Limits
Auction fever is much like buck fever. You’re struggling to be still while you’re heart is doing its best rendition of “Wipe Out”. So you must, absolutely must, agree with yourself on the maximum price you’ll bid for a gun before the bidding starts. And be sure that maximum price reflects the true purchase cost, including sales tax, background check fees, and the buyer’s premium, if any.
Sticking to that limit is critical. First, because you don’t want to end up spending the mortgage money, but also, because there’s always another opportunity around the corner.
For example, on a cold, damp day last fall, I went to a small outdoor auction in hopes of getting a good buy on a Mauser-made, numbers-matching K98k. Ha! Despite the fact there were fewer than 50 bidders braving the drizzle, the gun sold for a whopping $3,200. (I bailed at $1,500.)
Is this the K98k that sold for $1,200? Or $3,200? The Karabiner 98 kurz (German for “carbine 98 short”), often abbreviated Kar98k or K98k, is a bolt-action rifle chambered for the 7.92×57mm Mauser cartridge.
But just two weeks later, I went to a warm, dry indoor auction with more than 200 bidders in the building. Yet I still managed to get a Mauser-made, numbers-matching K98k for just $1,200, a difference of a whopping $2,000. Crazy? Yes… Crazy good.
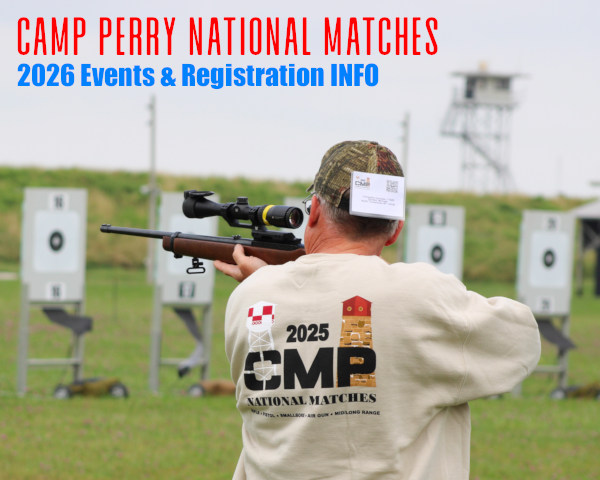
REGISTER Now for CMP 2026 National Matches at Camp Perry
Registration for the Civilian Marksmanship Program’s 2026 National Trophy Pistol and Rifle Matches is now. This year’s National Matches will run from July 12 through August 9, 2026. Review the new 2026 National Matches schedule and other event info on the CMP website at TheCMP.org/cmp-national-matches.
The CMP National Matches, held at the Camp Perry National Guard Training Base since 1907, is conducted via a partnership between the CMP and the Ohio National Guard. The National Matches include multiple indoor and outdoor events, with spectators welcome to watch this noteworthy, century-old competition.
Along with several competitive opportunities for adults and juniors of all experience levels, the National Matches features a variety of educational clinics for marksmen and women as well as retail selections from some of today’s leading industry vendors. Whether participating for the first time, a seasoned competitor or simply observing, the National Matches has something for everyone. All events are open to the public, free for viewing. Spectators are welcome to observe firing on the Camp Perry ranges at any time, with ample parking on-site.
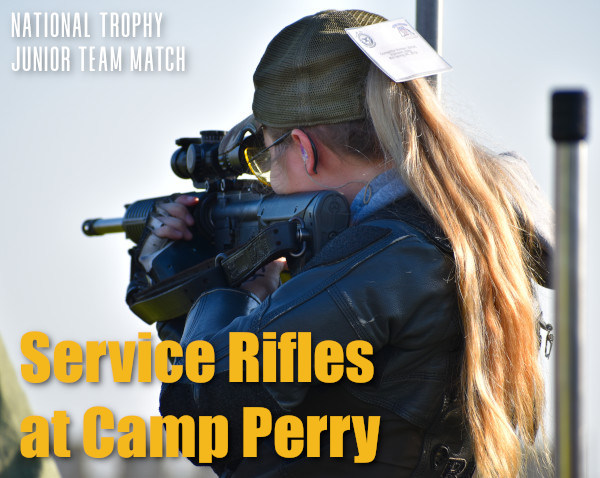
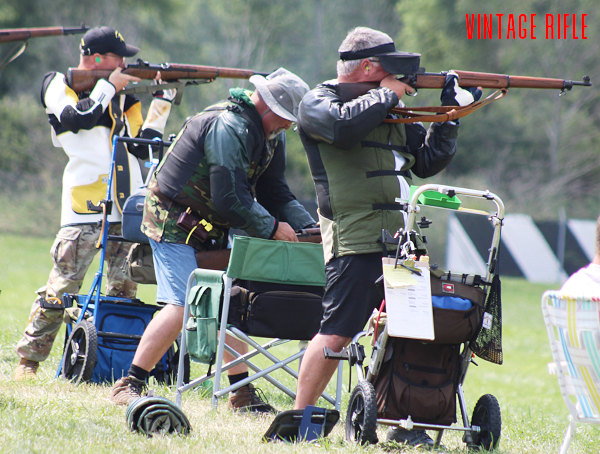
Highpower, Service Rifle, and Vintage Rifle
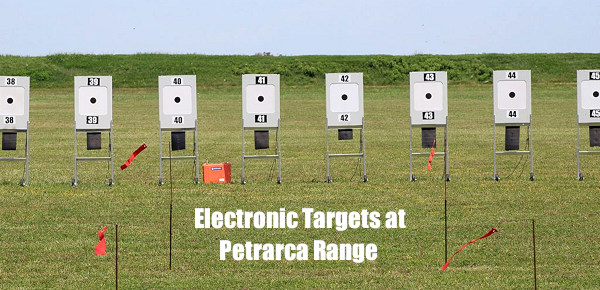
Introduced last year, the National Trophy Rifle series will again be held completely on electronic targets! The schedule of events includes prestigious matches like the President’s Rifle, Hearst Doubles, Rattle Battle, National Trophy Individual and National Trophy Team events. NOTE: The National Trophy Infantry Team Match will still be on paper targets.
A paired Junior Team Match is also on the schedule for young competitors, along with an assortment of vintage and modern military rifle events like the John C. Garand, Springfield and Vintage Sniper matches for individuals at every stage of their marksmanship abilities. Additionally, the M14 Heritage Match is a major attraction.
CMP National Championship Rifle
The CMP National Championship series features three days of 800 Aggregate competitions and a 4-Person Team event. Awards are presented for the leading competitors of each day as well as for the culminating 2400 Aggregate (800×3).
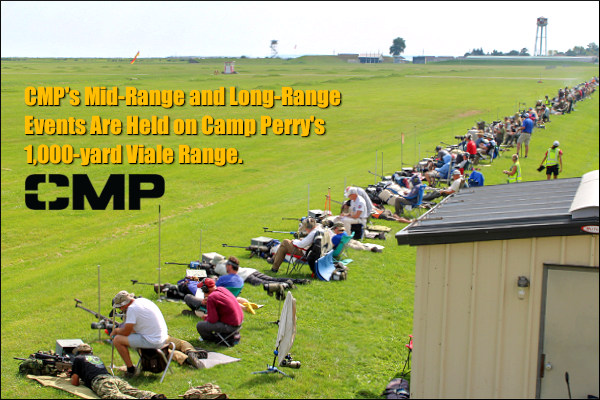
Mid-Range and Long-Range Rifle
The CMP’s National Mid-Range and Long-Range series features both individual and team competitions, fired fully on CMP’s line of outdoor electronic targets. All Mid/Long-Range matches are open to Match Rifle, Service Rifle, Palma Rifle, F-Open, F-TR or AR Tactical categories fired from 600 yards (Mid-Range) and 1,000 yards (Long-Range).
New for 2026: The CMP has added a Mid/Long-Range category for this year: F-Class Practical. This “Practical” class is geared toward new competitors and has more affordable equipment standards. In addition, this summer an International 12-Person Team Match will be held, featuring teams from the United States, Great Britain and Canada. The event will feature a Palma course of fire: record shots at 800, 900 and 1,000 yards.
Rimfire Sporter Rifle
Highlighted as one of CMP’s most popular events, the Rimfire Sporter Rifle Match features .22 caliber competition in open sights (O-Class), telescopic (T-Class), tactical/unlimited (TU) and U.S. military rimfire training rifles (M-Class). The event is perfect for those just beginning in the sport or those looking for a unique challenge on the range.
Like last year, the event will be fired completely on electronic targets! Competitors will be able to enjoy close parking and the covered structure of Petrarca Range.
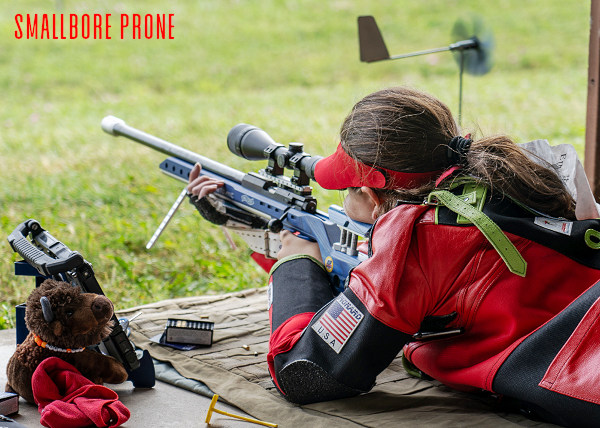
Smallbore Rifle
Likewise, the National Smallbore events will be fired on the same electronic targets as Rimfire Sporter — also setup on Camp Perry’s Petrarca Range. The schedule includes three-position and prone events, complete with an F-Class category for interested individuals.
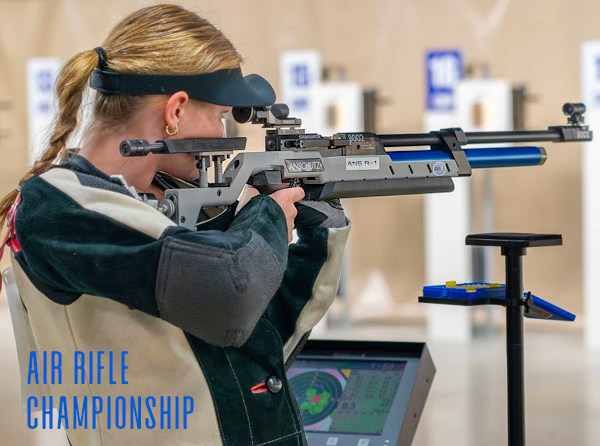
National Air Rifle Championship
The National Air Rifle Championship (60 Shot and Team Match) for adults and juniors will be held at the same time as 3-position smallbore to accommodate those competitors wishing to fire in both events. These are sanctioned USA Shooting Designated Ranking Matches.
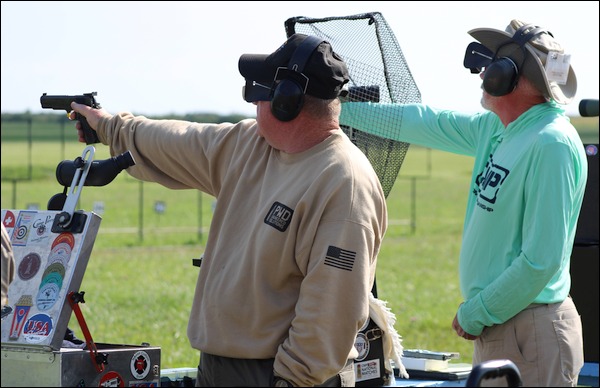
Pistol Events and Glock Challenge
Fired this year on newly minted paper targets branded with CMP’s insignia, the National Pistol events include a mix of traditional matches like the President’s 100 Pistol, National Trophy Individual and National Trophy Team events, along with a series of 900 Aggregate matches for .22, Center Fire and .45 Pistol. The GSSF GLOCK National Challenge will be returning to the schedule in 2026 along with the Service Revolver EIC Match. The National Air Pistol Championship will be held in the evening to allow competitors to take part in the aggregate matches during the day.
National Matches Air Gun Events
For air rifle and air pistol competitors, the National Matches Air Gun events will be offered within the Gary Anderson CMP Competition Center’s 80-point indoor electronic target range – also located on Camp Perry. The air gun events are available through the entirety of the National Matches and appeal to those of any experience level, with supported bench options included.
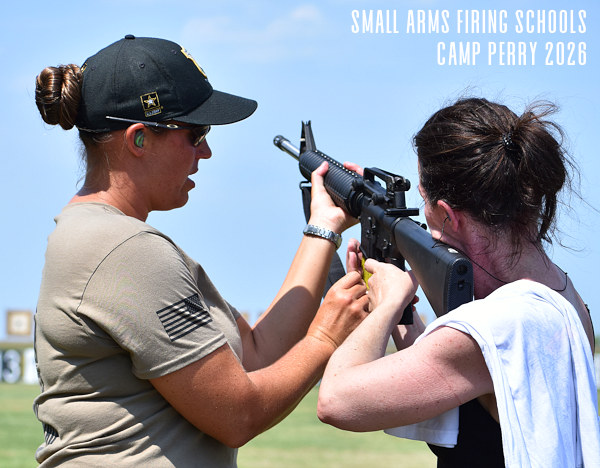
Marksmanship Training Clinics and SAFS
Image shows 2023 National High Power Rifle Champion Amanda Elsenboss (left) providing instruction. Amanda was, a former USAMU Team member, now serves in the National Guard.
Small Arms Firing Schools (SAFS) will be held for rifle, pistol and smallbore rifle. Participants in SAFS are trained by some of the top military instructors in the country on firearm safety and competition basics. All firearms and ammo are provided for the live-fire portion of the clinic. Other clinics during the National Matches include a Rimfire Sporter Rifle Clinic, the CMP Junior Rifle Clinic and the CMP Advanced Highpower Clinic, for more experienced competitors. Most clinics include both classroom and live-fire training on the range.
Sales at CMP Store
Behind the range, Commercial Row offers a variety of items for spectators and competitors – with an array of manufacturers selling used firearms, ammunition, competition gear, accessories, apparel and much more. The CMP North Store, located on the grounds of Camp Perry, allows even more buying opportunities at the Matches with a lineup of military surplus rifles, memorabilia and equipment needs.
Housing at Camp Perry
Housing for the National Matches is currently available on the grounds of Camp Perry. Accommodations include four-person huts, cottages, barracks, RV spaces and camp sites. Camp Perry housing info posted on the Camp Perry Lodging Center site. Also, if Camp Perry base housing is full, numerous hotels are available in the surrounding Port Clinton, Fremont, and Sandusky Ohio areas.
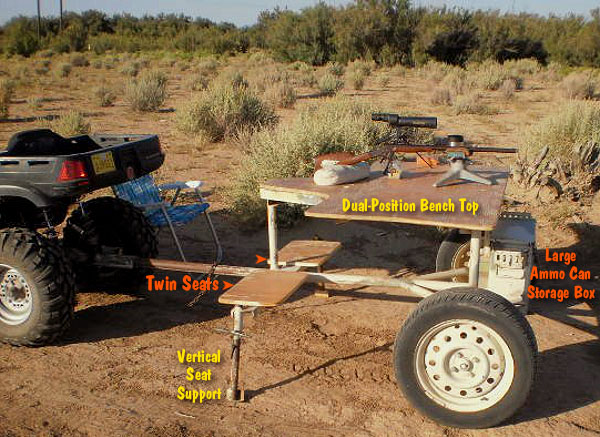
AccurateShooter Forum member John H. of New Mexico (aka “Skratch”) has created an impressive mobile shooting bench that he can haul with his ATV. This trailer-mounted, movable bench is built on a central tubular spine that also serves as the tongue for the trailer, which attaches to a standard hitch. The bench offers two (2) shooting positions so it works for both left-handed and right-handed shooters.
Up front, for storage, a surplus .50-Cal ammo can is secured to the trailer frame. The V-shaped middle section of the wood benchtop looks to be reinforced with a metal stiffener frame on the underside. The front section of the bench is supported by twin tubular uprights attached to the box-section axle housing. The two wooden bench-style seats (on left and right) ride on a cross-tube. At the ends of that cross-tube are adjustable legs for additional support.
Great Rig for New Mexico Varmint Hunting
There are plenty of great varmint hunting areas in Skratch’s home state of New Mexico — you’ll find some huge prairie dog fields there. But to get the best results on a varmint-hunting field session, you need a solid shooting station that can be easily hauled to new locations as needed. It looks like John (aka “Scratch”) has come up with an outstanding “War Wagon” for his New Mexico varmint safaris.
Click on image frames to see full-size photos
Some readers wanted to know how John’s War Wagon is positioned in the field and if it is ever detached from John’s ATV. John answers: “We do unhook the 4-wheeler for target-checking unless we have an extra along which is usually the case. That way we can level the table front to rear. We have an umbrella from a patio table to provide shade on extra warm days.”
War Wagon Construction Details
John told us: “My brother-in-law and I built this mobile bench a few years ago. The axle, wheels and tire are a tag axle from a small Chevy car, obtained from a salvage yard for about $35-$40 a decade ago. The tubular frame is drill stem, while the bench-top and seats are 3/4′” plywood. Under the plywood we fitted rails so we can slide our target stand under the benchtop for secure travel. The total cost for everything (including storage box) was about $250-$300.”
We set the bench and seat heights so that, with adults, the rifle sets straight level to the shoulder. For the smaller ‘younguns’ we just use a sofa pillow to raise them up. (Yes, adjustable seat heights would be great.) The ammo box holds our rifle rest, sand bags, spotting scope, and miscellaneous gear. Options are a couple of lawn chairs, and a cooler of brew (for after the shooting is done).
Emil Praslick III is widely recognized as one of the greatest wind wizards on the planet — a master at identifying wind value and direction, and predicting wind cycles. As coach of the USAMU and top civilian teams, Emil has helped win many high-level championships. In the three videos we feature today, Emil, who works with Capstone Precision Group (Berger, Lapua, SK, Vihtavuori) and Team Applied Ballistics, explains how to determine wind direction and velocity using a variety of indicators. Praslick, now retired from the U.S. Army, was an 18-time National and 2-time World Champion coach with the USAMU.
Video ONE: Wind Theory Basics — Understanding “Wind Values”
In this video from UltimateReloader.com, Emil explains the basics of modern wind theory. To properly understand the effect of the wind you need to know both the velocity of the wind and its angle. The combination of those variables translates to the wind value. Emil also explains that the wind value may not be constant — it can cycle both in speed and velocity. Emil also explains some of the environmental conditions such as mirage that can reveal wind conditions.
Video TWO: Determining the Direction of the Wind
Key Point in Video — Find the Boil
Emil explains how to determine wind direction using optic. The method is to use spotting scope, riflescope, or binoculars to look for the “Boil” — the condition in mirage when the light waves rising straight up. The wind will generate that straight-up, vertical boil in your optics when it is blowing directly at you, or directly from your rear. To identify this, traverse your scope or optics until you see the boil running straight up. When you see that vertical boil, the direction your optic is pointing is aligned with the wind flow (either blowing towards you or from directly behind you).
Video THREE: The No Wind Zero Setting
In this second video, Emil defines the “No-Wind Zero”, and explains why competitive shooters must understand the no-wind zero and have their sights or optics set for a no-wind zero starting point before heading to a match. In order to hit your target, after determining wind speed and direction, says Emil, “you have to have your scope setting dialed to ‘no wind zero’ first.”
Coach of Champions — Emil Praslick III
SFC Emil Praslick III, (U.S. Army, retired) works with Berger Bullets and Applied Ballistics. Emil served as the Head Coach of the U.S. National Long Range Rifle Team and Head Coach of the USAMU for several years. Teams coached by Emil have won 33 Inter-Service Rifle Championships. On top of that, teams he coached set 18 National records and 2 World Records. Overall, in the role of coach, Praslick can be credited with the most team wins of any coach in U.S. Military history.
We are finally seeing prices drop on loaded ammo, and there are some notable inventories of ammunition right now at Midsouth, Palmetto State Armory, Powder Valley and Precision Reloading. We are even starting to see ample supplies of large-caliber hunting rifle ammunition — something hard to find a year ago.
Thankfully, if you shop around aggressively, you can now find many types of ammunition at reasonable prices. By using AmmoSeek.com you can instantly compare ammo prices from dozens of sellers. AmmoSeek monitors more than 180 online vendors — checking current pricing and available inventory, for pistol, rifle, and shotgun ammunition. Looking for .22 LR ammo for your rimfire trainer or .45 acp ammo for your 1911? Just select the cartridge type from the “Quick Seek” list on the right. Likewise you can find .223 Rem and .308 Win Rifle ammo with one click.
If you haven’t sourced ammo online before, note that, for nearly all jurisdictions, it IS legal to order ammunition online and have it delivered to you at home in most states. But check your state and local laws! California, for example, has prohibited direct ammo shipments to ordinary customers.
Got Ammo? Here’s just part of the vast inventory at Skagit Arms in Washington State.
Use Ammoseek.com to Find Reloading Components Too
Ammoseek.com also lets you search for reloading components, including powder, primers, brass, and bullets. This is a huge time-saver. You can instantly check a dozen or more vendors to see if a particular type of powder is in stock. Likewise, you can quickly check for primer availability. If you have a big match coming up and are short on primers — this could solve the problem. To search for components, from the AmmoSeek home page, click the gray “Reloading” Tab (see below), then select Bullets, Brass, Primers, or Powder from the pull-down menu.
AmmoSeek.com FAQ Page
If you have questions about using AmmoSeek.com, visit the AmmoSeek FAQ Page. You’ll find details on how the search engine works. Here’s one FAQ:
How often does the AmmoSeek engine process its ammunition data?
Every minute or two! AmmoSeek is constantly updating ammunition data 24 hours a day, 7 days a week, automatically. Individual retailers are updated at least hourly, most most are updated much more often. Still, however, there’s always the possibility that items can go out of stock the moment after our site is updated, so it’s not always possible to be 100% accurate.
Old “Number 2″ belonging to Ray Gross. Click Photo for full-screen Image.
Ray Gross, one of America’s great rifle competitors, has served as captain of the United States F-TR Team. While Ray is best known for his F-Class shooting and leadership, Ray is also an experienced service rifle shooter, who secured his Distinguished Rifleman Badge 31 years ago. Ray has shot many rifles during his competitive shooting career, but the M1A rifle above held a special place in Ray’s heart. This old semi-auto earned Ray his Distinguished Badge, and he’ll never forget that, though he parted with the rifle in 2016.
Posting back in 2016, Ray told us:
“I said goodbye to an old friend… Affectionately known as ‘Number 2′, she is the rifle that I earned my Distinguished Rifleman Badge with in 1995 (#1159).
That rifle was also responsible for a fair amount of Venison in the ’90s, as well. But since then, she has spent a lot of time in the closet. Last time I got her out was to destroy a bunch of hard drives containing evidence collected during my Computer Forensics days. She deserved better than that.
I will miss the beautiful sound of all that American steel slamming into battery when I tripped her bolt.” – Ray Gross
Ray Gross was profiled in Shooting Sports USA a few seasons back. Ray explained how he started his competitive shooting career with an M1A rifle:
How did you begin in competitive shooting?
I began competing in 1991, at age 27. I bought an M1A and joined the Midland County Sportsman’s Club. One day I was at the club shooting the M1A when a member, Rich Koskela, came over and invited me to join them shooting competitions. Up until that point, I had no idea there was such a thing as NRA Competitive Shooting and I had been a member since 1986. Anyway, Rich and some of his friends showed me the basics and at my first match, I finished in the top half and first MU.
What are your major accomplishments in the shooting sports?
In 1995, I earned the Distinguished Rifleman Badge and a few years later switched to Palma rifle. On the way to making my first Palma team in 2003, I won the Army Cup, the Andrus trophy twice and the Sierra Trophy once. As a coach, I won the Herrick match, and seven F-TR National Championship team matches. Internationally, I’ve coached three gold medal America Match teams (The USA has only won four in Palma Rifle), and earned a Silver and Bronze coaching on the Palma Team in 2015 and 2019. In 2017, I led the U.S. F-TR Team to a World Championship. In 2019, I also won the NRA ELR National Championship (25-lb max Division).”
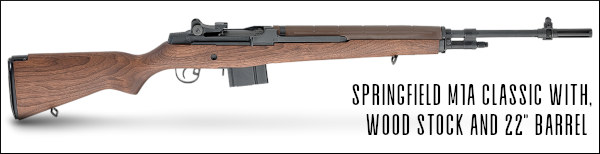
“Descended from the M1 Garand, the M14 utilized multiple improvements that made it a far superior firearm for combat and a much better rifle for competition.” — Dick Jones, Shooting Sports USA.
In the April 2018 issue of Shooting Sports USA, you’ll find a good article on the civilian version of the M14, now sold commercially as the Springfield M1A. An evolution of the battle-proven M1 Garand, the M14 was designed to shoot the 7.62×51 (.308 Win) round instead of the larger .30-06 Springfield cartridge used in WWI, WWII and Korea. While the vast majority of today’s M1As are chambered for .308 Win/7.62×51, Springfield Armory also produces a 6.5 Creedmoor version.
Dick Jones reports that accurized M14/M1As could post remarkable scores: “The accuracy potential of the M14/M1A is unquestionable. During their reign as service rifles, they produced multiple perfect 200 scores at 600 and 1000 yards in the hands of top shooters. This is a difficult feat with a modern, scoped, magnum-caliber rifle and remarkable with an iron-sighted battle rifle. Good competition rifles can group 10 shots under one MOA, and the meticulously-massaged rifles used by the top shooters during my career would consistently put up 10 shots under an inch at 200 yards off a test cradle.”
For many years, the semi-auto version of the M14 was “top dog” in iron sights Service Rifle competition. Now that discipline is dominated by .223 Rem (5.56×45) AR-type rifles, but the bigger .308-caliber rifle, now sold as the M1A, remains popular. And in non-pandemic years, the CMP hosts a major M1A Match at Camp Perry, sponsored by Springfield Armory. This is a very popular event with 100+ competitors and significant cash prizes.
This Springfield Armory video explains M1A field-striping, cleaning, and maintenance.
As racing improves automobiles, competition improves firearms, and the current crop of Springfield M1As, from the Basic to the top-of-the-line Super Match and Loaded models, reflects the years of development. The M14 and its variants are … still considered by many to be the best battle rifle in the history of the U.S. Military. — Dick Jones, Shooting Sports USA
Military Version Operation Revealed — M14 Training Film
The original military version of the M1A was the select-fire M14. The 27-minute official U.S. Army video below demonstrates the operation of the M14. Field-stripping is shown from the 5:13 time-mark through 8:30. Cut-away drawings show the M14’s gas operation at 8:40.
Watch M14 Functioning Cycle Starting at 9:25 Mark:
The M14’s complete 8-step functioning cycle is demonstrated from the 9:25 time-mark through 22:41. These eight operations are: 1) Feeding; 2) Chambering; 3) Locking; 4) Firing; 5) Unlocking; 6) Extracting; 7) Ejecting; and 8) Cocking. This movie is fairly long, but fans of battle rifles will find it well worth their time. Every M1A owner should definitely watch this video start to finish.
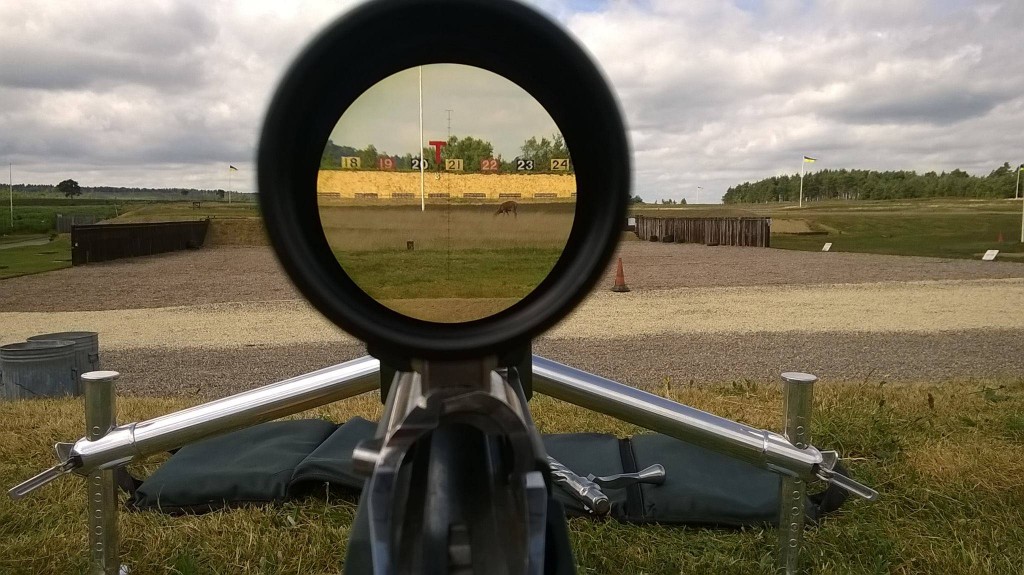
What’s wrong (or right?) with this picture? Does the “F” in F-class refer to “Fauna”? Look carefully at this Bisley Range photo taken by Australian R. Hurley while looking downrange through his March 8-80X scope. The photo was taken in 2015 at the Bisley National Shooting Centre in the UK.
The Story Behind the Photo
British shooter T. Stewart reports: “I was there when this photos was taken. All I can say was that Mr. Hurley was firmly reminded that should said deer accidentally jump in front of his bullet … he would spend five years ‘At Her Majesty’s Pleasure’.”
“That morning we had five deer moving across the targets, literally blocking the V-Bull. Since we were on the 900-yard Firing Point, and elevated for such, obviously the bullet would pass well above them. But they do NOT move or flinch at the noise or passing bullets since they are not hunted on the Bisley Ranges. Earlier this year we saw a herd of 20 or so deer grazing slowly across the Range.”
More Fauna Findings…
Apparently Bisley is not the only place were “the deer and the antelope play”. In Canada, on the Connaught Ranges near Ottawa, Ontario, shooters often encounter a variety of wildlife. William McDonald from Ontario says: “Animals are a common sight on the Range. Along with deer we see geese, turkeys, and coyotes on a daily basis.”
Likewise, E. Goodacre from Queensland, Australia often sees ‘Roos on his home range: “I shoot at Ripley, Australia, and shooting is regularly interrupted by kangaroos. Our last silhouette match was delayed by an hour while 30 ‘Roos dawdled across — silly buggers!”
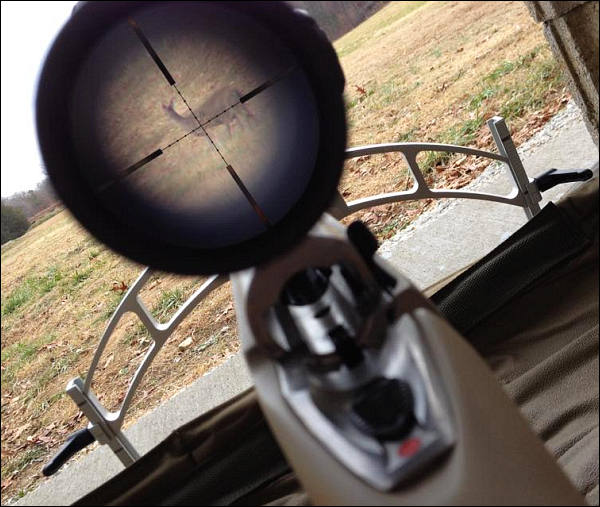
R. Hurley wasn’t the first fellow to view deer through his F-Class rifle’s scope. After seeing Hurley’s photo from Bisley, B. Weeks posted this image, saying: “Been there, done that!”


 by Hap Rocketto
About the Author: Hap Rocketto is a Distinguished Rifleman with service and smallbore rifle, member of The Presidents Hundred, and the National Guard Chief’s 50. He is a National Smallbore Record holder, a member of the 1600 Club and the Connecticut Shooters’ Hall Of Fame. A historian of the shooting sports, his work appears in Shooting Sports USA, the late Precision Shooting Magazine, The Outdoor Message, the American Rifleman, the CMP website, and Pronematch.com.


 Know The Bidding Process
 Know Your Price Limits


 Ray Gross was profiled in