Hunting season is underway now in many states. That means it’s time to inspect all your hunting gear, including your scope set-up. If you have a new optic, you’ll want to get it mounted correctly on your current rig. And if you have a new hunting rifle, you’ll need to mount the properly rings and install the riflescope so that you have the correct eye relief.
A proper scope installation involves more than just tensioning a set of rings — you need to consider the proper eye relief and head position, and it should be leveled correctly. This video shows a simple, quick method to mount a scope. The method assumes that the reticle (cross-hairs) are square without the turret. You’ll want to confirm that with a plumb line hanging straight down, a procedure you can do indoors.
In this NSSF video, Ryan Cleckner shows how to set up a scope on a hunting or tactical rifle. Ryan, a former U.S. Army Sniper Instructor, notes that many hunters spend a small fortune on equipment, but fail to set up their rifle to use the optics optimally. Cleckner likens this to someone who owns an expensive sports car, but never adjusts the seat or the mirrors.
Ryan notes that you want your head and neck to be able to rest naturally on the stock, without straining. You head should rest comfortably on the stock. If you have to consciously lift your head off the stock to see through the scope, then your set-up isn’t correct. Likewise, You shouldn’t have to push your head forward or pull it back to see a clear image through the scope. If you need to strain forward or pull back to get correct eye relief, then the scope’s fore/aft position in the rings needs to be altered. Watch the full video for more tips.
Tips on Mounting Your Scope and Adjusting Your Comb Height:
1. Normally, you want your scope mounted as low as possible, while allowing sufficient clearance for the front objective. (NOTE: Benchrest shooters may prefer a high mount for a variety of reasons.)
2. Once the scope height is set, you need to get your head to the correct level. This may require adding an accessory cheekpad, or raising the comb height if your rifle has an adjustable cheekpiece.
3. Start with the rifle in the position you use most often (standing, kneeling, or prone). If you shoot mostly prone, you need to get down on the ground. Close your eyes, and let you head rest naturally on the stock. Then open your eyes, and see if you are too low or too high. You may need to use a cheekpad to get your head higher on the stock.
4. If your scope has a flat on the bottom of the turret housing, this will help you level your scope. Just find a flat piece of metal that slides easily between the bottom of the scope and the rail. Slide that metal piece under the scope and then tilt it up so the flat on the bottom of the scope aligns parallel with the flats on the rail. Watch the video at 8:40 to see how this is done.
The 41st Annual Gun Rights Policy Conference (GRPC) takes place in Dallas, Texas on September 25 through 27, 2026. Co-hosted by the Second Amendment Foundation (SAF) and the Citizens Committee for the Right to Keep and Bear Arms (CCRKBA), this is one of the most important gatherings of Second Amendment legal experts and Federal ATF and DOJ administrators.
The 2026 GRPC event will be held at the Westin Dallas Fort Worth Airport hotel. This year there is a modest $25 Registration Fee which includes access to all Gun Rights Policy Conference events, including evening receptions on Friday and Saturday. The fee also includes coffee service during conference hours and boxed lunch on Saturday.
Note: 2026 GRPC Registration ends Friday, 09/11/2026 at 11:59pm EDT. Visit SAF.org/GRPC to REGISTER.
This year’s keynote address will be given by the Honorable Roger T. Benitez (Ret.), a highly respect Federal Judge who authored many landmark decisions while serving as a Federal District Judge in California. Judge Benitez authored multiple key decisions which have helped to restore and safeguard gun rights in California. Judge Benitez is considered to be one of the most important judicial defenders of the Second Amendment in the post-Heller era. Other notable speakers are ATF Director Rober Cekada, and William Kirk, Second Amendment attorney, and host of the Washington Gun Law YouTube channel.
Additional Notable Speakers Will Include: Robert Leider, ATF Chief Counsel Barry Arrington, Acting Chief of Civil Rights Division (2d Amend. section), U.S. Department of Justice Joseph Greenlee, NRA Institute for Legislative Action Litigation Counsel Office Alan M. Gottlieb, Founder and Executive V.P., Second Amendment Foundation Adam Kraut, Executive Director, Second Amendment Foundation Chris Boeck, General Counsel and Chief Legal Officer at Silencer Shop Mark Smith, Constitutional lawyer and host of The Four Boxes Diner YouTube Channel Cam Edwards, Editor of BearingArms.com and the host of the Cam & Company podcast Brandon Herrera, Second Amendment advocate and Congressional candidate
Pre-Conference AMM-Con Event
In addition to attending GRPC, registrants can also participate in the AMM-Con pre-conference event on Friday, September 25. This is a gathering of leading Second Amendment media personnel.
2026 GRPC Official Sponsors
GRPC 2026 is sponsored by NSSF, USCCA, U.S. Law Shield, Silencer Shop, Colt, Vortex, Magpul, Credova, Volquartsen, Trijicon, GrabAGun, RAYVN Group, AZFirearms Auctions, and Taurus.
Ace tactical shooter and gunsmith Jim See of Elite Accuracy LLC has tested a Frankford Arsenal rotary brass tumbler. Like the older Thumbler’s Tumblers, this can tumble your cases in a liquid solution. The wet-tumbling process worked very well Jim reports. Posting on Facebook, Jim noted: “I was super impressed with the Frankford Arsenal rotary tumbler and cleaning packs they sent me. I ran 350 pieces of brass for one hour. They now look great.” Jim appreciated not having to deal with dry tumbling media, such as crushed walnut shells. Dry media produces dust and can leave residues or clog flash-holes.
Interestingly, Jim recommends you try wet-tumbling WITHOUT using stainless media. At least give it a try. Tumbling without media simplifies the process and you don’t have to worry about pins stuck in flash-holes or case-necks*. Jim reports: “Stainless steel pins come with the Frankford kit, but mine hit the trash right out of the box. There is no need to clean the inside of your cases 100% and that’s all the pins add to the equation. The brass bumping brass with hot water and Frankford’s liquid cleaner works great all by itself.” One wag stated: “That’s great to hear. Stainless steel pins are a PITA.”
Other Facebook posters concurred with Jim’s evaluation of the Frankford Arsenal Rotary Tumbler:
“I’ve had one for a couple years, and it works well. I usually run about 250-300 Dasher cases at once in it. But I use the pins because I’m OCD about clean brass.” — David W.
“I’ve had one for a year and a half and it definitely works with or without pins.” — Luke C.
“I got one about six months ago and have yet to use any stainless steel media [pins]. I just use some dawn, distilled water, and Lemi Shine®. Turns nasty 5.56 range brass bright and shiny.” — Brian D.
“I don’t use the pins either and use a combination of Dawn soap and Lemi Shine.” — Jon N.G.
This video shows how to assemble and operate the Frankford rotary tumbler. But note, Jim See does NOT feel that it is necessary to use stainless media.
How to Dry Your Brass — Hair Dryer Vs. Machine
The downside of wet tumbling is that you end up with a pile of wet brass at the end of the cleaning cycle. There are many ways to dry brass, from drying in the sun to using a kitchen oven (be careful not to “overcook” your brass). One Facebook poster asked Jim: “What is your drying method for wet brass, and how long does it take?”
Jim See replied: “To start I just drain off the dirty water, and rinse the brass with clean hot water. Then I roll the brass on a towel for 30 seconds and put the brass in a one-gallon bucket. Next I insert a hair dryer in the bucket (with the brass) and let it run for about 5 minutes. With this procedure, the drying process for me is done in less than 10 minutes.”
Jack Lanhart has another method: “I use a food dehydrator. It takes 30 to 45 minutes.”
For those who don’t want to mess with towels and hair dryers, Frankford Arsenal offers a matching Platinum Series Case Dryer ($67.99 on Amazon) that simplifies the process of drying brass. Lyman also makes an excellent Cyclone Case Dryer ($81.99 on Amazon). These drying machines both have multiple levels so you can separate different types of cartridge brass. Lyman states that “The forced heated air circulation of the Cyclone will dry your brass inside and out within an hour or two, with no unsightly water spots.” The Lyman dryer can also be used for ultrasonically-cleaned gun parts.
*The Frankford Rotary tumbler does include media separators if you choose to use the provided pins or other media. CLICK HERE for diagram showing how to use media separators.
When shooting targets, the closer to the center the better the result. But this is not necessarily true when it comes to using jags and patches. There are some good reasons to try spiking your patches away from the center. This Creedmoor Sports Tech Tip explains why you may want to spike (puncture) your patch away from the center. CLICK HERE to order patches and Swab-Its cleaning bore tips from Creedmoor Sports.
You begin to push your first patch down the barrel and you notice it is extremely tight and then it jams! How can this be? A commonly overlooked solution to remedy the frustrating occurrences of overly tight or jammed patches is what we like to call “Side-Spiking”. Side-Spiking is super simple and works!
“Side-Spiking”, as the words suggest, refers to moving your patch spiking position from the center of the patch towards the corner of a square patch or the edge of a round patch.
Moving From Center-Spiking To Side-Spiking
The closer toward the edge of the patch you spike your jag, the looser the patch will be when pushed down the bore.
Important: Be careful to not go to the very edge of the patch. Leave enough patch material to fully cover the first set of rings on your jag as this insures your jag is properly centered in the bore and that no contact with the rifling will occur.
Proper Side-Spiking Location Creedmoor Sports recommends side spiking all wet patches. This allows for a looser patch in the bore which removes gross powder fouling and leaves more cleaning solution behind to start working on the remaining fouling.
When a tighter patch is needed, simply move your spike closer toward the center of the patch. The closer to the center of the patch you get, the tighter the patch will become in the bore. The objective is to have a snug-fitting patch that allows you to smoothly push your rod down the bore. Remember you do not need to end up in the center of the patch!
Bore-Tech Patch Size Selection Chart Recommends Patch Sizes by Caliber:
Close-up view of a sectioned case. This one here was “fixin’ to pop”, observed Glen Zediker.
Here are highlights from an article Glen Zediker wrote for the Midsouth Blog. In that article Glen, who sadly passed away in 2020, focused on cartridge brass. Glen identified the most common failures that appear with brass that has been shot multiple times, or which has been fired at excessive pressures. Glen explained some simple ways to check your cartridge brass to detect “early warning signs” of case failure, particularly case head separation, which can be very dangerous.
How Cases Degrade with Multiple Firings By Glen Zediker
This article explains when, and then how, to check after the progress of changes commencing with the firing on a new case. It’s the “progress of degeneration,” in a way of looking at it because the concern is getting a handle on when enough change in the brass has come about to require attention. Or abandonment. As said then, for me that’s 4 firings. That, as said last time, is when I might see changes that need attention. Also as said, that figure didn’t come out of a hat, but from my own notes in running my competition NRA High Power Rifle loads. [Editor’s Note: With Lapua brass, using moderate loads, in bolt-action rifles, we typically get about 10 good (match-worthy) firings. But if you anneal your Lapua brass, and run modest pressures, Lapua brass can perform well for 20 or more load cycles.]
The areas most affected are the case neck and case head area. Case neck walls get thicker [but] the case head area body walls get thinner. Primer pockets get shallower and larger diameter.
This case shows a cracked neck AND a crack (separation) above the case head. Zediker says it is “rare to see one case with both of the most common failures. [This case] was attacked by an M14.”
Case Head — Causes of Separation and Cracking
When a case is under pressure during firing, the brass, like water, flows where it can, where it’s more free to move. Of course, the chamber steel limits the amount it can expand. The case shoulder blows fully forward and the case base is slammed back against the bolt face. There is, therefore and in effect, a tug on both ends — it gets stretched. The shoulder area is relatively free to expand to conform to the chamber, but the other end, the case head area, is not. Since that’s the area of the case with the thickest walls, it doesn’t expand “out” much at all. What it does is stretch. The “case head area,” as I refer to it here, is the portion of the case above the web, which is just above the taper that leads in to the extractor groove. The “area” extends approximately an eighth-inch up the case body.
Here’s a “pressure ring.” You’ll see this after firing, if you see it. And, if you see it, that case is done. The bright ring indicates excessive stretching, which indicates excessive thinning. If you see a ring circling the case, noticeable because it’s lighter color than the case body, and it’s in this area, I’d say that case is done. And that’s right where a “head separation” occurs. It can crack and also blow slap in two, and that’s the “separation” part of case head separation.
Photo courtesy GS Arizona.
This is a spot to keep close watch on as cases age. It is also the area that is more “protected” by sizing with less case shoulder set-back. That is, pretty much, where the freedom for the stretching movement in this area comes from (the case shoulder creates a gap). If you’re seeing a sign that a head separation [might happen with relatively few firings], chances are the shoulder set-back is excessive, and also… the load pressure level.
Bent Paper Clip Case-Wall Gauge
Editor: You can use a bent paper clip to detect potential case wall problems. Slide the paper clip inside your case to check for thin spots. GS Arizona explains: “This simple little tool (bent paper clip) will let you check the inside of cases before you reload them. The thin spot will be immediately apparent as you run the clip up the inside of the case. If you’re seeing a shiny line on the outside and the clip is really hitting a thin spot inside, it’s time to retire the case.” Photo by GS Arizona.
Monitor Primer Pocket Dimensional Changes
Another case-head-area and pressure-related check is the primer pocket. As said, the primer pocket will get larger in diameter and shallower in depth each firing. As with many such things, the questions are “when” and “how much,” and the main thing, “how much?”
If the pocket gets excessively shallow, and that’s judged by a primer that seats fully but isn’t at least a tick below flush with the case base, there could be function issues. There’s a risk of a “slam-fire” with a semi-auto that uses a floating firing pin, and, if there is actual protrusion, that has the same effect as insufficient headspace. A primer pocket uniformer can reset the depth of a shallowed primer pocket to what it should be, but the real test for me is how easily the next primer seats into it. If it’s significantly less resistance, I’ll say that case is done. Shallower can be refurbished. That’s a primary function of a primer pocket uniformer. Larger diameter, though, can’t be fixed. I’ve mentioned in another article or two that, any more at least, my main gauge of load pressure has become how much primer pocket expansion there’s been.
Federal Court Holds that New Mexico Gun Waiting Period Law Is Unconstitutional
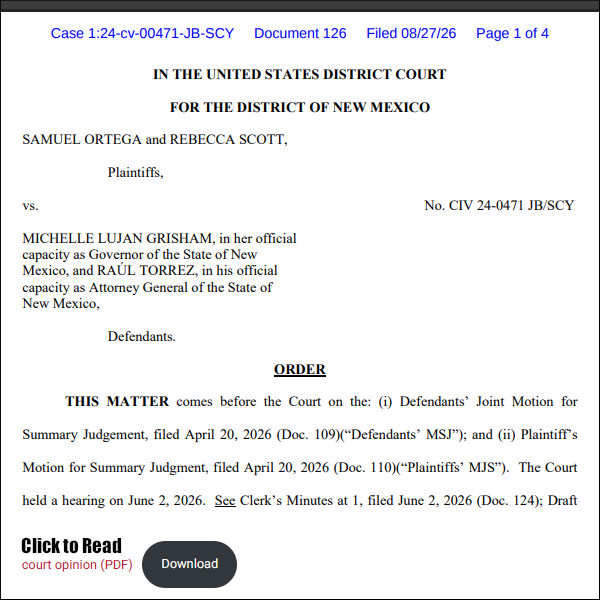
The U.S. District Court for the District of New Mexico has granted summary judgment and entered final judgment holding New Mexico’s seven-day firearm waiting period unconstitutional in Ortega v. Grisham. The case was brought by the National Rifle Association and Mountain States Legal Foundation (MSLF), in partnership with the National Shooting Sports Foundation (NSSF).
Enacted in 2024, the New Mexico law requires purchasers to wait seven (7) days before taking possession of a newly purchased firearm — even after immediately passing a federal background check confirming they were not prohibited from owning firearms. The NRA and MSLF filed suit the day the law took effect, filing on behalf of plaintiffs Samuel Ortega and Rebecca Scott. See: USACarry.com Report.
History of Legal Challenge to New Mexico Waiting Period Law
On August 19, 2025, the U.S. Court of Appeals for the Tenth Circuit held that New Mexico’s gun waiting period violates the Second Amendment. The court ruled that the right to keep and bear arms includes the lawful acquisition of arms and that “cooling-off” periods are a modern invention unsupported by the nation’s historical tradition of firearm regulation. On December 22, 2025, the Tenth Circuit denied the State’s petition for rehearing en banc.
After the case returned to the District Court, New Mexico’s lawyers argued that the Court was not bound by the Tenth Circuit’s decision and the NM waiting period law should be allowed to stand. However, District Judge James O. Browning concluded that the court was bound by the Appellate ruling and granted judgment to the plaintiffs on Thursday, August 27, 2026.
John Commerford, NRA-ILA Executive Director, praised the outcome in this case: “The NRA’s legal team has secured another historic victory by striking down New Mexico’s unconstitutional waiting-period law. A right delayed is a right denied, and the court correctly held that forcing law-abiding citizens to wait after passing a background check cannot be squared with the Second Amendment. Under New York State Rifle & Pistol Association v. Bruen, the NRA’s landmark 2022 case, waiting period laws like this fail because they have no analog in the nation’s historical tradition of firearm regulation.”
This video covers the December 2025 Ortega v. Grisham decision by the 10th Circuit Court of Appeals, which held New Mexico’s gun waiting period laws to be unconstitutional. After seeing the law struck down by a 3-judge panel of the 10th Circuit, the State of New Mexico appealed to the full en banc panel. But 10 of the 12 judges in that Court have denied that request. The case was then send back to the District Court, which issued its Summary Judgment and Final Judgment last week.
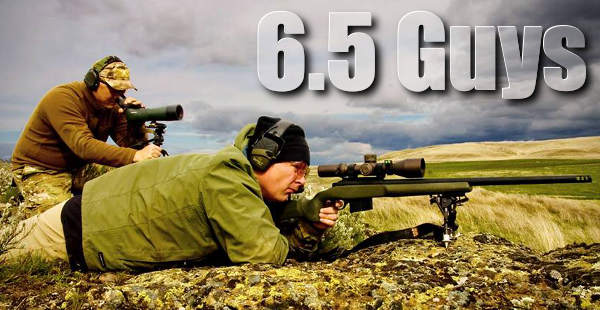
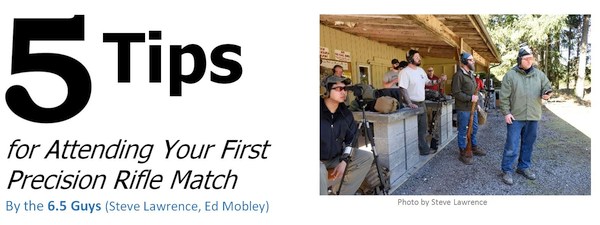
Our friends, Ed Mobley and Steve Lawrence, aka the “6.5 Guys”, have written an excellent article on getting started in practical/tactical competition. If you are new to the game, these tips can help you save money, progress faster, and have more fun. Here are article highlights, but we recommend you read the full story,5 Tips for Attending Your First Precision Rifle Match, onwww.65guys.com.
We often meet people who are new to long range precision shooting, and want to improve their knowledge and skill level. However, they aren’t sure if they are ready to sign up to compete in a match. They often ask, “What knowledge or skills are necessary to compete in a match?” Others may state, “I need to purchase this gear or that gear before I can attend a match”. For those guys who have a strong interest in precision rifle shooting, and who wish to chec out a precision rifle match, below are Five Tips to make it a positive experience.
TIP ONE: Make Plans and Commit to Go
First you need to start by finding a match to attend. This may entail a little bit of research and investigative work on your part to find what matches are scheduled in the next few months. We recommend starting with any match that may be within a reasonable driving distance. This may likely be a local “club” match, many of which are held on a regular basis. These make great venues because it will provide an opportunity to meet some of the regular attendees as well as shooters that are from your geographic area. Additionally, most of the smaller matches are a little more relaxed in terms of level of competitiveness.
Once you decide on the match you want to attend, do your homework. This means finding out if you need to pre-register or pre-pay the match fee. Commit to going by registering for the match and putting it on your schedule. Be sure to find other useful information for questions such as:
— What time should I arrive?
— Is there a mandatory safety briefing for new shooters at that venue?
— What is the travel time required to get to the match site?
— How many stages will there be?
— Is there a description of the stages available before the match?
— How many rounds should you bring?
— Are there special equipment requirements? (E.g. do you need chamber flags, is there a pistol stage?)
TIP TWO: Bring What You Have
(Don’t Spend a Fortune at the Start)
Some new shooters often assume they need a custom match rifle or all of the miscellaneous shooting gear associated with long range precision shooting to compete in match. While having a Kestrel weather meter and a high quality laser range finder and other shooting accoutrements are invaluable kit, you will find other shooters at your first match that will provide you with the information and coaching you need to get on target.
In fact, the only gear you really need to bring is a scoped rifle with a bipod and ammo capable of consistently shooting within one MOA. Also, be sure to know the ballistic drops or have a ballistic drop table prepared for your rifle/ammo to dial the correct DOPE on your scope for different target ranges. Many of the other participants at the match will be willing to let you borrow a support bag, bipod, tripod or other gear if you need one — just ask. Don’t use the excuse of not having the right gear to delay getting out to a match!
One reason not to make a big initial investment in a new rifle and assorted gear before competing, is we’ve seen a number of people come into the sport and try it for a year and then make the decision to move on to something else.
TIP THREE: Be Prepared to Learn
As a new shooter at a match, there is no better opportunity to learn. We often look to our local club matches as a group ‘training’ session to prepare for the bigger matches. You will find competitors at all levels of skill and many of your fellow shooters will enthusiastically provide helpful advice once they learn you are new to the sport. Take advantage of the opportunity to ask questions if you would like ideas for how to engage a stage, but also be sure to do more listening than talking as you receive guidance and tips from more experienced competitors.
Watch and observe other shooters and how they approach and ‘game’ a specific stage or course of fire. You’ll begin to recognize which shooting positions work best for different scenarios, and maybe even come up with some new ones that no one has thought of before.
Seeing what the better shooters do is an invaluable instructional tool. You can use your smart phone’s video camera to record other shooters (with their permission). When you’re ready to shoot, ask another shooter to record your performance. Watching yourself will point out needed areas of improvement.
After each match conduct an informal after action review and summarize for yourself the things that went well and what you should continue to do. You should also identify the specific shooting skills you should develop and make a plan to integrate the appropriate practice drills into your practice sessions. Finally, if you maintain a shooter’s data book or journal you’ll want to note things such as:
After Action Review – How you did, what went well, things you need to work on in practice. Stage Observations – Successful methods used for specific courses of fire. Note barricades, positions used, specific gear used for stages. Gear Observations – How your rifle/gear performed, what new items you should add to your “buy list”.
TIP FOUR: Be Safe and Have Fun
You’ve all heard a parent or teacher say, “It’s all fun and games until someone loses an eye.” The same can be said of the shooting sports. Safe handling of firearms is the number one rule at any match, and comes before the FUN part in terms of importance.
Before all matches start there will always be some form of a mandatory safety briefing. Make sure you know, understand, and follow any unique safety protocols for the match you attend. Some matches require all rifles have chamber flags inserted and are stowed in bags/cases while not on the firing line — other matches may not. If you run afoul of any safety rules, you risk the chance of being disqualified from a stage or worse, the entire match.
The second rule is simply have fun. This starts with having a good attitude throughout the day. Keep in mind that as a new competitor you should think of a match as a solid day of practice and training. If you blow a stage, use it as an opportunity to diagnose what you could have done differently or what you need to improve on — then smile and drive on.
Any day at the range or shooting is a good day. A match is an opportunity to hang out with like-minded people who are passionate about shooting and impacting targets far-far away. Life is great when you are doing what you enjoy!
TIP FIVE: Make Friends
There is no better way to meet lots of precision rifle shooters and make friends than at a match. The people that attend the tactical precision matches on a regular basis are those that have ‘fallen into the deep end of the pool’ and are really into the sport. As a result, they have become part of the local precision shooting community. As you strike up conversations at the match, find out if your new-found friends visit specific forum boards or social media outlets, or if there are other matches they attend.
Precision shooters tend to congregate and share information in different corners of the Internet. It will serve you well to meet some of the guys in person at matches and be able to connect a face to a screen name. As you develop your friendships and develop a level of trust, you will find opportunities become available to shoot with others in your local area, or get ‘read-in’ on a secret honey-hole of a spot to shoot long distance. Additionally, the local shooting community will often find it more convenient to sell or trade gear and equipment locally than deal with buyers/sellers that are out of state.
Getting Started in PRS/NRL — One Man’s Story
My name is Jeff Cosgrove. I have shot for 20+ years but I found my interest in shooting was dwindling over time. I got somewhat bored with shooting paper at 100 yards or plinking cans out in the desert. About 3 years ago I decided I wanted to shoot long range. I picked up a used MPA in .300 Win Mag and started shooting long range with a new buddy. That day I fell in love with guns all over again.
With that new .300 WM I found my reloads were not up to my expectations (high ES/SD), so I purchased all new reloading hardware. One of my purchases was a used Benchsource Annealer. The guy I bought that from asked if I had ever tried PRS and he invited me to check out a match. So I went to a local PRS event as a spectator. I looked at many rigs and took notes. By the end of the day I knew this was something I really wanted to do. I then acquired a used chassis rifle that I thought would work well for PRS.
After working with that first PRS rifle, a 6.5 CM with Stiller Tac30 action, MDT chassis, and Proof Carbon-wrapped barrel, I quickly learned that gun did not handle and balance the way I hoped. It was too light in the front, the ergos were poor, and scope eye relief was not optimal. So I decided to build my own GEN 2 PRS rifle, a switch-barrel rig that I now use in competition. READ FULL Story HERE.
Load Development Using 6.5 Guys Custom Spreadsheet
To hold and analyze his load development data, Jeff uses the spreadsheet from 65Guys.com. this can really help identifying your best load. The Excel spreadsheet is detailed, yet makes it simple to analyze your data. You can even copy and paste your chronograph data if your chrono logs on to a SD card.
In this 6.5 Guys video Steve provides an overview and tutorial for using the Excel load development analysis model that he has developed. The Excel Load Development Analysis Spreadsheet version 2.0 is FREE. Download from the 6.5 Guys Load Development Page using this LINK for XLSM spreadsheet.
NOTE: If that direct link does not work, CLICK HERE to go to the 6.5 Guys website page, then look for the “Load Development Analysis Model Version 2.0″ link in the second paragraph.
In this video Steve explains some key statistical concepts for performing load data analysis. He also provides tips and guidance for determining the optimal load for your rifle as you analyze the load data you’ve collected.
Good Resource for PRS/NRL Newbies — Practical Shooter’s Guide
Marcus Blanchard, $19.98 Paperback, $9.99 Kindle
Thinking of getting started in the Practical/Tactical shooting game? Looking for ways to be more stable when shooting from unconventional positions? Then you may want to read Marcus Blanchard’s Practical Shooter’s Guide (A How-To Approach for Unconventional Firing Positions and Training). Unlike almost every “how to shoot” book on the market, Blanchard’s work focuses on the shooting skills and positions you need to succeed in PRS matches and similar tactical competitions. Blanchard provides clear advice on shooting from barricades, from roof-tops, from steep angles. Blanchard says you need to train for these types of challenges: “I believe the largest factor in the improvement of the average shooter isn’t necessarily the gear; it’s the way the shooter approaches obstacles and how they properly train for them.”
Riflescopes are mechanical contraptions. One of the sad realities about precision shooting is that, sooner or later, you will experience a scope failure. If you’re lucky it won’t happen in the middle of a National-level competition. And hopefully the failure will be dramatic and unmistakable so you won’t spend months trying to isolate the issue. Unfortunately, scope problems can be erratic or hard to diagnose. You may find yourself with unexplained flyers or a slight degradation of accuracy and you won’t know how to diagnose the problem. And when a 1/8th-MOA-click scope starts failing, it may be hard to recognize the fault immediately, because the POI change may be slight.
How to Diagnose Scope Problems
When you see your groups open up, there’s a very good chance this is due to poor wind-reading, or other “driver error”. But my experience showed me that sometimes scopes do go bad. When your accuracy degrades without any other reasonable explanation, the cause of the problem may well be your optics. Here are some of the “symptoms” of scope troubles:
1. Large shot-to-shot variance in Point of Impact with known accurate loads.
2. Uneven tracking (either vertical or horizontal).
3. Change of Point of Impact does not correspond to click inputs.
4. Inability to zero in reasonable number of shots.
5. Unexpected changes in elevation click values (compared to previous known distance come-ups).
6. Visible shift in reticle from center of view.
7. Changed “feel” or resistance when clicking; or uneven click-to-click “feel”.
8. Inability to set parallax to achieve sharpness.
9. Turrets or other controls feel wobbly or loose.
10. Internal scope components rattle when gun is moved.
Even expensive scopes can fail, or start to perform erratically — and that can happen without warning, or for no apparent reason. Here are some signs that you may be having scope issues.
1. Click count has changed significantly from established zero at known range.
2. Noticeably different click “feel” as you rotate turrets, or turrets feel wobbly.
3. Inability to set Adjustable Objective or side focus to get sharp target image.
4. Shot Point of Impact is completely different than click value after elevation/windage change. For example, when you dial 2 MOA “up” but you observe a 6 MOA rise in POI.
When An Expensive Scope Goes Bad — Crazy Vertical Case Study
A few seasons back, this editor had a major-brand 8-25x50mm scope go bad. How did I know I had a problem? Well the first sign was a wild “drop-down” flyer at a 600-yard match. After shooting a two-target relay, I took a look at my targets. My first 5-shot group had five shots, fairly well centered, in about 2.2″. Pretty good. Everything was operating fine. Then I looked at the second target. My eye was drawn to four shots, all centered in the 10 Ring, measuring about 2.4″. But then I saw the fifth shot. It was a good 18″ low, straight down from the X. And I really mean straight down — if you drew a plumb line down from the center of the X, it would pass almost through the fifth shot.
Is My Scope Actually Malfunctioning or Is This Driver Error?
That was disconcerting, but since I had never had any trouble with this scope before, I assumed it was a load problem (too little powder?), or simple driver error (maybe I flinched or yanked the trigger?). Accordingly, I didn’t do anything about the scope, figuring the problem was me or the load.
Problems Reappear — Huge POI Swings Affirm This Scope is Toast
But, at the next range session, things went downhill fast. In three shots, I did manage to get on steel at 600, with my normal come-up for that distance. Everything seemed fine. So then I switched to paper. We had a buddy in the pits with a walkie-talkie and he radioed that he couldn’t see any bullet holes in the paper after five shots. My spotter said he thought the bullets were impacting in the dirt, just below the paper. OK, I thought, we’ll add 3 MOA up (12 clicks), and that should raise POI 18″ and I should be on paper, near center. That didn’t work — now the bullets were impacting in the berm ABOVE the target frame. The POI had changed over 48″ (8 MOA). (And no I didn’t click too far — I clicked slowly, counting each click out loud as I adjusted the elevation.) OK, to compensate now I took off 8 clicks which should be 2 MOA or 12″. No joy. The POI dropped about 24″ (4 MOA) and the POI also moved moved 18″ right, to the edge of the target.
For the next 20 shots, we kept “chasing center” trying to get the gun zeroed at 600 yards. We never did. After burning a lot of ammo, we gave up. Before stowing the gun for the trip home, I dialed back to my 100-yard zero, which is my normal practice (it’s 47 clicks down from 600-yard zero). I immediately noticed that the “feel” of the elevation knob didn’t seem right. Even though I was pretty much in the center of my elevation (I have a +20 MOA scope mount), the clicks felt really tight — as they do when you’re at the very limit of travel. There was a lot of resistance in the clicks and they didn’t seem to move the right amount.
And it seemed that I’d have four or five clicks that were “bunched up” with a lot of resistance, and then the next click would have almost no resistance and seem to jump. It’s hard to describe, but it was like winding a spring that erratically moved from tight to very loose.
At this point I announced to my shooting buddies: “I think the scope has taken a dump.” I let one buddy work the elevation knob a bit. “That feels weird,” he said: “the clicks aren’t consistent… first it doesn’t want to move, then the clicks jump too easily.”
Convinced that I had a real problem, the scope was packed up and shipped to the manufacturer. So, was I hallucinating? Was my problem really just driver error? I’ve heard plenty of stories about guys who sent scopes in for repair, only to receive their optics back with a terse note saying: “Scope passed inspection and function test 100%. No repairs needed”. So, was my scope really FUBAR? You bet it was. When the scope came back from the factory, the Repair Record stated that nearly all the internal mechanicals had been replaced or fixed:
Source of Problem Unknown, but I Have a Theory
Although my scope came with a slightly canted reticle from the factory, it had otherwise functioned without a hitch for many years. I was able to go back and forth between 100-yard zero and 600-yard zero with perfect repeatability for over five years. I had confidence in that scope. Why did it fail when it did? My theory is side-loading on the turrets. I used to carry the gun in a thick soft case. I recently switched to an aluminum-sided hard case that has pretty dense egg-crate foam inside. I noticed it took some effort to close the case, though it was more than big enough, width-wise, to hold the gun. My thinking is that the foam wasn’t compressing enough, resulting in a side-load on the windage turret when the case was clamped shut. This is just my best guess; it may not be the real source of the problem. Remember, as I explained in the beginning of this story, sometimes scopes — just like any mechanical system — simply stop working for no apparent reason.
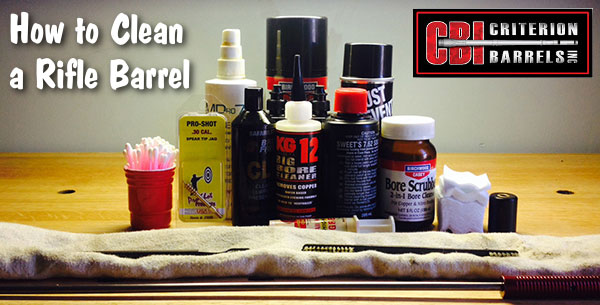
This article comes from the Criterion Barrels website. It provides good, conservative advice about barrel cleaning. Understand that cleaning methods may need to be adapted to fit the amount and type of fouling (and the particular barrel). In general, we do try to minimize brushing, and we follow the procedures Criterion recommends respecting the crown/muzzle. We have also had very good success using wet patches followed by Wipe-Out bore foam. Along with the practices outlined by Criterion below, you may want to try Wipe-Out foam. Just be sure to use a fitted cleaning rod bore guide, to keep foam out of the action recesses and trigger assembly.
The above video shows how to apply Wipe-Out or other bore-cleaning foam. We use a slightly different method. First, we use 3-4 wet patches to remove loose carbon fouling. Then we apply the foam as shown, but usually from the muzzle end (with bore guide in chamber). Here’s the important point — after 20-30 minutes, once the bubbles have dissipated, we apply the foam a second time, getting more of the active ingredients into the barrel. We then patch out, as shown, after 3-4 hours.
What is the Best Way to Clean a Rifle Barrel?
We are asked this question quite frequently alongside requests for recommended break-in procedures. Improper barrel cleaning methods can damage or destroy a barrel, leading to diminished accuracy or even cause a catastrophic failure. When it comes to barrel maintenance, there are a number of useful techniques that we have not listed. Some techniques may work better with different barrel types. This series of recommendations is designed to incorporate a number of methods that the Criterion Barrels staff has used successfully both in the shop and on their personal rifles. Please feel free to to list your own recommendations in the below comments section.
We recommend the use of the following components during rifle cleaning:
• Cloth patches (sized for the appropriate caliber)
• Brass jag sized properly for your bore
• One-piece coated cleaning rod
• General bore cleaner/solvent (Example: Hoppes #9)
• Copper solvent of your choosing (Example: Sweets/KG 12)
• Fitted cleaning rod bore guide
• Plastic AP brush or toothbrush
• Q-Tips
• Plastic dental picks
• CLP or rust preventative type cleaner
There are a number of schools of thought relating to the frequency in which a barrel should be cleaned. At minimum we recommend cleaning a barrel after each shooting session to remove condensation, copper, and carbon build-up. Condensation is the greatest immediate threat, as it can cause the barrel to rust while the rifle sits in storage. Copper and carbon build-up may negatively impact future barrel performance, increasing the possibility of a failure in feed or function. Fouling should be removed whenever possible.
The below tips will help limit the wear of different parts of your barrel during routine maintenance, helping extend the life of the barrel and improving its performance.
The Lands and Grooves
This portion of the barrel may experience reduced efficiency due to copper fouling and cleaning rod damage. If copper fouling takes place during the initial break-in of the rifle, make sure to check our barrel break-in article.
For regular maintenance we suggest using a single piece coated cleaning rod rather than the traditional segmented rod or bore snake. While segmented rods and bore snakes may be convenient for field use, the corners between the segments may bow out and catch on the lands, scraping along the length of the rifling. Residual grit and particles from expended cartridges may also get caught between segments, resulting in an abrasive surface working its way down the length of the barrel. Most bore snakes will remove significant amounts of carbon fouling, but may fall short in the removal residual carbon buildup and copper fouling during deep cleaning. Good rods can be sourced from multiple manufacturers, but we have found good results using both Pro-Shot and Dewey brand products.
General cleaning requires the use of patches rather than nylon or brass bore brushes. Brass brushes may be required when aggressive cleaning is required, but can lead to unnecessary wear on the barrel if used frequently. This is not due to the nature of the soft brushes themselves, but from the abrasive particles of grit that become embedded in the material that is being run repeatedly through the bore. We recommend the use of bore guides when cleaning from both the muzzle and breech. These bore guides will help serve to protect the crown and throat from cleaning rod damage.
If significant resistance develops while running the cleaning rod through the bore, no attempt should be made to force it in further. Back the rod out and inspect the barrel to determine the cause of the resistance. The jag may be pushing between a bore obstruction and the rifling, digging a divot into the barrel before pushing the obstruction back through the muzzle. One way to minimize the risk of a stuck rod is by utilizing a slightly smaller patch during the initial push.
The process of cleaning the length of the rifling is relatively straightforward:
1. Check to make sure the rifle is safely unloaded.
2. Carry out any necessary disassembly procedures prior to cleaning.
3. Remove bolt (if possible) and insert fitted cleaning rod bore guide in action.
4. Soak a patch in bore solvent (similar to Hoppes #9).
5. Center and affix the patch on the brass jag, inserting it into the chamber end of the barrel. A misaligned patch may cause the jag to damage the lands of the rifling, so make sure the patch is centered on the jag.
6. Run the patch the full length of the barrel, retracting it upon reaching the end of the muzzle.
7. Let the solvent sit for a minute.
8. Continue to run patches through the bore until carbon residue is minimized.
9. Run a dry patch through the bore to ensure carbon residue has been removed.
10. Soak a patch in copper solvent (Sweet’s or KG-12).
11. Run the patch through the bore, leaving it to sit for 3-5 minutes (do not let solvent sit for more than 15 minutes.*)
12. Repeat this process until no blue residue remains on the patches.
13. Run a patch of Hoppes #9 and a dry patch through the bore to neutralize the copper solvent.
14. Inspect the barrel prior to reassembling the rifle, verifying that no bore obstructions remain.
*Please note that some ammonia-based copper solvents may prove to be corrosive if left sitting in the barrel for an extended period of time. It is essential that these solvents be removed within 15 minutes to avoid ruining the bore.
The Crown
The crown is the portion of the barrel where the bullet loses contact with the lands and grooves and proceeds to exit the firearm. The area most critical to accuracy potential is the angle where the bullet last touches the bore of the barrel.
Avoid damage to this area by using a plastic toothbrush and CLP type cleaner to scrub the crown from the exterior of the barrel. Even the most minimal variation in wear to the crown will negatively impact barrel performance, so be careful to avoid nicking or wearing away this part of the barrel.
This can be very important — even life-saving. For example, with a hang fire, i.e. a round that does not fire immediately, it is vital to keep the gun pointed DOWN-RANGE. And with a squib load, which may have left a round inside the barrel, it is vital to UNLOAD and NOT take another shot! If you did, the gun could blow up in your hand when the second, full-charge bullet hits the trapped bullet.
The Five Topics Covered Are:
Misfeed (aka Tip-Up)
Double Feed
Stovepipe (Failure to Extract)
Misfire / Hangfire
Squib Load
1. Misfeed or Tip-Up: With any misfeed you should stop firing. With the muzzle pointed safely down-range, remove the magazine, then pull the slide back and remove the round that did not feed. Check the slide for dirt, debris, and check the round that did not feed. After re-inserting the magazine, make sure the mag is seated properly.
2. Double-Feed: This is a fairly common issue with some gun types with worn springs or cheap magazines. Again you want to remove the magazine. CTD states: “Remove the magazine and cycle the action until your double-fed rounds fall out — always keeping the muzzle pointed in a safe direction[.]”
3. Stove-Pipe: This occurs when the case of a fired round does not eject fully. There can be many causes — damaged extractor, low-pressure powder charge, dirty chamber, or greasy cartridge brass. In addition the issue is common with old, worn-out recoil springs. To avoid Stove-Pipes, replace the recoil spring every 4000 rounds, and make sure your chamber is clean and the extractor is not chipped or damaged.
4. Misfires and Hang-Fires: There are multiple causes for misfires (“click no bang”) and hang-fires (slow ignition). There can be a defective primer, the firing pin could be damaged, the powder many have been bad, or the case not filled properly. With a misfire, keep the gun pointed down-range at least one minute. If the case does not fire, eject it but leave it on the ground. With a hang-fire (delayed ignition after firing pin strike), keep the gun pointed down-range, then drop the magazine and eject the (new) unfired cartridge in the chamber and inspect the gun when completely empty.
5. Squib Load: A squib load is when the gun fires, but the actual case ignition is very light with little noise, smoke, or recoil. This can be because the case had a primer but no powder. Or it can be because the powder did not ignite. Squib loads can be very dangerous in rapid-fire situations. If you EVER get a squib load STOP immediately! Do NOT fire another round! This is because the squib may have left a bullet inside the barrel.


 In this NSSF video, Ryan Cleckner shows how to set up a scope on a hunting or tactical rifle. Ryan, a former U.S. Army Sniper Instructor, notes that many hunters spend a small fortune on equipment, but fail to set up their rifle to use the optics optimally. Cleckner likens this to someone who owns an expensive sports car, but never adjusts the seat or the mirrors.






 “Side-Spiking”, as the words suggest, refers to moving your patch spiking position from the center of the patch towards the corner of a square patch or the edge of a round patch.






 For the next 20 shots, we kept “chasing center” trying to get the gun zeroed at 600 yards. We never did. After burning a lot of ammo, we gave up. Before stowing the gun for the trip home, I dialed back to my 100-yard zero, which is my normal practice (it’s 47 clicks down from 600-yard zero). I immediately noticed that the “feel” of the elevation knob didn’t seem right. Even though I was pretty much in the center of my elevation (I have a +20 MOA scope mount), the clicks felt really tight — as they do when you’re at the very limit of travel. There was a lot of resistance in the clicks and they didn’t seem to move the right amount.