4140, 4150, 316, 17-4, 6061, 7075-T6 — What is the significance of these numbers? No, they’re not winning lottery numbers. These are all designations for metals commonly used in firearm and barrel construction. 4140 and 4150 are carbon steels, with 4150 often used in mil-spec AR15 barrels. 316 and 17-4 are grades of stainless steel. 316 is “marine grade” stainless, while 17-4 has 17% chromium and 4% nickel. 17-4 is a harder steel used in barrels and receivers. 6061 and 7075-T6 are aluminum alloys. 6061 is “aircraft grade” aluminum, often used for rings and trigger guards, while 7075-T6 is a much stronger, heat-treated aluminum commonly used in AR15 uppers.
You can learn about all these metals (and more) in the online archives of RifleShooter magazine.
Written by Patrick Sweeney, RifleShooter’s Guide to Gun Metal summarizes the primary types of steel and aluminum used in gun and barrel construction. Sweeney explains the nomenclature used to define metal types, and he outlines the salient properties of various steel and aluminum alloys. This is a useful resource for anyone selecting components or building rifles. We recommend you print out the page, or at least bookmark it.
Metals by the Number
The number system for steel classification came from the auto industry. Sweeney explains: “The Society of Automotive Engineers uses a simple designating system, the four numbers you see bandied about in gun articles. Numbers such as 1060, 4140 or 5150 all designate how much of what [elements are] in them. The first number is what class—carbon, nickel, chromium, and so forth. The next three numbers [list other elements in the alloy]. 4140, also known as ordnance steel, was one of the early high-alloy steels. It has about 1 percent chromium, 0.25 percent molybdenum, 0.4 percent carbon, 1 percent manganese, around 0.2 percent silicon and no more than 0.035 percent phosphorus and no more than 0.04 percent sulphur. That leaves most of it, 94.25 percent, iron.”
Aluminum Alloys
Numbers are also used to differentiate different types of aluminum alloys. Sweeny writes: “Aluminum is used in firearms in two alloys: 7075 and 6061. 6061 is commonly referred to as ‘aircraft aluminum’ and has trace amounts of silicon, copper, manganese, molybdenum and zinc. 7075 is a much stronger alloy and has markedly larger amounts of copper, manganese, chromium and zinc.” 7075 Aluminum has significantly better corrosion resistance, and that’s why it is used for AR receivers. The “T6″ you often see appended to 7075 refers to a heat-treating process.
Aluminum (or “Aluminium” in the UK) is a chemical element in the boron group with symbol Al and atomic number 13. It is a silvery-white, soft, nonmagnetic, ductile metal. Aluminum is the third most abundant element, and the most abundant metal, in the Earth’s crust. (Wikipedia)
To learn more about the metals used in your firearms’ barrels, rings, receivers, and internal parts, read Sweeney’s article in RifleShooterMag.com. Taking the time to read the article from start to finish will expand your knowledge of metal properties and how metals are chosen by manufacturers and gunsmiths. CLICK to Read Guide to Gun Metal.
Story Tip by EdLongrange. We welcome reader submissions. Aluminum Alloy chart courtesy AluminiumDesign.net.
Enjoy the Shooting Sports USA Archives
With winter coming, many Americans will soon be spending more time indoors at home. For some folks that means long sessions in front of the boob tube. Here’s a better idea — there’s a vast resource of great gun-related content available online for FREE. Check out the Shooting Sports USA Articles Archive. SSUSA maintains a vast digital library with hundreds of articles going back to June 2009.
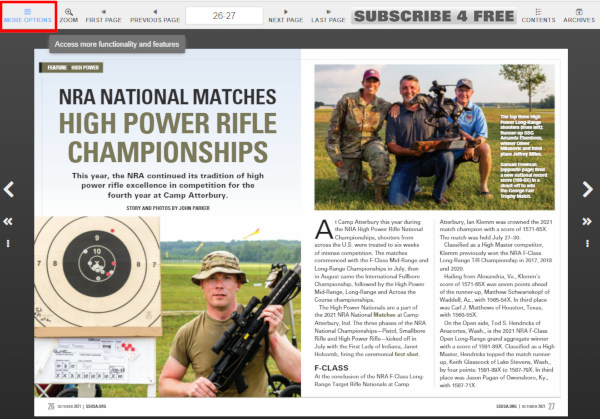
It’s easy to find back issues of Shooting Sports USA magazine. Here’s how: First, navigate to the SSUSA Online Issue. Then click on the “ARCHIVES” icon in the upper right area (indicated with red arrow). When you click on “ARCHIVES”, a window will open with a selection of Shooting Sports USA magazine covers/dates in a vertical column. The most recent issue (November 2021) will appear at the top. You can then scroll down — use the vertical scroll bar to go from November 2021 (the latest issue) all the way back to June 2009. Click any issue cover to read.
How to Find and Save Articles
To search back issues, select “MORE OPTIONS” from the toolbar (top left). Then click the “SEARCH” button. When that opens, select either “Search Archives” for ALL back issues or “Search Only this Issue”. When you’ve made your choice, enter your search term(s). For example, you can search for “Camp Perry” or “Palma” or “F-Class Championship”. You can also save any archived issue as a PDF for viewing offline. Just click “SAVE” to download the article you’re currently viewing/reading.
Read Sample Articles
Here are a couple of our favorite SSUSA feature stories from recent years. There are hundreds of other informative articles worth reading.
With over 240 shooting-related videos, the Alabama Arsenal YouTube Channel is a remarkable resource. This video channel provides detailed field tests of tactical-type rifles, ARs, and pistols. The testers have access to some very impressive ranges, and many of the tests are far more thorough than you’ll typically find with most gun magazines and gun-centric YouTube channels. For example, Alabama Arsenal has a series of 1000+ round pistol test videos. These are well worth watching if you are considering purchase of a defensive handgun.
Today we showcase three rifle videos, two centerfires, and the CZ 457 .22 LR in two styles. After these rifle videos, you’ll find two very interesting technical videos regarding suppressors. The first tech video shows how to install suppressors, while the second video explores how suppressors can affect muzzle velocity.
Barrett MRAD .300 PRC at 2200 Yards — Extreme Long Range
Here’s a rugged tactical rifle put to the test at Extreme Long Range. This video, featuring a Barrett MRAD chambered for the .300 PRC cartridges, features accuracy testing out to 2200 yards (1.25 miles). There is some good drone footage covering the long path to the target. The shooter noted that the bullets fired from his .300 PRC “go sub-sonic somewhere between 1800 and 1900 yards”, creating additional ballistics challenges at this yardage.
Savage 110 Elite Precision for PRS Production Class
In this video AA’s team reviews the Savage Elite Precision Rifle with MDT ACC Chassis. Retailing for about $1750.00, this is one of the better production class options for PRS and NRL competition. Guns America Digest did a full review of this rifle, and was quite impressed.
CZ 457 Varmint Precision Trainer and Chassis
In this video, Alabama Arsenal compares two versions of the popular CZ 457 rimfire rifle, a great choice for the NRL22 tactical game. The test compares the CZ 457 in a Manners composite stock with a CZ 457 version in a Varmint Precision aluminum chassis. Right now basic CZ 457 rifles start at about $400.00, with the Varmint Precision Chassis models running $845-$900.
Informational Videos about Rifle and Pistol Suppressors
Alabama Arsenal regularly tests its firearms with suppressors. Over the course of time, the testing team has leaned much about modern sound moderators, comparing features and learning how to install and maintain quality suppressors. These two videos offer valuable information on suppressors.
Silencer School Pt. 3 — Mounting Basics
Field Testing — Do Suppressors Change Bullet Velocity
Want to see more content like this? Here are LINKS…
Alabama Arsenal has 240+ videos on its YouTube channel. In addition, you’ll find dozens of firearms photos and other shooting-related content on Alabama Arsenal’s social media pages: Facebook; Instagram; and Twitter. You can support the Arsenal’s gun testing by subscribing to the Alabama Arsenal’s PATREON Page.
Are you planning to purchase or sell a gun? Or perhaps you want to give one to a family member. Maybe you want to transfer a gun to a friend out of state. These are all situations that demand you understand the law before you buy, sell, or transfer a gun. Thankfully the NRA Blog has a series of helpful articles that can guide you through firearms transfers and transactions.
Do note that laws on private transfers vary from state to state. Also, some of these articles are a few years old. Laws do change, typically becoming more restrictive. You should carefully review current laws in your state before buying/selling any firearm. For a summary of state gun laws, we recommend Attorney Bryan Ciyou’s Gun Laws by State 2021 reference book.
Here are five articles providing key facts you need to know.
Click each title to read the specific article.
IMPORTANT: All five of these articles reference general rules that apply nationally and in MOST states. However, some states, such as California, New Jersey, and New York (and others) have very special rules and regulations on gun transfers. If you have ANY questions about gun transfers in your state/region, you should consult an attorney familiar the laws of YOUR state and municipality.
Photo 1: Three Near-Equal-Weight 7mm Bullets with Different Shapes
TECH TIP: Bullets of the same weight (and caliber) can generate very different pressure levels due to variances in Bearing Surface Length (BSL).
Bullet 1 (L-R), the RN/FB, has a very slight taper and only reaches its full diameter (0.284″) very near the cannelure. This taper is often seen on similar bullets — it helps reduce pressures with good accuracy. The calculated BSL of Bullet 1 was ~0.324″. The BSL of Bullet 2, in the center, was ~0.430”, and Bullet 3’s was ~ 0.463″. Obviously, bullets can be visually deceiving as to BSL!
This article from the USAMU covers an important safety issue — why you should never assume that a “book” load for a particular bullet will be safe with an equal-weight bullet of different shape/design. The shape and bearing surface of the bullet will affect the pressure generated inside the barrel. This is part of the USAMU’s Handloading Hump Day series, published on the USAMU Facebook page.
Beginning Handloading, Part 13:
Extrapolating Beyond Your Data, or … “I Don’t Know, What I Don’t Know!”
We continue our Handloading Safety theme, focusing on not inadvertently exceeding the boundaries of known, safe data. Bullet manufacturers’ loading manuals often display three, four, or more similar-weight bullets grouped together with one set of load recipes. The manufacturer has tested these bullets and developed safe data for that group. However, seeing data in this format can tempt loaders — especially new ones — to think that ALL bullets of a given weight and caliber can interchangeably use the same load data. Actually, not so much.
The researchers ensure their data is safe with the bullet yielding the highest pressure. Thus, all others in that group should produce equal or less pressure, and they are safe using this data.
However, bullet designs include many variables such as different bearing surface lengths, hardness, and even slight variations in diameter. These can occasionally range up to 0.001″ by design. Thus, choosing untested bullets of the same weight and caliber, and using them with data not developed for them can yield excess pressures.
This is only one of the countless reasons not to begin at or very near the highest pressure loads during load development. Always begin at the starting load and look for pressure signs as one increases powder charges.
Bullet bearing surface length (BSL) is often overlooked when considering maximum safe powder charges and pressures. In photo 1 (at top), note the differences in the bullets’ appearance. All three are 7mm, and their maximum weight difference is just five grains. Yet, the traditional round nose, flat base design on the left appears to have much more BSL than the sleeker match bullets. All things being equal, based on appearance, the RN/FB bullet seems likely to reach maximum pressure with significantly less powder than the other two designs.
Bearing Surface Measurement Considerations
Some might be tempted to use a bullet ogive comparator (or two) to measure bullets’ true BSL for comparison’s sake. Unfortunately, comparators don’t typically measure maximum bullet diameter and this approach can be deceiving.
Photo 2: The Perils of Measuring Bearing Surface Length with Comparators
In Photo 2, two 7mm comparators have been installed on a dial caliper in an attempt to measure BSL. Using this approach, the BSLs differed sharply from the original [measurements]. The comparator-measured Bullet 1 BSL was 0.694” vs. 0.324” (original), Bullet 2 was 0.601” (comparator) vs. 0.430” (original), and Bullet 3 (shown in Photo 2) was 0.602” (comparator) vs. 0.463” (original). [Editor’s comment — Note the very large difference for Bullet 1, masking the fact that the true full diameter on this bullet starts very far back.]
Today is Halloween (originally “All Hallows Eve”). With the slow return to post-Pandemic normalcy, there will be trick-or-treating in many locales across the country. U.S. LawShield has provided Halloween safety tips for homeowners and families with kids. These tips are designed to keep kids safe/secure and to help adults supervise the young ones and avoid potential liabilities as homeowners. READ Full Article HERE.
Halloween Safety Tips for Adults (Parents and Homeowners) Drive Carefully – Drive slowly and watch for people crossing the street. Avoid distractions like phones or food so you can be ready to stop quickly. (But it’s best to just avoid driving after dark on Halloween[.]) Clear the Way – Clear your front steps, driveway, and lawn of any potential safety hazards. If any injuries happen on your property, you could be held liable! Leave a Light On – If you leave the house, keep a few visible lights on inside to discourage criminals. However, leave your porch light off to let trick-or-treaters know you aren’t giving out candy! Verify Insurance – Are you turning your home into a neighborhood haunted house? Are you charging admission? Make sure to check your local laws and verify your homeowners insurance coverage! Something like this could be considered a business activity, and accidents or injuries typically are not covered. (You should also verify your self-defense insurance coverage!) Go Flameless – Use electric lights in your jack-o-lanterns and other décor. House fires are one of the more common accidents reported by homeowners on Halloween.
Halloween Safety Tips for Kids Adult Supervision – All children aged 13 and under should be accompanied by an adult when trick-or-treating. Older kids without an adult should be in groups of three or more. Create a Route – Only trick-or-treat in familiar neighborhoods and at houses with porch lights on. Be aware of and avoid the addresses of local sex offenders. Street Smart – Walk only on sidewalks, and cross streets only at crosswalks or corners. Make eye contact with drivers before crossing to help prevent accidents. Take extra caution with costume masks, as they greatly reduce a child’s ability to see their surroundings. High Visibility – Carry glow sticks or flashlights when out after dark, and avoid wearing costumes that are dark-colored or aren’t reflective. Treat Smart – Check your kids’ candy! The CDC Halloween Safety Guide highly recommends throwing away any unwrapped or unsealed pieces.
U.S. LawShield also strongly recommends not having toy guns — even Nerf guns or squirt guns — as part of costumes. At night toy guns can cause confusion, with potential bad reactions.
About U.S. LawShield
Founded in 2009, U.S. LawShield now has 700,000+ members and 6,000+ industry partners. The goals are to help members handle critical, life-threatening situations and prevent potential injustices in the legal system after acts of self-defense. For more information on U.S. LawShield visit USLawshield.com.
Today is October 31st, Halloween (originally “All Hallows Eve”). That means it’s pumpkin time. Just how much fun can you have with pumpkins? Watch these two videos and find out. In the first video, the RatedRR team sends a few orange gourds to pumpkin heaven using Det Cord, C4, and binary explosives. The sequence starting at the 2:00 minute mark in the first video is truly amazing. WARNING: DO NOT TRY THIS AT HOME!
Watch Pumpkin Blasting with Explosives
In the next video, a pumpkin carved as a Death Star serves as the target for a .50 caliber rifle (looks like a Barrett M82 .50 BMG). As you may guess, the pumpkin Death Star suffers the same fate as the Hollywood version in Star Wars. NOTE: At the 0:42 mark in the video, a graphic displays “30,000 FPS”. That’s the high-speed camera’s frame-per-second rate, NOT the projectile velocity in feet-per-second.
Watch .50 BMG Rifle vs. Death Star Pumpkin
Warning: These demonstrations were carried out on closed ranges by experienced professionals certified to use explosives. Possession of C4 and Det Cord may be a violation of various Federal, State, and local laws. Detonating cord and C4 are classified as high explosives and are regulated by the BATFE. Don’t even think about trying to repeat these stunts on your own.
Do you often load at the range? Or maybe you need to transport loading gear when you travel in your RV. Well here is a smart transport option — a metal box that holds tools, dies, arbor press, case-trimmer, even a ChargeMaster.
Some guys have built their own loading tool-boxes from wood. Other may stuff gear in a couple of plastic range boxes. But clever Chris Covell came up with an even better solution. Chris sourced a handsome, sturdy metal Horse Grooming Box from eBay. Chris reports the multi-feature metal box “works perfectly for reloading. My ChargeMaster is now out of the wind.”
Bullets, Trickler, and Priming Tool on Top
On top, below the hinged metal lid, is a large compartment that holds Covell’s funnels, scales, priming tool, trickler and other vital gear (photo on right). This top compartment is deep enough to handle wide-mouth funnels with no problem.
Slide-Out Drawer with Dividers
Below the top level is a handy sliding drawer with multiple dividers. This is perfect for holding Covell’s inline seating dies, case-neck deburring and chamfering tools, among many other smaller bits and pieces.
In the bottom of the Horse Grooming box is a large compartment that holds bigger gear. In the bottom section, Covell places his RCBS Chargemaster Lite, along with a case-trimming tool, an arbor press, and various other bulky tools. Check it out:
Folks who load at the range need to bring a lot of gear — reloading presses, powder dispensers, scales, funnels, sizing/seating dies, brass prep tools and more. And there may be other important items to transport — such as ammo caddies, LabRadar mounts, over-size rest feet, and even barrel fans. With this metal box you can easily organize (and protect) al that gear. This box was sourced affordably via eBay.
Chris Covell’s Range Box was featured on the Benchrest Shooting and Gunsmithing Private Group Facebook Page. You may want to sign up for this Group — with membership you can access a wealth of information for accuracy-oriented shooters.
Shown is the Redding Model 15-P Competition Piloted Inside Chamfering Tool with pilot rod that centers in the case flash hole. Also shown is a Forster 45° Rocket Tool.
There are a wide variety of reloading tools designed to cut a slight chamfer in case necks and deburr the edge of the case mouth. You don’t need to spend a lot of money for an effective tool. A basic “rocket-style” 45° chamfering tool, such as the Forster, actually does a pretty good job taking the sharp edge off case mouths, particularly if you use a little scotch-pad (or steel wool) to smooth the edge of the cut. The Forster chamfer tool, shown below, is a nicely-made product, with sharper cutting blades than you’ll find on most other 45° chamferers. It costs $24.99 at Brownells.com.
Redding sells a handy piloted chamfering tool with a 15° inside cutting angle and removable accessory handle. This Redding Model 15-P chamferer works really well, so long as you have consistent case OALs. The pilot rod (which indexes in the flash hole) is adjustable for different cartridge types (from very short to very long). This ensures the concentricity of the inside neck chamfer to the case mouth. This quality tool works with cases from .22 to .45 Caliber, and retails for $36.99.
Sinclair International offers a 28° carbide chamferer with many handy features (and sharp blades). The $28.99 Sinclair Carbide VLD Case Mouth Chamfering Tool will chamfer cases from .14 through .45 caliber. This tool features a removable 28° carbide cutter mounted in the green plastic Sinclair handle. NOTE: A hex-shaft cutter head power adapter can be purchased separately for $14.99 (Sinclair item 749-002-488WS). This can be chucked in a power screwdriver or used with dedicated power drives when doing large volumes of cases.
Many folks feel they can get smoother bullet seating by using a tool that cuts at a steeper angle. We like the 22° cutter sold by Lyman. It has a comfortable handle, and costs just $12.99 at MidsouthShooterssupply.com. The Lyman tool is an excellent value, though we’ve seen examples that needed sharpening even when new. Blade-sharpening is easily done, however.
K&M makes a depth-adjustable, inside-neck chamferer (“Controlled Depth Tapered Reaper”) with ultra-sharp cutting flutes. The latest version, which costs $54.85 at KMShooting.com, features a central pin that indexes via the flash hole to keep the cutter centered. In addition, the tool has a newly-designed handle, improved depth-stop fingers, plus a new set-screw adjustment for precise cutter depth control. We caution, even with all the depth-control features, if you are not careful, it is easy to over-cut, slicing away too much brass and basically ruining your neck. We think that most reloaders will get better results using a more conventional chamfer tool, such as the Forster or Redding 15-P.
One last thing to note — tools like the K&M and the Sinclair chamferer are often described as VLD chamferers. That is really a misnomer, as bullets with long boat-tails actually seat easily with very minimal chamfering. In reality, these high-angle chamferers may be most valuable when preparing brass for flat-base bullets and bullets with pressure rings. Using a 22° or 28° chamferer can reduce the risk of cutting a jacket when using VLD bullets though — so long as you make a smooth cut.
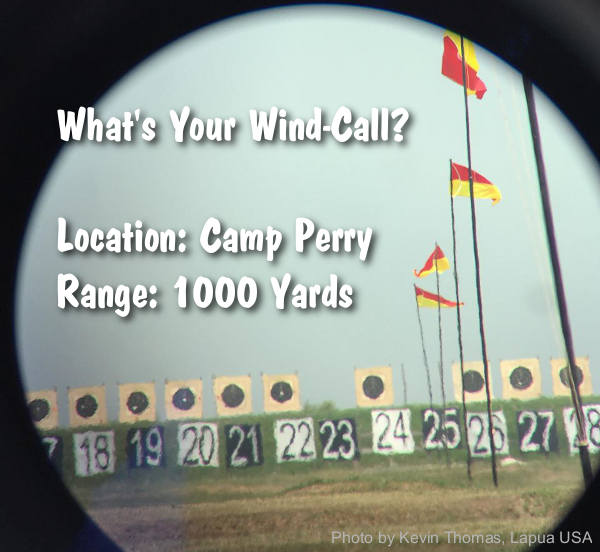
Keith Glasscock is one of America’s very finest F-Class shooters. This talented trigger-puller took second in F-Open division at the F-Class National Championships three years in a row. A smart engineer with aviation knowledge, Keith is a master wind reader, who has served as the wind coach for top F-Class teams. In fact Keith is in Arizona right now coaching a team at Ben Avery.
Keith shares his wind-reading expertise on his popular YouTube Channel — Winning in the Wind. This channel provides intelligent advice on multiple topics including reloading, load development, shooting strategies, and yes, reading the wind.
Keith has the credentials to back up the advice he offers in his video lessons. A High Master, Keith finished second overall at the 2021 NRA F-Class Long Range Championship in F-Open division. He also finished second at the 2020 Nationals, and he took second place at the 2019 Nationals. His consistency is unrivaled, which means he definitely knows the secrets of long-range wind calling and loading ultra-accurate ammo.
Today we feature two of Keith’s latest YouTube videos, both focused on wind reading.
Wind Direction vs. Wind Speed — Which is More Important
Most shooters find wind reading somewhat intimidating. That is understandable. The wind can change constantly during a match, with variations in both wind velocity and angles. Sometimes you think you have a cycle figured out, but then there can be an unexpected lull. Or you may start a string in what you think is a stable condition, but then a surprise shift changes everything. In addition, wind flows can be influenced by terrain features, such as berms, which have varying effects depending on wind angle (e.g. a tailwind hitting a berm will act differently than a 90-deg crosswind). That is why a good wind reader needs to identify both the wind speed AND the wind angle. In this video, Keith explains when to focus primarily on direction and when to pay most attention to velocity. With headwinds and tailwinds, Keith notes, you should monitor angle changes carefully. With crosswinds, speed is the key variable to watch.
KEY Points to Remember
— Small changes in wind direction changes alter POI drastically at long range
— During head or tailwinds, focus on wind direction
— During crosswinds, focus more on wind speed
— The wind is cyclic — always be aware of the pattern
Determining Wind Direction with Precision
Many shooters try to read the wind merely using whatever wind flags might be aloft on the range. Flags are important of course, but there are other vital factors that a wise wind-watcher will monitor. You want to watch mirage, and the movement of grass and trees. In looking for angle changes, Keith says the spotting scope is a very important tool. His tripod is equipped with angle markings on the rotating tripod head. This allows him to ascertain wind angles with great precision.
In the video below, Keith shows how to use a spotting scope to read the wind. He explains how he uses his spotting scope in his role as a wind coach. But a spotting scope can also be used effectively by competitors shooting prone or from a bench. Many top shooters use their spotting scopes to watch mirage during their relays. Keith notes that smart competitors can also use their spotters BETWEEN relays to scout natural wind indicators (moving grass, trees etc.), check for boils, watch mirage, and estimate wind velocity cycles.
KEY Points to Remember
— Wind flags leave a lot to be desired in precision wind direction reading
— Precision wind direction can be obtained with a spotting scope
— There is a boil both directly upwind and directly downwind
— Angle indicator on your tripod helps with angular precision in wind readings
— Scouting with a spotting scope before your turn to shoot can be fruitful
Questions and Answers with Keith Glasscock
Q. How did you get started as a wind coach, and what were the most important stages in your progress in wind-reading?
Keith: I started coaching this team in 2017. I was looking for a team to shoot on, but they needed a wind coach. I’ve been a backseat driver ever since. I learned the most about reading the wind from shooting when the conditions are absolutely miserable – flags popping, wind switching, people missing the targets entirely, and there I was, having to make the big call. I learn from my own mistakes, and it shows. I still make mistakes, but try to limit them to ones I haven’t already made. In essence, I am in the most important stage now. Humbly looking at the wind knowing its power and mystery, while learning new things every day.
Q. What are the most common wind-reading mistakes you see people make at matches?
Keith: The most common, in a word, is UNDER-confidence. Most shooters can make that wind call with accuracy. But their fear prevents them from doing that, and prevents them from learning or taking advantage of smooth, solid conditions. The second common mistake is failure to anticipate changes. That comes from not gauging the wind pattern. It’s all about patterns in a sport where wind changes so small have such profound impacts on score.
Q. What’s more important — wind flags, or mirage (or maybe the unexpected horizontal that appears on the last shot recorded on target).
Keith: Both flags and mirage lie. The only thing that tells the truth is a bullet. Unfortunately, the wind can switch faster than you can shoot in most cases. I take a fluid approach. I look for what on the range right now tells me what the wind is doing.
Q. When are conditions so bad/unpredictable that it is necessary to just stop shooting and wait for things to get better?
Keith: This is situational, and comes down to what you are observing. I never like to shoot in the top of a gust condition, even when I know what the hold is. The drop off is what gets you that surprise 8.
Q: What type of wind meters do you recommend?
Keith: While Kestrels are inexpensive and quite serviceable, they are directional in nature. If I want absolute wind speed, an omnidirectional style unit is preferred.
Q. Are there ways to practice reading the wind (and judging wind speeds) when one is away from the range?
Keith: I really concentrate on seeing mirage any time I’m outside, without optics. I can, many times, see the boil of the mirage, and wind direction with the naked eye. My time in aviation has my eye tuned to see things like shear zones and venturis in the airflow. I take a moment, anytime the air is moving, to feel the air on my skin, see the trees and grass moving, and areas where the wind does funny things. Trees and grass tend to get too much credit as precision wind indicators. I use them as wind change indicators. It also gives me an opportunity to humble myself and realize how dependent I am on mirage and flags.


 You can learn about all these metals (and more) in the online archives of RifleShooter magazine.







 Bullets, Trickler, and Priming Tool on Top