Are you planning to purchase or sell a gun? Or perhaps you want to give one to a family member. Maybe you want to transfer a gun to a friend out of state. These are all situations that demand you understand the law before you buy, sell, or transfer a gun. Thankfully the NRA Blog has a series of helpful articles that can guide you through firearms transfers and transactions. Do note that laws on private transfers vary from state to state.
Here are five articles providing key facts you need to know.
Click each title to read the specific article.
Turn a Rough Factory Rifle into an Accurate Hunting Rig
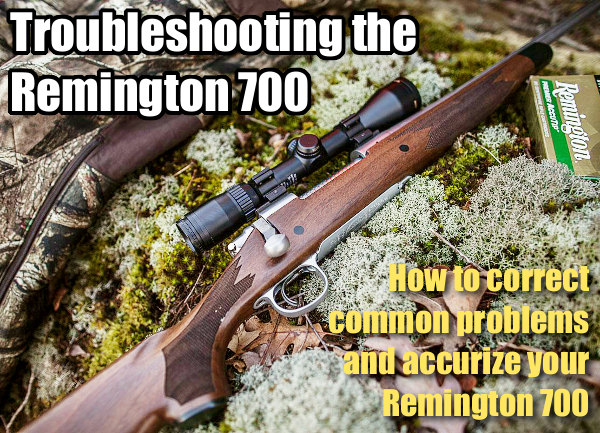
Kiwi Nathan Foster has produced a good video for hunters with “under-performing” Remington Model 700 rifles. In this video, Nathan helps a client turn a badly-behaving Rem 700 into a reliable tack-driver. A customer had sent Nathan this rifle to rectify stubborn copper fouling. After bedding the rifle, the customer discovered that the rifle produced terrible groups due to the stubborn bore.
Nathan told us: “This was a grand opportunity to study what can go wrong with the M700 rifle with regards to both do-it-yourself work and flaws within rifle production. To help structure the video, we used the chapters of our Accurizing Book as reference steps for the video. This footage also works in conjunction with our free Remington bedding tutorials on YouTube.
Those who have watched the full M700 Troubleshooting video say this is one of the most helpful videos yet released on problem-solving with a factory hunting rifle. This video is especially helpful for those just getting into the accuracy game, as it walks the viewer through the basics of rifle tuning, then proceeds to more advanced methods of improving a badly-behaving rifle.
This video focuses on the Remington M700 and Rem clones, such as the Bergara rifle. However the lessons and techniques in the video can apply to any type of bolt-action rifle suffering heavy copper fouling. The video features detailed footage of barrel break-in and barrel-lapping procedures. These procedures may be beneficial for rough factory barrels. IMPORTANT! AccurateShooter.com recommends different break-in and maintenance regimes for custom, hand-lapped premium barrels — be conservative with fine custom barrels. Our best custom barrels have all shot superbly with minimal break-in and zero use of abrasives during break-in.
Troubleshooting the Remington 700 Rifle with Nathan Foster
NOTE: This is a free 70-second trailer video. The FULL Remington Troubleshooting Video is 1 hour, 16 minutes long and can be streamed through Vimeo-on-Demand for $12.00. Access Full Video HERE.
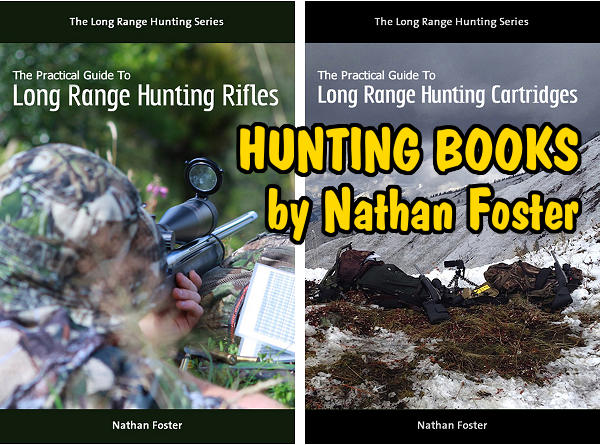
Nathan Foster of Terminal Ballistics Research in New Zealand, is a expert hunter and highly-respected author of a series of hunting and long range shooting books. Nathan’s first book, The Practical Guide to Long Range Hunting Rifles, is a classic — one of the best treatises ever written on choosing and using a hunting rifle.
The Remington 700 is the most popular bolt-action rifle in America, according to Gunbroker.com sales figures for new and “previously-owned” rifles. So, chances are that you (or a family member) have a Rem 700 of some vintage sitting in the gunsafe. Click the link above for a PDF version of the Remington 700 Owner’s Manual (also covers models Seven, and 673).
Forum member Keith W. (aka “Cigarcop”) of KW Precision LLC is a talented riflesmith whose projects display outstanding finish work and attention to detail. Keith does some of the best bedding work we’ve ever seen. Back in 2018, Keith built a stunning F-Class rig for a shooter in Delaware. It’s a beauty, that’s for sure. Keith has posted more details about this rifle in a Shooters’ Forum Thread.
This handsome rifle features a polished Stolle (Kelbly) Panda Action, and two (2) Brux barrels, both chambered for the .284 Winchester cartridge. The real eye-catching component of this rifle is the stunning Cerus F-Open stock. This features multiple laminations with highly-figured Walnut on the sides. This certainly ain’t your “off-the-shelf” laminated stock. This just shows the beauty that can be achieved with carefully-chosen lamination layers (plus 12 coats of clear).
This beautiful F-Open rig features a laminated wood stock with stunning figured walnut on the outside.
Keith of KW Precision LLC is renowned for his bedding work, and this rifle shows why. Keith takes great pride in his work, and his attention to detail is second to none. This bedding job is as good as it gets.
Bringing out the figure in the wood requires multiple finish coats (and careful sanding between coats). But the results are worth it. Shown below is the Cerus stock, BEFORE the finish coats were applied. It took time and effort to transform the “naked” Cerus stock into a true stunner. Keith applied twelve (12) coats of PPG Automotive Clear with wet sanding between each coat.
And Another Beauty — This One Built for Capstone’s Boss
CigarCop recently completed a handsome rifle for Bill Gravatt, President of the Capstone Precision Group, distributor for Berger, Lapua, Vihtavuori, and SK products. This F-TR rig is another example of beautiful craftsmanship. Look at that bedding job in the lower photo! To learn more about this rifle, which features a black Borden Rimrock BRM action (with fluted bolt), read this Shooters’ Forum Thread.
This article is part of Sinclair Int’l Step-By-Step Reloading Series. Most of the products mentioned in this article are sold through Brownells.com.
by Roy Hill, Brownells/Sinclair Copywriter
Making your own precision handloads is a meticulous journey with many steps, many important matters to consider, and many sets of measurements to calculate. For those who pursue the perfect group, the highest score, the really long accurate shot, the rewards more than outweigh the effort. Choosing the right cases, deburring the flash holes, making the primer pockets uniform, trimming the cases, and lubricating them are all familiar – and critical – steps along the journey. And now that your brass preparation is complete, you are at last ready to start running the cases through your press and fill them with primers, powder, and bullets. The very first die the brass encounters is the sizing die. You insert the case, work the press’s lever to return the case to its correct pre-fired dimensions – and the journey continues.
There are three types of sizing dies to think about: neck, full-length, and small base. All three have specific benefits and potential drawbacks, and you should choose the type of die you use by thinking very carefully about what kind of shooting you plan to do with your handloads. No matter which type you select, most sizing dies will also punch out the old spent primer with some sort of decapper assembly that uses a hardened steel rod. Many types of sizing dies use an expander ball inside the die to make sure the neck of the case will accommodate a bullet after being sized. With some size dies, the expanders are easily removable and interchangeable, letting you get exactly the neck tension you want. If you are reloading for pistol cartridges, carbide sizing dies allow you to quickly resize without applying any lube to the case. But rifle cases always need lube.
Neck-Sizing Dies Neck-sizing dies resize only the neck of the case. The benefit of sizing only the neck is that the brass is “worked” very little, letting you reuse the same cases many times over. Also, cases that have already been fired in your rifle are perfectly fireformed to fit that rifle’s chamber, which can help accuracy. However, neck-sized cases will fit only the specific rifle they were originally fired in, and may still require a little extra force to chamber or extract.
Sinclair recommends that neck-sized-only cartridges should not be used any in other rifle besides the one they were originally fired from [unless they are also FL-sized], or in any action other than a bolt-action. Neck-sized-only rounds are great for the target range or the benchrest but should not be used in critical situations like military or police operations, or hunting. And if you fire them enough times, neck-sized cases will still need to be full-length sized periodically for you to keep using them.
Full-Length Sizing Dies Full-length sizing dies do exactly what their name says: resize the full length of the case, not just the neck. Full-length sizing helps create handloads that will function in any rifle, not just the one from which the cases were originally fired. The potential downside of full-length sizing is that it may shorten case life because it works the brass more than neck sizing. But it’s possible to “tune” today’s full-length sizing dies so they barely work the brass at all, as this article by Sinclair Reloading Tech Ron Dague shows.
Illustration Shows How a Full-Length Sizing Die Works
Another way to reap the benefits of full-length sizing is to use Redding’s full-length bushing dies, which size the full length of the case but use a system of interchangeable bushings that enable you give the case neck the bare minimum of resizing needed. To see how finely adjustable bushing dies are, and how they resize the case while fully supported, CLICK HERE for Video. The neck bushing helps you precisely control the neck tension to help increase the consistency and accuracy of your handloads.
Small Base Dies
A Small Base Die is just another type of full-length sizing die, but one that is typically used when reloading for semi-automatic rifles, like the AR-15, M14, or AR-style .308 rifles. (It may also work well for bolt guns that need extra sizing on the lower section of the case.) A small base die works exactly like a full-length sizing die, only it compresses the brass just a bit more, usually about .001″ more, and may even push the case shoulder back just a hair. Small base dies give that extra bit of compression to the brass to help make sure the case will properly extract from a semi-automatic firearm. The upside is that you get precision handloads that should work flawlessly in your semi-automatic. The downside is case life is really shortened, especially compared to brass used only in one bolt-action rifle, because the brass is worked more.
Shoulder Bump Gauges
A handy tool for setting up your full-length sizing dies as close as possible to your rifle’s chamber is the Sinclair bump gauge. The bump gauge lets you resize the case as little as possible, to extend case life and help your handloads fit your rifle almost like a neck-sized only die. You use deprimed cases fired in your rifle and bump gauge inserts to help you set up the die so it resizes the case only about .001″ to .004″, depending on what type of rifle you’re shooting.
Video shows how to use a shoulder bump gauge to set up your full-length dies
Article Find by EdLongrange. We welcome reader submissions
Scary stuff — AK-74 after firing corrosive ammo and not being cleaned for a week.
Image courtesy ADCOFirearms.com.
No doubt you’ve heard the term “corrosive” used with respect to ammunition. But what exactly is “corrosive ammunition” (and how does it different from non-corrosive ammo)? What is the chemistry that leads to corrosion, and what cleaning procedures should you follow if you shoot corrosive ammunition? Brownells has come up with answers to these and other questions in a helpful TECH TIP video about corrosive ammo.
In this informative video, Brownells gun tech Steve Ostrem explains the primer-related chemistry that makes some ammo corrosive. The video then reviews suggested cleaning procedures you should follow after you have fired corrosive ammo through any firearms.
What Is “Corrosive” Ammunition?
What makes ammo “corrosive”? Generally speaking, primers are the problem. When corrosive ammunition is fired, the ignited primers leave a residue of corrosive salts. Typically these primers contain potassium chlorate, or sodium petrochlorate which, when burned, change into potassium chloride or sodium chloride. Sodium chloride is also known as common table salt.
Potassium chloride and sodium chloride are both very hygroscopic (i.e. they attract water). Because of that, these alkalis are rust generators. When exposed to the hydrogen and oxygen in the air (and moisture) potassium chloride and sodium chloride can form an acid that quickly causes metal rifle parts to rust and pit.
Given a choice, you may wish to avoid corrosive ammo altogether. However, for some types of fire-arms, particularly older military-style rifles, the most affordable ammunition may be corrosive. If you choose to use corrosive ammo, it is important to clean the gun thoroughly after use. After firing, you want to use an element that will neutralize the primer salts. Brownells suggests a water soak (see video above). Alternatively, Windex with ammonia can help neutralize the salts, but that doesn’t finish the job. After the salts have been neutralized and flushed away, basic anti-corrosion protectant (such as Eezox or other gun oil) should be applied to all metal parts.
This video ahows the effects of Corrosive Ammo after one month without cleaning:
To learn more about the proper procedures for cleaning rifles exposed to corrosive ammo, we suggest an article by Paul Markel on Ammoland.com. Markel, host of the popular Student of the Gun TV series, states that: “Windex (with ammonia) is the Corrosive Ammo shooter’s best friend. After you are done shooting your corrosive ammunition for the day, squirt the window cleaner liberally from the chamber down the barrel. Pull the bolt / bolt carrier / op rod if there is one and douse them as well. A couple of old cotton t-shirts will come in handy. A cotton barrel swab is a nice accessory but you can make do with patches. Some folks will rinse all of the ammonia and loosened corrosive salts off with hot water. Others prefer to wipe it all down and let the ammonia evaporate. Either way, once the corrosive salts have been tackled with the window cleaner, it is time for an all-purpose brush (old toothbrush) and some gun oil.” READ Full Article by Paul Markel.
Video Tip from EdLongrange. We welcome reader submissions.
Buell’s Beast with Massive 35 Inch Barrel
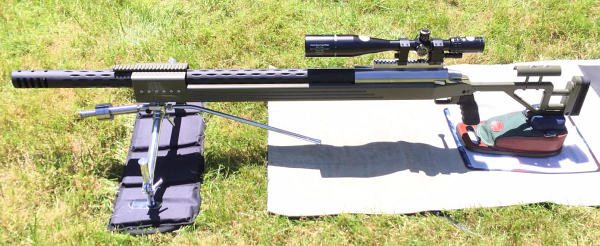
A few seasons back, Our friend Darrell Buell built a new Beast — a monster 64-inch-long .375 CheyTac that weighs more than 70 pounds! Designed for ultra-long-range shooting (two miles and beyond), this beast represents the state-of-the-art in extreme long-range rifles. NOTE: to see more details, click the two images above to open Full-Screen Photos.
Darrell reports: “This rifle is pretty much purpose-built to shoot 2+ miles extremely accurately. It is a .375 CheyTac (lengthened) built on a BAT 2.5″ action. The custom 35″, 1:10″-twist Brux barrel is a fat, 2″-diameter ‘straight taper’ with fluting. A custom 5″-long muzzle brake is fitted at the end. All barreled action work was done by R.W. Snyder Custom Rifles. The stock was created to fit the build by PDC Custom, and the massive muzzle brake as well.” The “bridge” at the end may look like a barrel block, but it’s not — the barrel completely free-floats. (The Picatinny rail on top of the bridge allows use of an overhanging bipod as an alternative to the JoyPod).
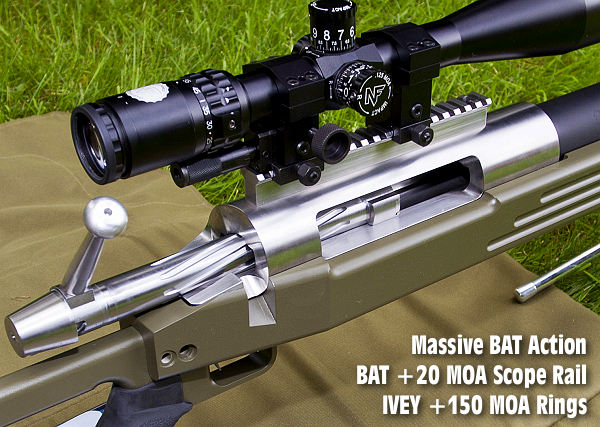
Darrell has lots of elevation on tap: “With 150 MOA in the Ivey rings, another 20 MOA in the scope rail, 55 MOA in the Nightforce Competition scope, and 10 MOA in the FCR-1 reticle, there’s an impressive +235 MOA available.”
Counter-Weighted SEB Joy-Pod Up Front
The bipod Darrell will be using for his ELR sessions and the ‘King of 2 Miles’ match is a custom counter-weighted JoyPod crafted by Seb Lambang. With the counter-weight, Darrell says his monster 70-lb gun “adjusts as smoothly as an F-T/R rig”. The glass is a Nightforce 15-55x52mm Competition scope carried in Ivey +150 MOA rings, which in turn are mounted to a +20 MOA BAT scope rail. Darrell says: “It’s been a heck of a couple months, getting this monster built in time, thanks particularly to Southern Cerakote, which turned it around in less than 24 hours.”
Buell’s Beast runs 350gr solid bullets at approximately 3250 fps. Check out the massive .375 CheyTac cartridge compared to a .308 Winchester:
This one-of-a-kind “JoyPod” was produced by Seb Lambang specifically for Buell’s big .375 CheyTac rifle. Darrell needed a JoyPod that wouldn’t sink under a heavy load. Seb explains: “This is the world’s first JoyPod equipped with an adjustable counterweight, to balance his 75-lb gun. I did some experiments and put some weights ranging up to 60+ lbs on the top, and I found that the joystick action works like a regular one….it’s smooth, light, and precise. In addition, the counterweight can be bent down to not interfere with the bottom of the barrel. The counterweight is secured into the front center shaft by a thumb screw, and there is a tightly fitted pivotal joint on the counterweight to allow angle adjustment.”
Darrell is happy with his customized coaxial bipod: “In addition to the adjustable counterweight system on the front, this JoyPod comes with a longer, solid joystick. These additions will make for extremely smooth, precise adjustments, even if the rifle weighs in at 75 pounds or more. Not including the counterweight, the actual structure of this bipod weighs in at a mere 1.09 pounds — exactly what the standard JoyPod weighs. It is extremely strong, however. Seb has pictures of himself standing on the pod … and he weighs 150 pounds!”
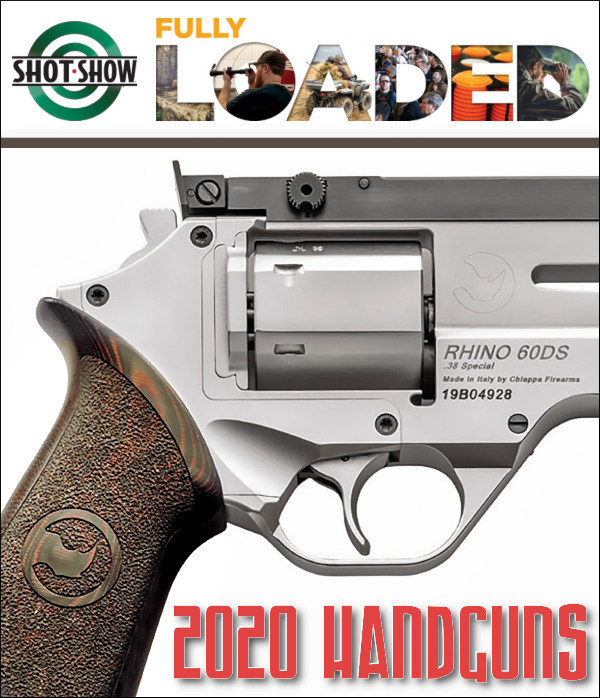
When covering SHOT Show 2020 our reporters will focus primarily on rifles, optics, and reloading equipment, because this website is dedicated to rifle accuracy. However we know many of our readers are interested in semi-auto pistols and revolvers, and we bet the majority of our Forum members own handguns. This Editor has competed in various pistol disciplines and I still love my semi-autos and wheelguns. So, for you fellow pistoleros out there, here’s our “Pick Six” — a half-dozen new handguns (both semi-auto pistols and revolvers) — all new for 2020.
1. Korth (Nighthawk Custom) — Korth Ranger
The new German-made Korth Ranger revolver is one of the most impressive wheelguns you can buy — at any price. Sold in the USA by Nighthawk Custom, Korth revolvers feature best-in-the-world workmanship, superb triggers, and outstanding accuracy. Designed for revolver match shooting, the Korth Ranger features a top Picatinny rail for Red Dot optics. The barrel shroud has lightening cuts which reveal a Lothar Walther match barrel with target crown.
2. Ruger 57 — New Competition Pistol for 5.7×28 Cartridge
The all-new Ruger 57 is an impressive full-size pistol with 4.94″ barrel. This looks like it will be a hoot to shoot. The 5.7×28 cartridge is a high-velocity, low recoil round — sort of a 22 WMR on steroids. Expect to get close to 1700 fps from a 40gr cartridge. We expect this long-slide pistol will be used mostly for gun games, but with a 20-round magazine, it certainly can handle self-defense duties too. According to a recent VIDEO REVIEW by 22Plinkster, the new Ruger 57 performs well. READ Ruger 57 Field Test.
3. Colt Python for 2020 — Stainless with 4.25″ or 6″ Barrels
The 4.25″ barrel Python is 9.75″ long and 42 ounces. The 6″ model is 11.5″ long and 46 ounces.
The Snake is back baby! For 2020, Colt’s Manufacturing Co. LLC will offer a refined and upgraded Colt Python with a hefty $1499.00 MSRP. The legendary double-action revolver, which originally debuted in 1955, returns in stainless steel in 4.25″ and 6″ barrel lengths. It is designed to be stronger than before. Numerous improvements were made to reinforce the revolver, including the use of stronger stainless steel alloys and a re-designed rear sight which allows for a 30% increase in the cross-sectional area of the top strap — meaning more steel for a stronger revolver.
4. Keltec P17 — New Compact, Budget-Priced .22 LR Pistol
Keltec’s new P17 rimfire pistol is lightweight, easy to handle, and features a fiber optic front sight and an adjustable rear. Priced at just $199.95 MSRP, the .22 LR P17 has 16+1 round capacity and ships with three, 16-round magazines. This is a small pistol — it weight just 14 ounces and OAL is 6.65″. Keltec states: “The new, affordable P17 pistol makes range days a lot less expensive and far more fun.” With low cost .22 LR ammo and a 16+1 capacity, this should be fun to shoot.
5. Ruger Super GP100 Revolver in 9mm Luger (9x19mm)
The 9×19mm Parabellum (aka 9mm Luger) cartridge was introduced in 1902 by German weapons manufacturer Deutsche Waffen und Munitionsfabriken (DWM) for the Luger semi-auto pistol. Now 118 years later, Ruger is bringing us a sturdy, 6″-barrel revolver for this popular cartridge. Ruger adapted its existing Super Redhawk frame for this Super GP100 9mm revolver, which features a rather short 8-round PVD-coated cylinder to better fit the 9x19mm round. According to Guns.com the 9mm GP100 “uses a cylinder and extractor cut for moon clips to speed up reloading [and] sports a 6-inch half-lug sleeved and shrouded barrel with an 11-degree target crown[.]”
6. Wilson Combat — Experior Series 1911 Pistols
Wilson Combat’s new Experior handguns feature match-grade components, sweet triggers, and accuracy guarantees. Wilson states that “The Experior lineup [is] the most fully-loaded package we offer, showcasing nearly every tactical, functional and cosmetic option as a standard feature. They are a unique blend of classic 1911 design, paired with modern-day reliability and ergonomic enhancements[.]” Experiors will be offered in both 9mm and .45 ACP in a variety of barrel lengths. There will be both single-stack and double-stack Experior models.
MORE HANDGUNS HERE: You’ll find 18 other new-for-2020 pistols featured on the Guns Holsters & Gear (GHG), Shot Show 2020 Preview Page
BONUS — Upgraded for 2020
Smith & Wesson M&P M2.0 C.O.R.E. Pro Series Pistols
Smith & Wesson M&P 2.0 pistols were introduced back in 2017, so they aren’t new. But for 2020, S&W is offering Performance Center variants with cool new features. The New M&P M2.0 Performance Center pistols include porting and Competition Optics Ready (C.O.R.E.) slides. Chambered in 9mm and .40 S&W, the new Performance Center M&P M2.0 pistols are available with either a 4.25″ or 5″ barrel. Features may include ported barrels and slides and fiber optic sights. For those looking to mount an optic without custom work, the new C.O.R.E. pistols have slides cut for optics straight from the factory. These will support the majority of popular pistol reflex sights.
“A well regulated Militia, being necessary to the security of a Free State, the right of the people to keep and bear Arms, shall not be infringed.”
If you’re reading this, you’re probably a firearm owner (most of our Daily Bulletin readers are). But how much do you really know about the history of the Second Amendment to the U.S. Constitution? The Second Amendment itself contains only 27 words (printed above), but those words have a rich history behind them.
To illuminate the origins of the Second Amendment, and to explain how its interpretations have evolved over the years, Arizona Attorney, the journal for the State Bar of Arizona, has published a detailed two-part “Illustrated History” of the Second Amendment by attorney Robert J. McWhirter, an expert on the Bill of Rights. To read the two-part series, CLICK Here for PART ONE, and CLICK Here for PART TWO.
We think all gun owners should read McWhirter’s article, which is both entertaining and insightful. Don’t worry — this is not a dull “law school” treatise. McWhirter’s article features dozens of illustrated footnotes (some fascinating, some merely amusing). Here are some sample footnotes — you can see this is a treasure trove of Second Amendment trivia.
*The American Bar Association has published Mr. McWhirter’s book Bills, Quills, and Stills: An Annotated, Illustrated and Illuminated History of the Bill of Rights.
Creedmoor Sports has released a series of helpful “how-to” videos in its new InfoZone web page. In the latest InfoZone video Bill Gravatt shows how to seat bullets using L.E. Wilson Hand Dies and an Arbor Press. The basic process is simple, particularly with a micrometer-top seating die. That makes it easy to adjust and set seating depth. Before you start seating bullets, you want to adjust the height of the arbor so the stroke is appropriate to the height of your die.
Bill Gravatt Shows How to Use Hand Seating Dies — Creedmoor INFOZONE
ARBOR PRESS TECHNIQUE: When using an arbor press, smooth is good. You don’t want to slam the handle down quickly. Try to repeat the same motion each time. You can also experiment by seating the bullet part way, then rotate the cartridge (in the die) and do the final seating with a second stroke. If your arbor press has a force gauge, note both the max value of the gauge needle and how it moves as you seat the bullet. If the needle spikes too rapidly, or bounces back and forth irregularly, set that cartridge aside and/or mark it. You could have neck tension issue with that case or some other fault. You might even have a bad bullet. That’s rare, but can happen. The key to success is moving the press arm in a smooth motion every time, maintaining the same down-pressure with each cartridge.
Here Bill Gravatt Offers a Simple Tip for Adjusting Wilson Seating Dies
One of our Forum readers asked “How can I get a custom in-line seater for my new rifle?”. First, we would say that, if you are not shooting an unusual Wildcat, check first to see if L.E. Wilson makes a stainless Micrometer Seater Die for your rifle. These dies are a joy to use, and we’ve found the fit to be exceptionally good with many calibers. Typically priced from $90-$100, Wilson stainless micrometer-top seaters are available for dozens of cartridge types: .204 Ruger, 20 BR, .222 Rem, .223 Rem, 22 PPC, 22 BR, .22-250, .223 WSSM, 6 PPC, 6mmBR, 6XC, 243 Win, .243 WSSM, 25 WSSM, 6.5×47 Lapua, 6.5 Creedmoor, 6.5-284, 26 Nosler, .270 WSM, 7mm-08, .284 Win, 28 Nosler, 7mm RUM, 30 BR, 30 IHMSA, .308 Win, .300 WinMag, .338 Edge (and MORE).
If you do want a custom seater die, the process is relatively simple. Purchase a die blank from Wilson and have your gunsmith run the chambering reamer in. Forum member Gunamonth explains: “I start with a Wilson seating die blank. They’re available from Sinclair and other vendors. Just run the reamer in. For some of my rifles, where I wanted the stainless die with the micrometer adjustment, I bought a smaller die and had the smith ream it with the chamber reamer. That’s how I had my 6 Dasher and 6mm AI seaters made. With the Dasher I stared with a 6mmBR Micrometer die.”
SEATER STEM TIP: If, on your seated bullets, you are seeing a sharp line around the jacket near the ogive, you may want to smooth out the leading edge of the Wilson seater stem (see above left). Do this by putting a little lapping compound on one bullet and manually spin this around in the stem. Without much effort you’ll have a smooth bullet/stem interface.
Micrometer Top Add-on
We really like micrometer tops on a seating die. But what if Wilson doesn’t make a micrometer top seater for your chambering? Don’t despair, Sinclair Int’l sells a $39.99 micrometer top that can be added to Wilson standard seaters or to a custom seater die made from a Wilson die blank.
22Plinkster Tours CCI/Speer Idaho Factory
Trickshot artist and YouTube host 22Plinkster recently got a chance to tour the CCI/Speer production facility in Lewiston, Idaho. This large plant produces both rimfire and centerfire ammunition. While touring the plant, 22Plinkster was allowed to capture video showing the creation of .22 LR rounds from start to finish. This is a fascinating video, well worth watching.
This revealing video shows all phases of .22 LR ammo production including cupping, drawing, annealing, washing, drying, head-stamping, priming, powder charging, bullet seating, crimping, waxing, inspection, and final packaging. If you’ve got ten minutes to spare, we really recommend you watch the video from start to finish. You’ll definitely learn some new things about rimfire ammo.
Field & Stream Tours Federal Ammo Plant in Minnesota
Note to Viewers — After Starting Video, Click Speaker Icon to HEAR audio!
Last year a Field & Stream writer toured the Federal ammunition production facility in Anoka, Minnesota. This large plant produces both rimfire and centerfire ammunition. While touring the plant, the reporter was allowed to capture video showing the creation of .22 LR rounds from start to finish. This is a fascinating video, well worth watching. Click speaker icon for sound.
The Manufacturing Process for .22 LR Rimfire Ammunition Shooting Sports USA explains: “Rimfire cartridge cases are the oldest self-contained cartridge in existence, having been in continuous production since the mid-1850s. Rimfire cases are drawn from a thin piece of brass and formed with a hollow rim. A priming compound is then forced into the case using centrifugal force, where it is charged with powder and a bullet is seated in the mouth of the case. The case is then crimped around the bullet to ensure sufficient push and pull when the round is fired. When the firing pin strikes the thin brass rim of the case, the hollow rim is crushed and the primer is ignited.” Source: SSUSA.org 9/2/2017.
Buried in CCI Rimfire Ammo
22Plinkster was literally up to his neck in ammo while touring the CCI/Speer Idaho ammo plant. He says: “This was truly a dream come true for me. I can’t thank the people at CCI and Speer enough for allowing me to do this. I couldn’t possibly show everything that went on at the factory. However, hopefully I showed you enough for you to grasp the concept of how rimfire [ammo] is made.”
History — Speer Brothers Brought Ammo Production to Lewiston
Here is an interesting historical footnote. Today’s large CCI/Speer operation in Idaho can be traced back to the companies founded by the Speer brothers. After settling in Lewiston in 1944, Vernon Speer started Speer Bullets. A few years later, in 1951, Vernon’s brother Dick (with partner Arvid Nelson) started Cascade Cartridges Inc., a producer of small-arms ammunition and primers. Yes, as you may suspect, Cascade Cartridges Inc. is now CCI, a Vista Outdoor company, and one of the largest manufacturers of primers and loaded ammunition. Today, the CCI/Speer Lewiston plant produces both Speer bullets and CCI-branded ammunition and primers. Vista Outdoor’s predecessor, ATK, acquired the plant in 2001. Vernon Speer died in 1979, and Dick Speer died in 1994.




 No doubt you’ve heard the term “corrosive” used with respect to ammunition. But what exactly is “corrosive ammunition” (and how does it different from non-corrosive ammo)? What is the chemistry that leads to corrosion, and what cleaning procedures should you follow if you shoot corrosive ammunition? Brownells has come up with answers to these and other questions in a helpful TECH TIP video about corrosive ammo.





 “A well regulated Militia, being necessary to the security of a Free State, the right of the people to keep and bear Arms, shall not be infringed.”


 One of our Forum readers asked “How can I get a custom in-line seater for my new rifle?”. First, we would say that, if you are not shooting an unusual Wildcat, check first to see if


