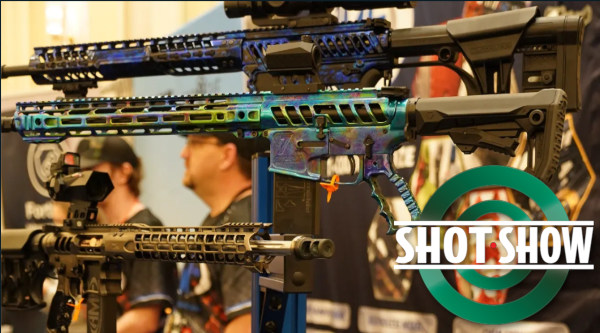
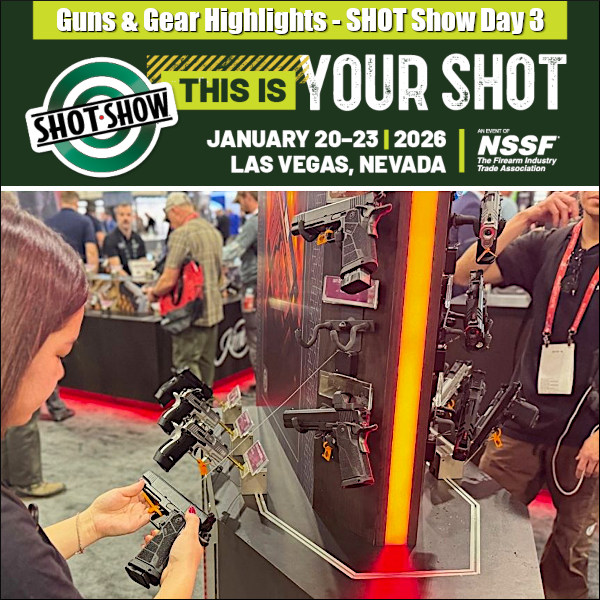
It’s now Day 3 at SHOT Show 2026. There are impressive new offerings from hundreds of manufacturers. In today’s story we feature some notable new rifles, pistols, and suppressors. To learn more about new-for-2026 products, check out the SHOT Show Blog which had these recent features:
SHOT Show is one of the biggest trade shows of the year among ALL industries. This year there are thousands of exhibitors spread out over two exhibit halls the combined size of 14 football fields (19 acres)! This is the 9th largest trade show in the USA, promoting an industry that supports over 380,000 jobs and generates over $26 billion in wages.
Savage Revamps Multiple Rifle Models
As displayed at SHOT Show 2026, Savage Arms has updated its rifle line-up, including the Savage 110, signaling a major refresh across multiple platforms. While specifics are still limited, these changes point toward improved features and modern refinements throughout the lineup. This video features GunsAmerica Media Editor True Pearce, who recently tested many new firearms at Industry Day at the Range.
New CZ Rimfire Match Rifle for Position Shooting Competitions
The new CZ 457 Target is a break-through. This is the first high-end rimfire rifle CZ has crafted for high-level 3P competition. Purpose-built for ISSF 3-position and 3P Olympic competition, the new CZ 457 Target in .22 LR features a fully-adjustable aluminum chassis, fully-adjustable trigger and a longer, 26-inch Match barrel with 12 grooves and a target crown.
New Rifle Builder PRO Platform
At SHOT Show 2026 our friend Gavin Gear has introduced an impressive new software/info system for gunsmiths and gun-building operations. RifleBuilderPro.com provides key specifications and data for smithing operations. But it is more than just about machine controls — Rifle Builder PRO will be a comprehensive platform for precision gunsmiths including: Comprehensive cartridge and rifle action information, Integrated tooling solutions, Digital machining companion, Training for seasoned machinists and newcomers, and Online community. Stay tuned for a more complete report in the weeks ahead.
New Trends in Suppressors — Elimination of NFA Tax Stamp Fee
Thanks to the Trump Administration, the expensive cost of a Tax Stamp for a Silencer/Suppressor has been eliminated. You still have to fill out paperwork, but suppressors are now MUCH more affordable. The $200 NFA tax stamp for suppressors (silencers) and other items like Short-Barreled Rifles (SBRs) was eliminated effective January 1, 2026, meaning the monetary fee is now $0, but the registration process through the ATF (forms, background checks, fingerprints) remains mandatory. The change significantly lowers the cost barrier to owning these items, making them more accessible, but does not remove them from National Firearms Act (NFA) oversight.
The elimination of NFA fees is creating a huge growth in the suppressor markets. At SHOT Show 2026 several suppressor makers have showcased innovative designs and affordable options. This video reviews Dead Air Silencers and the cutting-edge technology behind their most innovative suppressor designs with lightweight titanium construction. Highlighted in this video are the RXD910Ti and RXD22Ti, highlighting their advanced materials, impressive sound suppression, and multi-platform versatility. Also featured is the Nomad Ti OTB, an over-the-barrel design.
Evolution of SIG Sauer’s M7 Military Rifle — Updates
In this video, TFBTV’s James Reeves chats with SIG Sauer about the SIG M7 rifle and what has changed since the M7’s adoption by the U.S. Army. While the M7 has already entered service, SIG explains that the platform is still evolving through the Army’s Product Improvement Effort, driven by real soldier feedback rather than a ground-up redesign. Updates focus on reducing weight, shortening the system with an 11-inch barrel, refining the suppressor, and improving handling without walking back the performance goals of the 6.8×51 cartridge. This conversation breaks down what was changed, why it was changed, and how the M7 continues to mature as the Army\s next-generation service rifle.
New High-BC Sierra MatchKings and New GameKing Bullets
Sierra has released a large selection of new match and hunting projectiles. There are new GameKings, 7 new tipped MatchKings, and two impressive new all-metal MatchKings — .22 Cal 77gr and 6mm 105gr. The new 105-grainer MK caught our attention. Sierra claims that its new 105gr MatchKing is the highest BC 105-grain bullet available, delivering an unmatched blend of speed and high BC. Sierra says the new 105gr SMK (non-tipped) offers the BC performance of heavier bullets while maintaining the velocity advantage of a lighter projectile.
Beretta B22 Jaguar .22 LR Pistol
The team at All4Shooters.com spotted a cool new rimfire handgun, the Beretta B22 Jaguar. This new blowback semi-auto handgun is an innovative chassis gun. Controls are ambidextrous and you can even choose left-side or right-side ejection. The mechanical system is Ruger-type, with a bolt that is cocked by operating the two rear serrated ears. The double-stack magazine has a capacity of 15 rounds. The standard B22 Jaguar pistol is priced at $699.00, while the B22 Jaguar Competition, featuring match barrel, compensator, and thumb rest, is $999.00.
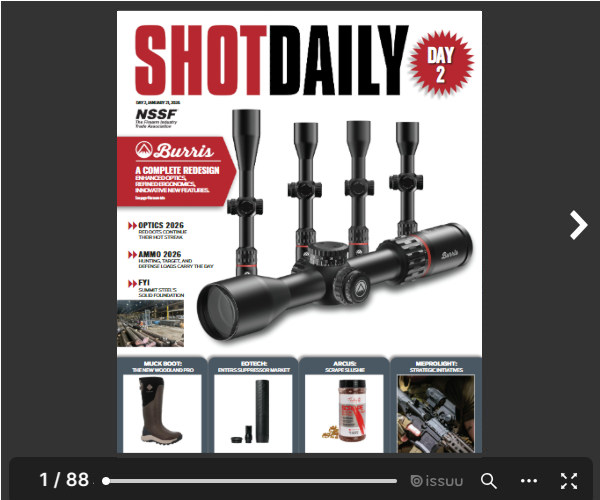
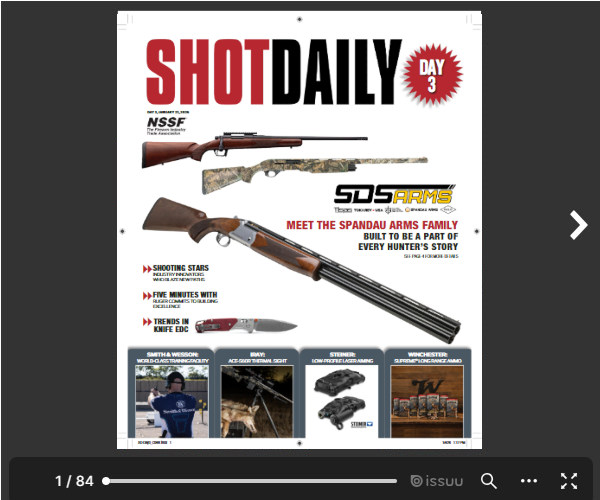
SHOT Daily Magazines Feature New Guns, Optics, Products
Want more information on new firearms and gun gear? Then check out SHOT Daily Magazine. Shown below are the digital edition covers for the SHOT Daily Day 2 and Day 3 magazines distributed at SHOT Show. The Day 2 issue features new scopes and ammo products while the Day 3 issue features a variety of topics including notable shooters. Click either Day 2 or Day 3 cover pages below to launch the full digital versions which you can read online for free.
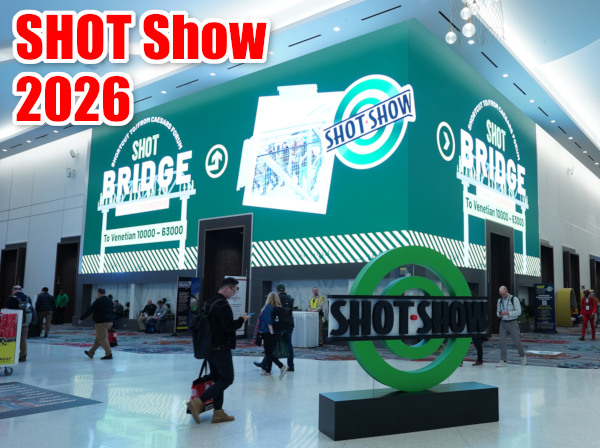
It is now Day Two of SHOT Show 2026 in Las Vegas. There are huge crowds visiting the thousands of display booths in the “miles of aisles” (19 acres to be precise). Over 52,000 people have registered for the event. This year’s SHOT Show encompasses two facilities — the Venetian Expo AND the new Caesars Forum. Combined, these facilities provide over 830,000 net square feet of exhibit space. The two trade show halls are connected by an elevated walking bridge.
CLICK HERE for the searchable database of all SHOT Show 2025 exhibitors.
Today, as part of our Day Two coverage of SHOT Show 2026, we feature videos and images of new rifles from Smith & Wesson, CZ, Century Arms and new chassis systems from MDT. Other major makers, including Beretta, Bushmaster, FN, Remington, Rossi, SIG Sauer, and Tikka have many new guns on display at SHOT Show 2026.
Interesting New Products at SHOT Show 2026
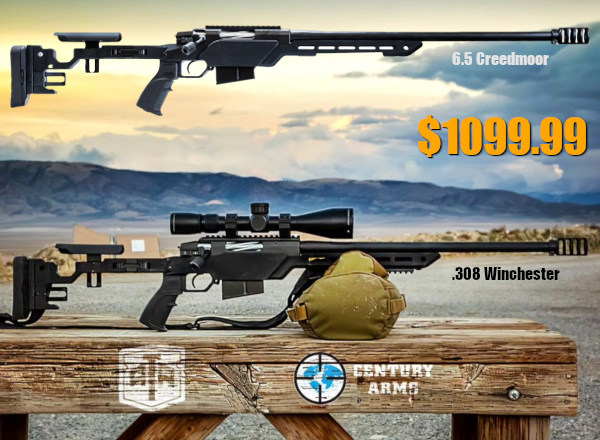
Century Arms ATA ALR — Affordable Precision Rifle
At SHOT Show, Century Arms showcased the new ATA ALR Tactical Rifle. Chambered in .308 Win or 6.5 Creedmoor, this modular rifle comes complete with adjustable aluminum chassis and muzzle brake. This could be a good starter rifle for PRS/NRL competition that does double duty as a hunting rig. And the ATA ALR is just $1099.99. That’s a great deal — you can pay that much just for an aftermarket chassis system.
Smith & Wesson New Metal-Frame Handguns
Smith & Wesson has many new products coming out in 2026. Many impressive new handguns have been seen at this year’s SHOT Show. This video covers some very impressive S&W handguns that feature aluminum and steel frames. The first pistol is the S&W SPEC VI with aluminum frame, ported barrel, and pre-installed Aimport optic. Next the reviewer covers the impressive steel-framed HD series pistols — both standard and competitor models. With good ergonomics and triggers, these are great for action pistol games.
MDT New Ultra-Light Chassis — Just 3.2 Pounds
In this video MDT Product engineer Josh Botha reviews the new MDT DRT lightweight chassis. This was designed for lighter weight for easier carry in the field by hunters. DRT stands for “Dead Right There” and this models was designed for “precision night hunting”. The chassis bare weight is just 3.2 pounds a significant reduction compared to previous MDT ACC chassis systems.
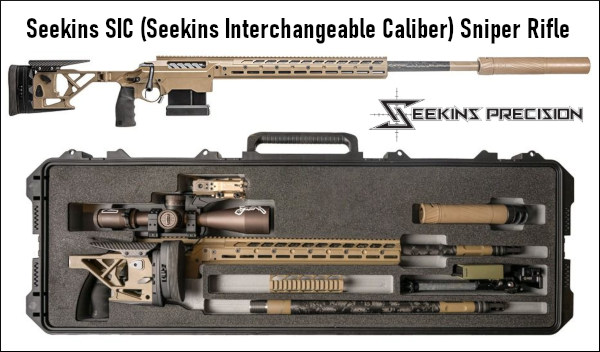
Ryan Cleckner — New Seekins SIC Multi-Caliber Sniper Rifle
Ryan Cleckner is a respected gun journalist and former Army Sniper marksman and Sniper Instructor. In this video, at the 1:00-minute mark, Ryan spotlights the innovative Seekins SIC rifle crafted specifically for U.S. Special Operations. This rifle is designed to allow quick and easy barrel/bolt/magazine swaps so you can shoot multiple cartridge types with the same rifle. The Seekins SIC rifle is built to withstand extreme environments while letting the operator rapidly select and swap calibers to meet mission criteria. The $8900.00 Seekins SIC is a “purpose-driven, modular system” — not a chassis retrofitted to accept a barreled action.
New Hunting Rifles — Many Rifles Reviewed
This video reviews multiple hunting rifles, many of which were introduced in the last 12 months. This employs manufacture-supplied video clips, but it’s a good starting point if you’re shopping for a new hunting and/or varmint rifle. The video covers the pros and cons of these hunting rigs. Note, there is considerable annoying commentary in this video, but it does have good footage of the rifles and shows the bolts working and the rifles cycling. In order, the featured rifles are:
0:55 Bergara Platinum Stalker
2:30 Weatherby Mark V Backcountry Capra
2:52 Bergera Premier Cima Pro
5:32 Henry SPD Predator
7:06 Ruger American Rifle Gen II Prairie
8:34 Marlin 1894 Trapper (10mm)
10:15 CZ 600+
11:10 Previous CZ Models
11:45 Weatherby Model 307 Alpine ST
13:28 Smith & Wesson Model 1894 Stealth Hunter
15:06 Christiansen Arms Evoke
16:36 Bergara BMR-X (rimfire)
Handgun Shorts — CZ and Walther
NEW Nightforce NX6 Scope Family for 2026
Nightforce’s new NX6 riflescopes offer lightweight configurations with an impressive 6X magnification range across the series. NX6 options include: NX6 1-6x24mm, 2-12x42mm, 3-18x50mm, 4-24x50mm, and 5-30x56mm. NX6 scopes are designed for wide field of view and good clarity. The FieldSet turret system provides great repeatability and tracking while offering ease of use and configurability, allowing shooters to convert from capped to exposed dials and custom Bullet Drop Compensating (BDC) dials.
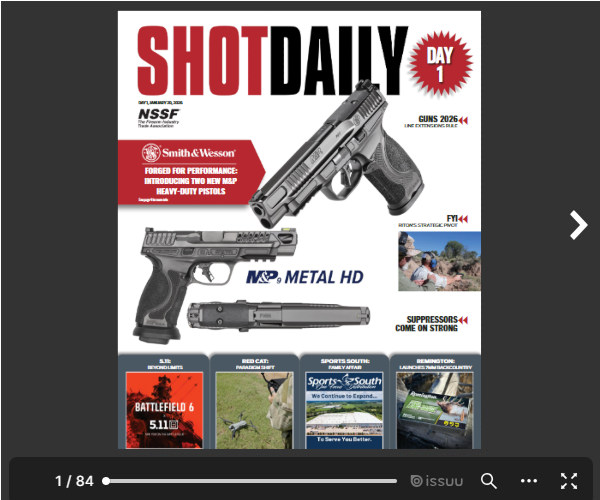
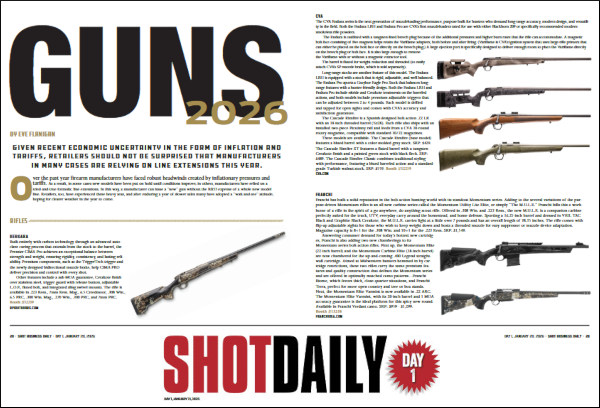
SHOT Daily Magazines Feature New Firearms
Want more information on new firearms and gun gear? Then check out SHOT Daily Magazine. Shown below is the digital edition cover for the SHOT Daily Day 1 magazine distributed at SHOT Show. The Day 1 issue features new rifles, shotguns, and pistols (pp. 30-42), and there is a good feature article on suppressors (pp. 64-71). The Day 2 issue should be released later today. Click the Day 1 cover page below to launch the full version which you can read in full for free.
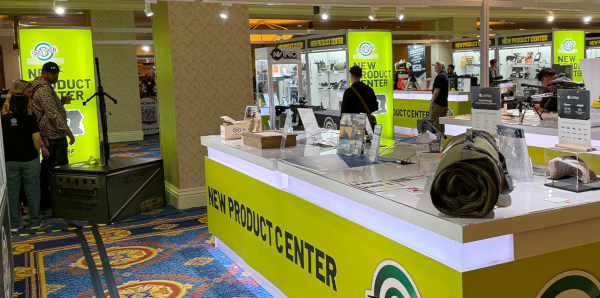
New Product Center
The New Product Center is a “must-see” offering at the Venetian EXPO. There are dozens of interesting and innovative new products all in one convenient location. On display were rifles, pistols, optics, electronics, gunsmithing tools, holsters, and dozens of other products.
Useful reloading gear does not have to be costly. Here are ten handy (and very inexpensive) items that belong on your loading bench or in your range kit.
• Magnifying Glass – We use a flat, 2″x2″ pocket 4x-8x magnifier. This folds up on itself. Very handy, we use it to inspect bullets and brass. Use this to check your flash holes for burrs, and check the meplats of your bullets before loading.
• Clear 35mm Film Cannister – Use this to transfer the thrown powder charge to the little measuring cup that sits on your scale. That way you don’t get any kernel splash. Also if the charge weight is obviously off, it’s easy to dump back in the measure. A film canister works pretty well as a trickler too.
• Compressed Air in a Can -- Get these at office supply stores. Use the can (with tube attached) to blow crud out of cases after cleaning the neck with a brush, and blast loose debris out of primer pockets.
• Pin Vise – A simple pin vise with a #53 bit is perfect for deburring small PPC and BR flash holes without reaming the flash-holes any larger. The Lapua PPC/BR flash-hole diameter is 1.5 mm, or 0.059″. Amazon.com sells a handy $8.29 pin vise kit with 10 bits, including the ideal 1.5mm bit. Other vendors offer a #53 pin vise bit that measures .0595″ or .060″ (depending or source). You can find pin vises and bits at hobby stores — here’s an example below with ten bits including 1.5mm. Pin vise sets can be found from $7 to $15.
• Bounce Dryer Sheets – The common dryer sheets eliminate “static cling” on your plastic reloading parts such as powder measure cylinders, powder funnels, and reloading press plastic bins. Thanks to Doc76251 for this tip.
• Ballistol Aerosol – Try using this versatile lubricant/solvent for full-length sizing. Spray some on a patch and you can wipe the carbon off your case necks. Then, continue to apply a very small amount of Ballistol on the case bodies — just thin sheen is all you need. Ballistol is super slippery, and easy to remove. For general full-length sizing (on small cases) it works great and doesn’t leave a gooey, waxy, or chalky residue. For heavier case-forming jobs, we recommend Imperial Die Wax.
• Shotgun Mop – Stick this in the chamber when using Wipe-Out foaming bore cleaner. This will seal off the chamber so the foam doesn’t flow into your action. For long chambers screw on one section of cleaning rod to aid extraction.
• Colored Sharpie Marking Pens – Mark your bullets ahead of the bearing surface, and the color transfers to the target. This way you can shoot multiple loads at the same point of aim and discern which load shoots the tightest. (Recommended for 300 yards and beyond). With colored bullet tips you can test multiple loads “round robin” to equalize wind effects. When testing seating depths for example, you can mark the longer-seated set of bullets red and the shorter-seated set green and shoot them during the same sequence. Just look at the colored marks on the target to see which grouped better.
• Thin Latex Gloves – You should keep a box of inexpensive, disposable latex gloves (the kind doctors use) in your loading room. These will prevent contamination of primers or powder kernels that you handle directly. Also, use the gloves when handling fine blued tools or firearms to prevent transfering body oils and salts that promote rust.
• Plastic Washers for Neck Mic – If you use a Sinclair Neck-wall Micrometer Gauge with integral stand, you can use thin plastic washers to adjust the height of the case on the mandrel. This makes it much easier to measure the same point on the case neck every time. Thanks to MikeCR for this tip (and photo).
Some years ago, the folks at TargetWorkz published a a handy set of plans for a 48-inch tall self-supporting target stand. This makes a great do-it-yourself project. To create a sturdy, self-supporting target frame, all you need are some 2x4s, 1x2x48 furring strips, plus fasteners. The target holder, which supports an 18×24 inch cardboard target backer, separates from the base for easy transport.
Note: There is no cross-piece shown in the plan, but we do recommend putting wood crosspieces at the top of the target stand and about 18″ up from the bottom. This will make the frame more rigid, and will allow the frame to work even if the cardboard is badly “shot up”. Use a T-square to set the crosspieces before attaching them with screws.
Alternative Target Stand May from ABS or PVC Pipe
If you like this kind of project, but want to build a frame that is taller, yet can break down into sections, we also have an article showing you how to build a nice frame with inexpensive ABS or PVC tubing. VIEW ABS/PVC Tubing Target Frame Plans.
The 2026 SHOT Show (Shooting, Hunting, and Outdoor Trade Show) is officially underway in Las Vegas, with the full opening this Tuesday morning, January 20, 2026. Thousands of new products are on display at SHOT Show 2026, hosted at the Venetian Expo/Convention Center and Caesars Forum in Las Vegas. Gunmakers from around the world will be introducing hundreds of new (and updated) rifles, pistols, and shotguns. Along with the new guns, SHOT Show will feature noteworthy new optics, electronics, reloading equipment, hunting gear, and accessories.
The 2026 SHOT Show combines exhibit space at Caesars Forum and The Venetian Expo with a bridge between the two facilities. This year more than 2,700 exhibitors will showcase their products on 830,000+ net square feet (19 Acres!) of floor space. SHOT Show is the largest trade show of its kind in the world. Total attendance at last year’s SHOT Show exceeded 54,000 exhibitors, buyers, media, and industry professionals from 50 states and over 115 countries.
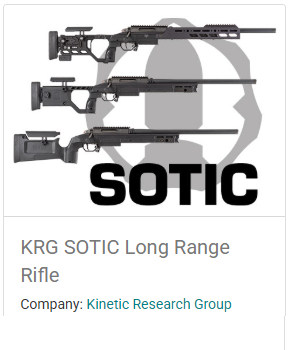
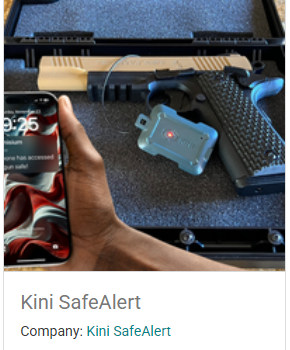
Here are 4 interesting products from SHOT Show 2026. Click each Image for more details.
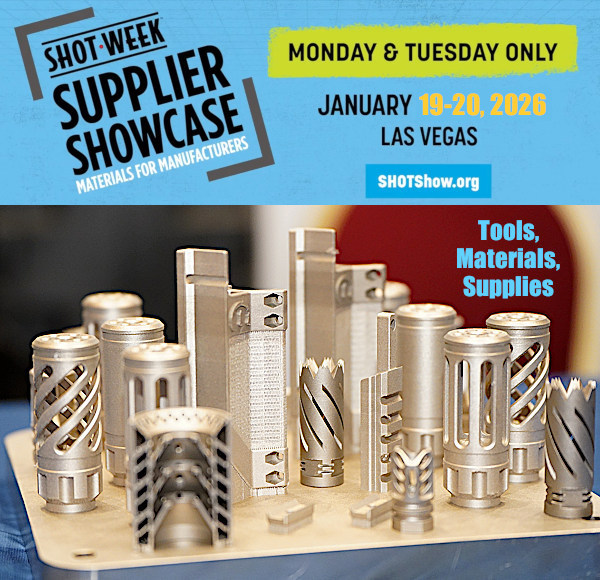
SHOT Show Supplier Showcase — Monday and Tuesday
The SHOT Week Supplier Showcase returns this year with 600+ suppliers and countless materials and solutions. After a great first day yesterday, the Supplier Showcase kicks off its second and final day in the 5th Floor Palazzo Ballroom of The Venetian Convention Center.
SHOT Show 2026 INFO Sources
SHOT Show TV and YouTube — For all SHOT Show TV product highlights, interviews and overall show coverage, visit the SHOT Show Youtube Channel. SHOT Show Daily News — The SHOT News Blog Page has multiple daily reports and links to key content. Social Media — For real-time highlights and breaking news from the show, the SHOT Show’s Facebook, Instagram, YouTube, and X (Twitter) feeds offer regular reports with interviews, photos, and videos. SHOT Show Mobile App — Download the SHOT Show 2026 Mobile App for real-time show announcements, interactive floor maps, meeting and scheduling functions, product-information downloads (including product scanning at the New Product Center), SHOT Show video feeds and more!
Here’s an inexpensive product that can make your case prep and loading tasks easier. We use and recommend the cleverly-designed Lyman Bleacher Blocks. These multi-level (stepped) cartridge holders save space on your bench AND make it easier to select a particular case/cartridge from a full block. Each row is a different height for convenience. With Bleacher Blocks it’s also easier to check for powder levels, or place bullets before the seating process.
Lyman’s Bleacher Block cartridge holders have many advantages over conventional, single-level blocks. Use the different levels for sorting brass. Or, migrate the brass from top to bottom as you proceed through case prep stages. If you are assembling loads with different bullets for load testing, you could arrange the loaded rounds on different levels for easy recognition. For example put V-Max loaded rounds on the top tier, and Berger Hybrid loaded rounds on the bottom tier. Or, if you are experimenting with neck tension, you can use different rows for cases processed with different bushings.
Made of durable orange polymer, Lyman Bleacher Blocks are now molded in five sizes — small pistol, large pistol, and three rifle sizes. The smallest rifle block (with 0.388″-diam holes) fits .223 Rem-size case heads. The middle size rifle block (with 0.485″-diam holes) fits .308 Win-size case heads. That works for 6mmBR/Dasher sized cases perfectly. The biggest rifle Bleacher Block has 0.565″-diameter recesses for magnum-size cases. There are also two pistol blocks — .445″ hole size for 9mm/.357 size and .565″ diameter for larger .44/.45 pistol cartridges.
Here’s what Lyman says about its innovative cartridge block design: “Our [stepped] loading blocks allow for easier handling of cases in and out of the loading block. Our stepped design allows you to easily grip a single case without jamming your fingers down into a group of cases like in traditional loading blocks, and allows for a smaller ‘footprint’ on your bench.”
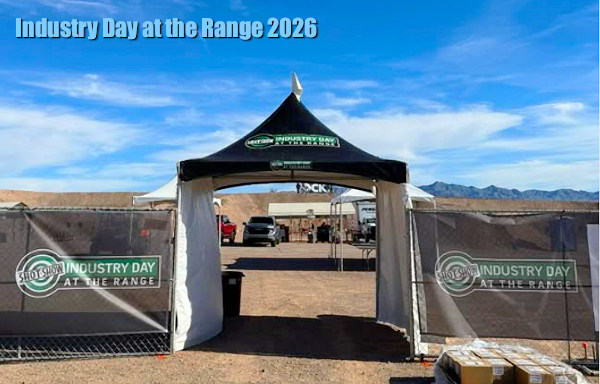
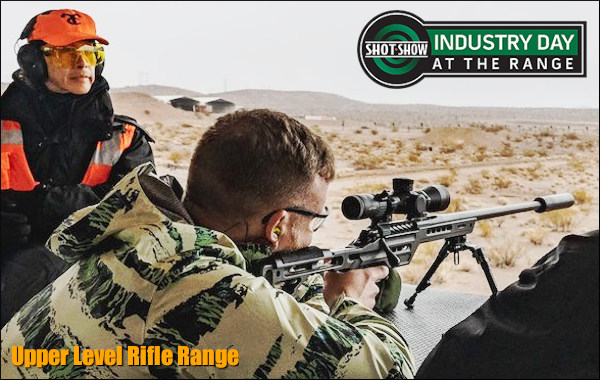
Industry Day at the Range is a unique event. Gun industry representatives are able to view, inspect, and shoot scores of new rifles, shotguns, and pistols provided by 200+ manufacturers from around the globe. In addition, new optics and shooting accessories are on display. Hundreds of media members and tech personnel visited the range on 1/19/2026 to test a wide variety of new firearms. There were many notable, innovative new rifles, pistols, and optics on display.
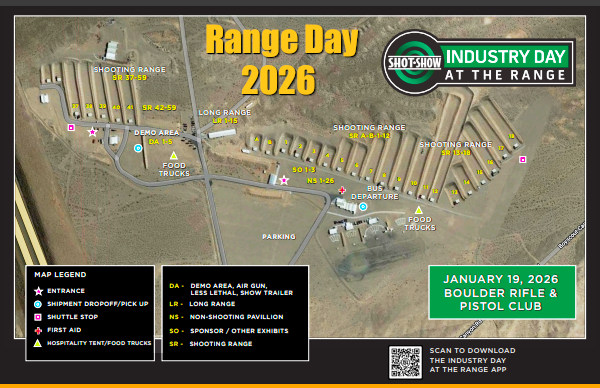
Conditions were good this year, with bright skies and temps in the high 60s. Winds did pick up in the afternoon. Still most of the shooting was at targets inside 50 yards so those breezes didn’t stop the show. It did make it more challenging to hit the longer range rifle targets. Still, media members were excited to see the scores of new rifles, pistols, and shotguns on display. See Range Day Map.
Notable New Guns and Products Previewed at Range Day
Range Day Special with Beretta and SAKO
Prior to the main Range Day, some major makers previewed important new offerings for select media members. This video features new guns from Beretta (which also owns SAKO/Tikka). The firearms covered include shotguns, rifles, and pistols listed below:
1:00 SHOTGUNS — SL2
2:46 DT11 Super Sporting
7:26 AX800
10:32 A300 Ultima
11:20 1301 Tactical
14:27 RIFLES – Sako TRG22
16:52 BRX1
17:40 PISTOLS – NEW Jaguar 22
20:47 92G Elite LTT II
24:24 M9A4 Overlanding
26:17 92SB Repro 50 Years
29:13 Langdon Tactical
SIG Pistols — New GT4 and GT5 2011 Handguns
SIG Sauer unveiled the new GT4 and GT5 2011 pistols at an early preview at the Desert Sportsman’s Club range outside Las Vegas. This GunsAmerica video, hosted by our friend True Pearce, provides a first look at these impressive new SIG pistols with competition inspired designs. Details are still under wraps, but these new models are already turning heads with their metal frames and superb accuracy. Pearce praised the ergonomics and accuracy of the new GT4 and GT5.
FN SCAR 20S 7.62×51
SIG MCX Spear M7
Impressive Zeiss optics were on display this year, as shown here in 2020.
This rapid-paced A-1 Locksmith video shows numerous rifles and pistols, including full-auto rifles. There are close-ups of new pistols from CZ and demos of multiple suppressors. This is a good, quick intro to the Range Day experience.
One of the best things about Industry Day at the Range is the FREE Ammo provided by Federal and other manufacturers. Rifle, pistol, shotgun — the ammo is ALL FREE.
Most folks would be very impressed with a centerfire rifle that can shoot a quarter-inch group at 100 yards. But to do that with a rimfire rifle, shooting little .22 LR cartridges, that’s quite an accomplishment. Today’s Sunday GunDay story spotlights a superbly accurate new .22 LR Benchrest gun belonging to Forum member Dave Way. This rimfire tack-driver was crafted by respected gunsmith Alex Wheeler of Wheeler Accuracy. Check out this five-shot group Dave shot once he had figured out his optimal tuner position. That is mighty impressive for a rimfire rifle!
A sub-quarter-MOA group at 100 yards is impressive for a centerfire rifle. But for a rimfire rifle, it is truly stunning. Check it out — this rifle hammers!
I tested three lots of Lapua Super Long Range today. This lot looked really good so I bought a case. It’s a blast shooting this rifle over wind flags. It’s amazing how little wind it takes to move the bullet at 100 yards. I was having to hold off today to finish up groups. That’s when it’s the most fun. — Dave Way
Dave posted in our Shooters’ Forum: “To say I was impressed with the quality of the action and the accuracy of the rifle would be an understatement. I shot five different lots of Lapua Midas, Lapua Long Range, and Lapua Super Long Range ammunition. At 50 yards all the groups were pretty tight. I was shooting in some wind, using flags. One lot seemed to stand out so I put a target at 100 yards and shot three rounds in it as aiming points. I shot three five shot groups with the last 15 rounds of that lot that I had with me. All three groups were under 1/2″ and they were getting tighter as I moved the tuner!”
Above are initial 100-yard, 5-shot groups Dave Way shot with his rifle, while experimenting with different tuner positions. The largest group (on left) was a 0.416″, while the smallest (on right) was 0.296″. The average of the three groups was a stellar 0.369″ (0.352 MOA).
Dave Way treasures this rifle and praised Alex Wheeler’s skills as a gunsmith: “I have never received a rifle from Alex that didn’t shoot incredibly well and this one is no exception. I’m just getting into the .22 world so I don’t know if this is good, great, or excellent accuracy but it seems pretty accurate to me.”
Lot Testing and Tuner Experimentation Pays Off
Here are some initial groups Dave Way shot during initial ammo testing. They are all under half-inch at 100 yards. That’s pretty impressive — but read on. When Dave optimized his tuner position and found a great lot of Lapua Super Long Range .22 LR ammo — his groups got even smaller. Dave notes: “They could have been better but I was just getting used to the trigger and everything.”
Here are a series of three-shot, 50-yard groups. You can see this rifle is quite consistent. This is with five different lots of Lapua .22 LR ammunition.
Lot Testing with Lapua Ammo — Three-Shot Groups at 50 Yards
Rifle Components
Holeshot 2500X Right Bolt, Left Port Action
Muller Works 1:16″-twist, 8-groove Barrel
Holeshot Barrel Tuner
Bix-N-Andy Trigger
Holeshot 2500X actions and Holeshot tuners are now produced and sold by Precision Quest Products.
Have questions about this ultra-accurate rig? You can discuss this Wheeler-built rimfire rifle in a current AccurateShooter Forum Thread.
Three 50-Yard Groups, All Under 0.180″ — That’s Consistency!
With the right ammo, this rig is wicked accurate. Here are three groups shot at 50 yards one after another. Dave shot these three 5-shot groups consecutively while optimizing his tuner: “Working with tuner the last two trips to the range. [It was] very consistent and pretty tight at tuner setting 162. Here are three consecutive 50-yard groups (5 shots each).” The biggest group (at bottom) measured 0.175″ (0.334 MOA), while the smallest group (middle) was a stellar 0.154″ (0.294 MOA) — that’s mighty impressive!
Alex Wheeler Crafted His Own Superb Rimfire Rifle First
Gunsmith Alex Wheeler of Wheeler Accuracy has, over the years, concentrated on ultra-accurate mid-range and long-range centerfire benchrest rifles, along with some stellar long-range hunting rifles. But Alex has started to venture into rimfire shooting. Prior to building the Dave Way rimfire rifle featured here, Alex built a “sister rifle” for himself with similar components. That gun turned out so well that Dave asked Alex to build another. And, as you can see, Dave’s new Wheeler-built rimfire rifle turned out to be a true tack-driver.
Alex credits Dave’s shooting skills: “I don’t think its possible for anyone to send a rifle to Dave that doesn’t shoot. He just has a knack for it. I’m glad I got into the rimfire stuff. I don’t have any interest in rimfire competition but it’s taught me a lot about bench manners and I get a lot more trigger time. It’s a great tool to learn wind flags with as well. It should make me a better centerfire shooter. That was really why I built mine. I normally sell every gun I build eventually and Dave was going to get mine but I said you should start gathering parts, I think I’m keeping this one!”
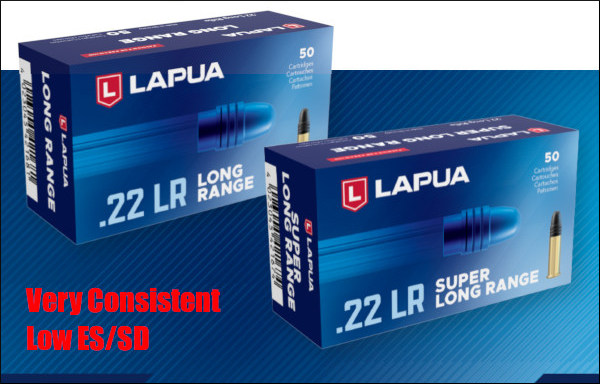
Lapua Long Range and Super Long Range .22 LR Ammunition
Dave Way had great results with his Lapua .22 LR ammo. Lapua Long Range and Super Long Range ammunition comes from Finland, and is designed for the growing long-range rimfire disciplines with targets at 100-300 yards. This ammo delivers very low ES and SD numbers. Our friend F-Class John tested this ammo and confirmed it performs very well (SEE Test Video).
Capstone’s Marketing Director, Geoff Esterline, explains: “Each production lot of Lapua’s [LR and Super LR] are test-fired in 50-round groups for dispersion. The results determine whether it makes Super Long Range or Long Range packaging.”
The 2026 SHOT Show (Shooting, Hunting, and Outdoor Trade show) is just 3 days away. Thousands of new products will be on display at the SHOT Show, hosted at the Venetian Expo/Convention Center and Caesars Forum in Las Vegas January 20-23, 2026. Gunmakers from around the world will be introducing hundreds of new (and updated) rifles, pistols, and shotguns. Along with the new guns, SHOT Show will feature many noteworthy new optics, electronics, reloading equipment, and accessories.
Here are six interesting videos that preview new (and updated) firearms expected to be on display at SHOT Show in Las Vegas next week. There are hunting rifles, tactical rifles, rimfire rifles, plus a wide range of new pistols and some interesting shotguns.
Here’s a good initial video that covers a huge selection of new firearms. This 13.7-minute video covers a whopping 29 guns that will be showcased at SHOT Show 2026. Selections range from next-gen handguns and precision rifles to innovative tactical platforms and cutting-edge upgrades from top manufacturers. Whether you’re into concealed carry, competition shooting, duty weapons, hunting rifles, or tactical gear, this lineup has something you’ll want to see.
In this long 52-minute video, Pistol9x19 reviews 17 new firearms to be displayed at SHOT Show 2026. The video highlights innovative features, and performance for new pistols, rifles and shotguns. The 17 featured guns (with time-markers) are:
01:10 – Ruger SFAR 6.5 Creedmoor
04:07 – Henry Carbon Fiber Lever Action
07:03 – Savage Revel 22 LR Takedown
09:50 – Shadow System
12:58 – H&R Retro M16 Clones
16:05 – Mossberg 590 Professional Series
19:02 – Stoeger Combat SX 9MM
21:54 – Springfield Integrally Compensated Pistol
24:54 – H&R T48 FAL Clone
27:47 – Smith & Wesson M&P9 M2.0 Metal
30:50 – Korean K2 Civilian Rifle
33:33 – H&K P7 M13 Pro Slim
36:18 – Beretta 1301 Mod
39:19 – FN True Velocity 338 Norma Magnum LMG
42:16 – COLT KING COBRA
44:50 – RUGER SP 101
47:20 – Marlin 1895 Dark Series
This video features seven new rifles that will be unveiled at SHOT Show 2026. There’s a wide selection — lightweight hunting rifles, modern lever guns, piston-driven tactical rifles, and even a big .50 BMG (the “King” shown in video cover shot). New guns include:
Glenfield Model A — affordable bolt-action rifle
Ruger American Rifle Gen 2 with new stock, trigger, and recoil system
Marlin Trapper 1894 in 10mm blending classic lever-gun heritage with modern power
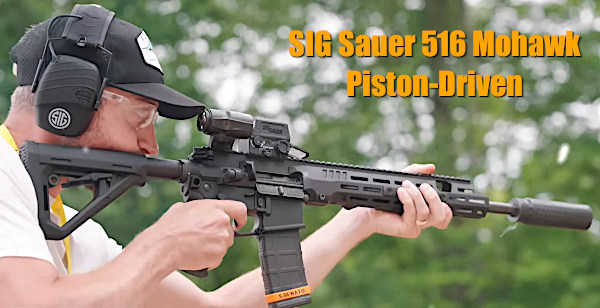
SIG Sauer 516 Mohawk — piston-driven AR-type rifle built for reliability and hard use
Christensen Arms Evoke bolt action hunting rig in 6.5 PRC
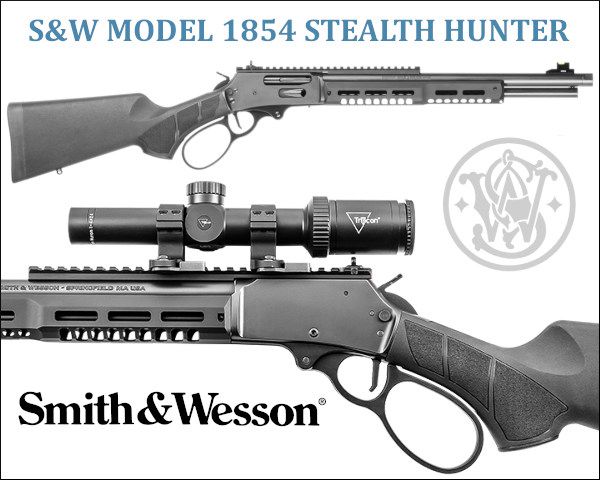
S&W 1854 Stealth Hunter — lever-action rifle with modern features
Thompson TA 50 — modern powerhouse in 50 BMG
This 25-minute long video has good indoor/outdoor footage of 10 new firearms. Rifle shooters should check out the new Savage 110 Magpul (3:07) and the new CZ 600 Plus bolt-action rifle (7:46) which has a 100-yard sub-MOA accuracy guaranteee. Here are the time-mark slots for all ten guns:
00:54 – Smith and Wesson 1854 Stealth Hunter
03:07 – Savage 110 Magpul
05:29 – Savage RXR 22
07:46 – CZ 600 Plus American Rifle
10:01 – Springfield Armory Echelon 4.0C COMP
12:31 – Smith and Wesson M&P Shield X
14:54 – Staccato Compact HD C3.6
17:20 – Retay RXP 22
19:30 – Taurus GX4 Strike Bravo
22:06 – Taurus 66 Combat
Featured as the “Cover Shot” rifle is the Smith & Wesson Model 1854 Stealth Rifle (12:15 time), a lever gun upgraded with modern features including a long optics rail, tactical forearm panel, and threaded muzzle. Another interesting new rifle is the Savage Arms RXR22 (9:15 time) a very affordable semi-auto .22 LR rimfire rifle that accepts aftermarket Ruger 10/22 magazines, triggers, and barrels. Most of the other features guns in this 20.5 minute summary video are handguns.
This 23.5-minute video covers important handgun releases of SHOT Show 2026. The host says this video features the most notable new-for-2026 handguns — from ultra-concealable carry pistols to competition-ready, high-capacity race guns. Featured pistols are:
• Smith & Wesson M&P Shield Plus
• Taurus GX4 XL
• SIG Sauer P365 Fuse
• Springfield Armory Hellcat Pro Comp
• CZ P-10 M
• Canik MC9 LS
• Walther PDP F-Series
• Shadow Systems CR920P Elite
• Staccato CS 2
• Springfield Armory Ronin (Modular)
BONUS: SHOT Show Floor Tour — Locations of Gun Companies
Will you be heading to SHOT Show this year? CLICK HERE for the handy official Interactive Floor Map. For each building and floor level this shows the location of exhibitors. This can help you efficiently organize visits to your favorite gun and optics manufacturers.
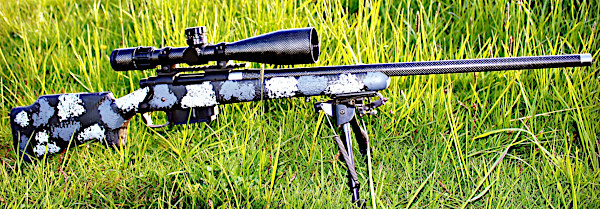
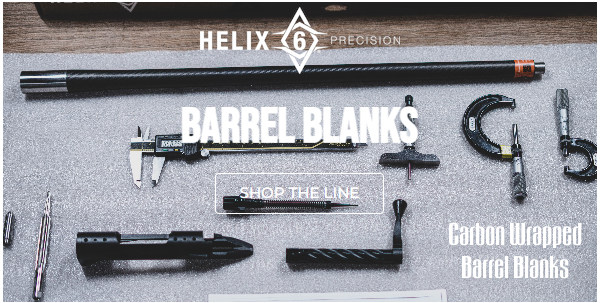
Are you looking to shave POUNDS from your hunting rig or varmint rifle? There are now multiple options for folks looking for a weight-saving, carbon fiber-wrapped barrel. You’ve probably heard about Proof Research. Yes that’s a good company that crafts good products. But now Proof Research has some noteworthy competition — Helix 6 Precision in Washington State.
Helix 6 Precision crafts button-rifled and cut-rifled carbon-wrapped barrels in both conventional and “pre-fit” configurations. The conventional (not pre-fit) carbon-wrapped Helix 6 barrel blanks cost $979.99 for most listed chamberings. Pre-fits are offered for Savage rifles, Ruger Precision Rifle (RPR) series, Tikka T3, Aero SOLUS, Defiance Ruckus, Sig CROSS, and Zermatt rifles. These pre-fit barrels are not cheap. A 6mm Creedmoor RPR pre-fit costs $1099.99, while the Savage pre-fits are also $1099.99 for most chamberings.
While Helix 6 barrels do offer significant weight savings, the founders of Helix 6 say low mass wasn’t the number one design goal: “Accuracy was paramount and weight reduction was secondary. We’ve taken the industry’s most advanced carbon fiber engineering and pushed the technology further with our proprietary … carbon fiber process.”
The founders of Helix 6 Precision say they build some of the best carbon/steel hybrid barrels on the market: “Our unique carbon fiber-layup design dampens barrel harmonics for better accuracy. Each barrel is cut from a 416R stainless steel core, and carbon fiber-wrapped using the Helix 6 Precision’s advanced process. This creates match-grade accuracy barrels with high heat dispersion that are 30% lighter than a steel barrel of the same contour. The bores are … hand-lapped for precision accuracy.” Helix 6 claims its barrels are “lighter, stronger, and faster cooling than anything else available on the market.”
Myth vs. Reality — What Carbon Can and Cannot Do
Carbon fiber is formed using thin strands of carbon bonded together with a plastic polymer resin. The resulting material is very strong and light weight. There’s a reason Formula 1 cars are crafted with carbon-fiber composites. But is a carbon-wrapped barrel the right option for you? Here are some factors to consider:
Weight Savings — There’s no doubt that a carbon-wrapped barrel will weigh less than an unfluted stainless steel barrel with identical length and contour (outside diameters). Helix 6 claims a 30% weight reduction compared to a conventional stainless steel barrel. That’s significant.
Accuracy — Carbon-wrapped barrels are NOT commonly being used for F-Class or Benchrest competition. However, Proof Research carbon-wrapped barrels have performed well in PRS competitions in the hands of top shooters. So, we can conclude that carbon accuracy is good enough for the PRS/NRL tactical game, at least at the local club level.
Heat Dispersion — Carbon-wrapped barrel-makers claim their hybrid design disperses heat better than an all-steel barrel. Some independent testers disagree, saying: “hold on now — the carbon actually acts as an insulator, so more heat is retained in the barrel”. The jury is still out. One thing that is true is that the carbon barrels seem to generate less mirage from barrel heat. Ask yourself, “if less heat is coming OFF the barrel, where is that heat retained?” But the reduced mirage could be a function of the black woven surface which may release heat differently than polished steel.
Pre-Fit, AR, and Custom Barrel Options
Helix 6 precision barrels are available as pre-fits for a wide variety of rifle types in many popular long-range cartridges. Helix 6 can also thread and chamber a barrel for most precision rifles. And pre-fit AR barrels are available in a wide variety of chamberings and lengths. Helix 6 Precision also supplies carbon-wrapped barrel blanks which can be chambered and fitted by a professional gunsmith. Helix 6 barrel blanks, buttoned-rifled or cut-rifled, are sold in many calibers. Offered calibers are: .224, .243 (6mm), .264 (6.5mm), .257 (pending) .277 (pending), .284 (7mm), .308, .338, and .375. In addition, .22 LR rimfire carbon barrel blanks are offered.


 • Magnifying Glass – We use a flat, 2″x2″ pocket 4x-8x magnifier. This folds up on itself. Very handy, we use it to inspect bullets and brass. Use this to check your flash holes for burrs, and check the meplats of your bullets before loading.
 • Ballistol Aerosol – Try using this versatile lubricant/solvent for full-length sizing. Spray some on a patch and you can wipe the carbon off your case necks. Then, continue to apply a very small amount of Ballistol on the case bodies — just thin sheen is all you need. Ballistol is super slippery, and easy to remove. For general full-length sizing (on small cases) it works great and doesn’t leave a gooey, waxy, or chalky residue. For heavier case-forming jobs, we recommend Imperial Die Wax.