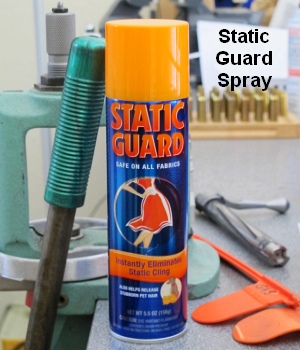
Apparently reducing static charges on and around electronic scales can reduce their propensity to drift, lessening the problem of “wandering zero”. Just how and why static charges interfere with scale performance is unclear, but many shooters have noticed that static electricity can cause electronic scales to behave strangely. So how do you reduce static charges around your digital balance? Our late friend German Salazar (aka “GS Arizona”), creator of the Rifleman’s Journal Blog, found a very simple solution — an anti-static aerosol spray — that, by all indications, actually works. When this “spray-can solution” was suggested to German by a fellow shooter, German was skeptical. However, he tried the stuff and he says that it really does help the scale maintain zero over time, with much less observed drift.
Static Guard Reduced Scale Drift
German Salazar explained that the use of “Static Guard” spray helped mitigate the problem of a drifting zero on his Ohaus Navigator electronic scale. He writes: “My electronic scale… suffers from drifting zero (as they all seem to). I’ve read dozens of forum posts about drift and how to minimize its occurrence, so I know this problem isn’t limited to my scale or my workshop. Sometime last year, John Lowther mentioned the use of anti-static spray as a solution to the drift problem. John stated that the spray had virtually eliminated drift for him.”
Salazar found that the Static Guard actually worked: “The spray works great, just as John said it would. I spray all surfaces that I touch with my hands and arms as well as the pan (top and bottom), the metal tray on which the pan rests and the table under the scale. In six months or so of using the spray I’ve re-applied it about two or three times; it certainly isn’t something that you need to do each time you sit down to load. Before using the spray, it was not uncommon for me to re-zero the scale 10 times in the course of loading 72 rounds; now it might need it once during a session.”
If you will be flying with firearms this summer, here are six videos you should watch before you travel. You need to familiarize yourself with current Federal Regulations on gun transport before you get anywhere near an airport. Thankfully, the Transportation Security Administration (TSA) has an official INFO page that states the important requirements for airline passengers traveling with firearms and/or ammunition.
You’ll want to visit the TSA Firearms and Ammunition webpage, and read it start to finish. In addition, before your trip, you should check the regulations of the airline(s) with which you will fly. Some airlines have special requirements, such as weight restrictions.
We have two other key tips: 1) WEIGH Your Guns and ammo (as packed) BEFORE you get to the airport — so you comply with all airline flight limits without being surcharged; 2) Carry a printed copy of TSA and airline baggage regulations pertaining to firearms — this can help when dealing with airline personnel.
TSA offers this general advice: “You may transport unloaded firearms in a locked, hard-sided container as checked baggage only. Declare the firearm and/or ammunition to the airline when checking your bag at the ticket counter. The container must completely secure the firearm from being accessed. Locked cases that can be easily opened are not permitted. Be aware that the container the firearm was in when purchased may not adequately secure the firearm when it is transported in checked baggage.”
Traveling by Air with Firearms — Advice from Legal Expert
This is a good video by a very knowledgeable attorney. Washington Gun Law President William Kirk goes over everything you need to know in order to fly safely, and legally, with a firearm if you travel domestically. Kirk states: “While many believe this is a complicated formula of various state laws, in actuality TSA regulations govern all travel domestically with a firearm. There are very specific rules which must be followed in order to do this correctly.”
Colion Noir — Air Travel with Packed Firearms
Popular YouTube host and lawyer Colion Noir has created a good video that shares important points about traveling with firearms. Colion says: “Don’t risk making costly mistakes — get informed and ensure your firearm journey is hassle-free and lawful.” In this video, Colion covers these key points:
1. Bag Check: Learn the crucial pre-flight checklist to avoid any unwanted surprises at the TSA checkpoint.
2. Airline Check: Discover the differences in airline policies and ensure a smooth journey by reviewing your chosen carrier’s firearm guidelines.
3. Law Check: Stay on the right side of the law by understanding the gun regulations in every state you’ll visit during your trip.
4. The Gun Case: Explore the essential details about the TSA-required hard-sided lockable case and find out which one is my top choice.
5. Ammo Transport: Learn the correct way to transport ammunition separately from your firearm, all while staying within the weight limit.
Step-By-Step Guide to Gun Transport — Good Tips
This 18-minute Spiritus Systems video provides some very valuable practical tips for gun owners traveling by air. The host explains what to look for in a rifle case and locking system. He also explains how to pack the rifle and gear efficiently and how to label and track your gun/ammo cases. If you’re new to airline travel with guns, this video is worth watching start to finish. Here are highlights are listed by video times:
00:01 Introduction and Regulations
00:51 Storage Container Options
2:50 Type of Lock You Should Use
6:25 Tape Tip
7:16 Contact Information, and Labeling Your Bag
8:07 Firearm Considerations / Configuration
10:03 Documents
12:30 Tracking Your Bag
13:20 Packing Your Ammo
16:00 Prepping Your Magazines
How to Efficiently Pack Your Rifles and Gear
Our friend F-Class John often travels by air to major F-Class matches (most recently to the V2 Finale in Texas). John has learned how to transport valuable match rifles and optics most efficiently and economically. In these two videos F-Class John shows how to pack your rifles and equipment, and how to employ carry-on bags to secure optics and other non-regulated equipment.
TSA Video about Airline Travel with Guns and/or Ammo
This is the latest official TSA video covering gun/ammo transport via airlines. When packing for a flight be sure to start with an empty bag (make sure there are no forgotten gun parts or ammo inside before you pack). If you’re planning to travel with a firearm, follow the tips in this video and remember that you may NEVER bring a firearm in your carry-on bag. Also make sure you are not “packing” when entering the airport even if you have a CCW permit. TSA.gov Firearms/Ammo Transport INFO Page.
Official TSA Guidelines for Airline Travel with Firearms and Ammo
When traveling, comply with the laws concerning possession of firearms as they vary by local, state, and international governments.* Declare each firearm each time you present it for transport as checked baggage. Ask your airline about limitations or fees that may apply.
Firearms must be unloaded and locked in a hard-sided container and transported as checked baggage only. As defined by 49 CFR 1540.5 a loaded firearm has a live round of ammunition, or any component thereof, in the chamber or cylinder or in a magazine inserted in the firearm. For civil enforcement purposes, TSA also considers a firearm to be loaded when both the firearm and ammunition are accessible to the passenger.
Only the passenger should retain the key or combination to the lock unless TSA personnel request the key to open the firearm container to ensure compliance with TSA regulations. You may use any brand or type of lock to secure your firearm case, including TSA-recognized locks.
Bringing an unloaded firearm with accessible ammunition to the security checkpoint carries the same civil penalty/fine as bringing a loaded firearm to the checkpoint. You may find information on civil penalties at the Civil Enforcement page.
Firearm parts, including magazines, clips, bolts and firing pins, are prohibited in carry-on baggage, but may be transported in checked baggage. Replica firearms, including firearm replicas that are toys, may be transported in checked baggage only.
Rifle scopes are permitted in carry-on and checked baggage.
TSA Guidelines for Transporting Ammunition on Flights
Ammunition is prohibited in carry-on baggage, but may be transported in checked baggage. NOTE: Check with your airline for quantity limits for ammunition.
Firearm magazines and ammunition clips, whether loaded or empty, must be securely boxed or included within a hard-sided case containing an unloaded firearm. Read the requirements governing the transport of ammunition in checked baggage as defined by 49 CFR 175.10 (a)(8).
Small arms ammunition (up to .75 caliber and shotgun shells of any gauge) must be packaged in a fiber (such as cardboard), wood, plastic, or metal box specifically designed to carry ammunition and declared to your airline.
Ammunition may be transported in the same hard-sided, locked case as a firearm if it has been packed as described above. You cannot use firearm magazines or clips for packing ammunition unless they completely enclose the ammunition. Firearm magazines and ammunition clips, whether loaded or empty, must be boxed or included within a hard-sided, locked case.
*INTERNATIONAL: If you are traveling internationally with a firearm in checked baggage, please check the U.S. Customs and Border Protection website for information and requirements prior to travel.
Edgewood Shooting Bags makes some of the best front and rear shooting bags you can buy. And the Edgewood rear bag are offered with a modern, hybrid “slick material overlay”. This combines the shape retention and stability of leather ears, with slick, low-friction material where the stock rides. This “best of both worlds” solution delivers both bag stability and improved tracking. Derek Rodgers, the only man who has won BOTH the F-Open and F-TR National Championships, has used this bag and he says his gun tracks great with the slick material on top of leather-based ears.
New Copperback Edgewood Rear Bags
Edgewood’s new Copperback bags boast a new bag shape and ear geometry that maximizes stability while minimizing interference with shooter’s body. The Cooperbacks also feature a new ear material specially coated to reduce friction for smooth recoil and return to battery.
Along with great front and rear bags, Edgewood also offers quality leather OWB holsters and IWB holsters. And we bet you didn’t know that Edgewood got its start making tack and bridles for horse riders. Here’s a short history of Edgewood Leather, a family-run business based in Albuquerque, New Mexico.
The History of Edgewood Leather
by Jack Snyder
I’ve always enjoyed working with leather and still do to this day. Something about starting with an idea and building a useful and hopefully, beautiful piece does it for me. There’s nothing like leather to stimulate my imagination. It brings out my creativity and makes me happy.
I began doing leatherwork as a kid, 12 or 13, and the first piece I made was a pair of shoes. Got a job in a leather shop in the late ’60s and made purses and belts, wallets and sandals — many pairs of sandals. I opened a small retail shop in Estes Park, CO and made even more of the same, adding vests, halter tops, hats, mountain man gear of all sorts from skunk hats to goat fur high-top moccasins.
After a decade or so, I became restless for something new and taught myself bridle work. I discovered a niche market with English riders who were always looking for beautiful, well-fitting show bridles and over a period of about twenty years developed and produced many products for these riders — numerous types of nosebands, breastplates, martingales, girths and many different varieties of reins. At the same time I observed that for every horse and rider there were at least two dogs trotting along beside. I began making dog products which closely resembled their horse buddies bridle work. Sales were good. Leashes, leads, halters and collars showed up at dog shows around the country. My bridles were worn by many champions in every horse discipline — dressage, show ring, hunter-jumpers, and my polo gear became popular among the players. All of that was fun and I’m still proud of those products (still being made today), but it was time for a change. I sold my interest to my partner and tried to retire. Didn’t work, though.
My plan was to shoot benchrest matches, as many as I could. And I did for some time and loved every minute. I’ve made many friends among the shooters, discovering early on that these people are the most interesting, smart folks a guy could ever associate with. To the man, they’ll share what they know with you and even hand you their gun when yours malfunctions during a match, and grin and slap you on the back when you beat ‘em with it!
When I was getting started in benchrest, one aspect of the game was somewhat disappointing to me-the quality and stability of the shooting bags. It was natural with my past leather experience to make what I thought would be a better product. I cobbled up a couple of bags and went to a match in Oklahoma. All hell broke loose. Most of the shooters had to have one. By the end of the summer, I had so many orders for shooting bags, I couldn’t keep up the pace. I was improving the designs, based on the shooters telling me what worked and didn’t work. I was adding new products, experimenting with materials, processes and configurations and having a great time. Completely by accident, Edgewood Shooting Bags was born. My wife Cindy and my two kids Jackie and Aaron jumped in and we became a bag-making machine — always looking to improve and expand upon the products. Jackie’s husband Ryan joined us several years ago and together, we’ve made a pretty awesome team.
Latest Rear Bag Design — Leather Ears with ‘Slick Material Overlay’
Edgewood constantly strives to improve its products. Witness the new “slick material overlay” bag ears. This is a major design improvement over our regular “slick ears”. The development of the overall design all started when we noticed some shooters applying household products like talcum powder or dryer sheets to the ears of their bag in an effort to reduce friction and speed up their rifle’s return to battery. We found a material that would achieve this function without the need to raid their wife’s pantry for powders or laundry accessories and began sewing the ears up using this “microscopic glass bead impregnated” fabric. We were happy with the results. However, we soon began to realize that the slick material could have the longevity of our nylon as well as its slick properties, if we found a way to increase its thickness without causing wrinkles or inconsistencies.
First, we ended up hunting down some similar fabric with a much higher strength and thickness. It even has a fireproof backing that makes it far more durable — even if shooters aren’t planning on exposing it to temperatures higher than the Arizona desert can offer. This material was definitely superior and even more representative of the quality and durability that shooters have come to expect from products wearing the Edgewood logo. We didn’t stop there, either.
We started experimenting with a way to combine our toughest ear design, which is made from soft leather, with the slick material to create the best of both worlds. We deemed it the “slick overlay” option and many of the world’s top shooters now swear by it. There is no compromise with this ear set — shooters gain all of the advantages of the slick material, in addition to durability and consistency that exceeds even our tried and true nylon ears. Many of our original bags have been punished by shooters for over a decade and are still performing. We expect this design to last even longer.
Keeping ahead of the curve with innovations that create and help propel evolution in the sport is a signal of our commitment to retain our status into the future. Along with other new products like our second generation of concealed and open carry holsters, range bags for sighting in hunting rifles, radius front bags for AR-style rifles, camouflage color options and more. Check us out online or give us a call. We’re ready to meet the demands of shooters — from Benchrest and F-Class to concealed carry and IDPA.
Jack Snyder
President – Edgewood Shooting Bags and Gun Leather
When developing loads, it is important to know the true internal capacity of your cases, both fired and “as FL-sized”. In particular, when using the QuickLOAD program, it is vital to determine true case capacity. The default case capacity values listed by QuickLOAD may be off half a grain (or more) because brass from different manufacturers can vary considerably in capacity. Case capacity is a very important variable that will affect the pressure of a load and the velocity of your bullets.
To determine the true internal capacity of your cases, first weigh an empty cartridge case, then fill the case with water (all the way to the top of the neck) and weigh the case again. The difference in weight is your H20 capacity in grains. But how do you keep the H20 from flowing out the bottom? When measuring fired, unsized cases, you can simply leave the spent primer in the pocket. However, if you want to measure new brass or “as-FL sized” cases that have been deprimed, you’d have to insert a spent primer to “stem the tide”. Until now that is… 21st Century Shooting sells a great little $5.50 tool that plugs the bottom of the case so you can measure H20 capacity with ease.
When we saw 21st Century’s Primer Pocket Plug we thought “That’s smart — why didn’t someone think about that a long time ago?”. This handy “end-cap” lets you quickly measure multiple new brass cases or deprimed FL-sized cases so you can get an average H20 capacity. The primer pocket plugs are NOT case-specific (they feature an O-ring that fits the pocket). One version will work with all small-primer-pocket cases, while another works with all large-primer-pocket cartridge types. Price is $11.99 for either small-pocket or large-pocket version.
ALTERNATIVE: >If you want to measure H20 capacity on fired, sized brass, but don’t want to shell out the money for the tool (or re-insert a spent primer), here’s a simple suggestion. When you size your case, first remove the decapping rod from the die. Then you can FL-size the case without removing the primer. Of course, you will eventually have to knock the primer out, and that requires putting the decapping rod back in the die and running the case through a second time. To avoid that hassle, the Primer Pocket Plug may be worth the $5.50 over the long haul.
Product Find by ELR Reseacher. We welcome reader submissions.
In Tennessee, when you order a take-out pizza, you get a cardboard shooting target at no extra charge. Nashville, Tennessee-based Hunt Brothers Pizza has come up with a clever idea to promote pizza consumption among the hunting and shooting fraternity. They’ve put targets on the pizza boxes — a very cool idea.
Hunt Brothers offers cardboard pizza boxes with five red and black bullseyes printed on the back. Now your used empty pizza boxes can do more than just take up space in the trash can. This is a pretty smart idea we think — it’s a great example of clever “dual-use” packaging. Hopefully pizza parlors in other locations nationwide will follow suit someday….
Give credit to The Firearm Blog for finding this story and publishing it first.
You have to admire someone with serious do-it-yourself skills. Not just hammer and nail skills, but formidable design and fabrication skills. Well Forum Member Dave D. (aka “AKShooter”) has a DIY skill set that might put some trained machinists to shame. You see, “DIY Dave” crafted his own pedestal front rest from scratch, using his own design and about $100.00 in materials (not counting the Edgewood front bag). Dave estimates he put 20 hours of labor into the project, but the end result was worth it: “This Do-It-Yourself rest drives like a dream. I’ve played with the Caldwell and a Sinclair, they have nothing on this one.”
Dave tells us: “Here is my Do-It-Yourself front rest. I wanted to show other folks who are handy that a solid front rest is doable with a bit of time — and you don’t need to spend $1000.00. (You could say this is a design for shooters with more time than money.) This is for F-Class. I was originally overwhelmed by the equipment needed, so I decided to make my own rest. I didn’t have the money for a SEB or Farley Coaxial. This is what I’ll run this season (my second as an F-Class competitor).”
We asked Dave what equipment was used to make the rest. He explained: “My brother has a CNC cutter. But most water-jet outfits would do the work for $100 or less. All the plates are tapped and screwed. I found small machine screws on eBay.” Dave says there are other ways to build a front rest: “You could do the same with a welder and plate stock for base. It’s easier to do the top out of aluminum though, with all the tapping.”
Dave enjoys fabricating his own gear, but he admits the process can be time-consuming: “I’m a DIY guy. Sometimes I wrap up a project and wonder why the heck I just spent X amount of time on it.” Dave has other projects in the works: “Another option we are making for a friend is taking a cheap front rest and bolting to a 3/4″ thick, wide MDF base and adding additional adjustment screws. The hardware store is your friend!”
On the competition front, Dave is tuning up a 6mm Dasher: “My rifle last year was a .260 Rem Savage repeater. I was about middle of the pack in my group of shooters. Just went with unsorted Bergers and Lapua brass, and had a ton of fun. Now I’m in — hook, line, and sinker. I have an unfired 6 Dasher barreled action from the folks at Kelbly’s to break in. I’m cheap, so I ended up with a Do-It-Yourself stock for the Dasher.” Hopefully Dave will send us a photo of his DIY-stocked Dasher when the gun is dialed-in and “ready to rumble”.
Mike Kurtz’s Competition Machine F1 “Pro-Mod” F-Open Rifle
Today’s Sunday GunDay article showcases a modern F-Open Rifle built on a Competition Machine Aluminum Chassis. This is quite a bit different than a typical F-Open rifle with a laminated wood or wood/carbon stock. But the rifle shoots extremely well, and has already won some mid-range F-Open matches.
The rifle’s owner, a highly respected vehicle mechanic, explained his objective with this rifle: “I wanted to build a second F-Open rifle to shoot primarily 600-yard Mid-Range and also serve as my back-up long range rifle. That way I can use the same brass, bullets, and primers. So it would be chambered in 7mm-6.5 PRC, the same as my other F-Open rifle. That rig is a 7mm-6.5 PRC with Cerus XR stock, BAT Neuvo action, and Bartlein 1:9-8.7″ gain-twist barrel. I absolutely love that rifle and it has achieved several top honors. But for this project, I wanted to try some different rifle components to see how they performed in this same caliber. So I decided to go with Brux barrels, BAT Neuvo aluminum action (but see below), and an Eliseo Competition Machine F1 aluminum alloy chassis.”
BARREL SPECIFICATIONS: I ordered two Brux 7mm x 33″ barrels with 1:8.5″ twist. The contour was supposed to be 1.350″ diameter for 5″, tapered-down to 1.150″ diameter at the muzzle end. However, when the barrels arrived they were tapered down to 1.050″, a bit smaller. The folks at Brux admitted the work order was mis-read and offered to take back the barrels and make me two more. Or, I could keep the barrels with nice discount. I contacted my gunsmith, Omar Alonzo, for his advice and he said to keep them, they would shoot just fine. That turned out to be a blessing because the total rifle weight is now just three ounces under 22 pounds with one of these barrels. Omar chambered it with his 7mm-6.5PRC “no-turn” reamer that was used on my Cerus rifle. The Brux barrel was finished at 32″ with the muzzle end threaded for a V2 tuner.
ACTION and TRIGGER: I intended to use an aluminum BAT Neuvo action because I anticipated weight may be a concern, but they were on back-order with no lead time in sight. So for now I went with a used steel BAT Model M, 1.47 Octagon action that I acquired via the AccurateShooter Forum marketplace. This is a RBLP Right Eject action with magnum bolt face and 20 MOA integral Picatinny rail. The trigger is a Bix’N Andy Competition also scored on the Forum, set at 3 ounces. [NOTE: I now have an aluminum Neuvo AL in my possession. However, the F1 rifle is shooting so well, I’ll save the aluminum Neuvo for a future build.]
STOCK and FINISH: When I was planning my second F-Open 7mm-6.5 PRC rifle build, Gary Eliseo’s F1 aluminum chassis was my immediate choice. I was already familiar with Gary’s products since I started out three years ago with a used 6BR-chambered R1 tube gun. I purchased it from a Forum member and I adapted it for Mid-Range F-Open very successfully. Being a long-time drag racer and fabricator piqued my interest in these aluminum chassis combos. I contacted Gary Eliseo at Competition Machine and ordered his F1 F-Open Chassis System with one of his custom-machined bedding blocks for the Bat M action I acquired off the Forum.
Video of F1 Chassis Rifle in Action
Turn-around time was just about eight weeks, including aligning and epoxying the action bedding block into the chassis. Gary Eliseo offers full custom Cerakote services for his customers but I had something else in mind so I had the chassis sent to me “raw”, i.e. with a bare aluminum finish. At first I thought about polishing some or all the entire chassis but that would be too high maintenance. I decided to go with anodizing as I have done in the past with many race car components. Anodizing is an electrochemical process that converts the metal surface into a decorative, very durable, corrosion-resistant, anodic oxide finish that’s pretty tough and looks great!. This finish is available in many colors and in clear.
While I was surfing the internet looking for some color/combo ideas I stumbled on a local custom anodizer who had dozens of some really wild and crazy anodizing patters and color mash-ups. I messaged Stephen @ Caustic Customs and told him about my project. He replied that his specialty is paint-ball guns and this would be his first long gun but, hey, it’s aluminum! I gave him all the pieces of my F1 chassis. There were a couple of his patterns I really liked so I asked his opinion which he thought might look best for my project. He replied why not both? So I instructed him take both patterns and “run with it”. The end result is the Icy-Hot blue/red finish as seen in the pictures.
It all came together at Alonzo’s Custom Rifles in Pasadena, Texas. Omar hand-lapped the action bedding block surface to smooth-out some tiny high spots. He then skim-bedded the action with an epoxy filler to make sure the action made 100% contact with the bedding block. Barrel chambering, action fitting, trigger tuning, and final assembly was performed by Omar.
I finished the rifle with a hydraulic recoil pad from Falcon Strike and Anarchy Outdoor’s Penguin Precision Grip. Gary designed the F1 to utilize AR15-style grips. The Falcon Strike pad is not as sexy as the R.A.D. unit I have on my Cerus-stocked rifle, but I think its recoil-absorbing performance is up there with the R.A.D. unit. So, if a RAD is not in your budget or if weight is a concern, you can’t go wrong with a Falcon Strike recoil pad.
SCOPE/RINGS: My intention was to switch my March-X 8-80x56mm Majesta High Master scope between my two rifles. However the hefty stainless Bat M action nixed that idea. So to ensure the new rifle would be F-Open legal weight I went with a used March-X 10-60x56mm High Master scope that I acquired through the AccurateShooter Forum Marketplace. That 10-60X March, shown in the video, is almost 11 oz. lighter that my 8-80X March-X Majesta HM. NOTE: In some of the photos here, the rifle is fitted with an older March 8-80X scope (NOT the latest Majesta). The rings are March Superlight Titanium Ghost Rings — under 5 oz. for the set, the lightest I could find.
F-Open F1 Chassis Rifle Specifications
Chambered for: 7mm-6.5 PRC Wildcat
Stock: Competition Machine F1, F-Open Chassis, Falcon Strike Recoil Pad, Anarchy Outdoors Penguin Grip. Custom anodizing by Caustic Customs.
Trigger: Bix’N Andy Competition trigger
Action: Bat Model M — Right Bolt, Left Port, Right Eject with 20 MOA scope rail
Barrel: Brux 7mm, 1:8.5″ twist, 32″ overall, 1.350″ x 5″, tapering down to 1.050″, V2 Tuner
Scope: March-X 10-60 High Master, MTR-1 reticle. March Ultra-Lite Titanium Ghost scope rings.
Gunsmith: Alonzo Custom Rifles
CARTRIDGE COMPONENTS and LOADING METHOD: I use Lapua 6.5 PRC brass, Berger 180gr Hybrid bullets and Federal 210M primers. New brass necks are expanded to 7mm and skim-turned to get a consistent .014″ neck thickness. I use a 35-degree cutter and go just a slight bit into the shoulder to ward off donuts. I then chamfer the flash holes, uniform the primer pockets, full-length size the cases, then expand and trim/chamfer the necks. My fired brass gets annealed, wet-tumble cleaned, full-length sized/expanded, and trimmed in that order. Bullets are pointed and then sorted by OAL. Primers are sorted by height and then by weight. I apply Neo-Lube to the inside of the necks with a foam Q-Tip for consistent seating psi.
This is from a 600-yard match shot with the F1 rifle a few months ago. Despite a strong wind from behind constantly switching right to left, I scored a 200-12X — good enough for Second Place.
LOAD DEVELOPMENT PROCESS: Thanks to some good 7mm-6.5 PRC load data posted on AccurateShooter.com, it helped me with a starting point to find a nice velocity node at 2865 fps using Hodgdon H4350. I did this by shooting some 2-shot groups seated .010″ off the lands. my focus was to find a node where the velocity leveled-out in at least two 0.5 grain increments in the 2850-2880 fps range. I then did a seating depth test at 100 yards to find my ideal seating depth which ended up at .024″ jumped. Next, I did some 3-shot groups at 100 yards to dial-in he barrel tuner until I got at least two consecutive ultra-tight groups. I verified that setting with a one-hole, three-shot group.
About Mike Kurtz
Michael Kurtz is owner/operator of Century Automotive & Transmission. An ASE Master L1 Technician since 1983, Mike has been an avid drag racer over the last 40 years. Mike notes: “I never owed any kind of rifle until I retired from racing. Got bit by the accuracy bug and learned about F-Class in 2021. I read several reloading and long range shooting books while I scoured the AccurateShooter Forum Marketplace for a rifle, scope, rests, and reloading equipment for my first F-Open rig. Most all of my major components I acquired via online Forums. I have to attribute the early success of my F-Open accomplishments to the vast content found on AccurateShooter.com.
I am also a member at Bayou Rifles Inc. in Houston Texas where I’ve learned from some of the best shooters in the country. The competition here is fierce but the camaraderie is second to none!”
Every shooter should have a good rimfire rifle, both for fun shooting and for training. The .22 LR is very affordable to shoot, and the more potent .17 HMR and .22 WMR rounds also are great for small varmints out to 200 yards or so. Among the rimfire rifle makers, the Czech manufacturer CZ (Česká Zbrojovka) has been a world leader for many decades. In today’s Video round-up we feature a variety of CZ rimfire rifles including the the all-new CZ 457, the versatile CZ 455 VPT, and the classic CZ 452. We also include one semi-auto, the CZ 512 in .22 Winchester Magnum Rimfire (WMR).
New Generation CZ 457 with Upgrades
The CZ 457 may be the most modular precision rimfire on the market. You can swap barrels and magazines easily. The interchangeable barrel feature is by far the best feature of the CZ 457. Want to shoot .22 WMR for varmint hunts then transition to a .22 LR for precision shooting? No problem — five minutes and four screws are all you need. The CZ 457 is also an excellent value — it’s WAY better than a 10/22 but a fraction of the cost of high-end custom rimfire rigs. In the second video below, the CZ 457 goes head to head
In this video, Josh of Pursuit of Accuracy drives nails at 100 yards with his CZ 457:
And here Josh comparison-tests his Lilja-barreled CZ 457 head-to-head with the much more expensive Vudoo V22. The results may surprise you.
CZ 457 MTR Varmint — Product Showcase and Review
We really like the relatively new CZ 457 Varmint MTR .22 LR rifle. Along with other CZ 457 models, the MTR (“Match Target Rifle) Varmint features a completely new action that runs very smoothly with shorter bolt throw. The new 457s also have an American-style, push-to-fire safety. The new-generation actions have been trimmed back nearly one-inch in length, and slab-sided to reduce the footprint and weight of the actions. CZ ditched the 90º bolt rotation of the past in favor of 60º rotation. This change provides more room between bolt handle and scope for easier cycling of rounds. It also allows for the use of scopes with larger ocular bell diameters and lower ring heights.
The well-designed MTR stock has good ergonomics and nice stippling on the grip and fore-end. We were pleased to note that, with the 457 series, CZ is once again offering steel magazines that are interchangeable with older 452/455 magazines.
Here our friends at Area 419 offer a side-by-side comparison between a $2300+ rifle with Vudoo V-22 action in Manners stock and the $752.00 CZ 457. On a bang-for-the-buck basis, the CZ wins hands down. However, the Vudoo V-22 does offer centerfire-style action cycle, which helps with training. It also can run Rem 700-compatible triggers.
CZ 457 Royal Model — Handsome and Very Accurate
Above is a British review of the CZ 457 “Royal” model. This features a premium-grade Turkish walnut stock with contrasting dark fore-end tip. This rimfire rig is offered for $779.99 in the USA. CLICK HERE for a detailed written review on ShootingTimes.com. The Shooting Times’ test rifle showed very impressive accuracy with Lapua and SK Match ammo, with average 5-shot 50-yard groups under one half inch (Lapua Midas+ 0.41″; SK Long-range Match, 0.39″). SEE Full Test Results table.
CZ 455 Varmint Precision Trainer in Manners Stock
Rimfire cross-training allows PRS competitors to build their skill sets without breaking the bank (or burning out barrels). One great .22 LR option for cross-training is the CZ 455. The TFBTV video below spotlights the CZ 455 Varmint Precision Trainer (VPT), a smooth-running .22 LR bolt action. This factory rifle (now superseded by the CZ 457) was designed specifically as a training tool for precision long-range competition. It boasts a Manners composite stock and 20.5 or 24-inch heavy barrel. The 0.866″-diameter tube is threaded and suppressor-ready. The model 455 VPT is mag-fed and comes with a crisp trigger that adjusts to two pounds. If you can find one, expect to pay about $850 but you’re getting a premium Manners stock that originally cost $534 by itself.
Field Testing the CZ 455 Varmint Precision Trainer
CZ 452 — Classic Bolt-Action Rimfire Rifle
The CZ 452 is an affordable classic. It is ultra-reliable, easy to clean and maintain, and you’ll find very good examples on the used market for under $400. This is an excellent first rifle for a young family member. In this video, The TFB TV team tests a CZ 452-2E fitted with a suppressor. As the 452 series is being replaced, if you want to buy a new 2019 CZ 452, you’ll need to spend big bucks on the Grand Finale model: “Produced in limited quantity, the 452 Grand Finale (MSRP $1189.00) is a last hurrah to the venerable CZ 452. Built using the last 452 actions ever produced, on the original manual barrelling equipment and at the Brno workshop, the Grand Finale [features] hand-engraved scroll-work on the action, barrel, bottom metal and scope rings. The upgraded American walnut is trimmed with an ebony fore-end and grip cap.”
Semi-Auto CZ — Model 512 American in .22 Magnum Rimfire
The folks at Varminter.com are avid varmint hunters, who test varmint rigs in the real world, seeing how they perform in the varmint fields. Varminter.com was quite impressed with the CZ Model 512 American semi-auto .22 WMR (Winchester Magnum Rimfire) rifle. The testers found the Model 512 to be accurate, extremely reliable, and fun to shoot. Watch the video to field tests conducted in California. This self-loading rifle performed ultra-effective on California ground squirrels. Erik Mayer, Varminter.com’s publisher says: “The 22 Magnum (.22 WMR) is beginning to see a resurgence of sorts, as the rimfire ammunition becomes more readily available. Because of this, rifles like the CZ Model 512 have also begun to see a rise in interest again”. CLICK HERE for FULL REPORT with accuracy findings for multiple ammo types.
We talked with the experts at Bartlein Barrels. They confirmed that they have seen many, many more barrels harmed by crown damage caused by improper cleaning than by anything else. If you use a bronze brush, Bartlein recommends that you REMOVE the BRUSH after it passes through the muzzle. This is because the bristles take a set (pointing to the breech) during the out-stroke. In other words the bristles angle back as you push towards the muzzle from the breech. If you drag the brush backwards at the muzzle, you force these bristles to reverse direction abruptly right as they cross the delicate crown. In time, that can damage the crown. NOTE: John Krieger of Krieger Barrels also advises his customers not to pull a bronze brush backwards across the crown.
Response to Skeptics
Whenever we’ve published similar advice, given by guys who are producing some of the most accurate barrels in the world, some readers get extremely angry. They say, “You’re crazy! I’ve was pullin’ triggers when you were still in diapers. I’ve got Hall of Fame points and I say there’s no way a phosphor bronze brush can ever do anything to steel. You’re full of it.” Well, these guys are entitled to their opinion. But here’s our response. Number one, we’re just telling you what the barrel-makers are telling US. Don’t kill the messenger. Number two, many of the guys who say bronze brushes can’t affect the crown are the same guys who feel they need to recrown their barrels every 400-500 rounds (Do we see a connection?). Third, if you don’t think a softer material can affect steel, look at the steel ferrules of a well-used fishing rod — there the steel is worn away by plastic. (With time, water will wear away granite.) Lastly, this Editor can tell you I’ve seen the damage myself, first-hand, using a magnifying glass on much-brushed benchrest barrels. Right at the muzzle, the top edge of the lands had sharp, jagged edges that looked like little shark’s teeth, or the edge of a serrated knife. By contrast, a new barrel will have a nice, smooth straight edge along the top of the lands at the muzzle.
Also Be Careful with Jags
Bartlein’s experts also told us to be careful about the jags you use. Dewey-style jags in particular can cause problems. These have a long shaft with multiple rings with diamond-pattern “teeth”. The teeth are designed to grip a patch. The problem is that the lower rings may be exposed below the patch fabric, so the teeth can grind directly on the rifling and/or crown. Bartlein says Dewey-style metal jags can damage a crown very quickly if any of the toothed rings are exposed, metal-on-metal. Tim North of Broughton barrels also advises against using the Dewey-style jags with toothed rings. Interestingly, Dewey uses the same type of diamond-shaped teeth on the bottom of its “Crocogator” primer pocket tool, so you know those knurled teeth can scrape.
The 6mmBR Norma cartridge has spawned many great variants in multiple calibers: 6mm Dasher, 6BRA, 22 BR, 22 Dasher, 30 BR and others. This article is about a handsome 22 BR Rem-action varmint rig.
Richard Franklin (who operated Richard’s Custom Rifles prior to his retirement), has built scores of varmint rifles, in many different calibers. One of Richard’s all-time favorite varmint rifles is a 1:14″-twist, 22 BR built on his Model 11 stock in laminated Black Walnut and fiddleback maple. Richard says the rifle is versatile and deadly accurate out to 400 yards. Richard uses a Leupold 8.5-25x50mm LRT with varmint reticle.
Richard’s 22 BR Varmint Rifle with Lilja Barrel
Richard tells us: “[Shown above] is my light walking varminter. It’s built on a blue-printed Stainless Steel Remington 700 short action and chambered as a no-turn 22 BR for Lapua brass. The bolt handle is a Dave Kiff replacement and I’ve fitted a Jewel BR trigger with bottom safety. The barrel is a Lilja, 1:14″ #6 contour with a muzzle diameter of .750″. I shoot the 40gr V-Max bullets in the rifle at 4000 FPS. It’s tough on hogs if you don’t try them too far. 400 yards is about the max with it.
Accuracy is outstanding and with Roy, Mike, my grandson and myself shooting this rifle I don’t believe it has missed more than three hogs out of over 100 we shot at one summer. This rifle is carried in a ceiling rack in the truck where it’s handy and is used by the first person that grabs it when a hog is sighted if we are moving between setups. The Varmint reticle on the Leupold (shown below) is nice for quick hold-overs as you change distances.”
At right is a another Franklin Model 11 stock in Birdseye maple. That photo shows the details of the thumbhole stock.
Editor’s Note: We have shot a 1:8″-twist 22 BR in varmint matches and it was very accurate with 80gr bullets. It actually shot flatter out to 500 yards than our 6mmBR running 105-grainers. If we were to build a new long-range, bolt-action varmint rifle it would probably be a 22 BRA, essentially a 22 BR with 40° shoulder. That gives you a very stable cartridge with a bit more capacity. The 22 BRA retains a longer neck compared to the 22 Dasher, which is also an excellent cartridge — versatile and accurate.
22 BR Rivals 22-250 Performance
With bullets in the 40gr to 60gr weight range, the 22 BR gives up very little in velocity to a 22-250, despite burning quite a bit less powder (30-32 grains for the 22 BR vs. 35-38 grains for the 22-250). With a match-quality chamber, the 22 BR will probably have an edge in accuracy over a 22-250, and you should experience longer barrel life. Here are some recommended 22 BR loads for 40-60gr bullets:


 Apparently reducing static charges on and around electronic scales can reduce their propensity to drift, lessening the problem of “wandering zero”. Just how and why static charges interfere with scale performance is unclear, but many shooters have noticed that static electricity can cause electronic scales to behave strangely. So how do you reduce static charges around your digital balance? Our late friend German Salazar (aka “GS Arizona”), creator of the Rifleman’s Journal Blog, found a very simple solution — an anti-static aerosol spray — that, by all indications, actually works. When this “spray-can solution” was suggested to German by a fellow shooter, German was skeptical. However, he tried the stuff and he says that it really does help the scale maintain zero over time, with much less observed drift.


 I began doing leatherwork as a kid, 12 or 13, and the first piece I made was a pair of shoes. Got a job in a leather shop in the late ’60s and made purses and belts, wallets and sandals — many pairs of sandals. I opened a small retail shop in Estes Park, CO and made even more of the same, adding vests, halter tops, hats, mountain man gear of all sorts from skunk hats to goat fur high-top moccasins.


 In Tennessee, when you order a take-out pizza, you get a cardboard shooting target at no extra charge. Nashville, Tennessee-based

 You have to admire someone with serious do-it-yourself skills. Not just hammer and nail skills, but formidable design and fabrication skills. Well Forum Member Dave D. (aka “AKShooter”) has a DIY skill set that might put some trained machinists to shame. You see, “DIY Dave” crafted his own pedestal front rest from scratch, using his own design and about $100.00 in materials (not counting the Edgewood front bag). Dave estimates he put 20 hours of labor into the project, but the end result was worth it: “This Do-It-Yourself rest drives like a dream. I’ve played with the Caldwell and a Sinclair, they have nothing on this one.”


 I am also a member at


 Rimfire cross-training allows PRS competitors to build their skill sets without breaking the bank (or burning out barrels). One great .22 LR option for cross-training is the CZ 455. The TFBTV video below spotlights the


 The 6mmBR Norma cartridge has spawned many great variants in multiple calibers: 6mm Dasher, 6BRA, 22 BR, 22 Dasher, 30 BR and others. This article is about a handsome 22 BR Rem-action varmint rig.
 Accuracy is outstanding and with Roy, Mike, my grandson and myself shooting this rifle I don’t believe it has missed more than three hogs out of over 100 we shot at one summer. This rifle is carried in a ceiling rack in the truck where it’s handy and is used by the first person that grabs it when a hog is sighted if we are moving between setups. The Varmint reticle on the Leupold (shown below) is nice for quick hold-overs as you change distances.”


