When he measures his loads or sorts bullets by weight, Forum Member Boyd Allen often employs his trusty RCBS 10-10 balance beam scale (although he does have handy digital scales as well). He finds that the balance beam scale works predictably, time after time, and it doesn’t suffer from the drift and calibration issues that plague some of the less expensive electronic scales on the market.
To make it easier to see the balance point, Boyd has adapted a magnifying glass with a mirror. This makes the end of his balance beam easier to view from his normal position on the bench. Boyd explains: “This set-up uses a cheap magnifier with positioning arms that was probably designed to hold and magnify small objects while soldering them. I think that it came from Harbor Freight many years ago. The mirror lets you look at the scale as if is was at eye level, and of course the magnifier makes the image easier to see.”
If you have a balance beam scale, we suggest you try this simple enhancement. We predict you’ll find the magnifier speeds up the process with enhanced assurance of your load weight.
Progressive reloading presses offer shooters speed and efficiency in producing custom-tailored rifle and pistol ammunition. However, there is a wide choice of Progressive Presses and a bewildering array of options to consider. In this video, the 6.5 Guys and UltimateReloader.com’s Gavin Gear provide an overview of the leading Progressive Presses on the market along with key considerations for precision rifle shooters. If you are considering getting a Progressive for rifle ammo reloading, you should watch this informative, 25-minute video.
10 Tips for Reloading Rifle Ammo on a Progressive Press:
1. Make sure the brass is very clean. Don’t mix old range pick-up brass with newer brass.
2. Apply a thin, spray lube to all cases before the sizing/loading cycle.
3. Consider priming your brass separately (with a hand or bench tool) before the operation. Then inspect the primers before loading powder and bullets.
4. Always wear eye protection when loading with the Progressive, particularly if you are priming cases.
5. With masking tape, mark the powder measure/dropper with the powder type and cartridge charge weight. Check the charge mass multiple times (see below).
6. Cycle a few cases, sizing and adding powder but NOT seating bullets. Weigh the powder charges to ensure the powder measure is dispensing the correct charge. Sometimes this will change a couple tenths as it “settles down” after the first few charges.
7. Check the brass for shoulder bump and bullet seating depth carefully for the first few rounds, then check again periodically.
8. Try to maintain a steady pace and operate the handle the same way every time.
9. Visually inspect the powder charge in each case (before bullet seating), and use a lock-out die if your Progressive Press has enough stations.
10. Never, ever mix pistol and rifle powders! If you have previously loaded pistol ammo with your Progressive, make sure ALL the powder (every flake and kernel) is removed from all parts of the powder-dropping system before you add rifle powder.
Visit these sites for more Reloading and Precision Shooting Videos:
If you don’t match your ammo to your chamber, bad things can happen, that’s for sure. A while back, Forum member BigBlack had an experience at the gun range that reminds us of the importance of safety when shooting. He encountered evidence that someone had fired the wrong cartridge in a 7mm WSM rifle. The problem is more common than you may think. This Editor has personally seen novices try to shoot 9mm ammo in 40sw pistols. BigBlack’s story is along those lines, though the results were much more dramatic. It’s too bad a knowledgeable shooter was not nearby to “intervene” before this fellow chambered the wrong ammo.
7mm-08 is Not the Same as a 7mm WSM
BigBlack writes: “I know this has probably been replayed a thousand times but I feel we can never be reminded enough about safety. This weekend at the range I found a ruptured case on the ground. My immediate thoughts were that it was a hot load, but the neck area was begging for me to take a closer look, so I did. I took home the exploded case and rummaged through my old cases until I found a close match. From my investigative work it appears someone shot a 7mm-08 in a 7mm WSM. Take a look. In the above photo I’ve put together a 7mm WSM case (top), the ruptured case (middle), and a 7mm-08 case (bottom).”
The photo reveals what probably happened to the 7mm-08 case. The shoulder moved forward to match the 7mm WSM profile. The sidewalls of the case expanded outward in the much larger 7mm WSM chamber until they lacked the strength to contain the charge, and then the case sides ruptured catastrophically. A blow-out of this kind can be very dangerous, as the expanding gasses may not be completely contained within the action.
Can’t Happen to You? Think Again.
This kind of mistake — chambering the wrong cartridge — can happen to any shooter who is distracted, who places even a single wrong round in an ammo box, or who has two types of ammo on the bench. One of our Forum members was testing two different rifles recently and he picked up the wrong cartridge from the bench. As a result, he fired a .30-06 round in a .300 Win Mag chamber, and the case blew out. Here is his story:
“I took two of my hunting rifles I have not used for over 25 years to the range yesterday to get new scopes on paper, a .30-06 and .300 Win Mag. I had four boxes of old Winchester factory ammo (two of each cartridge), which had near identical appearances. I accidentally chambered a .30-06 round in the Sako .300 Win Mag rifle. It sprayed powder on my face and cracked the stock at the pistol grip. If I had not been wearing safety glasses I might be blind right now.
You should always wear protective eyewear, EVERY time you shoot.
“I feel lucky and am very thankful for being OK — other than my face looks funny right now. I am also grateful for learning a valuable lesson. I will never put two different cartridges on the bench at the same time again.”
Forum member Rich DeSimone uses a handy “Stub Gauge” for setting shoulder “bump” and seating depth. The gauge is made from a section of barrel lopped off when the muzzle is crowned. The chambering reamer is run in about 1/4 of the way, enough to capture the neck and shoulder area of the case. Rich then uses his full-length die to “bump” a master case with the ideal amount of headspace for easy feeding and extraction. He takes that case and sets it in this Stub Gauge, and measures from the front of the gauge to the rim. He can then quickly compare any fired case to a his “master” case with optimal headspace. Since the gauge measures off the shoulder datum, this tells him how much to bump his fired brass.
In addition, the Stub Gauge can be used to set bullet seating-depth. Rich has a channel cut transversely on one side of the gauge, exposing the throat area. Since the interior of the gauge is identical to the chamber in his gun, this lets him see where a seated bullet engages the rifling. He can tinker with bullet seating length until he gets just the right amount of land contact on the bullet, confirmed visually. Then he measures the case OAL and sets his seating dies accordingly. This is much handier than using a Hornady Tool to measure distance to the lands.
But what happens when the throat wears and moves out on your live barrel — making the actual length to lands different (slightly longer) than before. Well, the stub gauge is still valuable as a known starting point. As your barrel’s throat wears, you may seat your bullets out further to “chase the lands”, but the gauge provides a constant land engagement point, in the barrel’s “as new” condition. By measuring the difference between the land contact point on the gauge and the actual contact point on your barrel, you can determine throat “migration”.
Here’s an inexpensive product that can make your case prep and loading tasks easier. We use and recommend the cleverly-designed Lyman Bleacher Blocks. These multi-level (stepped) cartridge holders save space on your bench AND make it easier to select a particular case/cartridge from a full block. Each row is a different height for convenience. With Bleacher Blocks it’s also easier to check for powder levels, or place bullets before the seating process.
Lyman’s Bleacher Block cartridge holders have many advantages over conventional, single-level blocks. Use the different levels for sorting brass. Or, migrate the brass from top to bottom as you proceed through case prep stages. If you are assembling loads with different bullets for load testing, you could arrange the loaded rounds on different levels for easy recognition. For example put V-Max loaded rounds on the top tier, and Berger Hybrid loaded rounds on the bottom tier. Or, if you are experimenting with neck tension, you can use different rows for cases processed with different bushings.
Made of durable orange polymer, Lyman Bleacher Blocks are now molded in five sizes — small pistol, large pistol, and three rifle sizes. The smallest rifle block (with 0.388″-diam holes) fits .223 Rem-size case heads. The middle size rifle block (with 0.485″-diam holes) fits .308 Win-size case heads. That works for 6mmBR/Dasher sized cases perfectly. The biggest rifle Bleacher Block has 0.565″-diameter recesses for magnum-size cases. There are also two pistol blocks — .445″ hole size for 9mm/.357 size and .565″ diameter for larger .44/.45 pistol cartridges.
Here’s what Lyman says about its innovative cartridge block design: “Our [stepped] loading blocks allow for easier handling of cases in and out of the loading block. Our stepped design allows you to easily grip a single case without jamming your fingers down into a group of cases like in traditional loading blocks, and allows for a smaller ‘footprint’ on your bench.”
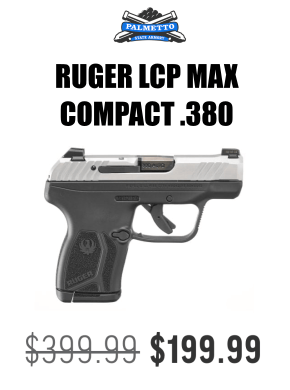
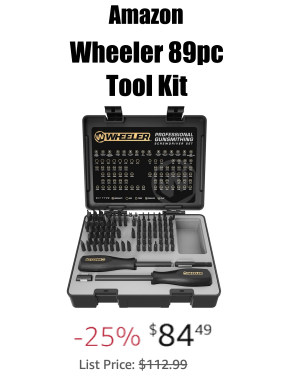
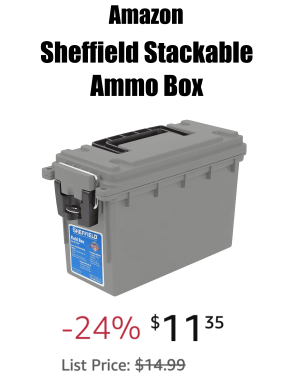
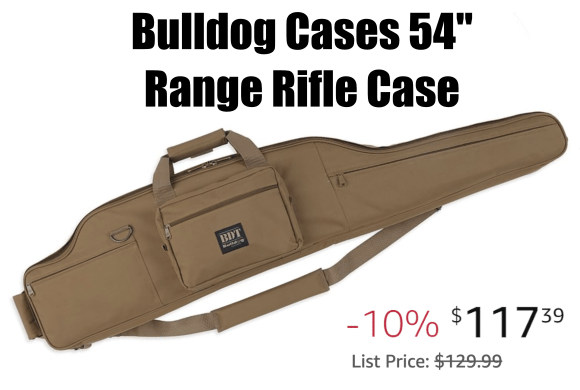
At the request of our readers, we provide select “Deals of the Week”. Every Sunday afternoon or Monday morning we offer our Best Bargain selections. Here are some of the best deals on firearms, hardware, reloading components, optics, and shooting accessories. Be aware that sale prices are subject to change, and once clearance inventory is sold, it’s gone for good. You snooze you lose.
NOTE: All listed products are for sale to persons 18 years of age or older. No products are intended for use by minors.
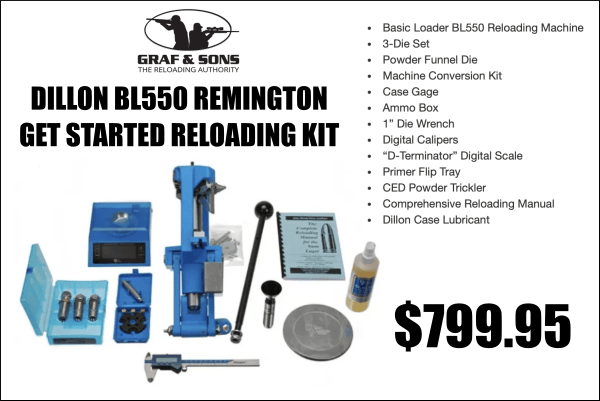
Graf & Sons — Dillon Get Started Reloading Kit, $799.95
⏺️ » Great savings on Dillon combo reloading kits
If you need a good progessive press system, consider the Dillon Get Started Reloading Kit at Grafs.com. This combo set includes a Basic Loader BL550 Reloading Machine, 3-Die Set, Powder Funnel Die, Machine Conversion Kit, Case Gage, Ammo Box, 1″ Die Wrench, Digital Calipers, D-Terminator Digital Scale, Primer Flip Tray, CED Powder Trickler, Reloading Manual, and Dillon Case Lubricant. This quality progressive reloading system is sold with dies for a particular cartridge. Chose a kit with dies for one of these cartridge types: .380 ACP, .38 SPL, .357 Mag, 9mm, .40 S&W, .44 Magnum, 10mm, .45 ACP, .45 Colt, .223 Rem, .308 Win, and .30-06 Springfield.
Midsouth — All Lee Precision ON SALE
⏺️ » Vast selection of Lee products with big discounts
Lee Reloading offers affordable, well-designed reloading equipment that can produce very good ammo with a minimal investment. We like the Lee presses, priming systems, powder measures, and dies. Right now Midsouth is running a major sale with dozens of Lee products on sale including reloading combo sets, which provide all the tools you need to get started loading your own ammo.
As an Amazon affiliate, this site can earn revenues through sales commissions.
This article is part of Sinclair Int’l Step-By-Step Reloading Series. Most of the products mentioned in this article are sold through Brownells.com.
by Roy Hill, Brownells/Sinclair Copywriter
Making your own precision handloads is a meticulous journey with many steps, many important matters to consider, and many sets of measurements to calculate. For those who pursue the perfect group, the highest score, the really long accurate shot, the rewards more than outweigh the effort. Choosing the right cases, deburring the flash holes, making the primer pockets uniform, trimming the cases, and lubricating them are all familiar – and critical – steps along the journey. And now that your brass preparation is complete, you are at last ready to start running the cases through your press and fill them with primers, powder, and bullets. The very first die the brass encounters is the sizing die. You insert the case, work the press’s lever to return the case to its correct pre-fired dimensions – and the journey continues.
There are three types of sizing dies to think about: neck, full-length, and small base. All three have specific benefits and potential drawbacks, and you should choose the type of die you use by thinking very carefully about what kind of shooting you plan to do with your handloads. No matter which type you select, most sizing dies will also punch out the old spent primer with some sort of decapper assembly that uses a hardened steel rod. Many types of sizing dies use an expander ball inside the die to make sure the neck of the case will accommodate a bullet after being sized. With some size dies, the expanders are easily removable and interchangeable, letting you get exactly the neck tension you want. When sizing cases (neck of full-length), rifle cases always need lube.
Neck-Sizing Dies Neck-sizing dies resize only the neck of the case. The benefit of sizing only the neck is that the brass is “worked” very little, reducing the amount of changes to the brss. [We recommend full-length sizing for all applications after the first couple of firings, and semi-auto brass should be full-length sized every time!] Sinclair recommends that neck-sized-only cartridges should not be used any in other rifle besides the one they were originally fired from [unless they are also FL-sized], or in any action other than a bolt-action.
Full-Length Sizing Dies
Full-length sizing dies resize the full length of the case, not just the neck. Full-length sizing helps create handloads that will function in any rifle, not just the one from which the cases were originally fired. The potential downside of full-length sizing is that it may shorten case life because it works the brass more than neck sizing. But it’s possible to “tune” today’s full-length sizing dies so they barely work the brass at all, as this article by Sinclair Reloading Tech Ron Dague shows.
Illustration Shows How a Full-Length Sizing Die Works
Another way to reap the benefits of full-length sizing is to use Redding’s full-length bushing dies, which size the full length of the case but use a system of interchangeable bushings that enable you give the case neck the bare minimum of resizing needed. To see how finely adjustable bushing dies are, and how they resize the case while fully supported, CLICK HERE for Video. The neck bushing helps you precisely control the neck tension to help increase the consistency and accuracy of your handloads.
Small Base Dies
A Small Base Die is another type of full-length sizing die, but one that is typically used when reloading for semi-automatic rifles, like the AR-15, M14, or AR-style .308 rifles. (It may also work well for bolt guns that need extra sizing on the lower section of the case.) A small base die works exactly like a full-length sizing die, only it compresses the brass just a bit more, usually about .001″ more, and may even push the case shoulder back just a hair. Small base dies give that extra bit of compression to the brass to help make sure the case will properly extract from a semi-automatic firearm. The upside is that you get handloads that should work flawlessly in your semi-automatic. The downside is case life may be shortened as compared to brass used only in one bolt-action rifle, because the brass is worked more.
Shoulder Bump Gauges
A handy tool for setting up your full-length sizing dies as close as possible to your rifle’s chamber is a shoulder bump gauge. The bump gauge lets you resize the case as little as possible, to extend case life and help your handloads fit your rifle almost like a neck-sized only die. You use deprimed cases fired in your rifle and bump gauge inserts to help you set up the die so it resizes the case only about .001″ to .004″, depending on what type of rifle you’re shooting.
Video shows how to use a shoulder bump gauge to set up your full-length dies
Article Find by EdLongrange. We welcome reader submissions
NOTE: If you prefer drying your brass in an oven we recommend a temp setting no higher than 200° F. Better yet, use a dedicated case dryer that cannot possibly over-cook your cases.
Tech Tip by Craig Arnzen of Area419.com
As wet-tumbling brass has become more popular in recent years, guys have tried a LOT of ways to get their brass dry — towels, hair dryers, and even food dehydrators. (See Top Ten Brass Drying Methods). Another common method — albeit with some potential issues — is putting your wet brass in the oven to dry. Provided you monitor TEMP and TIME, this method is fast, effective, and easy (as long don’t use the wife’s favorite cooking pans — that’ll get you in trouble.)
With oven-drying, however, unexpected issues can arise, as illustrated by this worrisome story: “I put my brass in for an hour at 200° F and turned it off. Next thing I know I realize my wife has the oven pre-heating to 350° F. Is my brass ruined?”
If you search the AccurateShooter.com Shooters’ Forum, you’ll find at least three threads with stories like that (i.e. higher-than-expected oven temps when drying brass), and answers on both sides of the line. I know this, because it happened to me — I had some 6XC brass drying and the wife pre-heated the oven. Concerned about my cases, I consulted a genuine annealing expert, Andrew Rixon.
Andrew is the Director of Engineering and Manufacturing at Alpha Munitions, makers of premium-grade rifle brass. I had baked a batch of Alpha 6XC brass, which is exceptionally consistent and well-made. (This 6XC brass is currently out of production, but Alpha produces many other good 6mm cases including 6 PPC, 6mm ARC, 6mm BR, 6 Dasher, 6BRA, 6 GT, and 6mm Creedmoor).
Before Andrew would answer my question though, he gave me a little lesson on what really happens during annealing:
“Annealing is performed by heating the brass to specific temperatures. There are three phases of annealing: recovery, recrystallization, and grain growth. All of which have specific temperatures and or exposure times related to them. It is key for cartridge brass annealing processes to hit the recrystallization phase which allows for strain-free grains to grow. The growth of strain-free grains eliminate dislocations, drastically decreasing hardness and increasing ductility. For recrystallization to occur the material temperature must be within 600-1000 degrees Fahrenheit (F).”
He then got into really answering the question, and was (fortunately) definitive in his answer: “If the temps do not exceed 450 degrees F then there is nothing to worry about as it did not exceed the critical temperature for annealing to occur.” Editor: Caution — do NOT assume that the temperature marked on the oven knob is the actual temperature INSIDE the oven, particularly near the back. Some older ovens can be off as much as 75 degrees F. Be conservative!
Well, there you have it. If you’ve baked your brass, you’re probably OK. If you got it hotter than 450° F then there can start to be some changes to the metal.
Setting optimal bullet seating depth is very important for maximum accuracy. While some cartridges and barrels may deliver good accuracy with a wide range of bullet seating depths, other barrels may be more fussy, and may strongly prefer a specific seating depth, such as .006″ in the lands or .020″ off. To get this kind of precision, you need to know the exact position of the lands in your barrel. In addition, because barrel throats tend to move as the round count goes up, you should check the position of the lands regularly on a competition rifle.
Today’s Saturday Videos demonstrate a number of methods for finding Length to Lands in your rifle barrel. We start with the most common method — using the Hornady O.A.L. Gauge with a threaded modified case. With some practice, and a refined touch, this is actually very accurate. After this, we offer videos that have alternative methods, each with its pros and cons. You should find a method that works for you, that can achieve results within a couple thousandths for multiple measurements.
Finding Cartridge Length to Lands with O.A.L. Gauge
Probably the most common method to find length to lands is using a Hornady O.A.L. Gauge Tool with a comparator on a set of calipers. We regularly use this method with a custom modified case for our 6mmBR rifle. Using the technique described below, we can get results within .0015″ or so three out of four times. We do recommend taking multiple measurements. As explained below, be consistent and do NOT push the gray plastic rod too fast or with too much force.
During this measurement process, the modified case, with a bullet in its neck, is inserted in the chamber. Go slow, take your time. Here are FIVE TIPS that will help you get repeatable and reliable length-to-lands measurements with the Hornady O.A.L. Gauge:
1. Start with a clean chamber and clean barrel throat.
2. Make sure the modified case is fully screwed down and seated on the O.A.L. Gauge. It can sometimes unscrew a bit during repeated measurements.
3. Insert the modified case slowly and gently, but ensure the shoulder of the modified case is fully seated on the end of the chamber.
4. Push the gray plastic rod GENTLY. It is common for the bullet to be tilted a bit. You want to allow the bullet to self-center in the throat BEFORE you apply much pressure. Then tap a couple times and push until you feel resistance. Do NOT push too hard — that will jam the bullet in the lands.
5. Repeat the measurement at least 3 more times. If you follow our instructions, you should, typically, get a repeatable measurement, within 0.0015″ or so, 3 out of 4 times.
NOTE: We’ve seen some folks struggle to get repeatable measurements with this tool. In most cases, they were going too fast and pushing too hard on the gray rod, creating a hard jam.
Brownells — Using Hornady O.A.L. Gauge with Modified Case
This Brownells video shows how to use the modified (threaded) case for the cartridge your rifle shoots. Attach it to the O.A.L. Gauge, then insert a bullet into the case neck and slide the tool into the chamber. It takes a little practice to get consistent results. After getting the measurement in the barrel, you ascertain the length to lands using a Hornady Bullet Comparator attached to your calipers.
Making Your Own Modified Case — Threading the Case End
This helpful video from our friend Gavin Gear of UltimateReloader.com shows how to create a custom modified case to use with a Hornady O.A.L. Gauge. You need to drill out the primer pocket area, then tap and thread the bottom of the case.
Ultimate Reloader Shows 3 Ways to Find the Lands
This video shows three different ways to measure distance to lands. First Gavin Gear shows how to use a Hornady O.A.L. Gauge with Modified Case. The second methods shows how to use a bit of Loctite INSIDE the neck to secure a bullet. Be sure there is NO Loctite on the outside of the neck — you don’t want that in your chamber! You place the case with bullet into the chamber, then close bolt to seat the bullet. After waiting 5-10 minutes for the Loctite to set, you remove the cartridge gently. The third method (time-mark 16:50) is a Jam method using a bolt with the firing pin assembly and ejector removed (so there is no extra pressure on the case). Gavin notes: “The bullet ogive can be colored with a permanent marker if you want to indicate lands contact.”
About this third Jam method, ace F-Class shooter Erik Cortina posted: “My method is actually the last one that Travis showed. The one where you let the lands push bullet in. But it is neck tension dependent. I also put die wax in bullet ogive to prevent it from sticking in the lands. The method of seating bullet deeper and deeper until bolt closes is the Alex Wheeler method. As you said, there are a tons of ways to measure this.”
Finding Length to Lands the Speedy Way
Here is another method to find length to lands that can work with an unmounted barrel. This method is explained by Thomas “Speedy” Gonzales, a top gunsmith and ace benchrest shooter. Speedy drops a case with bullet seated into the chamber and then adjusts the seating depth with an inline seating die until there is no sticking or resistance felt. He can then adjust the true length to lands easily with his micrometer seating die. If you don’t have a modified case and do not want to partially disassemble your bolt to take measurement, you might want to use Speedy’s method.
Finding Length to Lands Using Bolt Movement — Primal Rights
This video shows how to remove the firing pin assembly in your bolt. This way the bolt can be used to advance a case with bullet smoothly into the chamber. Then the bullet seated in the case neck will move back to “first touch” contact position. Then extract the case slowly and measure.
The video host states: “Overall length gauges and modified cases tend to be close, but never as precise as we would like them to be. Here we describe how to measure the length to your lands in your rifle as precisely as possible, using a caliper and bullet comparator.” NOTE: The host says a store-bought Modified Case may not deliver that exact same length from case base to lands as your own fired case. That is true, but as long as the commercial Modified Case gives you repeatable results, you have a functional reference point which you can then use to test seating depths relative to that measurement.
Finding Length to Lands Using Bullet in Case With Split-Cut Neck
Here is a common method that requires no special tools. Simply take a fired (no primer), neck-sized case and split the necks down vertically with a Dremel. Done right, this will hold the bullet in place when you chamber the unloaded round. As the bullet touches the rifling it will move back. As the cartridge chambers, the bullet slides back into the case to give you length to lands. This is not super-accurate but it is probably good enough for finding the length to lands for a hunting rifle. The video maker explains: “No need to purchase gauges for this if you are willing to sacrifice one case. With a little time and patience you can get good results with this method.” Further Explanation.
How to Adjust Tension — Length and Number of Neck Cuts
Forum member Andris Silins, who uses this method, explains: “I made the neck cuts using a Dremel with a cut-off wheel. You can adjust tension two ways. First, you can make the cuts longer or shorter. Longer cuts = less tension. If you used only three cuts instead of four you would get more tension. The trick is to be gentle when you open and close the bolt. If you ram the bolt closed you may wedge the bullet into the lands. When you open the bolt it helps to keep a finger or two near by to guide the case out straight because the ejector wants to push it sideways.” READ MORE.
Finding the Lands with HK Rifleworks
This is another video that demonstrates how to disassemble the bolt so that the firing pin assembly and spring does not apply pressure on the empty case which would affect the bullet as it touches the lands. The video maker shows how to use a Brownells bolt disassembly tool to quickly take the bolt apart (3:20 time-mark). Once you have a repeatable measurement, you know exactly where is “first touch”. Then you can adjust your seating depth to be into the lands, or jumping the bullets. Many benchrest shooters like to load “into the lands”. PRS/NRL shooters and hunters will generally prefer to jump their bullets .0020″ or more.
For some applications, we prefer a non-bushing FL die over a bushing die. Shown here are three Forster full-length sizing dies, with necks honed to three different dimensions: 0.265″, 0.266″, and 0.267″.
The Honed Full-Length Sizing Die Option
There are many good options in full-length (FL) sizing dies. Most precision hand-loaders prefer FL dies with neck bushings. These let you adjust the “grip” on your bullet by using larger or smaller bushings. FL bushing dies are available from Whidden Gunworks, Forster, Redding and other makers.
Conventional, non-bushing full-length sizing dies can create ultra-accurate ammo with very low run-out. But many conventional non-bushing FL dies have an undersized neck diameter so you end up with excess neck tension, and you work the brass excessively.
There is another effective option, one that promises extremely low run-out. The honed FL die is a full-length sizing die that has the necked honed to provide a precise fit to the case-neck. When done right, honed FL dies produce extremely straight ammo — as there are no issues with bushing alignment (or bushings that are not perfectly concentric). This Editor owns honed dies from Forster, Redding, and Whidden Gunworks. They all perform extremely well, delivering match ammunition with extremely low run-out measured with a 21st Century Concentricity Gauge.
In one of the most popular articles we’ve ever published, Bugholes from Bipod, California shooter “Froggy” explained why he prefers honed dies for his tactical ammo.
Q: Do you FL size every time? Do you use custom dies?
Absolutely, I full length resize all of my brass every time I reload. And guess what? I’ve never had a feeding problem.
I do use a modified sizing die, without bushings. My FL resizing die has been custom-honed in the neck area to give .0015″ press fit on the bullet. I also put a slightly larger radius at the neck shoulder junction. I feel that this helps to seal the chamber. With this die, I get consistent neck tension every time–without bushings. Bushings are useful when you’re fishing around for a good load. But once you find the right amount of sizing for ideal neck tension, you can do this better with a customized FL die.
6.5 Guys Review Forster Honed Full-length Dies
The 6.5 Guys have reviewed honed FL sizing dies from Forster, explaining the pros and cons of this type of reloading die. They explained that, if you load a wide variety of bullets from different manufacturers, you many want to stick with a Bushing FL die. However, if you have settled on a particular bullet and found the “ideal” neck tension, then a honed die may make sense.
In this Gear Update, the 6.5 Guys discuss a service offered by Forster Products to custom hone the neck diameter of its full-length sizing dies to the customer’s specifications (to the thousandth). Whidden Gunworks has also crafted custom-honed FL dies for many customers, including this Editor.


 Forum member Rich DeSimone uses a handy “Stub Gauge” for setting shoulder “bump” and seating depth. The gauge is made from a section of barrel lopped off when the muzzle is crowned. The chambering reamer is run in about 1/4 of the way, enough to capture the neck and shoulder area of the case. Rich then uses his full-length die to “bump” a master case with the ideal amount of headspace for easy feeding and extraction. He takes that case and sets it in this Stub Gauge, and measures from the front of the gauge to the rim. He can then quickly compare any fired case to a his “master” case with optimal headspace. Since the gauge measures off the shoulder datum, this tells him how much to bump his fired brass.


 Neck-sizing dies resize only the neck of the case. The benefit of sizing only the neck is that the brass is “worked” very little, reducing the amount of changes to the brss. [We recommend full-length sizing for all applications after the first couple of firings, and semi-auto brass should be full-length sized every time!] Sinclair recommends that neck-sized-only cartridges should not be used any in other rifle besides the one they were originally fired from [unless they are also FL-sized], or in any action other than a bolt-action.


 If you search the AccurateShooter.com


