There WILL be shooting matches at Camp Perry in 2021, with safety protocols in effect to prevent COVID transmission. The Civilian Marksmanship Program (CMP) will host a variety of Garand, Springfield, Vintage and Modern Military (GSMM) rifle matches during the 2021 season at the historic Camp Perry National Guard Training Facility in Ohio. There will be matches at both the Petrarca Covered range and the Viale outdoor range. Registration for all matches is now open. Competitors of all skill levels are welcome to attend these recreational events. Knowledgeable CMP staff members will be on hand at all events. Space will be limited, so sign up soon.
Garand, Springfield, Vintage and Modern Military at Petrarca Range
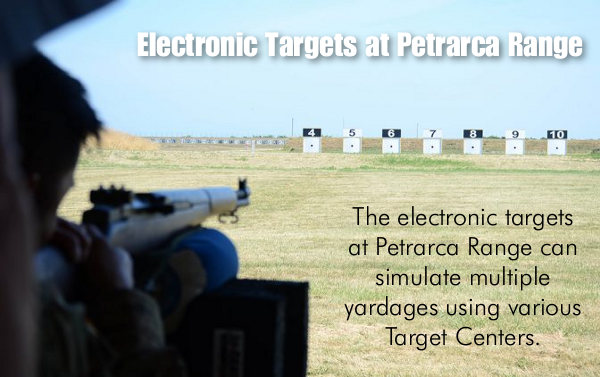
A series of GSMM matches will be held at Camp Perry’s Petrarca Range using Camp Perry’s advanced electronic target system. The use of the KTS (Kongsberg Target System) targets means faster competition time (with no need for pit duty) and extra convenience for competitors who can rely on the instant and accurate shot monitors, located beside each firing point. Dates for the 2021 GSMM events at Petrarca Range currently include: May 22, June 26, and September 25.
High Power Matches at Viale Range
In addition to the Petrarca matches, a set of High Power rifle 800 Aggregate and Excellence-In-Competition (EIC) events will be held on Camp Perry’s outdoor Viale Range, June 26-27, 2021. The CMP explains: “The matches are ideal for those in the quest for a Distinguished Rifleman Badge as well as those with a love for modern military rifle shooting.” The Viale matches will utilize CMP’s High Power electronic targets.
Availability of Petrarca Range for Public Shooting Practice
Along with organized competitions, Camp Perry’s Petrarca Range is open for public shooting each Monday, with advanced reservations. Opening day for Petrarca Range’s Open Public slots begin March 15, 2021. Every Monday, by appointment only, guests may use Petrarca during the hours of 9 a.m. to 5 p.m., March through May and September through November. During the summer months (June through August), Petrarca is open from 9 a.m. until 6 p.m.
Please note: During the National Matches scheduled July 12 – August 14, Petrarca Range will be open throughout the week but only after firing is complete on Rodriguez Range. Guests to Petrarca must adhere to current CDC guidelines, including masks and social distancing.
Good news for folks in the middle of the country — Vortex, the optics-maker, has built a very impressive new training facility in Wisconsin. This new 55,000 square-foot Vortex EDGE facility boasts indoor and outdoor ranges, with shooting outdoors to 1000 yards. The modern EDGE 100-yard range is one of only a few 100-yard indoor ranges in the country, and the only one in the Midwest. The impressive new Vortex EDGE training center is part of the Vortex campus located in Barneveld, Wisconsin. The EDGE buildings are “just across the parking lot from the Vortex HQ” in Barneveld.
Vortex has just released a video “sneak preview” showing the new EDGE facility, with the multiple indoor ranges, “shoot rooms”, and simulator training center. Check it out below:
VIDEO – Behind the Scenes of Vortex EDGE – First Look!
Vortex posted: “If you can’t travel to our campus, you can still experience Vortex EDGE. We’ll be regularly releasing videos and content, and we’ll be active on social media celebrating all things firearms training.”
The 100-yard Indoor Range is ideal for load development and accuracy testing. Three-time F-TR National Champion Ian Klemm, who works for Vortex, told us: “If someone asked me to describe my dream job, I’d probably depict some magical place where I could do serious 100-yard indoor load development and rifle tuning whenever I wanted. Well, for the last three years while the Vortex EDGE facility was being completed, that’s exactly what it’s been like and we’re all excited to finally be able to share it with the rest of the Vortex Nation. I’m extremely grateful to work for the kind of company that would want to build this facility in order to share it with our customers. Come visit us and I bet you’ll at least leave with the best ‘no wind zero’ you’ve ever had on your rifle!”
There is a 1000-yard outdoor range, plus multiple indoor facilities including a 100-yard range, 50-yard indoor “tactical” range, 25-yard tactical range, a LEO/Military “Shoot House”, and even a simulator room with VirTra 300® interactive video.
Along with the training areas, the EDGE center includes a classroom, cleaning/locker area, and a commercial showroom. Go to VortexEdge.com to learn more about the facility and class offerings. On that website, you’ll also find EDGE Instructor Bios.
The U.S. Army Marksmanship Unit (USAMU), in cooperation with Shooting USA TV, has created a series of instructional Pro Tip pages covering a wide range of shooting disciplines. All totaled, there are more than 50 USAMU Pro Tips. Most relate to rifle marksmanship but there are also numerous tips for shotgunners and pistol shooters. Each Pro Tip entry includes multiple photos and 6-15 paragraphs, in an easy-to-follow format. Many Pro Tips also include an instructional video produced by Shooting USA. Here are three Pro Tip videos, and links to seven more Pro Tip web pages.
USAMU TOP TEN PRO TIPS
1. Reading the Wind with SGT Sherri Gallagher.
Apart from gravity, wind has the most pull on the bullet as it travels down range. Being able to accurately read the wind and mirage will greatly enhance your performance on the rifle range. National Champion, SGT Gallagher gives you some of her tips.
2. Angle Shooting with SFC (Ret.) Emil Praslick.
SFC Praslick shows you how to determine the angle to your target, and then how to include that to change your data necessary to hit your target on the first shot.
3. Rifle Grip, Stance and Body Position for 3-Gun with SFC Daniel Horner.
Professional 3-gun marksman SFC Daniel Horner, U.S. Army Marksmanship Unit (USAMU), give tips on how to properly handle a semi-automatic rifle, including grip, stance and body position.
Forum member Martin Tardif (aka “Killick” in our Forum) competes with a very accurate .284 Win F-Open rig fitted with a Barnard action, Brux barrel, and Eliseo F1 chassis. Unlike some F-Class shooters, Martin has tried many disciplines over the years, including service rifle and Mid-Range and Long Range sling competition. But he told us, “After experiencing arthritis in my hands and wrists, I decided I would dabble with F-Class. And that has turned into a happy obsession.” Today’s story features the object of that happy obsession — Martin’s tack-driving .284 Win he calls the “Red Rocket”.
F-Open Match Rifle — .284 Winchester “Red Rocket”
by Martin Tardif
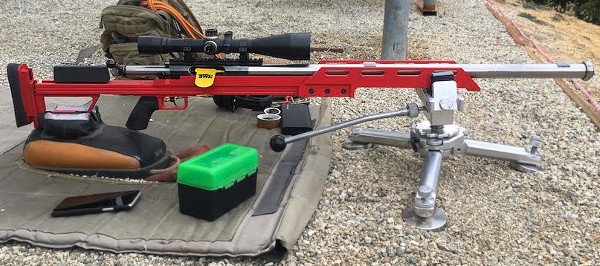
This is the story of the new “Red Rocket”, my new F-Open rifle. It’s chambered in .284 Winchester (.317″ neck, .220″ freebore). This rifle features Barnard P action, Barnard single-stage trigger (4 oz.), and Brux 30″ one-inch straight-taper, 1:8.5″-twist barrel fitted with Blake Tuner. The barreled action rides in a Gary Eliseo Competition Machine (CMI) F1 F-Open metal chassis with Marine Corps Red powder coat. On top is March 48x52mm fixed-power High Master scope. In a previous incarnation, this same Barnard action served in a wood-stocked F-Class rig, a Red Retromod built from a modified Anschutz stock. I still have the Barnard action (and trigger), but mostly everything else is new.
Here’s the .284 Win “Red Rocket” with CMI F1 Stock, Barnard action, Brux barrel, and Blake Tuner on my SEB Mini at Burbank Rifle and Revolver Club in SoCal.
My previous F-Class rifle started out as a Palma rifle back around 2008. With a modified Anschutz prone stock, that .308 Win Palma sling gun served me well, helping me earn the 2009 California State Palma Championship. Much later I grafted more wood on and whittled that same stock into an F-Open specimen (shown below). That did get me to Long Range High Master but it definitely had limitations. For one it had annoying flex in the fore-end and the buttstock was not aligned with the barrel channel.
I wanted to upgrade my stock to get a more consistent, better-shooting F-Open performer. So in April of 2020 I contacted Gary Eliseo of Competition Machine and ordered one of his streamlined, F1 “boom-stick” chassis units. These feature a very low Center of Gravity. I sent Gary my Barnard action and had Brux send him a barrel that I had won at the 2020 SWN raffle.
This video shows Martin shooting the “Red Rocket” in California
This rifle has been a success from the very start. At its first big match, the 2020 California State Championships, the Red Rocket tied for First Place on points but finished second overall on X-count.
Martin tells us: “The new red Eliseo stock is phenomenal and far surpasses the old red stock on my RetroMod project previously featured on the Daily Bulletin. The three things I like best about this Eliseo F1 chassis system are:
1. The lean, clean, efficient engineering and styling.
2. Easy manipulation of buttstock and cheek piece adjustments, ease of bolt removal.
3. Inherent confidence in its straightness and the durability of all the parts and finish.”
“I’m extremely impressed with the potential of this rig and I have still yet to fiddle with the tuner and test some of my Wolf/KVB primers. It’s all gravy now.” — Martin Tardif
I received the finished rifle in September and was impressed with its stark and consummate functionality and there is no doubt as to that function. The collinear aspect from any angle suggests a Red Rocket Car on the Bonneville Salt Flats, so that’s what I call this rig.
Reloading Methods and Load Development
My virgin brass prep starts with a .284 neck mandrel with the occasional squirt of WD-40, then to the drill press to turn the necks to 0.014″ wall thickness with my PMA Model B turner. After a quick dip in the media tumbler I run the whole batch through my DIY cake pan annealer and they’re ready for sizing. I like the Whidden Gunworks full length bushing dies. I use a .310″ bushing and a loaded round measures .312″. After sizing, I run the cases through the tumbler for 10-15 minutes to clean them up and then they are primed. I’m using my stash of S&B primers with an RCBS benchtop primer seater with a Holland Perfect Primer Seater add-on. I do point my 180-grain Berger Hybrid bullets with a Hoover die (see below).
Here is Martin’s reloading bench. From left to right: A&D FX-120i Force Restoration Scale with Auto-Trickler V3, Hoover Bullet-Tipping Die, Whidden .284 Win FL Sizing Die with PMA click-adjust lock ring, Hodgdon H4350 powder. Martin reports: “I’m also using some of F-Class John’s Auto Trickler Methods — using two powder cups to speed up the process, hash marks on Auto Trickler gear drive, and minimal openings on FX-120i wind guards. These all improve the powder measuring.
Load Development and Accuracy Testing in Competition
I started load testing in November 2020. I tried both H4831sc and H4350 at 100 yards. I usually have excellent results with H4831sc but the Brux tube stubbornly preferred H4350. So I took a preliminary recipe (52.2 grains) to the California Long Range Championship and tied for First Place on points but got beat on Xs. Having seen a little too much vertical at the state match, I went with a lighter load that looked good for vertical at 100 yards (51.8 grains — see photo below). That load got me an overall win at our 1000-yard club match.
I wanted to fine tune that load so I started a seating depth test. I did a final head to head test, comparing .015″ jump (away from first lands contact) and .018″ jump at 1000 yards. The .015″ jump load was the clear winner. This 15-round group was shot at 1000 yards with no flags on an overcast day with no mirage.
The ShotMarker screenshot above shows 15 shots at 1000 yards with bullets seated .015″ out, switching winds and no flags, just watching the mirage. I added .25 MOA up after the first round ‘9’ (me fighting a clean barrel on first shot) and went to town.
Advice for New F-Class Shooters — by Martin Tardif
1. Watch a Top Competitor — Find a good shooter that you respect and watch and take note of their equipment, how they set up to shoot, how they shoot, what conditions they shoot in or don’t. Ideally you should ask to be squadded with them (if possible) so you can score for them. That way you’re not dividing your attention from the shooter you’re supposed to be scoring for. Be mindful not to pester them while they are setting up. Best to wait until they have finished shooting and try to ask questions off the firing line, others still shooting need to concentrate.
2. Cartridge Selection for F-Open– Go to Accurate Shooter’s 7mm Cartridge Guide and scroll to the .284 Winchester section by Charles Ballard. You can read further about the 7mm WSM and 7mm SAUM but for a caliber that’s not fussy you should stick with the .284 Win.
3. Reloading Equipment — To win, you really need ammo as perfect as you can make it. You should be able to find out everything you need to know about reloading equipment via the Accurateshooter Forum’s Reloading and Competition areas. It’s a one-stop shopping brain trust for everything F-Class, Sling, and Benchrest. And the Forum Marketplace is literally a never ending ‘Gun Show’ of For Sale items. It’s a great place to buy quality used stuff for newbies.
As a final bit of advice — BELIEVE the wind — it’s smarter than you are!
Commentary on Metal Chassis vs Wood Stock
I previously had a wood F-Class stock so flexible you could easily pinch the barrel to the fore-end with one hand and hold it there. My Eliseo metal chassis is MUCH more rigid. I don’t think there is any argument that a metal stock is more rigid than wood. I also think a metal stock with its monolithic properties has a more consistent cross-sectional density along its length than a wood stock would have due to the vagaries of grain structure. However I have no experimental data to support that theory, or how that might positively affect shot to shot consistency. I CAN say that the gun shoots better, with smaller groups and higher scores, than the previous wood stock version.
The CMI F1 chassis has three main sections: rear assembly, main assembly, and fore-end. The main assembly is a 27″-long solid billet section with milled cavities for the rear assembly and trigger group. This also supports the action V-Block which cradles the full length of the action. The V-Block is mated to the top of the billet in a milled channel but doesn’t touch the sides to avoid uneven harmonics. The rear assembly hold the LOP-adjustable butt pad/bag rider and “easy off” cheek piece. The 3-piece fore-end is fitted to the main section with screws. The complete F1 chassis with grip and cheek piece weighs 6 pounds.
F1 Chassis Maker Gary Eliseo Talks about His Design
The F1 was designed to incorporate the most important features needed in an F-Open rifle system. Top priority was placed on how the rifle tracked. The chassis had to be perfectly straight, and immune to weather so it will stay straight. On the F1, the fore-end is designed to keep the centerline of the barreled action as low as possible. This super-low center of gravity, along with the tall vertical sides, keep torque to a minimum, so the gun doesn’t twist or hop, but instead comes straight back.
The F1 chassis can be fitted with bedding blocks to accommodate any action. These action bedding blocks are carefully epoxy-bedded to the chassis so the customer’s barreled action is perfectly in line with the central axis of the chassis. In addition to optimizing tracking, I also took a look at how the shooter interfaced with the rifle. I wanted the cheek piece to be narrow so that the shooter would not be forced into applying side pressure on the stock to get their eye behind the scope. The cheek piece is also easy to remove for those who shoot without one. This also facilitates bolt removal.
If you’re interested in an F1 F-Open Chassis, contact Gary via the Competition Machine eMail page. The current price for an F1 Chassis with Cerakote finish (any color) is $1150.00. Lead time is about 12 weeks.
Green Tools for Red Rocket — Martin uses an RCBS Rock Chucker single-stage press on an Inline Fabrication UltraMount. Primers are seated with an RCBS Bench Primer fitted with Holland’s Gunsmithing Perfect Primer Seater Adapter. This provides ultra-consistent primer seating.
F-Class Match Strategies for California Ranges
My strategy for a match clearly depends on the specific location. For instance, at my home range, the Burbank Rifle and Revolver Club, which has several cuts and gullies crossing the canyon, the wind comes primarily from NNE and since the range faces slightly NNE the predominant condition will be a head or right wind so I’m looking for R to L mirage and left angled flags.
By contrast, Coalinga CA is a much more open/exposed range which can make it much more challenging. When you see all the flags going against the mirage for the majority of the string (after you’ve gone for record of course) that can be tough. So I like to watch the wind while I’m scoring and for a few minutes during sighters and shoot them in a few ‘looks’ if I can get them. But sometimes you have to go with your gut if your sighters whisper “go-for-record-you-knucklehead” and so it’s off to the races. It often seems like I should have just chased the spotter when I’m waiting out a fishtail or let-up there.
To get the best accuracy out of any benchrest rifle, you need to find the optimal position of front rest and rear bag. The important point to remember is that each rig is different. One gun may perform best with the front rest right at the tip of the forearm (Position ‘D’ in photo), while another gun will work best with the rest positioned much further back. This Editor’s own 6mmBR rifle has a laminated stock that is pretty flexy in the front. It shoots best with the front rest’s sandbag located a good 6″ back from the forearm tip (position ‘A’).
Here’s some benchrest advice that can help you reduce vertical and shoot tighter groups… without spending another penny. Many benchrest shooters spend a fortune on equipment and devote countless hours to meticulous handloading, but they never experiment with their rifle’s position/balance on the bags. This article explains why you should test your rifle in various positions. What you learn may surprise you (and improve your scores).
Next time you go to the range, experiment with the position of your rifle on the front rest, and try a couple different positions for the rear bag. You may find that the rifle handles much better after you’ve made a small change in the placement of your gun on the bags. Recoil can be tamed a bit, and tracking can improve significantly, if you optimize the front rest and rear bag positioning.
This competitor has the front rest positioned fairly far forward but not all the way out. Note the stop on the front rest — this limits forward stock travel.
A small change in the position of the forearm on the front rest, or in the placement of the rear bag, can make a big difference in how your gun performs.
Balance Your Gun BEFORE You Spend Hours Tuning Loads
In the pursuit of ultimate accuracy, shooters may spend countless hours on brass prep, bullet selection, and load tuning. Yet the same shooters may pay little attention to how their gun is set-up on the bags. When you have acquired a new rifle, you should do some basic experimentation to find the optimal position for the forearm on the front rest, and the best position for the rear bag. Small changes can make a big difference.
Joel Kendrick, past IBS 600-yard Shooter of the Year, has observed that by adjusting forearm position on the front rest, he can tune out vertical. He has one carbon-fiber-reinforced stock that is extremely rigid. When it was placed with the front rest right under the very tip of the forearm, the gun tended to hop, creating vertical. By sliding the whole gun forward (with more forearm overhang ahead of the front sandbag), he was able to get the whole rig to settle down. That resulted in less vertical dispersion, and the gun tracked much better.
Fore/aft stock position is important even with very wide fore-ends.
Likewise, the placement of the rear bag is very important. Many shooters, by default, will simply place the rear bag the same distance from the front rest with all their guns. In fact, different stocks and different calibers will NOT behave the same. By moving the rear bag forward and aft, you can adjust the rifle’s overall balance and this can improve the tracking significantly. One of our shooters had a Savage 6BR F-Class rifle. By default he had his rear bag set almost all the way at the end of the buttstock. When he slid the rear bag a couple inches forward the gun tracked much better. He immediately noticed that the gun returned to point of aim better (crosshairs would stay on target from shot to shot), AND the gun torqued (twisted) less. The difference was quite noticeable.
A small change in the position of the forearm on the front rest, or in the placement of the rear bag, can make a big difference in how your gun performs. You should experiment with the forearm placement, trying different positions on the front rest. Likewise, you can move the rear bag back and forth a few inches. Once you establish the optimal positions of front rest and rear bag, you should find that your gun tracks better and returns to battery more reliably. You may then discover that the gun shoots smaller groups, with less vertical dispersion. And all these benefits are possible without purchasing any expensive new gear.
The U.S. Army Marksmanship Unit (USAMU) has produced an excellent series of videos covering the Basic Rifleman’s Course. If you are getting started in High Power shooting, or want to improve your position shooting skills, this series is well worth watching. And these videos are not just for service rifle shooters — even bench shooters can benefit from these videos, particularly Part 5, which explains how to estimate wind speed and direction. The lead instructor for these videos is SFC Brandon Green, three-time National High Power Champion, and 2017 Service Rifle Champion. When SFC Green talks, you should listen.
SFC Brandon Green is a shooting superstar. Green won his third NRA National High Power Rifle Championship in 2018 at Camp Atterbury, Indiana. He dominated the HP Championship cycle, finishing eight points and ten Xs ahead of his nearest competitor. Brandon also won High Power National Championships in 2015 and 2013. One of the greatest marksmen in the nation’s history, SFC Green excels at all positions, both rapid-fire and slow-fire.
Part 5 — Wind and Weather Estimation (Very Useful for All Shooters)
Note: This video includes a hit location “target analysis” in the first 6 minutes.
Part 4 — Minute of Angle Explained
Part 3 — Ballistics and Zeroing
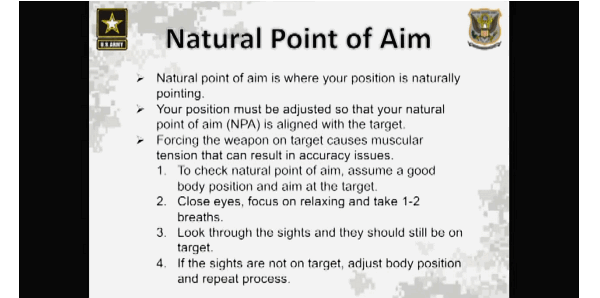
Part 2 — Positions, Sight Alignment, and Natural Point of Aim (Very Useful)
Part 1 — Aiming and Sight Picture
SFC Brandon Green (left above) has set multiple National Records at Camp Perry.
Do you enjoy shooting pistols for sport, or perhaps you carry a handgun for self-defense? If you’re like most of us, you might benefit from a “refresher course” on the fundamentals of handgun shooting. The NRA has created a useful Infographic that covers important basics of handgun marksmanship — key things such as Sight Alignment and Trigger Control.
Here are the first two (2) lessons. Click the link below to see all SIX (6) training topics: Sight Alignment, Sight Focus, Trigger Control, Breath Control, Hold Control, and Follow-Through.
Video Shows Sight Alignment, Grip, Stance, Trigger Control and More
In this USAMU video, SGT Shane Coley talks about the basics of sight alignment and trigger control. But then SGT Coley talks about other important control factors such as grip, arm position, and body stance. For rapid-fire shooting, you need to have a good arm and body positioning to control recoil and get back on target quickly. This video is a valuable complement to the NRA Infographic because it demonstrates all the important pistol fundamentals during live fire, at the range.
Allen Company has introduced Hardrock AR500 Targets, a new series of affordable steel targets suitable for rimfire rifles and pistols as well as centerfire pistols. Note, these targets are NOT designed for centerfire rifles (you can damage the targets with repeated impacts). Most Hardrock targets are supplied with frames with front legs that slide into the ground for added stability.
Allen Hardrock Steel Target Systems
Allen’s Hardrock family of targets are constructed from heavy-duty 1/4″-thick AR500 hardened steel. They are all finished with a high-visibility cross/bulleye pattern that makes aiming easier. After a bit of shooting, however, you will need to paint the targets, and/or supply your own pasters. However we do like the red ring/black diamond/orange center graphics supplied on these Hardrock targets out of the box.
Allen AR500 Hardrock Steel Target Products:
Circular gong targets 4″, 8″, 10″ diameter
Note: These must be hung with chains or straps you supply*
MSRP $19.99 to $44.99
Allen Self-Healing Polymer Targets — Reactive Movement without the “Clang” of Steel
Along with its new AR500 targets, Allen offers some unique “self-healing” orange polymer reactive targets. These will move when hit, but the bullet hole will then close up, as the rubbery, orange polymer heals itself. There are 10 different EZ-Aim Self-Healing Targets including ground rollers, Spinners, and Silhouette-style “critter” targets. Here are three versions:
*To mount the Hardrock Gongs, Allen offers a Quick-set Steel Target Stand and a Rubber Strap Gong Hanging Kit, priced at $62.99 and $16.99 respectively.
Precision Rifle Challenge on Shooting USA This Week
This week, Shooting USA TV features a show that should interest PRS/NRL fans, tactical marksmen, and long range hunters. Run in Utah’s backcountry, the Hornady Precision Rifle Challenge is a unique long range competition with serious wind and elevation changes.
This isn’t a typical PRS Pro Series match by any means. Participants in this challenging Precision Rifle match encounter tough conditions not typically seen in other tactical matches.
This video is great — lots of equipment closeups, stage set-ups, plus drone footage of range.
This Shooting USA episode airs Wednesday, February 24, 2021, at 9:00 PM Eastern (8:00 PM Central) on the Outdoor Channel. If you miss that, it runs again on Thursday afternoon. In addition, you can watch all episodes of Shooting USA on the VIMEO channel by subscription. Each episode is just $0.99.
Former Army Ranger sniper instructor Ryan Cleckner is the author of the best-selling Long Range Shooting Handbook. Cleckner hosts a series of videos that cover shooting techniques appropriate for tactical and PRS-type disciplines. Here are five short videos that cover various aspects of shooting techniques and rifle set-up. We think PRS/NRL competitors (and long-range hunters) can benefit from these videos.
“Consistency is the key to accuracy.
You need to think about a system of how you’re going to shoot that is not only comfortable, but [is] repeatable when you’re shooting.” — Ryan Cleckner
In this first video, Cleckner explains proper scope position. Ryan finds that some shooters place the scope too far forward or too far rearward. If the scope is too far back you may have issues with eye relief and stock reach to shoulder. If it is too far forward, you may have cheek-weld problems or get neck strain.
Cleckner offers a simple method to check your scope position: “To see if your scope is set up properly … close your eyes, lay your head on your gun, get completely comfortable, and only when you are set-up, then open your eyes. If you can’t see clearly through your scope, CHANGE something [such as comb height or scope position]”. “When you open your eyes, if you see some scope shadow [i.e. the black ring around the edge of the scope picture], figure out which way you need to move your head to get rid of that shadow, and then make adjustments to either your position, the rifle, or the scope.”
Cleckner prefers shooting off a bag when in the prone position, when that is practical. The bag provides a more stable support than a small Harris-type bipod, doesn’t require pre-loading the rifle, and there is less bounce or hop on recoil.
Former Army Ranger sniper team leader Ryan Cleckner explains how important it is to keep your rifle straight up and down when long-range precision shooting. Cleckner demonstrates with an AR-10 modern sporting rifle how slight cant to your rifle can cause a miss over long distances.
Here Cleckner covers some of the basic points of trigger control on tactical-style rifles. These basic principles apply to both single-stage and two-stage triggers. NOTE: For benchrest rigs, with ultra-light pull weights, more refined techniques may be appropriate.
In tactical events, when you’re shooting on the clock and loading from a detachable magazine, you should manipulate the bolt smoothly but strongly. Here Cleckner demonstrates how to cycle a tactical-type rifle. He says, “You should be running the bolt on your rifle with authority. Run it like you mean it!” NOTE: Completely different techniques are appropriate for custom benchrest rifles that manually feed.
Long Range Shooting Handbook — A Good Resource
Cleckner’s Long Range Shooting Handbook covers a wide range of topics important for precision marksmanship — both shooting skills and technical matters. You can view Sample Chapters from Ryan’s Book on Amazon.com. Cleckner’s book is designed as an intro to key concepts such as MOA vs. Mils, External Ballistics, and Environmental Effects. Included are personal tips and advice based on Cleckner’s years of experience as a sniper instructor and special operations sniper.
The Long Range Shooting Handbook is divided into three main categories: What It Is/How It Works, Fundamentals, and How to Use It. “What It Is/How It Works” covers equipment, terminology, and basic principles. “Fundamentals” covers the theory of long range shooting. “How to Use It” gives practical advice on implementing what you’ve learned, so you can progress as a skilled, long range shooter.