The Civilian Marksmanship Program (CMP) Western Games and Highpower Matches will be held March 10-19, 2023 at the Ben Avery Shooting Facility in Arizona. The Western CMP Games and CMP Highpower Matches present a mix of marksmanship opportunities. CMP Games events like the Garand, Springfield, Vintage Military, Modern Military, Rimfire Sporter, Carbine and Vintage Sniper will again fill the rifle competition schedule, while those wanting more educational experiences may sign up for the Pistol or Rifle Basic courses, which teach firearm fundamentals in a one-on-one classroom setting.
Registration is now open! More information about the Western CMP Games and registration forms can be found on the CMP website at CMP Western Games Webpage.
RETURNING EVENTS: The Western CMP Games include the Garand, Springfield, Vintage Military, Modern Military, Rimfire Sporter, M1 Carbine, and Vintage Sniper Match. There will also be a Rifle Marksmanship 101 with M16 EIC Match. Other clinics include the GSM New Shooter Clinic and the M1 Maintenance Clinic.
Another add-on to the Western Games schedule for 2023 is a 3×600 Rifle Match. This competition includes sighting shots, followed by three 20-shot strings for record in slow-fire prone from 600 yards. Competitors may use Match Rifle, Service Rifle, F-Open, F T/R or AR Tactical Rifles during the 3×600 event.
Pistol Bundle for Multiple Handgun Matches
A series of pistol opportunities like the Pistol 2700, .22 Rimfire Pistol, EIC Pistol, 1911 and Military & Police Service Pistol events will also resume for the second year. New for 2023, the CMP has added a Service Revolver EIC Match to the schedule.
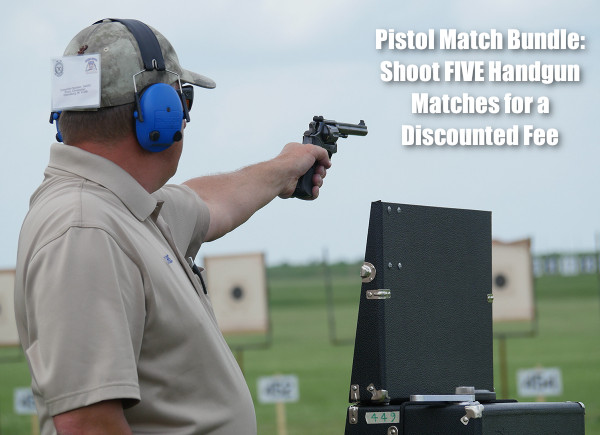
Competitors firing in all five individual pistol matches (.22 Rimfire EIC Pistol, EIC Service Pistol, EIC Service Revolver, 1911 As-Issued Pistol and Military & Police Pistol) will be able to register for the Individual Pistol Match Bundle for a discounted price! Slightly augmented entry fees over all Western Games events for 2023 makes the Bundle even more appealing.
Highpower Aggregate Competitions and Team Matches
Outside of the Games schedule, the CMP Highpower Matches include three days of 800 Aggregate competitions with additional recognitions given for the culminating 2400 Aggregate event. The Highpower events also include 4-Man Team and Service Rifle EIC matches that create even more exciting possibilities on the firing line.
CMP Advanced Highpower Clinic
Additionally, a CMP Advanced HP Clinic (featuring live fire training and practice), will be conducted by CMP Instructors. The clinic offers lectures and demonstrations by some of the world’s leading civilian Highpower service rifle competitors. Those signed up for the course will need to bring their own shooting equipment, rifle and ammunition to participate.
To further ensure a safe environment for all competitors and spectators, trained CMP staff members will be present at every match. Both youth and adults are welcome, so join in on all the competition, new experiences and fun!
With December just two days away, winter is here. For many Americans that means indoor training if they want to maintain their shooting skills. Even if you can shoot outdoors all year long in your location, it makes sense for position shooters to work on their rifle holds. The Mantis systems help with that. These advanced smart devices record and plot the movement of your firearm as you aim and then break the shot. There are systems for both dry-fire and live-fire training, starting at $99.99. Considering the cost of bullets these days, and the difficulty of finding primers, it makes sense to increase your dry-fire training.
Mantis X2 for Dry-Fire, $99.99
Built for dry-fire use only, the Mantis X2 ($99.99) provides real-time, shot-by-shot feedback for both pistol and rifle users. You can track multiple training sessions with data-driven insights, and monitor your progress. This unit has earned high user reviews such as: “As a new gun owner the Mantis X is a game changer for me. I have not been able to get to the range during the lockdowns and being able to practice at home [is great].” And another: “Easy to install[.] The App is free and easy to use.”
The Mantis X2 is a good value. The manufacturer states: “There is nothing at this price point that will give you this level of feedback for dry fire.” There are actually four Mantis models: X2 ($99.99), X3 ($169.99), X7 Shotgun ($199.99) and X10 Elite ($249.99). The X3 adds live fire functionality. MORE INFO HERE.
Mantis X10 Elite– Advanced Training System
The advanced Mantis X10 Elite ($249.99) is 50% lighter and 40% smaller than the original Mantis, with three times the battery life and four times the data transfer rate. This new quick-detach X10 system offers all X2 and X3 functions PLUS recoil analysis and software support for all shooting sports (pistol, rifle, shotgun, archery). Collecting thousands of data points per second, the X10 works with dry fire, live fire, airsoft/CO2, and simulated firearm systems.
Mantis Blackbeard Trigger Reset System for AR-Platform Rifles
If you compete with an AR-platform rifle, you can definitely benefit from the Mantis Blackbeard system, a drop-in Bolt Carrier + Magazine replacement that works with your existing trigger. Using electromechanical wizardry, the $199.00 Blackbeard quickly resets the hammer between each shot, so you can stay in position through multiple practice shots. Installation takes less than a minute — remove the bolt carrier group, drop in the red upper unit, place the red Mantis magazine and you’re good to go. All Blackbeards now support both direct impingement and piston-driven ARs. Guys we know say that a few sessions with this system delivered marked improvement in their service rifle scores.
Mantis X3 for Live-Fire or Dry-Fire, Rifle and Pistol
The Mantis X3 collects thousands of data points per second and analyzes your shooting in real-time. For both pistols and rifles, the X3 works with dry fire and live fire. It will also work with airsoft/CO2/compressed air, and simulated firearm systems. Priced at $169.99, the Mantis X3 mounts to standard universal accessory rails. (No Picatinny rail? Creedmoor Sports sells adapters). The X3 is part of the second generation of Mantis Shooting Performance Systems.
Interview with NBRSA 3-Gun and Tackdriver Champ Bart Sauter
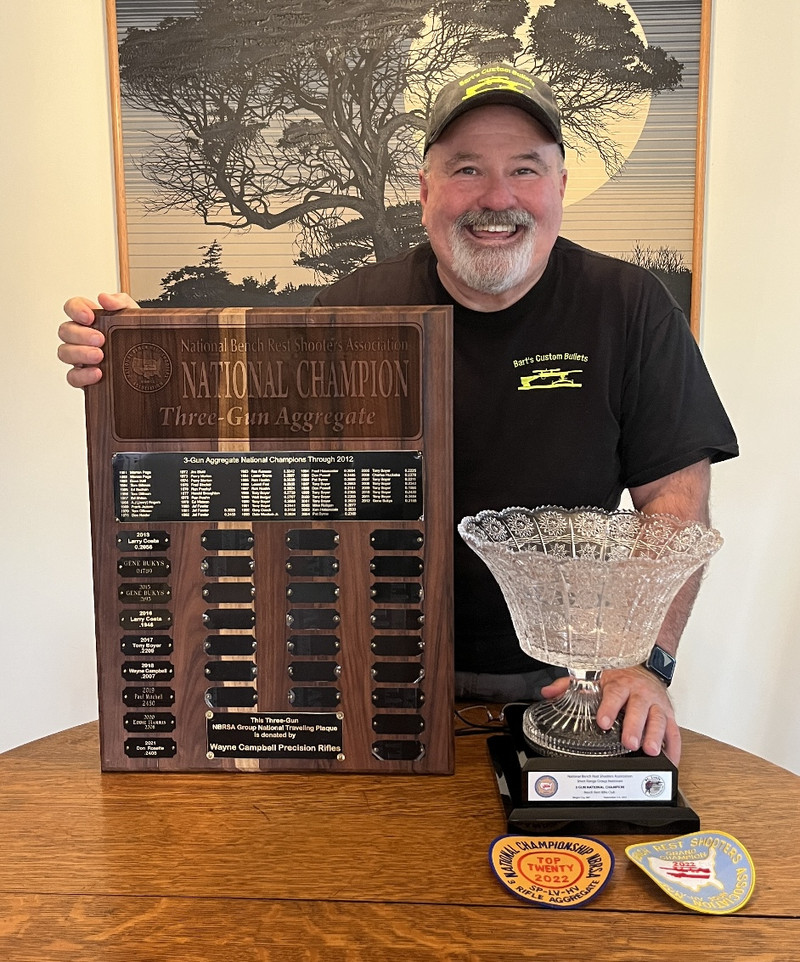
Bullet-maker Bart Sauter is one of the world’s best benchrest shooters. He won the 2022 NBRSA 3-Gun National Championship this year, and he also has won the multi-class Tack Driver event two years in a row. Plus he has set small-group world record at 600 yards. In this very informative interview, Bart talks about bullets, equipment selection, match preparation, and shooting techniques. We think every benchrest shooter should watch this video.
Master at Work — Sauter in Action
If you want to see how a world-class bench shooter runs his rifle, check out this short video showing Bart Sauter in action. He runs five shots in about 9 seconds.
Interview with 6-Time Nat’l Long Range Champion John Whidden
CLICK HERE for full 81-minute interview with John Whidden.
John Whidden of Whidden Gunworks is one of the greatest American marksman in history. Shooting sling rifles, John has won the U.S. Long Range National Championship a remarkable six times. He has also won a Palma World Championship, and this summer John won the 2022 Smallbore Prone U.S. National Championship. While a humble individual, John has superb shooting skills and unrivaled mental toughness. In this interview, John talks about the challenges of competition and what motivates him to excel. John also talks about the products he has developed for Whidden Gunworks.
Interview with Tod Hendricks, 2021 F-Open National Champion
A member of Team Lapua/Brux/Borden, Tod Hendricks has been one of the most talented and consistent F-Open competitors for many years. He used his mental toughness and wind-reading skills to capture a National Championship in 2021. In this wide-ranging interview with his team-mate Erik Cortina, Tod reveals what it takes to win in F-Open these days, covering equipment, ammo quality, and match preparation.
Brux Barrels is a machine tool company located in Lodi, Wisconsin, specializing in premium, custom, cut-rifled barrels. Brux barrels have set some impressive benchrest records, and have won championships in multiple disciplines. In this video Erik Cortina interviews Ken Clemens of Brux. They discuss the production process at Brux, from the selection of top-quality steel blanks to the final hand-lapping procedures.
Interview with Lanny Bassham, Olympic Gold Medalist and Author
Erik Cortina recently interviewed noted author and Olympic Gold Medal-winning shooter Lanny Bassham. Erik asked Lanny about his book With Winning in Mind. Lanny discussed the “mental game” in the shooting sports and Lanny’s program for visualization of a winning performance. Lanny explains that after you have mastered your rifle skills, and learned to read the wind, it is important to adopt a winning mentality and to visualize success. Lanny should know. He won a shooting Gold Medal in the Olympics along with 22 world individual and team titles.
Interview with Lindsey Paul, Queen of 2 Miles
Lindsey Paul is the only women to win the King of Two Miles ELR competition, becoming the first-ever QUEEN of Two Miles, shooting a .375 CheyTac. In 2021, the talented lady Texan beat a field of top competitors, including past KO2M Champions, all guys. Lindsey had a truly outstanding performance, including 3 hits in 5 shots at the max distance, 2.0 miles (3520 yards). In this interview, Lindsey, who works in the law enforcement field, talks about the Extreme Long Range (ELR) game, and she also explains what it’s like to shoot the heavy-recoiling .375 CheyTac.
Interview with Frank Galli — Founder of Sniper’s Hide
The founder of the popular Sniper’s Hide Forum, Frank Galli is an online pioneer and living legend in the tactical shooting sports world. A former U.S. Marine Scout-Sniper, Frank (aka “Lowlight”) runs a very active Forum with over 180,000 members. Along with moderating his Forum, Frank runs training clinics and hosts regular podcasts. Frank is also the author of the book Precision Rifle Marksmanship: The Fundamentals, an excellent resource for PRS/NRL competitors as well as tactical marksmen.
BONUS Videos — Two Great Tech and Reloading Videos
How to Find Jam Point on your Barrel
Loading for F-Class
Erik Cortina produces his own line of EC Barrel Tuners and Tuner Brakes. These have been used successfully by many top shooters. View the full line of Cortina Precision products at: ShootSmallGroups.com.
Shooting Sports USA (SSUSA) offers a wide selection of informative articles on marksmanship techniques. If you shoot prone, “hard-holding”, you know how important proper positioning and technique can be. There is a SSUSA article that every prone shooter should read — whether you shoot air rifle, smallbore, or High Power. Compiled wtih the help of some of the country’s best prone marksmen, this article, How to Master Prone Shooting, provides a step-by-step guide to perfecting your prone position technique.
How to Master Prone Shooting — SSUSA by NRA Staff
The prone position is the most precise of the rifle shooting positions. It is used in many different shooting events at distances as close as 5 meters and as far away as 1,000 yards, and beyond that in long-range disciplines such as PRS and NRL. Prone shooting is very popular among shooters whose training time is limited, because it does not require as much practice. Age has little effect on a shooter’s ability to do well in prone; many older shooters are able to continue competing successfully in prone matches.
Here is a sample, listing STEP ONE, the basics of the prone position:
Step One: Study the Position
The prone position is steady because it is low, which gives a wide base of support to help keep the rifle still. Below are the key features of the prone position.
1. Straight line form left hand through left arm, side and leg.
2. Head tipped down comfortably.
3. Right hand grips rifle lightly.
4. Body lies behind rifle. Angle to rifle is 10 to 20 degrees.
5. Right knee bent slightly, toe pointing out.
6. Rifle lies on heel of left hand, fingers relaxed.
7. Left elbow rests to left of rifle.
8. Sling (if present) supports weight of rifle. Left arm relaxed.
9. Body rests slightly more on left side.
10. Left leg straight, toe pointing inward or straight back.
There are FIVE MORE STEPS described in detail with specific actions to perform, in the FULL Article. For example, in STEP FOUR (Sling Adjustment), the article explains: “Put the sling high on the arm and tighten the sling keeper. Wrap the arm around the sling so that the sling comes across the left hand and forearm.”
The Civilian Marksmanship Program (CMP) invites young men and women shooters to apply for CMP scholarships for the 2023-2024 school year. The CMP offers $1,000 and $3,000 one-year scholarships to current high school seniors. In addition, this year the CMP will award four, 4-year $20,000 scholarships ($5000/year). New this year, CMP scholarships may be applied to trade and technical schools.
Since 2005, CMP has awarded over $1.2 million in scholarship grants. Winning scholarship recipients, in their senior year of high school, came from JROTC schools, 4-H groups, and other shooting clubs.
CMP Scholarship Application Deadline is March 31, 2023
CMP to Present Four $20,000 Scholarships, Other Notable Updates for 2023
The Civilian Marksmanship Program (CMP) is pleased to announce four new scholarships named in honor of distinguished members of its Board of Directors. These $20,000 scholarships, awarded over four years at $5,000 each year, are named for:
Judith Legerski, former Chairman of the Board and Chief Executive Officer Maj. Gen. Harry Sieben, former board member and Vice Chairman Jon Bengtson, former board member and Treasurer Dr. Carolyn Hines, former board member and founder of the CMP Scholarship program
“CMP has long focused on youth programs and giving back to the community. These new scholarships allow us to support the very best youth in America and at the same time recognize the individuals who championed youth programs while guiding the success of the CMP,” said Jerry O’Keefe, the new CMP Chairman of the Board and Chief Executive Officer.
In addition to the new $20,000 scholarships, other changes include:
A new online application process
Scholarships for trade and technical schools
No minimum Grade Point Average (GPA) to apply
Each year, high school student-athletes involved in marksmanship programs are encouraged to apply for CMP Scholarships — a program that lends economic support to young marksmen and women who have demonstrated excellence on and off the firing line.
Traditionally, these scholarships have been used to pursue post-secondary or vocational programs, community colleges or university educations. However, in 2023, the CMP will broaden its scholarship program even more by involving trade and technical schools in order to keep up with national trends and to provide opportunities for athletes with a variety of interests.
“Our scholarships are available to all graduating high school seniors who have distinguished marksmanship, academic and community service records. By eliminating a minimum GPA, we are including those late bloomers who may have had a slow start in one area but have shown great potential by the end of their high school career,” said Dan Durben, former National Rifle Team and U.S. Olympic Team Rifle Coach and chairman of the CMP Scholarship Committee.
Since 2005, the CMP Scholarship Program has presented $1,000 one-year scholarships to high school seniors based on merit, humanitarian efforts, extracurricular activities and marksmanship participation. In 2020, the CMP added one $5,000 scholarship, the Carolyn Hines Memorial Scholarship — awarded to the top applicant who best embodied the values of Dr. Hines, who was instrumental in shaping the program.
This year, CMP will continue to award $1,000, $3,000, and $5,000 scholarships for over 90 rising high school seniors. Applicants will compete based on their rifle, pistol and/or shotgun competition history, academic excellence, community service, leadership and potential.
As stated, the CMP no longer requires a minimum GPA, though academic performance is still a key component of the selection criteria. In addition, the new automated application replaces paper forms and mailing documents with an online application and the ability to upload documents.
CMP will award a total of $200,000 for the 2023-2024 school year. Additionally, the Garand Collectors Association has generously donated $30,000 in partnership with the CMP in its recognition of our nation’s best young marksmen and women.
The deadline to apply for a CMP Scholarship will be March 31, 2023. The online application portal link and other scholarship information is found at https://thecmp.org/youth/cmp-scholarship-program.
Thanksgiving is just 9 days away. What better way to celebrate the Thanksgiving season than to practice your marksmanship shooting some bearded gobblers (of the paper variety). Here’s our custom Turkey Target, ready for family fun this fall. This special Turkey Bullseye Target was created by our friend and Forum member Pascal (aka “DesertFrog”). It features a central bullseye with five rings, along with three smaller 3-ring circles. CLICK HERE for FREE Turkey Target.
If you prefer color targets, here’s another turkey target, courtesy of the NRA. Hone your skills on a trio of turkeys. The target features three red bullseyes, centered on the gobblers. You can print the target in black and white, but they look best in color. Click the image below to download a FREE printable PDF file.
Get a Full Set of Animal Targets
For your convenience, we’ve packaged the Turkey Target along with five (5) other varmint/animal-themed targets. These are all offered in .pdf (Adobe Acrobat) format for easy printing.
Forest of Windflags at World Benchrest Championships in France in 2011
There’s a simple, inexpensive “miracle device” that can cut your groups in half. If you’re not using this device, you’re giving away accuracy. The “miracle device” to which we refer is a simple wind indicator aka “windflag”. Using windflags may actually improve your accuracy on target much more than weighing charges to the kernel, or spending your life savings on the “latest and greatest” hardware.
Remarkably, many shooters who spend $3000.00 or more on a precision rifle never bother to set up windflags, or even simple wood stakes with some ribbon to show the wind. Whether you’re a competitive shooter, a varminter, or someone who just likes to punch small groups, you should always take a set of windflags (or some kind of wind indicators) when you head to the range or the prairie dog fields. And yes, if you pay attention to your windflags, you can easily cut your group sizes in half. Here’s proof…
Miss a 5 mph Shift and You Could DOUBLE Your Group Size
The table below records the effect of a 5 mph crosswind at 100, 200, and 300 yards. You may be thinking, “well, I’d never miss a 5 mph let-off.” Consider this — if a gentle 2.5 mph breeze switches from 3 o’clock (R to L) to 9 o’clock (L to R), you’ve just missed a 5 mph net change. What will that do to your group? Look at the table to find out.
Values from Point Blank Ballistics software for 500′ elevation and 70° temperature.
Imagine you have a 6mm rifle that shoots half-MOA consistently in no-wind conditions. What happens if you miss a 5 mph shift (the equivalent of a full reversal of a 2.5 mph crosswind)? Well, if you’re shooting a 68gr flatbase bullet, your shot is going to move about 0.49″ at 100 yards, nearly doubling your group size. With a 105gr VLD, the bullet moves 0.28″ … not as much to be sure, but still enough to ruin a nice small group. What about an AR15, shooting 55-grainers at 3300 fps? Well, if you miss that same 5 mph shift, your low-BC bullet moves 0.68″. That pushes a half-inch group well past an inch. If you had a half-MOA capable AR, now it’s shooting worse than 1 MOA. And, as you might expect, the wind effects at 200 and 300 yards are even more dramatic. If you miss a 5 mph, full-value wind change, your 300-yard group could easily expand by 2.5″ or more.
If you’ve already invested in an accurate rifle with a good barrel, you are “throwing away” accuracy if you shoot without wind flags. You can spend a ton of money on fancy shooting accessories (such as expensive front rests and spotting scopes) but, dollar for dollar, nothing will potentially improve your shooting as much as a good set of windflags, used religiously.
Windflags Sources and Options
Which Windflag to buy? There are many vendors selling windflags of various types, some with daisy wheels others without. You may want to go to a match and see what types works best for you. CLICK HERE for the Benchrest Central Classifieds with multiple windflag types and accessories for sale. Here is a sample:
Bullet-maker Bart Sauter is the king of 300 meters, winning his second straight Tack Driver III multi-discipline match in South Carolina. For the second year in a row, Bart won the Tack Driver Grand Agg, after finishing sixth in Group shooting and first in Score shooting. Finishing second overall was short-range Benchrest ace Wayne Campbell. Wayne finished first in the Group-shooting phase and took eighth place in score shooting. Third overall was Jeff Peinhardt who, interestingly, was fifth in Group AND fifth in Score — that’s consistency. According to reports, 6mm PPCs dominated this year’s Tack Driver III match held November 5-6, 2022. We believe 6 or 7 out of the top 10 finishers shot a 6PPC. For decades the 6PPC has been the leading chambering for 100/200-yard benchrest-for-group competition.
The Tack Driver Showdown is a one-of-a-kind “all comers” rifle match. This unique multi-discipline match, with both SCORE and GROUP targets, reveals what rifle types are truly the MOST accurate, at least out to 300 meters. The Tack Driver Showdown III match took place last weekend, November 5-6, 2022 at the Mid-Carolina Gun Club in Orangeburg, South Carolina. The organizers invited virtually any type of rifle (except railguns) to compete at 300 meters for group and score honors. No organization membership is required. There were 89 competitors this year.
Unlike any other rifle match in the world, on the Tack Driver firing line you might see 6 PPC LV/HV rifles, 30 BR score rigs, and 17-lb 600-yard and 1000-yard benchrest guns together all lined up together. There may also be a few F-Class rifles, a PRS rifles, and maybe even an AR15 or two. But in 2022, nearly all the competitors had benchrest-style rifles, the majority designed for the 100/200 yard score and group games. That’s not surprising, as low-profile, smooth-recoiling BR rifles rule the roost at 100, 200, and 600 yards. Here are the list of rifles that competed this year according to cartridge type:
Tack Driver III targets were placed at 300 meters (328 yards). That’s not even “mid-range” by benchrest standards, but it is far enough that higher-BC bullets should have an advantage in windy or rapidly changing conditions. This year, however, the 6PPCs shooting lighter-weight 6mm bullets dominated.
Commentary by Tack Driver III Winner Bart Sauter
Winning Equipment — I shot a 6PPC with a .273 no-turn neck, Bartlein 1:13.5″-twist barrel, BAT DS action, Jewell trigger, Harris tuner, and Scarborough stock. On top was a great big ole 10-60X Valdada “Precision” scope with 40mm tube. I also used Vihtavuori N133 powder and my 68gr boat-tail bullets.
Shooter vs. the Gun — The long and the short of it is… you’re only as good as your equipment and the equipment can only perform up to the ability of the shooter. It’s a system. I’ve won it last year with a 6BRA and now with a 6PPC. I’m telling you, caliber-wise, there are a lot of different cartridges and combinations that can win. Jeff Godfrey (of the Piedmont Mafia) brought his 6BRX (I believe), and it shot like a laser. Jeff was in second place at the end of Day 1. If not for a couple of “Orangeburg Gotchas” Jeff would have been right there for the win.
Rifle and Cartridge Choice — Why did I shoot the 6PPC? It’s simple — the goal for this year was to try to make the benchrest World Team. So my resources were directed towards barrels for the 6PPC. I didn’t buy a single long range barrel this year. I used the last of my competitive long range gear for the 600- and 1000-yard Nationals. If I had both the 6BRA and 6PPC working, for this match I’d pick the 6BRA EVERY TIME and TWICE ON SUNDAY.”
Video of Bart Explaining Rest/Bag Set-Up and Showing Shooting Technique
Editor’s Note: 2022 has been a good year for Bart Sauter. He also won the 2022 NBRSA 3-Gun Short Range National Championship shooting his no-turn-neck 6PPC.
Comments by Forum Members:
“Congratulations Bart for your second Tack Driver win! Bart is no doubt a great shooter. He has [the ability] to prepare for a match to the Nth degree, then adapt and overcome changes that arise during a match. Not many have his skill, knowledge, and dedication! Congratulations to all that were there. You are all winners… I hear it was a great time had by all competitors!” — Samuel Hall (Past IBS Champion)
“While the Tack Driver concept is designed to attract shooters from Short Range Group, Short Range Score, F Class, PRS, and all of the other disciplines that require the ultimate in rifle accuracy, it is still a Benchrest match, run under Benchrest rules. Downrange ballistics such as a bullet’s ability to buck conditions take a back seat to a combination’s overall Agging capability. That includes the bullets, the barrel, the tune, the bench equipment[.]” — Jackie Schmidt
“What [the Tack Driver match] shows is the domination of the 6mm bore and small cases. It is a great event to showcase precision bench shooting [with] different disciplines coming together. Good job to Mr. Cline and all those involved including the shooters.” — Jeff PPC
Basic Information on the Tack Driver Shoot:
There are two divisions — bolt-action rifles and semi-auto gas guns. There are no specific design limits other than a 22-lb maximum weight, and a .338 maximum caliber. Past IBS President Jeff Stover tells us: “We envision the full array of the world’s most accurate rifles on the line: short and long range benchrest rifles, F-Class, AR, other tactical, egg-shoot rifles, whatever…[.]” Semi-autos required chamber flags, otherwise bolts must be out at all times.
Shooting USA TV has a very good show released today. Shooting USA’s Wednesday Night episode features an interesting tactical-style airgun competition, and then there’s a sequence from Julie Golob on how to use video recordings to improve your pistol handling and marksmanship. For fans of military firearms, this week’s episode also features a notable WWII German rifle — the Gewehr 43.
Shooting USA SHOW TIMES: This Shooting USA Episode airs Wednesday, November 9, 2022 at 9:00 PM Eastern and Pacific; 8:00 PM Central. If you miss the regular broadcast, you can stream the show online at any time on Vimeo for $0.99 per episode.
The Rocky Mountain Airgun Challenge
The 2022 Rocky Mountain Airgun Challenge in Provo, Utah attracted top shooters with over $100,000 worth of prizes. The stages look like what you’d see at PRS/NRL events, but the targets are smaller, the range is shorter, and the power behind each shot is air. Practical Air-Gun competition has a well-established community that spans the globe, and recently competitors from other shooting disciplines, the powder burners, beginning to take notice. Air-Gun practical competition is fun and inexpensive — you are paying pennies a round vs. a $1.25 or more for premium centerfire ammo. The Rocky Mountain Airgun Challenge is leading the way in this interesting air-powered shooting discipline. This multi-day event featured a variety of events on multiple stages.
Germany’s Answer to the M1 Garand — the Gewehr 43
The Gewehr is now one of History’s Guns on Shooting USA. When the legendary M1 Garand served as the US standard issue rifle in WWII the impact on the battlefield was undeniable. And the effectiveness of the Garand was not lost on the German military, armed with bolt-action Mausers that dated back to the first world war. For Nazi Germany the pressure was on to develop a semi-automatic battle rifle that could match the repeating firepower of the M1. The result was the Gewehr 43 was created to serve the German armed forces.
Using Video to Improve Your Shooting — S&W Pro Tip
The talented Julie Golob has another Smith & Wesson Pro Tip on using video to improve your shooting. Julie states: “Did you know that one of the best tools for self-diagnosing technique is your smart phone? You can set up your smartphone to record your shooting and coach yourself through valuable skills. In this Pro Tip I am going to walk you through three different ways to use your [smartphone’s video camera] to become a better shot. READ FULL STORY with More TIPs and 14 Photos.
When setting up the shot for the draw you can use either landscape or portrait, that doesn’t matter. A small tripod is useful, or you can use a larger one.
One last tip when we’re using video is to use the pause function and drag the frames along so that you can stop frame-for-frame so you can see exactly your positioning when you draw, reload, or shoot positions and your footwork. Until the next one be safe and have fun.
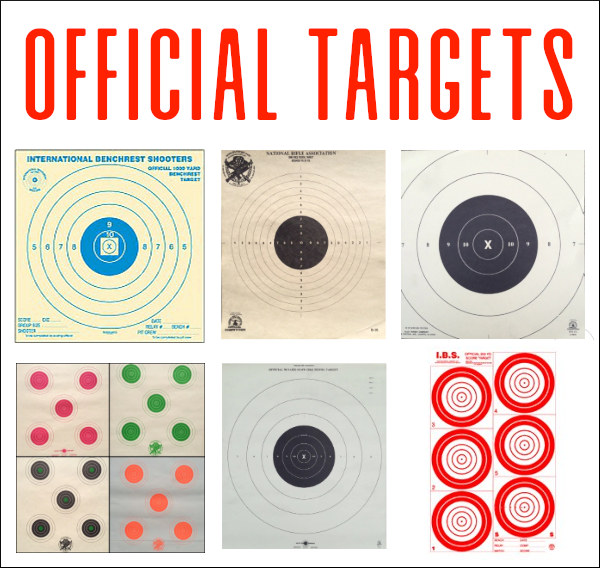
Do you need targets — not just any old targets, but the correctly-sized targets for specific shooting disciplines (such as NRA Smallbore, F-Class, and 1K Benchrest)? Well you won’t find them at your neighborhood gun store. Precise, dimensionally-correct competition targets are produced by a half-dozen specialty printers. In this article we provide links to the leading target sellers, with a chart showing “who’s got what”. Look for your particular discipline and the vendors will be specified.
Sources for Official Shooting Competition Targets:
AccurateShooter.com offers dozens of FREE, printable targets for target practice, load development, and fun shooting. We also offer a few of the most popular NRA Bullseye targets. One or more of these printable targets should work for most training purposes. However, some readers have asked: “Where can we get the real targets… exactly like the ones used in NRA, IBS, and NBRSA shooting matches?”
All these vendors carry nearly all the NRA High Power and Smallbore targets, including the smaller F-Class targets. National Target has the F-Class and High Power targets, including 100-yard reductions of the 200, 300, and 600-yard military targets.
Orrville Printing currently sells IBS targets for rimfire (50 yard) benchrest, short-range centerfire Benchrest (100, 200, 300 yards), Hunter BR Rifle (100, 200, 300 yards), plus the official 600-yard and 1000-yard IBS targets. National Target Company also has most of the IBS targets. NBRSA short-range, 600-yard, and 1000-yard benchrest targets are available directly from the NBRSA Business Office. Send an email to nbrsa@icloud.com or call (434) 993-9201.
Need Steel, Cardboard Silhouettes or specialty targets? ALCO Target Company in Duarte, California is the USA’s leading producer of the full spectrum of shooting targets including paper targets, cardboard targets, steel targets, and target stands.




 The Civilian Marksmanship Program (CMP) invites young men and women shooters to apply for


 There’s a simple, inexpensive “miracle device” that can cut your groups in half. If you’re not using this device, you’re giving away accuracy. The “miracle device” to which we refer is a simple wind indicator aka “windflag”. Using windflags may actually improve your accuracy on target much more than weighing charges to the kernel, or spending your life savings on the “latest and greatest” hardware.