We have all been there — you place a piece of tumbled brass in the shell-holder of your press, raise it into the die, and suddenly it is like somebody hit the brakes. The case is stuck in the die. Your first instinct is to reverse it out. You crank on the handle, and BANG! The rim rips off the case head and you are looking at a piece of brass stuck in the die.
A stuck case is one of the boo-boos that all of us reloaders have faced from time to time. If proper lubrication is applied, then it should not be a problem. No matter if you are a seasoned reloader or new to it, this situation can happen. Take your time, use the proper procedures, and you will be back in business in no time! This article explains how to avoid stuck cases (through proper lubrication) and how to use a stuck case removal system.
What Causes Stuck Cases
One of the first common mistakes reloaders face is the stuck case. It can be caused by too much or too little lube. Too much and a vacuum can be formed causing the case to become suctioned into the die. Too little lube and friction is the culprit. So what is the cure? There is no exact cure, but the best lube that we have found so far is just a dab of Imperial Sizing Die Wax on your fingers and applied in a thin coat on the body of the case, not the shoulder or neck. Too much of this wax can cause the vacuum effect, or can eventually load your die up with gobs of residue. If it is applied to the shoulder area, or the leftover wax moves up into the shoulder region of the die, you will see dents or dimples in the shoulder. [AccurateShooter.com Editor’s Note: For normal full-length sizing of small cases such as 220 Russian/PPC, 6mmBR, 6.5 Grendel, or 6.5×47 Lapua we recommend Ballistol (aerosol) lube. It is very slippery, goes on very thin, and does not gum up the die.]
A great way to ensure that your dies are clean is to use a simple chamber mop with a dab of your favorite solvent on it and clean out the die. Be sure all of the solvent is out after cleaning by spraying the die out with Quickscrub III or use a clean chamber mop. If you are storing your dies, you can apply a thin coat of a good oil to protect the steel such as TM oil or Starrett M1 Spray.
This video shows how to use an RCBS Stuck Case Removal Kit:
Using a Stuck Case Removal Kit
If you do stick a case in your die there are a few good stuck case removal kits available. Each one works in a similar fashion. I have found the Hornady kit very effective and easy to use. [Editor: Forster, Lyman, and RCBS also make good kits for removing a case stuck in a die.]
Basically what you do is remove the die from the press. Unscrew the decapping assembly and pull it out as far as you can. You then need to drill/tap threads into the stuck case head (this is why it is suggested to unscrew the decapping assembly as far as you can to get it clear of the drill bits). Once this is done screw the die back into the press. You then install the included shellholder attachment on the shellholder ram, and thread it into the case via a small wrench. With some elbow grease you can reverse the stuck case out of the die with the leverage of the press, and not damage the die.
However if the case is stuck… REALLY stuck, you may pull out the threads on the case and you are still left with a stuck case in the die without any way to pull it out. If the case is really difficult to remove even with the use of a stuck case removal kit, do not try to be Hercules with the press ram. Here is a trick that may work. Take the die with the stuck case and place it in your freezer for a couple of hours. Then repeat the removal with the cold die. The freezing temperatures may cause the brass to contract, and make removal easier. If this does not work it is recommended to send it to the die manufacturer. They will be able to remove the case without damaging the die.
Another fix if you can remove the decapping assembly completely is to use a tap hammer and a punch or small wooden dowel to knock the stuck case out. This isn’t the best way since it is very possible that you will damage the die internally or externally on the threads, or both. Send the die to the manufacturer to have this done properly. You will be happier in the long run.
This article appears courtesy Sinclair International. It first appeared in Sinclair’s Reloading Press Blog.
Most competitive shooters are pretty good about bore cleaning (some may even clean their bores too aggressively). However, we’ve found that many shooters neglect the chamber area and the bolt lug recesses. It’s too easy to clean the bore, slip out the guide rod and say “I’m done.” Sinclair Int’l explains why it’s important to clean the action interior: “Shooters use a lot of grease and oil on their bolts to reduce friction and to prevent wear[.] Unfortunately, both of these compounds attract grit, powder and primer residues. Cleaning your receiver is especially critical [with] custom actions where the fit between the action and bolt is held to very tight tolerances. Routine cleaning of the action will prevent unnecessary wear on the bolt body, locking lugs, and the action raceways/guide rails. Frequent action cleaning is also essential to keeping the trigger area free of debris which can cause trigger hang-ups and failures.”
Your rifle deserves a clean action and lug recesses. For action cleaning, our friend Danny Reever favors the PMA Action Cleaning Tool. This handy tool speeds up the cleaning process, letting you do a better job in less time. Danny reports: “I’ve been using the PMA Action Cleaning Tool Kit ($79.95) for quite some time. Previously, I used one of the old style (round knob) action-cleaning tools with cylindrical cotton rolls. I think the PMA Action Cleaning Tool Kit is easier to use, and possibly achieves better results. CLICK HERE to Read Full Tool Review.
Cleaning the Chamber
Combustion by-products, lubricants, and solvent residues can collect in your chamber. Severe build-up of grease and carbon can interfere with chambering. Also some solvents will promote corrosion. You need to keep your chambers clean.
1) Install a clean cotton mop of the correct size on the end of a chamber rod and insert the mop into the chamber. Rotate the mop several times to remove any brush bristles left behind and any excess solvent that was between the rod guide snout and the end of the chamber. Make sure the chamber is dry. Prior to storing a rifle you can oil the chamber but make sure the oil is removed prior to firing the rifle.
2) Alternatively, install an old bore brush on a chamber rod, overlap a couple of patches on the brush bristles, and wrap them around the brush completely. Then insert the patch-covered brush into the chamber while rotating it to remove the excess solvent and debris. Push it firmly into the neck area of the chamber. A similar method is to pierce a large patch on the end of the brush loop and insert it into the action, again rotating the brush as you push the patch up against the breech.
Cleaning the Lug Recess Area
The action lug recess area is one of the dirtiest places on a bolt-action rifle. To properly clean this area, always use a tool designed for the task, such as the $24.99 Sinclair Action Cleaning Tool (Brownells #749003115) which is part of the full Sinclair Action Cleaning Tool Kit ($48.99 at Brownells, #749004651).
1) Insert a cotton roll or cleaning felt into your lug recess cleaning tool and wet both ends and the face of the cotton roll/felt with solvent.
2) Insert the tool into the action and push it forward until it is positioned fully in the lug recess area and rotate the tool head several times. Then reverse the rotation for another few turns. While rotating the tool move it slightly in and out to cover the entire recess area and to also clean the breech face.
3) Remove the tool from the action and inspect the surface of the felt or cotton roll. If there is quite a bit of residue on both sides of the felt/roll, then repeat with another wet felt/roll.
4) When you feel the recess area is completely clean, insert a dry cotton roll into the tool and rotate the tool head to remove any remaining solvent and debris. If necessary, use a second dry cotton roll.
5) You can follow this step up with another pass of a mop or patches into the chamber to get any debris or solvent that pushed forward out of the lug recess area.
We are often asked “Can I get more velocity by switching primer types?” The answer is “maybe”. The important thing to know is that changing primer types can alter your load’s performance in many ways — velocity average, velocity variance (ES/SD), accuracy, and pressure. Because there are so many variables involved you can’t really predict whether one primer type is going to be better or worse than another. This will depend on your cartridge, your powder, your barrel, and even the mechanics of your firing pin system.
BE SAFE: Be cautious when changing primer types. Glen Zediker recommended decreasing your load ONE FULL GRAIN when changing to a different primer type, one that you haven’t used before.
Interestingly, however, a shooter on another forum did a test with his .308 Win semi-auto. Using Hodgdon Varget powder and Sierra 155gr MatchKing bullets, he found that Wolf Large Rifle primers gave slightly higher velocities than did CCI-BR2s. Interestingly, the amount of extra speed (provided by the Wolfs) increased as charge weight went up, though the middle value had the largest speed variance. The shooter observed: “The Wolf primers seemed to be obviously hotter and they had about the same or possibly better ES average.” See table:
Varget .308 load
45.5 grains
46.0 grains
46.5 grains
CCI BR2 Primers
2751 fps
2761 fps
2783 fps
Wolf LR Primers
2757 fps
2780 fps
2798 fps
Speed Delta
6 fps
19 fps
15 fps
You can’t extrapolate too much from the table above. This describes just one gun, one powder, and one bullet. Your Mileage May Vary (YMMV) as they say. However, this illustration does show that by substituting one component you may see significant changes. Provided it can be repeated in multiple chrono runs, an increase of 19 fps (with the 46.0 grain powder load) is meaningful. An extra 20 fps or so may yield a more optimal accuracy node or “sweet spot” that produces better groups. (Though faster is certainly NOT always better for accuracy — you have to test to find out.)
WARNING: When switching primers, you should exercise caution. More speed may be attractive, but you have to consider that the “speedier” primer choice may also produce more pressure. Therefore, you must carefully monitor pressure signs whenever changing ANY component in a load. In his books, the late Glen Zediker recommended decreasing your load ONE FULL GRAIN when changing to a different primer type, one that you haven’t used before.
We talked with the experts at Bartlein Barrels. They confirmed that they have seen many, many more barrels harmed by crown damage caused by improper cleaning than by anything else. If you use a bronze brush, Bartlein recommends that you REMOVE the BRUSH after it passes through the muzzle. This is because the bristles take a set (pointing to the breech) during the out-stroke. In other words the bristles angle back as you push towards the muzzle from the breech. If you drag the brush backwards at the muzzle, you force these bristles to reverse direction abruptly right as they cross the delicate crown. In time, that can damage the crown. NOTE: John Krieger of Krieger Barrels also advises his customers not to pull a bronze brush backwards across the crown.
Response to Skeptics
Whenever we’ve published similar advice, given by guys who are producing some of the most accurate barrels in the world, some readers get extremely angry. They say, “You’re crazy! I’ve was pullin’ triggers when you were still in diapers. I’ve got Hall of Fame points and I say there’s no way a phosphor bronze brush can ever do anything to steel. You’re full of it.” Well, these guys are entitled to their opinion. But here’s our response. Number one, we’re just telling you what the barrel-makers are telling US. Don’t kill the messenger. Number two, many of the guys who say bronze brushes can’t affect the crown are the same guys who feel they need to recrown their barrels every 400-500 rounds (Do we see a connection?). Third, if you don’t think a softer material can affect steel, look at the steel ferrules of a well-used fishing rod — there the steel is worn away by plastic. (With time, water will wear away granite.) Lastly, this Editor can tell you I’ve seen the damage myself, first-hand, using a magnifying glass on much-brushed benchrest barrels. Right at the muzzle, the top edge of the lands had sharp, jagged edges that looked like little shark’s teeth, or the edge of a serrated knife. By contrast, a new barrel will have a nice, smooth straight edge along the top of the lands at the muzzle.
Also Be Careful with Jags
Bartlein’s experts also told us to be careful about the jags you use. Dewey-style jags in particular can cause problems. These have a long shaft with multiple rings with diamond-pattern “teeth”. The teeth are designed to grip a patch. The problem is that the lower rings may be exposed below the patch fabric, so the teeth can grind directly on the rifling and/or crown. Bartlein says Dewey-style metal jags can damage a crown very quickly if any of the toothed rings are exposed, metal-on-metal. Tim North of Broughton barrels also advises against using the Dewey-style jags with toothed rings. Interestingly, Dewey uses the same type of diamond-shaped teeth on the bottom of its “Crocogator” primer pocket tool, so you know those knurled teeth can scrape.
Today, June 20, 2024 is Summer Solstice, the longest day of the year. And right now the Northeast USA is undergoing a major heatwave. That means “peak heat” summer conditions have arrived already. It’s vitally important to keep your ammo at “normal” temps during the hot summer months. Even if you use “temp-insensitive” powders, studies suggest that pressures can still rise dramatically when the entire cartridge gets hot, possibly because of primer heating.
It’s smart to keep your loaded ammo in an insulated storage unit, possibly with a Blue Ice Cool Pak if you expect it to get quite hot. Don’t leave your ammo in the car or truck — temps can exceed 140° in a vehicle parked in the sun.
The way ambient temperatures, barrel heating, and powder warming can affect cartridge pressures (and hence velocities) was covered in a study Pressure Factors: How Temperature, Powder, and Primer Affect Pressure by Denton Bramwell. In that article, the author used a pressure trace instrument to analyze how temperature affects ammo performance. Bramwell’s tests yielded some fascinating results.
For example, barrel temperature was a key factor: “Both barrel temperature and powder temperature are important variables, and they are not the same variable. If you fail to take barrel temperature into account while doing pressure testing, your test results will be very significantly affected. The effect of barrel temperature is around 204 PSI per F° for the Varget load. If you’re not controlling barrel temperature, you about as well might not bother controlling powder temperature, either. In the cases investigated, barrel temperature is a much stronger variable than powder temperature.”
This Editor had the personal experience of 6mmBR hand-loaded ammo that was allowed to sit in the hot sun for 45 minutes while steel targets were reset. The brass became quite warm to the touch, meaning the casings were well over 120° on the outside. When I then shot this ammo, the bullets impacted well high at 600 yards (compared to earlier in the day). Using a Magnetospeed, I then chron-tested the sun-heated ammo. The hot ammo’s velocity FPS had increased very significantly — all because I had left the ammo out in the hot sun uncovered for 3/4 of an hour.
LESSON: Keep your ammo cool! Keep loaded ammo in the shade, preferably under cover or in an insulated container. You can use a SEALED cool pack inside the container, but we do NOT recommend H20 ice packs. And don’t have the container do double duty for food and beverages.
Powder Heat Sensitivity Comparison Test
Our friend Cal Zant of the Precision Rifle Blog has published a fascinating comparison test of four powders: Hodgdon H4350, Hodgdon Varget, IMR 4451, and IMR 4166. The first two are Hodgdon Extreme powders, while the latter two are part of IMR’s Enduron line of propellants.
The testers measured the velocity of the powders over a wide temperature range, from 25° F to 140° F. Hodgdon H4350 proved to be the most temp stable of the four powders tested. [NOTE: New Alliant Reloder TS 15.5 has also proved very temp stable in AccurateShooter’s range tests.]
Over the past 12 months, this article was one of the TOP 20 most-read Daily Bulletin features. We’re reprising it today for those who may have missed it the first time. The above diagram comes from a TiborasurasRex YouTube Video comparing G1 and G7 BC models. CLICK HERE to watch the video.
The better, up-to-date ballistics programs let you select either G1 or G7 Ballistic Coefficient (BC) values when calculating a trajectory. The ballistic coefficient (BC) of a body is a measure of its ability to overcome air resistance in flight. You’ve probably seen that G7 values are numerically lower than G1 values for the same bullet (typically). But that doesn’t mean you should select a G1 value simply because it is higher.
Some readers are not quite sure about the difference between G1 and G7 models. One forum member wrote us: “I went on the JBM Ballistics website to use the web-based Trajectory Calculator and when I got to the part that gives you a choice to choose between G1 and G7 BC, I was stumped. What determines how, or which one to use?”
The simple answer is the G1 value normally works better for shorter flat-based bullets, while the G7 value should work better for longer, boat-tailed bullets.
G1 vs. G7 Ballistic Coefficients — Which Is Right for You?
G1 and G7 refer both refer to aerodynamic drag models based on particular “standard projectile” shapes. The G1 shape looks like a flat-based bullet. The G7 shape is quite different, and better approximates the geometry of a modern long-range bullet. So, when choosing your drag model, G1 is preferable for flat-based bullets, while G7 is ordinarily a “better fit” for longer, boat-tailed bullets.
Drag Models — G7 is better than G1 for Long-Range Bullets
Many ballistics programs still offer only the default G1 drag model. Bryan Litz, author of Applied Ballistics for Long Range Shooting, believes the G7 standard is preferrable for long-range, low-drag bullets: “Part of the reason there is so much ‘slop’ in advertised BCs is because they’re referenced to the G1 standard which is very speed sensitive. The G7 standard is more appropriate for long range bullets. Here’s the results of my testing on two low-drag, long-range boat-tail bullets, so you can see how the G1 and G7 Ballistic coefficients compare:
G1 BCs, averaged between 1500 fps and 3000 fps:
Berger 180 VLD: 0.659 lb/in²
JLK 180: 0.645 lb/in²
The reason the BC for the JLK is less is mostly because the meplat was significantly larger on the particular lot that I tested (0.075″ vs 0.059″; see attached drawings).
For bullets like these, it’s much better to use the G7 standard. The following BCs are referenced to the G7 standard, and are constant for all speeds.
Many modern ballistics programs, including the free online JBM Ballistics Program, are able to use BCs referenced to G7 standards. When available, these BCs are more appropriate for long range bullets, according to Bryan.
[Editor’s NOTE: BCs are normally reported simply as an 0.XXX number. The lb/in² tag applies to all BCs, but is commonly left off for simplicity.]
This article is copyright 2023 AccurateShooter.com. No 3rd Party republication of this article is allowed without advance approval and payment of licensing fees.
Protect Your Hearing — Wear Protection Whenever You Shoot
Noise-induced hearing loss and tinnitus are two of the most common afflictions for recreational shooters and hunters. Everyone knows that gunfire is loud, but very few people understand the repercussions that shooting can have on their hearing until it’s too late.
The better quality suppressors can reduce the noise of a gunshot by 20 to 35 decibels (dB). Good muffs or plugs will reduce sound by 23 to 33 dB. By decreasing the overall sound signature, suppressors help to preserve the hearing of recreational shooters and hunters. Even the most effective suppressors, on the smallest and quietest calibers (.22 LR) reduce the peak sound level of a gunshot to between 110 to 120 dB. To put that in perspective, according to the National Institute for Occupational Safety and Health (NIOSH), that is as loud as a jackhammer (110 dB) or an ambulance siren (120 dB). For normal caliber handguns and rifles, suppressed sound levels routinely exceed 130 dB, just shy of OSHA’s “hearing safe” threshold of 140 dB.
According to Dr. William W. Clark, the current Director of the Washington Univ. School of Medicine’s Audiology/Communication Sciences Program, a “serious threat to hearing comes from recreational hunting or target shooting”. This is in large part due to the fact that many people choose not to use traditional hearing protection devices like earplugs and earmuffs because they want to be able to hear their surroundings. Multiple studies have found that between 70 to 80% of hunters never wear earplugs or earmuffs, and nearly half of all target shooters don’t consistently wear traditional hearing protection. Thus, it should come as no surprise that for every five years of hunting, hunters become seven percent more likely to experience high frequency hearing loss.
This article is based on information from the American Suppressor Association (ASA). Since the ASA’s formation in 2011, three additional states have legalized suppressor ownership and 18 states have legalized suppressor hunting. For more information, visit www.AmericanSuppressorAssociation.com.
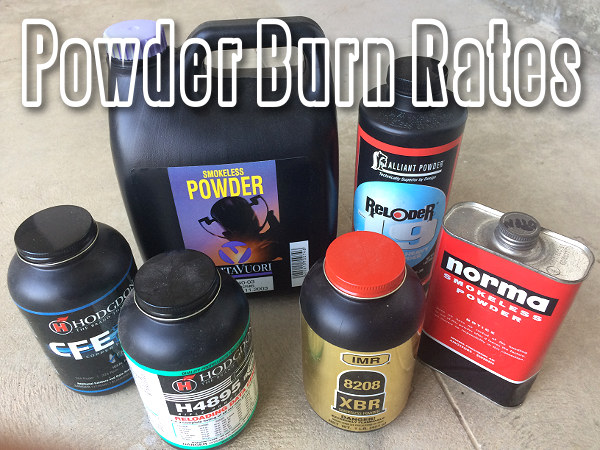
Among AccurateShooter.com’s most-visited web pages have been powder burn rate reference guides ranking powders from fastest to slowest. Here is a new, updated version of the Powder Burn Rate Table. Compiled by Hodgdon Powder Co., this Burn Rate Chart displays the relative burn rates of 176 different powders. Shown below is the latest table, released by Hodgdon in July 2024.
You’ll want to download this Powder Burn Rate Chart PDF. This 176-entry comparison table provides vital information for hand-loaders — with tested burn-rates. Note — this invaluable chart is not limited to Hodgdon and IMR propellants. This burn rate chart includes powders from eight major powder-makers: Accurate, Alliant, Hodgdon, IMR, Norma, Ramshot (Western), Vihtavuori, and Winchester.
This chart (July 2024 version) provides useful information for all hand-loaders. When doing load development, and testing one powder versus another, it’s generally wise to choose propellants that share the same relative burn rate, as least for starters.
NOTE: Hodgdon powders are red, IMR powders are yellow, Winchester powders are blue, Accurate powders are gray, and Ramshot powders are orange. Powders from Alliant, Norma, and Vihtavuori appear on the chart with white background. DOWNLOAD Burn Rate Chart HERE as PDF.
Ace tactical shooter and gunsmith Jim See of Elite Accuracy LLC has tested a Frankford Arsenal rotary brass tumbler. Like the older Thumbler’s Tumblers, this can tumble your cases in a liquid solution. The wet-tumbling process worked very well Jim reports. Posting on Facebook, Jim noted: “I was super impressed with the Frankford Arsenal rotary tumbler and cleaning packs they sent me. I ran 350 pieces of brass for one hour. They now look great.” Jim appreciated not having to deal with dry tumbling media, such as crushed walnut shells. Dry media produces dust and can leave residues or clog flash-holes.
Interestingly, Jim recommends you try wet-tumbling WITHOUT using stainless media. At least give it a try. Tumbling without media simplifies the process and you don’t have to worry about pins stuck in flash-holes or case-necks*. Jim reports: “Stainless steel pins come with the Frankford kit, but mine hit the trash right out of the box. There is no need to clean the inside of your cases 100% and that’s all the pins add to the equation. The brass bumping brass with hot water and Frankford’s liquid cleaner works great all by itself.” One wag stated: “That’s great to hear. Stainless steel pins are a PITA.”
Other Facebook posters concurred with Jim’s evaluation of the Frankford Arsenal Rotary Tumbler:
“I’ve had one for a couple years, and it works well. I usually run about 250-300 Dasher cases at once in it. But I use the pins because I’m OCD about clean brass.” — David W.
“I’ve had one for a year and a half and it definitely works with or without pins.” — Luke C.
“I got one about six months ago and have yet to use any stainless steel media [pins]. I just use some dawn, distilled water, and Lemi Shine®. Turns nasty 5.56 range brass bright and shiny.” — Brian D.
“I don’t use the pins either and use a combination of Dawn soap and Lemi Shine.” — Jon N.G.
This video shows how to assemble and operate the Frankford rotary tumbler. But note, Jim See does NOT feel that it is necessary to use stainless media.
How to Dry Your Brass — Hair Dryer Vs. Machine
The downside of wet tumbling is that you end up with a pile of wet brass at the end of the cleaning cycle. There are many ways to dry brass, from drying in the sun to using a kitchen oven (be careful not to “overcook” your brass). One Facebook poster asked Jim: “What is your drying method for wet brass, and how long does it take?”
Jim See replied: “To start I just drain off the dirty water, and rinse the brass with clean hot water. Then I roll the brass on a towel for 30 seconds and put the brass in a one-gallon bucket. Next I insert a hair dryer in the bucket (with the brass) and let it run for about 5 minutes. With this procedure, the drying process for me is done in less than 10 minutes.”
Jack Lanhart has another method: “I use a food dehydrator. It takes 30 to 45 minutes.”
For those who don’t want to mess with towels and hair dryers, Frankford Arsenal offers a matching Platinum Series Case Dryer that simplifies the process of drying brass. Lyman also makes an excellent Cyclone Case Dryer. These drying machines each cost about $65.00 and both have multiple levels so you can separate different types of cartridge brass. Lyman states that “The forced heated air circulation of the Cyclone will dry your brass inside and out within an hour or two, with no unsightly water spots.” The Lyman dryer can also be used for ultrasonically-cleaned gun parts.
*The Frankford Rotary tumbler does include media separators if you choose to use the provided pins or other media. CLICK HERE for diagram showing how to use media separators.
Assembly Diagram: Here are all the components of the target frame. The overall maximum assembled dimensions are roughly 26″ wide, 41″ deep, and 66″ tall (the cardboard is 2 x 3 feet).
One of the easiest ways to build a portable target stand is to use PVC pipe and connectors. Utah .308 Shooter “Cheese” has created a simple yet sturdy target frame, and he’s shared his design so you can build a similar frame easily and at low cost. The components are wood furring strips, 2″-diameter PVC pipes (and connections), and a 2’x3′ sheet of cardboard. The PVC base can be glued together, or, for easier transport and storage, you can leave some or all of the connections free. “Cheese” tells us: “I didn’t glue any of it together so I could disassemble it, shove it in a bag and take it anywhere.”
“All the parts are just pushed together and not glued. That way I can break it down and carry it all in a bag. Also, if a buddy (not me!) happens to shoot the stand, I can easily replace just the damaged piece. The last 6 inches of the furring strips are wittled-down a bit so they can be pushed into the upright pipes with a little friction. The cardboard is 2 x 3 feet, and I use a staple gun to attach it to the furring strips. Then I just staple the target onto the cardboard and go at it.
Of course you can modify the dimensions as desired. I chose the black ABS pipe over white PVC simply for cost — black ABS is a little cheaper. You can also glue some or all of the parts together, it’ll just be larger for transporting. In windy conditions, the thing likes to come apart. Duct tape might work well.
For weight, I thought about filling the two end pipes with sand and gluing test caps on each of their ends. The test caps still allow the pipes to slip into the elbows.”
Add Anchors or Internal Weight for Stability
On a very windy day, a PVC stand can shake or even topple over. There are a couple solutions to this. Some people fill the PVC pipe sections with sand to add weight, or you can put short sections of Re-BAR inside the long legs. One GlockTalk forum member noted: “I built [a frame] almost identical to this. I also take four pieces of wire coathanger bent into an inverted “U” shape to anchor the frame to the ground. It is so light that wind will knock the stand over [without anchors].”
You can find photos of a similar home-made PVC target stand (with a slightly different rear section) on the Box of Truth website. This also employs a PVC tubing base with wood uprights. We’ve also seen all-PVC target stands, but we’ve found that it is easier to attach the cardboard to wood strips than to PVC pipe. Also, if the upper section is wood, you can fit different height targets, while using the same base.


 A stuck case is one of the boo-boos that all of us reloaders have faced from time to time. If proper lubrication is applied, then it should not be a problem. No matter if you are a seasoned reloader or new to it, this situation can happen. Take your time, use the proper procedures, and you will be back in business in no time! This article explains how to avoid stuck cases (through proper lubrication) and how to use a stuck case removal system.


 The way ambient temperatures, barrel heating, and powder warming can affect cartridge pressures (and hence velocities) was covered in a study Pressure Factors: How Temperature, Powder, and Primer Affect Pressure by Denton Bramwell. In that article, the author used a pressure trace instrument to analyze how temperature affects ammo performance. Bramwell’s tests yielded some fascinating results.

 The better, up-to-date ballistics programs let you select either G1 or G7 Ballistic Coefficient (BC) values when calculating a trajectory. The ballistic coefficient (BC) of a body is a measure of its ability to overcome air resistance in flight. You’ve probably seen that G7 values are numerically lower than G1 values for the same bullet (typically). But that doesn’t mean you should select a G1 value simply because it is higher.
 Drag Models — G7 is better than G1 for Long-Range Bullets


 One of the easiest ways to build a portable target stand is to use PVC pipe and connectors. Utah .308 Shooter “Cheese” has created a simple yet sturdy target frame, and he’s shared his design so you can build a similar frame easily and at low cost. The components are wood furring strips, 2″-diameter PVC pipes (and connections), and a 2’x3′ sheet of cardboard. The PVC base can be glued together, or, for easier transport and storage, you can leave some or all of the connections free. “Cheese” tells us: “I didn’t glue any of it together so I could disassemble it, shove it in a bag and take it anywhere.”


