This popular video, viewed 3.9 million times on YouTube, provides a clear explanation of Minute of Angle (MOA) and how that angular measurement is used. Among novice shooters, there is much confusion over this term. In this NSSF Video, Ryan Cleckner, a former U.S. Army Sniper Instructor, defines the term “Minute of Angle” (MOA) and explains how you can adjust for windage and elevation using 1/4 or 1/8 MOA clicks on your scope. This allows you to sight-in precisely and compensate for bullet drop at various distances.
For starters, Ryan explains that, when talking about angular degrees, a “minute” is simply 1/60th. So a “Minute of Angle” is simply 1/60th of one degree of a central angle, measured either up and down (for elevation) or side to side (for windage). At 100 yards, 1 MOA equals 1.047″ on the target. This is often rounded to one inch for simplicity. Say, for example, you click up 1 MOA. That is roughly 1 inch at 100 yards, or roughly 4 inches at 400 yards, since the target area measured by 1 MOA increases in linear fashion with the distance.
More Minute of Angle (MOA) Explanatory Videos
This Gunwerks video explains that Minute of Angle subtends approximately 1″ for each 100 yards (well, 1.047″ to be more precise). That means a Minute of Angle increases in actual measured size the greater the distance of the target from the shooter.
This lengthy (24-minute) video defines Minute of Angle, and uses multiple diagrams to illustrate how MOA angular measurements works. The video also how MOA-based click values translate to point-of-impact changes at various distances.
Do you know what the inside of a rifle chamber (and throat zone) really looks like? Do you understand the concept of headspace and why it’s important? If not, you should read the Brownells GunTech article Gauging Success — Minimum Headspace and Maximum COL. This article explains the basics of headspace and shows how to measure headspace (and length to lands) in your barrels with precision. The article also explains how to adjust your full-length sizing dies to “bump the shoulder” as needed.
Why is headspace important? The article explains: “Controlling headspace and setting proper C.O.L. also represent improved safety and reduced cost of handloading. Excessive headspace can cause case head separation and gases in excess of 60,000 PSI escaping from a rifle’s chamber. Too little headspace can result in a chamber forced bullet crimp and a bullet that becomes an obstruction more than a properly secured projectile. Excessive C.O.L. can result in a rifling-bound bullet, a condition that could result in spikes of excessive pressure.” [Editor’s NOTE: It is common for competitive benchrest shooters to seat bullets into the rifling. This can be done safely if you reduce your loads accordingly. With some bullets we often see best accuracy .010″ (or more) into the lands. However, this can generate more pressure than the same bullet seated .010″ away from initial lands contact. As with all reloading, start low and work up gradually.]
How is headspace specified? Most cartridges used within the United States are defined within ANSI/SAAMI Z299.3-4. Brownells explains: “In the case of the .243 Winchester, as an example, there are pressure specifications, cartridge drawings and, as pictured above, chamber drawings. Armed with a chamber drawing, each manufacturer producing a firearm for the .243 Winchester knows the proper standard dimension to cut chambers and set headspace. Notice there are two headspace reference dimensions for the chamber. The upper is a place in the chamber where the shoulder is .400″ in diameter; the “datum” or “basic” line. The lower is the 1.630″~1.640″ minimum – maximum dimension from the breech face (bolt face) to that point in the chamber that measures .400″.”
The actual headspace of any firearm is the distance from the breech face to the point in the chamber that is intended to prevent forward motion of a cartridge.
Finding Cartridge Length to Lands with OAL Gauge
Using a comparator on a set of calipers, you can quickly determine cartridge base-to-ogive length. This is the measurement from the base of the case to the forward-most full diameter section of the bullet, which is for convenience called the ogive. (Technically, the “ogive” is the full curve from bullet tip back to full-diameter ring). Shown here, that ogive is 0.243″ diameter.
The next step is using a modified (threaded) case with a Hornady OAL tool to determine Length-to-Lands (LTL) in your rifle’s chamber. During this measurement process, the modified case, with a bullet in its neck, is inserted in the chamber. Go slow, take your time. Here are 5 tips that will help you get repeatable and reliable LTL measurements:
1. Start with a clean chamber and clean barrel throat.
2. Make sure the modified case is fully screwed down and seated on the OAL Gauge. It can sometimes unscrew a bit during repeated measurements.
3. Insert the modified case slowly and gently, but ensure the shoulder of the modified case is fully seated on the end of the chamber.
4. Push the gray plastic rod GENTLY. It is common for the bullet to be tilted a bit. You want to allow the bullet to self-center in the throat BEFORE you apply much pressure. Then tap a couple times and push until you feel resistance. Do NOT push too hard — that will jam the bullet in the lands.
5. Repeat the measurement at least 3 more times. If you follow our instructions, you should, typically, get a repeatable measurement, within 0.0015″ or so, 3 out of 4 times.
Here’s a smart tip from Bryan Litz, explaining how damage to a bullet jacket can harm the projectile’s Ballistic Coefficient (BC). This tip is posted on Bryan’s new Bryan Litz Ballistics Facebook page. We recommend you subscribe to that page to access Bryan’s latest informative posts.
Bryan notes: “If the case mouth scratches the bullet when you seat it, the damage can cause the BC to be inconsistent, which shows up as vertical dispersion at long range.”
We see this sometimes when running Doppler Radar for competitors at Applied Ballistics Mobile Lab events. If someone is shooting a bullet that typically has a very consistent BC (1% or less) but they’re seeing a higher BC variation, it can be due to the bullets being damaged in the loading process.”
The lead photo above shows the badly-scratched jacket of a bullet seated in a rough-mouthed case. To prevent such jacket damage, one should chamfer, deburr, and smooth case mouths after trimming.
Below is a recorded Doppler radar result showing excessive BC variation. Such variation can increase vertical dispersion at long range. This can result in larger group sizes and lower scores.
Many Remington 700 rifle owners swap out the factory trigger. This is not a difficult task, but you need to follow the proper procedure so you don’t damage any important parts during installation, and so that you don’t interfere with the operation of the bolt and safety. This Do-It-Yourself video from Brownells explains and demonstrates, step by step, how to safely and correctly replace your Remington 700 trigger. This installation video covers the common methods used to install most of the popular after-market Rem 700 triggers. Importantly, the video also shows how to function test after installation, and how to make sure your safety is working properly.
Many Rem 700 owners fit Timney triggers to their rifles.
Video find by ELR Researcher. We welcome reader submissions.
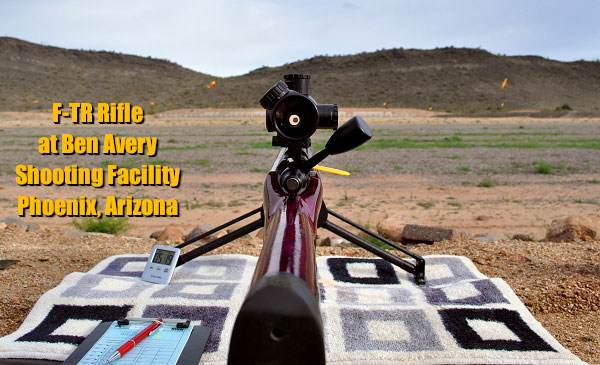
The 2026 Southwest Nationals will be held at the Ben Avery Shooting Facility in Phoenix, Arizona on February 11-15, 2026. We know many of our readers will be traveling by air with their rifles next week to compete at the SW Nationals in Arizona. Here is a helpful article from Team Savage Shooter Stan Pate. This covers how to ship your rifle safely, and then re-establish zero properly when the gun is reassembled after transport. This is one of a series of Shooting Tips articles in the Savage Blog.
Traveling with Firearms — Important Advice
Traveling with firearms can be stressful. You must comply with multiple regulations and then trust your expensive guns to airline baggage handlers. And after arrival you’ll need to put your rifles back together and confirm the zeros. This article offers helpful travel advice from Team Savage shooter Stan Pate. Pate has traveled the globe competing with match rifles. Here he shares his tips for making trips easier on you and your firearms.
Easier Air Travel With Firearms
TSA isn’t nearly as careful with your rifles as you are. Proper storage before sending your firearm up a conveyer belt and into the belly of a plane is critical. Stan Pate spends lots of time each year traveling the skies and has devised a system for keeping his rifle safe when going to and from.
“Never travel with your firearm completely assembled,” Pate cautions. “A fully assembled firearm is much heavier [as a total unit] than one that has been broken-down and stored [in separate sections]. More weight creates more in-the-case movement, which can result in damage. I learned this the hard way years ago. My rifle was actually broken in half when traveling to an international competition. Record your torque settings, use those settings during reassembly and your return to zero should be no problem.”
“Be sure to check on current TSA rules and regulations before travel to be aware of any changes that may effect how you pack your rifles,” says Pate.
Rifle Reassembly and Resetting Zero
The quicker you can reestablish your zero, the quicker you can relax and stop worrying about if your rounds are going to hit their mark during competition. Pate, over the years, has developed a system for rifle reassembly and getting back to zero as quickly as possible. While his torque settings may not be the same as yours, the process can still be used.
“The barreled-action goes back on the stock, and then I tighten all three receiver screws finger tight,” says Pate. “Next, I tighten the front two receiver screws down to 35-inch pounds. The rear receiver screws on this particular rifle likes 15-inch pounds. [Note: Proper torque settings will vary with your action and stock type. Most actions have TWO screws, not three.] Scope attachment comes next, and I follow manufacturer settings when tightening it down. All that’s left to do now is go zero your rifle.”
This video explains an efficient method to Re-Zero your rifles
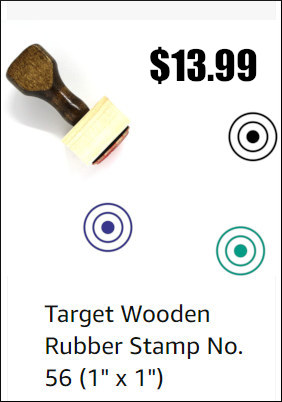
However, if you don’t have a printer, don’t want to pay for commercial targets or adhesive target stickers, then there IS an interesting option. One of our Forum members has created his own Custom TARGET STAMP. Using an INK PAD, this creates a black multi-ring bullseye on paper that matches the exact dimensions of a competition target (SEE Top Photo).
Forum member JimmyMac wanted a target that replicates a competition multi-ring bullseye. He wanted to be able to stamp this bullseye quickly and easily on blank paper. Shown below is the custom stamp he created to accomplish that task. JimmyMac posted: “I took dimensions of a 100-yard group target and had a stamp made to transfer to the paper of my choice. Not revolutionary by any stretch, but works good. I may do a UBR score target stamp next.” JimmyMac purchased the target stamper through an online vendor: “I bought mine online. I provided a template. They did the rest. Here is the stamp and the ink that goes inside.” READ FORUM Thread for more information.
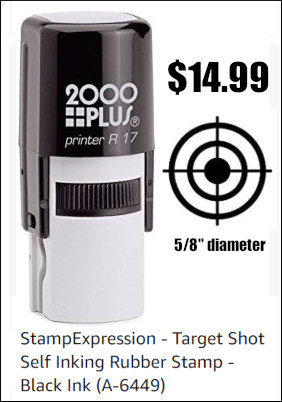
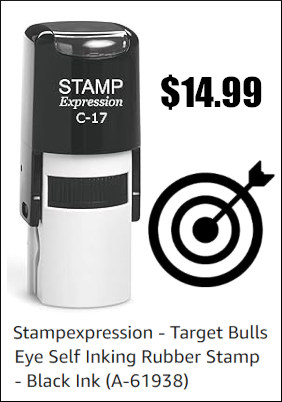
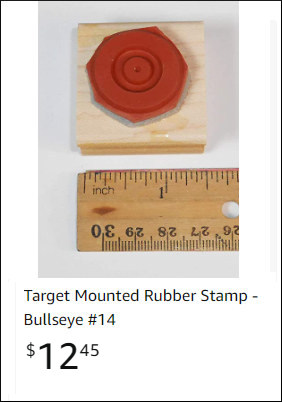
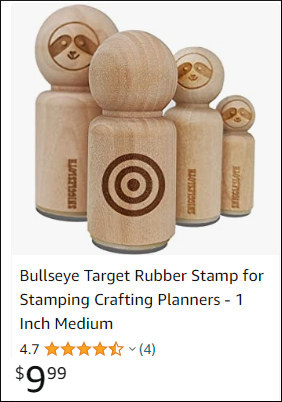
Target Stamp Sets on Amazon
There are a large variety of ink-using target stamps available now on Amazon. Some of these are “self-inking” for convenience, while others require a separate ink pad to function. Here are some of the many target stampers currently offered. There are many target pattern and target size options.
This article is Copyright 2026 AccurateShooter.com. Republication by any other website or media violates Federal copyright law and obliges that third party to pay statutory penalties and damages.
More and more folks are using Burris Signature Rings these days. These unique rings feature polymer inserts. That allows you to pre-load some elevation in your scope set-up, or you can center-up the windage. Additionally, the polymer inserts hold your scope securely without leaving marks on the tube. Lastly, some folks believe that Signature rings may offer advantages for benchrest competition. Rodney Wagner shot a world-record 600-yard group using Burris Signature Zee Rings (“Zee” denotes the Weaver-rail model). James O’Hara set multiple IBS 1000-yard records using Burris Signature Zee Rings. James will tell you he thinks “all his guns seem to shoot best with these rings”.
IBS World Record Set with Signature Zee Rings
Are Signature Zees good enough for competition? Absolutely. Some folks scoff at these Burris rings, given their modest price. A set of 1″-diameter Sig Zees cost $40.89 at Midsouth. But consider this, in 2013 Rodney Wagner shot the then-smallest 600-yard group in history, a 0.336″ 5-shot stunner, using Signature Zee Rings on his IBS Light Gun. It took five years for a smaller 600-yard group to be shot, a 0.311″ by bullet-maker Bart Sauter, using his IBS Heavy Gun. (See IBS 600-yard Records.) Here’s Rodney with his record-setting rifle, fitted with affordable Signature Zee 30mm rings.
Vendors Have Burris Signature Rings in Stock Now
Various models of Burris Signature Rings are available from many online vendors including Brownells, Midsouth, and MidwayUSA. NOTE: You may have to check with more than one seller to get the exact size, height, and model you prefer. But right now these vendors have pretty good selections of Signature Zees in stock now, including the popular 30mm High ($61.99 at Brownells) and 30mm Extra High models ($56.36 at Midsouth). If you check all three sellers, you’ll probably find what you need.
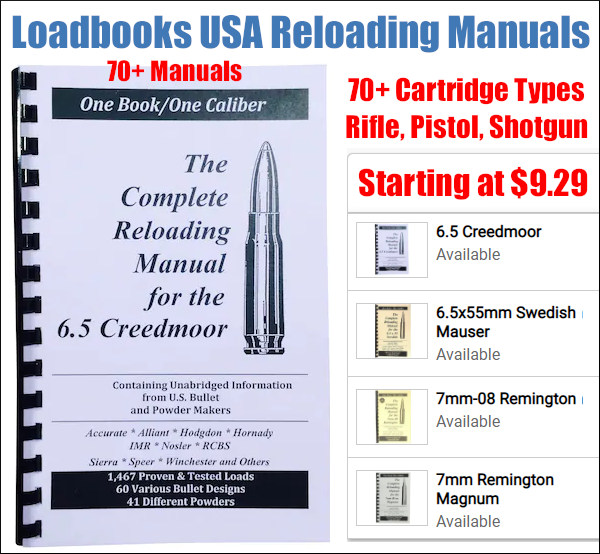
⏺️ » Over 70 loadbook varieties — great for pistol and hunting loads
Loadbooks pack a ton of valuable load data in a single handy volume. These booklets efficiently summarize data from multiple bullet and powder manufacturers. We have used these Loadbooks for our pistol loading as well as common rifle hunting loads. Right now a wide selection of these loadbooks are in-stock at MidwayUSA, with affordable prices. The 6.5 Creedmoor manual is $9.29, the .45 ACP book is $10.49, the .223 Rem book is $11.49, and the .308 Win book is $12.49.
Chose from over 70 cartridge types, including .380 ACP, 9mm Luger, .357 Magnum, .40 SW/10mm, .45 ACP, .204 Ruger, .223 Rem, 22-250, 6mm Remington, 6.5 Creedmoor, 6.5×55, 7mm-08, .270 Win, .284 Win, .308 Win, .30-06, 300 WinMag, .338 LM, 12ga shotshell and many more. NOTE: On MidwayUSA’s landing page, click “Select Title” then scroll down to choose your preferred cartridge type. You an order multiple loadbook titles by adding to the shopping cart.
NOTE: Good load information is available online from Hodgdon and other powder companies. But it’s handy to have a print book that you can use without Wifi, and make notes about your loads. Sometimes a traditional reference is actually more convenient than the internet.
Smart gun owners know they need a good, solid gun safe. But when choosing a gun safe, what kind of lock should you select — electronic or mechanical? Both types have their advantages and disadvantages. This article will help you make the right choice for your needs and also get the most reliable performance from either type.
Gunsafes can be fitted with either an electronic keypad-style lock, or a conventional dial lock. In our Gunsafe Buyer’s Guide, we explain the important features of both dial and electronic lock systems. Many safe-makers will tell you that consumers prefer electronic locks for convenience. On the other hand, most of the locksmiths we’ve polled believe that the “old-fashioned” dial locks, such as the Sargent & Greenleaf model 6730, will be more reliable in the long run. CLICK HERE to learn more about the Pros and Cons of Mechanical (dial) Lock vs. Electronic (keypad) safe locking systems.
One safe supplier, The Safe Keeper, notes that mechanical (dial) locks tend to be more reliable over long periods: “When it comes to reliability, a mechanical lock is the way to go. Anything electronic is designed to fail sooner or later. For every 20 broken electronic locks we will get one mechanical. Bottom line is, it’s not that complicated to input a combination on a mechanical lock. Those extra 7 seconds just might save you from being locked out and having your safe drilled opened.”
This Liberty Safe video compares Mechanical (dial or key) vs. Electronic (keypad) safe locking systems.
Here is the opinion of RFB from Michigan. He is a professional locksmith with over two decades of experience servicing locks and safes of all brands and types:
What a Professional Locksmith Says:
For the convenience of quick opening, the electronic locks can’t be beat. However, for endurance and years of trouble-free use, the electronics can’t compare with the dial lock.
I’ve earned my living, the past 22 years, servicing locks of all types. This includes opening safes that can’t otherwise be opened. I do warranty work for several safe manufacturers (including Liberty). What I’ve learned in all those years is that manual dial locks have very few problems. The most common is a loose dial ring which can shift either left or right, which will result in the index point being in the wrong place for proper tumbler alignment. This is simple to fix.
Electronic locks, however, can have all kinds of issues, and none (except bad key-pad) are easy to fix, and when one goes bad, it must be drilled into to open it. IMO, it’s not a matter of ‘if’ an electronic lock will ultimately fail, but a matter of ‘when’ it will fail. Over the past 10 years or so, since electronics have become more and more prevalent, I’ve had to drill open bad electronic locks vs. bad manual dial locks on a ratio of about 20-1.
My professional opinion is to get the manual dial lock, unless you’ve got a good friend who is a locksmith/safecracker.
How Secure is Your Lock?
RFB tells us that both dial and electronic locks offer good security, provided it’s a good quality lock made by LaGard, Sargent & Greenleaf, Amsec, or Kaba/Ilco. However, RFB warns that “Some of the ‘cheaper’ locks (both manual and electronic) however, are very simple to bypass.
An electronic lock that’s glued or ‘stuck’ to the door with double-sided tape, and has its ‘brain’ on the outside of the lock in the same housing as the keypad, and merely sends power to an inner solenoid via a pair of wires through the door, is a thief’s best friend. The good ones have the brain inside the safe, inaccessible from the outside.
No amateur can ‘manipulate’ either a good manual or electronic lock. Both give you a theoretical one million possible combinations. I say ‘theoretical’ because there are many combinations that cannot, or should not, be used. You wouldn’t set your combo on a dial lock to 01-01-01 etc., nor would you set an electronic to 1-1-1-1-1-1, or 1-2-3-4-5-6.”
Tips for Dial Locks
RFB notes that “The speed, and ease of use, of a manual dial lock can be improved upon, simply by having your combo reset using certain guidelines. Avoid high numbers above 50. Having a 1st number in the 40s, 2nd number anywhere from 0-25, and 3rd number between 25 and 35 will cut dialing time in half, without compromising security. (For mechanical reasons I won’t get into here, the 3rd number of a good manual dial lock cannot — or should not — be set to any number between 95 & 20).”
Tips for Electronic Locks
Electronic locks can have the combination changed by the user much more easily than dial locks. That should be a good thing. However, RFB explains: “That can be a double-edged sword. More than a few times I’ve had to drill open a safe with an electronic lock that has had the combo changed incorrectly by the user, resulting in an unknown number that nobody can determine. Also, don’t forget that electronic locks have a ‘wrong-number lock-out’. I would NOT rely on the normal quickness of an electronic 6-number combo in an emergency situation. If for any reason (panic etc.) you punch in the wrong number several times, the lock will shut down for a 5-minute ‘penalty’.
Combo Manual and Electronic Locking Systems
Forum member ELR Researcher notes that some companies offer Combo Electronic and Manual lock systems: “You can get BOTH on the same safe[.] That said, I have ALWAYS been able to just change batteries on the very rare occasion when I forgot to replace a battery, and I’m right into my safe. Securam also offers a SafeLogic Xtreme model that has both types in one unit — see Securamsys.com. This offers “Push button access for everyday use [and] SpinDial Access for Xtreme situations.”
Replace Electronic Lock Batteries Every Year
To get the most life out of any electronic (keypad Lock), you should always change the battery at least once a year, whether it needs it or not. With some systems you should replace every 6 months! Low voltage won’t necessarily shut down the lock, but using it in a low voltage situation is bad for the electronics, and eventually will cause lock failure. So, If you do nothing else to maintain your digital-lock safe, replace the battery every year.
And get a fresh battery (with a release date) from the store — don’t just pull a battery out of a storage bin, even if it’s never been used. Old batteries can lose “juice” and physically degrade, even when in storage.
This article is Copyright 2025 AccurateShooter.com. No reproduction on any other website is authorized without payment of licensing fees or liquidated damages.
Q: What’s more important — wind speed, or direction?
A: Obviously they both matter, but they do trade dominance based on direction. For example, a 10 mph wind between 2:30 and 3:30 is only changing its value from 9.7 to 10 to 9.7 mph (bracket of 0.3 mph). However a 10 mph wind between 11:30 and 12:30 is changing its cross wind component value from 2.6 mph left to zero to 2.6 mph right (bracket of 5.2 mph). There is the same 30° change in direction, but this results in a massively different bracket.
Point being, in this case, a direction change is far more critical if it’s near 6 or 12 o’clock. A small direction change when it’s close to 3 or 9 o’clock is negligible.
On the contrary, a change in wind SPEED when it’s near 3 or 9 affects your crosswind component directly. But for a near head or tail wind, a fluctuation in wind speed only causes a small fraction of a change to the crosswind component.
SUMMARY: If you’re in a near full-value wind, pay more attention to wind SPEED. If you’re closer to a head- or tail-wind, nailing the exact DIRECTION will be more important.
Get More Tips on Bryan Litz Ballistics Facebook Page
This post is from the new Bryan Litz Ballistics Facebook Page. FB users should check that page regularly for more tips from Bryan, American’s leading ballistics expert and founder of Applied Ballistics LLC.


 Finding Cartridge Length to Lands with OAL Gauge


 AccurateShooter.com has a page with dozens of


 More and more folks are using Burris Signature Rings these days. These unique rings feature polymer inserts. That allows you to pre-load some elevation in your scope set-up, or you can center-up the windage. Additionally, the polymer inserts hold your scope securely without leaving marks on the tube. Lastly, some folks believe that Signature rings may offer advantages for benchrest competition. Rodney Wagner shot a world-record 600-yard group using Burris Signature Zee Rings (“Zee” denotes the Weaver-rail model). James O’Hara set multiple IBS 1000-yard records using Burris Signature Zee Rings. James will tell you he thinks “all his guns seem to shoot best with these rings”.


 Gunsafes can be fitted with either an electronic keypad-style lock, or a conventional dial lock. In our
  Tips for Dial Locks
 Replace Electronic Lock Batteries Every Year


