Summer Solstice is just four days away. That means shooters nationwide will soon be dealing with peak summer ambient temperatures. When it’s hot outside your barrels will heat up even faster during use — and that’s not good for barrel longevity or consistency during long strings of fire. If you want a barrel to have maximum useful life you need to keep it from getting very hot. That’s why you should have a barrel cooler. There are many variations, but the most popular models blow cooling air through the bore. This can reduce barrel temps significantly in a relatively short period of time.
For this Saturday Movies feature, we’ve found 7 videos that review commercial barrel coolers or show how to build your own cooler with a hose, small electric fan, and modified case. There are a variety of barrel coolers on the market currently. Three of the most popular coolers are the yellow BarrelCool, $39.99 at MidwayUSA, the red Magnetospeed RifleKuhl, $56.89 on Amazon ($59.99 MSRP), and the black/yellow Chamber Chiller BA PRO, $80.40 on Amazon.
Barrel Coolers — Why You Should Use Them
This video explains why it’s vitally important to keep your barrel cool, particularly when running a suppressor. The host, a long-range shooting instructor, explains: “The best way to extend your barrel life [is using] barrel coolers. We have learned through decades of shooting that keeping the barrel cool and cooling it as fast as possible between relays and strings of fire will return meaningful results in the longevity of your rifle barrel. If you shoot suppressed like we do, this brings the level of importance up to a whole new level. Keeping it cool will keep it running at its best longer than you ever thought possible.” The barrel cooler featured in this video is $65.00 on the Wolf Precision website.
Barrel Cooler Comparison Tests — Four Options
Barrel coolers are vital accessories that let you get more shots downrange with less time waiting. In this excellent, comparison test video LongRangeOnly’s Ryan Furman shows which barrel coolers will remove the most heat with the rate of air flow comparison. Ryan also covers some basic differences and attributes of each unit tested and tests the units with temp gauges. Units tested are the BarrelCool, Magnetospeed RifleKuhl, the blue-bodied Original Barrel Cooler (6:48 time-mark), and a large Coleman rechargeable Quick-Pump (8:12 time-mark). The latter two units provided the most airflow when fitted with an appropriate hose.
Build Your Own Barrel Cooler — New and Improved
Popular YouTube host F-Class John was one of the pioneers in building very affordable, yet very effective do-it-yourself barrel coolers. John initially used a hose fitted to a battery-powered black Rechargeable Mini Air Pump. John then tapered a hose to fit a cartridge case for a perfect fit in the chamber. The case-head was cut off to better fit the hose for maximum airflow.
F-Class John later created an upgraded barrel cooling system using smaller, more compact pumps. He would charge these with a high-capacity battery pack (see above) and a USB charging cord. As shown in the video above, this Gen 2 system proved to be very effective. John notes: “Make sure you watch how long you the pump runs and don’t let it overheat”. One of these USB-port Mini Air Pumps is currently available on Amazon for $29.98, and there are similar compact pumps for a bit less.
Chamber Chiller BA Pro vs. Magnetospeed RifleKuhl
This video compares two compact barrel coolers, the red Magnetospeed RifleKuhl, $56.89 on Amazon and the yellow Chamber Chiller BA PRO, $80.40 on Amazon. Hear the tester’s conclusions starting at the 2:40 time-mark. The tester reports that both the RifleKuhl and the Chamber Chiller fit well in the chambers. The two units cooled down barrels pretty much identically in the field. Measured with a Kestrel, the RifleKuhl had a 12 mph flow vs. 11 mph flow for the Chamber Chiller (3:03 time-mark). The deciding factors for the tester (1:32 time-mark) were the superior battery life of the Chamber Chiller (with an extra USB battery attached) and the quietness of the Chamber Chiller.
Riflekühl Barrel Cooler by MagnetoSpeed
The MagnetoSpeed Riflekühl barrel cooler is designed to get barrel temperatures down to intended operating levels quickly. The turbocharger-inspired impeller is engineered to produce great airflow in a small package. Powered by a single CR123A Lithium battery (included), ambient air is forced through the extendable nozzle down the bore of the rifle. This is pretty efficient and can typically cool a barrel in under 8 minutes. The Riflekühl doubles as a chamber flag and features an exclusive built-in air filter to prevent dust and dirt from being blown into your rifle.
DIY Barrel Cooler Made with Mattress Inflator and Hose
An average gun-owner can build a good barrel cooler relatively easily with low-cost components. In this GunMart.TV video from the UK, the host showcases a very effective barrel cooler he crafted with an electric mattress inflator and a hose. The unit has good flow and can cool a barrel in a couple of minutes (3:10 time-mark). These components can be purchased for under $30.00. The tester purchased his cooler fan for $14.99 on Amazon (3:40 time-mark).
Thanks to Boyd Allen for help finding these videos.
Much of the Northeast USA recently suffered from smoke drifting south from massive forest fires in Canada. This underscores the importance of helping to prevent wildfires. There were 68,988 wildfires in 2022 that burned more than 7.5 million acres of land throughout the country, according to the National Interagency Fire Center. These conflagrations — an increase from 2021 of over 10,000 more wildfires — caused billions of dollars in damage plus hardship for both people and wildlife.
NSSF reminds target shooters and hunters to take precautions so they don’t accidently ignite a wildfire. Some 90 percent of wildland fires in the United States are caused by human actions.
KEY PRECAUTIONS:
1. Be aware of any/all restrictions on shooting and other activities in fire-prone areas.
2. Do NOT use tracer rounds, exploding targets or ammunition that is steel-jacketed or contains steel-core components.
3. Be aware that a car, truck, or ATV’s hot exhaust system can ignite dry vegetation — so stay on roads whenever possible. Park only in designated areas and don’t leave the motor running in wilderness areas.
4. Make sure all campfires and smoking materials are properly extinguished.
NSSF’s Help Prevent Wildfires public service campaign helps remind recreational shooters and outdoor enthusiasts to be mindful of their surroundings and to follow the key precautions outlined above. Wildfires are tragic in many ways. Remember that most wildfires can be prevented if people pay attention to their surroundings and follow safe practices.
The Summer Solstice is June 21, 2023, just a week away. And July is coming very soon. That means “peak heat” summer conditions. It’s vitally important to keep your ammo at “normal” temps during the hot summer months. Even if you use “temp-insensitive” powders, studies suggest that pressures can still rise dramatically when the entire cartridge gets hot, possibly because of primer heating.
It’s smart to keep your loaded ammo in an insulated storage unit, possibly with a Blue Ice Cool Pak if you expect it to get quite hot. Don’t leave your ammo in the car or truck — temps can exceed 140° in a vehicle parked in the sun.
To learn more about how ambient temperature (and primer choice) affect pressures (and hence velocities) you should read the article Pressure Factors: How Temperature, Powder, and Primer Affect Pressure by Denton Bramwell. In that article, the author uses a pressure trace instrument to analyze how temperature affects ammo performance. Bramwell’s tests yielded some fascinating results.
For example, barrel temperature was a key factor: “Both barrel temperature and powder temperature are important variables, and they are not the same variable. If you fail to take barrel temperature into account while doing pressure testing, your test results will be very significantly affected. The effect of barrel temperature is around 204 PSI per F° for the Varget load. If you’re not controlling barrel temperature, you about as well might not bother controlling powder temperature, either. In the cases investigated, barrel temperature is a much stronger variable than powder temperature.”
This Editor had the personal experience of 6mmBR hand-loaded ammo that was allowed to sit in the hot sun for 45 minutes while steel targets were reset. The brass became quite warm to the touch, meaning the casings were well over 120° on the outside. When I then shot this ammo, the bullets impacted well high at 600 yards (compared to earlier in the day). Using a Magnetospeed, I then chron-tested the sun-heated ammo. The hot ammo’s velocity FPS had increased very significantly — all because I had left the ammo out in the hot sun uncovered for 3/4 of an hour.
LESSON: Keep your ammo cool! Keep loaded ammo in the shade, preferably under cover or in an insulated container. You can use a SEALED cool pack inside the container, but we do NOT recommend H20 ice packs. And don’t have the container do double duty for food and beverages.
Powder Heat Sensitivity Comparison Test
Our friend Cal Zant of the Precision Rifle Blog has published a fascinating comparison test of four powders: Hodgdon H4350, Hodgdon Varget, IMR 4451, and IMR 4166. The first two are Hodgdon Extreme powders, while the latter two are part of IMR’s Enduron line of propellants.
The testers measured the velocity of the powders over a wide temperature range, from 25° F to 140° F. Hodgdon H4350 proved to be the most temp stable of the four powders tested. [NOTE: New Alliant Reloder TS 15.5 has also proved very temp stable in AccurateShooter’s range tests.]
Today’s Sunday GunDay Story is a unique and beautiful F-Class rifle from France. This handsome rifle was first featured in our Gun of the Week Archives. This rifle was a gift from husband to wife. Because this is such a unique rifle, with a great back-story, we are reprising this “French Connection” rifle once again.
Europe has a number of capable custom arms makers, and in this article we feature one of them, Christian Salva of Toulouse, France. Here we spotlight an ultra-accurate and handsome 6-6.5×47 Lapua F-Class rifle. Built for a lady, the rifle exhibits flawless craftmanship to match its superior performance.
Alie Gets Her Gun — Thanks to Husband Aurélien
Photos and text by LONASSAC, translation by T.J.E., NRA UK
Aliénore, a charming young French lady, shares her passion for short- and long-range shooting with her husband, Aurélien. Aurélien already owns a 6mmBR PGM Ultima Ratio rifle and decided to have a rifle built for his wife so that they could shoot together. They therefore turned for help to the Christian Salva workshop, located in Toulouse in the south of France, close to their home.
SALVA Walnut Stock–Gorgeous Wood, and Great Ergonomics
Aliénore chose a superb, perfectly-grained French walnut blank for the stock. The stock is a single, solid piece of walnut, with a waxed finish to show off its fine figuring. The stock design is optimized for F-Class, prone and Bench Rest shooting. The fore-end is flat and 3.35″ (85mm) wide, slightly wider than the common 3″ used on most benchrest rifles. On the underside of the forearm is a rail to take a Parker-Hall or a Versa Pod-type bipod. The trigger guard is a custom, light alloy SALVA design. The butt plate is Anschütz-type. It adjusts vertically and can be rotated on its horizontal axis. The cheek piece is adjustable for height only — all that is needed.
Aliénore selected the F-Class Target Rifle from Christian Salva’s range of rifles, which is the one best suited to the type of shooting she wanted to do. Their club’s rifle range, near their home, goes out to 600 meters (See photos above). Unfortunately, as is usual in France, the range does not have a target pit. Members shoot prone using front benchrest-style rests, as in F-Class. The problem is that, without a proper target trench, it’s not possible have individual shots spotted and marked (as would be done in American High Power matches). However, with a good scope, in good light, shot-holes can be seen at 400m, and sometimes even at 600m — but this is rare.
When this rifle was crafted, Christian Salva was one of the few gunsmiths in France who manufactures complete rifles from front sight to butt-plate. With the sole exception of the barrel, he constructs the whole rifle, including action, bolt, trigger and stock. He also does all the bedding and chambering himself. Everything is done to his customer’s specification which, of course, can only be achieved in a small and highly specialized business.
General Rifle Specifications
The rifle was built on a SALVA hexagonal long range action with a flat base, which is set in a highly-figured French walnut stock using a bedding block. The gun is 49″ (125 cm) overall, and weighs 9 kg (about 20 lbs.), including scope. The barrel is 29″ (74cm) long, and a straight 1.22″ (31mm) in diameter. Given the weight and size of the barrel, the decision was made to secure the barreled action into the stock with a bedding block. On top of the action is an angled Picatinny rail with 20-MOA built-in to allow long-range shooting without using up the scope’s internal elevation. The rifle is currently fitted with a Nightforce 12-42x56mm BR scope held in alloy rings.
Details of SALVA Action
The rifle features a light Dural alloy right bolt, right port, single-shot action treated and coated with a champagne-color surface hardener. The action is hexagonal in shape (normal for a French action), with a flat base for improved bedding. On this particular gun, however, the action is floated, with the barreled action secured by the long barrel block. Take a good look at the photo below. Yes, the action on is fully-floated — the barrel block secures the barreled action into the wood stock. This is similar to some Benchreast heavy guns.
Christian Salva produces his actions from scratch, employing high-tech machinery, including CNC multi-axis mills. The advanced design allows the action to be very strong as well as light. The SALVA action is very thick and sturdy, in spite of its weight being reduced to a minimum. It can chamber cartridges from the 6mmBR size up to magnum calibers such as the 300 Win Mag. A treated steel insert is screwed into the front of the action. This is threaded to receive the barrel and machined to receive the locking lugs of the bolt. The threaded section is especially long (36mm with a 1.5mm thread) so as to ensure proper rigidity for the unit. Where the bolt lever closes, a steel insert, screwed into place with a BTR screw, prevents the steel bolt lever from wearing the softer Dural alloy of the action.
Tri-Lug Bolt with Extractor and Ejector in Lugs
The cylindrical all-steel bolt has a diameter of 0.906″ (23mm) and three (3) front locking lugs. The bolt design has BOTH extractor and ejector placed in locking lugs. Salva’s goal, in engineering the position and operation of both extractor and ejector, was to reduce side pressure on the cartridge. The extractor is designed to hold a cartridge case in place with minimal lateral displacement. The ejector is also built into one of the three lugs. [Editor’s Note: Many modern benchrest actions, such as the Stolle Panda, Stiller Viper, and some BATs employ an extractor in the lug. This is also a feature on Savage bolts and push-feed Model 70 Winchesters. However, these bolts do not have the ejector in a lug as well.]
Remarkably, the ejector has no spring, unlike most bolt designs. It should be noted that this springless ejector is designed to eliminate side pressure when chambering a round, thus keeping the round concentric in the chamber. The ejector is mechanical and will eject the case if the shooter pulls the bolt all the way back. If the shooter prefers to extract the case by hand, one simply pulls the bolt part way back. The 1.5″ (38mm) bolt lever is fairly short, but it has an oversize 30mm polymer knob to facilitate the opening and closing of the bolt.
French Gun, German Barrel — a 29″ Lothar Walther
On Aliénore’s rifle, the barrel is the only component not manufactured by SALVA in Toulouse. For the barrel, Christian Salva chose a stainless Lothar Walther, 6-groove barrel, with a 1:8″-twist for handling 105gr bullets. The muzzle is milled with an 11º slope so as to handle boat-tail VLD bullets. This German-made Walther tube has a 1.22″ (31mm) straight contour and is 29″ (74mm) in length. This long, non-tapered barrel is heavy enough that Salva decided to mount it with an alloy bedding block, about 8″ long (20 cm). Ten Allen-head screws clamp the block to the barrel, while the lower section of the bedding block is secured to the wood stock with eight screws and bedding compound.
Proprietary SALVA Trigger
The trigger is also manufactured by SALVA in its entirety, from Christian’s own design. Overall trigger pull weight adjusts from 50-250 grams (1.8 oz. – 8.8 oz.). The SALVA trigger can also adjust for: Longitudinal trigger position (Length of Pull); Over-travel; Main travel; Second-stage pressure; and Sear engagement.
Cartridge and Load Info
The rifle is chambered in 6-6.5×47 Lapua. Aurélien starts with Lapua 6.5×47 cases. These are then necked-down to 6mm and neck-sized with a .265″ bushing. The necks are turned very slightly, to ensure neckwall uniformity, and achieve a consistent grip on the bullet. Aurélien loads Berger 105gr VLD bullets, pushed by Vihtavuori N160 powder and small magnum primers. His preferred load is 38.2 grains of N160 with a cartridge overall length (COAL) of 2.732″ (69.40 mm). With this load, muzzle velocity is 2854 fps (870 meters per second) chronographed one meter from the muzzle. [Editor’s note–this is a very mild load. The 6-6.5×47 can drive 105-grainers over 3100 fps.]
How the Rifle Shoots
Smooth Function + Great Accuracy
When firing using a front rest, the recoil of a 9 kg, 6-6.5×47 Lapua rifle is minimal and ideal for a lady. The operation of the rifle is trouble-free, even if a few rounds were initially a bit stiff on loading for the first time. Thereafter everything sorted itself out very nicely. The action of the bolt is solid and one can feel that everything is very snug and that the tolerances are properly tight.
The versatile trigger rivals the best benchrest triggers, with the additional bonus of a single- or two-stage operation. That said, with a minimum pull-weight of 50 grams (1.8 oz.) perhaps the term “two-stage” is not the best description, since it is difficult to detect a let-off point at that weight. The trigger can be set to be a very light, single-stage let-off.
The rifle is fitted with a Nightforce 12-42x56mm BR model scope. This high-magnification optic enables the shooter to see his/her bullet holes at 400 meters in good light. This is very useful when it comes to adjusting for wind. The stock’s adjustability and ergonomics allow the shooter to feel comfortable using this rifle. The Anschütz butt-plate and easily-adjustable height of the cheek piece help in that regard.
This rifle has demonstrated some impressive accuracy. Below is a group shot by Aurélien at 400 meters (437.4 yards) on C200 targets. Using OnTarget group measuring software, we calculated this 5-shot group at 0.555″ or 0.121 MOA. That’s remarkable for a gun shooting long, VLD-style bullets. At 100 meters the rifle has yielded “one-ragged hole” groups.
After a successful first year at the 2022 NRA National Matches, electronic targets are returning to Camp Atterbury for the 2023 Rifle Matches. Shooting Sports USA reports that: “Last year at the NRA National Matches at Camp Atterbury, Indiana, the High Power Rifle Nationals were fired on electronic targets from Silver Mountain Targets. The e-targets that made their debut last summer … will be returning for use again in competition this year at Camp Atterbury during the High Power … National Championships.”
Cole McCulloch, NRA’s Director of Competitive Shooting explained: “For 2023, we are continuing with range improvements, including 50 Silver Mountain electronic targets to support High Power Rifle and F-Class. We will have these targets in place for the 2023 National Matches.” (NOTE: The 2023 F-Class National Championships will be held Oct. 29 through Nov. 6 at the Ben Avery Range in Arizona.)
The e-targets on Camp Atterbury’s Range Six at Camp Atterbury last summer eliminated pit duty last summer and, importantly, allowed real-time scoring. Competitors could immediately see their shot placements and scores using mobile devices (such as iPads) connected via WiFi to the e-targets. Shooting Sports USA noted that: “After a few hiccups on day one of the 2023 NRA High Power Nationals, which were quickly rectified, the Silver Mountain electronic targets performed without any major issues for the duration of the championship.”
Camp Atterbury competitors last summer were generally impressed with the electronic targets: “E-targets were a godsend, as they totally eliminated the need to pull in the pits, which was especially valuable this summer in the scorching Indiana heat,” Charles Rowe, a longtime NRA High Power shooter, said.
At the 2023 NRA Nationals at Camp Atterbury, the High Power Rifle matches (Over the Course (OTC), Mid-Range, Long-Range) will have electronic targets. That means faster relays, quicker scoring, and NO PIT DUTY! Relays can proceed much more quickly and efficiently, so matches can be completed in significantly shorter time-spans.
Silver Mountain Targets Electronic Targets at Camp Atterbury
The Silver Mountain Targets (SMT) electronic target system is an OPEN SENSOR system fitted to conventional wood target frames. It uses four sensors to plot shot location (and score value) with great precision. Scores are transmitted via a WiFi network to mobile devices placed at each shooting station. Along with shot location, the score values are listed and recorded on the receiving devices.
The electronic target systems from Silver Mountain Targets provide instantaneous scoring, with scores instantly transmitted to WiFi monitors at each station on the firing lines. This shows competitors their shot locations immediately. That helps with wind calls. For the most part, the system worked very well in 2022 after some glitches on Day One.
Silver Mountain Target’s David Schnelle explained “The system is designed to be easily expandable and provide a high level of reliability. System components are battery-powered to simplify deployment on a military range and allows the system to even operate if there is a power outage. Communications between targets and the firing line is via a highly reliable WiFi connection, utilizing any WiFi-capable device to display competitors’ shots.”
For some applications, we prefer a non-bushing FL die over a bushing die. Shown here are three Forster full-length sizing dies, with necks honed to three different dimensions: 0.265″, 0.266″, and 0.267″.
The Honed Full-Length Sizing Die Option
There are many good options in full-length (FL) sizing dies. Most precision hand-loaders prefer FL dies with neck bushings. These let you adjust the “grip” on your bullet by using larger or smaller bushings. FL bushing dies are available from Whidden Gunworks, Forster, Redding and other makers.
Conventional, non-bushing full-length sizing dies can create ultra-accurate ammo with very low run-out. But many conventional non-bushing FL dies have an undersized neck diameter so you end up with excess neck tension, and you work the brass excessively.
There is another effective option, one that promises extremely low run-out. The honed FL die is a full-length sizing die that has the necked honed to provide a precise fit to the case-neck. When done right, honed FL dies produce extremely straight ammo — as there are no issues with bushing alignment (or bushings that are not perfectly concentric). This Editor owns honed dies from Forster, Redding, and Whidden Gunworks. They all perform extremely well, delivering match ammunition with extremely low run-out measured with a 21st Century Concentricity Gauge.
In one of the most popular articles we’ve ever published, Bugholes from Bipod, California shooter “Froggy” explained why he prefers honed dies for his tactical ammo.
Q: Do you FL size every time? Do you use custom dies?
Absolutely, I full length resize all of my brass every time I reload. And guess what? I’ve never had a feeding problem.
I do use a modified sizing die, without bushings. My FL resizing die has been custom-honed in the neck area to give .0015″ press fit on the bullet. I also put a slightly larger radius at the neck shoulder junction. I feel that this helps to seal the chamber. With this die, I get consistent neck tension every time–without bushings. Bushings are useful when you’re fishing around for a good load. But once you find the right amount of sizing for ideal neck tension, you can do this better with a customized FL die.
6.5 Guys Review Forster Honed Full-length Dies
The 6.5 Guys have reviewed honed FL sizing dies from Forster, explaining the pros and cons of this type of reloading die. They explained that, if you load a wide variety of bullets from different manufacturers, you many want to stick with a Bushing FL die. However, if you have settled on a particular bullet and found the “ideal” neck tension, then a honed die may make sense.
In this Gear Update, the 6.5 Guys discuss a service offered by Forster Products to custom hone the neck diameter of its full-length sizing dies to the customer’s specifications (to the thousandth). Whidden Gunworks also offers custom-honed FL dies.
This article is Copyright 2023 AccurateShooter.com. Any publication on another website is unauthorized and obligates monetary compensation and statutory damages.
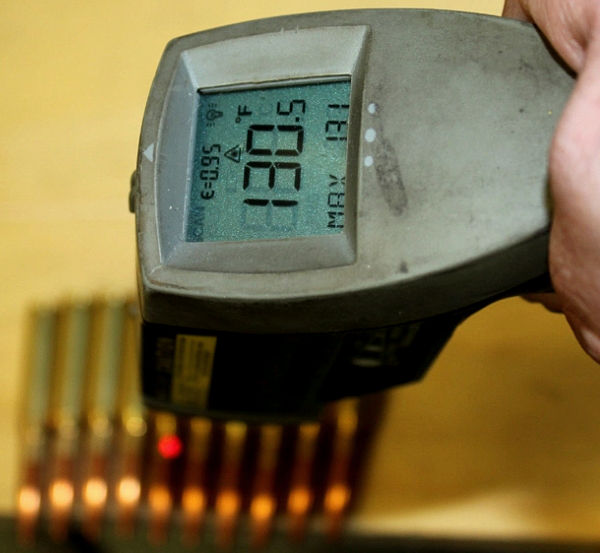
In this .308 Win test, 70° F ammo shot 96 FPS slower than ammo heated to 130.5° F. And the 130.5° ammunition was 145 fps faster than ammo taken right out of the freezer (at 25.5° F). That’s a huge difference…
Summer Solstice is just two weeks away, so most parts of the country will soon be encountering peak summer heat. Some ranges in the Western states have already recorded temperatures well over 100 degrees F during matches. When dealing with extreme summer heat, you should make a serious effort to keep your ammo at reasonable temperatures. When possible, keep ammo in a cooler in the shade.
Never leave boxes of ammo out in the hot sun. Even with powders advertised as “temp stable” you can see significant velocity increases when ambient temps reach 90 degrees and above. This article explains how temperature extremes (both hot and cold) can alter bullet velocities. The velocity differences between very cold ammo and very hot ammo can be very large, as this article explains.
EDITOR’s NOTE: The Sierra tester does not reveal the brand of powder tested here. Some powders are much more temp sensitive than others. Accordingly, you cannot extrapolate test results from one propellant to another. Nonetheless, it is interesting to see the actual recorded velocity shift with ammo temperature variations in a .308 Win.
Written by Sierra Chief Ballistician Tommy Todd This story originally appeared in theSierra Bullets Blog
A few weeks ago I was attending the Missouri State F-Class Match. This was a two-day event during the summer and temperatures were hot one day and hotter the next. I shot next to a gentleman who was relatively new to the sport. He was shooting a basically factory rifle and was enjoying himself with the exception that his scores were not as good as he hoped they would be and he was experiencing pressure issues with his ammunition. I noticed that he was having to force the bolt open on a couple of rounds. During a break, I visited with him and offered a couple of suggestions which helped his situation somewhat and he was able to finish the match without major issues.
He was shooting factory ammunition, which is normally loaded to upper levels of allowable pressures. While this ammunition showed no problems during “normal” testing, it was definitely showing issues during a 20-round string of fire in the temperatures we were competing in. My first suggestion was that he keep his ammunition out of the direct sun and shade it as much as possible. My second suggestion was to not close the bolt on a cartridge until he was ready to fire. He had his ammo in the direct sunlight and was chambering a round while waiting on the target to be pulled and scored which can take from a few seconds to almost a minute sometimes.
This time frame allowed the bullet and powder to absorb chamber [heat] and build pressure/velocity above normal conditions. Making my recommended changes lowered the pressures enough for the rifle and cartridge to function normally.
Testing Effects of Ammunition Temperature on Velocity and POI
After thinking about this situation, I decided to perform a test in the Sierra Bullets underground range to see what temperature changes will do to a rifle/cartridge combination. I acquired thirty consecutive .30 caliber 175 grain MatchKing bullets #2275 right off one of our bullet assembly presses and loaded them into .308 Winchester ammunition. I utilized an unnamed powder manufacturer’s product that is appropriate for the .308 Winchester cartridge. This load is not at the maximum for this cartridge, but it gives consistent velocities and accuracy for testing.
I took ten of the cartridges and placed them in a freezer to condition.
I set ten of them on my loading bench, and since it was cool and cloudy the day I performed this test I utilized a floodlight and stand to simulate ammunition being heated in the sun.
I kept track of the temperatures of the three ammunition samples with a non-contact laser thermometer.
The rifle was fired at room temperature (70 degrees) with all three sets of ammunition. I fired this test at 200 yards out of a return-to-battery machine rest. The aiming point was a leveled line drawn on a sheet of paper. I fired one group with the scope aimed at the line and then moved the aiming point across the paper from left to right for the subsequent groups.
NOTE that the velocity increased as the temperature of the ammunition did.
The ammunition from the freezer shot at 2451 fps.
The room temperature ammunition shot at 2500 fps.
The heated ammunition shot at 2596 fps.
The tune window of the particular rifle is fairly wide as is shown by the accuracy of the three pressure/velocity levels and good accuracy was achieved across the board. However, notice the point of impact shift with the third group? There is enough shift at 200 yards to cause a miss if you were shooting a target or animal at longer ranges. While the pressure and velocities changed this load was far enough from maximum that perceived over pressure issues such as flattened primer, ejector marks on the case head, or sticky extraction did not appear. If you load to maximum and then subject your ammunition to this test your results will probably be magnified in comparison.
This test showed that pressures, velocities, and point-of-impact can be affected by temperatures of your ammunition at the time of firing. It’s really not a bad idea to test in the conditions that you plan on utilizing the ammo/firearm in if at all possible. It wouldn’t be a bad idea to also test to see what condition changes do to your particular gun and ammunition combination so that you can make allowances as needed. Any personal testing along these lines should be done with caution as some powder and cartridge combination could become unsafe with relatively small changes in conditions.
Mirage shields are useful for all shooters, not just hard-core competitors. A mirage shield helps you see your target better, without distortion caused by heat waves coming off your barrel. This isn’t rocket science — it’s a simple, inexpensive way to see better and shooter more accurately. We’ve advocated that varmint shooters give mirage bands a try on those hot summer groundhog and prairie dog expeditions. And we observed that practically every shooter at the 2013 World F-Class Championship was using a mirage shield of some kind.
Forum member Fabian from Germany, whose Sako 6mmBR Rifle was featured many years ago as a Gun of the Week, has devised a clever and inexpensive mirage band option. Fabian is a radiologist by trade. He notes that many X-ray machines require a daily test film for calibration. These are normally just discarded in the trash, so you can get them for free.
Fabian explains: “I’m a radiologist, so I handle medical x-ray films every day. Modern X-ray machines use laser-based printers and they need to print a test-film every day. One x-ray film is about 43×35 cm (16.9″ x 13.7″). Made from polyester, the films are very stable and only 0.007″ inches thick. They are light-weight, semi-transparent, and very stable. Using normal scissors, you can easily cut four mirage shields from a single sheet of film. Then glue on some velcro to attach to your barrel. Try it, you will not be disappointed.”
Carbon Fiber Mirage Shield from Rodzilla
If you’re not into making your own mirage shield, aka “mirage band”, Rodzilla, makers of the superb Raptor front rest and 5-Axis rest tops, offers an excellent 3″ x 24″ carbon fiber mirage shield. This 1/32″-thick band is really a top-tier, state-of-the-art shield. Order it for $30.00 from TheRodzilla.com web store.
Shooting Industry magazine has released its first-ever “Safety Issue” this month (June 2023), coinciding with National Safety Month. Among the many articles in the June issue are three major features which can benefit gun owners and range operators. These articles cover Firearms Safes (large and small), Eye and Ear Protection, and general range Health and Safety procedures.
Gun Safe Trends for Large Vaults and Portable Units
In this month’s featured Gun Safes article, SI writer Shannon Farlow spoke with Stephen Hall of Lock It Up Safe Company; Brice McCunn, of Iowa Safe Company; and Larry Hyatt, president of Hyatt Guns.
SI: Which types of gun safes are the most popular these days?
Hall: In our store, we tend to divide safes in a few categories such as pistol/travel, “home safes” (which usually means 44″ and shorter, small safes (think 1–20 rifles), big safes (20+ rifles) and extra-large safes, which can have capacities of close to 100. We seem to rotate through all of them pretty consistently, but if I had to pick one that’s a bit slow it would be the medium sizes such as 60″ tall and between 36″–42″ wide. Oftentimes, I think people want something much smaller or much larger.
McCunn: In Iowa, we’ve noticed a trend of larger safes being sold. For instance, 72″ tall safes are by far the most popular for our region, but we do sell a variety of sizes.
Hyatt: Small handgun safes remain our top sellers. We use these as add-on sales for every gun sold in our store and we offer a discount at point of purchase.
SI: How popular are portable gun safes?
Hyatt: These are our top sellers by a significant margin. They are an inexpensive way to allow gun owners to secure their firearms, while still allowing easy access to them, both in the home and on the go.
Hall: Securing a firearm in a car is probably the most popular thing small handgun-style safes are utilized for. Vaultek has done a phenomenal job of addressing this with their LifePod and Barikade line of travel safes. They come in a variety of sizes, colors and features. Vaultek has biometric options along with keypad options, creating an option for most shoppers.
Eye and Ear Protection
Eye and ear protection are vital for all gun owners. And visitors to shooting ranges should rent/borrow eye and ear protection if they don’t have their own gear.
Store owners interviewed by Shooting Industry noted that safety gear sells well: “Out of all the stuff in the shop, they’re probably the easiest things to sell, maybe other than ammo,” confirmed Tim Van Leiden, owner of The Gun Guys in Kansas. Indeed, this stuff is pretty much a mandatory part of every shooter’s kit, suggests John Stephenson, general manager of Metro Shooting Supplies in Missouri. Accordingly Metro Shooting promotes eye and ear protection for all customers.
There is a trend to shooters getting electronic muffs. These offer excellent protection against high-decibel sounds while still allowing shooters to hear range commands. Plugs alone can work well, but plugs under electronic muffs may be the best option. Plugs under muffs can provide maximum sound protection (with 6-8 dB NRR better than typical muffs alone), while allowing shooters to hear instructions and communicate with fellow shooters.
Shooting Range Safety and Health Programs
In a detailed “Best Practices” artile Dale Krupinski explains how to maintain effective range safety and health programs, and keep indoor ranges safe for workers and customers. Among the key points covered in the article are:
1. Frequently inspect the shooting range for safety hazards.
2. Conduct lead dust and noise exposure tests for range workers.
3. Provide safety and health training to range managers and employees.
4. Communicate safety and health protocols to contractors working at the range.
5. Regularly verify that the safety and health programs are working as intended.
Let’s face it, AR-platform rifles run dirty, at least compared to typical bolt-action rifles. The AR-15 works by piping gas from the barrel back into the bolt carrier, causing the bolt to unlock and the carrier to move the bolt backward. The “exhaust gas” from the barrel contains soot and carbon. The carbon will form hard deposits on the bolt. In addition, the carbon can combine with lube on the bolt carrier to make a nasty, paste-like sludge. This can be particularly problematic when the black paste pollutes the ejector and extractor recess.
This Editor has inspected dozens of ARs over the years. Other than mag-related malfunctions, the most common cause of AR cycling problems I found was oily gunk in the extractor and ejector areas. Many AR owners overlook these critical areas. Look at an AR that hasn’t been cleaned properly and you’ll probably find black gunk (and small brass shavings) in the ejector and extractor recesses.
If you want to keep your black rifle running smoothly and reliably, you must clean it regularly and follow the correct maintenance procedures. Here are three videos that explain how to properly disassemble and clean AR-platform rifles. And then they cover the essential lubrication ARs need to run reliably.
Take-Down and Full Cleaning of AR15 by Jerry Miculek
Here ace shooter Jerry Miculek takes down and cleans an AR-platform rifle belonging to his daughter Lena. This is a good video because Lena’s rifle was “run hard and packed up dirty” so you can see where carbon and grease build up. This 35-minute video is very thorough. Jerry is one of the nation’s top action carbine shooters, so listen carefully to his advice on cleaning and lubrication.
General AR-15 Maintenance and Lubrication
There are various schools of thought on AR lubrication. Some guys like to run “wet” with lots of CLP, while others choose to focus lubrication on the key spots that receive the most friction and wear, such as the contact point for the bolt carrier. We do advice check the ejector recess and extractor spring recess frequently as gunk can get in there, causing malfunctions. Here is a good video from Pew Pew Tactical — a 7-minute guide to cleaning and lubricating AR-platform rifles. This shows important details for both the upper and the lower.
How to Clean Your AR-15 Bolt Carrier Assembly
This video offers very specific advice on the bolt carrier group, which receives the dirty gas directly from the barrel. Be sure to check the extractor and ejector recesses. That’s where old lube, brass shavings, and carbon accumulate. Follow the directions in this video for lubrication, and don’t over-lubricate the bolt carrier — that will only capture more carbon.


 To learn more about how ambient temperature (and primer choice) affect pressures (and hence velocities) you should read the article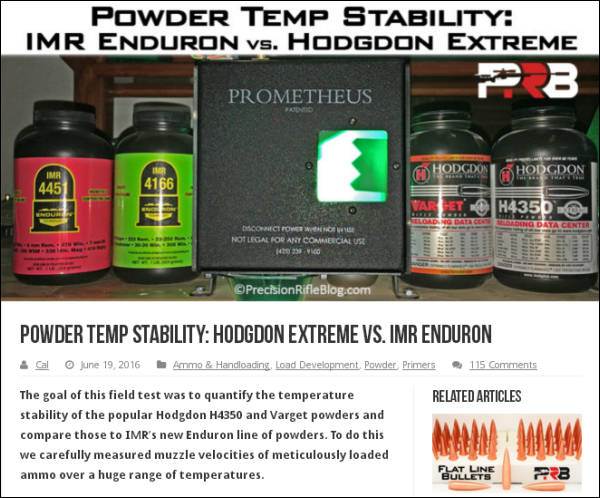


 Details of SALVA Action


 Proprietary SALVA Trigger