In this NSSF Video, Ryan Cleckner, a former Sniper Instructor for the 1st Ranger Battalion, defines the term, “Minute of Angle” (MOA) and explains how you can adjust for windage and elevation using 1/4 or 1/8 MOA clicks on your scope. This allows you to sight-in precisely and compensate for bullet drop at various distances.
For starters, Ryan explains that, when talking about angular degrees, a “minute” is simply 1/60th. So a “Minute of Angle” is simply 1/60th of one degree of a central angle, measured either up and down (for elevation) or side to side (for windage). At 100 yards, 1 MOA equals 1.047″ on the target. This is often rounded to one inch for simplicity. Say, for example, you click up 1 MOA. That is roughly 1 inch at 100 yards, or roughly 4 inches at 400 yards, since the target area measured by 1 MOA increases in linear fashion with the distance.
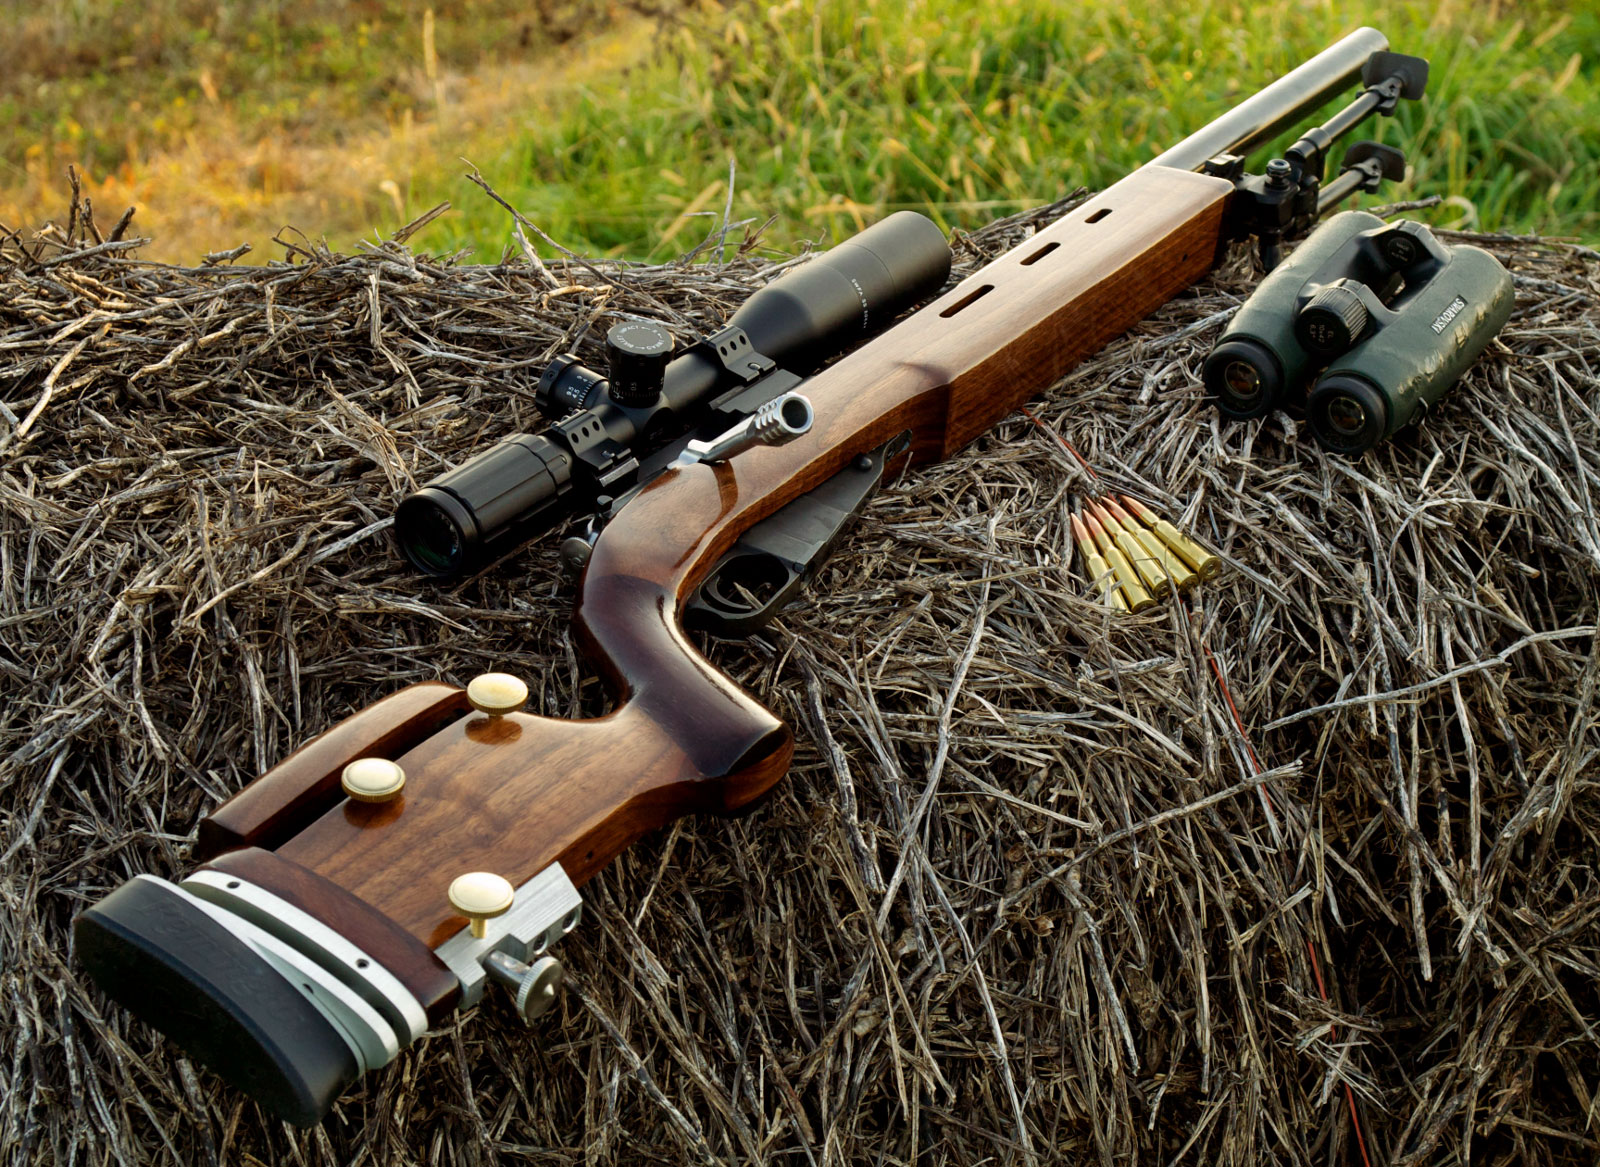
In our Shooters’ Forum a reader asked: “How much neck tension should I use?” This prompted a Forum discussion in which other Forum members recommended a specific number based on their experience, such as .001″, .002″, or .003″. These numbers, as commonly used, correspond to the difference between case-neck OD after sizing and the neck OD of a loaded round, with bullet in place. In other words, the numbers refer to the nominal amount of interference fit (after sizing).
While these commonly-used “tension numbers” (of .001″, .002″ etc.) can be useful as starting points, neck tension is actually a fairly complex subject. The actual amount of “grip” on the bullet is a function of many factors, of which neck-OD reduction during sizing is just one. Understanding these many factors will help you maintain consistent neck tension as your brass “evolves” over the course of multiple reloadings.
Neck Tension (i.e. Grip on Bullets) Is a Complex Phenomenon
While we certainly have considerable control over neck tension by using tighter or looser bushings (with smaller or bigger Inside Diameters), bushing size is only one factor at work. It’s important to understand the multiple factors that can increase or decrease the resistance to bullet release. Think in terms of overall brass-on-bullet “grip” instead of just bushing size.
One needs to understand that bushing size isn’t the beginning and end of neck tension questions, because, even if bushing size is held constant, the amount of bullet “grip” can change dramatically as the condition of your brass changes. Bullet “grip” can also change if you alter your seating depth significantly, and it can even change if you ultrasonically clean your cases.
Bullet grip is affected by many things, such as:
1. Neck-wall thickness.
2. Amount of bearing surface (shank) in the neck.
3. Surface condition inside of neck (residual carbon can act as a lubricant; ultrasonic cleaning makes necks “grabby”).
4. Length of neck (e.g. 6BR neck vs. 6BRX).
5. Whether or not the bullets have an anti-friction coating.
6. The springiness of the brass (which is related to degree of work-hardening; number of firings etc.)
7. The bullet jacket material.
8. The outside diameter of the bullet and whether it has a pressure ridge.
9. The time duration between bullet seating and actual firing (necks can stiffen with time).
10. How often the brass is annealed
— and there are others…
Seating Depth Changes Can Increase or Decrease Grip on Bullet
You can do this simple experiment. Seat a boat-tail bullet in your sized neck with .150″ of bearing surface (shank) in the neck. Now remove the bullet with an impact hammer. Next, take another identical bullet and seat it with .300″ of bearing surface in another sized case (same bushing size/same nominal tension). You’ll find the deeper-seated bullet is gripped much harder.
Neck-Wall Thickness is Important Too
I have also found that thinner necks, particularly the very thin necks used by many PPC shooters, require more sizing to give equivalent “grip”. Again, do your own experiment. Seat a bullet in a case turned to .008″ neckwall thickness and sized down .003″. Now compare that to a case with .014″ neckwall thickness and sized down .0015″. You may find that the bullet in the thin necks actually pulls out easier, though it supposedly has more “neck tension”, if one were to consider bushing size alone.
In practical terms, because thick necks are less elastic than very thin necks, when you turn necks you may need to run tighter bushings to maintain the same amount of actual grip on the bullets (as compared to no-turn brass). Consequently, I suspect the guys using .0015″ “tension” on no-turn brass may be a lot closer to the guys using .003″ “tension” on turned necks than either group may realize.
Toward a Better Definition of Neck Tension
As a convenient short-cut, we tend to describe neck tension by bushing size alone. When a guy says, “I run .002 neck tension”, that normally means he is using a die/bushing that sizes the necks .002″ smaller than a loaded round. Well we know something about his post-sizing neck OD, but do we really have a reliable idea about how much force is required to release his bullets? Maybe not… This use of the term “neck tension” when we are really only describing the amount of neck diameter reduction with a die/bushing is really kind of incomplete.
My point here is that it is overly simplistic to ask, “should I load with .001 tension or .003?” In reality, an .001″ reduction (after springback) on a thick neck might provide MORE “grip” on a deep-seated bullet than an .003″ reduction on a very thin-walled neck holding a bullet with minimal bearing surface in the neck. Bushing ID is something we can easily measure and verify. We use bushing size as a descriptor of neck tension because it is convenient and because the other important factors are hard to quantify. But those factors shouldn’t be ignored if you want to maintain consistent neck tension for optimal accuracy.
Consistency and accuracy — that’s really what this all about isn’t it? We want to find the best neck tension for accuracy, and then maintain that amount of grip-on-bullet over time. To do that you need to look not only at your bushing size, but also at how your brass has changed (work-hardened) with time, and whether other variables (such as the amount of carbon in the neck) have changed. Ultimately, optimal neck tension must be ascertained experimentally. You have to go out and test empirically to see what works, in YOUR rifle, with YOUR bullets and YOUR brass. And you may have to change the nominal tension setting (i.e. bushing size) as your brass work-hardens or IF YOU CHANGE SEATING DEPTHS.
Remember that bushing size alone does not tell us all we need to know about the neck’s true “holding power” on a bullet, or the energy required for bullet release. True bullet grip is a more complicated phenomenon, one that is affected by numerous factors, some of which are very hard to quantify.
Peltor folding ‘Shotgunner’ ear muffs are on sale right now at Amazon.com. Available in red (#97013), dark green (#97012), or black (#97011), the muffs cost about $15.00 (red version), and you can get free shipping with an order over $35.00. That’s a good deal for a good product. This Editor owns two sets of these muffs. They are very lightweight and comfortable. Because they fit well, with gel foam cushions, they actually seem to work better than some big bulky muffs (with higher NRRs) that don’t seal so well. If used with plugs underneath, these are highly effective and very handy.
Peltor’s Shotgunner muffs feature tapered ear domes, cutaway on the lower half for stock clearance. We have not found any other muffs on the market that allow a better cheek weld, with less interference with the comb on a riflestock. These muffs also fold up into a very compact package. You can keep one set in your range kit and a spare set in your vehicle for back-up or if a friend needs hearing protection.
This video shows the process of single-point, cut-rifled barrel-making by one of the world’s best barrel manufacturers. See Krieger barrels being made, start to finish. Krieger cut-rifled barrels have set numerous world records and are favored by many top shooters. The video show the huge, complex machines used — bore-drilling equipment and hydraulic riflers. You can also see how barrels are contoured, polished, and inspected.
For anyone interested in accurate rifles, this is absolutely a “must-watch” video. Watch blanks being cryogenically treated, then drilled and lathe-turned. Next comes the big stuff — the massive rifling machines that single-point-cut the rifling in a precise, time-consuming process. Following that you can see barrels being contoured, polished, and inspected (with air gauge and bore-scope). There is even a sequence showing chambers being cut.
Here is a time-line of the important barrel-making processes shown in the video. You may want to use the “Pause” button, or repeat some segments to get a better look at particular operations. The numbers on the left represent playback minutes and seconds.
This article originally appeared in Sinclair Intl’s Reloading Press Blog, which has been merged into the Gun Tech Section on Sinclair’s website, www.SinclairIntl.com
Steps to Minimize Bullet Run-Out
Poor bullet run-out can cause poor and inconsistent accuracy, and variations in bullet velocities. The truer the loaded round, the more consistent your results will be on paper and across the chronograph.
Measuring Concentricity
We all know that low run-out is the goal. But how can you tell if your run-out is high or low? Run-out is generally measured in thousandths of an inch with a concentricity gauge. There are many concentricity gauges to choose from that work well. Some work on loaded rounds only, some have a bullet straightening feature, and a few work on both loaded rounds and empty cases for checking case neck concentricity. The tool of choice for the Sinclair Reloading Tech Staff is the Sinclair Concentricity Gauge (Part # 09-175).
This tool is a mainstay on my bench, and it is used about as much as I use my reloading press! The tool uses two sets of bearings that are set on lateral, length-adjustable anodized aluminum blocks to accommodate cartridges from .221 Fireball-sized cases up to .50 BMG. The indicator is set on a height adjustable swiveling base on a stand that can be used for checking bullet or case neck run-out. The adjustable blocks ride aligned in a precision-milled slot. The entire set up is on an anodized base plate that gives excellent support during the process that is crucial to operation and accuracy. Basically the operation consists of placing a loaded round (for checking bullet run-out) or an empty case (for case run-out) on the bearings with the indicator end touching the chosen point to be measured. The case is easily spun with one finger as the indicator measures the amount of run-out. Once this process has been done a few times it is a fast and accurate means of measurement. In terms of indicator type being used, whether dial or digital, I actually prefer a standard dial indicator over the digital type. My reason for this choice is that you can see the needle jump when run-out is present. I believe this to be easier and faster than looking at digital numbers while measuring. In the video below, Sinclair’s Bill Gravatt shows how to use the Sinclair Concentricity Gauge correctly.
Sizing Steps to Minimize Run-Out
One of the most common steps in the reloading process that contributes to bullet run-out occurs is the sizing operation. If improper techniques are used or there are issues with the sizing die set up, a once perfectly concentric case can become out of whack. By using the proper dies for your application, properly setting up the die/shell holder or floating the de-capping/expander assembly, you can eliminate problems before they happen.
Many of us on the technical staff choose the Redding Type-S series of dies. These are full-Length or neck sizing dies that utilize a removable/changeable neck bushing (sold separately) to size the neck according to your application. These dies are machined with true precision and quality in mind. The Type-S dies come with a standard de-capping assembly with a caliber-specific expander ball in place. In addition to this an undersized retainer to hold the de-capping pin is included with the die. In my experience with these dies I use the standard expander ball with new, unfired brass on the initial re-size. I will then use the undersized retainer in place of the expander ball with brass that has been fired. I have found this step crucial in my reloading regiment to minimize bullet run out. The use of the expander ball can cause a few thousandths of run-out when the case is being pulled back out of the sizing die. With the undersized retainer in place the only thing that touches the neck of the case in sizing is the bushing. If you prefer to use an expander ball, Redding offers caliber specific carbide floating expander balls that fit on the de-capping rod. This free floating expander ball will self center on the case neck, and reduce the amount of run-out that can be caused by a standard expander ball.
When setting up a Type-S sizing die, set the neck bushing into the die with the numbers facing down toward the body of the die. Tighten the de-capping assembly until it contacts the bushing and then back it off ¼ of a turn. This allows the bushing to free float in the die. You should be able to hear the bushing rattle if you shake the die. Having the bushing free floating self centers the neck, and again minimizes any run-out that can occur.
If you prefer other brands of sizing dies there are a few tricks that people use to minimize run-out as well. Many reloaders claim that the use of an O-ring at the base of the de-capping assembly lock nut will float the assembly and help self center during sizing. Another trick that has been used is to remove the retaining pin on the shell holder slot on the press ram, and use an O-ring in its place to hold the shell holder in place. This allows the shell holder to self center during sizing as well.
Seating Steps to Minimize Run-Out
Run-out issues can arise during the bullet seating process. To reduce run-out during seating, use a high-quality die with a sliding sleeve. The sliding sleeve perfectly aligns the case with the bullet to be seated. Good examples of these dies are the Redding Competition Micrometer bullet seating dies, Forster Ultra Seaters, or RCBS Competition Seating dies. All of these dies utilize a micrometer top to precisely set seating depth. They are all very high quality dies that have tight tolerances to maximize bullet straightness during seating.
We receive many questions about seating long pointed bullets such as the Berger VLD or Hornady A-Max. One problem that the reloader faces with longer bullets is that they are so long that the standard seating stem is not machined deep enough to contact these bullets properly. The point of the bullet “bottoms out” in the stem and the result is off-center seating and/or rings and dents on the bullet nose. If you plan on using such bullets, you should purchase a “VLD” style seating stem, which is cut to accommodate the longer bullets. The use of this stem results in truer seating of the bullet without leaving a ring or marring the tip of the bullet.
Besides using a traditional press and threaded seating die, another great way to get a true bullet seat is by using an arbor press and Wilson chamber-type seating die. These dies are cut to very tight tolerances and have proven themselves as the main choice for bench rest enthusiasts. The design of the die positively aligns the case with the bullet as they are both captured by the die before the bullet is pushed straight into the case by the stem. These seating dies are available with the standard seating cap and stem or an additional micrometer top can be added for precise adjustment. Wilson also offers a stainless seating die with an integral micrometer seating head.
Finally another trick used by many in the seating process is to turn the case while the bullet is being seated. Some people claim this will keep things straight. What they do is raise the ram in increments while seating and rotate the case in the shellholder in increments of 90 degrees from the original starting while the bullet is being seated. Personally I have tried this and have seen no significant difference at all. However you may be the judge of this one. It makes sense, and maybe I should try this a little more before I rule it out.
After the Rounds Are Loaded — Batch Sorting by Concentricity Levels
No matter how meticulous you are, and no matter how good your components and tools are, run-out will still show up. Reloaders can drive themselves crazy trying to make each and every loaded round a true “0” in run-out. You will still see some minimal amount no matter what you do. Set yourself a standard of maximum allowable run-out for your loads. For instance for my Long Range 600- and 1000-yard F-Class loads I like to see .002” or less. I average .0015” and see a few in the range up to .004”. I spin each loaded round on my Sinclair Concentricity Gauge and sort them by run-out. Those that run over .002” I use for sighters or practice. Though achieving zero run-out (on every round) isn’t possible, minimizing run-out can definitely help your performance. Not only will your loads shoot better but you will have one less thing to worry about when you are lining up the sights on the target.
East Coast buried in a winter whiteout? No problem — grab your snow shovel and go shooting. Here’s how hardy Forum Member Nick (aka “ChevyTruck 83″) coped with winter’s fury back in December 2012. Never underestimate the resourcefulness of a dedicated AccurateShooter Forum member….
We admire the fortitude of Forum Member Nick who braved wintry December weather to enjoy a day at the range in his native Pennsylvania. A little snow on the ground couldn’t stop this intrepid shooter, who brought snow shovel and arctic gear to his range session. Folks, here’s a true “hardcore” fan of shooting! Despite the “relentless snow”, Nick reports that “at least it wasn’t windy”. Nick shot a variety of long guns, including his .22LR rimfires, a .223 Rem, and a .308. Not daunted by the cold, Rick said it was fun to “play like a kid once in a while.” That’s the spirit!
Nick reports: “There was no wind to speak of — just relentless snow. I’ll tell you what — it’s awesome to get out and play like a kid once in a while.”
Nick’s foray into the winter wonderland really puts things in perspective for “fair-weather” shooters. After viewing Nick’s Forum thread about his snowy range session, fellow Forum member DennisH observed: “I will never complain about our super hot sugar cane fields in south Louisiana ever again! We can hold matches 12 months a year. I have NEVER had, owned, or used a snow shovel.”
During the Christmas season we get together with our families and enjoy the fellowship of our relatives and dear friends. For many, this holiday is a time to pause and look inwards — to examine how we can improve our relations with loved ones, and lead happier, more fulfilling lives together. To that end, consider the message of a Native-American parable, the Tale of Two Wolves.
The Tale of Two Wolves
An old Cherokee chief was teaching his grandson about life. “A fight is going on inside me,” he said to the boy. “It is a terrible fight and it is between two wolves.”
“One is evil: he is anger, envy, sorrow, regret, greed, arrogance, self-pity, guilt, resentment, inferiority, lies, false pride, superiority, self-doubt, and ego.
The other is good: he is joy, peace, love, hope, serenity, humility, kindness, benevolence, empathy, generosity, truth, compassion, and faith.
This same fight is going on inside you — and inside every other person, too.”
The grandson thought about it and then asked his grandfather, “Which wolf will win?”
Holiday Greetings to Our Readers
Merry Christmas and Happy Holidays to all our readers and especially our 26,480+ Forum Members. This marks our tenth Christmas “in business”, and the site is stronger than ever thanks to our members and industry sponsors. AccurateShooter.com (and 6mmBR.com) are now accessed by over 150,000 unique users every week. Part of the reason for that success is the hard work of our volunteer helpers.
Unsung Heroes Deserve Recognition
I want to acknowledge some guys who have really helped out the site. Number one is JayChris, our IT guy — he keeps the servers running smoothly and maintains our Forum. We just updated the Forum software this week and Jay pulled that off without a hitch. Thanks also go to Jeff Williams, our “Answerman” who fields miscellaneous questions from our readers. We have a great place to test rifles thanks to our good buddy (and designated trigger-puller) Joe Friedrich. I also want to recognize our regular contributors, including German Salazar, Jason Baney, Robert Whitley, Mark LaFevers, and Vince Bottomley. And special thanks to Boyd Allen and EdLongRange who tirelessly supply story leads for the Daily Bulletin. These guys (and many others) have all contributed much time and effort.
You can download this photo as a FREE computer wallpaper from Wallpaperhere.com.
We also want to thank our major sponsors, without whose support the site could not provide the full AccurateShooter.com experience, with an active Forum, an archive of in-depth articles, and fresh content 365 days a year in our Daily Bulletin. We’re grateful to all our sponsors and advertisers.
What do you get when you combine red Cerakote and barrel fluting? Well, a candy-cane AR barrel — just in time for the holidays. This unique barrel was created by Black Hole Weaponry in St. Helens Oregon. No this is not a Photoshop job. This barrel is really finished this way (as you can see in the close-up). Thanks to Anette Wachter, aka 30 Cal Gal, for finding this festive firearm fitting.
One of the most popular features of our Shooters’ Forum is the Official ‘Pride & Joy’ Rifle thread. There you’ll find dozens of interesting rifles, with photos and descriptions supplied by proud owners. Today we’re spotlighting one of the more interesting ‘Pride & Joy’ rifles unveiled this year, a Mosin Nagant “senior citizen”. This 72-year-old Russian bolt gun is not like any Mosin Nagant you’ve ever seen before. It has been brought into the 21st Century with a handsome target stock and some first-class upgrades, including Lothar Walther barrel and Timney trigger. Here’s a look at a very nice Russian rifle, belonging to Forum member Ben C. (aka “Grimstod”):
CLICK TO See Full-Screen Photo:
Video Shows Rifle Shooting Sub-Half-MOA from Bipod (in the Snow):
Name of rifle: Smyert Mk3 (Modified Mosin Nagant)
Make: Izhmekh/Izhevsk (“Izzy”) High Wall
Model: 91/30 | Year: 1942
Scope mount: Rock Solid (looks like an action sleeve)
Scope: SWFA 20x42mm MRAD
Gunsmith: Sheppard
Bolt handle: Rock Solid with Surgeon tactical handle
Bipod: Versa Pod
Total Weight: 18.6 lbs
Grimstod’s Mosin Nagant Custom Shoots Under 0.5 MOA From Bipod
Even in harsh winter conditions, the rifle shot well. (I guess we should expect that for a Russian gun). The photo below shows a group shot from bipod. (The video shows Grimstod’s snow-bound range session). Grimstod calculated the group at 0.394 MOA measuring from outside edge to edge. Using our On-Target software, which measures center to center of most distant shots, we came up with 0.428 MOA. Still that’s impressive for an ancient action being shot in the dead of winter with snow falling. To learn more about this rifle (and view photos of the build process), visit the SurplusRifleForum.com.


 In our
  Neck-Wall Thickness is Important Too
 Measuring Concentricity
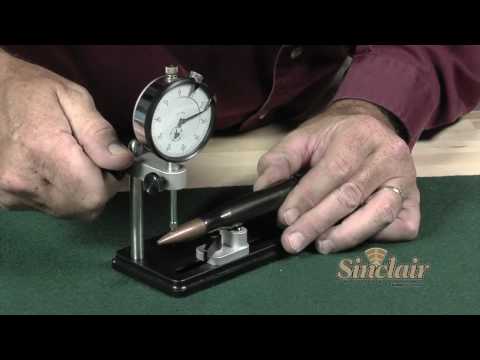
 Many of us on the technical staff choose the Redding Type-S series of dies. These are full-Length or neck sizing dies that utilize a removable/changeable neck bushing (sold separately) to size the neck according to your application. These dies are machined with true precision and quality in mind. The Type-S dies come with a standard de-capping assembly with a caliber-specific expander ball in place. In addition to this an undersized retainer to hold the de-capping pin is included with the die. In my experience with these dies I use the standard expander ball with new, unfired brass on the initial re-size. I will then use the undersized retainer in place of the expander ball with brass that has been fired. I have found this step crucial in my reloading regiment to minimize bullet run out. The use of the expander ball can cause a few thousandths of run-out when the case is being pulled back out of the sizing die. With the undersized retainer in place the only thing that touches the neck of the case in sizing is the bushing. If you prefer to use an expander ball, Redding offers caliber specific carbide floating expander balls that fit on the de-capping rod. This free floating expander ball will self center on the case neck, and reduce the amount of run-out that can be caused by a standard expander ball.
 We admire the fortitude of Forum Member Nick who braved wintry December weather to enjoy a day at the range in his native Pennsylvania. A little snow on the ground couldn’t stop this intrepid shooter, who brought snow shovel and arctic gear to his range session. Folks, here’s a true “hardcore” fan of shooting! Despite the “relentless snow”, Nick reports that “at least it wasn’t windy”. Nick shot a variety of long guns, including his .22LR rimfires, a .223 Rem, and a .308. Not daunted by the cold, Rick said it was fun to “play like a kid once in a while.” That’s the spirit!


 Holiday Greetings to Our Readers