Tripods aren’t just for cameras and spotting scopes — they can be used as shooting supports as well. In this video, our friends Ed and Steve, aka The 6.5 Guys, take a look at a variety of tripod options for shooters. Steve and Ed provide a brief overview of some of the techniques they use to shoot off a tripod support from kneeling, seated, and standing positions. They also demonstrate how slings can be used to control elevation and stabilize a rifle.
Ed and Steve employ different techniques — one uses a ball head while the other doesn’t. In the video, they explain why they have adopted their respective techniques. They explain why you may want to try a variety of tripod set-ups, depending on the shooting scenario (and your personal preferences). The 6.5 Guys also discuss the differences between two popular tripod accessories — the Hog Saddle and the lower-cost Pig Saddle.
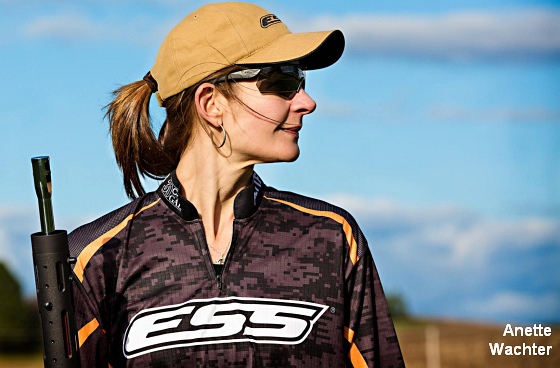
Tripod Use in the Precision Rifle Series (Anette Wachter)
I have noticed in the last year of precision rifle competitions that the tripod is a valuable asset to have. Most of the time when a stage calls for the offhand position, unless otherwise stated, people can use a tripod. Easy enough but you realize quickly that not all tripods are alike. You need to think of weight since you are carrying everything with you for 10 hours a day. And of course stability is your number one importance.This is different than a photographer’s tripod. Think of it as a tactical tripod. — Anette Wachter, The 30 Cal Gal.
Our friend Anette Wachter, a member of the 2015 U.S. Palma Team, recently tested some .308 Win ammo from Eagle Eye Precision. We have heard good things about this ammunition, and Anette (aka 30 Cal Gal) confirms that it shoots great. Here is her impressive 200-yard test target. Anette posted: “Most amazing out of box ammo I have shot. First six rounds at 200 yards test [is shown at right].”
0.212 MOA at 200 yards
Using OnTarget group-measuring software, we measured Anette’s 6-shot group at 0.445″ (center-to-center). That’s 0.212 MOA. That’s right, Anette’s group measured under quarter-MOA at 200 yards. For reference, a dime is 0.705″ in diameter.
Anette’s Group was measured with On-Target Software.
Another U.S. Palma Team member, Top Shot competitor Kelly Bachand, has also tried Eagle Eye ammo. Kelly came away very impressed: “I’ve personally tested this ammunition and in my initial tests it was as consistent as anything I can hand-load myself. Eagle Eye Precision Ammunition is on the up and up, you’ll have to check it out.”
Eagle Eye Ammo is Verified to Shoot 1/2 Minute of Angle or Better
Remarkably, every lot of Eagle Eye ammunition is rifle-tested for accuracy. If it doesn’t shoot 1/2-MOA or better, it will not ship. Obviously Eagle Eye can’t guarantee its ammo will shoot this well in every customer’s rifle, but this is still an impressive standard. Eagle Eye states:
“At Eagle Eye Precision we guarantee every lot is tested to 1/2 minute of angle or better. One minute of angle equates to approximately 1 inch at 100 yards and 1/2 minute of angle is approximately 1/2 inch at 100 yards. For comparison, the diameter of a dime is approximately 0.7 inches. Therefore, Eagle Eye Precision 1/2 minute of angle (0.5 inch) groups are smaller than a dime at 100 yards. Eagle Eye Precision ammunition is test fired with real rifles (not accuracy barrels bolted to a bench) at 100 yards. If the group size from the test exceeds 1/2 inch we reject and scrap the lot. If we are not absolutely certain a lot of ammunition can shoot 1/2 minute of angle we do not ship it to customers.”
The popular vertical-loading AirGlide rifle case from Plano is on sale again. You may want to strike while the price is right. Amazon.com is offering the Plano AirGlide for $33.96 with FREE shipping for Amazon Prime Members. (Non-Prime members will be charged for shipping.)
UPDATE: The widget is now showing a higher price. However, after getting to Amazon, if you click on other sellers there is still a price under $35.00. On 2/5/2015, the lowest price was $31.41.
Among injection-molded rifle cases, Plano’s AirGlide™ case is unique in holding a rifle vertically, in foam cradles. This allows ample room for the 3″-wide fore-ends on BR and Varmint rifles. The foam blocks front and rear can even be trimmed for a custom fit, and velcro webbing straps hold the rifle securely. The AirGlide’s hinged top-opening lid provides clearance for all but the most massive target scopes, with no side load on the turrets. (We’ve found that some eggcrate foam-lined gun cases can put enough pressure on scope knobs to alter your zero.)
Airglide Will Hold a Benchrest Rifle with Wide Fore-end and 28″ Barrel
Measuring 51 1/2″L x 7 3/4″W x 12 1/4″H, the AirGlide can easily handle rifles up to 50″ in length. That should hold BR rifles with barrels up to 29″ (or 28″ if you have a thick recoil pad). With its 27.5″ barrel, my 6BR is exactly 49″ long (including pad) and there is about 1.3 inches to spare in an Airglide. If you have a real long barrel or extended buttplate, measure the gun first.
Priced attractively, the AirGlide has proven very popular with Varmint shooters and BR competitors. Lockable and airline-approved, the AirGlide is a unique product at an affordable price. This Editor owns three AirGlides and they are my favorite hardcases for transporting wide-stocked rifles to the range. (For airline transport, I do prefer a heavy-duty, wheeled aluminum safari case with internal locks.)
In our Shooters’ Forum, there was an discussion about a range that was threatened with closure because rifle over-shoots were hitting a farm building over two miles from the firing line. One reader was skeptical of this, asking “how’s that possible — were these guys aiming at the stars?” Actually, you may be surprised. It doesn’t take much up-angle on a rifle to have a bullet land miles down-range. That’s why it’s so important that hunters and target shooters always orient their barrels in a safe direction (and angle). Shooters may not realize how much a small tilt of the barrel (above horizontal) can alter a bullet’s trajectory.
How many degrees of muzzle elevation do you think it would take to hit a barn at 3000 yards? Ten Degrees? Twenty Degrees? Actually the answer is much less — for a typical hunting cartridge, five to seven degrees of up-angle on the rifle is enough to create a trajectory that will have your bullet impacting at 3000 yards — that’s 1.7 miles away!
Five degrees isn’t much at all. Look at the diagram below. The angle actually displayed for the up-tilted rifle is a true 5.07 degrees (above horizontal). Using JBM Ballistics, we calculated 5.07° as the angle that would produce a 3000-yard impact with a 185gr .30-caliber bullet launched at 2850 fps MV. That would be a moderate “book load” for a .300 Win Mag deer rifle.
Here’s how we derived the angle value. Using Litz-derived BCs for a 185gr Berger Hunting VLD launched at 2850 fps, the drop at 3000 yards is 304.1 MOA (Minutes of Angle), assuming a 100-yard zero. This was calculated using a G7 BC with the JBM Ballistics Program. There are 60 MOA for each 1 degree of Angle. Thus, 304.1 MOA equals 5.068 degrees. So, that means that if you tilt up your muzzle just slightly over five degrees, your 185gr bullet (2850 fps MV) will impact 3000 yards down-range.
Figuring Trajectories with Different Bullets and MVs
If the bullet travels slower, or if you shoot a bullet with a lower BC, the angle elevation required for a 3000-yard impact goes up, but the principle is the same. Let’s say you have a 168gr HPBT MatchKing launched at 2750 fps MV from a .308 Winchester. (That’s a typical tactical load.) With a 100-yard zero, the total drop is 440.1 MOA, or 7.335 degrees. That’s more up-tilt than our example above, but seven degrees is still not that much, when you consider how a rifle might be handled during a negligent discharge. Think about a hunter getting into position for a prone shot. If careless, he could easily touch off the trigger with a muzzle up-angle of 10 degrees or more. Even when shooting from the bench, there is the possibility of discharging a rifle before the gun is leveled, sending the shot over the berm and, potentially, thousands of yards down-range.
Hopefully this article has shown folks that a very small amount of barrel elevation can make a huge difference in your bullet’s trajectory, and where it eventually lands. Nobody wants to put holes in a distant neighbor’s house, or worse yet, have the shot cause injury. Let’s go back to our original example of a 185gr bullet with a MV of 2850 fps. According to JBM, this projectile will still be traveling 687 fps at 3000 yards, with 193.7 ft/lbs of retained energy at that distance. That’s more than enough energy to be deadly.
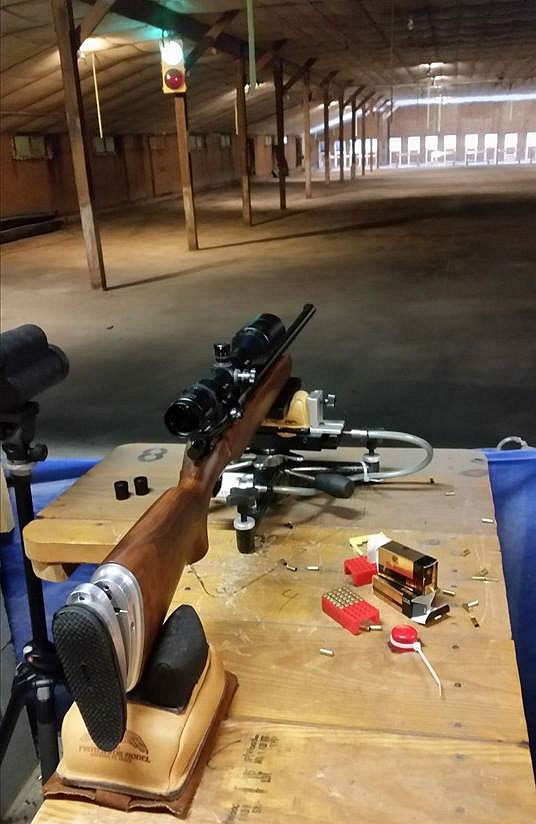
Low-BC bullets launched from a .22 LR gun are easily blown around by the wind. That’s why it’s a smallbore shooter’s dream to shoot indoors, where fickle wind currents are less likely to spoil your shots. Not many folks have the opportunity to shoot indoors at all, must less compete in an indoor match. However, a crew from Ashbury Precision Ordnance recently got the chance to try out their rimfire rifles in a indoor setting, a converted poultry barn to be precise. And today they’ll be competing in a smallbore “Barn Benchrest” match at that same barn. Looks like fun!
Could this be the beginning of a new “Barn Benchrest” league? The folks at Ashbury tell us: “Rube, Gary, and Matt headed over the mountains to Luray, Virginia, to get in some practice for [Saturday’s] .22 Cal Benchrest Rifle Match. It’s colder than a well diggers’ butt outdoors, but shooting a match indoors, in a converted poultry barn, is nice. As always, we’re shooting great RUAG/RWS ammo!”
Poultry Barn aka Piney Hill Benchrest Facility
The official name of this converted barn is the Piney Hill Benchrest facility. Virginia State 3-Gun Rimfire BR Championships will be held there February 20-21, 2015, while the IR50/50 Indoor Sporter Nationals are scheduled for Piney Hill in March. If you’re curious, the benches are made from cement blocks with wood tops, so they’re very solid. Here’s a panorama photo of the Piney Hill Barn.
Schmidt & Bender revealed some impressive optics at SHOT Show. Perhaps the “star” of the S&B line-up was the 3-27x56mm PMII. This optic boasts the first-ever 9 times zoom range. Originally custom-designed to U.S. SOCOM specs, this impressive optic won a contract for use in SOCOM sniper platforms. S&B’s representative said this scope, when employed with steep-angled bases, may be used to engage targets at distances exceeding 2 kilometers.
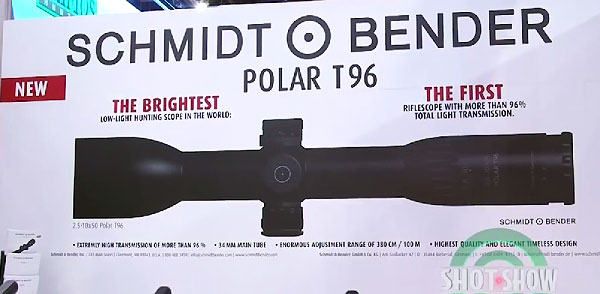
Unrivaled Brightness — T96 Polar Offers 96% Total Light Transmission
Schmidt & Bender also unveiled its all-new 2.5-10x50mm Polar T96 scope, which S&B claims is “the brightest low-light hunting scope in the world” Designed for hunting, the new Polar boasts extremely high 96% light transmission levels, the most ever in a 10-power scope. In addition, transmission of “night-relevant wavelengths” has been improved dramatically, offering 5% more light in the evening than other hunting scopes. This means the scope will be brighter at dusk than other optics, effectively extending a hunter’s usable time in the field, allowing the hunter to use “the last light of the day.” S&B is considering expanding the T96 scope line to include 3-12X or 4-16X models.
Schmidt & Bender had scores of scopes on display, worth well over $100,000 in retail value.
In her latest video, Kirsten Joy Weiss shows off the 300 AAC Blackout, a popular .30-caliber cartridge for AR-platform rifles. Kirsten explains the advantages for the 300 BLK for hunters as well as those using an AR for self-defense. The 300 BLK is popular with suppressor owners because it works well with heavy bullets launched at subsonic velocities.
Reasons to Shoot a 300 AAC Blackout:
— You can use your current AR Bolt, Bolt Carrier, Buffer, and Magazine. The only part you need to change is the barrel.
— 300 BLK conforms to state hunting regulations which may require a cartridge larger than .22 Caliber. The 300 BLK shoots .308 caliber bullets.
— Lapua now sells 300 AAC Blackout brass so no case-forming is required. Just load and shoot.
— You can shoot light bullets supersonic or heavier bullets subsonic. The subsonic capabilities of the 300 BLK make it ideal for use with a suppressed AR.
— With a .30-caliber bore and a modest powder charge, barrel life is outstanding with the 300 BLK.
— You can make 300 BLK cartridges from fired .223 Rem brass, which is plentiful and cheap.
— The .300 BLK performs well with some very accurate powders, such as Hodgdon H4198 and IMR 4227.
The 300 AAC Blackout was created by Advanced Armament Corp. and Remington primarily for the military as a way to shoot .30-caliber bullets from the M4/AR15 platform while using standard magazines. As explained by Robert Silvers, AAC’s R&D Director: “Now there is a way to shoot 30 caliber from your AR while still using normal magazines with full capacity. Even the bolt stays the same, and all that changes is the barrel.” For more information visit www.300aacblackout.com and download the 300 BLK Cartridge Information Guide (PDF).
SAAMI, the industry standards organization, adopted and standardized the AAC 300 Blackout in 2010. The SAAMI diagram for the 300 BLK is shown above. Lapua now makes 300 BLK cartridge brass.
300 BLK for 3-Gun Competition
The 300 AAC Blackout has been touted as an important new hunting round, but we see it more as a specialized “rule-beater” 30-cal option that lets 3-Gun competitors “make major” with a low-recoil cartridge that also offers long barrel life. For those who need to run a .30-caliber cartridge from a standard AR15 platform (as opposed to the AR10), the 300 AAC Blackout makes some sense. But for hunters using a bolt gun, there are any number of tried and true options, such as the 7.62×39, .30-30, and, of course, the .308 Winchester (7.62×51 NATO).
You can never be too safe when hand-loading your own ammunition. This helpful Brownells video outlines the Seven Fundamental Reloading Safety Tips. This is important information for novice hand-loaders and a good refresher for those with reloading experience!
Summary of the Seven Safety Tips:
1. Store your reloading supplies in a safe and dry location, away from children and away from any possible source of ignition. This includes keeping your powder and primers separate.
2. Get and use respected reloading manuals, especially for new cartridges. Start low and work up slowly while watching for warning signs of pressure and/or case fatigue.
3. Locate your reloading activity where you will not be distracted. If you get interrupted, stop. (Distractions will eventually lead to mistakes.)
4. Do NOT mix powders. Keep your powders clearly marked and dated. You can use masking tape to write the date on the container.
5. If you load the same cartridge type for different firearms, make sure your ammo headspaces properly in each gun.
6. Check cases frequently. Look for split necks, case head separation or other signs of fatigue and excessive pressure.
7. If reloading military brass, be aware that case capacity is usually reduced, and initial loads should be at least 10-15% lower than published data.
Here are some other tips that will help your avoid making costly mistakes (such as using the wrong powder, or undercharging a case):
Powder Type — Always double-check the label on your powder containers. After placing powder in the powder measure, put a piece of tape on the measure with the powder type written on it. Some guys write the powder type on a card and place that right in the hopper.
Scale Drift — Electronic balances can drift. If you are using a digital powder scale, calibrate the scale with a test weight every 50 rounds or so.
Case Fill — If you throw more than one charge at a time, look INSIDE every case before seating a bullet. Squib charges can be dangerous if you don’t notice them before firing the next round.
Progressive Presses — When using a progressive press, consider using an RCBS Lock-Out Die. This will detect a low charge and stop the machine. These dies will work with RCBS, Hornady, and Dillon progressives.
Springfield Armory has taken the M1A into the 21st Century with an adjustable modular stock that makes this classic semi-auto rifle more versatile than ever. The adjustable stock on this Loaded M1A (MP9826, MSRP $2,021) offers many cool features. You can raise/lower the cheek-piece with a handy rotary knob. Likewise the buttplate can be moved in and out with a quick-adjusting knob, allowing length-of-pull adjustment up to 1.3 inches. The toe of the stock features a bag-rider section, making the gun more stable on a sandbag. Up front you’ll find an accessory rail plus a forward-angled swivel stud allowing easy bipod mounting. The included iron sights feature half-minute adjustments for windage and 1-MOA adjustments for elevation. The 22″ stainless steel barrel has a 1:11″ twist. Rifle weight with an empty magazine is 11.25 lbs.
At the 2015 SHOT Show, Rob Leatham runs through Springfield Armory’s new Loaded M1A Series rifle with an adjustable stock (MP9826, MSRP $2,021).
Click Image to See Full-Size Photo
MIA Match at Camp Perry is Popular
In 1974, Springfield Armory began offering a civilian-legal, semi-automatic version of the M14 known as the M1A™. M1As have enjoyed some success in Service Rifle and High Power Competition but today most Service Rifle shooters use the lighter-recoiling AR-platform black rifles. Nonetheless the M1A remains popular with American shooters and the annual M1A Match at Camp Perry offers serious, big-time prize money, thanks to Springfield Armory. In 2014 over $25,000 worth of cash and gear was awarded to Camp Perry M1A competitors, making the M1A Match the richest single rifle event at the NRA National Championships.
Nick Till in 2009 M1A Match. Nick was the 2007 Service Rifle Nat’l Champion. Photo courtesy NRA Blog.
Each Wednesday, the U.S. Army Marksmanship Unit publishes a reloading “how-to” article on the USAMU Facebook page. Yesterday’s “Handloading Hump Day” post covered preparation of once-fired 5.56x45mm brass. This article, the first in a 3-part series, has many useful tips. If you shoot a rifle chambered in .223 Rem or 5.56x45mm, this article is worth reading. And visit the USAMU Facebook page next Wednesday for the next installment.
This week, Handloading Hump-Day will answer a special request from several competitive shooters in Alaska. They asked about procedures for morphing once-fired GI 5.56mm brass into accurate match brass for NRA High Power Rifle use. The USAMU has used virgin Lake City (LC) 5.56 brass to win National Championships and set National Records for many years. In this 3-part series, we’ll share techniques proven to wring match-winning accuracy from combat-grade brass.
Preparing Once-Fired GI 5.56 Brass for Reloading (Part 1 of 3)
Assuming our readers will be getting brass once-fired as received from surplus dealers, the following steps can help process the low-cost raw material into reliably accurate components.
1. Clean the Brass
First, clean the brass of any dirt/mud/debris, if applicable. Depending on the brass’s condition, washing it in a soap solution followed by a thorough rinsing may help. [This step also extends the life of the tumbling media.] Approaches range from low-tech, using gallon jugs 1/2 full of water/dish soap plus brass and shaking vigorously, to more high-tech, expensive and time-consuming methods.
2. Wet-Tumbling Options (Be Sure to Dry the Brass)
When applying the final cleaning/polish, some use tumblers with liquid cleaning media and stainless steel pins for a brilliant shine inside and out, while others take the traditional vibratory tumbler/ground media approach. Degree of case shine is purely personal preference, but the key issue is simple cleanliness to avoid scratching ones’ dies.
If a liquid cleaner is used, be SURE to dry the cases thoroughly to preclude corrosion inside. One method is to dump the wet brass into an old pillow case, then tilt it left/right so the cases re-orient themselves while shifting from corner to corner. Several repetitions, pausing at each corner until water stops draining, will remove most water. They can then be left to air-dry on a towel, or can be dried in a warm (150° F-200° F max) oven for a few minutes to speed evaporation.
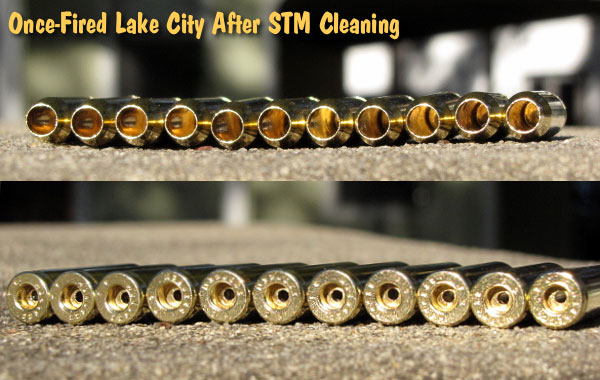
Shown below are Lake City cases after cleaning with Stainless Media (STM). Note: STM Case cleaning was done by a third party, not the USAMU, which does not endorse any particular cleaning method.
3. Inspect Every Case
Once dry, inspect each case for significant deformation (i.e., someone stepped on it), damaged mouths/necks and case head/rim damage. Some rifles’ ejectors actually dig small chunks of brass out of the case head — obviously, not ideal for precision shooting. Similarly, some extractors can bend the case rims so badly that distortion is visible when spinning them in one’s fingers. These can be used for plinking, but our match brass should have straight, undamaged rims.
Dented case mouths are common, and these can easily be rounded using a conical, tapered tool, [such as a .223 expander mandrel. A dummy 7.62 or .30-06 cartridge with a FMJ spitzer can also work.] If most of your brass is of one headstamp, this is a good time to cull out any odd cases.
4. Check the Primers Before Decapping
Your clean, dry and inspected brass is now ready for full-length sizing, decapping and re-priming. Historically, primer crimps on GI brass have caused some head-scratching (and vile language) among handloaders. Our next installment will detail efficient, easy and practical methods to remove primer crimp, plus other useful handloading tips. Until next week, Good Shooting!
NOTE: The USAMU Handloading (HL) Shop does not RE-load fired 5.56 brass. We use virgin LC brass with our chosen primer already staked in place. However, our staff has extensive personal experience reloading GI brass for competition, which will supplement the Shop’s customary steps. In handloading, as in life, there are many ways to accomplish any given task. Our suggestions are note presented as the “only way,” by any means. Time for loading/practicing is always at a premium. Readers who have more efficient, alternative methods that maintain top accuracy are invited to share them here.



 Our friend



 In our Shooters’ Forum, there was an discussion about a range that was threatened with closure because rifle over-shoots were hitting a farm building over two miles from the firing line. One reader was skeptical of this, asking “how’s that possible — were these guys aiming at the stars?” Actually, you may be surprised. It doesn’t take much up-angle on a rifle to have a bullet land miles down-range. That’s why it’s so important that hunters and target shooters always orient their barrels in a safe direction (and angle). Shooters may not realize how much a small tilt of the barrel (above horizontal) can alter a bullet’s trajectory.







 Preparing Once-Fired GI 5.56 Brass for Reloading (Part 1 of 3)